Photo Notes A place to talk about making images.

April 24, 2010

U-Shaped Curve

Filed under: Post-Processing — John Siskin @ 10:27 pm

Branded 2 468x60

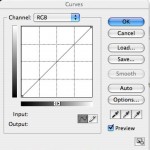
Normal curve

I wanted to take time out and talk a little about Photoshop this week, specifically curves. Curves is under Adjustments in the Image menu, if you don’t find yourself going there every time you’re in Photoshop. The standard curve is a line from the lower left corner to the upper right corner. This is a really powerful part of Photoshop; you can control contrast, exposure and color. You can do this with any level of detail you might wish. Some time ago I found an article at about.com that discussed solarization in the computer.  When you did in a wet darkroom you re-exposed the print to light during development. The results were very interesting, but unpredictable. I have to say that unpredictability was part of the charm.

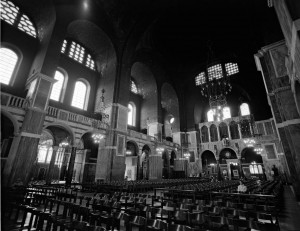
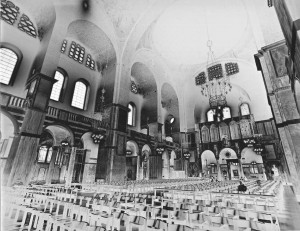
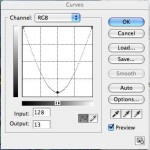
It turns out you can do something vaguely similar with curves. If you put the bottom left corner at the top left corner and bring the middle down all kinds of interesting things happen. The mid tones go toward black and the shadows and the highlights are light. With a gray scale image this can be very compelling.

U shaped curve

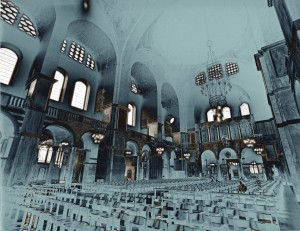
Cathredral grayscale

cathredral grayscale with u-curve

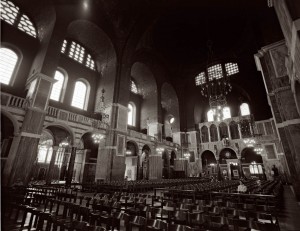
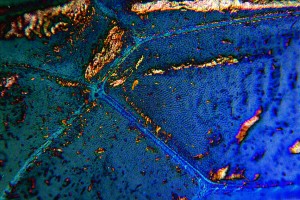
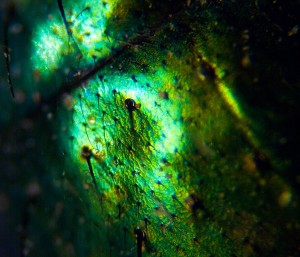
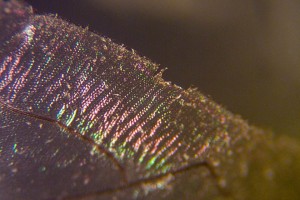
If you work with a color image or a gray scale image that you add a little color to, things get even more interesting. Here I added some red and yellow to the cathedral image. Then I used this u-shaped curve.  In addition to the cathedral image I used above I’m using some of the fly wings from last week with u-curve

The warm version of the Cathedral. I added red and yellow in Curves 

Fly wing with u-curve

The warm version of the Cathedral with the U shaped curve applied.

Please check out my classes at BetterPhoto. You can still sign up for the current session!
An Introduction to Photographic Lighting

Portrait Lighting on Location and in the Studio

Getting Started In Commercial Photography

Thanks, John Siskin

April 19, 2010

Using a Microscope

Filed under: Micro Photography — John Siskin @ 5:28 pm

Branded 2 468x60
First, unless someone wants to give me an electron microscope, this will be the last blog about macro/micro for a while. I am going to discuss the microscope, and I hope you’ll find it interesting. I’ve written about this before, and the best copy of the article is at BetterPhoto.com, here’s the link: www.betterphoto.com/article.asp?id=185. There are more images in this version than the version on my website. Anyway, I hope you’ll look, because I’m not going to cover everything here.

The microscope is a compound system, that is there are two sets of lenses that work together to create a large degree of magnification. Telescope and binoculars work the same way. The objective is the lens near the subject and the eyepiece is at the top of the microscope. You multiply the power of the two to get the power of the system: a 4X objective and a 10X eyepiece give you a 40X enlargement. A basic student grade microscope will cost you about $120 and reach an enlargement of 600X. In theory anyway.

The problem is that when you use powerful objectives, any thing over 4X, the lens is too close to the subject. You just can’t get any light on the subject. Still this will work well if the subject is translucent, because microscopes are designed to light things from below, so the light goes through them. So I often use a 4X objective and a 15X eyepiece, which gives me 60X. 60 times life size is pretty damn close! I use quartz lights to illuminate my subjects from above, or rarely from below. I have also used strobes successfully, but you need to have a bright modeling light to see the subject. Seeing the subject is a big challenge.

You need a standard monocular microscope like this one: http://www.surplusshed.com/pages/item/t1480d.html. Then you need the adapter. This allows you to use a T-mount to mount your camera to the microscope. Here’s the adapter: http://www.surplusshed.com/pages/item/m1573d.html. Here’s a T-mount to Nikon: http://www.surplusshed.com/pages/item/m1610d.html and for Canon: http://www.surplusshed.com/pages/item/m1607d.html and there are others.

Please check out my classes at BetterPhoto. You can still sign up for the current session!
An Introduction to Photographic Lighting

Portrait Lighting on Location and in the Studio

Getting Started In Commercial Photography

Thanks, John Siskin

Branded 2 468x60

April 11, 2010

Special Micro Lenses

Filed under: Micro Photography — John Siskin @ 11:57 am

Branded 2 468x60

Shot with the 63mm Zeiss Luminar lens and an extension tube.

First I want to say that I received the latest issue of Photo Technique Magazine yesterday, with my new article in it. This is the May/June issue and I hope you’ll pick it up. I really like the layout.

The macro/micro techniques I’ve been discussing in the last few weeks could easily have been done with a 50mm f1.8 lens. In fact, for use with bellows or an extension tube or a reverse mounting ring this is a very effective lens. The thing is that there are many other lenses that you could use and some of them are better. Most camera lenses are designed to focus at infinity. If you want the lens to focus much closer than it is good to optimize the spacing between elements to achieve that. I am not familiar with any lens that changes its internal geometry to continuously optimize the lens as you get closer. I don’t think it would be practical to attempt this for the small benefit it would provide. Still there are many lenses that have been designed to focus at a very close distances, but these lenses don’t work well at infinity.

The problem is how can we adapt these lenses to a modern digital camera? Since there are two lens mounts that are common for lenses that would work for micro imaging we really only need two kinds of adapters. First the two lenses: enlarging lenses and microscope lenses. Enlarging lenses were meant for traditional photographic enlargers. The distance between the negative and the photo paper was small, so these lenses were optimized for close work. Common focal lengths are in the range from 50mm to 135mm. These lenses would work well with extension tubes or bellows. High quality enlarging lenses, from Nikon and Schneider, are often available for reasonable prices. Almost all enlarging lenses were made with a simple 39mm thread mount. This is called the Leica Thread mount.

Shot with a Schneider 28mm enlarger lens

Microscope lenses are obviously designed for extremely close work. You can shoot with just an objective lens, with out the eyepiece. This gets you a considerable enlargement of your subject onto the sensor. The best lens for most situations is a 4X lens, as stronger lenses require you to be too close to the subject. A PLAN lens is very well corrected and would give excellent results. I will be talking about shooting with a complete microscope in another blog. Most microscope lenses also use a common thread, called DIN. In addition to lenses designed for microscopy there are some large format micro lenses that use this thread. Zeiss made a lens called the Luminar, which is extremely fine and uses this thread. I own a 63mm Luminar that has given me excellent results. There have also been other micro lenses that used this thread including the Micro Tessar from Bausch and Lomb. One advantage these lenses have over the microscope lenses is an adjustable diaphragm.

So the problem is how to mount Leica Tread and DIN lenses to a Nikon, Canon or whatever. The answer is actually two adapters. The first step is to covert the lens thread to a T-mount. This was a standard mount developed decades ago to allow secondary manufacturers to make lenses for several cameras. Since the mount doesn’t allow for any automation, aperture, focus and so on, the mount is little used. You still see them on mirror lenses, which don’t have auto focus and don’t have adjustable diaphragms. Anyway this adapter will allow you to mount a DIN microscope lens to T-mount: http://www.edmundoptics.com/onlinecatalog/displayproduct.cfm?productID=1968&PageNum=1&StartRow=1. I have now spent over an hour trying to find a Leica M39 thread to T-mount adapter. Actually finding one was easy. I have one right here in front of me. I can’t find a link to buy one. If you can find a link let me know, so I can update this.  For T-mount adapters, from the T-mount thread to Nikon, Canon and so on, you can go many places. I usually buy these from Surplus Shed (www.surplusshed.com).

I’ve attached a couple of pictures with the 63mm Zeiss Luminar, microscope thread to extension tube; and a picture with a 28mm Schneider Enlarging lens. I have no idea what the 28mm enlarging lens was actually designed to do, since it is too short for most enlargers.

Please check out my classes at BetterPhoto. You can still sign up for the current session!
An Introduction to Photographic Lighting

Portrait Lighting on Location and in the Studio

Getting Started In Commercial Photography

Thanks, John Siskin

Slag Glass
Branded 2 468x60

April 5, 2010

Reverse Adapters

Filed under: Micro Photography — John Siskin @ 5:43 pm

Branded 2 468x60

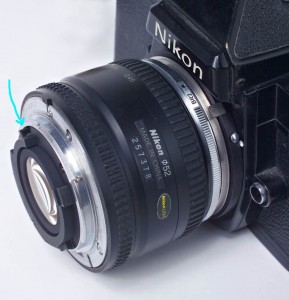
50 f1.8 lens reverse mounted. The mark shows where the diaphragm lever is on this lens.

What your average lens does is to make a big image, called reality, so small that it fits onto your sensor. Reality doesn’t fit on your sensor, just an image of it. Your sensor is pretty small, so this is a big reduction. Now if you could turn your lens around, so the back was facing the subject and the front element was facing your film, it would make small things big. There are devices from camera companies that do this. Nikon calls theirs a BR-2A. You can get a generic reverse adapter for less than half the price of a Nikon one, but the Nikon one is only about $40. Keep in mind that there are no optics in this, just a piece of metal that screws into the front of the lens on one side and has a lens mount on the other side. One of the great things about this gadget is that it is small and doesn’t weigh a lot, so it’s good to have in the camera bag.

There are a couple of things that make working with the reverse adapter tricky. First the auto-focus and auto-diaphragm controls are sticking out the wrong side of the lens, so they don’t work with the camera. Also your auto exposure systems don’t work. So you need to find your exposure by trial and error, using the image on the camera back. Of course you need to do zone focusing with this set-up. I talked about zone focusing in a recent blog. You can control the diaphragm with your hand, look at the picture of the reversed lens to see what lever you have to use. Nikon does make a ring to allow you to mount filters on your lens when it’s reversed, the BR-3. This will protect the back of your lens, which is a good idea. Nikon used to make a device called a BR-4 that would enable you to use the auto-diaphragm. In order to do this you needed a dual cable release, the second cable stops down the lens before you shoot. I used the BR-4 with my old 55 f3.5 Micro Nikkor for the pictures I’ve attached to this blog. If you want you can use extension tubes or bellows to get even closer. Wide-angel lenses and fixed focal length lenses work better. Wide-angle lenses give greater magnification. I used to have 20mm lens that was great reverse mounted. You can also reverse mount such things as enlarging lenses and get excellent sharpness. Reverse mounting lenses will enable you to make something anywhere from life size to several times life size on your sensor. Of course a print or a file can be many times larger than the sensor.

I have a new article on Architectural Lighting coming out in the May/June issue of Photo Technique Magazine . I hope you’ll check it out. I also hope you’ll check out my classes at BetterPhoto.

An Introduction to Photographic Lighting

Portrait Lighting on Location and in the Studio

Getting Started In Commercial Photography

Thanks, John Siskin


Branded 2 468x60

March 28, 2010

Tubes and Bellows

Filed under: Micro Photography — John Siskin @ 7:52 pm

Branded 2 468x60

The further the lens is from the sensor the closer the point of focus is to the lens. I have always thought that this is counterintuitive. If I want to focus closer, and thus make the subject bigger I need to move the lens away from the film or sensor. Regardless of how it should be this is the way it is. So if I could put an empty tube between the lens and the camera body the lens would become a macro lens? Yes, that is exactly right. There are two kids of empty tubes: rigid ones called extension tubes and flexible tubes called bellows.

I think that extension tubes are much easier to work with, particularly in the field. Still you need to do zone focusing, which I discussed in the last blog. A bellows will give you continuous focus. In fact if you start with a long lens, like a 135mm lens, you can focus to infinity with a bellows. Of course this only works with a lens that isn’t in a mount designed for a camera, like an enlarging lens or even a view camera lens. But you can use a standard camera lens, like a 50 f1.8 with an extension tube or a bellows. Fixed focal length lenses, particularly shorter focal lengths work very well with either the bellows or the tubes.

Nikon has made a lot of both tubes and bellows over the years. The first tubes I know about were the K tubes. These were completely manual. Not only didn’t they give the camera any auto-focus information or exposure information, they didn’t even stop the lens down automatically. When you see a set of these they’ll generally be pretty cheap. There are also a lot of other brand tubes that are very inexpensive. Since there are no actual optics in an extension tube buying cheap may make sense.

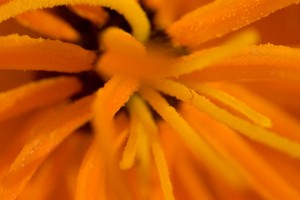
Spring Flower 1There is one tube that I should mention the Nikon BR-4. This tube will stop down a lens before you shot if you use a dual cable release. So you can use this with manual tubes like the K tubes, or with a bellows, because bellows don’t stop the lens down either. You can also use it if you reverse mount a lens, which I’ll get to soon.

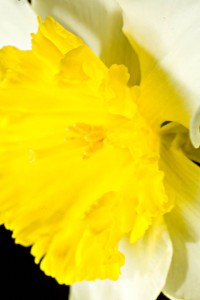
I really like having a few extension tubes in the camera case. They don’t take up much room and they provide a really high quality macro image. I’ve attached a bunch of images made with extension tubes. One other thing I want to mention about bellows: you can adapt a view camera to a digital camera and use the bellows of the view camera. This gives you camera movements in addition to simple bellows. You can read more about his here.  Next time, more macro!

I have a new article on Architectural Lighting coming out in the May/June issue of Photo Technique Magazine . I hope you’ll check it out. I also hope you’ll check out my classes at BetterPhoto.

An Introduction to Photographic Lighting

Portrait Lighting on Location and in the Studio

Business to Business: Commercial Photography

Thanks, John Siskin

Branded 2 468x60

March 24, 2010

Getting close, a Beginning

Filed under: Micro Photography — John Siskin @ 10:50 pm


Branded 2 468x60

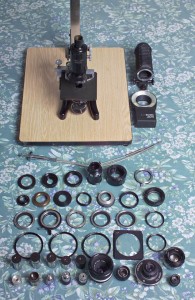
Micro and macro lenses adapters tubes bellows copy stand and a ring light.

In the spring a photographers’ thoughts turn to macro and micro photography. At the same time the photographer’s wallet turns inside out. I know that most people feel that the way to do micro photography is by buying a micro lens or using a macro zoom. Micro lenses are very fine, but a 60mm f2.8 Nikkor costs $600, and the micro 200mm is about $1800. I think this is a lot of money. Many micro zooms are just not all that good optically. The other problem with much of this gear is that it doesn’t get you all that close. I’m going to do a few blogs about unusual micro equipment. I might finish off with something about microscopes. I’ll start with some general things and the work into specific set-ups. One thing, I know that almost no one will actually want to use most of these set-ups. They require manual control and some thought and some experimentation. You will not always take good pictures. The trade off is that you can go MUCH closer that you could with a standard macro lens. Macro lenses tend to stop at the point where the subject is the same size on the sensor that it is in life. A microscope will allow you to make the subject eighty times larger on the sensor than it is in life. That is eighty times closer than a macro lens.

I will be discussing the adapters for Nikon lens mounts. There are adapters for other systems. Since I don’t think most people will actually be assembling these things, I’m not going to bother to find out what the adapters are for other systems.

Macro and micro are terms that get used interchangeably. Nikon calls all their close up lenses micro, Canon calls them macro. I am going to call close-up images that are less than life size on the sensor macro. Images that are more than life size on the sensor will be called micro. If you want to call them something else that is ok by me.

I used a +3 diopter

Some set-ups allow continuous focus; others only allow zone focus. This is important. Zone focus means that the lens will only focus over a limited distance, or that it is fixed focus. I like zone focus better. You set the system up and then weave back and forth till you find the right image and focus. Then you shoot. This is actually easier than racking the focus back and forth.

Lighting is important also. For most of the shots in the next few blogs I used a Sunpak 611 with a booty light cover. (https://siskinphoto.com/blog/?p=189) This gives a large light source since the object is never more than a few inches away. I like the Sunpak because it has manual output over a long range, down to 1/128 power. Any strobe with manual control will work well for micro work. You can use a ring light, but this has problems when you are really close. So I like the Sunpak. But I have a ring light. I am including a picture of all the micro items I’ve acquired. If you click on the image you’ll get a larger image.

Now that I’ve introduced everything I’m going to finish up with something simple: diopter lenses. These are basically reading glasses for your camera. They screw on the front of the lens like any filter. All auto features remain automatic. They are inexpensive (a set of 3 in 52mm is about $50). They are not always all that sharp. Still they’re good to have in the camera bag. You can also make large format lenses out of these filters, check out this article.

I used the +3 diopter

Next week extension tubes!

I have a new article on Architectural Lighting coming out in the May/June issue of Photo Technique Magazine . I hope you’ll check it out. I also hope you’ll check out my classes at BetterPhoto.
An Introduction to Photographic Lighting

Portrait Lighting on Location and in the Studio
Business to Business: Commercial Photography

Thanks, John Siskin

Once again the +3 diopter


Branded 2 468x60

March 14, 2010

Large Light Sources

Filed under: Lighting Technique — John Siskin @ 11:23 am


Branded 2 468x60

This image was made with a snoot, so the light source is very small.

People are often confused by the difference between what happens when you use a diffuser and when you use a device to make a light source larger. The language of lighting doesn’t make a good separation between these ways of modifying light. A regular reflector on a strobe or even a clamp light acts to keep light in one direction. Various reflectors modify the spread of the light, so they are known by the degrees they cover: a 30º reflector throws a tighter beam than a 60º reflector. A diffuser takes the light from a reflector, or from the built in reflector in a strobe light like an SB900, and spreads it to cover a larger area, generally everything in front of the light, say 180º. This is what the booty light does. A large light source does do this, but it does something else that is more important. Whatever light source you use, each point on the light source, whether it is 12 inches across or 12 feet across, lights each and every point on the subject, unless that point is shadowed by something between the light and the subject. So if you have a face the nose will throw a shadow with a small light source since the nose will block all of the light coming from the small light source. If you have a large light source the nose will block some of the light source, but not all of it, because there will be part of the larger light source that isn’t blocked by the nose.  So

Made with a translucent cloth over a light pane to give the light a hard/soft quality

you get softer gradation, because only some of the light is blocked by anything between the subject and the light, and you have reduced, or no, shadowing. How soft the light is depends on the size of the light source. Other factors include the distance from the subject to the light source and how translucent the fabric in the large light source is. A very translucent fabric creates both a hard and softened effect, because you can see the effect of the small light source in the larger light source. In the same way a silver fabric doesn’t spread light in an umbrella as much as a white satin fabric. The basic tools to make large light sources are umbrellas, soft boxes and light panels. The key is the size of the source more than the shape. So a 60-inch umbrella and a 4X5 foot soft box will make very similar light, and a 1X1.5-foot soft box will give a very different quality of light. In my classes I stress using large light sources, because of the quality of light they create. For more information you might want to check out this article.

I have a new article on Architectural Lighting coming out in the May/June issue of Photo Technique Magazine . I hope you’ll check it out. I also hope you’ll check out my classes at BetterPhoto.
An Introduction to Photographic Lighting

This image was made with both hard and soft light sources.

Portrait Lighting on Location and in the Studio
Business to Business: Commercial Photography

Thanks, John Siskin

Branded 2 468x60

February 24, 2010

Doing Business

Filed under: Commercial Photography,Photography Communication — John Siskin @ 6:26 pm


Branded 2 468x60

Mickey Mouse

I am often asked about the business of photography: how to get clients and how to charge clients and what to give clients. I can’t answer all these questions at once, but I did want to say some things about rights. I am not a lawyer, and these are only my opinions, but they are based on my experience. The thing I have to do first is to say some things about my clients. I work for businesses. The work I do is generally used for one of two reasons, either documentation or promotion. Of course a documentation shot is unlikely to be modified, because that might interfere with the use of the shot. I did macro shots of spark plugs for general motors because they needed to discuss the color of the deposits. They wouldn’t change those. I expect that a shot used for advertising or marketing will be optimized for the intended market. That is the client’s purpose for the shot.

The client has paid me to deliver a product. If they choose to modify the product, generally that is their business. So if I do a shot of a bank’s board of directors and the banks wants to swap one director for another I can’t stop them from doing that. The shot doesn’t reflect on me, as I am not credited in an annual report. So if the shot looks poorly it is not my problem. If the client paid the bill, if the client didn’t pay the bill that is a problem.
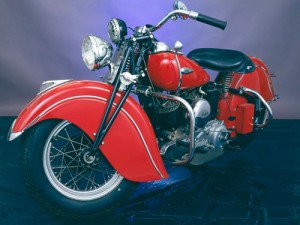
Indian Mortorcycle

I do have some concerns about what happens to my shots after I finish them. My largest concern is that a shot done for a contractor or an architect will be sold to a sub-contractor. I feel that I should be paid extra for this, because in cases like this my image is not being used to market a product, but has become the product. I try to approach situations like this in a reasonable manner, so it generally works out.

Finally there are times that images are stolen. A shot of mine was given to a major photography source book for a contest. They used the image on an in house comp that was later put on the web. I brought this to the publisher’s attention and was properly compensated. In a less pleasant situation some of my work, given to a stock agency, has been used multiple times on the web. I have never been compensated for this, and the stock agency is no longer located in the U.S. And so it goes.

I recognize that the situation is different when you work with individuals and families. Still, if a family commissions you to make an image, that will be part of the families archive, don’t they have some rights to that image? If they want their children and grand children to see them in a certain way, I think that should be available to them.
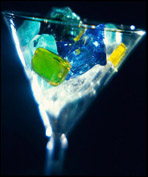
Martini, Rocks

I think that the real problem with all of this is the photographer’s income. Many photographers, especially portrait and wedding photographers, do not charge enough when they shoot. They give a cheap price for the shoot, and expect to make extra money on the prints or post work. Clearly, in an environment where perfect copies of digital files are very easy, it is difficult to protect this part of your income. Simply put I do not calculate into my original price any money from print or other post sales. I charge enough money to do the shoot, and charge that for the shoot. So it does not bother me to give a client full size files of an image they purchased. They can’t steal something that they have paid for. If you don’t charge enough for the shoot, and have a high charge for prints, you put yourself in a dangerous position.

As a commercial and advertising photographer I try to build relationships with my client, not maximize the profit from a single job. So I have one client that I have done more than 18 jobs for so far this year. No portrait or wedding client will give you that much work. While I understand that a portrait and wedding photographer may feel that she/he must maximize the profit from any single job, I try to maximize the profit over the long term. This also gives me security that the client will come back.

Regardless of what you do remember that you work for a client providing them with a custom product that they commission. It is always important to respect their ownership of the product that they paid for.

As always, I hope you will check out my classes at BetterPhoto.com:
An Introduction to Photographic Lighting
Portrait Lighting on Location and in the Studio
Business to Business: Commercial Photography

Once again, I’ve added images I like, commercial and peal
Thanks, John Siskin
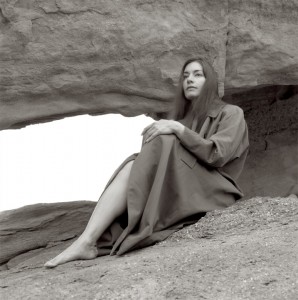
Paty
Violin & Flowers

Branded 2 468x60

February 10, 2010

Buying Camera Gear

Filed under: Photographic Equipment — John Siskin @ 1:36 am


Branded 2 468x60

Shot For Aids Walk, Los Angeles

One of my first big opportunities in photography was selling cameras at a store in Santa Barbara: Russ’ Camera. Russ Eckerstrom took a risk on me and I hope I gave him good service. I learned a lot there, not just about photography. I leaned about buying and selling and serving customers: the kinds of things that have been important in my business as a photographer. The store is still in business up in Santa Barbara.

When I came back to Los Angeles and started my business I needed suppliers that were local and would carry the products I had to have. I was in a camera store every couple of days looking for film, Polaroid or chemicals. I dealt with a lot of stores that provided these products, but often the service was bad. Too often the sales people felt they needed to tell me they could do my job. I don’t like spending my money and having some guy behind the counter feel he needs to compete with me. Of course there were a few great sales people over the years, but they mostly left camera sales.
What I learned at Russ’ and saw in many stores is that camera sales is a tough business. I’ve seen a lot of stores die in the last few years, so I know this is especially true after digital. The mark-up on gear is low, the market competitive. It used to be that a lot of money was earned on photofinishing, but this too has taken a big hit. I particularly miss the stores that have a lot of junk; I do a lot with junk. You might check out my article on building cameras.

Congressman Waxmand shot for Aids Walk, Los Angeles

I want to recommend that you do business with Calumet Photographic. I have been buying stuff from them since about 1984. I used to pour over their catalog, and I learned a lot from that book. For me, a great supplier has the little things that make everything else work. I remember needing several 40.5mm to 52 mm step up rings: Calumet had them, in stock. When I need a camera battery or a gel for my lights I can get it at Calumet. When they opened a store in Hollywood, there was only one problem for me; it wasn’t in the San Fernando Valley. I can go in their store and actually see the products. The sales people treat me like I might know something. I have dealt with many big stores including a couple of the stores in New York. I don’t look forward to buying from them again. But I do hope to do more business with Calumet. I should also say that every employee I have dealt with at Calumet has been knowledgeable, which is good, and a nice person, which is better

Calumet is now associated with this site. I am very happy about this. If you would like to support this blog please visit Calumet through the link on this page. If you think I am being unreasonably nice I suggest you visit some large camera stores in Los Angeles and New York.

As always, I hope you will check out my classes at BetterPhoto.com:
An Introduction to Photographic Lighting
Portrait Lighting on Location and in the Studio
Business to Business: Commercial Photography

The pictures this time are just a few I like. They are linked to my site
Thanks, John

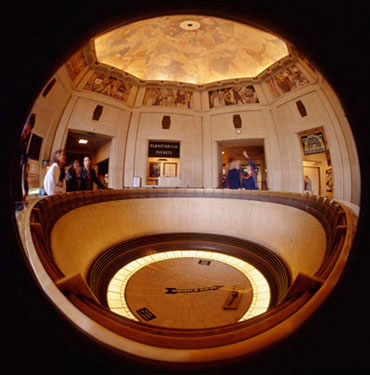
Shot with my 4X5 fisheye camera.


Branded 2 468x60

February 1, 2010

A New Tool For Lighting Space

Filed under: Architectural Lighting,Lighting Technique — John Siskin @ 8:25 pm
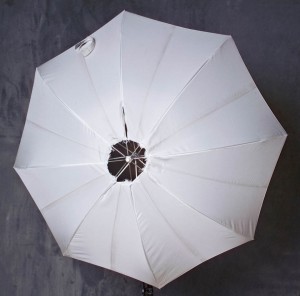
Modified Umbrella

Modified Umbrella

If your goal is to light a human face you are talking about controlling light on about one square foot of surface area, if you are lighting head to toe, or even a small group, you are not talking about that much area. When you are trying to light a room you may be talking about thousands of cubic feet of space. The problems are not unrelated, but the solutions are going to be very different.

One of the most important tools in lighting people or product is the large light source. If you have a light source that is very large, and close to the subject, you can create soft shadowless light. The light seems to come from many directions, like the light on an overcast day. Of course this is because the light does come from every point on the surface of the light source, whether the light source is an umbrella, soft box or light panel. So lighting with a large light source can be relatively simple, since the position of the light is not as critical as with a small light source. As the subject gets bigger you need an increasingly large light source to accomplish the same thing. If you light a motorcycle (http://www.youtube.com/watch?v=pqEfShhW5pA) a large light source might be about 20X9 feet. But if you are lighting a room a large light source would need to be approximately as big as the room.

Since I haven’t seen a lot of soft boxes you could live in, or an umbrella that could keep the entire Mormon Tabernacle Choir dry in a rainstorm, I think that the only way to achieve a large light source in an architectural setting is to bounce the light off a wall or ceiling. This will work quite well if the surface you bounce off is white or close to white. The other concern, with the ceiling, is to keep light off, or nearly off, any part of the ceiling that is in your shot. I suppose you could bounce light off a large piece of seamless paper if your walls or ceilings weren’t white, but that sounds like it might be difficult to set-up. You could also repaint the room, but I don’t think that this solution is very practical. A bounce light will also cause reflections, but reflections from large light sources are not as bright as those from small light sources.

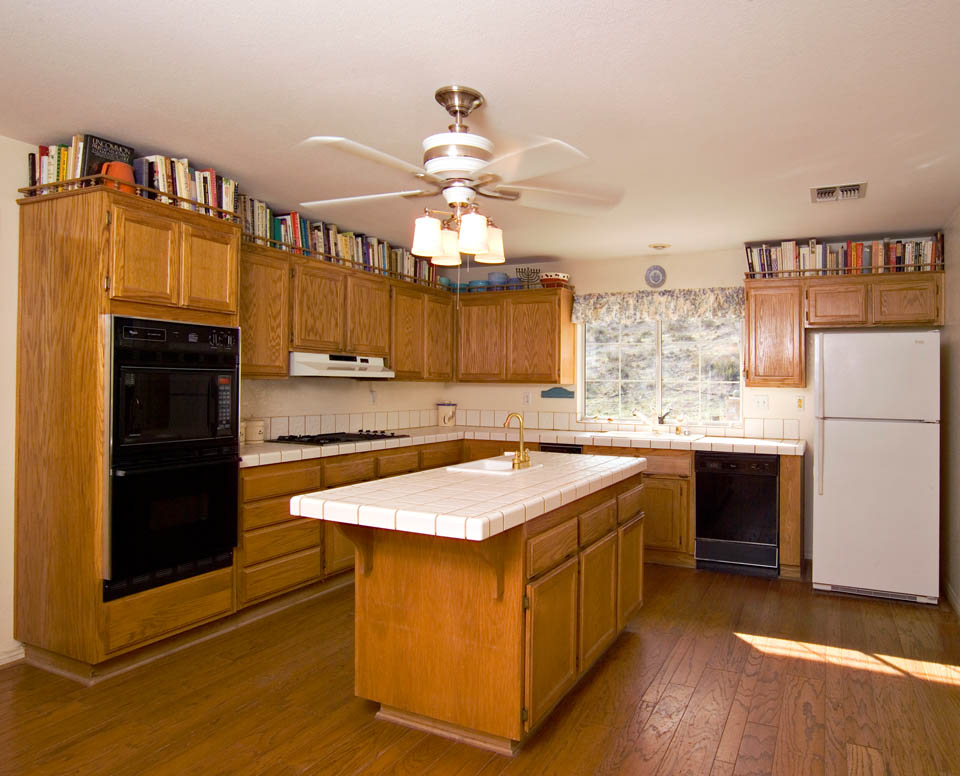
Recently I saw the way one of my students used an umbrella on a room shot. She pointed a shoot through umbrella at the ceiling. There was light all over the room and the ceiling from just one light. Of course there was not as much light as one would like bouncing off the ceiling, because the light had to go through the umbrella. I wondered what it would look like if you could bounce light off the ceiling and get light from the side of an umbrella. So I modified a white umbrella, by putting a hole in the center. I had to sew around the edges of the hole. The hard light went through the center of the umbrella and the umbrella diffused the light on all sides. This is a 360º light, so you get bounce fill from all over the room. The light worked wonderfully well. I have attached a before and after photo.

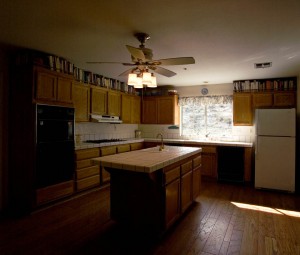
Without the new light

Without the new light

With the modified umbrella!

With the modified umbrella!

Of course I had to see what would happen with a portrait. The results on this test were less wonderful. The light needs to be place precisely, because it works as a hard light. In addition, since there is more hard light than soft light, the result is not really flattering to all subjects. Still the catch lights looked very fine.

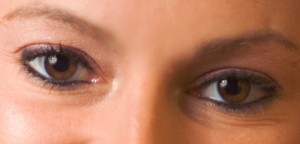
Catchlights from the modified umbrella

Catchlights from the modified umbrella

I have a picture on page 58 of the New Yorker this week, I hope you’ll check it out. I also hope you will also check out my classes at BetterPhoto.com:

An Introduction to Photographic Lighting

Portrait Lighting on Location and in the Studio

Business to Business: Commercial Photography

« Newer PostsOlder Posts »

Powered by WordPress