Photo Notes A place to talk about making images.

July 25, 2009

Aperture III

Filed under: Basic Photo Technique — John Siskin @ 1:29 pm


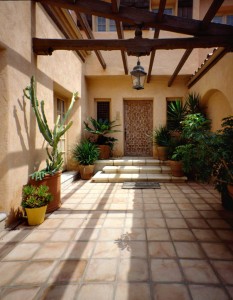
This shot was focused mid-way through the image to hold focus back to front. Shot made with a Toyo 4X5 camera.

This shot was focused mid-way through the image to hold focus back to front. Shot made with a Toyo 4X5 camera.

Well I hope I haven’t lost too many readers by going on about aperture for three blogs, but it is really important to understand this in order to make good pictures. The idea is that the use of the right aperture allows the photographer to control what part of an image the viewer concentrates on.

The next part of understanding aperture I want to discuss is the hyper focal distance. This is the point at which you focus and stop down in order to create the most depth of field possible in a shot. Of course it is different with different focal length lenses, as we saw last week. Of course it is also different at different apertures. The thing to keep in mind, regardless of aperture and focal length is that in order to maximize depth of field you would not focus on infinity. Two thirds of the depth of field exists behind the focus point and one third in front. You would not be using the depth of field efficiently if you focused on the furthest point that the lens could focus on, something closer would make better use of depth of field. Also if everything in you shot is effectively at infinity then depth of field doesn’t matter.

There is a button on most cameras to help you figure that out, and sometimes it does help. The reason I say sometimes is that this button causes the lens to stop down, and that makes the picture darker, but you can see the depth of field. The darker image in the viewfinder can mean that the image is hard to see, which can make the preview pretty useless especially indoors. Modern cameras are set up to let you look through the lens at its widest opening, which makes focusing much easier. The lens stops down to the working aperture at the moment you activate the shutter, this system works very well. Under the right circumstances, usually bright, the depth of field button can give you an indication of how the depth of field will look.

I promised that memorizing the apertures would be helpful, the reason is that these numbers apply to any time that you are

Careful use of aperture and focus point keep the whole image in focus.

Careful use of aperture and focus point keep the whole image in focus.

working with the area of a circle. For instance when working with light. If you have a light at 5.6 feet from a subject and you bring it closer, to say 4 feet that the light on the subject will be one stop brighter. You went from f5.6 to f4, a one-stop increase in light. Similarly if you had a light at 8 feet from a subject and dragged it back to 11 feet from the subject you would lose one stop of light. Wedding photographers used to use manual strobes like the Norman 200B, they would use this principal to rapidly figure changes in exposure. The same principal made it possible to figure bellows extension, but I won’t trouble you with that now.
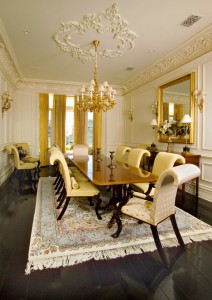
 

The depth of field keeps the whole shot in focus.

The depth of field keeps the whole shot in focus.

July 18, 2009

More on Aperture

Filed under: Basic Photo Technique — John Siskin @ 1:37 pm
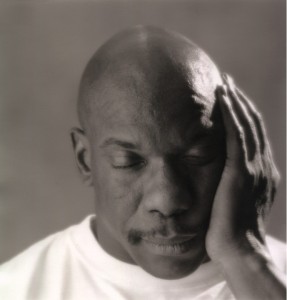
This image uses short depth of field to give the image a sense of three-dimensionality.

This image uses short depth of field to give the image a sense of three-dimensionality.

When I left off last time I had just suggested the concept of depth of field, and we will start with that this in this blog. The real problem is that the language is confusing here: what does “depth of field” mean? Obviously we aren’t talking about how much acreage you might have planted in corn. What we are taking about is how much of your image, closer and further from the lens, is in sharp focus. So if I want an image that will concentrate the eye on just part of the face, of a subject, I would say that I need a very narrow depth of field. In order to get this I will use a wide aperture (small number, say 2) that will let in a lot of light through the lens. This will create an isolated zone of focus. How low will depend on the focal length of the lens. For instance f2.8 is extremely short depth of field on a 200mm lens while it provides significant depth of field on an 18mm lens.

The focal length of the lens is one of the factors that affects the depth of field. If you use a long lens you see more details in the subject than you would with a short lens at the same distance. The need to use a smaller aperture (bigger number like 16) to achieve sufficient depth of field is related to this increase in detail. If you shoot with a 28mm lens at a distance of 10 feet from the subject many of the details of the subject are no more than specs, so you wouldn’t expect to see detail in them. If you shoot the same subject, from the same distance with a 150mm lens many of the parts of the subject that were specs in the 28mm shot will have visible detail, and thus need to be sharp. For this reason you can expect to need more depth of field with a longer lens. I should point out that the 150mm lens will see much less of the subject.

Another factor with depth of field is visualizing what will be sharp and how the soft areas will appear. This is covered by a rule that is usually referred to as the one third, two thirds rule. It is also know as the Scheimpflug rule, but since this name is hard to pronounce it doesn’t get used much. Regardless of what you call it the idea is that as you stop down the lens 1/3rd of the extra depth of field exists in front of the point you focus on and 2/3rds of the additional sharp focus area is behind the focus point. Think about this, if you want a lot of stuff in focus, don’t focus on the front of the image, but midway through the image. You will use the depth of field you have, at any give aperture, more effectively. Of course if you don’t have enough depth of field, for an image that needs it, the point of focus won’t save you; you need to use a smaller aperture.

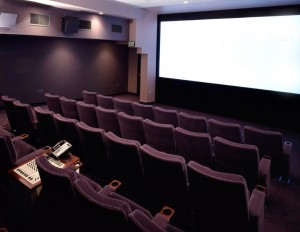
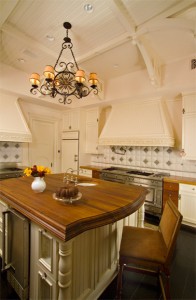
This shot uses long depth of field to keep the whole room in focus.

This shot uses long depth of field to keep the whole room in focus.

July 10, 2009

Understanding the Aperture

Filed under: Basic Photo Technique — John Siskin @ 1:14 pm
This shot uses short depth of field to bring the viewers' eye to the soup.

This shot uses short depth of field to bring the viewers' eye to the soup.

There is no other subject in teaching photography that is at the same time so basic and so important as understanding aperture and still so confusing and hard to explain. I want to start with a simple comparison to shutter speed: as the shutter speed number increases the amount of light let in by the shutter decreases. This is because the number is a fraction, and we are talking about the bottom number of the fraction, called the denominator. The number we use to discuss the aperture is also the bottom number of a fraction and as this number gets bigger the amount of light transmitted by the lens gets smaller. So for instance f16 lets less light reach the sensor than f8. Two stops less light, but we will get to that soon.

The aperture is a hole, which can be varied in size, in the middle of the lens. It blocks some of the light coming through the lens. The aperture number is actually the focal length of the lens divided by the width of the lens. So if you have a simple one-element lens that is one inch wide and has a focal length of 8 inches the lens aperture would be f8. If the lens had a one inch diameter and had a focal length of 4 inches that the aperture would be f4. Please don’t make me do this in metric, the relationships works but the math is more annoying. That wasn’t so bad was it? Here’s where it gets tricky, if you want the aperture to increase the light coming through the lens by one stop you have to double the area of hole in the middle of the lens. If you double the diameter (distance across the lens) you will increase the area of the circle to 4 times the originals size, or two stops. Instead of doubling the diameter of the lens you have to divide by the √2 (square root of two) which is approximately 1.4. This is similar to converting a focal length from your sensor size to what it would be in full frame 35mm. So 8÷1.4=5.714, which we refer to as f5.6. If you want to decrease the amount of light reaching the sensor by one stop you need to multiply by 1.4, remember the number must be smaller to let in more light. So 8 X 1.4=11.2, which we refer to as f11. It is important to remember that since we are working with fractions, things get turned around.

Please forgive me for all of this, but I didn’t make it up. As you may find it difficult to multiply by 1.4 in your head you may want some help on how to manipulate and use these numbers. There are a number of important applications that I will probably blog about later. In the mean time you might want to try to remember the full stops: 1, 1.4, 2, 2.8, 4, 5.6, 11, 16 and 22. You may notice that every other number is double; this helps to memorize the numbers.

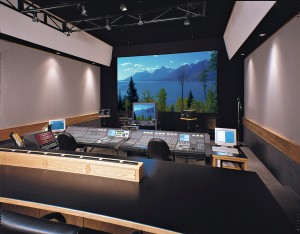
This shot uses long depth of field to keep the control panel and the room in focus

This shot uses long depth of field to keep the control panel and the room in focus

I also want to mention that small numbers isolate focus and large numbers increase the area. This is called depth of field. I wanted to mention it so that I can put pictures into this blog.
I am going to write about using the aperture to control the depth of field very soon, but I thought this was enough confusion for one week. People often tell me that they don’t need to know these things, and that is certainly true. But I want to control what happens in my pictures; I want to make pictures rather than just take pictures. If I understand how my camera records light I will, inevitably, have more control over my pictures.

July 1, 2009

Two and a Half Things About Lighting

Filed under: Lighting Technique — John Siskin @ 2:25 pm
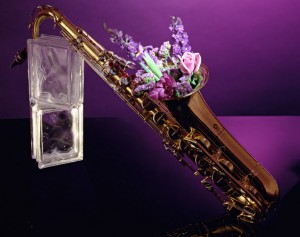
Purple Sax

Purple Sax

This is basic stuff on lighting. I am going to send some of it out to refresh my students in my new Commercial Photography class at BetterPhoto.

I find that many people decide to avoid working with strobes because they do not understand them. In my experience most people cannot understand strobes until they work with some kind of a light. Even in live classes where there is demonstration in front of the students, many will not understand strobes. But when someone sets up the lights, for themselves, and does a shot, perfects the exposure, and creates a photograph all becomes clear. This is why I have students use cheap clamp lights in my class An Introduction To Photographic Lighting . So the best way to learn lighting, as with so many things is practice.

There are two and a half important things about any light source: Color; the size and distance of the light source relative to the size of the subject or the product; and, finally the direction of the light is half important. While a digital camera can control color it doesn’t have the ability to adjust two different colors of light in the same shot. If we want to work with a yellow light like tungsten and a blue light like daylight we have to use filters over one of the light sources to make it match. A filter over the camera won’t fix this. The size of the light source affects the transition from light to shadow. A big light will have softer shadowing than a small light. Consider the light on a sunny day where the light comes from a very small part of the sky and an overcast day where light comes from everywhere. There aren’t any shadows on an overcast day, are there? Finally the position of a small light source is critical since it defines where the highlights and shadows are, but with a big light source position is less important. It doesn’t matter, in terms of shadowing, where a subject stands on an overcast day.

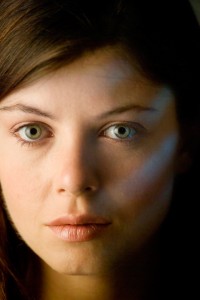
Mixed light colors. I particularly like wghat happens in the eyes.


Mixed light colors. I particularly like wghat happens in the eyes.

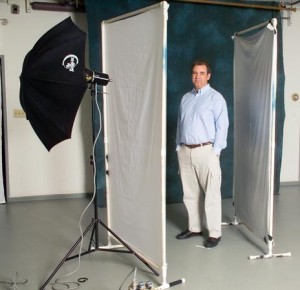
One of the things that confuses people about large light modifiers is that they think the purpose is to spread the light over a larger area. Actually you can spread light over a large area just be changing the reflector or leaving it off. The reason we use these modifiers is to soften the quality of light. A large light modifier lights each point on the subject from each point on the modifier. This means that an area of the subject that wouldn’t be lit by a small light source is often lit by a part of a larger light source, so an area that would be in shadow is merely darker.A one light set-up for a portrait

The reflections from a large light source are a bigger problem than the reflections from small sources. Of course this is because of the size. Before Photoshop controlling these reflections was very important, often it made the choice of which tool to use. Before Photoshop retouching a reflection was difficult and expensive. This is the biggest reason why soft boxes became popular. Now it is pretty easy to retouch. Reflections of the light source are much more of a problem in product photography than in portrait photography. The spherical shape of the eye tends to make reflections smaller, where a product will often show larger reflections.

Finally photography is both a craft and an art. In order to improve your craft you will need to practice. You will also take bad pictures in pursuit of good pictures. Something to keep in mind, even Eric Clapton and Luciano Pavarotti practiced.

Light and lens make this shot effective.

Light and lens make this shot effective.

I think that lighting is the most important skill I can teach a photographer, first because there are relatively few people who teach this skill. Also because it gives you control over your photographs that no other skill, even mastery of Photoshop, can give you. I approach teaching this skill from a flexible and technical point of view, if those two things are not incompatible. Flexible, because I don’t think that lighting formulas are the most effective way of approaching lighting. Technical, because I believe that lighting is a skill that is dependent on using tools effectively. While I have heard it said, “A workman is only as good as his tools,” the opposite is often said about photographers: he/she could make good pictures with any camera. I think that statement is basically stupid. I have enjoyed the work of many photographers over the years, and they have always been excellent at craft as well as people of great vision. I do try to show examples and explain how I did them. This seems like a reasonable way to approach teaching online to me. You may also want to check out my class Portrait Photography Lighting On Location And In The Studio .

Classes start on July 1, but you can join as late as July 6, and of course there is always next month!

Thanks, John Siskin

Powered by WordPress