Photo Notes A place to talk about making images.

August 17, 2023

Shooting a Bausch & Lomb Petzval Lens

I’m going to try to explain a project that I’m trying to work on. Unfortunately, for explanation, it’s a complex explanation with many threads; the good news, for me anyway, is that the complexity makes the project more interesting. You see one of my problems, as an image maker, is that I get bored with the simple things. Anyway, I’ve often heard that writing should begin at the beginning.
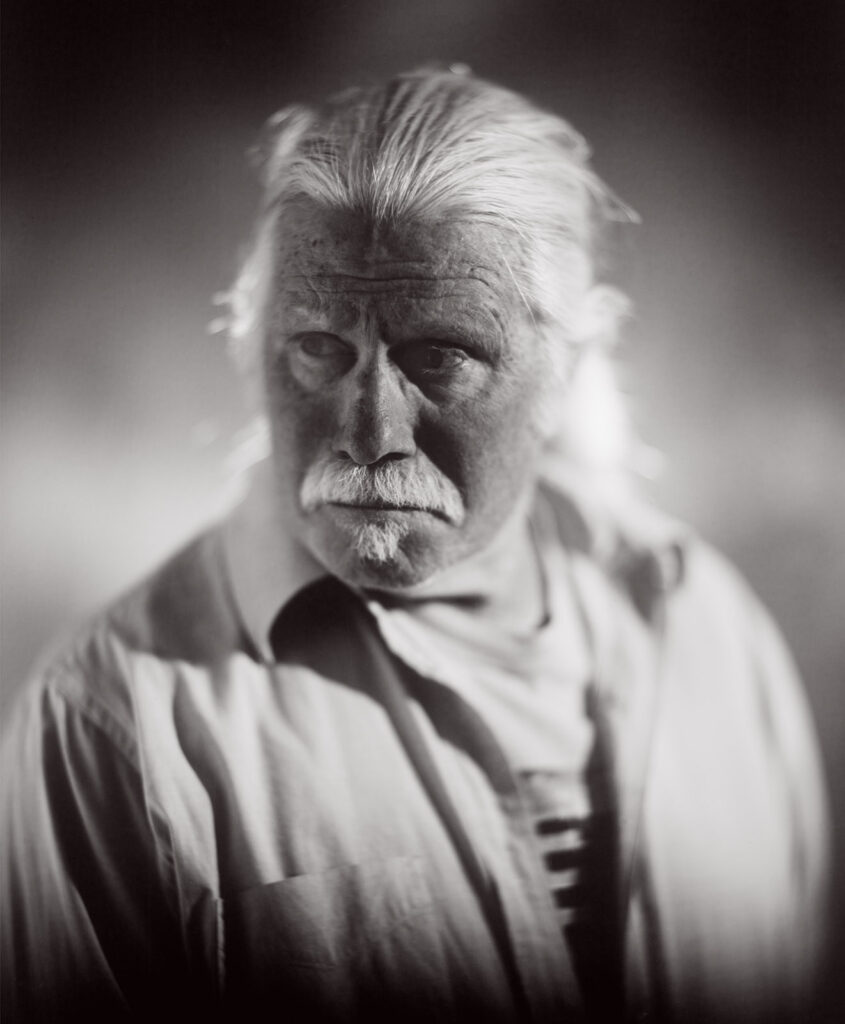
I

Photography was introduced in 1839. There were two competing methods of capturing an image with a chemical process. One was a direct positive image process called Daguerreotype, this is one of the threads which I hope to come back to. The more interesting process, to me anyway, was introduced by William Henry Fox Talbot. This process called photogenic drawing, involved making a negative, usually with a camera. The negative was dark where the original scene was bright and light where the scene was dark, a reversal of the original tones. Then the negative is put in contact with a second piece of sensitized paper and exposing this second piece of paper through the original paper negative. This produced a positive image, and you could make multiple positive prints. In terms of my project, it’s important to point out that he was using paper to make his negatives. There was no flexible film, which was invented by George Eastman. It would be quite a while before anyone found a process of making a photographically sensitive material that would stick to glass. Fox Talbot did the first book which explained how to do photography and was illustrated with actual photographs. You can see a good reproduction of the book Pencil Of Nature at this link: https://www.gutenberg.org/ebooks/33447

Very early in the practice of making photographs the martial used to make the negative, exposed in the camera, diverged from the materials used to make prints intended for display. The negative needed to be as light sensitive as possible, it needed to be on a translucent or, preferably, transparent material. The actual look of the negative was less important than the way it recorded information, since no one was really intending to look at negatives. In addition to being as sensitive to light as possible, it was a continuing challenge to make negatives that recorded color in ways that seemed intuitively right. For instance, the sensitive material, usually called emulsion, was unable to record red properly until the early years of the 20th century. Before that red, say red lips, were reproduced as black on prints. This panchromatic film and plate material was important to making negatives, but it made no difference for making prints. In fact, using an emulsion which was only sensitive to blue light made darkroom work much easier since you could work under red or amber light, called safelight. Many different ways of making photographic prints were introduced from the beginning of photography. Early methods included cyanotypes, platinotypes and kallitypes. By the middle of the 20th century the standard print was called a silver gelatin print. I’ll mention little more about working with direct positive materials at the end of this essay. I’ll want to mention are the introduction of color film, particularly Kodachrome, which was a direct positive material.

The positive black and white silver gelatin print was how most people experienced actual photographs for a long time. Of course, people experienced more images that were reproduced in ink, as newspapers, books and so on, but this essay is following photographic print making, rather than photomechanical printing. At the same time this was the dominant mode there were many creative photographers making images in unusual ways. For a long time, people continued to use film that wasn’t red sensitive, called orthochromatic film. In fact, Ilford still produces this sort of film. This made it possible to develop film by inspecting it during processing, rather developing film in total darkness which is necessary with panchromatic film. Kodak used to suggest using orthochromatic film for making portraits of European skin tones that had a reddish “ruddy” hue. I have no first-hand information about this technique. I am not sure when people started using silver gelatin paper in cameras instead of film. It was very popular with pin hole cameras because paper is cheaper than film and much easier to process. Kodak used to make a very thin paper, Ad Type, which was considered to be particularly good for making paper negatives, since it was more transparent that usual paper.

If you are currently making, or interested in making, paper negatives the situation is quite good. In the 1970s photo paper on a vinyl base, rather than paper, was introduced. This stuff is easy and quick to process. It dries flat. It scans very well. It is much cheaper than large film; 25 sheets of 8×10 Ilford HP-5 is over $200 and Ilford Multigrade paper is about $130 for 100 sheets ($8 per exposure vs. $1.30). The paper is sensitive to colors excepting amber and red, more than the original papers were. In addition, current photo paper, such as Ilford Multigrade RC is hugely more sensitive to light than 19th century materials. My tests tell me that the Ilford paper is something like 64 times more sensitive than tintype (an early and popular direct print) material was. Translated into modern film speeds I find that Ilford Multigrade RC can be exposed at ISO 64 with strobe (electronic flash) illumination. With daylight the ISO might be as low as 25.


II
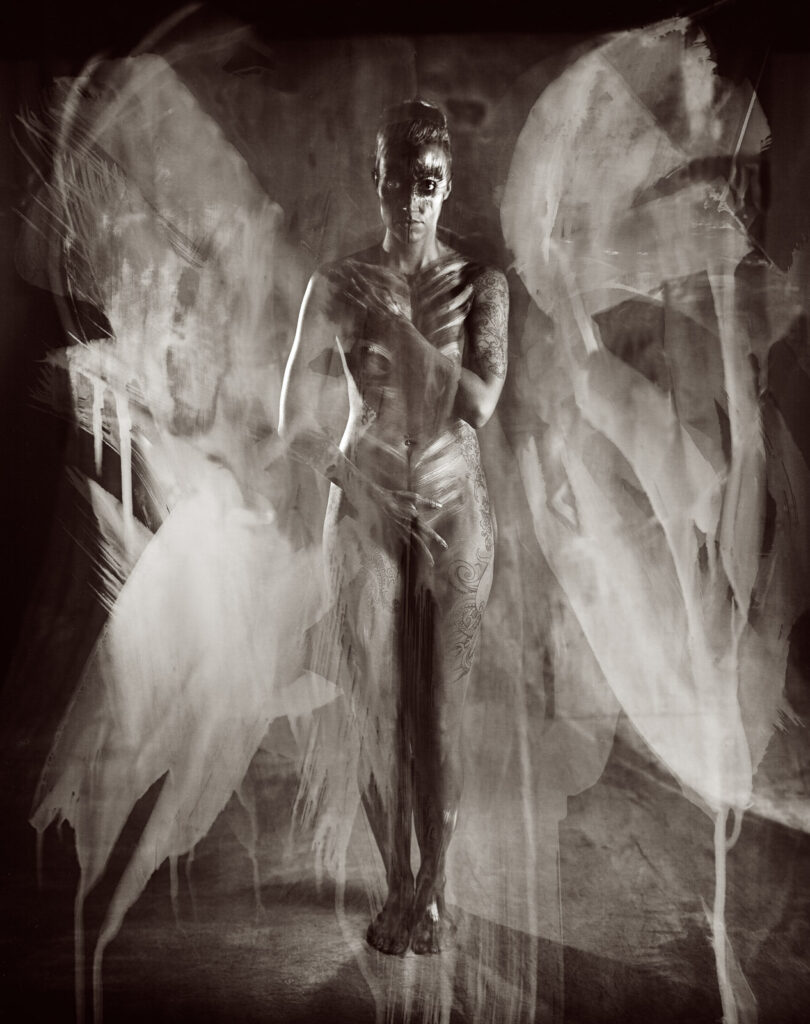
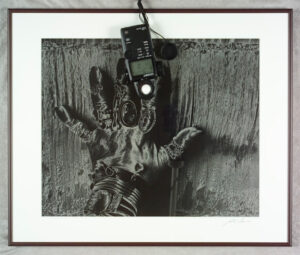
Cassie #14 from Courting Chaos

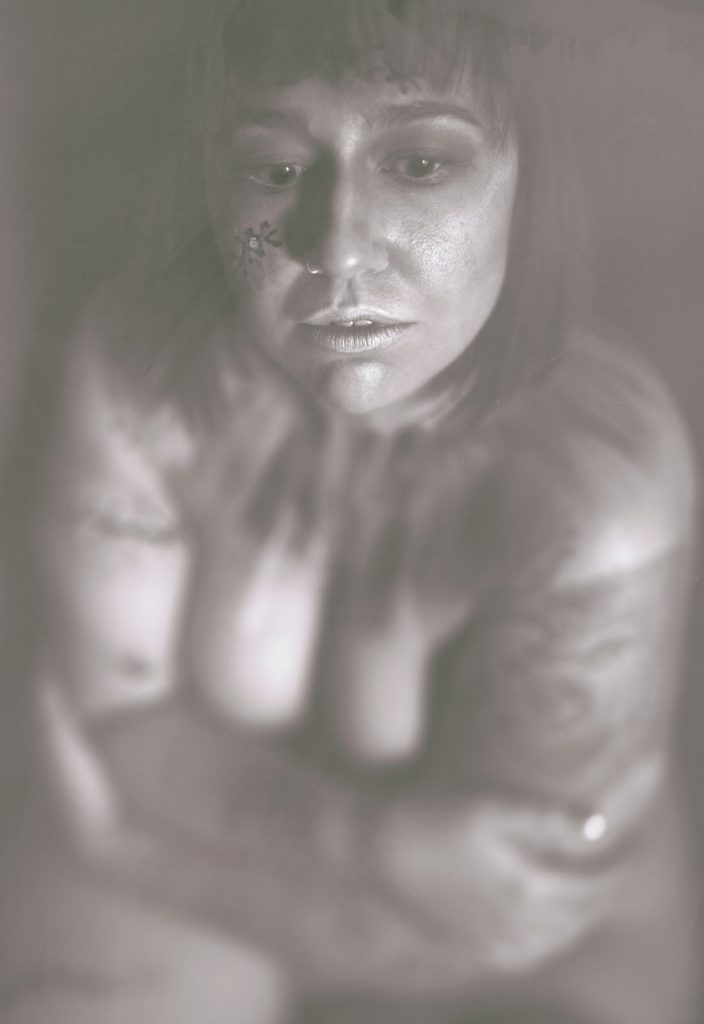
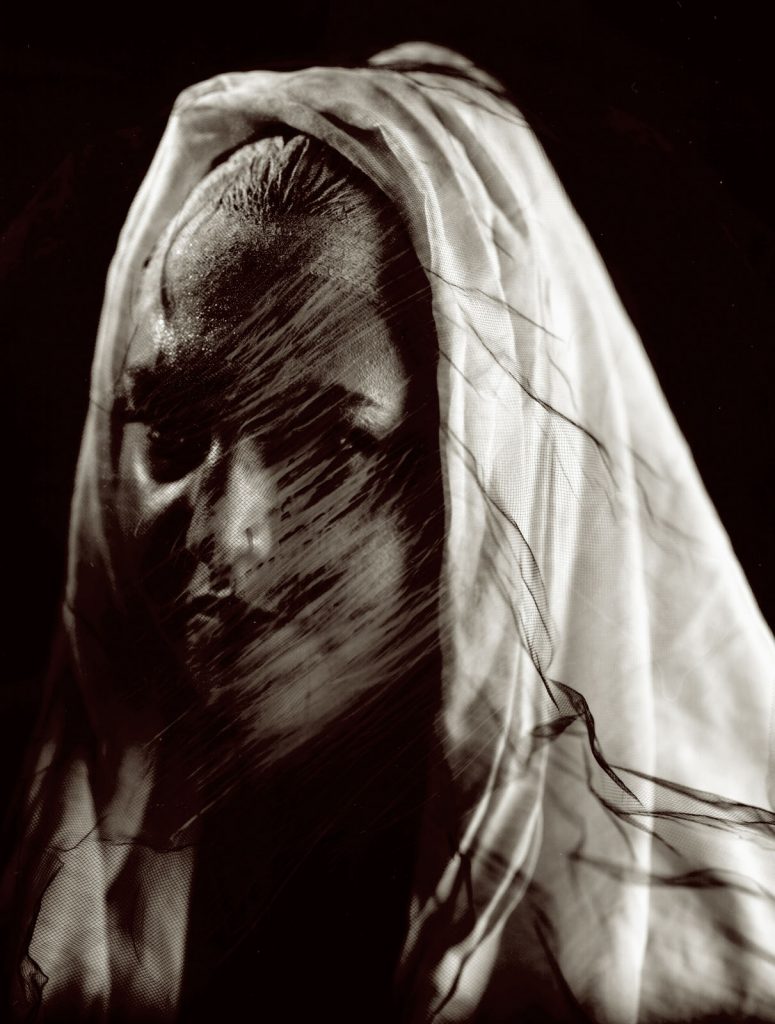
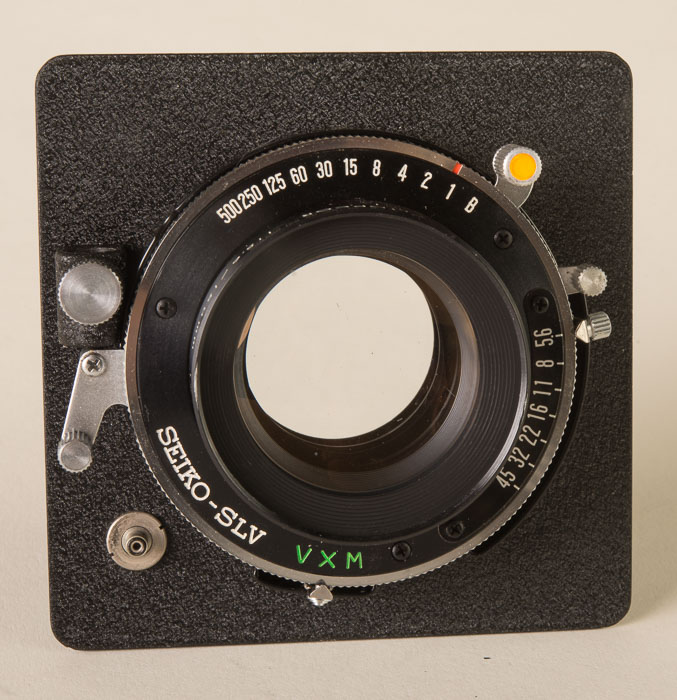
I am writing this as I begin a second project with paper negatives. The first project, Courting Chaos, began with an 11×14 camera and a desire to experiment with solarizing negative. Much of the inspiration came from Man Ray. You can see a lot of this project by starting with this link: https://siskinphoto.com/blog/?p=4397 (some of this project is not “work safe”). Whatever I’m doing now began when a friend sent me a Bausch & Lomb Rapid Portrait lens a couple of months ago. I am very fortunate. The lens is a Petzval design and built in the 1890s, about 135 years ago. For a long time, these sorts of lenses were the big deal portrait lenses. They are incredibly sharp in the center, almost three dimensional. Sharpness degrades quickly at you move out from the center. In addition, they were very fast lenses, especially for large format cameras, so they had almost no depth of field. They create a very compelling portrait. Often people don’t consider that the lens can do a lot more than just a neutral rendition of the subject.
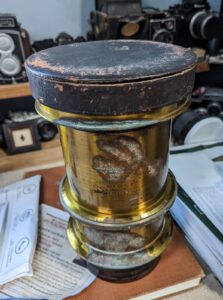
The Bausch & Lomb Rapid Portrait Lens

The Petzval was designed in 1840, just after Daguerre and Fox Talbot introduced methods of making photographs. Cameras existed before photographic materials. They were used as drawing aids. Of course, they had lenses, but, since an image for drawing could be re-focused and shifted, the lenses for these cameras weren’t suitable for making photographs where good focus had to cover most of the photographic plate. The Petzval was the first lens designed by mathematical computation rather than experience and experiment. Joseph Petzval was loaned several mathematicians by Archduke Louis of Austria, commander of artillery. The artillery was one of the few places where there were any people who could do the trigonometric calculations necessary for lens design. In addition to being incredibly sharp in the center of the image, theses lenses also had extremely high light transmission; they were “fast.” Even today this is one of the fastest lenses, for large format cameras, I have ever owned. I have owned a whole lot of lenses.

I should point out that there are some modern lenses, primarily from a company called Lomography, which are inspired by Petzval’s design. Of course, Petzval never made lenses designed to cover the small formats of today’s digital cameras; all of the original lenses were designed for cameras which shot plates that were quite large: a whole plate was 6.5×8.5 inches. Thus, these modern lenses are more inspired by than copies. Petzval lenses were not made for cameras much after 1900, but they were used for projecting images: movies and slides. Because they are fast lenses, and projection lenses are longer than shooting lenses this old formula worked well for this application.

These old lenses are quite prized by modern photographers making portraits with large format cameras. Also, modern photographers who make tintype and other wet plate images, the techniques used between the 1850s and the 1880s, are always looking for Petzval lenses. I am very fortunate to have been given this lens.


III

In order for any camera, modern digital or old large format, it needs to accomplish several things. It must focus light, which can be achieved with something as simple as a pinhole or with a complex modern zoom lens. While a pinhole doesn’t have to be in a particular position to achieve good focus, more complex lenses must be positioned quite precisely. A camera must hold the sensitive material in a the right position as well, or the focus will be degraded. A camera must control the amount of light which hits the sensitive material. This is achieved by controlling how much light comes through the lens and by how long the lens is open. The amount of light coming through the lens is controlled by a diaphragm in the middle of the lens. This control is usually measured in “f-stops.” These numbers are often confusing to new photographers. The amount of time the film or sensor is exposed to light is usually controlled by the aptly named “shutter.” When photography was beginning, since the sensitive materials were not very sensitive a lens cap could easily manage the exposure time. Modern cameras will generally have shutter speeds between several seconds and something as short as 1/4000th of a second. A camera must also block any stray light, light which doesn’t come through the lens, from exposing the film.
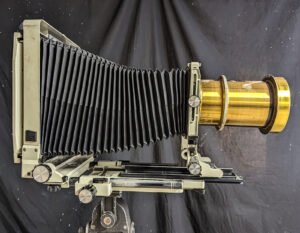
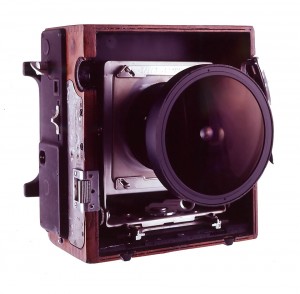
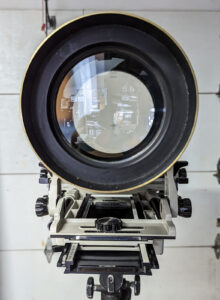
The Petzval mounted on my 8×10 Toyo. This is a camera from the 1980s

A camera from the 19th century generally had a ground glass back to focus the lens. The plate was in a holder which went the ground glass had been. The camera often had bellows between the film holding section, back standard, and the front standard, where the lens was mounted. Either the front or back, or both, could be moved to achieve correct focus. The diaphragm was most often in the middle of the lens, as a part of the lens. Sometimes a flat brass plate with a hole was used instead of a variable diaphragm. And the photographer might use his or her hat as a shutter. By the end of the 20th century all lenses designed for shooting had, in addition to a diaphragm, a leaf shutter. This shutter usually had speeds from 1 second to about 1/500th of a second. Photographers needed these shutters because, as mentioned, film is at least 50 times more light sensitive than the wet plate materials photographers were using when my Petzval was made. While I might make a 1 hour exposure, it was unusual to make an exposure longer than ¼ of a second.
IV

Perhaps all writing of done so far will make the problem clear to some readers. Certainly a few readers simply haven’t made it this far. The problem is how to actually make a picture with the Bausch Rapid Portrait lens. Often, I’ll read someone’s explanation of how to do a thing and it sounds as though they new exactly how to do a thing before even trying. I wish it was like that for me. First, I have to understand the problem then I begin to work through solutions.
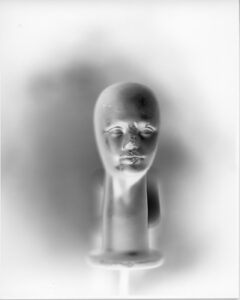
A first test shooting the Petzval. Note that this is the negative

Problem #1
Getting the lens onto a camera. I actually have considerable experience with this one. I use Toyo 6.25×6.25-inch lens boards for large lenses. I’ve done a blog post which describes one way of cutting a large hole for a large lens: https://siskinphoto.com/blog/?p=3662. There are other ways to cut lens boards, but this is about the only way I can cut very large holes, such as I need for the Bausch & Lomb lens. This lens did not come with a retaining ring, which is a threaded piece which holds the lens onto the board. When you don’t have the retaining ring, you can find a really good machinist to cut you one. Expensive. An alternative is the hose clamp method I’ve used here. It’s not elegant, but it does work. In addition to the clamp, I used some rubber as a sleeve which makes the lens more secure. I also used Permatex 82180 Ultra Black Maximum Oil Resistance RTV Silicone Gasket Maker. I’ve used this with a number of camera hacks, it’s really good stuff. Keep in mind you really, really don’t want the lens to fall off, really.
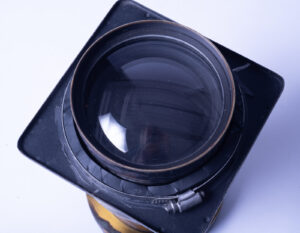
The lens held to the board with a hose clamp
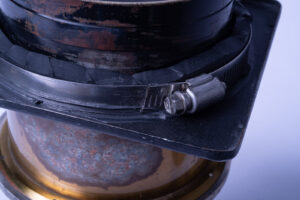
Close up of the hose clamp mount

Problem #2
Controlling the exposure time. Since the lens is very fast, about f4 and I’m using modern material this is a heck of a problem. If I was going
to shoot this lens outdoors in full daylight, I’d need a shutter speed of about 1/1000th of a second. I could shut the diaphragm down block most of the light, but this would remove the Petzval effect: extremely sharp center and diffused sides of the frame. I could use a very dark neutral density filter, but this adds another step between focusing and shooting. If your subject moves you picture could be ruined. Still if I could find an 8 stop neutral density filter that was about 5 inches across it might work.

I have not solved the shutter problem. If you are interested in shutter hack, please check out this link: https://siskinphoto.com/blog/?p=3695. Unfortunately, I don’t currently have any shutter large enough for this lens. I have found a work around.
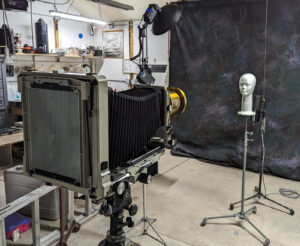
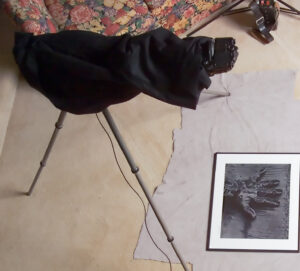
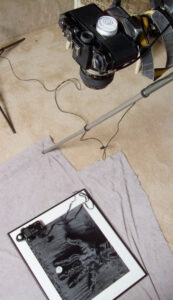
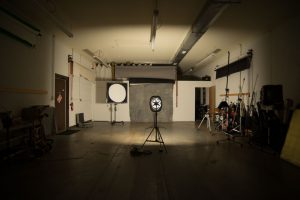
Studio set up for testing. Note the ground glass back on the camera

This is the method I’ve used to shoot with this lens without a shutter. I’ve blocked out all the windows in my shooting area. I know that many people prefer what is called a daylight studio, but since I’ve written a couple of books about shooting with strobes (available at Amazon). I have a sodium vapor safelight set up in the studio. This is a relatively bright light that won’t expose modern photo papers, such as Ilford Multigrade. You could use other safelights, but it’s very helpful to have a bright safelight. You will be evaluating the moment to make your picture under just the safelight illumination.
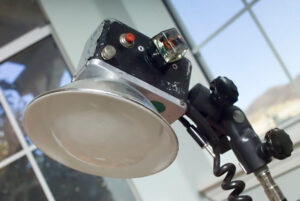
I usually begin a portrait session with 3 lights set up. While I might use more gear as a session goes on, I find if I have a bunch of extra lights out the subject will often want me to explain why I’m not using them. For anyone whose know me for a long time, yes, I am still using Norman LH2000 lights and power packs. These days I’ll have one light with a 5-inch reflector and barn doors, a second with a stove pipe snoot and the third will start as bare bulb. The bare bulb light will be behind the subject to light the background and to give edge light to the subject. In addition, I’ll have a light panel with a silver reflector and a second panel with rip stop nylon. All the lights are strobes, once the modeling lights are turned off, they make no light until triggered. Then they make A LOT of light for about 1/1000th of a second. While I could imagine trying to do this with continuous lights, on some sort of short timer, I think it would be very difficult. Particularly since you can set the amount of light an individual strobe will put out, which would be more difficult with continuous lights. I’ve done several magazine articles about portrait photography which might be helpful. You can see them at this link https://www.siskinphoto.com/magazinearticles.php which includes most of my magazine work. I’ll start with 5 film holders. Each holder has two sides, so I’ll have 10 pieces of Ilford Multigrade or other photo paper loaded. Just like I start with a limited number of lights out, I start with a limited number of exposures. When I had an assistant, I would start with more film loaded.

I do have one continuous white light set up on a foot switch I use this to help focus, frame and direct the shot.

Once I have the shot arranged, I’ll turn off the white light. I have to get the subject to stay still. This is ALWAYS a problem with large format portraiture. People have the expectation that I can somehow correct the exposure even after the film holder is in the back of the camera. It’s not more difficult with this set up, except you have even less depth of field than you might have in a normal large format portrait session.
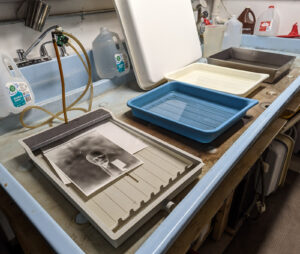

The greatest advantage of this method of working is that you can develop the images as you go. The first reason you’ll want to do this is that it makes it much easier to evaluate exposure and lighting. Since the processing time on modern paper is about 60 seconds this is almost as fast as Polaroid used to be in my 4×5 camera. Also, this tends to really impress the subject, who has likely never seen a print develop in a tray. The process helps to keep the subject engaged and motivated.

Thread 1

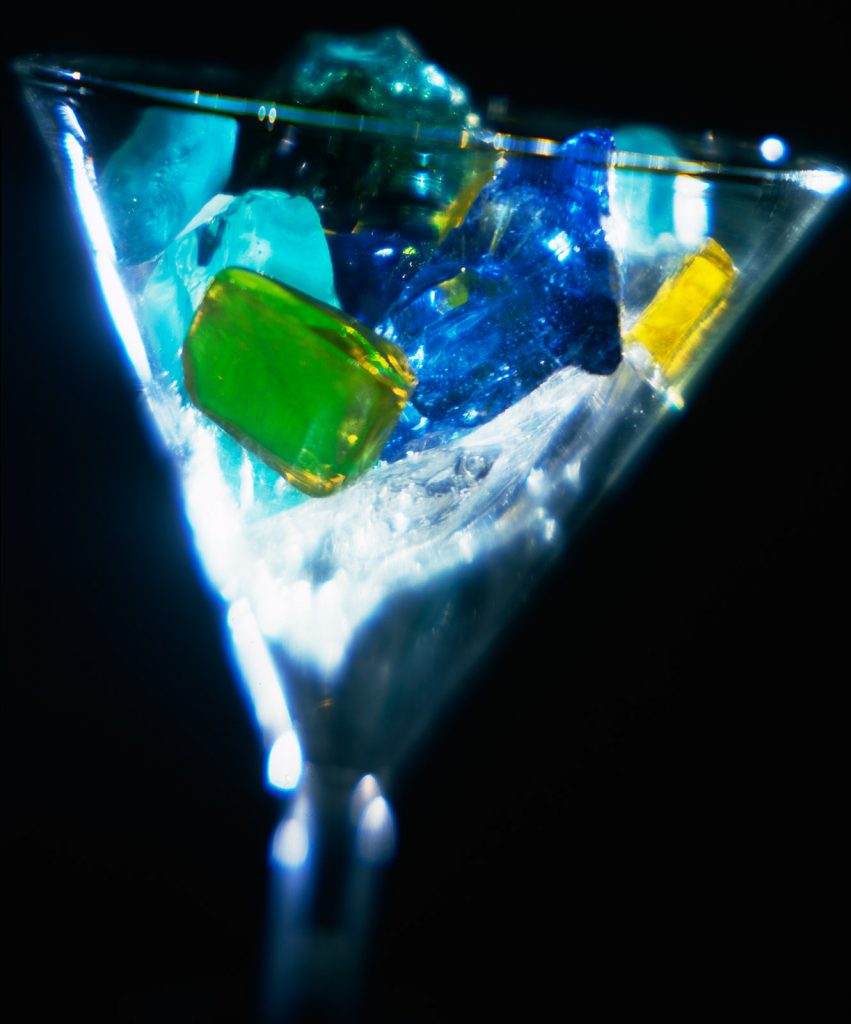
Direct positive photography was a very important part of commercial photography. Both of the early color photographic processes, Lumierre Autochrome and Kodak Kodachrome, were direct positive processes. The film you shot in the camera was put through several chemical baths and the product was positive color transparency or slide. This was particularly important for commercial color work because transparencies were easier to make color separations from for ink printing. Of course, Polaroid was a direct positive process as well and so were all those Super-8 movies. It was possible to use direct positive color paper, which was used for making color prints from transparencies and slides in the camera. Basically, the process was as described above but there was no safelight. So, in the moment you were making the shot, you were in the dark. This was interesting. Processing color paper is somewhat more difficult than processing black and white paper, but it wasn’t beyond what an amateur could do. Unfortunately, I can’t find anyone supplying direct positive color paper anymore. So it goes.
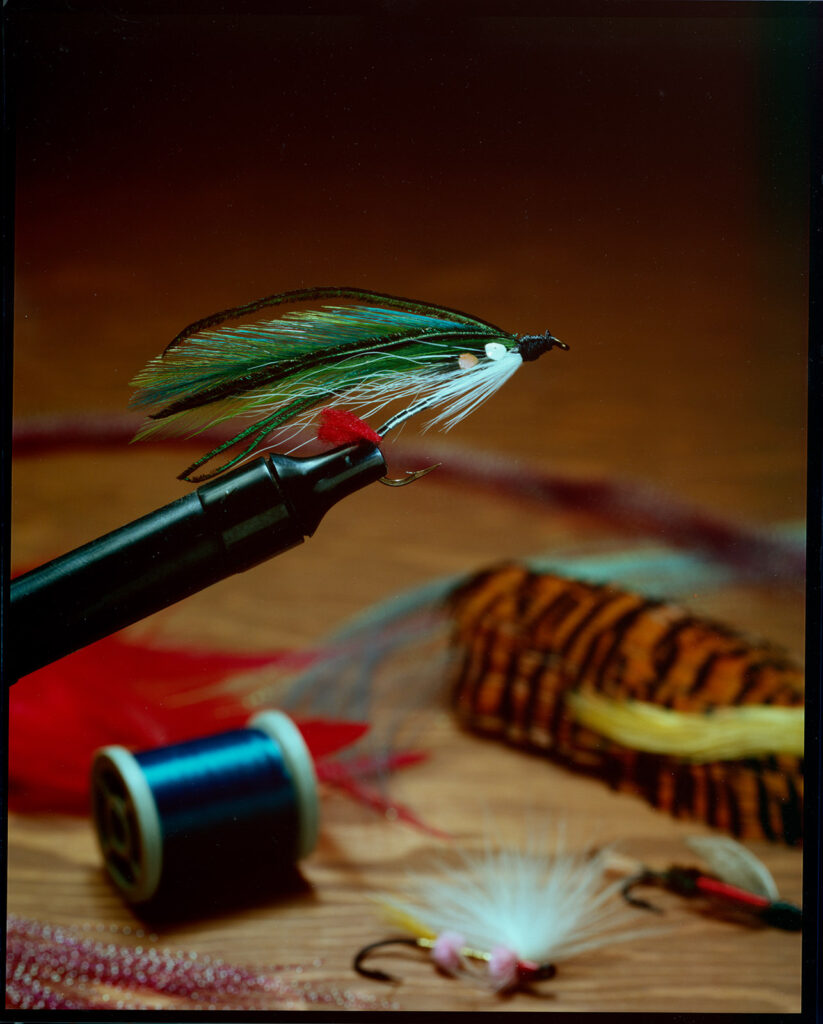
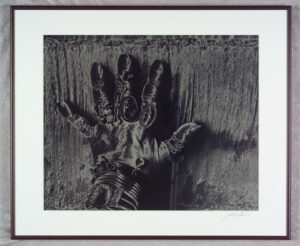
This shot was made by shooting Cibachrome print material in the camera. I did this shot more than 30 years ago. The print still looks fresh

A few links: Siskinphoto.Home

Introduction Page

Monument Valley

Taos Pueblo

Night Sky

Flowers

Monastery Road

Petroglyphs

Rock

Ice and Snow

Tsankawi

I did a large show when I was still in Indianapolis called Courting Chaos. The link will take you to the pages which describe the work and its evolution. These images are, well, chaotic and many of them are nudes. I hope you’ll find it interesting.

Links to my books, still available at Amazon!
January 5, 2023

Repairing Scratches on Camera Lenses

I have purchased over the years, a large number of old lenses. Many of those lenses have been in poor condition. So, I have been concerned with rejuvenating lenses for some time. I’m reminded particularly of a Schneider 360-millimeter f5.6 lens and a Rollieflex f2.8 that were improved by different techniques. The Schneider had several distinct scratches which affected its performance. As you might imagine this lens had a large front element. I used black water-based paint to fill the scratches. The black paint was on a very small percentage of the front element of the lens so it did not affect the image, however stray light from the scratches did affect the image. The light from the scratches could cause overall flare, which affects shadows and perceived sharpness. Also, the scratches could sometimes cause visible image flare when light hit them, which was bad. I would certainly use this technique again on a lens that had distinct scratches, particularly if there were only a few. The Rollieflex was another matter, the entire front element of the lens had scratches, mostly very small ones. This was some time ago, and there was a business in Pasadena CA. that would polish and coat lenses. I believe the name was Pacific Optical. Anyway, that was a very effective treatment for that lens. I also had them coat an old Schneider Angulon, 165mm, that I used for many years, which did improve that lens.


I do not know of any company that is polishing camera lenses at this time. I wish I did. I do understand that some opticians now have lens coating facilities in house, so, perhaps it would be good to find out if this is a way to improve old lenses. Regardless, I wish I knew of a company which would polish lenses with precision.


I was searching for information about restoring lenses recently, because of a lens I recently purchased which has a good deal of scratching. There was some information about physically polishing scratches out of lenses, but I believe this is unlikely to work. If you polish only part of a lens, you will damage any coating on that part of the lens and change its optical character.


There were also suggestions about coating lenses with auto wax products. I thought that this might work, and it was certainly worth trying. This is the manner in which I tested the idea. I took a UV filter and damaged it with 400 grit sand paper. This can make an interesting optical effect, but regardless it really does damage the filter. I then tried various products on the lens and some of them did improve the lens in a significant way. Some samples below. This is one time that a really good digital camera can make it much easier to test and evaluate a procedure. I tested Gtechniq Nanotech Glass Polish, Renaissance Micro-Crystalline Wax Polish, Rain-X Original and Chemical Guys Lucent Spray Shine.

No Filter

Sanded, before Gtechniq

Gtechniq Polish


Sanded, before Rain-X

Rain-X, after


Sanded, before Lucent Spray Shine

After Lucent Spray shine


sanded, before Renaissance Wax

After Renaissance Wax


The two products which seemed to give the best results were Rain-X and Chemical Guys Lucent Spray shine. I also tried Renaissance Wax and a polish. The polish was a complete bust.


I then tested the Rain-X on a Goerz 12 inch Apochromatic Artar lens and the Chemical Guys Lucent on a Schneider 180mm Componon lens. Of course, these lenses were not equally degraded. I put the Nikon D-850 on the back of my Toyo Camera (set-up picture below), and shot through these lenses. It was very difficult to establish which product was better in this case, but both were useful. Results are attached below. Please note that I was evaluating full size digital files and those full-size files are not attached to this post. If you would like to study the full-size files please contact me at john@siskinphto.com to arrange to get full size raw files.

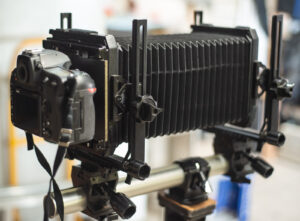
Toyo camera test set-up, front

Toyo camera test set-up back


Schneider 180mm Componon AFTER Lucent Spray shine

Schneider 180mm Componon BEFORE Lucent Spray shine


12 inch Goerz Artar BEFORE Rain-x

12 inch Goerz Artar AFTER Rain-X


I tried the Chemical Guys Lucent product on the lens which I’ve been working on. I would like to believe there is a significant but I really don’t see it. This lens is extremely small and had many micro scratches, so the fact that there is no significant difference is not a reason to discount the use of the product in other situations. It is helpful that the product hasn’t seemed to reduce the lens quality in any tests. Both tests were done using Kodak T-Max 100 film.

30mm lens AFTER Lucent Spray Shine

30mm lens test BEFORE Lucent Spray Shine


If anyone has additional experience in this kind of lens repair, I would be quite interested to know of it!


If you would like to see some of my photography please use the links below

Siskinphoto.Home

Introduction Page

Monument Valley

Taos Pueblo

Night Sky

Flowers

Monastery Road

Petroglyphs

Rock

Ice and Snow

I did a large show when I was still in Indianapolis called Courting Chaos. The link will take you to the pages which describe the work and its evolution. These images are, well, chaotic and many of them are nudes. I hope you’ll find it interesting.


Links to my books, still available at Amazon!
March 28, 2021

Testing a Graflex XLSW

Testing a Graflex XLSW 46A 3-12-2021 #2

This shot is made with a Graflex XLSW. I was testing it out here at the house. There are a couple of cameras built around the Schneider 47mm Super Angulon f8 lens. Brooks made two versions of the Veriwide, and Graflex made a special version of their medium format XL camera that was designed for this lens. I’ve posted a lot of shots I made with a camera I assembled out of parts of a Brooks Veriwide and a Graflex XLSW. This is actually a whole Graflex XLSW. I wanted to see if it’s significantly different from the camera I’ve been using. The test negatives from both cameras are very good. Not sure what I’m going to do with two such similar cameras, maybe get one of them ready to sell… I really like the lens and having a small, super wide camera that shoots 6X9cm film. If you’re interested in a Superwide roll film camera send me a message at john@siskinphoto.com. Thanks for your interest and support!

I am now offering prints of many of these images. The index code for this image is: 46A 3-12-2021 #2. you can buy a print! Right now, all prints are set to fit on an 11×14 inch piece of paper. If the image is too thin it will have white paper on the sides. I am printing with an archival ink/paper combination. Prints are shipped by USPS priority mail to anywhere in the US that’s covered by Priority Mail service. The price is $75 for the first print and $60 for each additional print ordered at the same time. Please e-mail me at john@siskinphoto.com and include index code and your address. I will send you a PayPal request to arrange payment. I will be adding old and new images to this service. If you see an image on my site you would like to purchase please tell me where you found it and I’ll try to make it available to you. Thanks for your support!

And my books!
Understanding and Controlling Strobe Lighting: A Guide for Digital Photographers

https://amzn.to/3tH5Dp9

Photographing Architecture: Lighting, Composition, Postproduction and Marketing Techniques

https://amzn.to/3c8nLlU

October 3, 2020

Copying Artwork and Photographs

I wrote this a few years ago when I was teaching at BetterPhoto. Recently a friend asked about copy work, so I thought I’d re-post it here. The basic ideas are still valid, but today I would use different strobes to do the work. I hope you find it interesting…

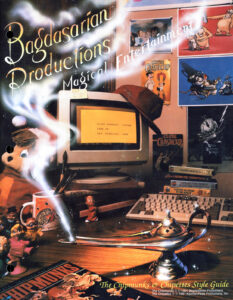
Wow, look at how old that computer is… The cover for the Style Guide for Bagadasarian Productions.

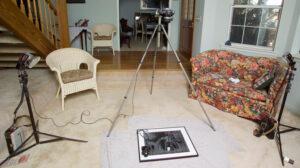
When I started my photography business a few decades ago my commercial client was Bagdasarian Productions. They made the Chipmunk animated cartoons, with Alvin, Theodore and Simon. They were working on a full-length movie about the adventures of the Chipmunks. One of the keys to animation, back in the eighties was high quality painting for backgrounds. Those paintings were done here in Los Angeles and then shipped to Korea for the character animation. My job was to make high quality copies of the backgrounds so that the background painters would be able to refer to them in order to maintain accurate color and style. Since then I have done copy work for businesses, artists and galleries. Copy work is pretty simple but it must be done very carefully in order to get the best results. I often do copy work in the living room, since I keep my finished work at home.

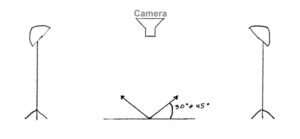
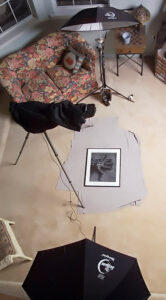
The basic layout of a copy job is to have the camera back, whether film or sensor, parallel to the original. The lights need to be between 30º and 45º from the plane of the original. In this range they light the original but you don’t see reflections of your lights in the original. You can even shoot through glass! The lights need to be far enough from the original to even out the lighting. In the example with this article the lights are about five feet from the center of the original. You need the lights further away from a larger original. The reason for this is that if the distances from the light to the corner of the original and to the center of the original are significantly different you will not be able to even out the light. The amount of light that makes it to the subject goes down as the distance from the light source increases. So, if the distances to different parts of the original are very different you will not be able to even out the light. In the example the difference between the light on the center of the shot and the corner is 1/10th of a stop, pretty small.

This is the one area of digital photography where I still use a light meter. When I set-up a copy job I put the lights an equal distance from the center of the original. I also point the lights at the original. Then I use the light meter to move the lights into the most advantageous position.

As I mentioned above, in this case I was able to get the lights to almost perfectly even. It is very difficult for the eye to see differences of less than 1/3rd stop, so if you can get your lighting even to the 1/3rd stop level your light will be even on the copy. I also use diffusion domes over my lights to make them more even.

You might need these if your lights are close to the original, as you move the lights further back, they don’t matter as much. I generally use them, but then I already have them. I will usually use the lights directly, to reduce the chance of reflection. If I am photographing a piece of art with an irregular surface I will probably use umbrellas to reduce the shadows on the irregular artwork. If I am including the frame in the copy I will also use the umbrellas to reduce the harsh light on the frame.

The kinds of lights for copies are also important. The easiest lights to use are strobes. Strobes have a color balance that is the same as daylight; this is a big advantage if you are using film to make copy slides. You can use strobes in a room that has existing light; the room light will be so much less than the light from the strobes (if you have reasonably powerful strobes) that the room light won’t affect your shot. If you can remove existing light from your location (including daylight) you can shoot with quartz lights. These lights are designed for photography and they have the qualities to make good copies. I would avoid the tungsten photo bulbs that look like regular light bulbs; they change color too quickly. I would not use any fluorescent lights for copy work, although digital cameras can balance for them reasonably well, they do not have a continuous spectrum. Consequently you will probably have problems achieving accurate color everywhere in your image.

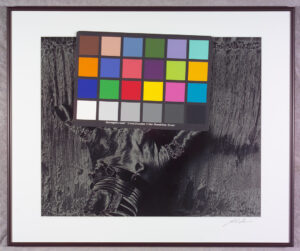
Whatever light source you decide to use you will need to do a color balance if you are using a digital camera and a color test if you are shooting transparency film. The key to doing a good balance with a digital camera is to use an accurate grey sample. I use a GretagMacbeth ColorChecker, to keep things accurate.

I use the grey samples on this card to set my balance on the digital camera and the whole card to test my film. Getting the color set accurately is a very important part of copying, so it will be important to check the best way to do this on your digital camera.

There are popular copy stands for doing small copies, say 11X14 inches at the largest. These are faster than using than my tripod set-up. If you are copying a large amount of originals from 4X6 inch to 11X14 inch you should check these out. However, if you are doing larger originals or doing copy work less often you should consider a Side Arm attachment for your tripod. I use a Bogen/Manfotto 3059 with my Gitzo tripod; you can mix and match in this area. The side arm mounts on the tripod legs and then the tripod head mounts on the side arm. I cover the side arm with black Duvateen fabric when I am shooting products under glass or very glossy originals.

There can be enough light spilling onto the side arm for it to reflect in the picture. The key to keeping your copy square is to be able to get the original parallel to the camera back. Before you do the leveling get the camera into about the right position, because if you have to move the camera you may have to level it again. I use two surface levels to make the camera parallel to the original. I place one on the original and one on the camera back. This is generally a part of the procedure that requires some patience. The object is to get the two bubbles in precisely the same place.

I have used several different types of levels over the years, these little round levels work pretty well. The key is to not be in a hurry, and to double check if you move the camera. Remember you can move the original as well as the camera. If you are copying an original mounted on a wall, then the levels won’t help you. The way to get your camera positioned is to make the original square in the frame by moving the camera. This also requires patience.

You can use any lens to do copy work, but if you want to have a high quality copy, some lenses are better. You should probably avoid zoom lenses, they do not copy flat objects as well as fixed focal length lenses, and they often do not focus close enough.  One inexpensive alternative is 50mm lens. The best lenses for this work are macro lenses; they are designed to shoot a flat field. I use an older Nikon 55mm f3.5 macro lens. It does not have any automatic features when I use it with my camera, but those features don’t do me a lot of good with copy work. I have exposure information since I used the meter to set my lights. Auto focus often doesn’t work well on artwork, since there may not be enough contrast to focus on, and I don’t want to reposition my camera to focus. I usually place a coin or other object on the original to help me focus by eye with the macro lens. I can check my focus on the computer. Of course, when I am using a film camera it is a little easier to focus, since the viewfinder is designed for manual focus. One of the other problems with focus is that I have to stand on a stepladder to focus. I wouldn’t have to do that if I shot the original mounted on a wall, but it is much harder to get the sensor parallel to the original!

I hope you’ll also check out my books, use the links below:


One more thing, there are more than14,000 people subscribed on this blog. Wow! Thanks everyone.

March 27, 2019

Lens Board Hacks for Large Format Cameras

I’ve been teaching people about view cameras for a long time. I used to tell people it was like a cross between an erector set and a camera. You can put it together in whatever way you want. I also used to tell them that it was a simple camera; the thing is simple doesn’t mean easy. An ax is a very simple tool, but if you need to cut down a tree, I guarantee you that a chain saw, while more complex, will be easier…


The view camera is essentially three parts, the lens, the bellows and the film holder. The rest of the camera is there to make it possible to fit these parts together in the best position for a specific photograph. I’m going to be discussing how the lens is mounted on the camera in the rest of this post. Almost any lens will fit on almost any view camera. Brands don’t matter because lenses are fitted to boards which fit specific cameras. There are no electrical contacts, rangefinder cogs or complex bayonets in this system, only rectangular boards. These boards are designed to fit on a camera so that no light can leak around the board. Many recent manufacturers use metal boards with a sort of lip that fits the camera, but may versions have been used over the years. This s the problem: most cameras use a board that only fits that brand, or at most a couple of brands, of camera. In fact, many camera companies use different boards for different model cameras. While this doesn’t mean that you can’t exchange lenses between different cameras it does become a pain in the neck. In order to mount a lens on a different board you generally have to unscrew the rear elements and remove the retaining ring before you put it back together on another board fitted to that lens.


If you only have a couple of lenses and a couple of cameras this isn’t intolerable, but for me it’s getting out of hand. I have a couple of dozen lenses and five cameras I might use them on. Since each lens might be used with any of the cameras this can mean a lot of lens boards. I’m not the first person to create conversion boards, in fact, many of the camera companies build boards to fit boards from other cameras. However, a couple of my recent cameras, my 11X14 and 8×20 camera, are older and no conversion boards exist. Also my main lens boards, the 6X6 inch Toyo board, is too large to easily fit to these cameras. To compound the problem these two cameras don’t take the same lens board. So, I want to show you how I solved this problem. In addition I want to show you a way to use lenses that don’t have a retaining ring and lenses that don’t have a shutter.


The basic plan, which I’ve illustrated below, is to take a lens board that fits the new camera and attach it to a lens board that fits a Toyo camera. You’re going to put them together front to front, with a little space between. The space allows for the boards to be connected to the camera. Then you can take the center piece of the front standard and mount it to the Toyo board. Since the standards on Toyo cameras, and several other cameras, are the same on both the front and back this works well to give a place to attach any lens mounted on a Toyo board. I should also point out that the standards on Toyo cameras, at least older ones, are pretty fragile, so it’s possible to get the part you’ll want off a broken camera.

THIS PROCESS REQUIRES POWER TOOLS. BE CAREFUL. USE EYE PROTECTION. IF YOU HAVEN’T USED THESE TOOLS BEFORE PRACTICE ON UNIMPORTANT MATERIALS.

01: This shows my new Korona 8X20 camera. The lens board I’m converting is mounted on the camera.


02: The wooden lens board for the Korona and a metal Toyo board. I want the Korona to take Toyo boards.


03: After I’ve outlined the hole I want; I drill holes around the edge of the hole. These holes make it easier to control the Dremel tool.

04: The Dremel set up. The bit cuts to the side. The black collar makes it easier to control the Dremel tool. BE CAREFUL, the Dremel is tricky to use.

05: Cutting the hole with the Dremel tool.

06: I use the hole in the wood lens board to size the hole in the Toyo board.

07: I’ve used the same process as I did on the wood lens board. Holes first then the Dremel too. The metal board is more difficult to cut than the wood board. BE CAREFUL-USE EYE PROTECTION!

08: The metal board has sharp edges. I’ll use the Dremel to sand them smooth

09: I’ve drilled holes in the edges of the Toyo board. Then I’ll use those holes to drill hole for the bolts into the wood lens board. I’ve placed washers in the space between the boards. If you just screw the two boards together you won’t have space to mount them on the camera.

10: I’ve assembled the two boards. I’ll check this assembly on the camera Before I Glue The Parts!

11: I’ve put a bead of the glue onto the wood board. I use Ultra Black Gasket Maker Glue. Basically it’s black silicone sealer.

12: I’ve put the glue into the gap. Use a lot of glue. You don’t want light leaks. This is a messy step.

13: This is the part I salvaged from a broken Toyo standard. I had to fill a couple of screw holes with the same Ultra Black Gasket Maker Glue. I use the same part on my 11×14 camera.

14: the assembly mounted on the 8×20 Korona camera.

15: My Schneider 270mm Wide Angle G-Claron f6.3 mounted onto the camera!

View camera lenses are connected to lens boards with a threaded ring machined on the outside of the lens. These threads mate with a ring called a retaining ring. This is a simple system which works well until the retaining ring is lost. If all these retaining rings had been standardized to just a few sizes losing a ring might not be a problem. Unfortunately there are at least dozens of different widths and thread counts and pitches, so it’s impossible to just order a replacement. Generally you’ll have to have a new retaining ring custom machined. This is expensive; if you can find a machinist with the needed skills. However there is a fix! Many years ago, a sort of universal lens holder was made. This used a variable diaphragm, like the aperture in a lens. These diaphragms were made with very stiff blades, which could be locked in place. These are generally available at eBay, but they are pricey. Expect to pay from $200 to $500 for a good one. You want to be careful to check how large and how small the diaphragm adjusts, so you can be sure it will fit as many lenses as possible. Use terms like adjustable large format lens diaphragm to find one on eBay. Keep in mind that you need to be sure the lens is probably seated and locked in place before you put the lens on your camera.

A1: The lens mounting diaphragm on the camera.

A2: An old brass lens on mounted to the 8×20 camera.

In addition to lenses that don’t have a retaining ring there are also a lot of lenses that don’t have a shutter. Of course you can use a lens cap if you’re working with a long exposure, but if you want more choices it’s good to have a shutter. You can have a machinist install your lens in a new shutter, but this is quite expensive and requires a very good machinist. If you have as many old lenses as I do this can be a daunting prospect. There is a way around this problem as well, but it isn’t as controllable as a modern leaf shutter. The solution is a Packard shutter. Strangely enough these are still being made! You can find a new shutter at packardshutter.com, or you can find used ones on eBay. These are air driven shutters, which means that they’re powered by an air bulb that you hold in your hand. In fact these air bulbs are the reason that most shutters have a B setting, b stood for bulb. With these shutters you can hold the shutter open as long as you want, or open and close the shutter in about 1/20 of a second. It’s important to stress that that fast speed is extremely variable. These shutters are often mounted inside a large view camera or on the back of lens boards. I’ve arranged one to fit on the front of a Toyo compendium lens hood. This works very well for a couple of reasons, first I can use a very large Packard shutter that wouldn’t fit into my camera. Second, I can use the same shutter with several cameras. The compendium lens hood protects my film from being exposed by light from the side of camera. It’s also nice that the compendium hood fits onto the part of the front standard that I used as my lens board converter! This means that I can mount the same shutter assembly on several cameras, including some that are quite old.

B1: The Toyo standard has mounting holes for a compendium lens shade. The shade is mounted in this shot.

B2: I’ve moved the compendium shade in front of the lens. I put magnetic strips on the front of the shade. These strips are holding the Packard shutter in this shot.

B3: The Packard shutter is open in this shot. Now I can use the Schneider G-Claron on the camera!

I hope you’ll also check out my books, use the links below:


One more thing, there are more than 10,000 people registered on this blog. Wow! Thanks everyone.

December 7, 2018

About Lenses #1

So this post is sort of a plan or, if you prefer, a work in progress. A couple of days ago I put a post on Facebook announcing a series about lenses; this is the beginning. The idea is to have place where there will be links to the other posts and to give a sort of outline for the project. I’ll update this post as the project takes shape.

The first thing you should know: if you’re looking for advice about what lens to buy for your dSLR you may just want to pass on this whole thing. There are a lot of places you can get that information. This series is about understanding lenses and lens design. It may help you choose a lens for a dSLR, but the intent is to help you choose lenses for large format film work. Regardless it will help you understand how lenses work, and that can’t be a bad thing.

I was shooting with my 11X14 camera yesterday. I made a dozen negatives and shot with four lenses: a casket lens-focal length about 230mm; a Schneider Dagor-14 inch focal length; a Goerz Artar-focal length 12 inches; and a Goerz Gotar-13 inch focal length. The thing is, the focal lengths are very similar on these lenses, so there must be other reasons for making choices about which lens to use. When shooting with a small camera one of the first reasons to make a choice about a lens is the distance you’ll be from the subject. If you are closer to a subject you build more shape into the image, while if you’re further from a subject the image will feel flatter. People discuss this as if the lens changes the perspective. But that’s not true-it’s how far the subject is from the camera. If you shoot a persons face from 10 feet away it will always look flatter than if you shoot the same face from a foot away, regardless of what lens you use or how you crop. Distance from the subject is important to my work, but many other things influence my lens choice. First I think about coverage: you need a lot of image to shoot an 11×14 inch camera. I have a lot of lenses that would just make a circle in the center of the ground glass, and I have a lot more that won’t be sharp over the entire frame. The sense of sharpness and how the un-sharp image feels is critical to conscious lens choice. It’s like a painter picking a brush; even a house painter uses different brushes for different tasks, even more so for a portrait painter.

There’s more to the character of a lens that just sharpness. Contrast is also very important. The human eye interprets contrast AS sharpness. As a result of this modern lenses are always designed to maximize contrast, and that is generally a good thing. Maximizing contrast was particularly important before Photoshop because it was very difficult to control contrast in color printing. One of the things that improved contrast, perhaps more than any other factor, was lens coating.

Shot with 28 cm and back elements of my C. Bethiot casket set. An un-coated lens.

So this is a quick discussion of some of the topics I’d like to explore.

History of lenses. Lens construction pre-dates photography by at least a couple of centuries and possibly millennia. Lenses added to human vision. The thing is that since the human eye sees only a small field at any moment you don’t need to make lenses that are accurate over a large field since a person can move the eye or lens to compensate. Making photographic lenses that would cover a large area, at one time, was an early challenge.

Soft focus lenses. There is a difference between spherical aberrations and chromatic aberration and just poor focusing. I’ll also spend some time on soft focus filters. Many lenses have been specially designed to make soft focus images.

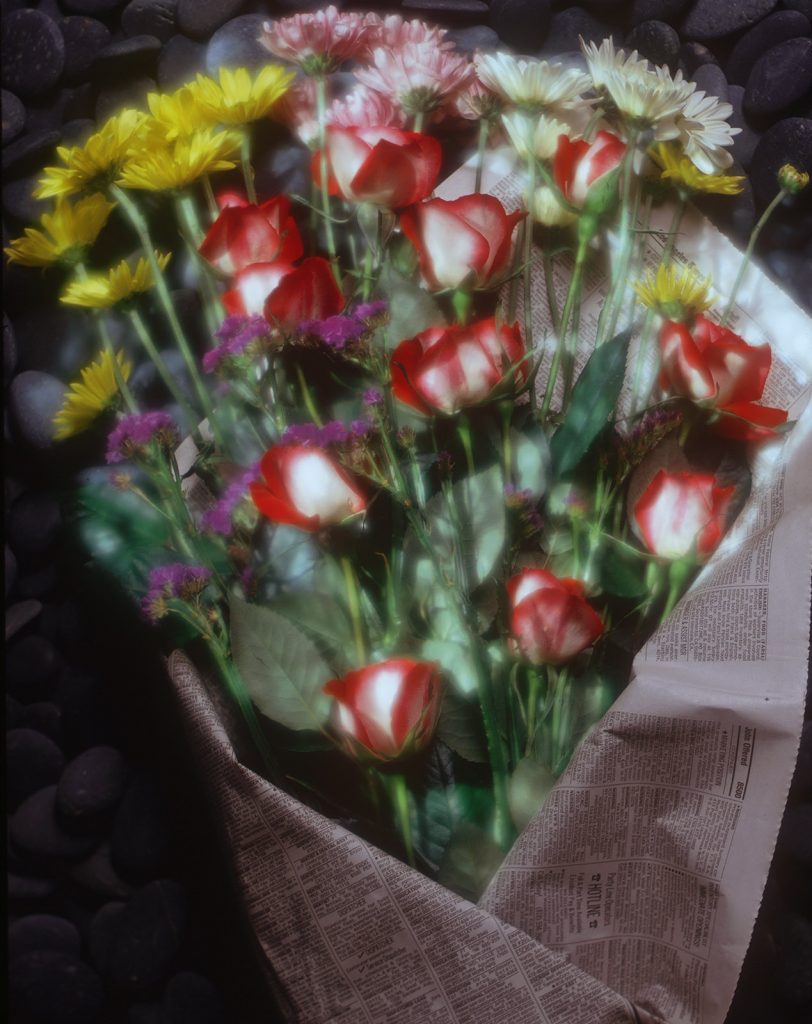
Flowers Wrapped in Newspaper-Shot with a Bausch & Lomb Plasigmat. This is a double exposure at two different apertures, which allowed me to selectively choose what was soft and sharp.

Process lenses. These are specially designed to meet the challenges of making printing plates for off-set presses. They are highly corrected for color and field flatness. Using them offers some special opportunities and challenges. I have several of these lenses that I use with my 11×14 camera.

Shot with a Goerz 12 inch Red Dot Artar on my 11×14 camera. Processing effects do not reduce the great sharpness and contrast of this lens.

Lens aberrations. These include pin cushion distortion, barrel distortions and coma.
Classic designs. Of course there is the Tessar from Zeiss, and there are so many more: Dagors, Dogmars, Angulon, Biogon…
Casket lenses and convertibles. Large format lenses are basically fixed focal length lenses, but many large format lenses have been designed that offer multiple focal lengths. I wrote an article for View Camera some years ago about DIY casket sets. You can download it here: www.siskinphoto.com/magazine/zpdf/LensAssembly.pdf

Shot for an article in View Camera about DIY soft focus lenses. This uses Kodak Portra lenses (add on lenses) instead of a lens designed to be used alone.

This whole thing will go on, but if I don’t post something now I may never get started.

I hope you’ll also check out my books, use the links below:


One more thing, there are almost 9000 people registered on this blog. Wow! Thanks everyone.

June 20, 2018

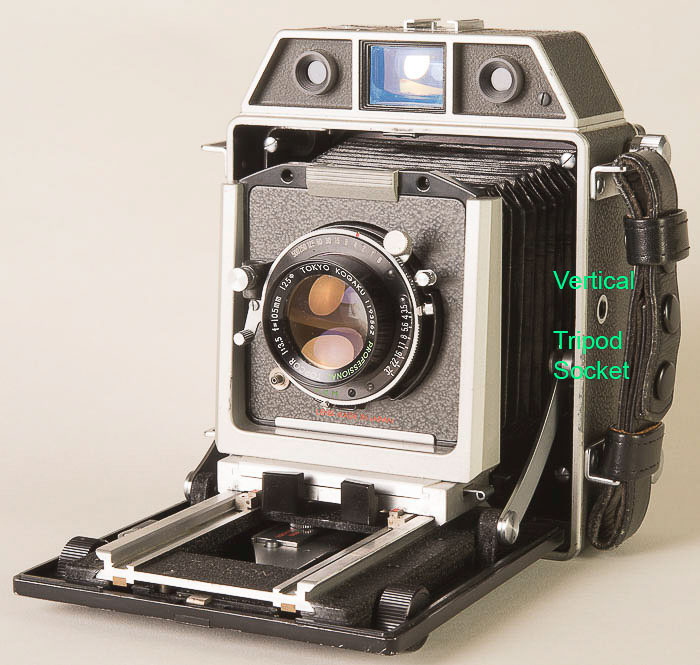
Horseman 970 Medium Format Camera

Filed under: Film Technique,Large Format Photography,Photographic Equipment — John Siskin @ 3:48 pm

I’ve wanted to discuss some vintage cameras for a while. I know that a lot of people are more interested in shooting film again, so I wanted to share some of what I’ve learned about film cameras, especially fun film cameras, over the decades. Of course my idea of fun might be different from yours. Also I’m teaching Large Format Photography at the Art Institute of Indianapolis in a couple of weeks, so these posts will add a little extra information to the class. I’ll be adding a few of more of these discussions about film cameras to this blog over the next months.

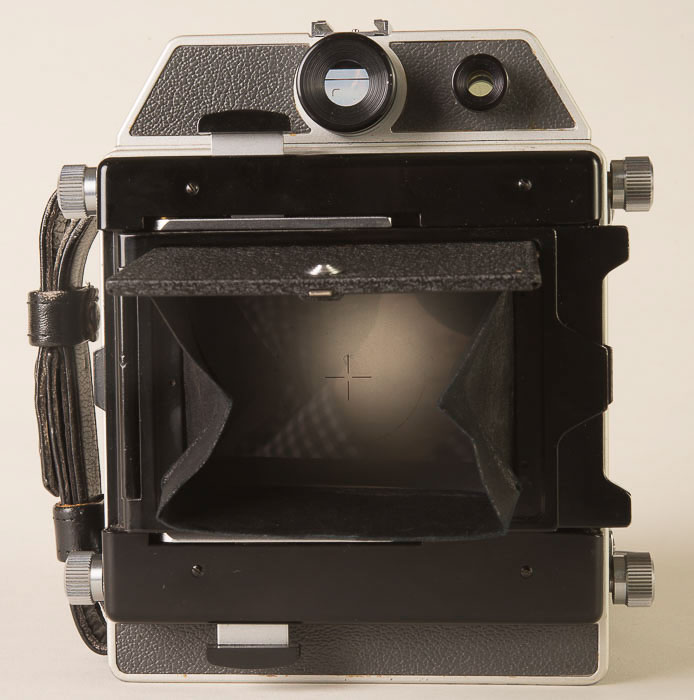
I’d like to start with a medium format technical camera, the Horseman Press. The one I have is the 970. The later models have more movements and some even have a single window for the viewfinder and the rangefinder. The extra are very nice improvements, but not important for me, because I’m not using the camera for commercial shooting, only fun.

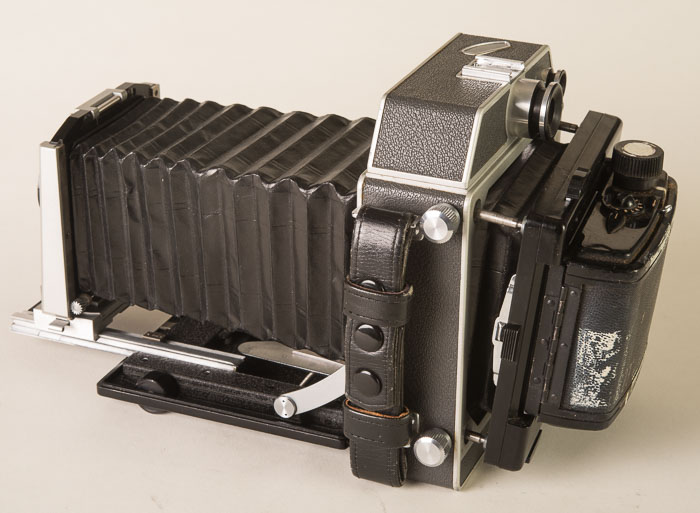
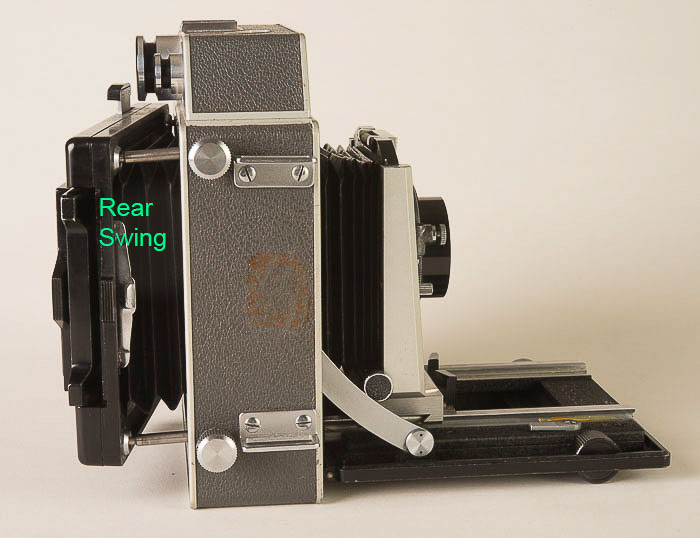
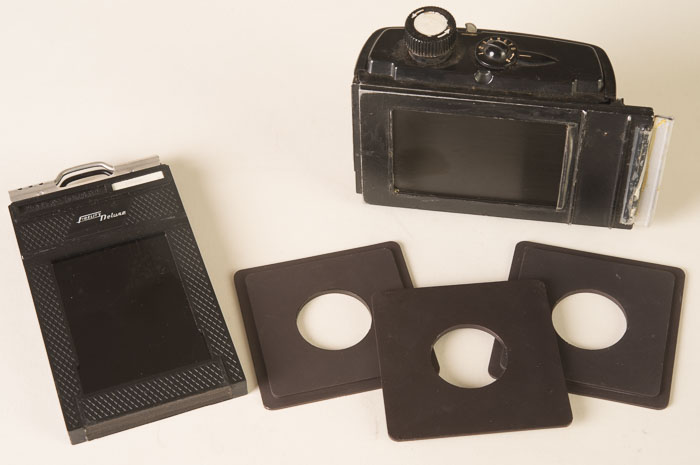
The camera weighs in at less than 5 pounds, without a roll film back. It collapses to about 6X7X4 inches, so it’s easy to carry with you. You can use a Horseman roll film back, which is probably your best choice, but Graflex roll film backs and even sheet film holders will work as well. You can get the Graflex holders in 6X6cm, 6X7cm and 6X9cm. I’ve included a picture with an old Graflex back. I’m not sure about the sizes of the horseman backs. The build quality is extremely fine; everything on mine works just beautifully.

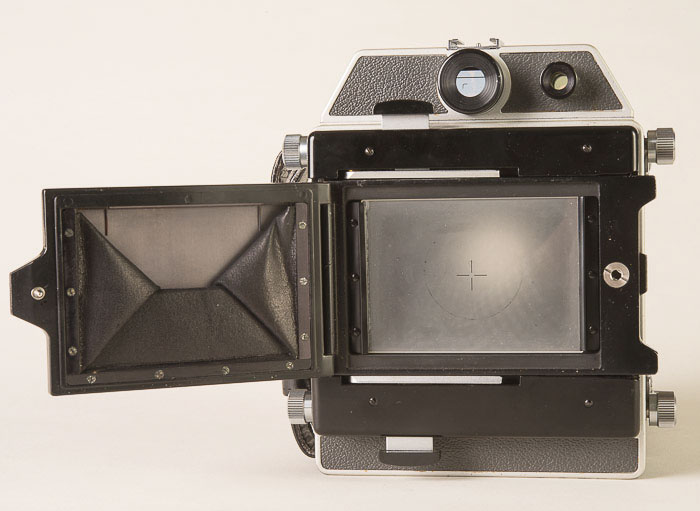
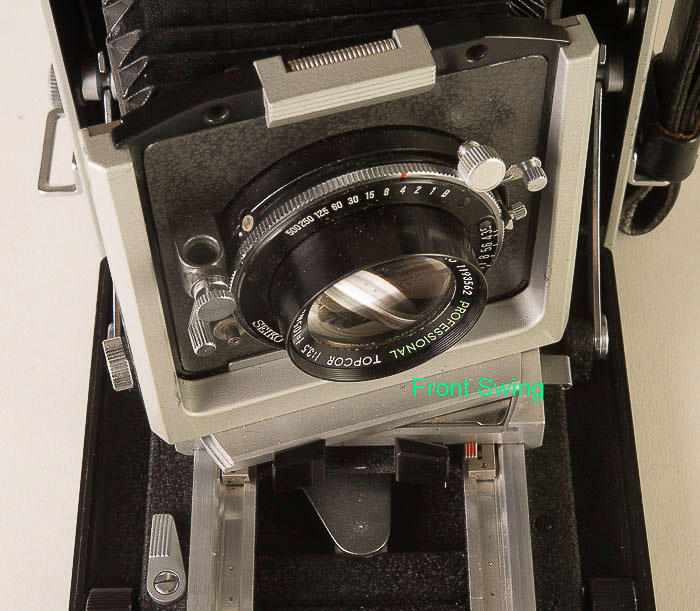
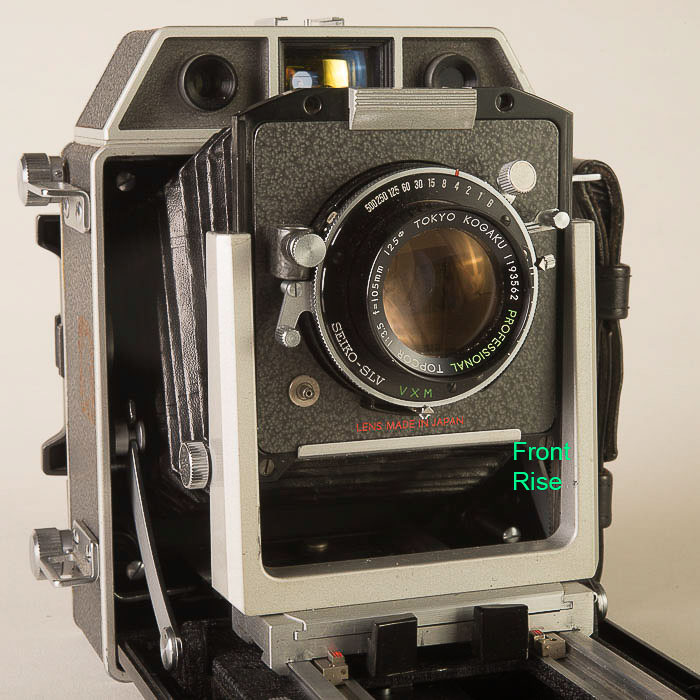
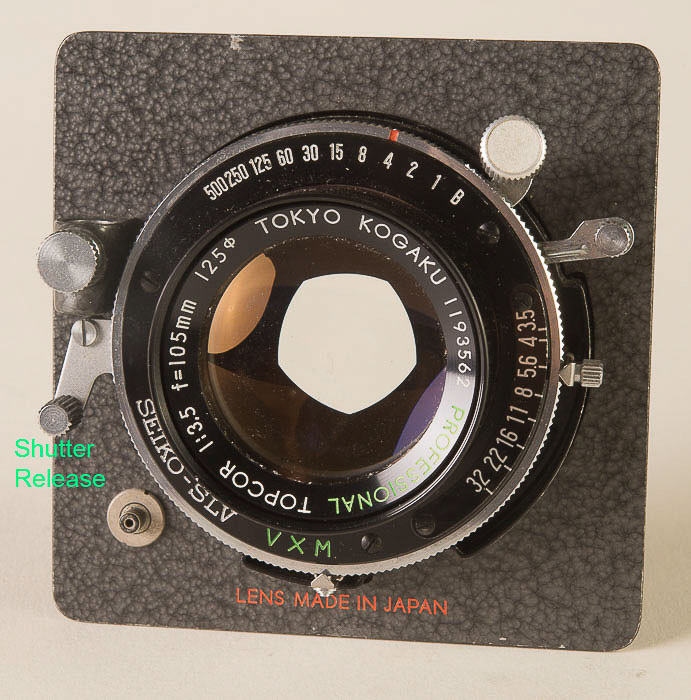
Here are a few things I really like: first it will shoot with a large variety of view camera lenses, not just the Horseman lenses. Since you can focus on the ground glass you don’t have to have the actual Topcon lenses that were made for the camera. This is also critical if you want to use the camera movements: tilt, swing and so on. Focusing on the ground glass is the only way to utilize camera movements on any camera. The camera has a hood so you can use the ground glass out doors and the hood pops out of the way for critical focus with a magnifier. Topcon made lenses that were designed for this camera. They are really very nice, and designed to work with the camera. If you do use one of those lenses you can actually hand hold the camera using the rangefinder to focus and the viewfinder to compose. I should point out that the shutter release on the Topcon lenses is designed to be easy to use when you’re hand holding the camera. No need for a special trigger grip. The camera has really good ergonomics to go with its build quality.

The camera has front rise and front swing. If you might want more movements you have a couple of choices: first you could get one of the later versions of the camera. Alternatively, you could use the back movements. The camera has a back bellows that can be opened with four knobs on the side of the camera. If you do this you have about an inch of play in any direction, which provides back tilt and back swing. It’s a little more difficult to use these movements than working with a monorail camera, but no monorail camera collapses to something you can carry with one hand. If you want to shoot a vertical orientation on a tripod there is an extra tripod socket on the side of the camera, another nice design item.

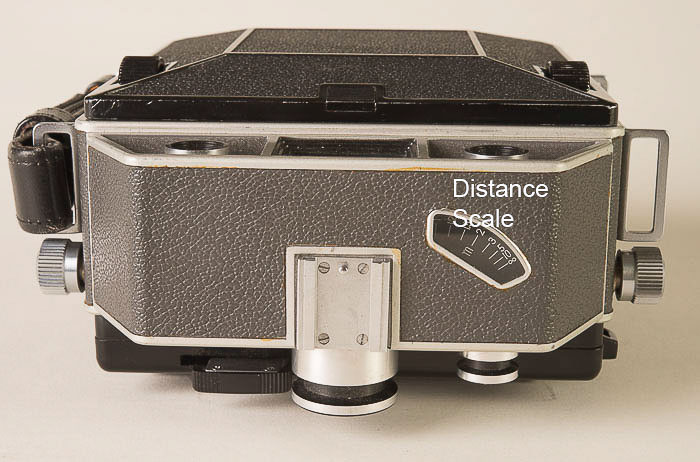
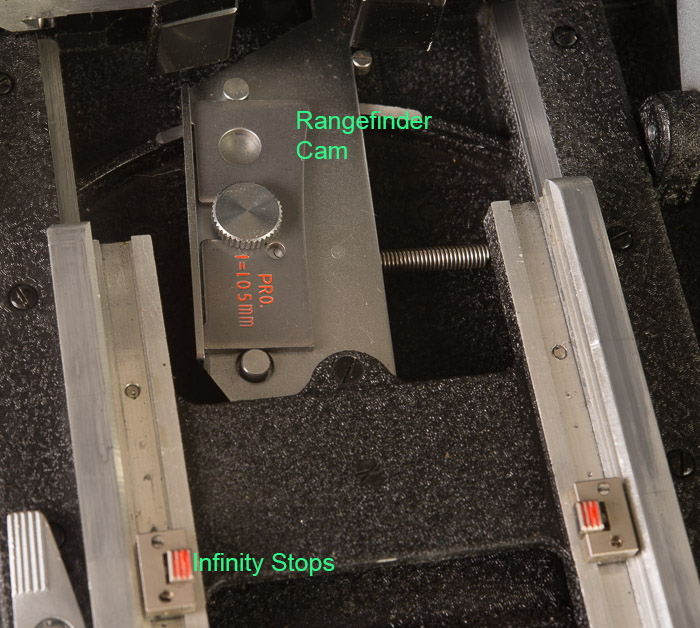
While I can mention additional nice features, like the distance scale on the top of the camera, I should mention a couple of problems. The first one is that, if you want to use any Topcon lens with the rangefinder, and who wouldn’t, you need a rangefinder cam and a set of infinity stops. The rangefinder cams are generally available on eBay, but they can be a little pricey. The infinity stops, which keep the lens in the right place for its focal length, are very rare. Both of these things make it a little difficult to use this camera with multiple lenses, which is a shame. An additional issue is that the front bed doesn’t drop so it’s unlikely that you could use this camera with any lens wider than a 65mm. A 65mm isn’t that wide on 6X9cm negative. However you could set up the camera with a 150mm or even a 210mm and shoot portraits and the 65mm might be about right for groups.

I’m putting this camera up for auction on eBay. I would have continued to search for a set of infinity stops, but another great medium format camera fell into my hands. That’s a story for next time. Here’s the eBay link
Or you could contact me at john@siskinphto.com.

I guess I should mention that the camera comes with the Topcor 105mm f3.5 Super lens, which is a nice thing. This lens covers the 6X9cm format, but won’t cover 4X5. Topcon made another version that did cover 4X5, but it’s slower.

I’ve also included a Graflex 6X9cm roll film back, a sheet film holder and 3 extra lens boards in the Auction! What a deal.

I’m setting up a separate auction for a Super Topcor 150 f5.6 lens. It’s on a Horseman lens board, but unfortunately I don’t have the rangefinder cam or the infinity stops for the lens. Check it out at this eBay link!

I hope you’ll also check out my books, use the links below:

One more thing, there are more than 8000 people registered on this blog. Wow! Thanks everyone.

March 15, 2018

A Do It Yourself LED light!

I’ve been watching the evolution of LED lighting for some time. As with any light source I’m interested in a couple of things, first how much actual light can I get? Second what does the spectrum look like? Third what is the color temperature of the light? Fourth what is quality of the light, and by this I mean how hard or soft is the light? Fifth what is the portability of the light? Finally, I’m interested in the price. In this post I’ll present a Do It Yourself light that presents a satisfactory solution to these problems.

How much light? I compared this light to a Lowell Omni light with the 420 watt EKB bulb. The DIY LED bulb had 1/3 of a stop less light that the Omni did if the Omni was set to throw a broad light. When the Omni was set to throw a spot then the Omni was 2-1/2 stops brighter. You should note that the LED light is a broad light, so the comparison to the Omni set for spot is not realistic.

I looked at the spectrum with my homemade spectrometer. The spectrum is continuous from red to blue. I can’t tell accurately if the cut off is different from a tungsten light source, but I don’t see a difference. The earlier LED light sources I tested did not have a continuous spectrum; so this is a real improvement.


I tested the light with a Konica Minolta Color Meter III F. This is a very accurate meter. The DIY LED had a color balance of 2930K. If you prefer the light needed an 82B filter AND a CC9 magenta filter to match 3200K. 3200K is, of course, the standard professional movie color temperature, which is the color temperature the Lowell Omni light is designed for. This means the DIY LED is a little warmer and a very little bit green. With a ¼ CTB filter over the unit the light had a temperature of 316, essentially even with the 3200K standard. There was still a small amount of green color that could be corrected with a CC10 G filter. This is a small correction, which could be ignored in many situations. I should point out that my various quartz lights show a color spread from about 2900K to 3300K, so there is normally variation in standard quartz lights. You can see the variation in these images.

The left test is a Quartz light with a DYS bulb, the center is the LED with a ¼ CTB filter and the right side is the uncorrected LED.

When corrected in Photoshop all the files look pretty much the same as you can see in the image below.

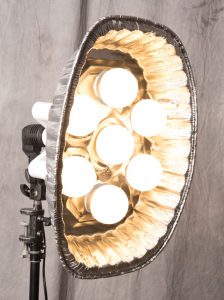
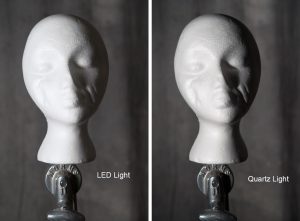
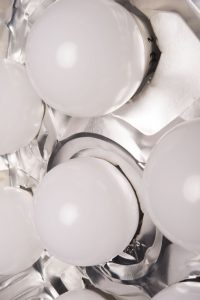
The DIY LED light acts like a small soft box. If you’re not worried about a specular highlight that might reflect the multi bulb set up, it’s really quite nice. Especially if you use it close to the subject. If the multi bulb design creates a problem in your image you can use it with a fabric cover. You can also use it with a light panel to make it even softer. You can see the difference between the LED light on the left and the Lowell Omni light on the right below. Both lights were set in the same position, about 5 feet from the wig head and about 45º to the left side of the camera. The version from the Lowell light has harder transitions and deeper shadows.

My design for the light is quite light weight, but a little bulky. The turkey roasting pan is easily pushed out of shape, which could be a problem. The good part is that the light will run for quite a while on a 12volt battery with a 120volt converter.

With out a filter the light will cost you about $45. NICE PRICE! Of course this doesn’t include a light stand. The filter is about $7 to $10 depending on which manufacturer makes it. Since the front of the lights are cool you won’t need to worry about burning or melting the filter.

Please note that I am looking for other color temperature bulbs that would work with this design. At this time these are the best balanced bulbs I’ve found. They will work well with a DSLR set to Tungsten. And in many cases can be mixed with other tungsten light sources. I am doing other tests as well, so look for updates. The daylight balanced bulbs I’ve tried are not very close to daylight or strobe.

Here’s the parts list:

The bulbs are Feit 100 Watt Dimmable. I got them at Costco, which was about half the price of the bulbs at this Amazon link.

The 7-bulb holder is available at Amazon. Here’s the link:

The socket, which has an on/off switch, is on Amazon at this link:

I should point out that this socket fits onto a standard light stand. There are several versions of this device. All are a little flimsy. The one in the link has a bigger tightening knob. I think this is better than the one I actually bought, mine slips.

I bought the turkey roasting pan at the Dollar Store. You can get them at Amazon, but you have to get a bunch of them. The pan was just a dollar that the Dollar Store.

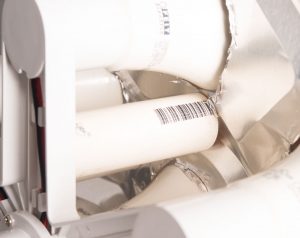
The only trick to assembling the thing is to get the roasting pan to sit at the base of the bulbs. I used a couple of feet of pvc pipe to push the pan against against the base of the bulbs. I attached the pvc parts with pvc glue. I’m sure other things would work as well. Keep in mind that the base of the bulbs does get pretty warm, so you probably don’t want to glue the roasting pan to the bulbs. Take a look at the picture to see how I assembled it.

This shot shows how deep the bulbs are set into the turkey roasting pan.

I hope you’ll also check out my books, use the links below:

One more thing, there are now more than 7500 people registered on this blog. Wow! Thanks everyone.

August 22, 2017

Dedicated Strobe Test

Over the years I’ve written and taught many times about lighting gear. I believe that any photographer who is wholly dependent on finding good light, rather than being able to make and modify light, when making a picture is limited in ability. While I recognize that there are many photographic artists who work in this manner, it is just not acceptable for a commercial photographer to be limited in this way. I should point out that you still purchase my book on this strobe lighting, just click on the link below.

The tools of light are evolving, as are all the tools of photography. When I first started making pictures on camera electronic flash was pretty new. It was also not very good. Now there are many fine lighting tools that work with digital cameras. Of course this doesn’t solve the biggest problem of portable flash units: you can’t see the light you’re actually photographing. An on camera flash makes light at your camera, so, if you’re not careful, you’ll get the dear in the headlights effect and red eyes. Any lighting unit is only as good as the visualization or lighting control of the photographer. Automation doesn’t make good pictures, just properly exposed pictures. It takes a photographer to make good pictures.

Since I started teaching at the Art Institute of Indianapolis I’ve had to discuss lighting tools almost constantly. The tools I’ve used for decades aren’t practical or available for the students. It seems ridiculous to suggest that twenty something students buy strobes older than they are. So I’ve been evaluating many of the current products. I have just a couple of important parameters for evaluating a flash: light and price.

Flash Fill using the Godox TT685

It may seem obvious that I would evaluate a flash based on actual light output, but I’ve had a couple of conversations lately that make me think it’s not obvious.

Photographers have told me that, since their cameras make very fine images at very high ISO setting, they don’t need a lot of strobe power. I’ll admit that a high ISO is a wonderful thing and that it does change they way you can use lighting tools in many situations but it can’t solve every problem. And that is the issue: not light quantity but light problems. A little bit of light can improve the images you take at an event even if you’re shooting at ISO 1600, but that’s not the only problem you’d like to solve with a camera amounted flash. The biggest problem for a dedicated flash is flash fill in sunlight. I refer to this as the ribbon-cutting problem. Your job requires you to shoot a group of people outdoors in the middle of the day, say an opening of a new store. There is a group of people standing around. You can’t change the light on the group or change the angle, simply because they have to be shot in front of building, and right now. The folks look a little like raccoons because of the shadows created by their brows, chins and so on. There isn’t any way to solve this problem with a reflector, unless the reflector is the size of a truck. You can solve this problem with a flash. The technique is called flash fill. The idea is to use a strobe that will fill in your shadows. You need ¼ to ½ the amount of light from your strobe that you get from daylight to make the ribbon-cutting shot work. In other situations you may use much less or, perhaps, even more fill flash. The Daylight 16 Rule states that you set your shutter speed to match your ISO and shoot at f16 for a full daylight shot: ISO 100, 1/100 and f16. Since this is a group you’ll be about 10 feet from all of them. In order to make this work you’ll need an exposure f11 from your strobe, or if you can shoot at 1/200 then f8. This would put your flash power at ½ the daylight exposure, or 1 stop less than daylight. This level of light will do a good job of filling your shadows.

You may be thinking, but the new strobes allow me to sync at higher speeds, so I’ll just raise the sync speed and then I can use less strobe. Doesn’t work. As you use higher sync speed the strobe has to fire more times so you get less total light in the shot. The power drops off very fast, so the fastest speed you can use for the ribbon cutting shot is they original sync speed of your camera, probably around 1/200 for a modern digital camera. Raising the ISO just raises the shutter speed, so that doesn’t work either.


No Flash

Flash Fill using the Godox TT685

So it would be very useful if we knew what aperture we could use with a flash at 10 feet from the subject with ISO 100. Good news and bad news on this subject. The good news is that most dedicated flash units are evaluated using a metric called guide numbers. Guide numbers are often done in feet and in meters, for our purpose the guide number measured in feet is the most useful. The guide number in feet is the aperture the strobe would give you at 10 feet from the subject at multiplied by 10. So if your flash is 10 feet from the subject, and the exposure is f5.6, your guide number is 56. Of course this is measured without any other light source. If the f-stop at 10 feet is f8-1/3 then the guide number would be 90. This isn’t rocket science, and using this information we can see that we’d need at least a guide number of 80 and we’d like to have 110. Now the bad news: while the manufactures usually list guide numbers for flash units they lie about the numbers.

I don’t mean they lie just a little, they lie A LOT! I tested the Sunpak 120J II. The manufacturer’s listed guide number is 177. The actual guide number is 50. The difference is about 4 stops. That means the unit has about 1/8th the power that Sunpak says it does. If I took the unit to the ribbon cutting I would fail. While Sunpak lies a lot, most of the manufacturers are lying by 2 or more stops. One notable exception here, the NIKON SB910 has a guide number of 111 according to Nikon and my test says that’s true. I also tested the Youngnuo YN685, which had a real guide number of 70; the Bolt VS570, which had guide number of 90, and the Polaroid PL190, which had a guide number of 60. I also tested a couple of classic strobes, Norman 200B, guide number of 120: the original Quantum Turbo, guide number 90, and some other things.

The second consideration I mentioned above is price. There are quite a number of dedicated flash units priced between $100 and $200. I like this price point for a couple of reasons: first it’s doable for my students at the Art Institute. Second it allows you to buy several units for what one Nikon unit would cost: $597.00. While a little extra power is good, several units will allow more creative lighting and offer back up when something breaks.

So what did I find out? The best unit for price and power is the Godox TT685. It has a guide number of about 90. It costs $119 at B&H or Amazon.
I would like t than B&H. I’ve ordered half a dozen different flash units, tested them and returned them. They are just great about returns. I couldn’t have afforded to test so many units without the returns department at B&H. Thanks folks!

Using the Godox TT685

No Flash

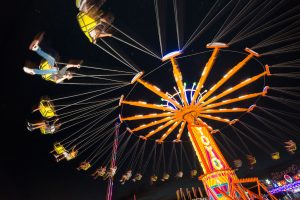
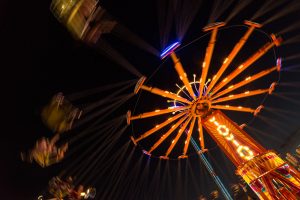
I’ll be writing more about working with the Godox soon! By the way the shots are from the Indiana State Fair.
Oh, and one more thing, you can get my book on Photographing architecture at this link:

March 23, 2017

New Work With The 11X14 Camera!
Bree 12a v-8 The numbers are only a working title.

Bree 12a v-8
The numbers are only a working title.

I think this is the sixth time I’ve taken the 11X14 camera out for a spin. I’m extremely gratified with the results of this shoot. I worked with a model named Bree Widener and a make up artist Julie Powers; both are excellent. Of course I also worked with my current assistant David Kidwell. Really I don’t think I could manage the camera without his help. As you may imagine the camera is a beast. I’ve written before about the process. You can review the early blog posts if you’d like, at these links: blog-3207 and blog-2871

Bree 7 v-2 There is less process manipulation in this image.

Bree 7 v-2
There is less process manipulation in this image.

I think the business of coming to grips with the ultra large format camera and working out an accessible process is quite interesting. A lot of skull sweat has gone into figuring out this method of shooting the big camera. I’m using 11X14 Ilford Multigrade RC paper in the camera. This gives me an 11X14 negative, but it’s on paper rather than film. This works out well because I have an oversized scanner that enables me to scan the paper negatives. This means that the basic process is analog-digital rather than the strictly analog process you would get with a film negative and direct printing to silver gelatin printing.

Bree 9 v-5 The color is added in post processing. The analog/digital process allows for considerable creative input.

Bree 9 v-5
The color is added in post processing. The analog/digital process allows for considerable creative input.

The process allows me to introduce chaos into the images in ways that I can only do with a wet darkroom process. In fact this method is probably better for creating these chaotic images than working with film or any other method. There are of course many ways of working, both with digital capture and with film, where the goal is to gain control over image making. I would be shocked and dismayed if an architectural or product image I made suddenly displayed totally random results, but that doesn’t mean that I don‘t want chaotic results in some circumstances. Many people are shooting film just to court random results, and they sometimes achieve results so random that it’s hard to see any original intent in the final image. I just can’t go that far, though some of my results have been totally out of control. The primary way that I crate chaos in these images is to re-expose the paper to light as I process it and to process the paper in unusual ways.

Bree 1 v-2 The first test image of the day! Off to a good start.
Bree 1 v-2
The first test image of the day! Off to a good start.

Part of what makes this whole process exciting is that I develop and solarize, the negative while the shoot goes on. The whole studio is lit by a sodium vapor safelight, so we can load, handle and develop the paper while the shoot continues. The people involved in the shoot, make up, talent and assistants are always amazed to see the image develop right in front of them. Often I can finish scanning the first good negative from the shoot and make a print before the shooting day is finished. Of course it takes a while to dry and scan each image, so finishing the post processing may take weeks after the shoot ends.

Bree 5 v-2 This image shows the brush work that is done during processing.

Bree 5 v-2
This image shows the brush work that is done during processing.

Since this is an analog digital process all the control and interpretation that Photoshop offers is available after the scans are made. I do a lot with layers and curves to manage the contrast. In addition there are usually defects, dust and other problems, that have to be fixed. Unless you’ve done print spotting, you have no idea how much easier it is to spot an image in Photoshop than it is on a print. I usually add a slight warm tint to my images, just as I would have done by printing on a warm paper, like Agfa Portriga Rapid, in a darkroom. I may also add false color to the image, if the spirit moves me.

Bree 4 v-2

Bree 4 v-2

I tested another piece of the process with these images. I made a new negative on a transparent film with my digital printer. I had always hoped to be able to take these images back into a wet darkroom and make various kinds of prints: silver gelatin and alternative process. I was able to make a couple of Cyanotypes from the new digital negatives. They really look great! My test prints are 8X10 but of course I could make a really enormous negative make enormous prints with it.

Bree 12a-cyanotype Of course the scan of the Cyanotype isn't like seeing the original.

Bree 12a-cyanotype
Of course the scan of the Cyanotype isn’t like seeing the original.

Since the original negatives are 11×14 inches and the scans are 1200dpi the final files are just huge. I could make a print that is about 5 feet tall at 300 dpi without any problems. Psd files are about 600mgs. which can make them a little difficult to deal with in Photoshop.

Bree 5-cyanotype

Bree 5-cyanotype

I’m not offering prints of these images at this time. If you’ve been watching this blog you know that prints of a lot of my images are available through the blog. I really hope you’ll buy some. These images will be available, but I hope to create a show with them first. I will do a few more people shoots before I start working on that. I’m looking for models, of course for figure studies, but I’d also like to work with people with facial tattoos and who knows what else?

I hope you’ll also check out my books, use the links below:

One more thing, there are now almost 6000 people registered on this blog. Wow! Thanks everyone.

Older Posts »

Powered by WordPress