So it’s been a long time since I last updated this blog. I’ve done a lot of personal projects since I updated this blog. The biggest one has been moving to New Mexico. I’ve also done a number of equipment related photographic projects in the last year, which I am going to add to this blog as time goes by. This is the first one of those, and in some ways it’s just an extension of the last blog post I did. You may remember, or you can check below, it was about shutters and lens boards for large cameras.

New Photography from Taos San Francisco de Asís Mission Church #1. Made with the Toyo 810M and 6 ½ inch W.A. Dagor.
The two elements that have the most do with how your final images are captured, are first, the lens that makes the image, and second the way in which you record the image. Many lenses are designed to have as little character and to be as sharp and contrasty as possible, but that’s not true of all lenses. Some lenses are designed for soft focus, some lenses are designed primarily to bring the image closer or to give you a wider angle. Many lenses have lower contrast and more flare. Modern lens design is often more concerned with contrast than with sharpness. The human will often see contrast and saturation as more graphic than actual detail. Also, some lenses are just not very good. Many older lenses, while they may have flare or other defects, can make very compelling images. Some modern lenses have been designed for digital cameras that exhibit these properties: check out Lomography.com for examples. The lens you use may have more effect if you’re working with a large format film camera; and you’ll have more lens choices.
Regarding recording the image, if you’re recording it in digital then the simple thing is how much resolution do you have? But if you’re recording it in film, the size of the film and the characteristics of the film will have a huge effect on your final image. The resolution of the film, whether the film is color or positive transparency, or black and white negative film, all these things have a tremendous amount to do with your final capture.
In order for the lens and film (or sensor) to function well, you need a number of controls on your camera. You need to control how much light finds the final capture area, whether it’s film or digital, and that’s done by blocking some of the light in the lens with a diaphragm (aperture) and by using a shutter (shutter speed). You’ll need to focus the lens by changing the distance between the lens and the film and of course, you need to keep everything dark between the lens and the capture area.
So a camera may be quite simple: just a film holder and focus. With large format cameras the shutter is usually mounted in the lens, as is the diaphragm. Many large format cameras are little more than a platform for the assemblage of parts. Many cameras are much more complex, particularly digital cameras, which will have the sensor and shutter and meter and viewfinder and electronics built into the camera. One advantage of a large format camera, not only can you change the focus of the lens, but you can change the geometry of the camera: the camera allows you to change whether the film plane and the lens plane are parallel to each other as well as the distance between the two. Sometimes simplicity offers more control than complexity.
All of this means that you can modify large format cameras. You can create or customize cameras that give you special abilities or enable you to use special lenses or enable your lenses to do things they might not otherwise have done. You can put different sizes of film on behind lenses that were designed for something else. And all of this can be very creative, and it can be fun! It can enable you to make images you couldn’t otherwise make.
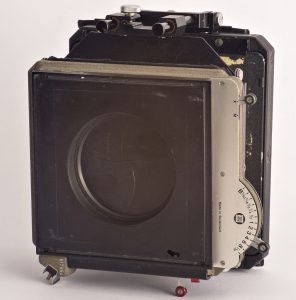
The Sinar shutter mounted onto a Toyo Bellows lens hood. You can sell all the shutter speeds on the side. It’s mounted sideways to keep the shutter control away from the rails of the bellows lens hood.
In the last blog post I talked about changing lens boards and mounting different lenses onto multiple large format cameras. I showed how I made a make lens board converter to enable me to fit a Toyo lens board on my old 8X20 Korona view camera. I also showed how to mount an external shutter, called a Packard shutter, on to a bellows lens shade. This puts the shutter in front of the lens. Packard shutters are air-driven shutters and they’re incredibly useful, but they have only limited control. In this post I’m demonstrating two more shutter adaptations: one is using a shutter from a Sinar camera and the second one with a Packard shutter.
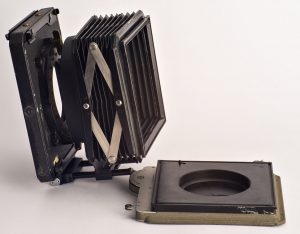
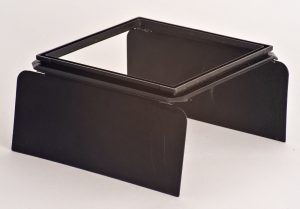
A side view of the bellows lens hood and the shutter. The adapter from the lens hood is glued to the lens hood. The original purpose of the lens hood and the barn doors is similar.
Sinar are made wonderful view cameras, very complex, with very precise levels of control. Very fine Swiss workmanship. They were some of the finest view cameras you could buy, but they were also some of the most expensive view cameras you could buy. They made some really, really interesting accessories. One of the things they made was a shutter designed to fit into the camera. This shutter was way better than your average Packard shutter because this shutter what had accurate shutter speeds from 1/60 to 30 seconds. As time went by their shutters evolved into electronic devices that could only work with Sinar cameras. The shutter I adapted was designed to work with the older Sinar Norma cameras. It is a completely mechanical shutter.
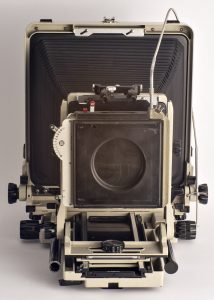
Rather than use the magnetic strip I used to hold a Packard shutter to my bellows lens shade, I used the mount from a Sinar barn door attachment, which I put on the front of a Toyo bellows lens shade. Now it works with any of the cameras that I’ve already adapted to take the Toyo bellows lens shade: my 8X20 Korona camera, my 11X14 camera, my Toyo 810M and Toyo 45C. Not only will it fit a lot of cameras, it will fit a lot of lenses. You can see how this comes together in the pictures associated with this particular post. The Sinar shutter requires a cable release with an extremely long throw, much longer than a regular cable release. This is because the cable cocks the shutter as well as triggering the shutter. I’ve found that the only cables that work are the ones Sinar built for the shutter.
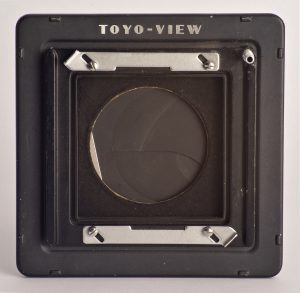
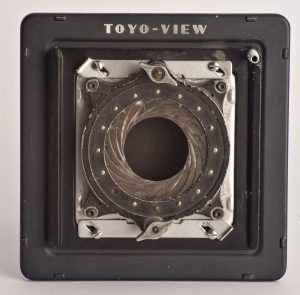
Another project that I want to share here is a shutter I attached to a Toyo board that was originally made to fit adapt the Speed Graphic lens boards onto the Toyo cameras. Many of my lenses are mounted on the speed graphic lens boards since the boards are common, inexpensive and small. The Packard shutter mounts directly behind the Toyo board. You can see this in the pictures. This is a smaller Packard shutter. There’s a pipe which attaches the air hose through the shutter. It’s a very handy item.
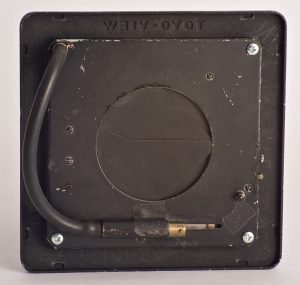
The back of the Toyo/Packard lens board. You’ll notice the tube from the front is attached with rubber air hose to the piston.
Both projects are also shown with the diaphragm adapters that allow you to hold lenses that aren’t mounted onto boards and don’t have retaining rings. This all makes for very, very flexible lens mounting system. You can put practically any lens on the front of your view camera, even lenses that were never designed for cameras.
I’ll be describing several more projects in upcoming posts, including a tour of my new darkroom. Also, I will be selling a number of items that I no longer need. So, if you watch this blog you may find those items listed; and they will cost a little less money here than on eBay.
So if there’s anything that you’re particularly looking for you might let me know send an email to John@Siskinphoto.com, thank you very much for your attention.
