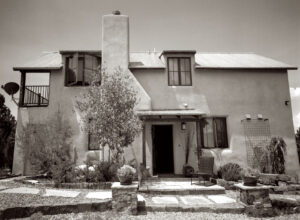
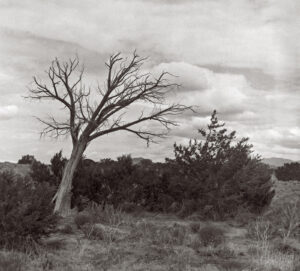
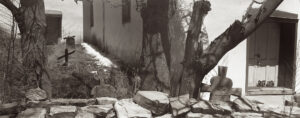
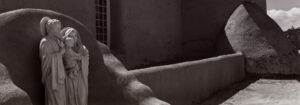
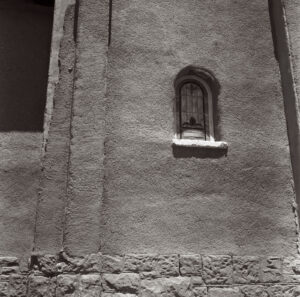
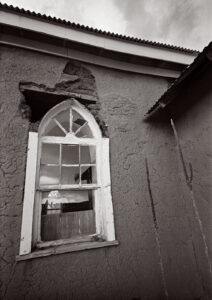
I don’t suppose it’s news that I’ve retired, at least it’s not news to me. Also, I’ve moved to a place just outside of Santa Fe, New Mexico. I should say that life is very, very good out here. Anyway, that being said, I wanted to say a few things about what I’m doing photographically right now. As I’ve finished up the Courting Chaos project, closed the studio and stopped teaching, there are not a lot of things pushing me to do photography anymore, and, at the same time, I’m not trying to find any commercial work. That used to take a lot of time. What I am doing is working with black and white film and a few interesting cameras. I feel very good about doing this; it’s a kind of re-invention, or maybe, a return to my roots…
In order for me to get my film chops back, so to speak, I need to do the simple basic things that any photographer needs to do, especially when they aren’t being pushed form the outside: practice, play and test. I wanted to write a little about these things today. I think the first time I heard about photographers practicing was when I went to Nikon School. I was selling cameras in Santa Barbara at the time, if memory serves. What they suggested was focus practice. Back in the days of 35mm film SLR cameras focus practice was very important. I remember that they stressed learning to focus anywhere on the screen, not just using the split image. The fact was that they were right: focus practice does make you a better photographer. Of course, if you’re using an auto focus camera it’s different; you need to stay aware of the point or points the camera is focusing on, and how that fits your image. Also, modern digital cameras have so many menus and useful features that it helps to practice using any feature that you like that you don’t often use. One great thing about practicing with a digital camera is that you can take actual pictures to get feedback on your practice, practicing with actual film could get pretty expensive.
I’ve been working with a couple of cameras and with processing equipment, so I needed a lot of practice. It seems a little strange to me that the first camera I started to practice with was the Toyo 810M. Strange because this is one of the most difficult cameras to work that I’ve ever used. It’s an 8X10 metal field camera, so it weighs a LOT. As I mentioned above, working with film can get expensive, especially when each piece of film is 8X10 inches! I suppose I wanted to start with this beast because I knew that if I could work with that everything else would be easier. Then, of course, not only do you need to shoot this huge film; you need to process it! I’m using a Jobo processor. I got an 8X10 film reel that fits my tank and hold 3 pieces of 8×10 film. However just having this stuff doesn’t mean that you can actually load the reel in total darkness and get through a film run successfully. The processor makes it lot easier than running 35mm film in a metal tank: with inversion agitation every 30 seconds… However, it does help to have practice in running the processor. Also, there’s a lot of stuff you have to arrange to process film. I had to build a darkroom and get plumbing to my sink! And, it’s important to know where you’re going to dry the film before you start! Every time you build a new darkroom, and I’ve built a few, there are a huge number of little details to be worked out.
But there are more details than just processing to worry about. Just composing an 8×10 camera is a little tricky. You’re working on an image that is upside down and backwards. It’s often difficult to see the image, especially if wind is blowing your dark cloth around. Depending on the lens the image can be tough to see. Lenses with smaller stops, and wide-angle lenses are tougher to see. I did get a new fresnel lens for the camera, which is helping. It’s also good to practice getting the camera onto the tripod; not only is the camera heavy it’s very awkward. I’ve purchased a couple of lenses for the big camera recently, so I needed to understand how they see and how they work. Of course, you can look through a lens and know a lot about the way it sees, but you know a lot more if you shoot film with it.
I’ve also practiced with a couple of medium format cameras. I’m trying to find a medium format camera that I want to stick with, but it’s tough to find something that meets my standards. First I’d prefer to work with the 6x9cm format. Obviously I like big negatives, but I also like that this format has the same ratio as 35mm full frame film. This cuts out a lot of popular cameras, like the Hasselblad (6x6cm), my beloved Mamiya C330 (6x6cm), the Mamiya RB and RZ (6x7cm) and the Bronica, Pentax and more. In fact, most of what it leaves you with are press cameras made in the late 1950s and 60s. Actually not such a bad thing, most have rangefinder focusing and they’re pretty cheap. I’ve tried out the Koni-Omega, the Horseman, the Graflex and the Mamiya Press. All of them have their advantages, but right now I’m using the Mamiya. There are a couple of reasons: first the Mamiya has the widest lens I can find for a medium format press camera, a 50mm f6.3. Second, some of the Mamiya Press cameras can use Graflex roll film backs. This is kind of rare, but I have one. I like this because I have a bunch of these backs, and they fit other things I own. Also, they are easier to find than most of the other roll film backs. The actual range of lenses is probably larger than most of the other cameras I mentioned, but the Horseman could take many view camera lenses. The Mamiya has some back movements, sort of like a perspective control lens for a digital camera or a standard view camera. The back also allows some macro work not available with the other cameras. In fact, one of the reasons I don’t like the Koni-Omega, is that it doesn’t have close focusing. Of course, you have to put on a ground glass to focus, but it’s great that the camera has this. Still, there are problems… These are all metal cameras, so they’re bulky and heavy. With 4 lenses my kit weighs almost 25 pounds. Second, these are old cameras and they often need maintenance. One of the things I’ve had to do is re-calibrate the rangefinder, a job which requires patience. You can’t just run to your local camera store and buy one, you’ll be searching for a while on eBay.
I’ve needed to practice with the Mamiya quite a bit. The rangefinder isn’t very contrasty, so you need to work with it to get the hang of it. The viewfinder is separate from the camera lens, so you need to learn about how the camera actually frames. In addition, the wide-angle lenses require auxiliary viewfinders, which is a little annoying, maybe a lot annoying… I needed to practice changing the lenses, too. If I forget to put the dark slide in, I’ve ruined a frame. One other thing that takes getting used to is that there isn’t any double exposure prevention. You need to decide if you’re going to wind the film before you shoot or after, and stick to it! Of course the upside is that you can change film holders in the middle of a roll. Perhaps it just that I’m a person who likes to d things the hard way. I believe there is evidence for that.
While I’m discuss getting my chops back with various cameras, I should mention the Brooks Veriwide/Graflex XLSW camera. Both cameras were designed for the 47mm f8 Schneider Super Angulon. The 47mm S.A. was designed as a super wide-angle lens for 6X9cm. I really enjoy working with wide angle lenses, just in case that wasn’t evident. The thing about this camera is that it’s quite simple, lens, with built in shutter; viewfinder; focusing helical; and Graflex roll film back. The result is a fairly small, reasonably light camera, with a huge angle of view. Really nice. Of course, it’s scale focusing, no rangefinder. I suppose I could use the Graflex ground glass back, but that would make the camera much slower to use. The other drawback is that the lens is f8, and doesn’t entirely hit its stride until f16, well no one is perfect.
I have several other cameras that I still need to practice with. I’ve done almost no work with my Cyclops camera, which shoots 120 film with a moving lens. It makes very large panoramas. Speaking of very large panorama shots I have a Korona 8×20 camera that I need to drag out soon. I really should do a shot in the next few days so I can say I used it during August, after all the date is 8-20. I haven’t used the 11×14 camera since I closed the Courting Chaos project, but I did use it a lot for that project. If you’re counting my cameras there are a lot more… Keith Richards has three thousand guitars, so I have a way to go.
Now clearly all of this practice is well and good, but practice has its limits. The limits of practice are discovered by testing. Some testing is very easy to understand: all the lenses I’ve been using have leaf shutters, which are inaccurate. Leaf shutters are mounted in the middle of a lens rather than near the film. In addition all old leaf shutters are inaccurate to some degree, and all of mine are old, much like myself. There is actually a phone app that does a pretty good job of shutter testing, if you have old shutters you should find the app. I’ve know a lot of people who do obsessive processing testing. This used to be extremely important. Even as recently as the 1950s and 60s many film emulsions were thicker, which changed the way films recorded light a lot! This has a lot to do with why Ansel Adams and others developed the Zone system. Film recorded low light differently from middle grey and highlights blocked up. There are some films which will still react this way, if you want to experience greater frustration. Modern black & white films, like Kodak T-max and Ilford Delta will handle the highlights much better than say Super-XX; so exposure is easier to manage. In addition, most photo papers are multi-contrast which gives the printer much more control over the way the print looks. Alternatively, you can scan a negative and manipulate it in Photoshop, which gives you much more control over the outcome! You can make a new enlarged negative with a printer and make a variety of different kinds of prints, customizing your negative to fit the printing material. So my goal in testing film is to get a negative with a long scale, many tones between black and white. I’m also looking at the graininess of the film and it’s resolution. So far I like the Ilford Delta 400, but I do want to check more films. While I’m looking at film resolution I’m also examining the resolution of my lenses; all lenses are not created equal. At some time I need to do some writing about the way lenses affect pictures. Many people are fiends for “sharp” lenses, however many people interpret contrasty lenses as sharp because they make images that “pop”. Here’s the thing, if you do post processing of your shots with Photoshop it can be better to have lenses with resolution that you like and control contrast in post. I’ve found that I like Goerz lenses, and I have a bunch of them. More on lenses at another time.
There are some basic tests I shouldn’t ignore: is your camera light tight? Are your film holders light tight? Some of mine were not. It’s important to know where the weaknesses of your gear are. One more test: can you carry the damn camera bag and the tripod without too much suffering…
Here’s the thing, we do all this so that we can PLAY. If we get too caught up in technical details that we forget that photography is way of communicating and documenting. If we aren’t doing any shooting that all the gear and all the knowledge don’t matter. Play means both expressing technical skill, craft, and experimenting. If you don’t make mistakes; don’t walk outside your comfort zone you aren’t really doing anything new. If you don’t express yourself with good craft than people won’t be able to appreciate your images.
