I’m going to try to explain a project that I’m trying to work on. Unfortunately, for explanation, it’s a complex explanation with many threads; the good news, for me anyway, is that the complexity makes the project more interesting. You see one of my problems, as an image maker, is that I get bored with the simple things. Anyway, I’ve often heard that writing should begin at the beginning.
I
Photography was introduced in 1839. There were two competing methods of capturing an image with a chemical process. One was a direct positive image process called Daguerreotype, this is one of the threads which I hope to come back to. The more interesting process, to me anyway, was introduced by William Henry Fox Talbot. This process called photogenic drawing, involved making a negative, usually with a camera. The negative was dark where the original scene was bright and light where the scene was dark, a reversal of the original tones. Then the negative is put in contact with a second piece of sensitized paper and exposing this second piece of paper through the original paper negative. This produced a positive image, and you could make multiple positive prints. In terms of my project, it’s important to point out that he was using paper to make his negatives. There was no flexible film, which was invented by George Eastman. It would be quite a while before anyone found a process of making a photographically sensitive material that would stick to glass. Fox Talbot did the first book which explained how to do photography and was illustrated with actual photographs. You can see a good reproduction of the book Pencil Of Nature at this link: https://www.gutenberg.org/ebooks/33447
Very early in the practice of making photographs the martial used to make the negative, exposed in the camera, diverged from the materials used to make prints intended for display. The negative needed to be as light sensitive as possible, it needed to be on a translucent or, preferably, transparent material. The actual look of the negative was less important than the way it recorded information, since no one was really intending to look at negatives. In addition to being as sensitive to light as possible, it was a continuing challenge to make negatives that recorded color in ways that seemed intuitively right. For instance, the sensitive material, usually called emulsion, was unable to record red properly until the early years of the 20th century. Before that red, say red lips, were reproduced as black on prints. This panchromatic film and plate material was important to making negatives, but it made no difference for making prints. In fact, using an emulsion which was only sensitive to blue light made darkroom work much easier since you could work under red or amber light, called safelight. Many different ways of making photographic prints were introduced from the beginning of photography. Early methods included cyanotypes, platinotypes and kallitypes. By the middle of the 20th century the standard print was called a silver gelatin print. I’ll mention little more about working with direct positive materials at the end of this essay. I’ll want to mention are the introduction of color film, particularly Kodachrome, which was a direct positive material.
The positive black and white silver gelatin print was how most people experienced actual photographs for a long time. Of course, people experienced more images that were reproduced in ink, as newspapers, books and so on, but this essay is following photographic print making, rather than photomechanical printing. At the same time this was the dominant mode there were many creative photographers making images in unusual ways. For a long time, people continued to use film that wasn’t red sensitive, called orthochromatic film. In fact, Ilford still produces this sort of film. This made it possible to develop film by inspecting it during processing, rather developing film in total darkness which is necessary with panchromatic film. Kodak used to suggest using orthochromatic film for making portraits of European skin tones that had a reddish “ruddy” hue. I have no first-hand information about this technique. I am not sure when people started using silver gelatin paper in cameras instead of film. It was very popular with pin hole cameras because paper is cheaper than film and much easier to process. Kodak used to make a very thin paper, Ad Type, which was considered to be particularly good for making paper negatives, since it was more transparent that usual paper.
If you are currently making, or interested in making, paper negatives the situation is quite good. In the 1970s photo paper on a vinyl base, rather than paper, was introduced. This stuff is easy and quick to process. It dries flat. It scans very well. It is much cheaper than large film; 25 sheets of 8×10 Ilford HP-5 is over $200 and Ilford Multigrade paper is about $130 for 100 sheets ($8 per exposure vs. $1.30). The paper is sensitive to colors excepting amber and red, more than the original papers were. In addition, current photo paper, such as Ilford Multigrade RC is hugely more sensitive to light than 19th century materials. My tests tell me that the Ilford paper is something like 64 times more sensitive than tintype (an early and popular direct print) material was. Translated into modern film speeds I find that Ilford Multigrade RC can be exposed at ISO 64 with strobe (electronic flash) illumination. With daylight the ISO might be as low as 25.
II
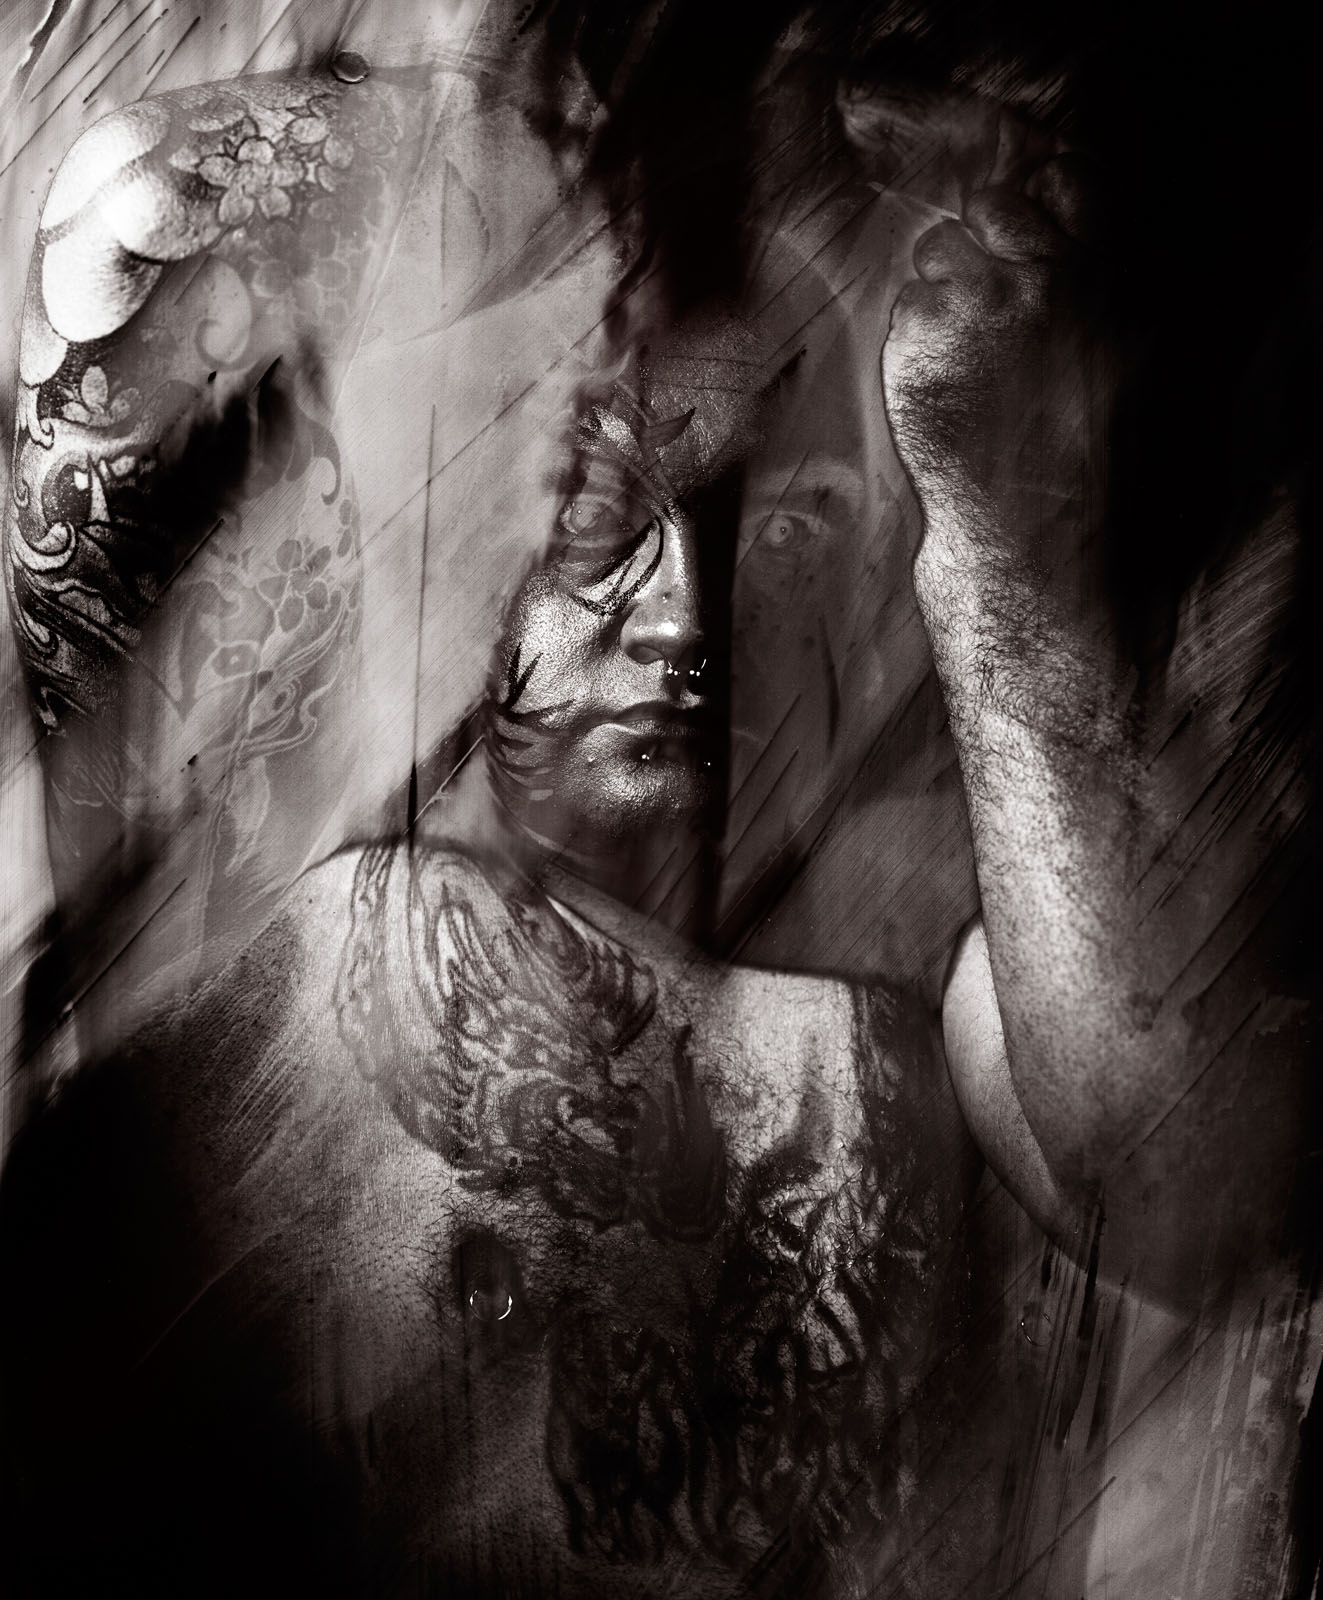
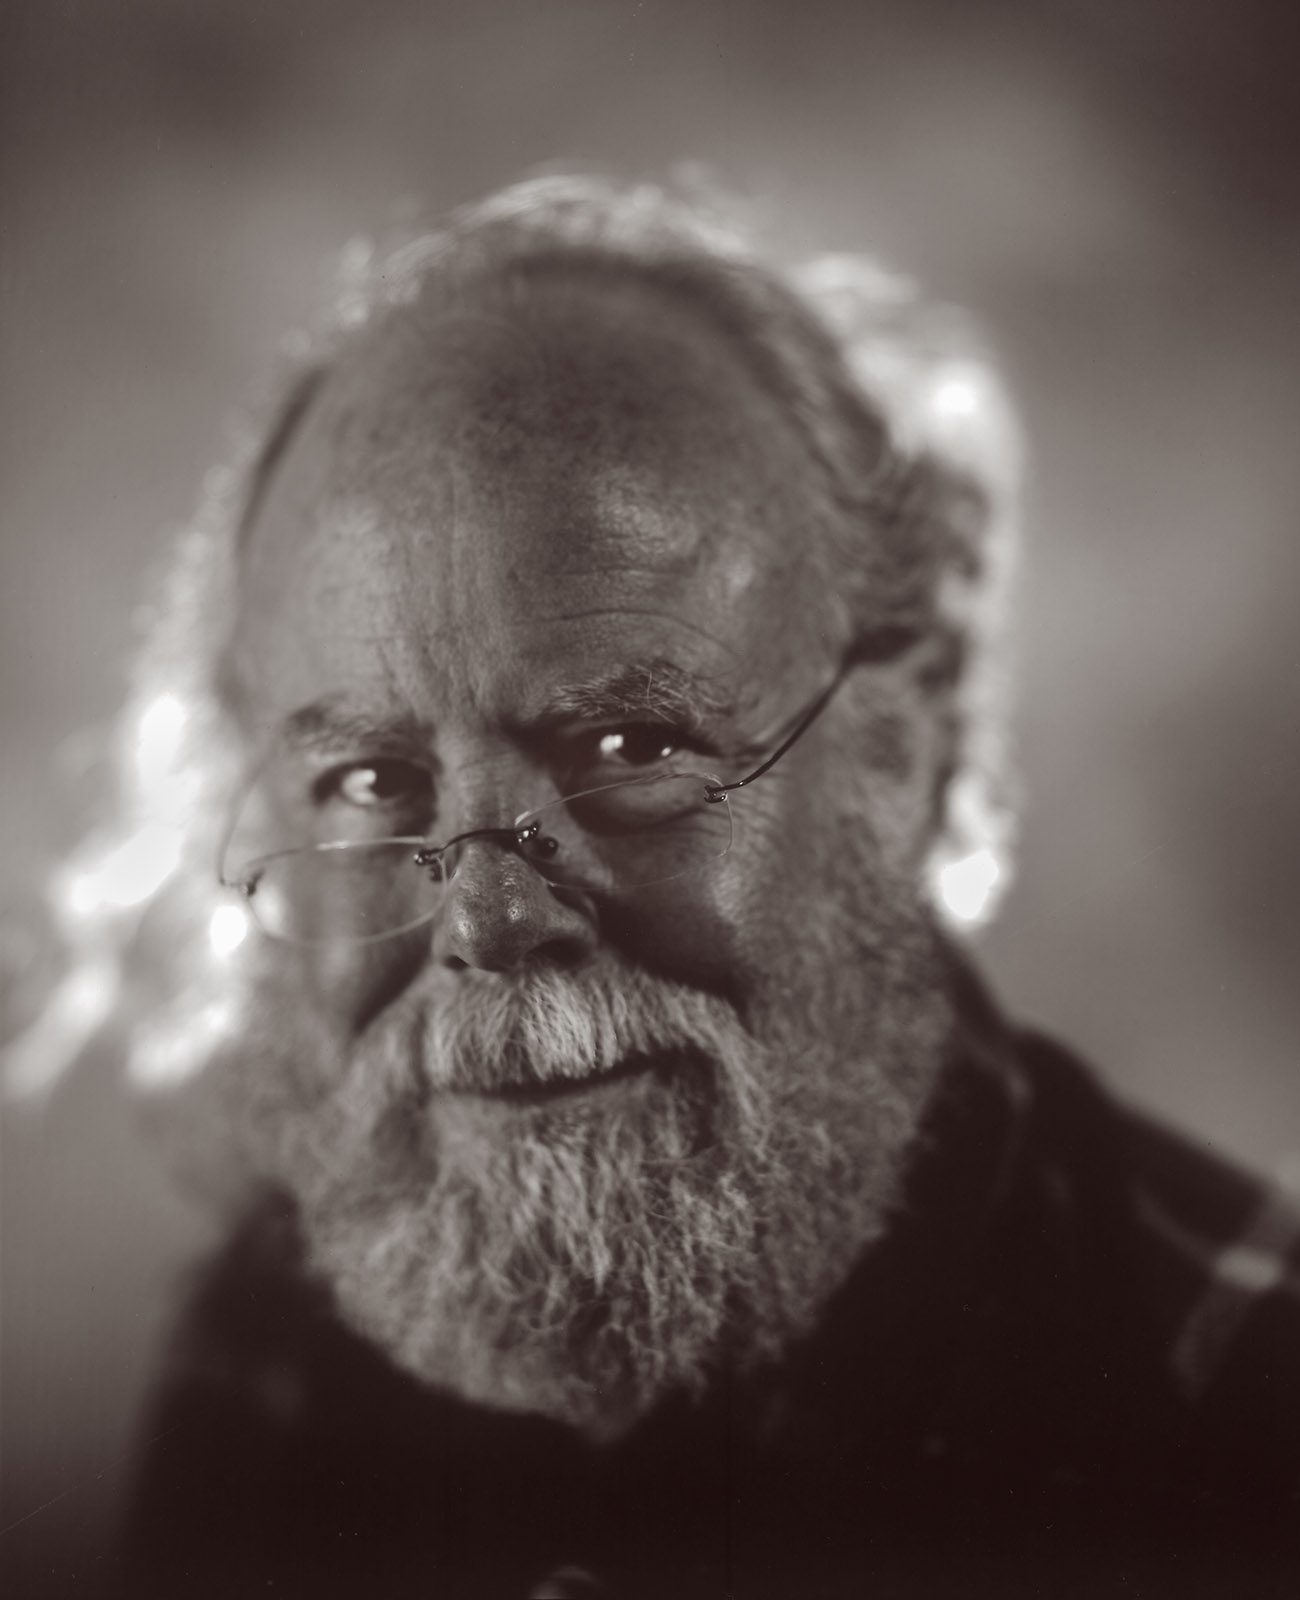
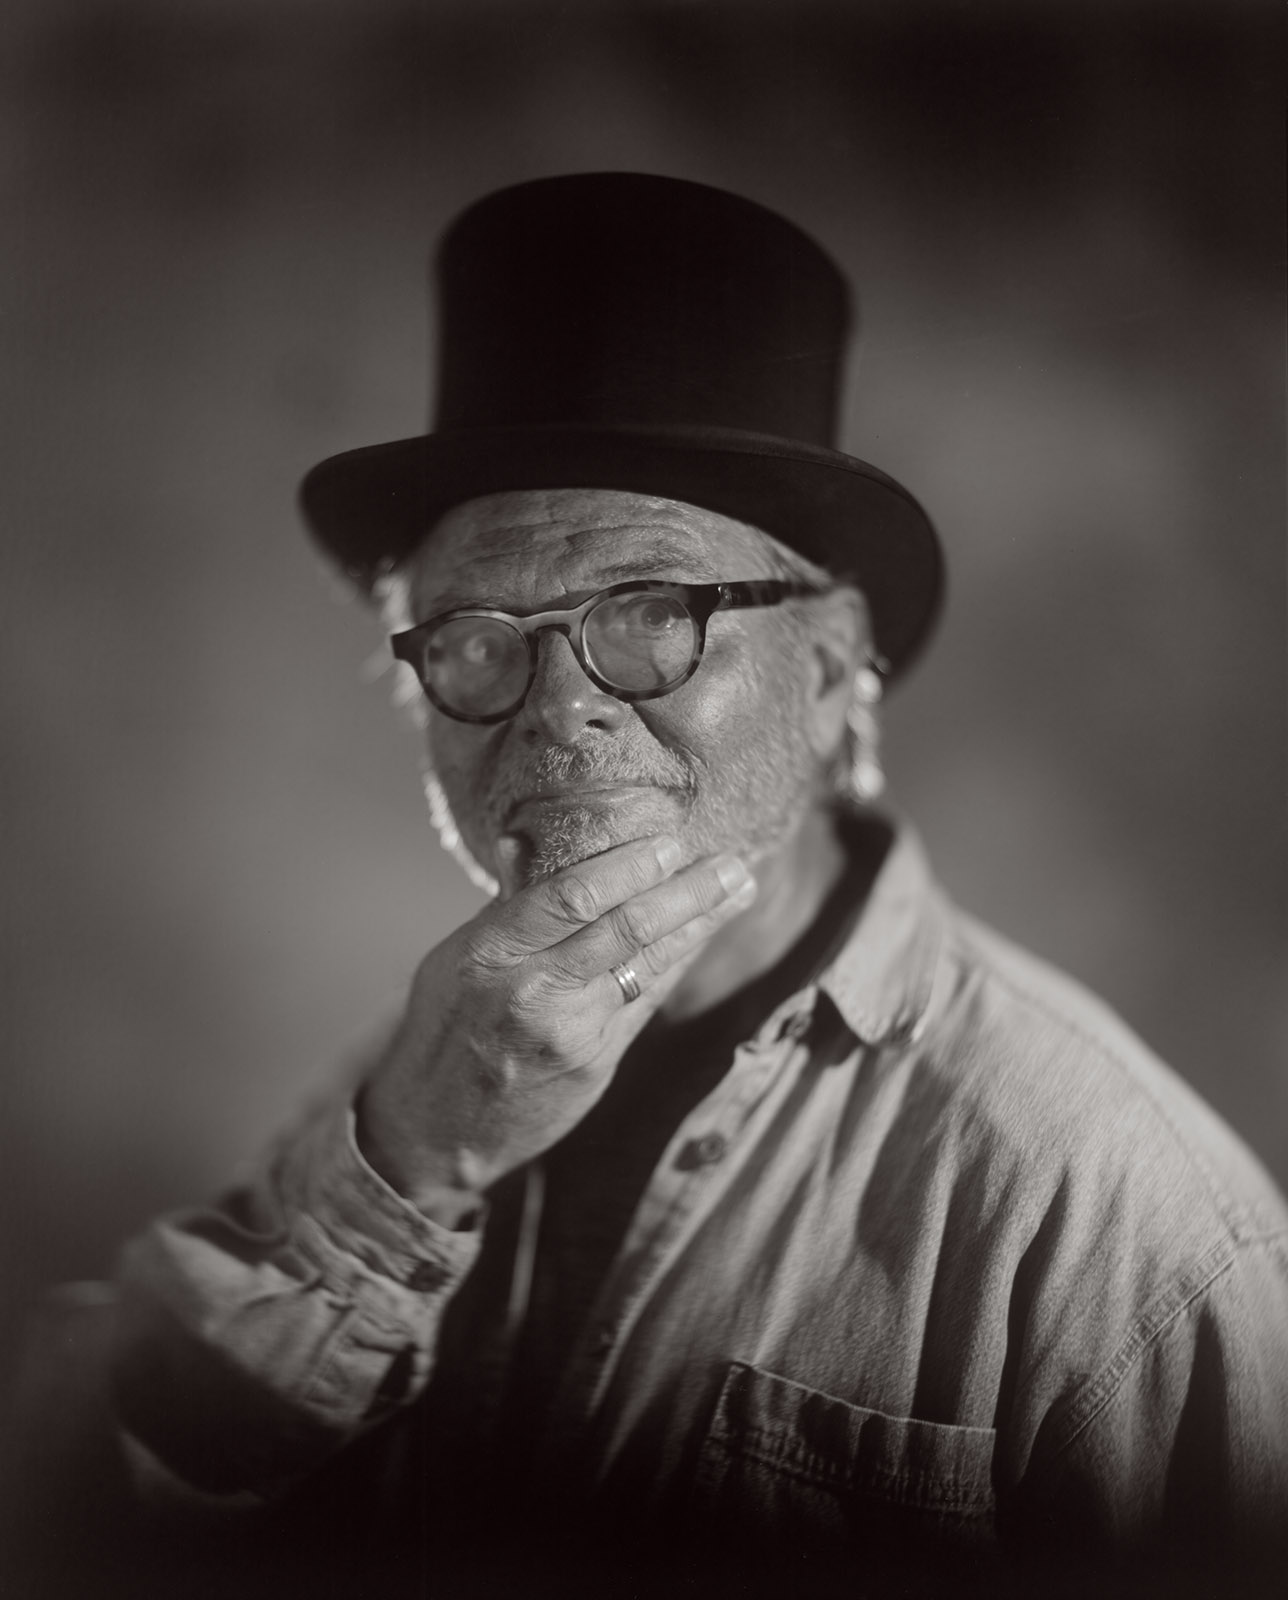
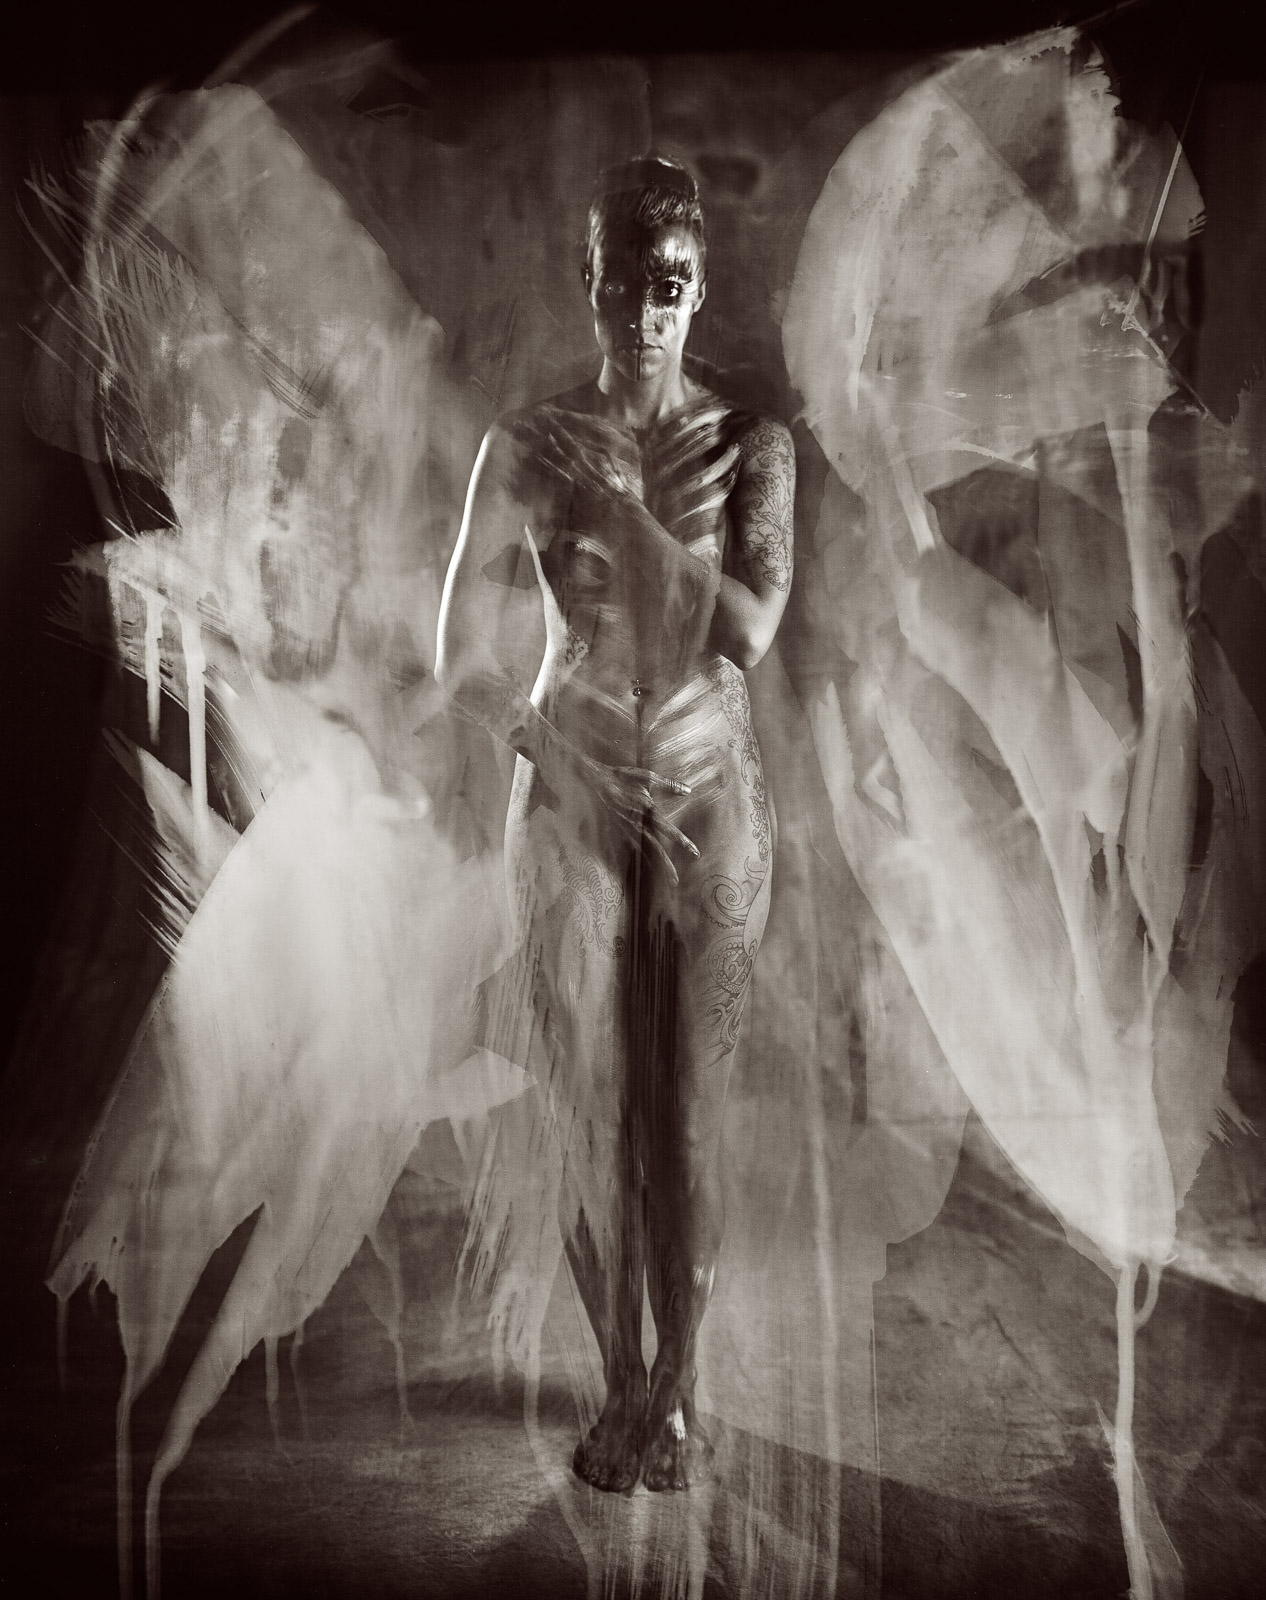
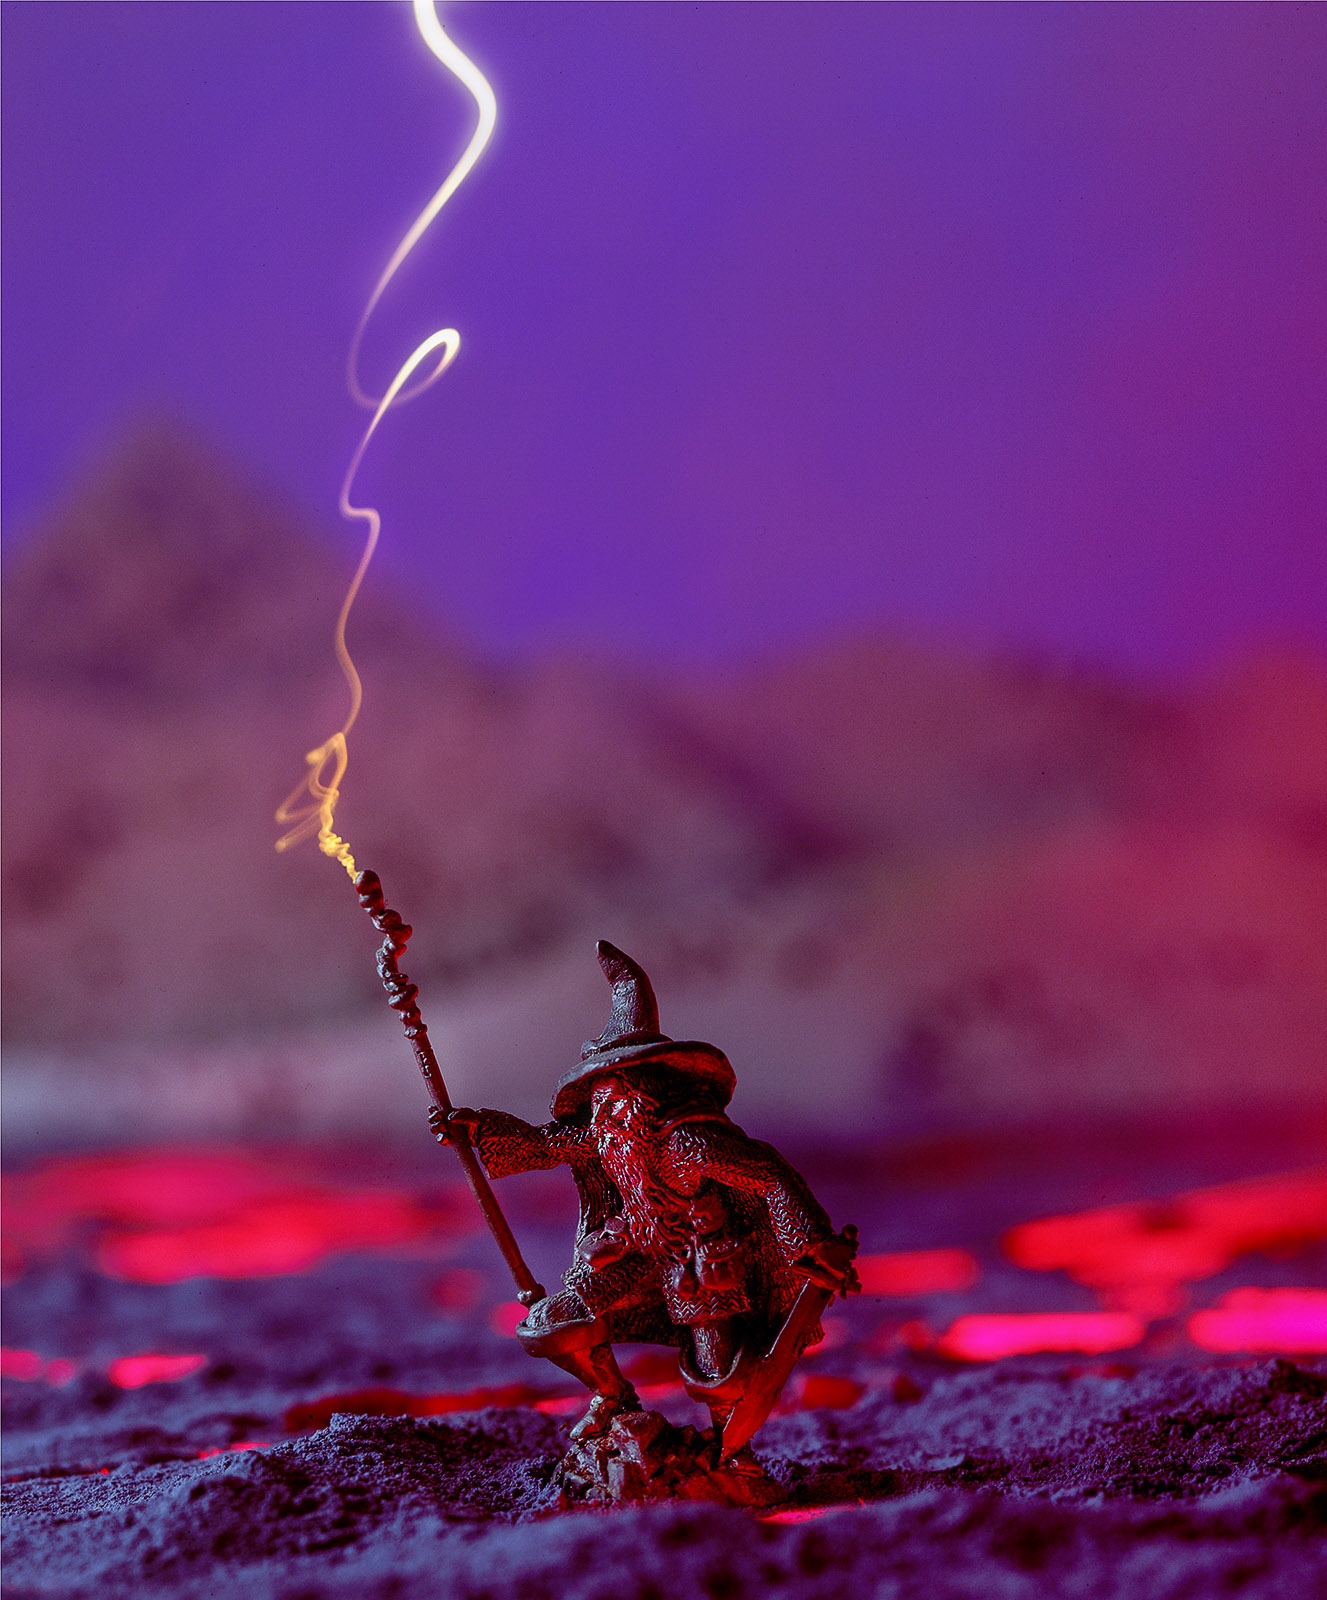
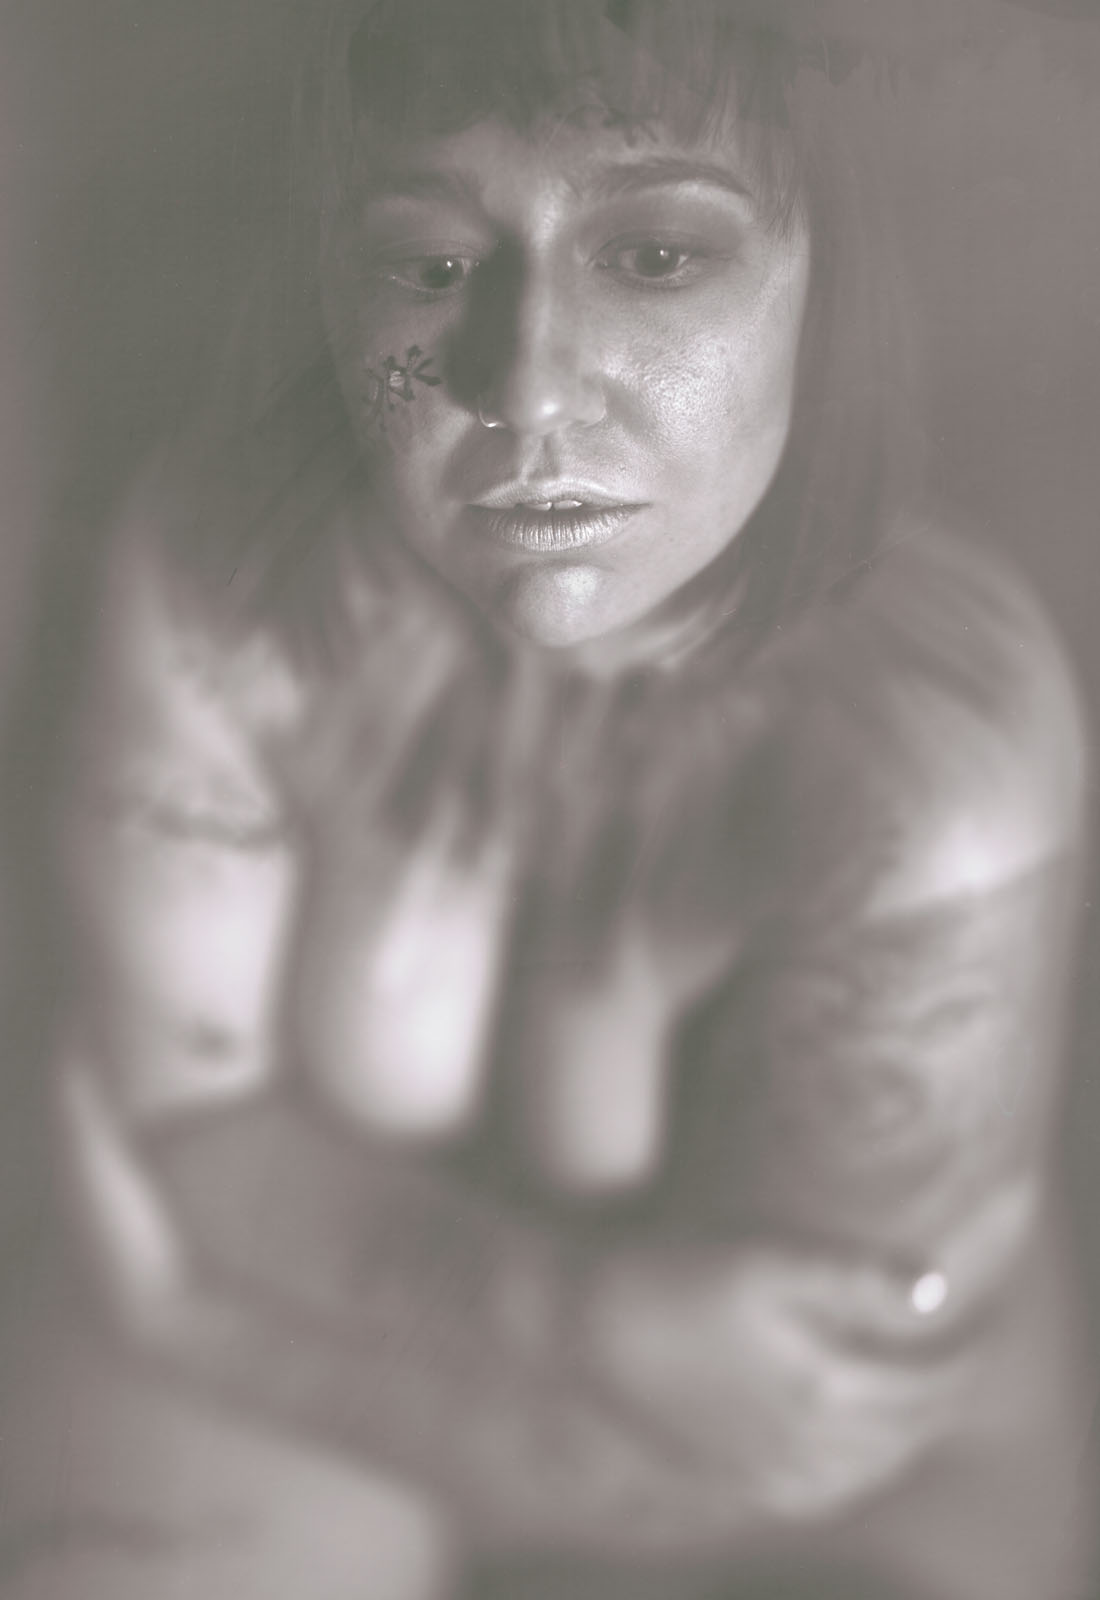
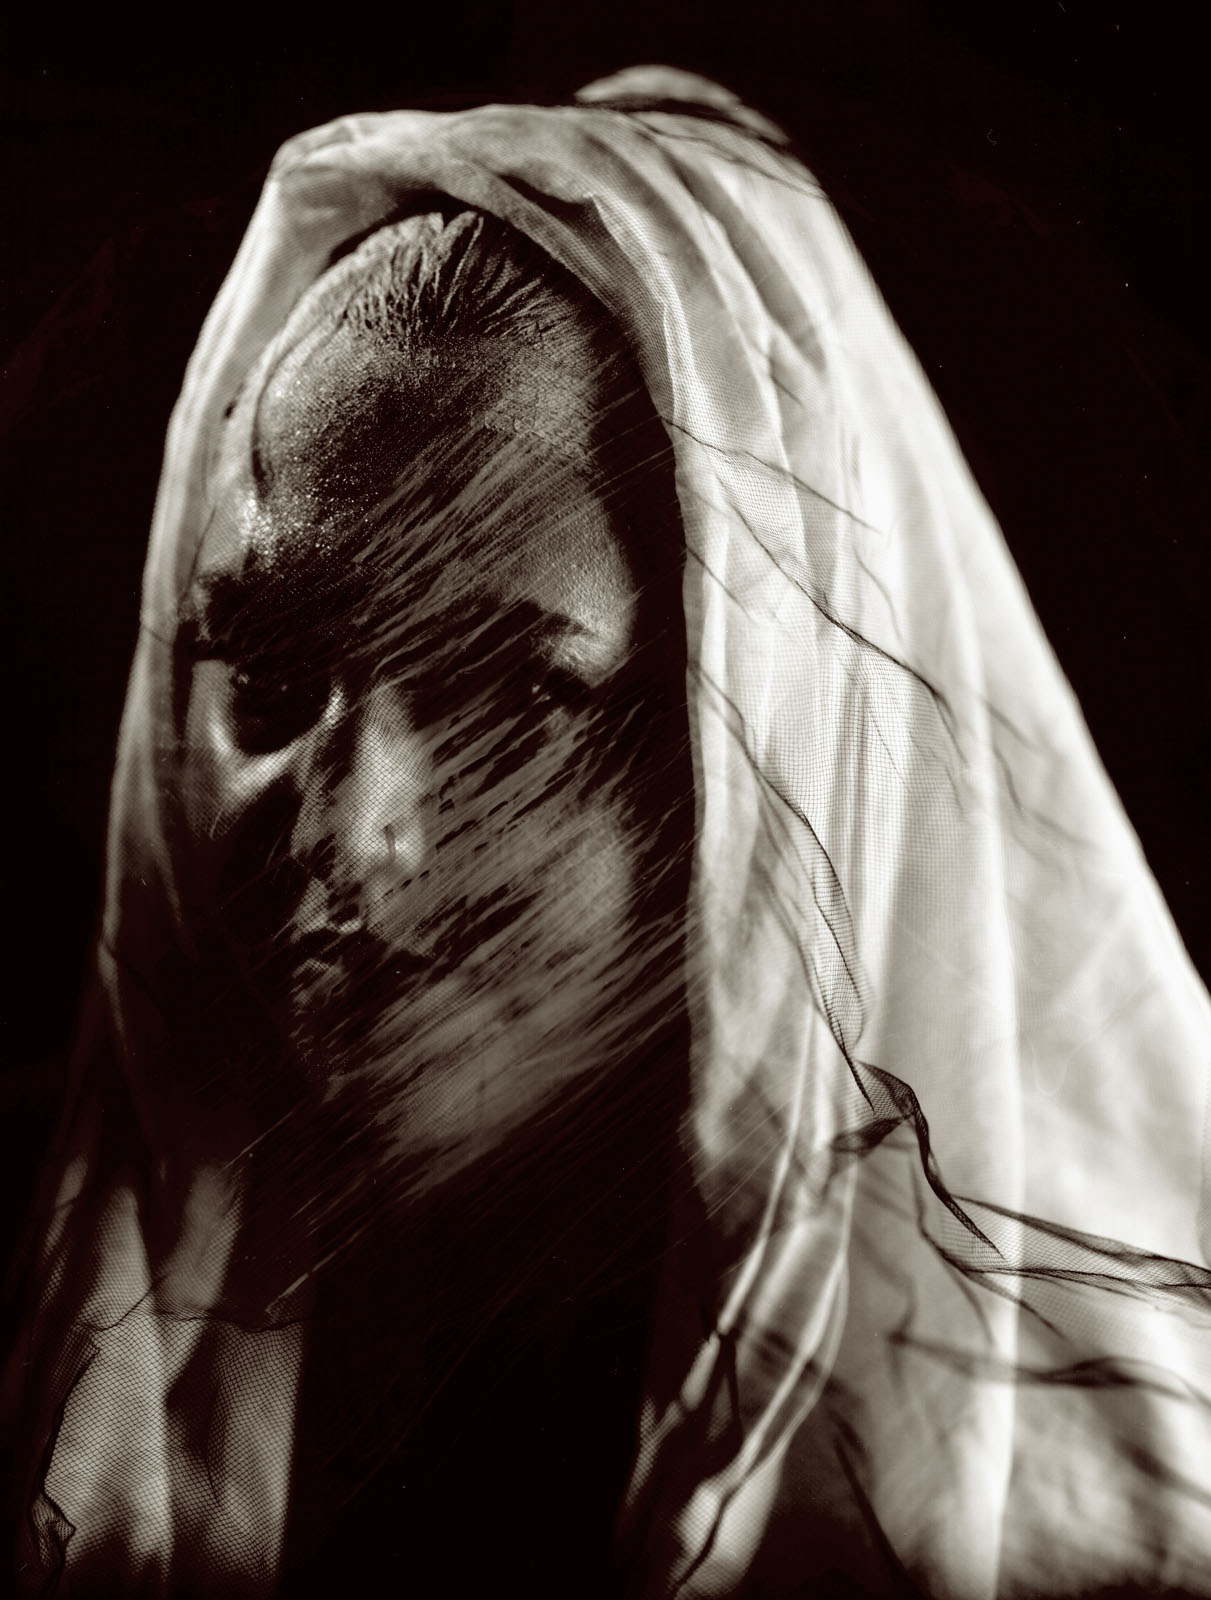
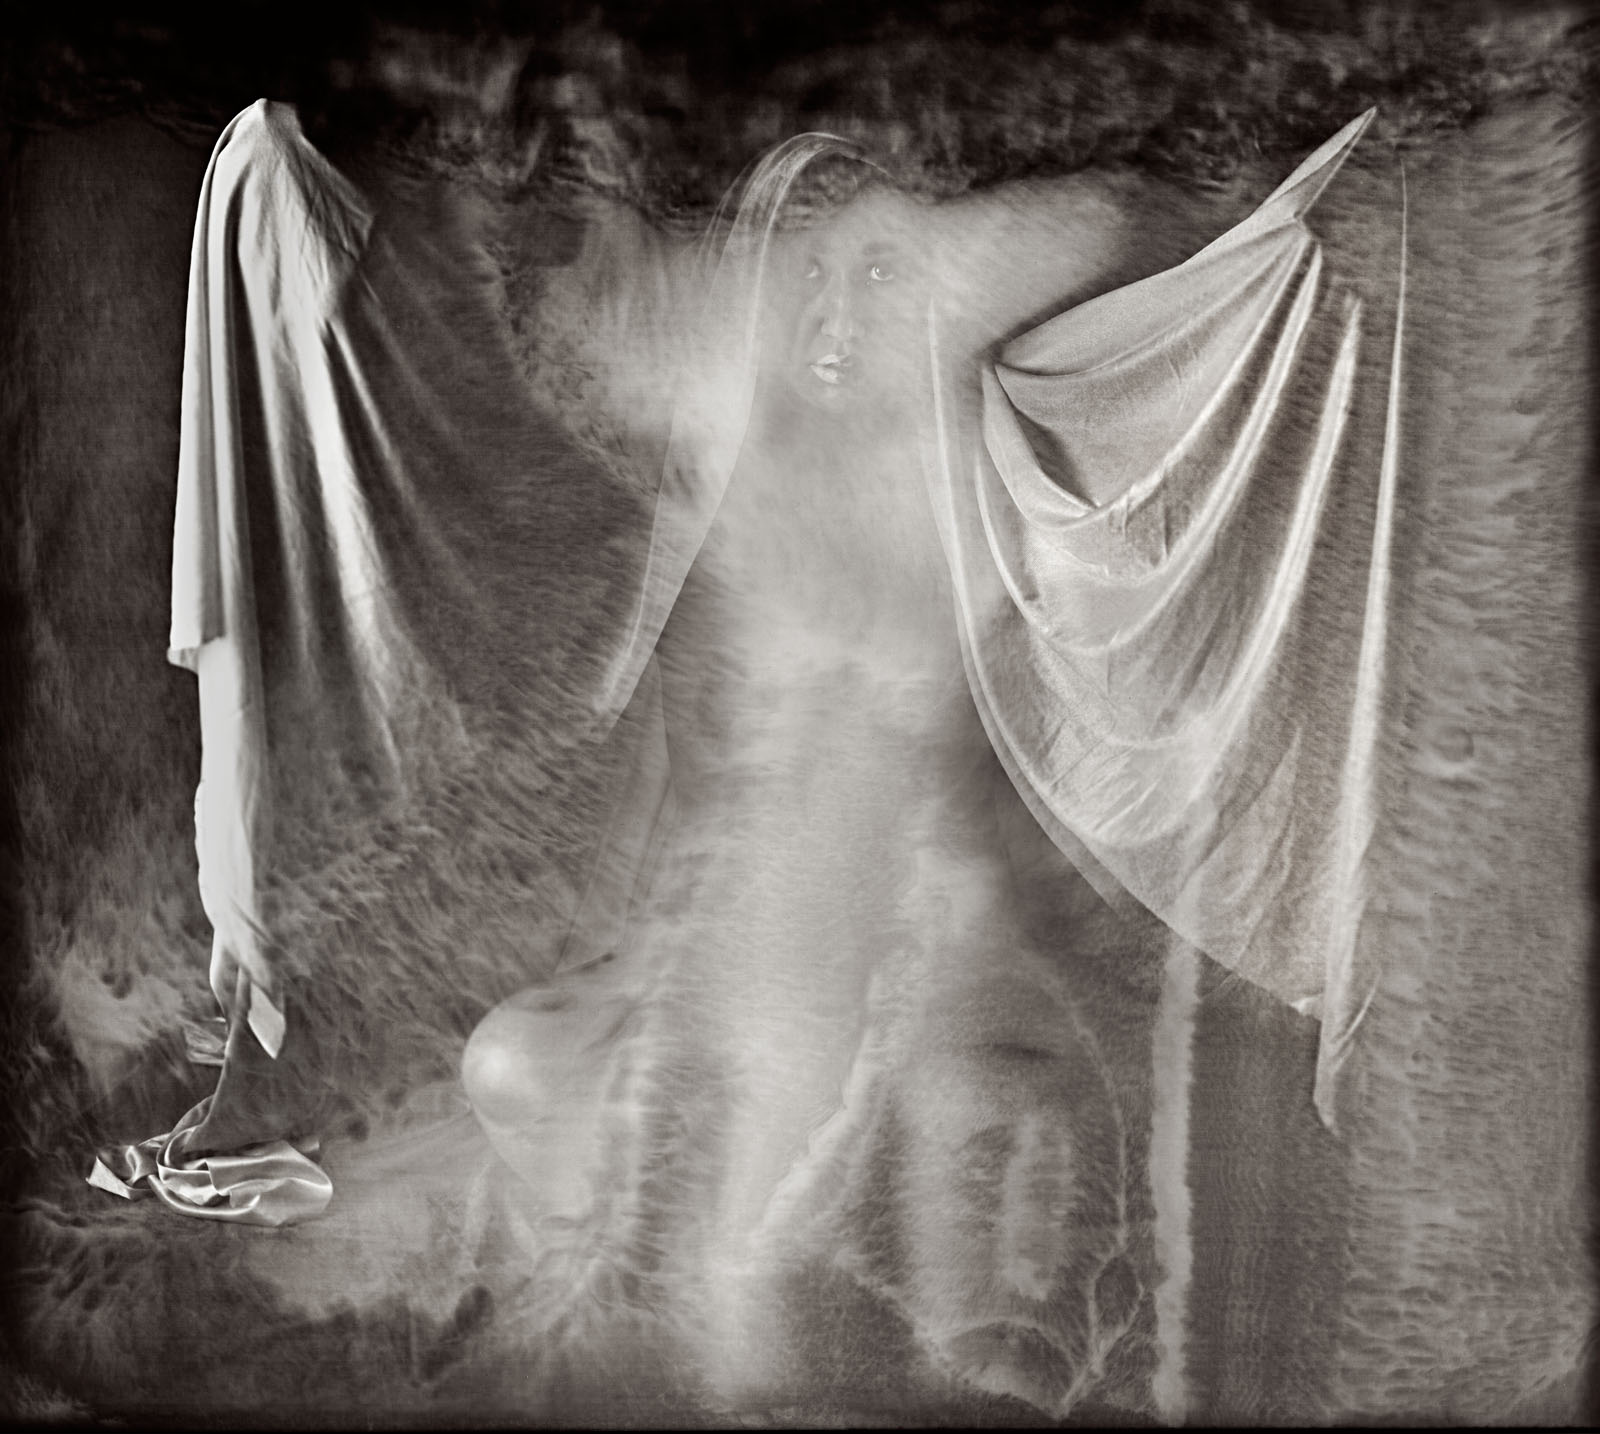
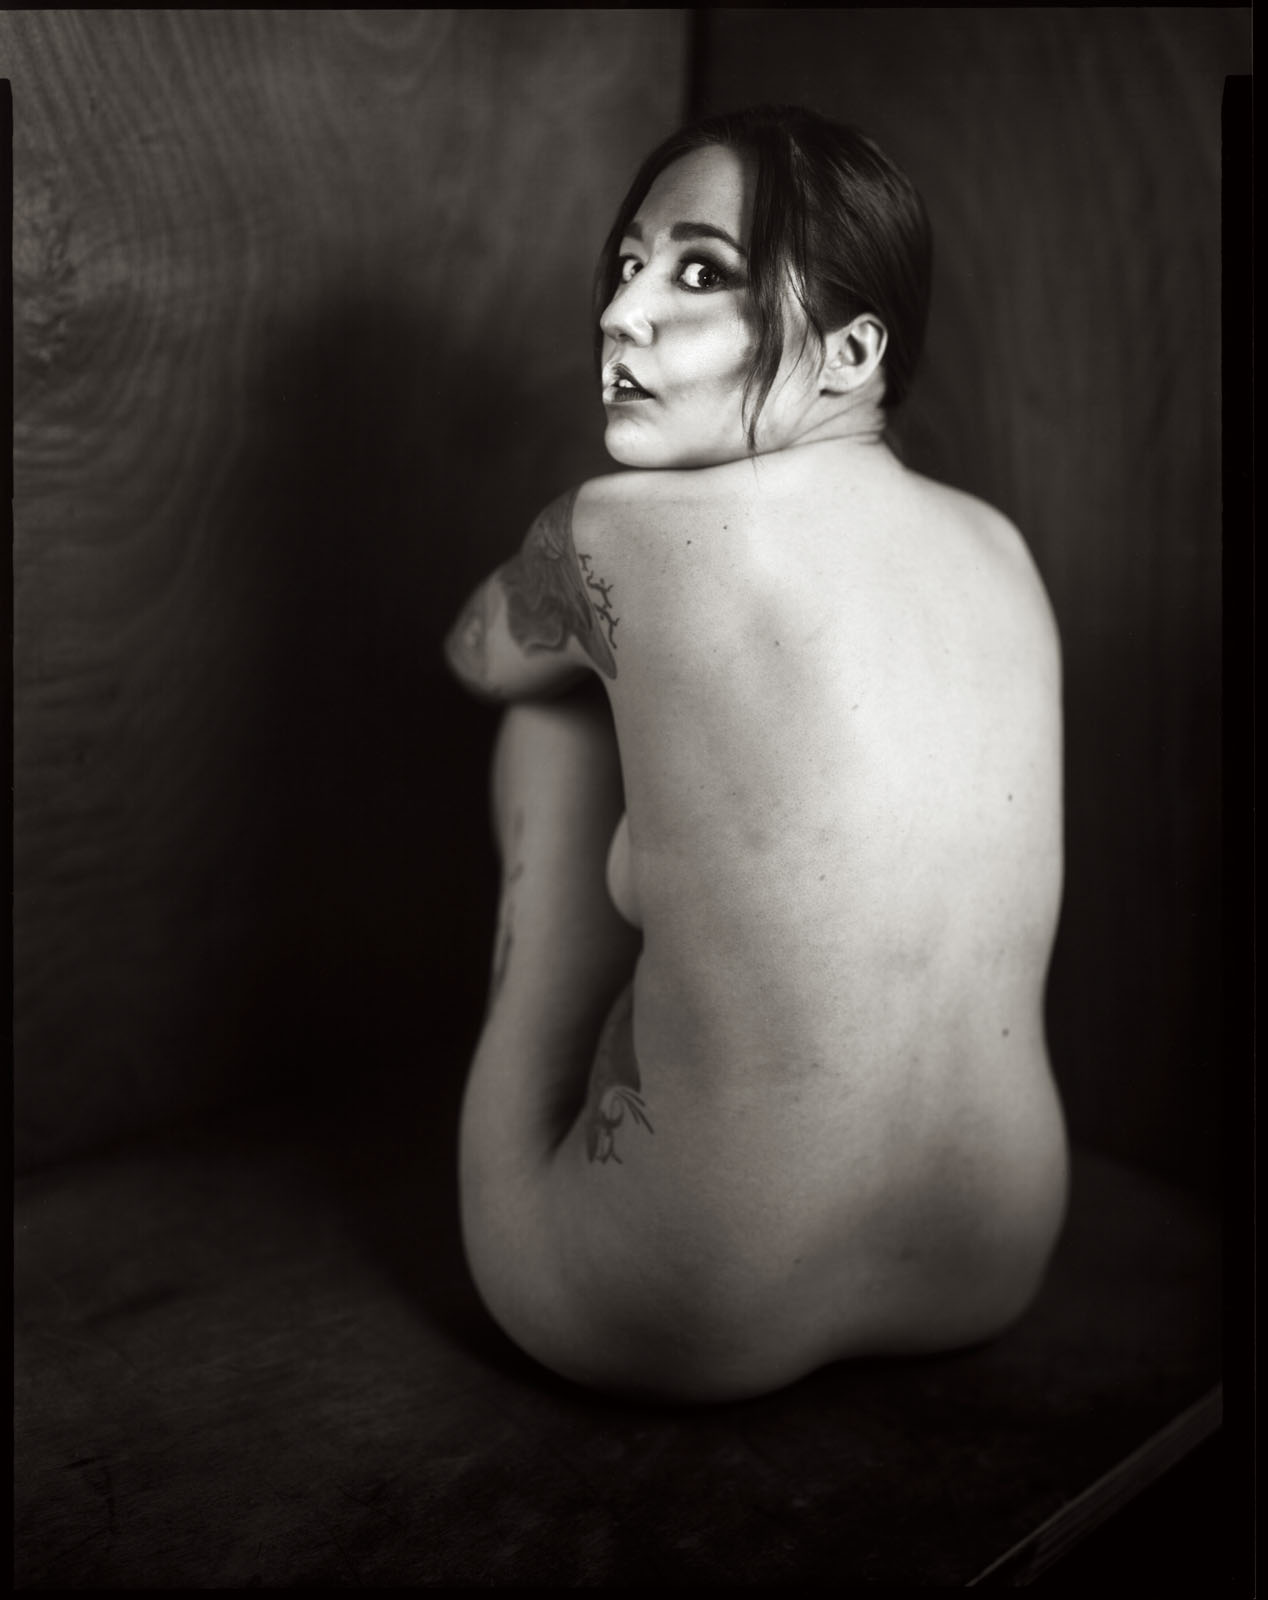
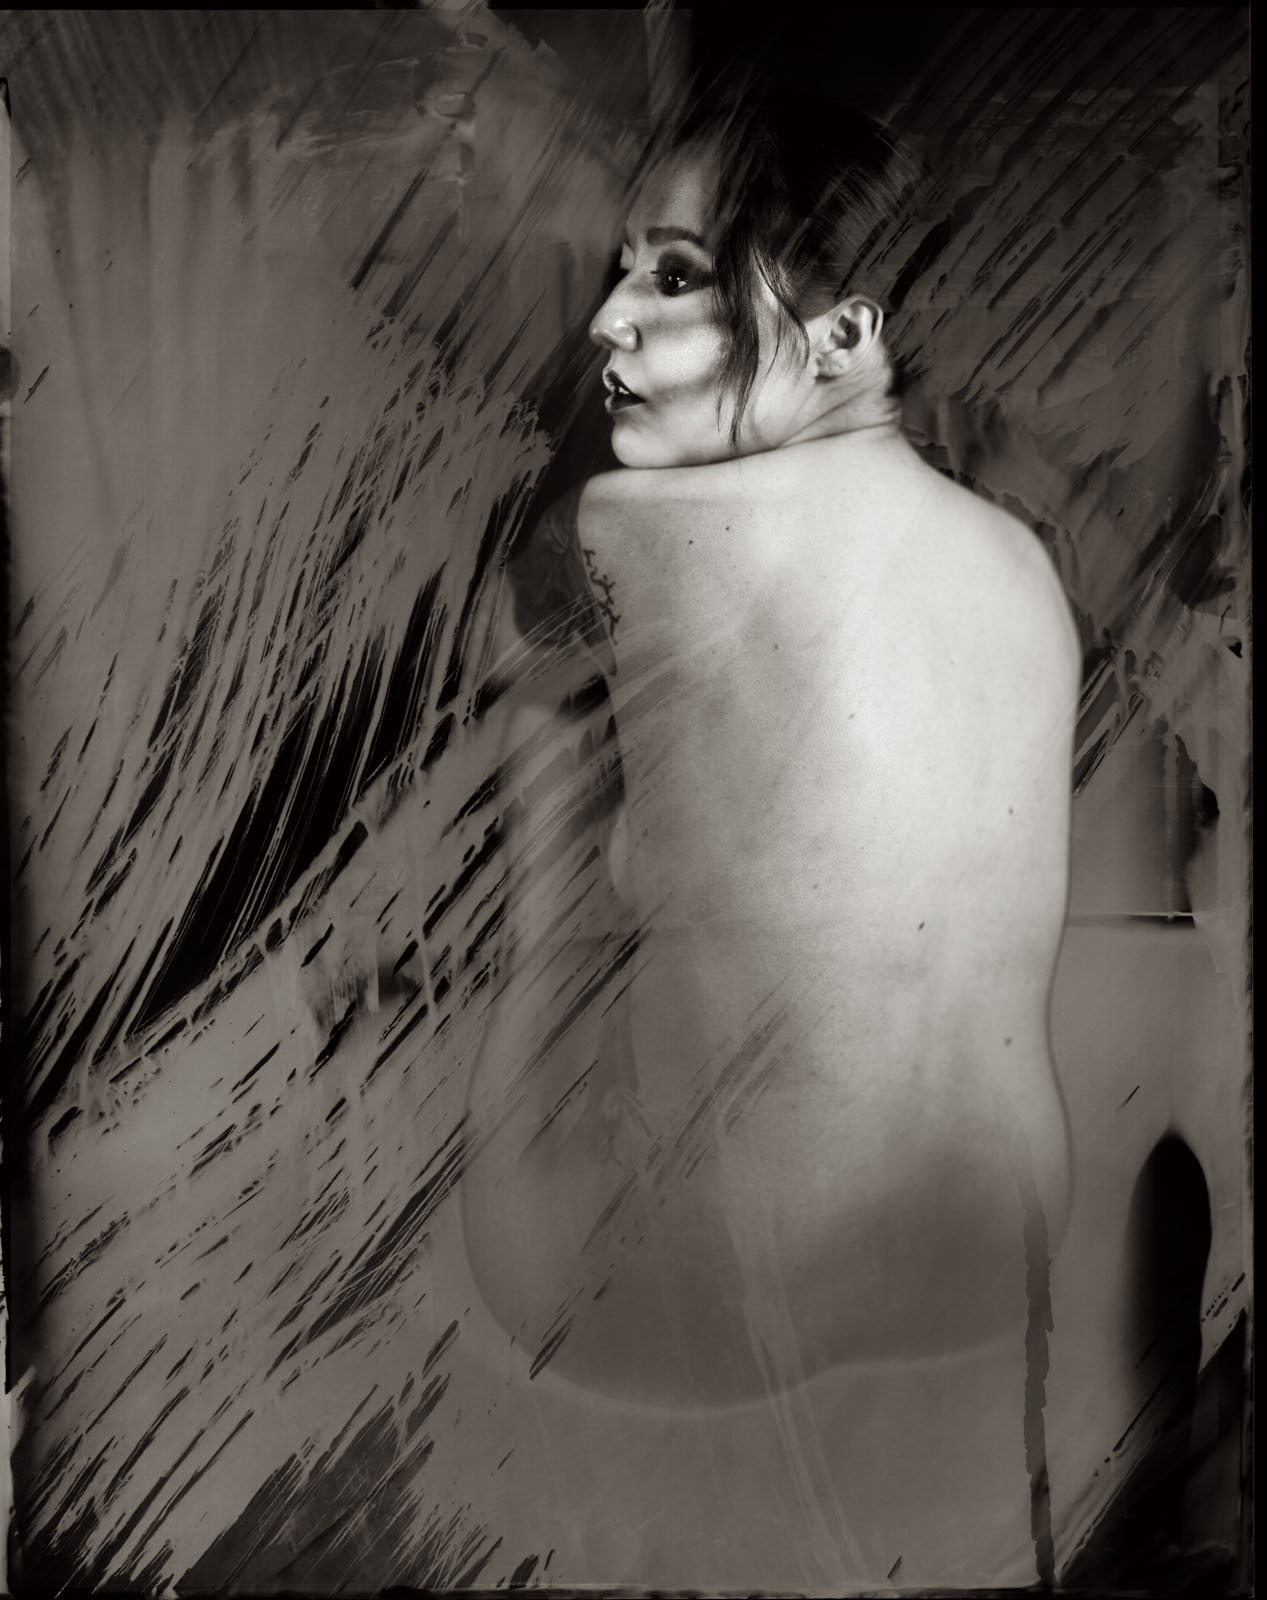
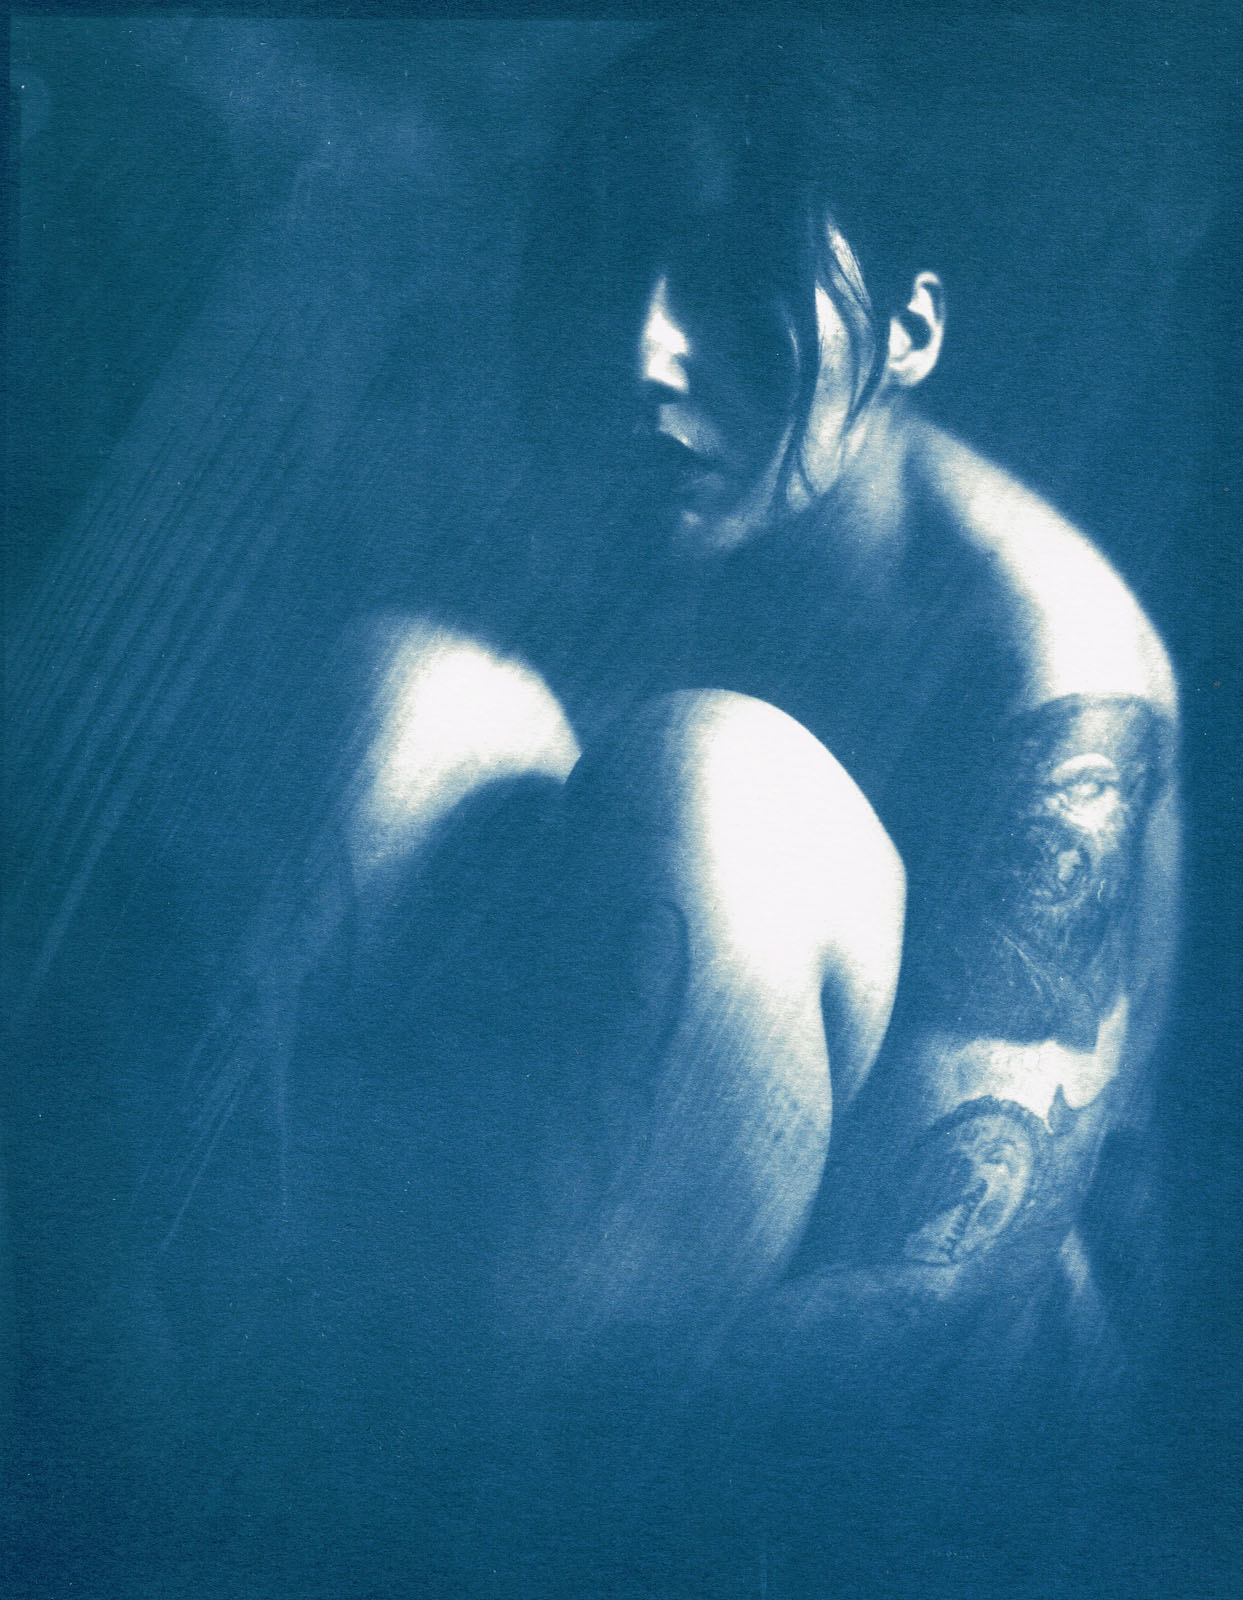
Cassie #14 from Courting Chaos
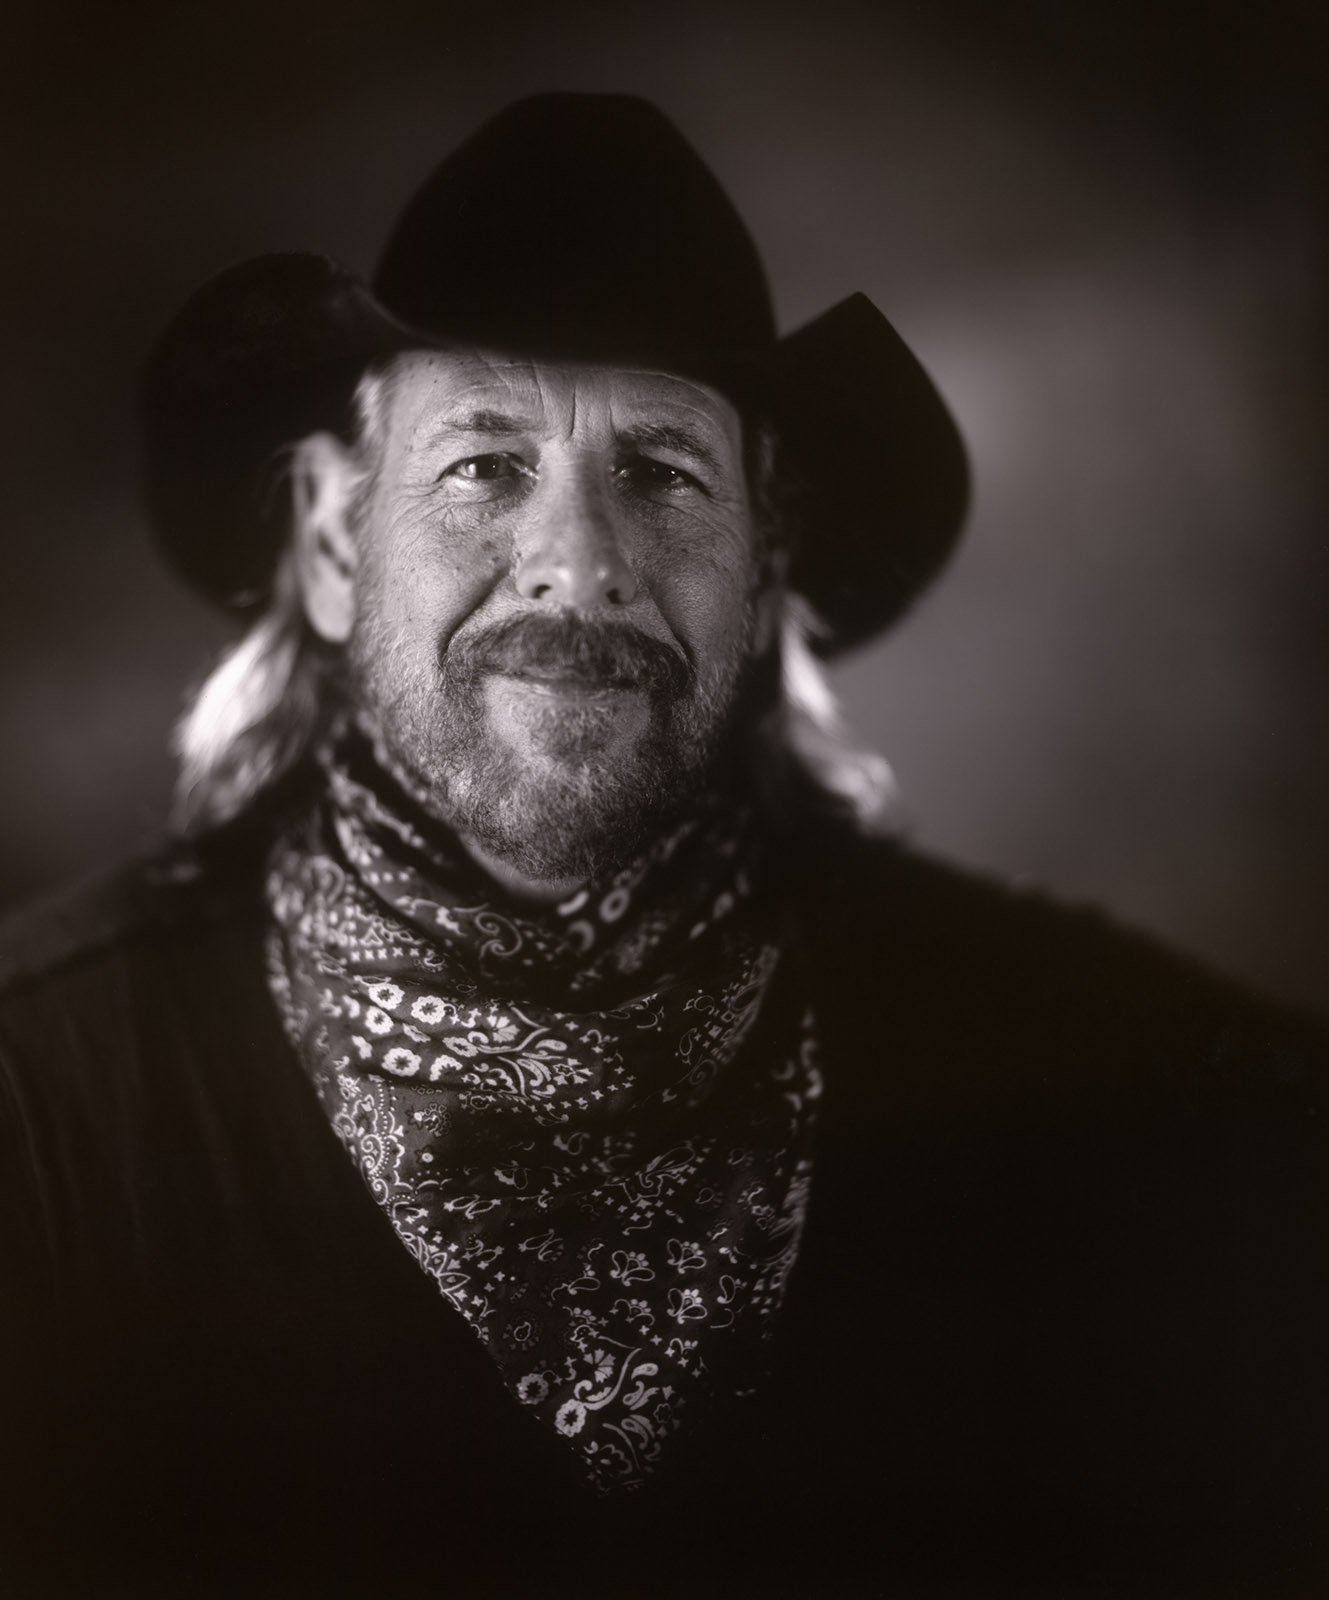
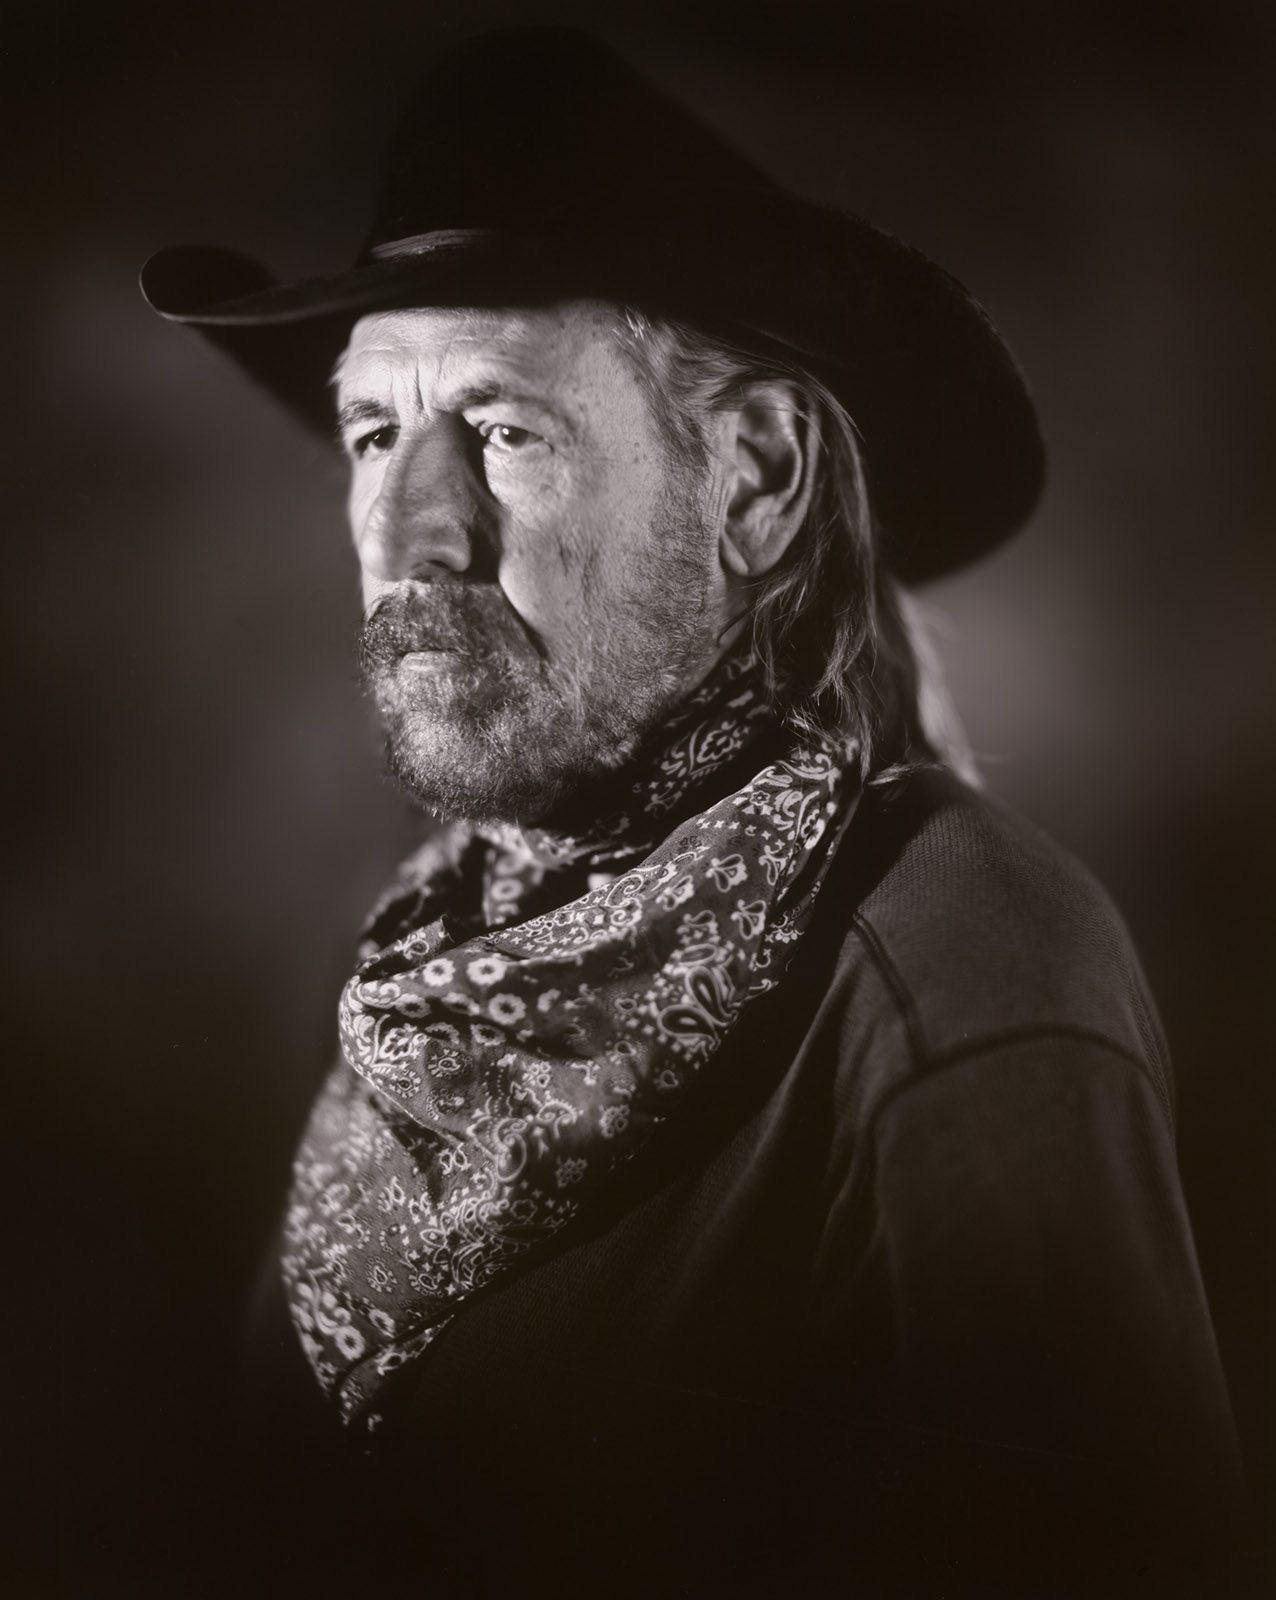
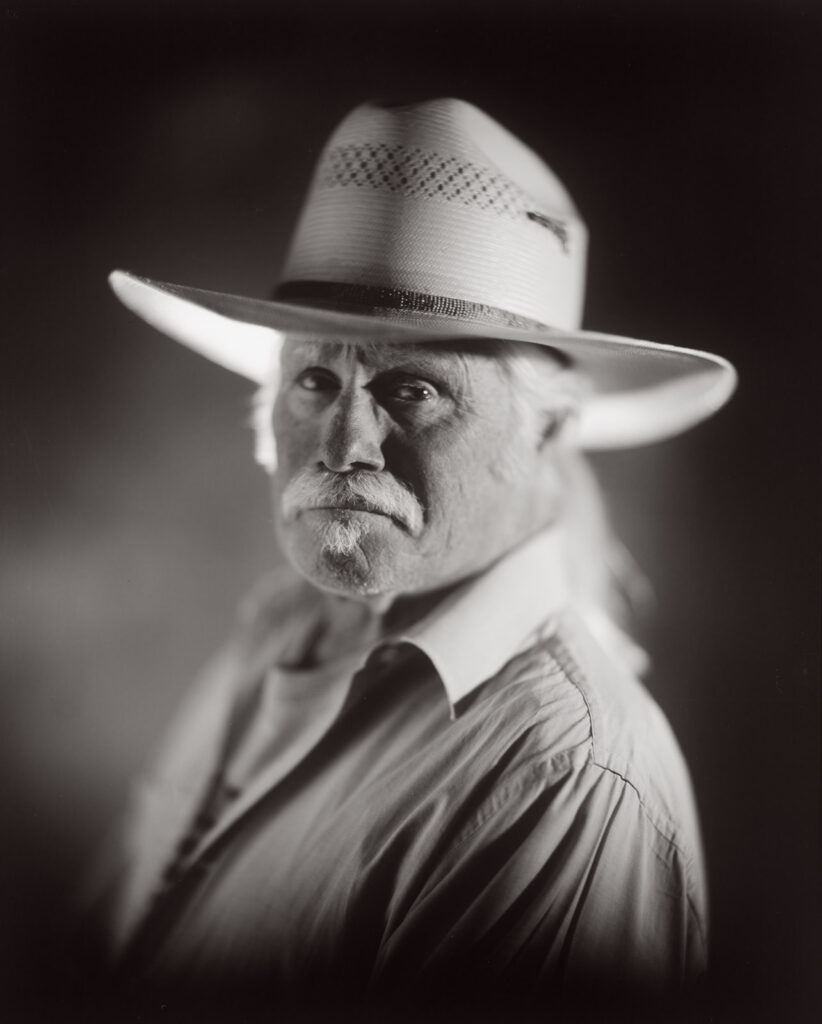
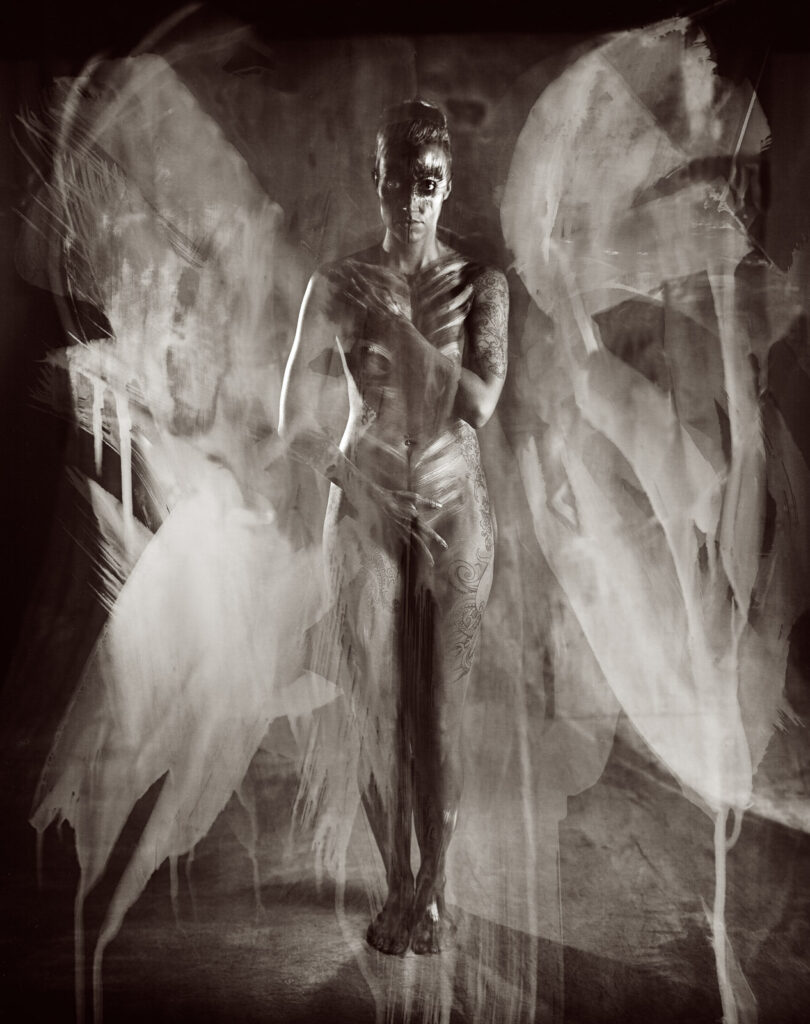
I am writing this as I begin a second project with paper negatives. The first project, Courting Chaos, began with an 11×14 camera and a desire to experiment with solarizing negative. Much of the inspiration came from Man Ray. You can see a lot of this project by starting with this link: https://siskinphoto.com/blog/?p=4397 (some of this project is not “work safe”). Whatever I’m doing now began when a friend sent me a Bausch & Lomb Rapid Portrait lens a couple of months ago. I am very fortunate. The lens is a Petzval design and built in the 1890s, about 135 years ago. For a long time, these sorts of lenses were the big deal portrait lenses. They are incredibly sharp in the center, almost three dimensional. Sharpness degrades quickly at you move out from the center. In addition, they were very fast lenses, especially for large format cameras, so they had almost no depth of field. They create a very compelling portrait. Often people don’t consider that the lens can do a lot more than just a neutral rendition of the subject.
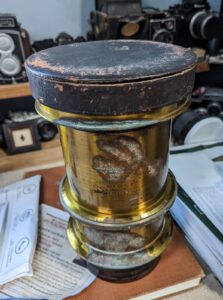
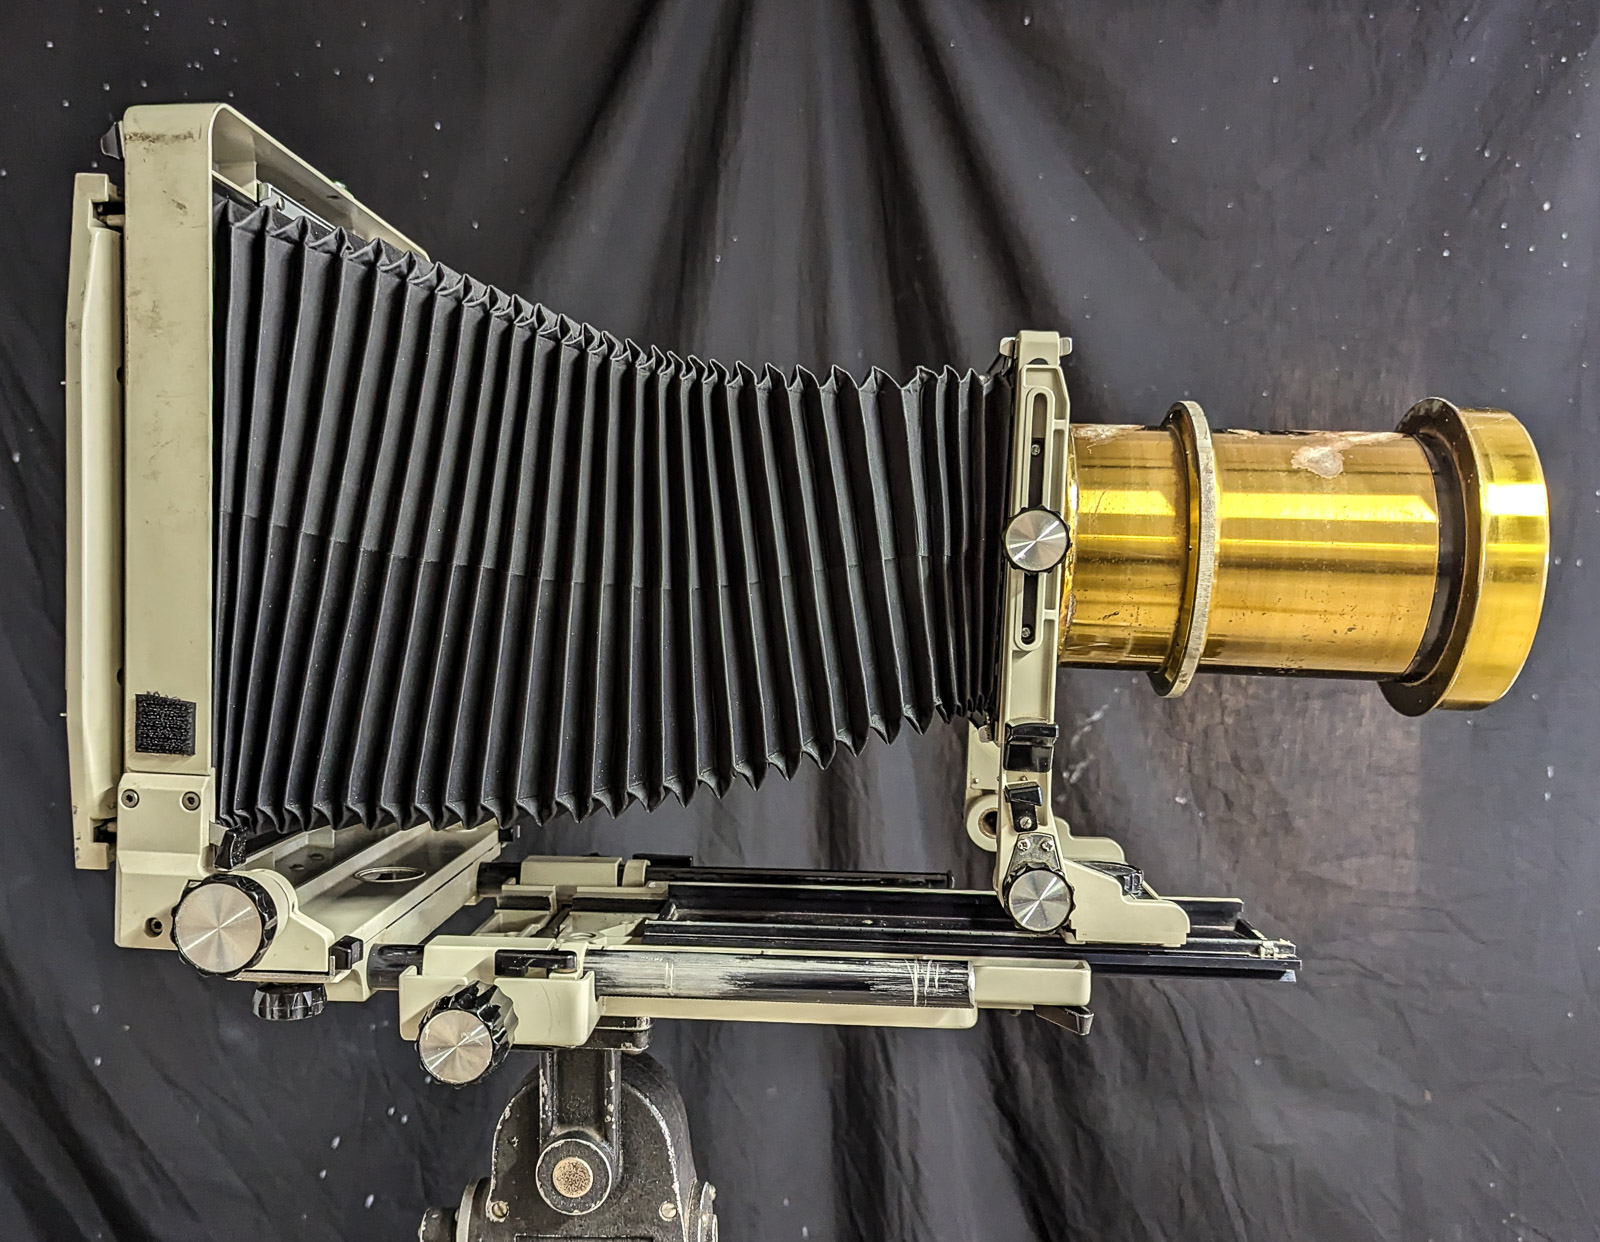
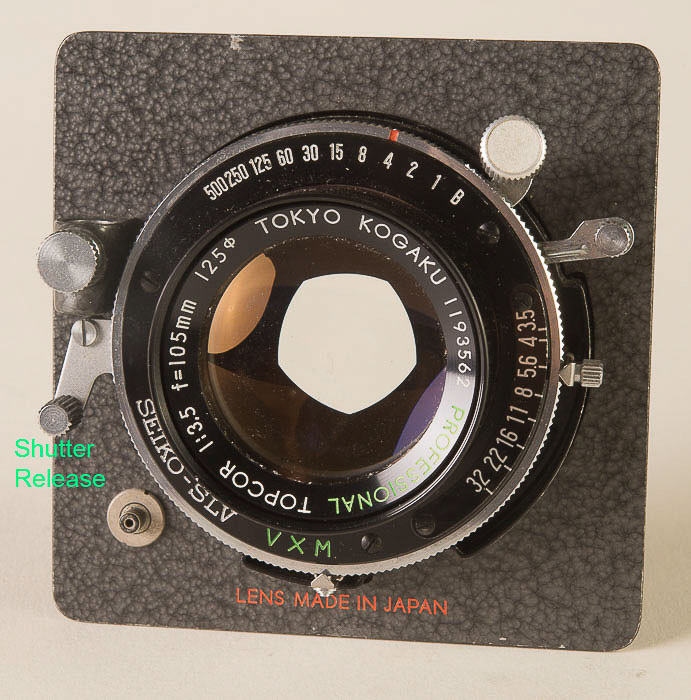
The Bausch & Lomb Rapid Portrait Lens
The Petzval was designed in 1840, just after Daguerre and Fox Talbot introduced methods of making photographs. Cameras existed before photographic materials. They were used as drawing aids. Of course, they had lenses, but, since an image for drawing could be re-focused and shifted, the lenses for these cameras weren’t suitable for making photographs where good focus had to cover most of the photographic plate. The Petzval was the first lens designed by mathematical computation rather than experience and experiment. Joseph Petzval was loaned several mathematicians by Archduke Louis of Austria, commander of artillery. The artillery was one of the few places where there were any people who could do the trigonometric calculations necessary for lens design. In addition to being incredibly sharp in the center of the image, theses lenses also had extremely high light transmission; they were “fast.” Even today this is one of the fastest lenses, for large format cameras, I have ever owned. I have owned a whole lot of lenses.
I should point out that there are some modern lenses, primarily from a company called Lomography, which are inspired by Petzval’s design. Of course, Petzval never made lenses designed to cover the small formats of today’s digital cameras; all of the original lenses were designed for cameras which shot plates that were quite large: a whole plate was 6.5×8.5 inches. Thus, these modern lenses are more inspired by than copies. Petzval lenses were not made for cameras much after 1900, but they were used for projecting images: movies and slides. Because they are fast lenses, and projection lenses are longer than shooting lenses this old formula worked well for this application.
These old lenses are quite prized by modern photographers making portraits with large format cameras. Also, modern photographers who make tintype and other wet plate images, the techniques used between the 1850s and the 1880s, are always looking for Petzval lenses. I am very fortunate to have been given this lens.
III
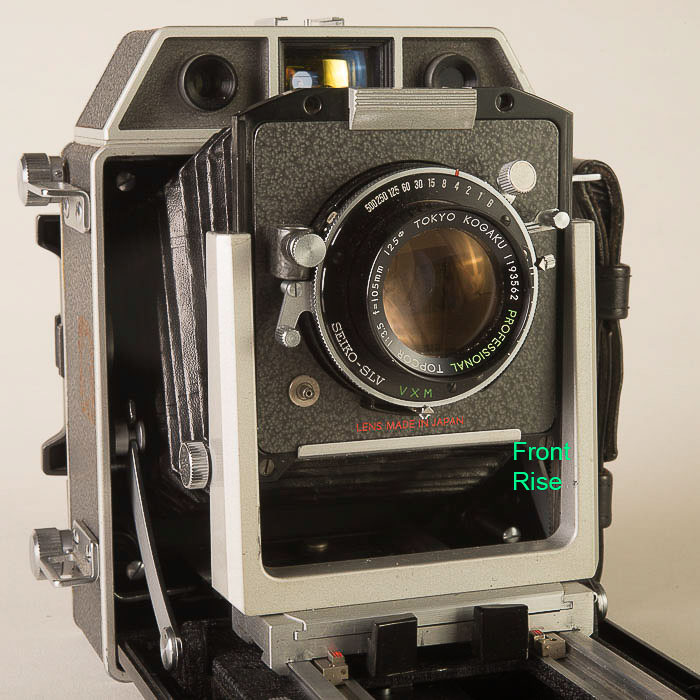
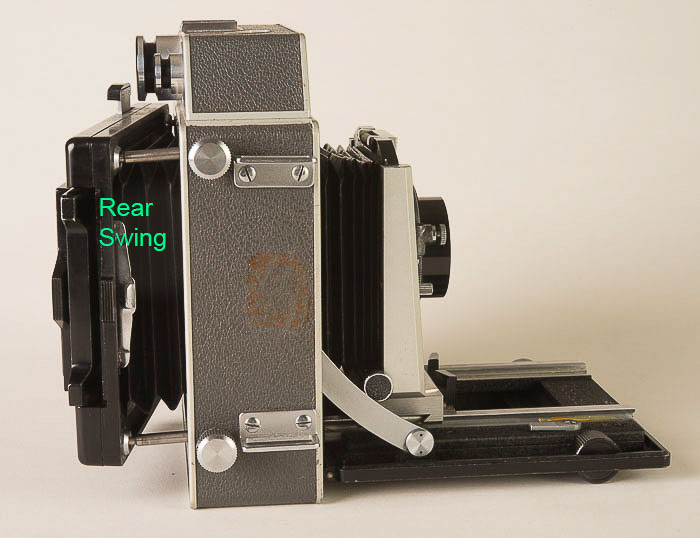
In order for any camera, modern digital or old large format, it needs to accomplish several things. It must focus light, which can be achieved with something as simple as a pinhole or with a complex modern zoom lens. While a pinhole doesn’t have to be in a particular position to achieve good focus, more complex lenses must be positioned quite precisely. A camera must hold the sensitive material in a the right position as well, or the focus will be degraded. A camera must control the amount of light which hits the sensitive material. This is achieved by controlling how much light comes through the lens and by how long the lens is open. The amount of light coming through the lens is controlled by a diaphragm in the middle of the lens. This control is usually measured in “f-stops.” These numbers are often confusing to new photographers. The amount of time the film or sensor is exposed to light is usually controlled by the aptly named “shutter.” When photography was beginning, since the sensitive materials were not very sensitive a lens cap could easily manage the exposure time. Modern cameras will generally have shutter speeds between several seconds and something as short as 1/4000th of a second. A camera must also block any stray light, light which doesn’t come through the lens, from exposing the film.
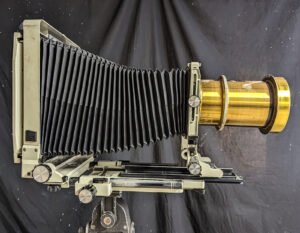
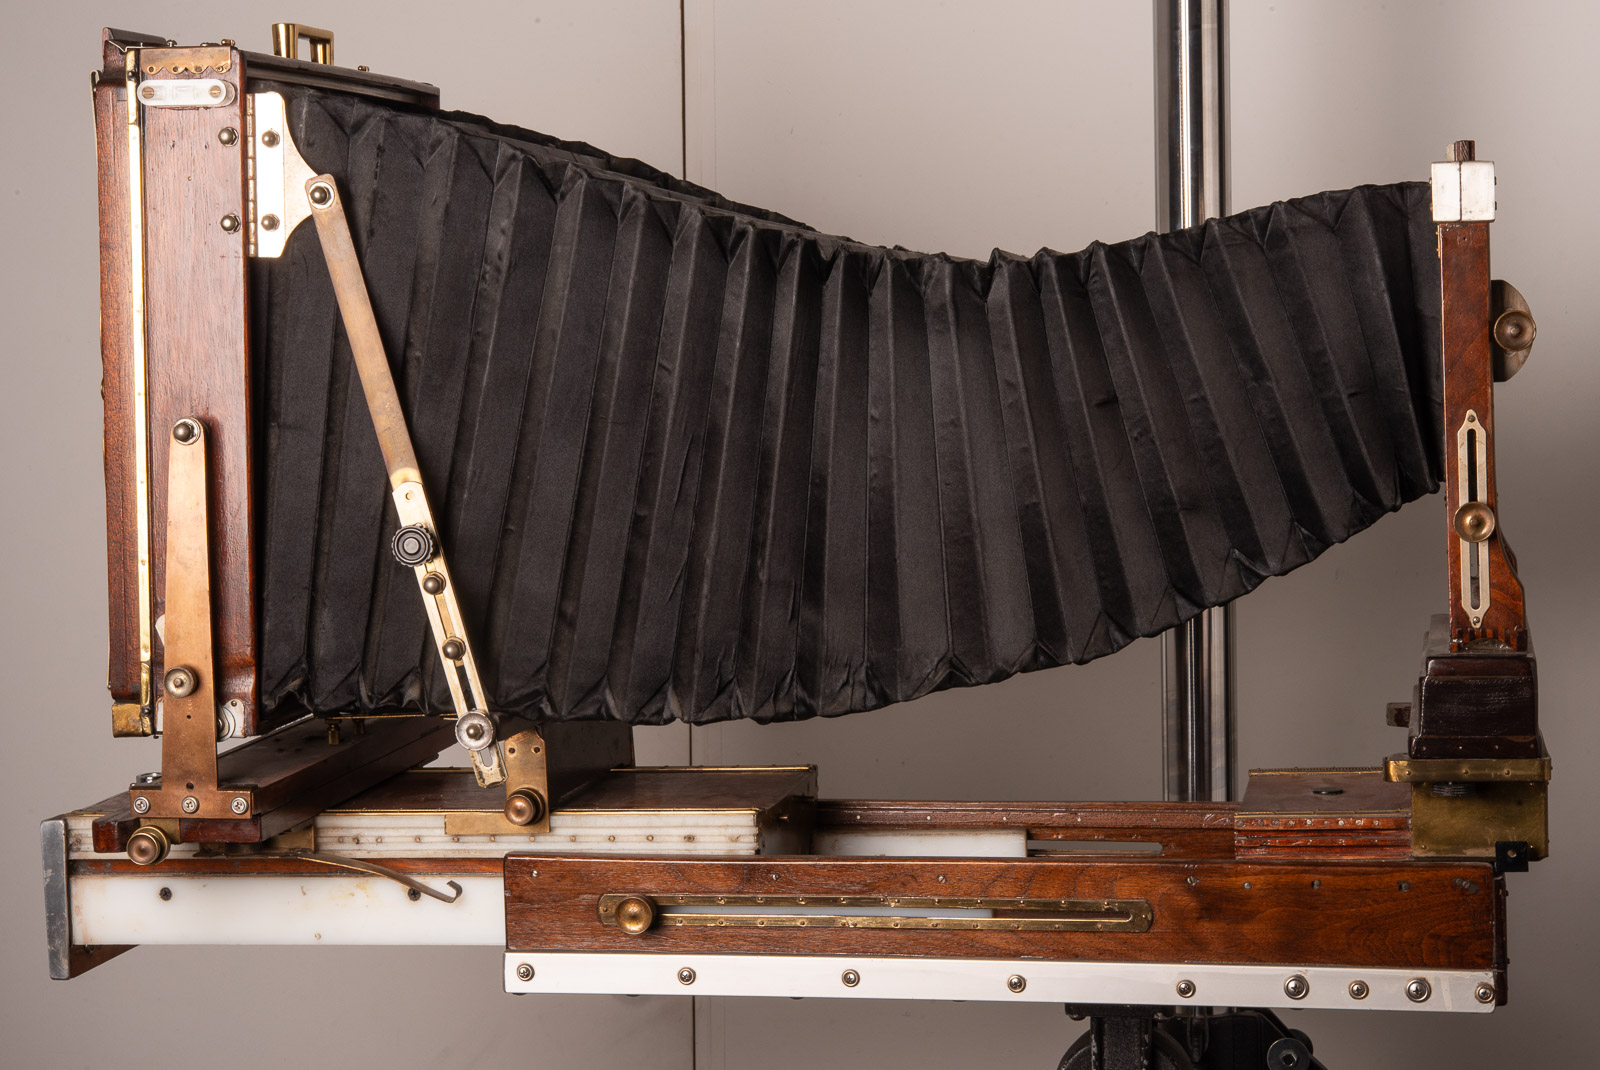
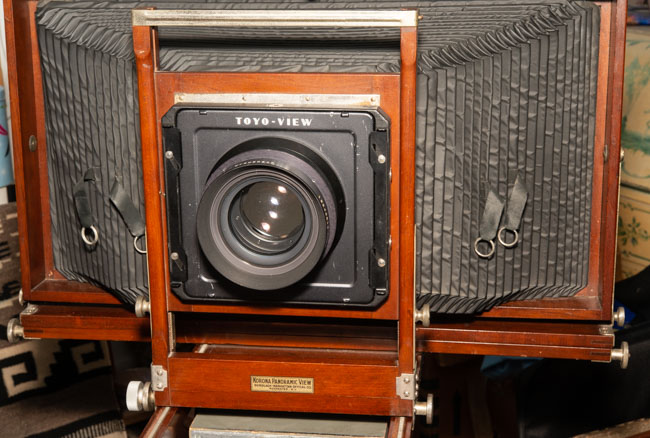
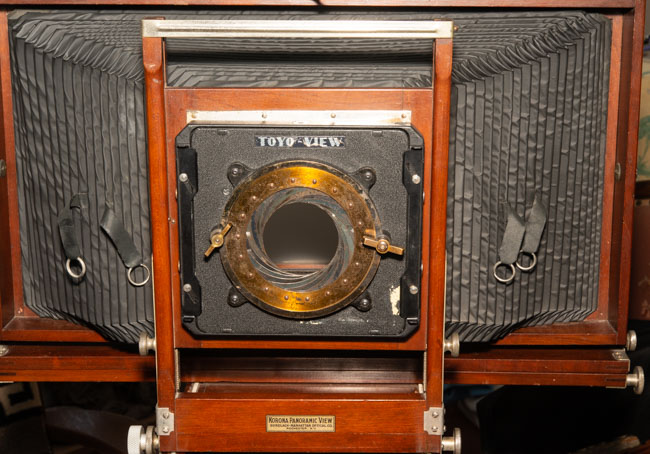
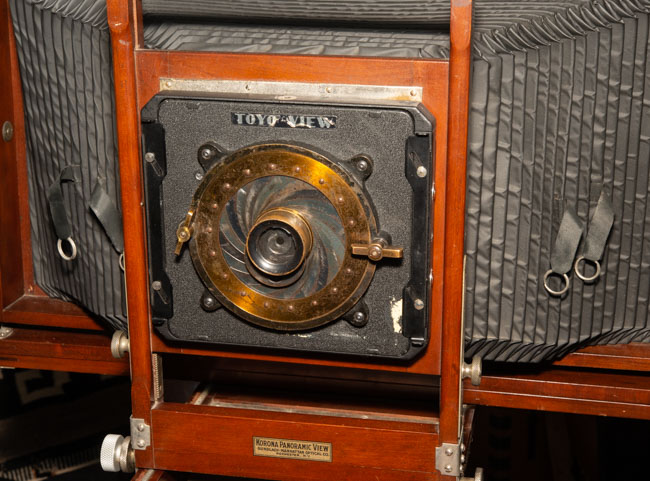
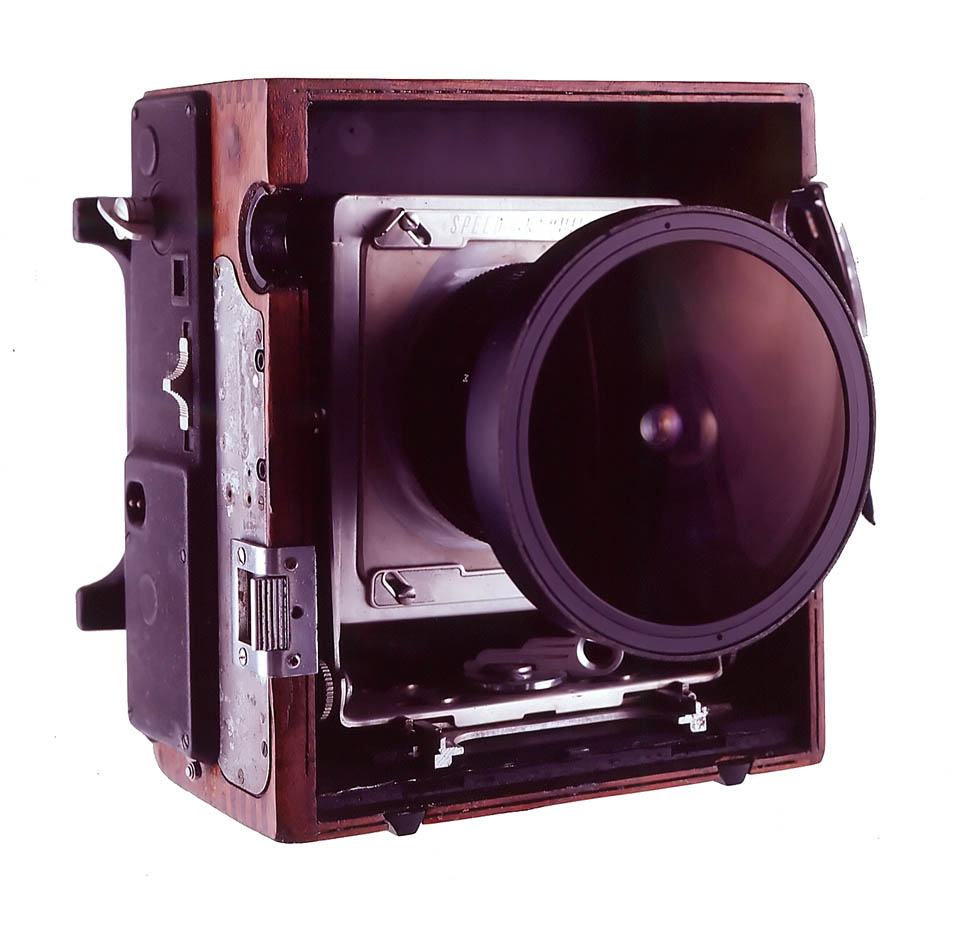
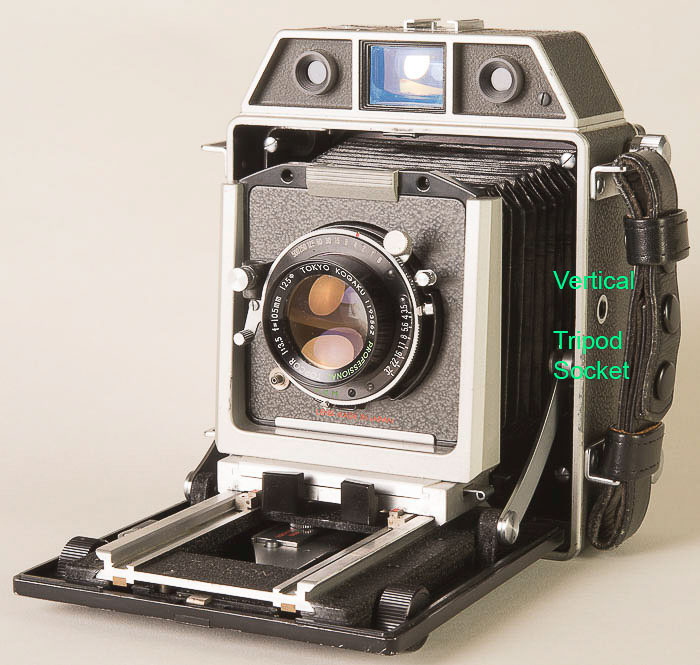
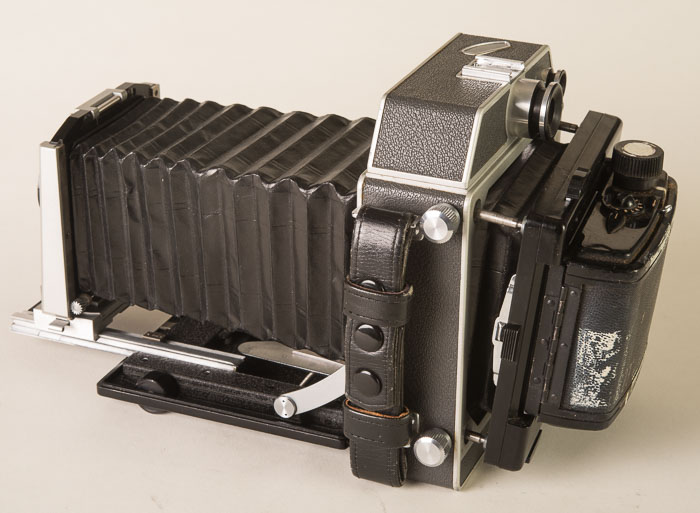
The Petzval mounted on my 8×10 Toyo. This is a camera from the 1980s
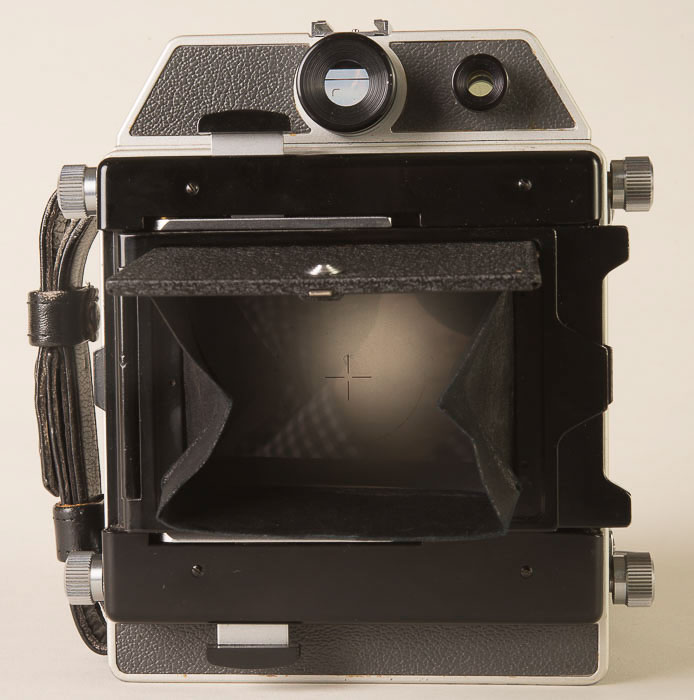
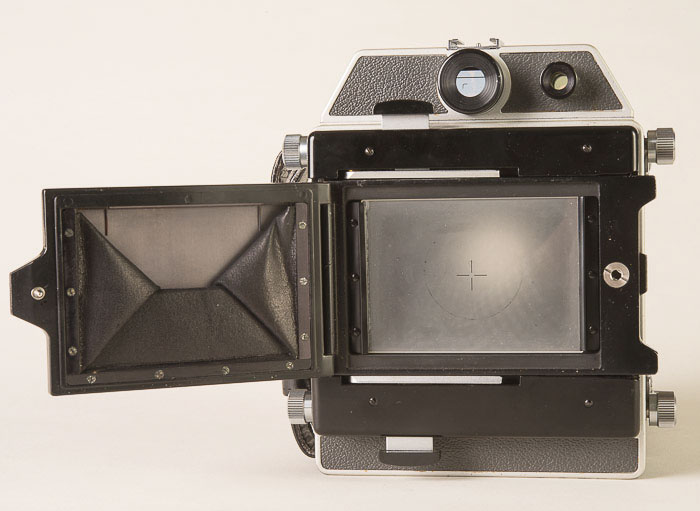
A camera from the 19th century generally had a ground glass back to focus the lens. The plate was in a holder which went the ground glass had been. The camera often had bellows between the film holding section, back standard, and the front standard, where the lens was mounted. Either the front or back, or both, could be moved to achieve correct focus. The diaphragm was most often in the middle of the lens, as a part of the lens. Sometimes a flat brass plate with a hole was used instead of a variable diaphragm. And the photographer might use his or her hat as a shutter. By the end of the 20th century all lenses designed for shooting had, in addition to a diaphragm, a leaf shutter. This shutter usually had speeds from 1 second to about 1/500th of a second. Photographers needed these shutters because, as mentioned, film is at least 50 times more light sensitive than the wet plate materials photographers were using when my Petzval was made. While I might make a 1 hour exposure, it was unusual to make an exposure longer than ¼ of a second.
IV
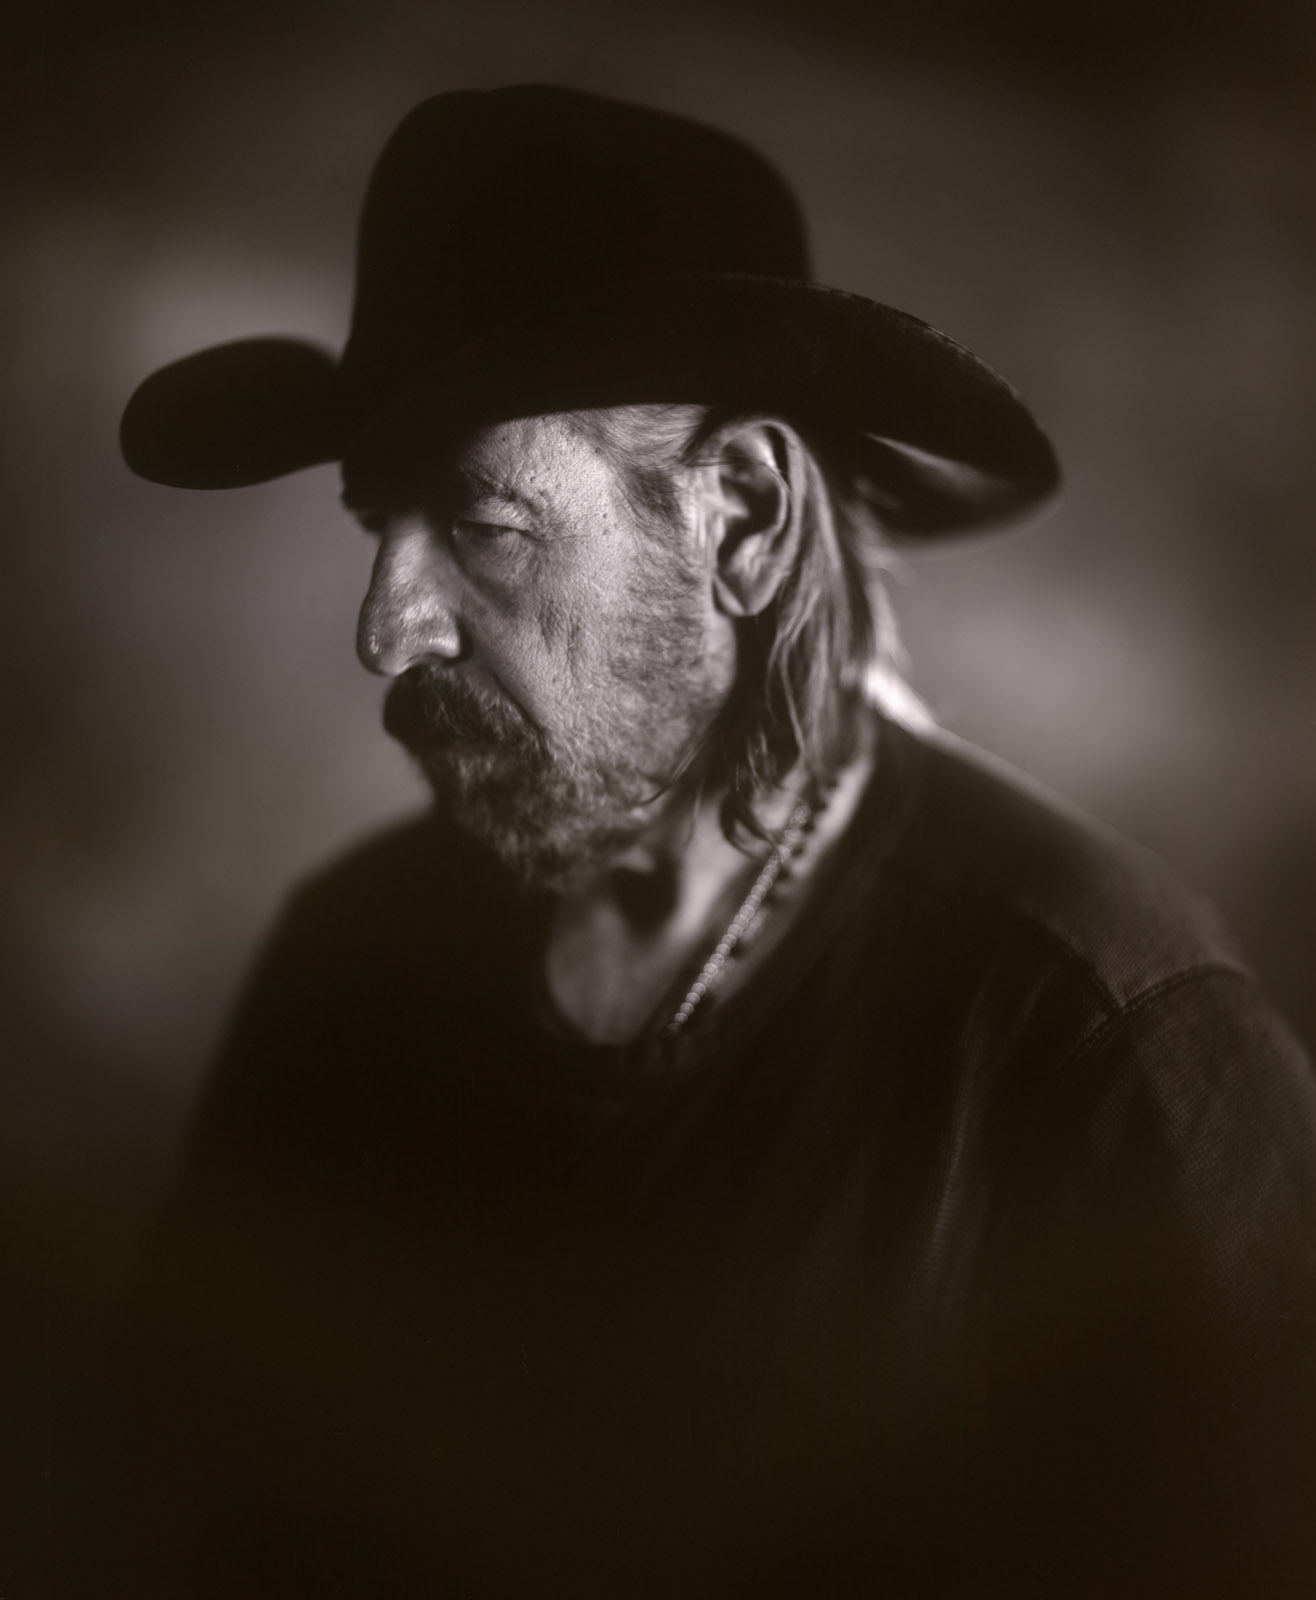
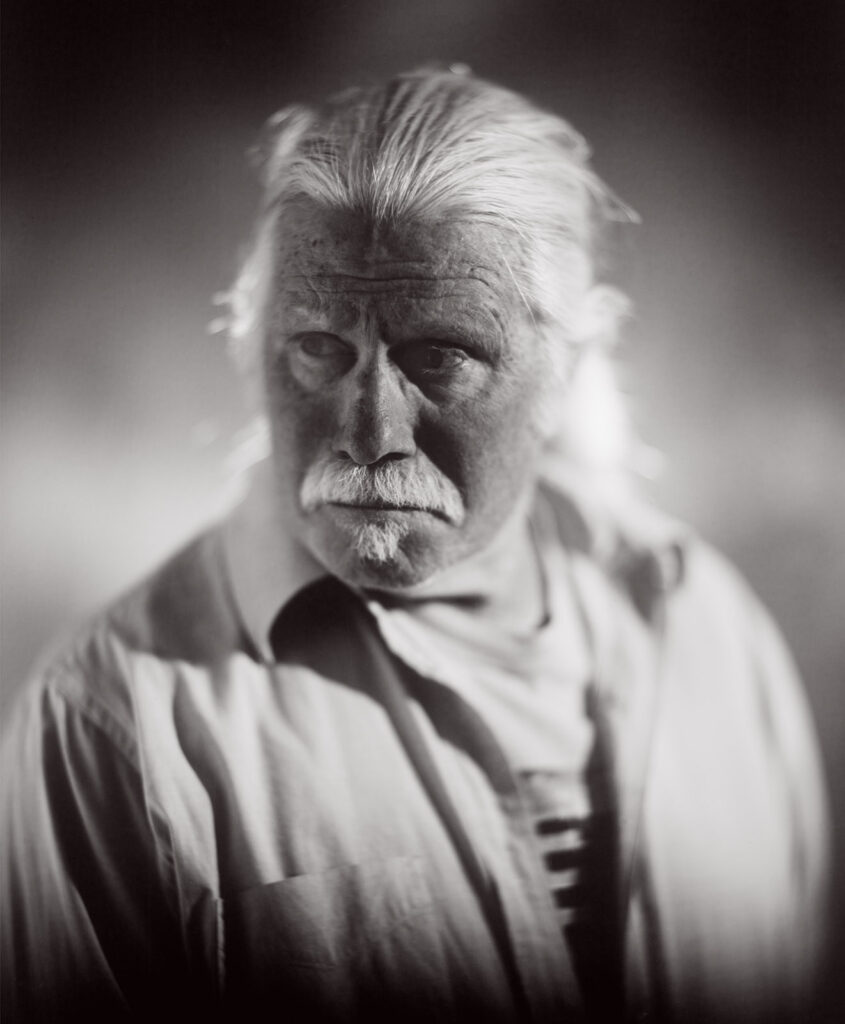
Perhaps all writing of done so far will make the problem clear to some readers. Certainly a few readers simply haven’t made it this far. The problem is how to actually make a picture with the Bausch Rapid Portrait lens. Often, I’ll read someone’s explanation of how to do a thing and it sounds as though they new exactly how to do a thing before even trying. I wish it was like that for me. First, I have to understand the problem then I begin to work through solutions.

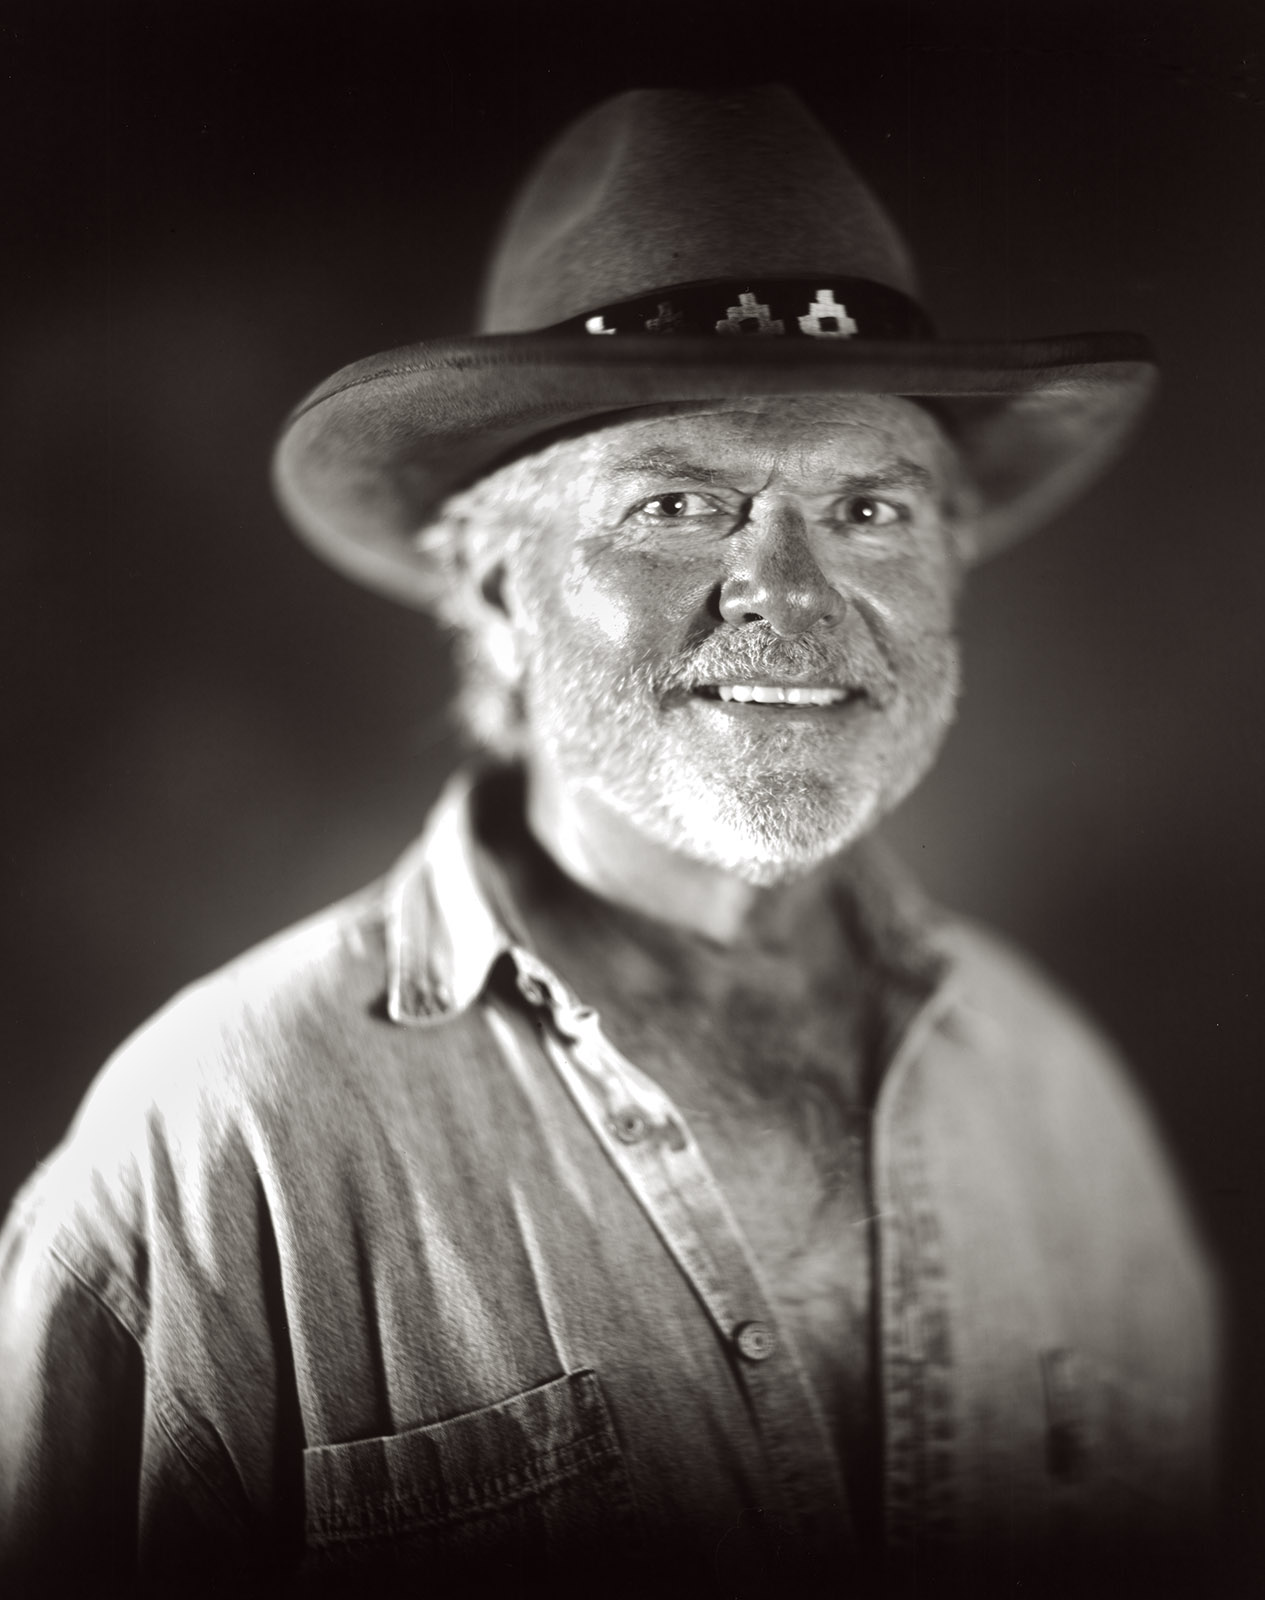
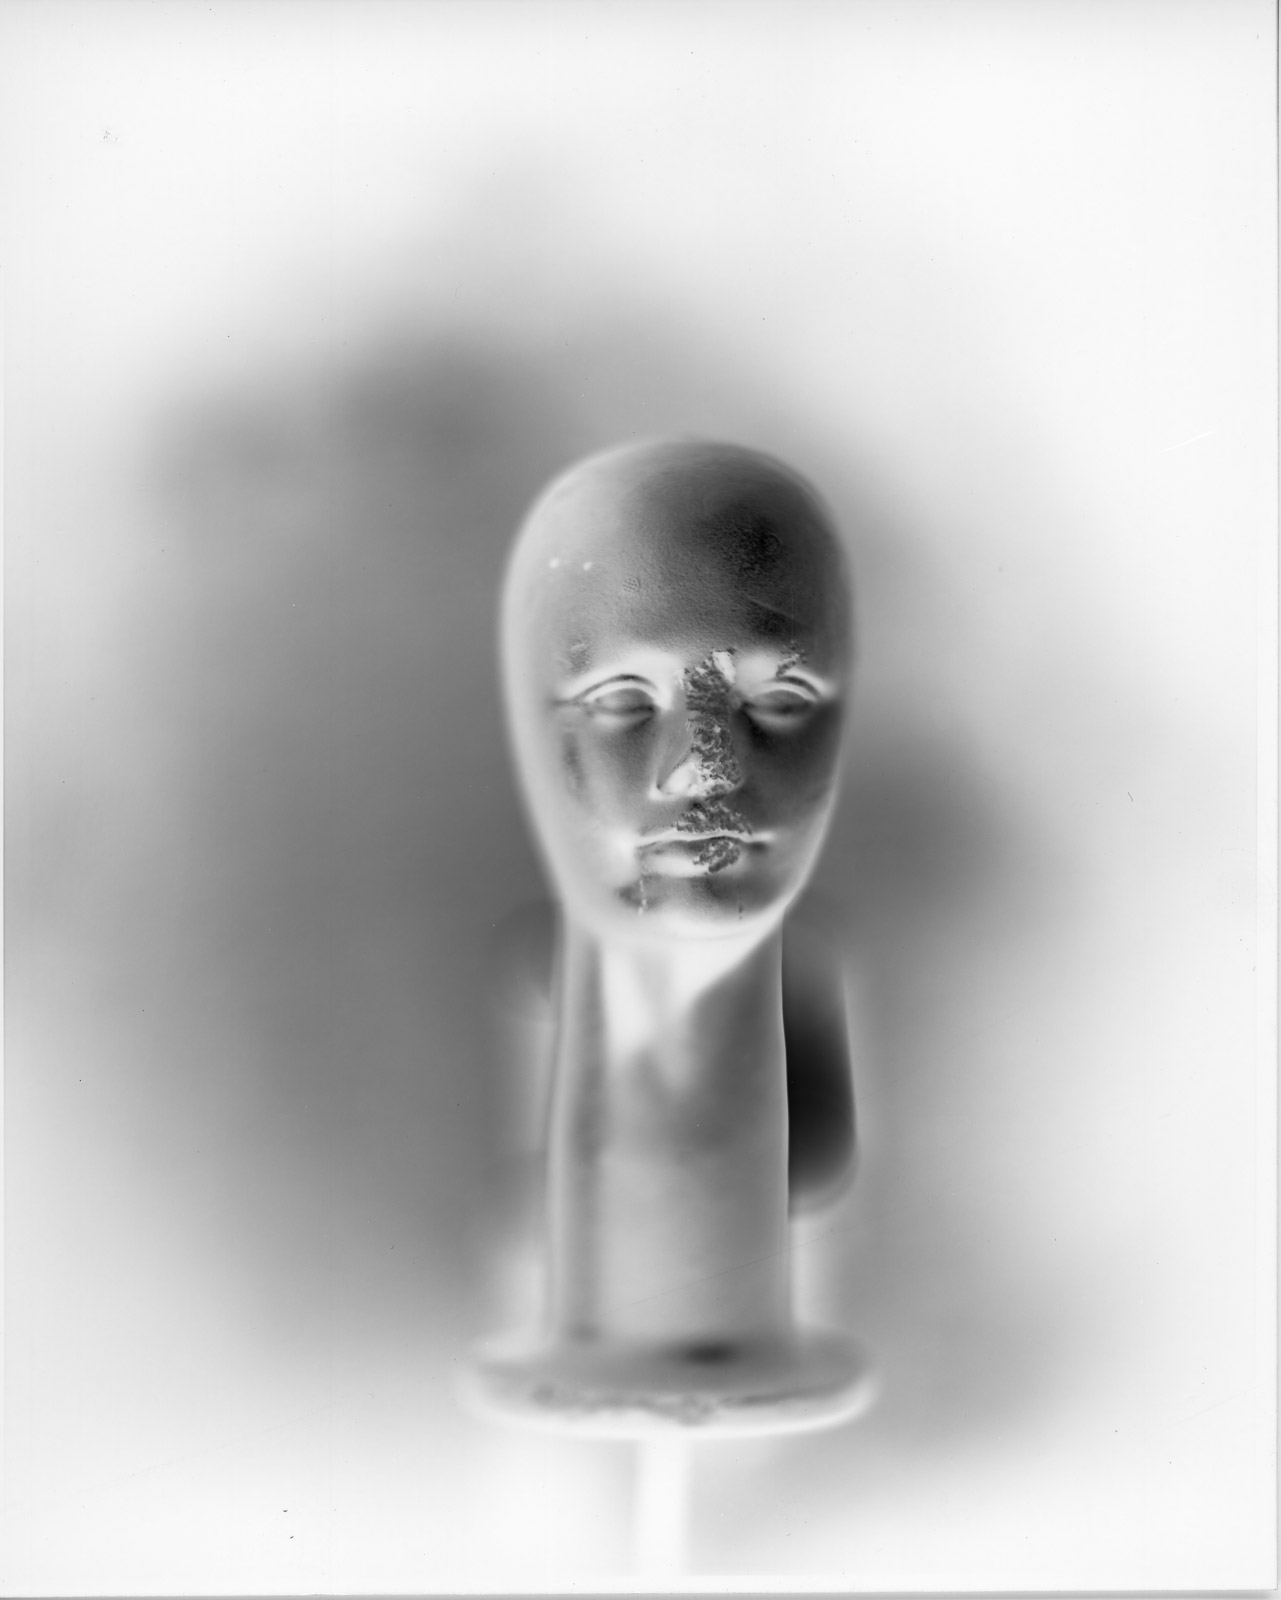
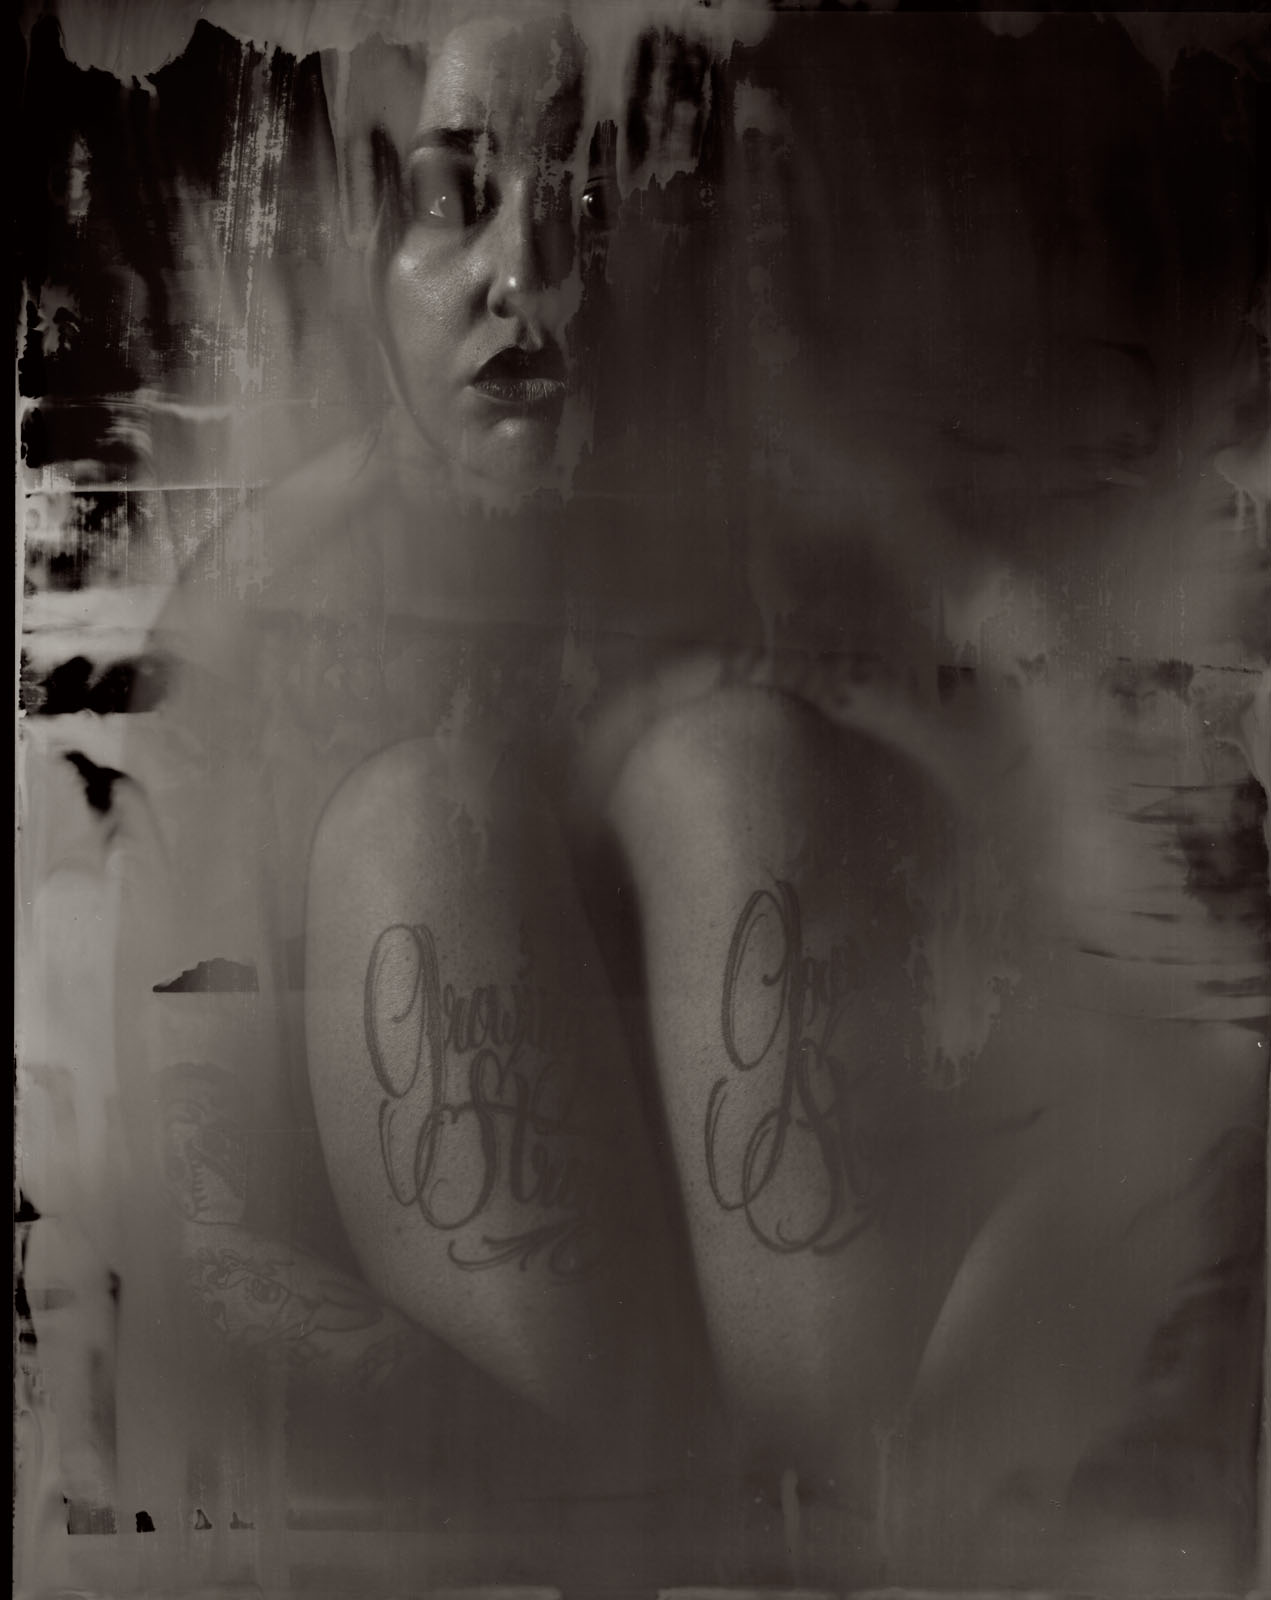
A first test shooting the Petzval. Note that this is the negative
Problem #1
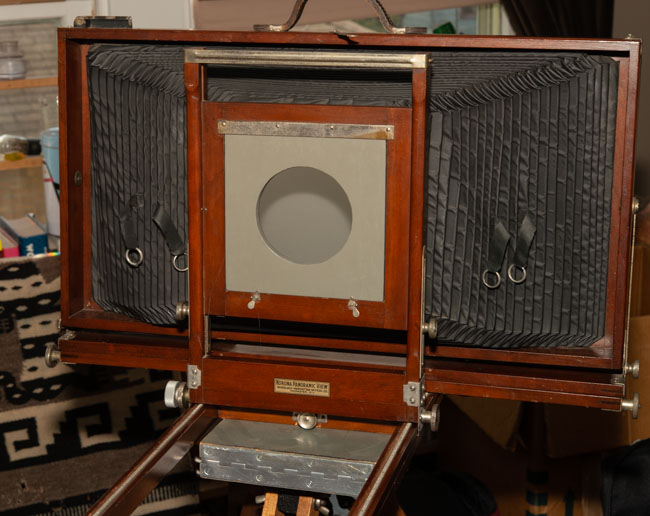
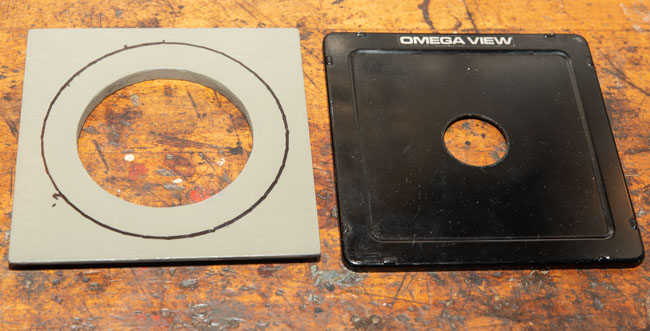
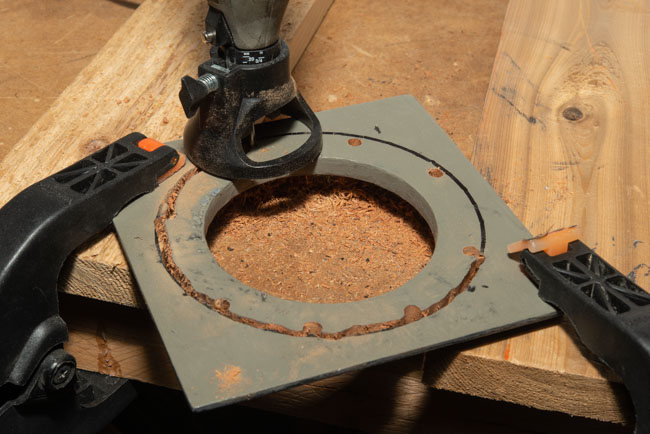
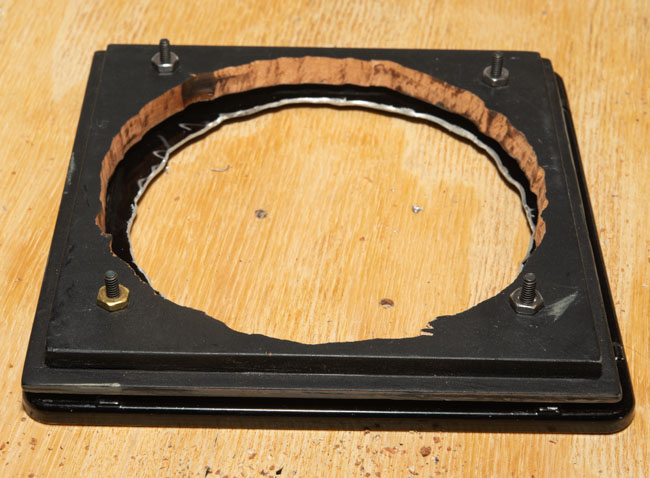
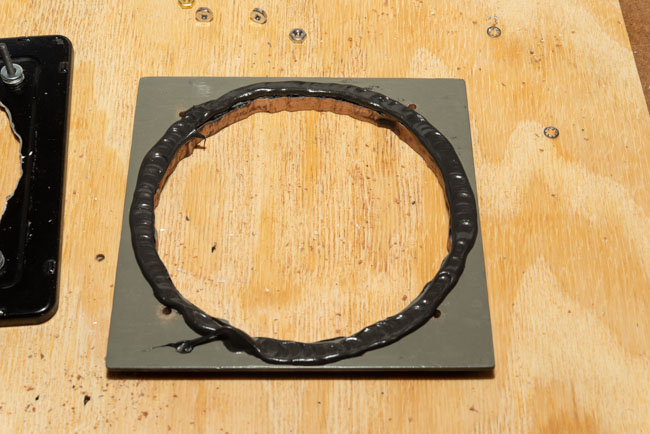
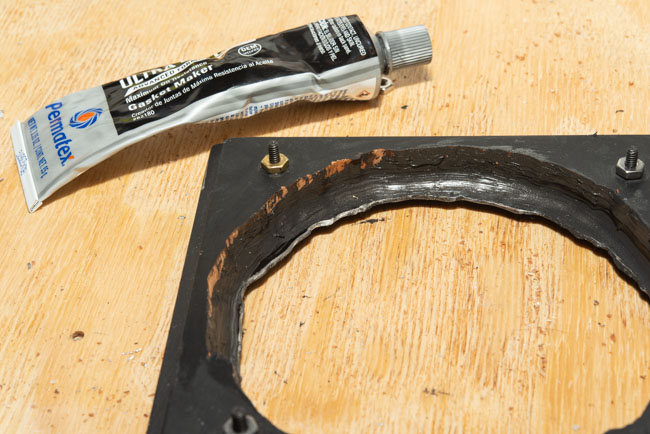
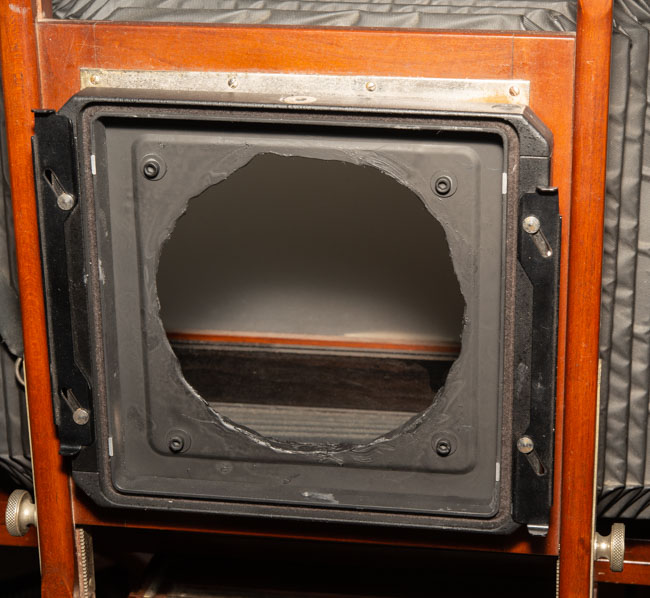
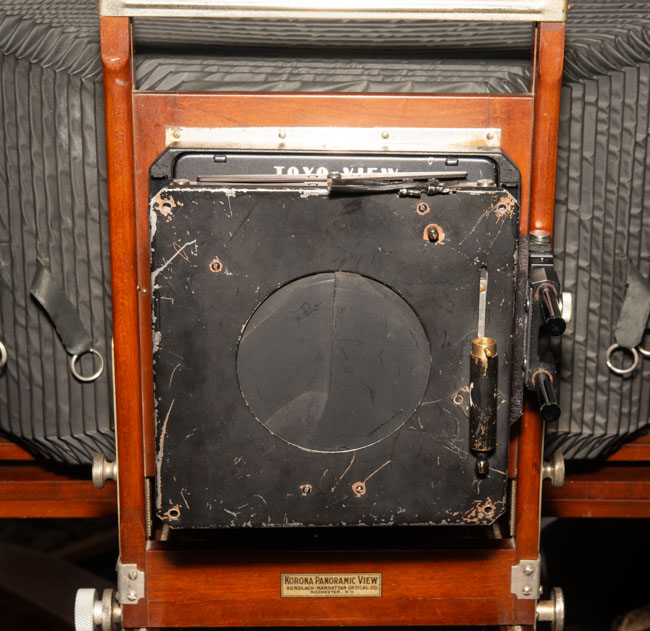
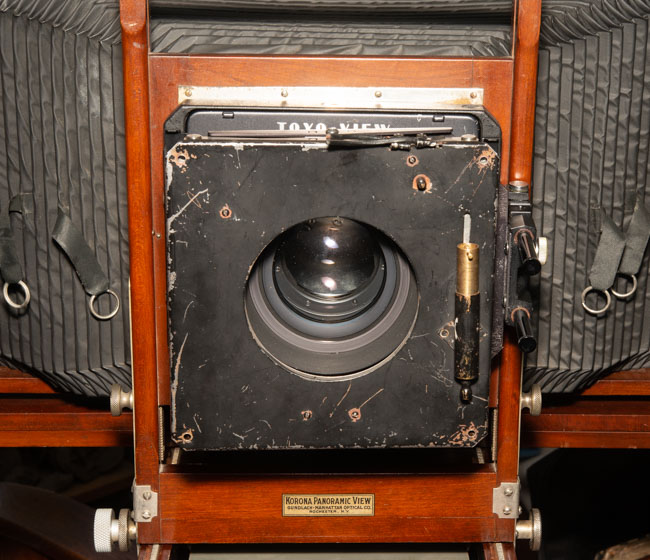
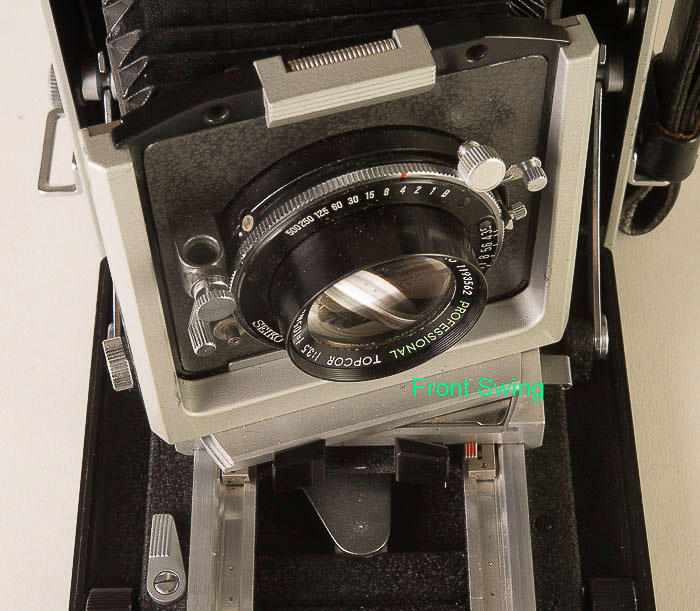
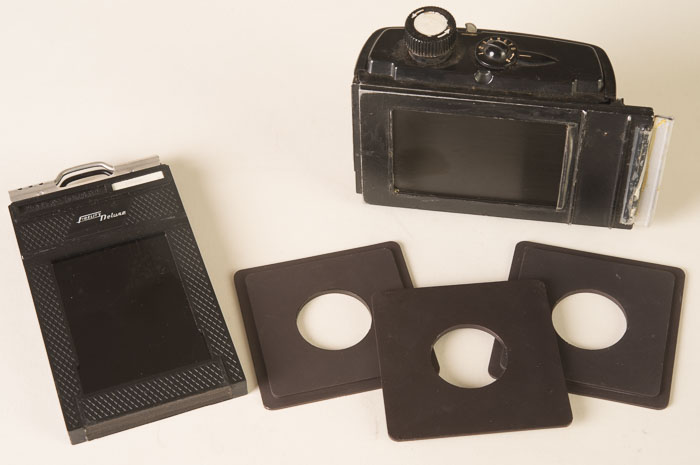
Getting the lens onto a camera. I actually have considerable experience with this one. I use Toyo 6.25×6.25-inch lens boards for large lenses. I’ve done a blog post which describes one way of cutting a large hole for a large lens: https://siskinphoto.com/blog/?p=3662. There are other ways to cut lens boards, but this is about the only way I can cut very large holes, such as I need for the Bausch & Lomb lens. This lens did not come with a retaining ring, which is a threaded piece which holds the lens onto the board. When you don’t have the retaining ring, you can find a really good machinist to cut you one. Expensive. An alternative is the hose clamp method I’ve used here. It’s not elegant, but it does work. In addition to the clamp, I used some rubber as a sleeve which makes the lens more secure. I also used Permatex 82180 Ultra Black Maximum Oil Resistance RTV Silicone Gasket Maker. I’ve used this with a number of camera hacks, it’s really good stuff. Keep in mind you really, really don’t want the lens to fall off, really.
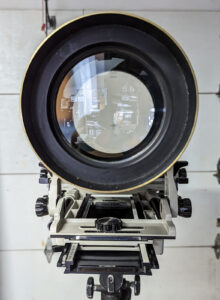
The lens held to the board with a hose clamp
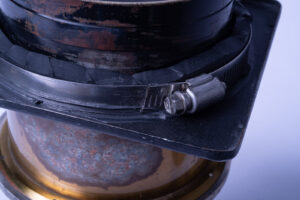
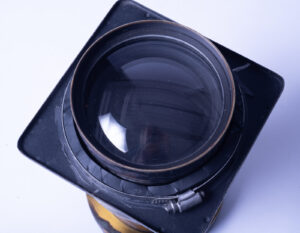
Close up of the hose clamp mount
Problem #2
Controlling the exposure time. Since the lens is very fast, about f4 and I’m using modern material this is a heck of a problem. If I was going
to shoot this lens outdoors in full daylight, I’d need a shutter speed of about 1/1000th of a second. I could shut the diaphragm down block most of the light, but this would remove the Petzval effect: extremely sharp center and diffused sides of the frame. I could use a very dark neutral density filter, but this adds another step between focusing and shooting. If your subject moves you picture could be ruined. Still if I could find an 8 stop neutral density filter that was about 5 inches across it might work.
I have not solved the shutter problem. If you are interested in shutter hack, please check out this link: https://siskinphoto.com/blog/?p=3695. Unfortunately, I don’t currently have any shutter large enough for this lens. I have found a work around.
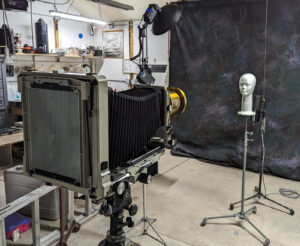
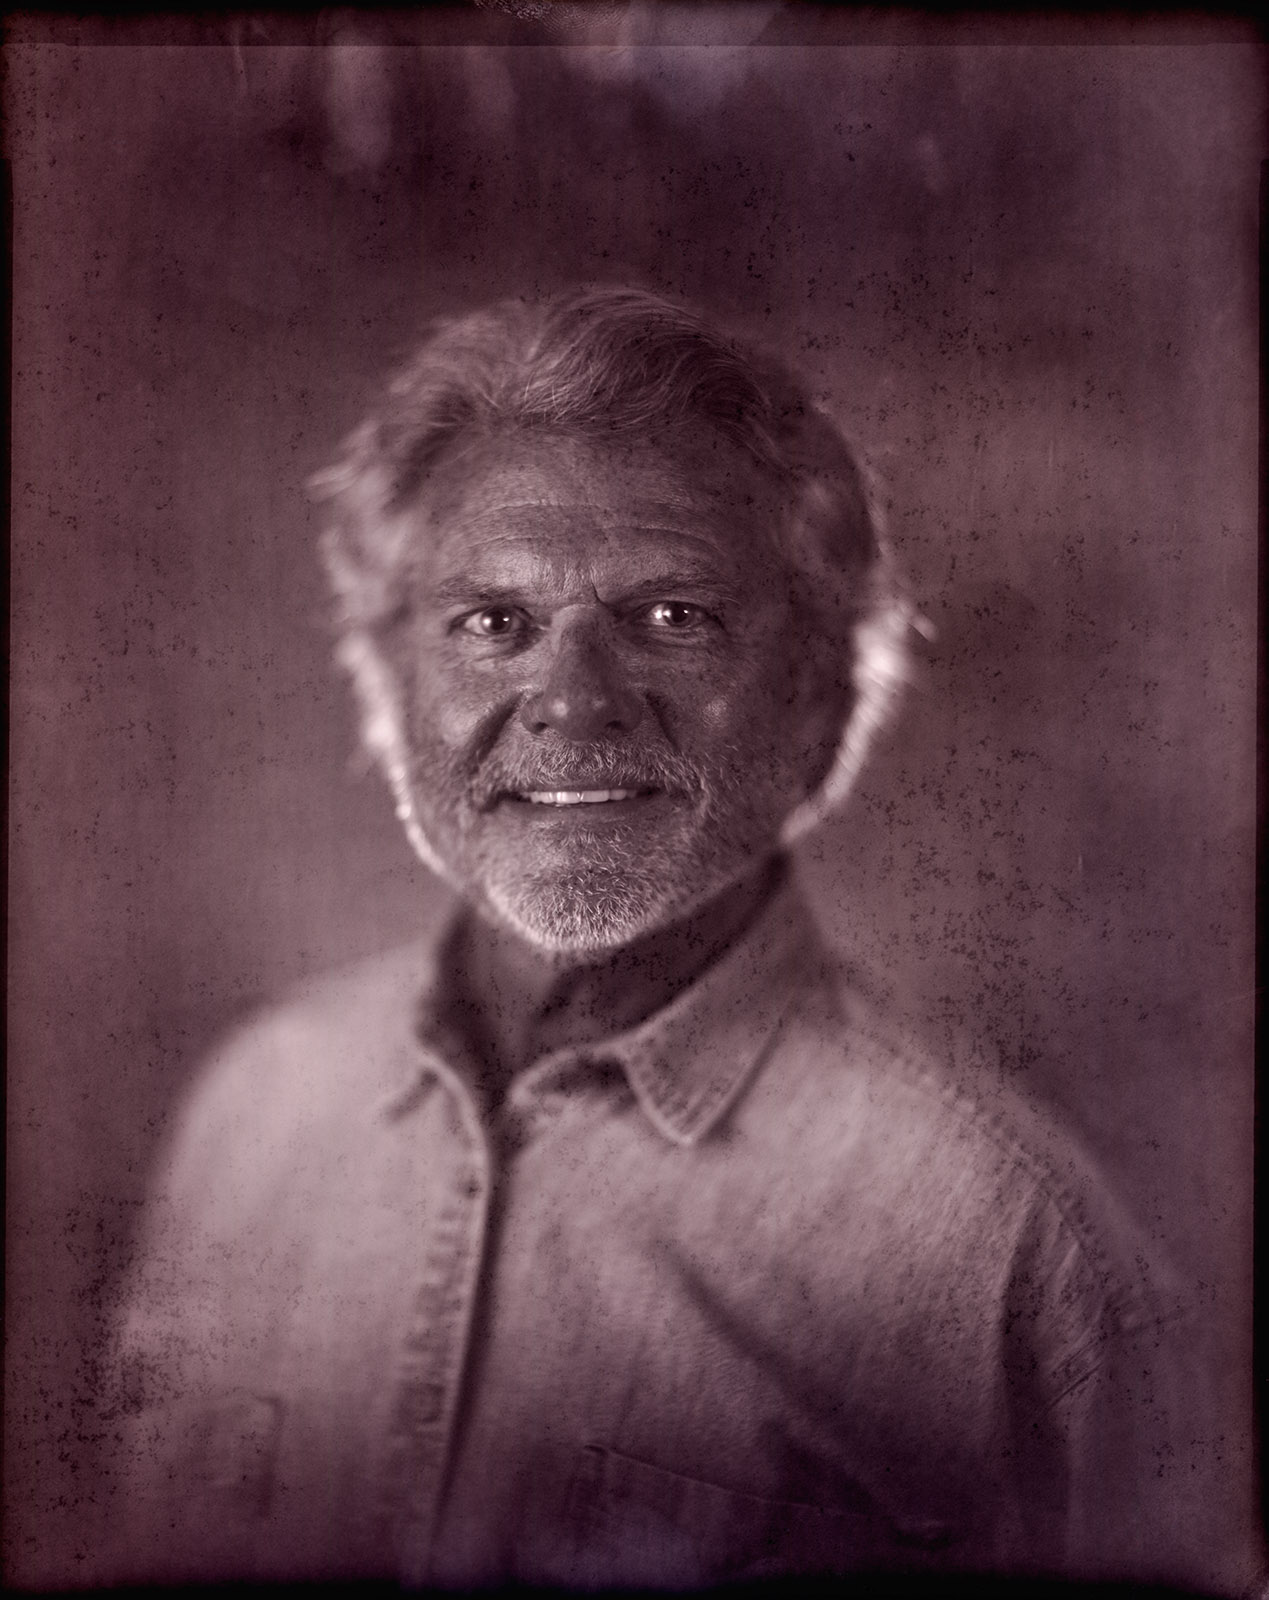
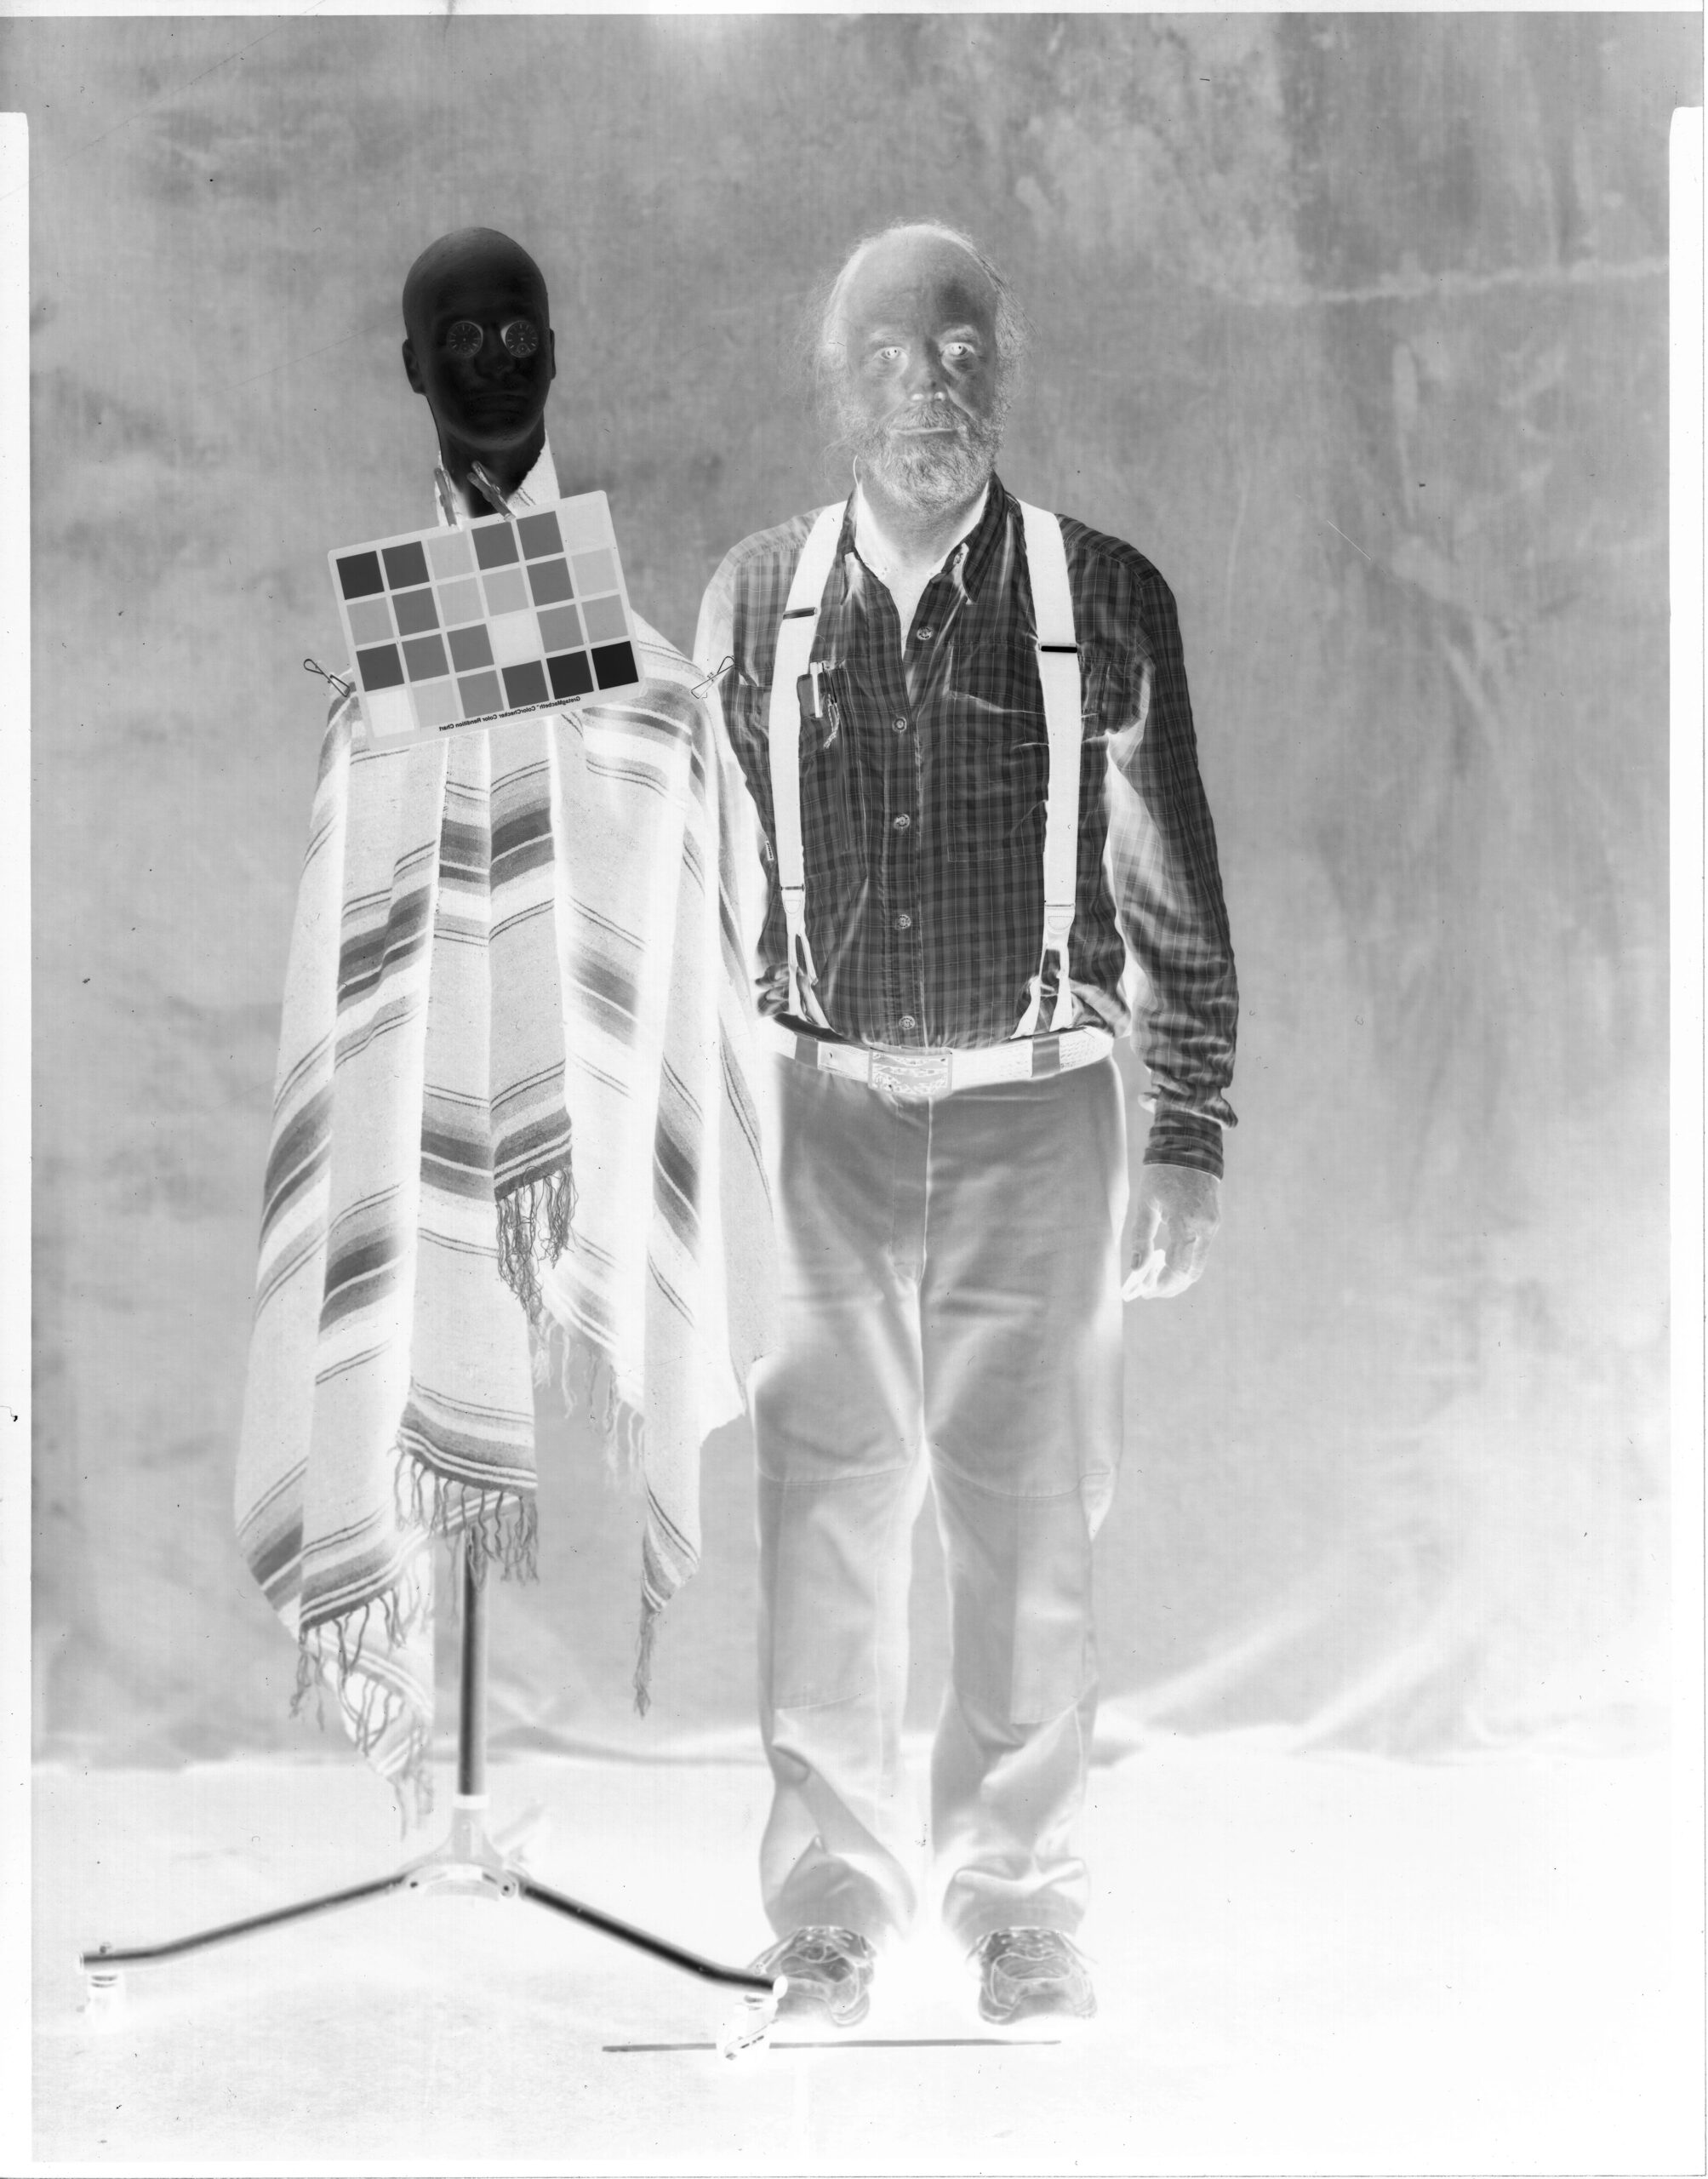
Studio set up for testing. Note the ground glass back on the camera
This is the method I’ve used to shoot with this lens without a shutter. I’ve blocked out all the windows in my shooting area. I know that many people prefer what is called a daylight studio, but since I’ve written a couple of books about shooting with strobes (available at Amazon). I have a sodium vapor safelight set up in the studio. This is a relatively bright light that won’t expose modern photo papers, such as Ilford Multigrade. You could use other safelights, but it’s very helpful to have a bright safelight. You will be evaluating the moment to make your picture under just the safelight illumination.
I usually begin a portrait session with 3 lights set up. While I might use more gear as a session goes on, I find if I have a bunch of extra lights out the subject will often want me to explain why I’m not using them. For anyone whose know me for a long time, yes, I am still using Norman LH2000 lights and power packs. These days I’ll have one light with a 5-inch reflector and barn doors, a second with a stove pipe snoot and the third will start as bare bulb. The bare bulb light will be behind the subject to light the background and to give edge light to the subject. In addition, I’ll have a light panel with a silver reflector and a second panel with rip stop nylon. All the lights are strobes, once the modeling lights are turned off, they make no light until triggered. Then they make A LOT of light for about 1/1000th of a second. While I could imagine trying to do this with continuous lights, on some sort of short timer, I think it would be very difficult. Particularly since you can set the amount of light an individual strobe will put out, which would be more difficult with continuous lights. I’ve done several magazine articles about portrait photography which might be helpful. You can see them at this link https://www.siskinphoto.com/magazinearticles.php which includes most of my magazine work. I’ll start with 5 film holders. Each holder has two sides, so I’ll have 10 pieces of Ilford Multigrade or other photo paper loaded. Just like I start with a limited number of lights out, I start with a limited number of exposures. When I had an assistant, I would start with more film loaded.
I do have one continuous white light set up on a foot switch I use this to help focus, frame and direct the shot.
Once I have the shot arranged, I’ll turn off the white light. I have to get the subject to stay still. This is ALWAYS a problem with large format portraiture. People have the expectation that I can somehow correct the exposure even after the film holder is in the back of the camera. It’s not more difficult with this set up, except you have even less depth of field than you might have in a normal large format portrait session.

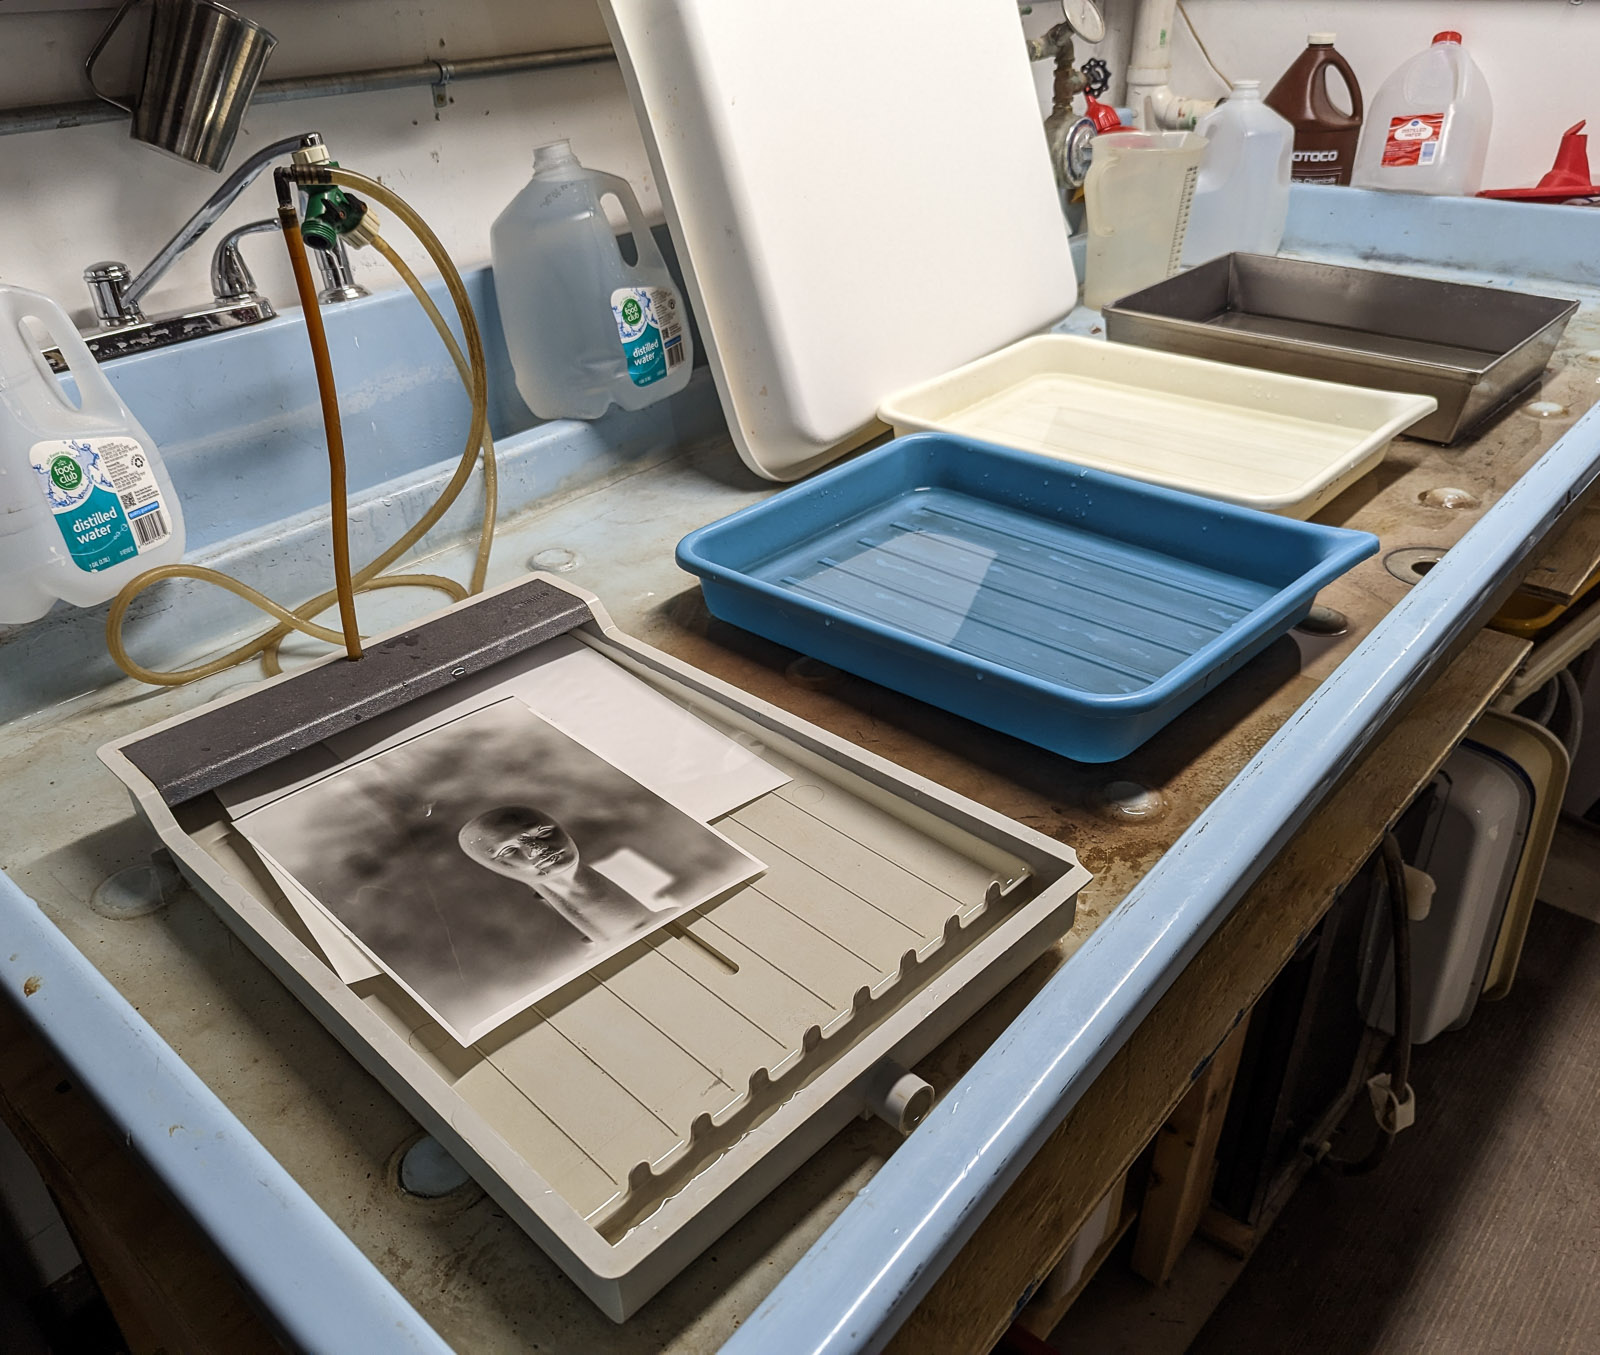
The greatest advantage of this method of working is that you can develop the images as you go. The first reason you’ll want to do this is that it makes it much easier to evaluate exposure and lighting. Since the processing time on modern paper is about 60 seconds this is almost as fast as Polaroid used to be in my 4×5 camera. Also, this tends to really impress the subject, who has likely never seen a print develop in a tray. The process helps to keep the subject engaged and motivated.
Thread 1
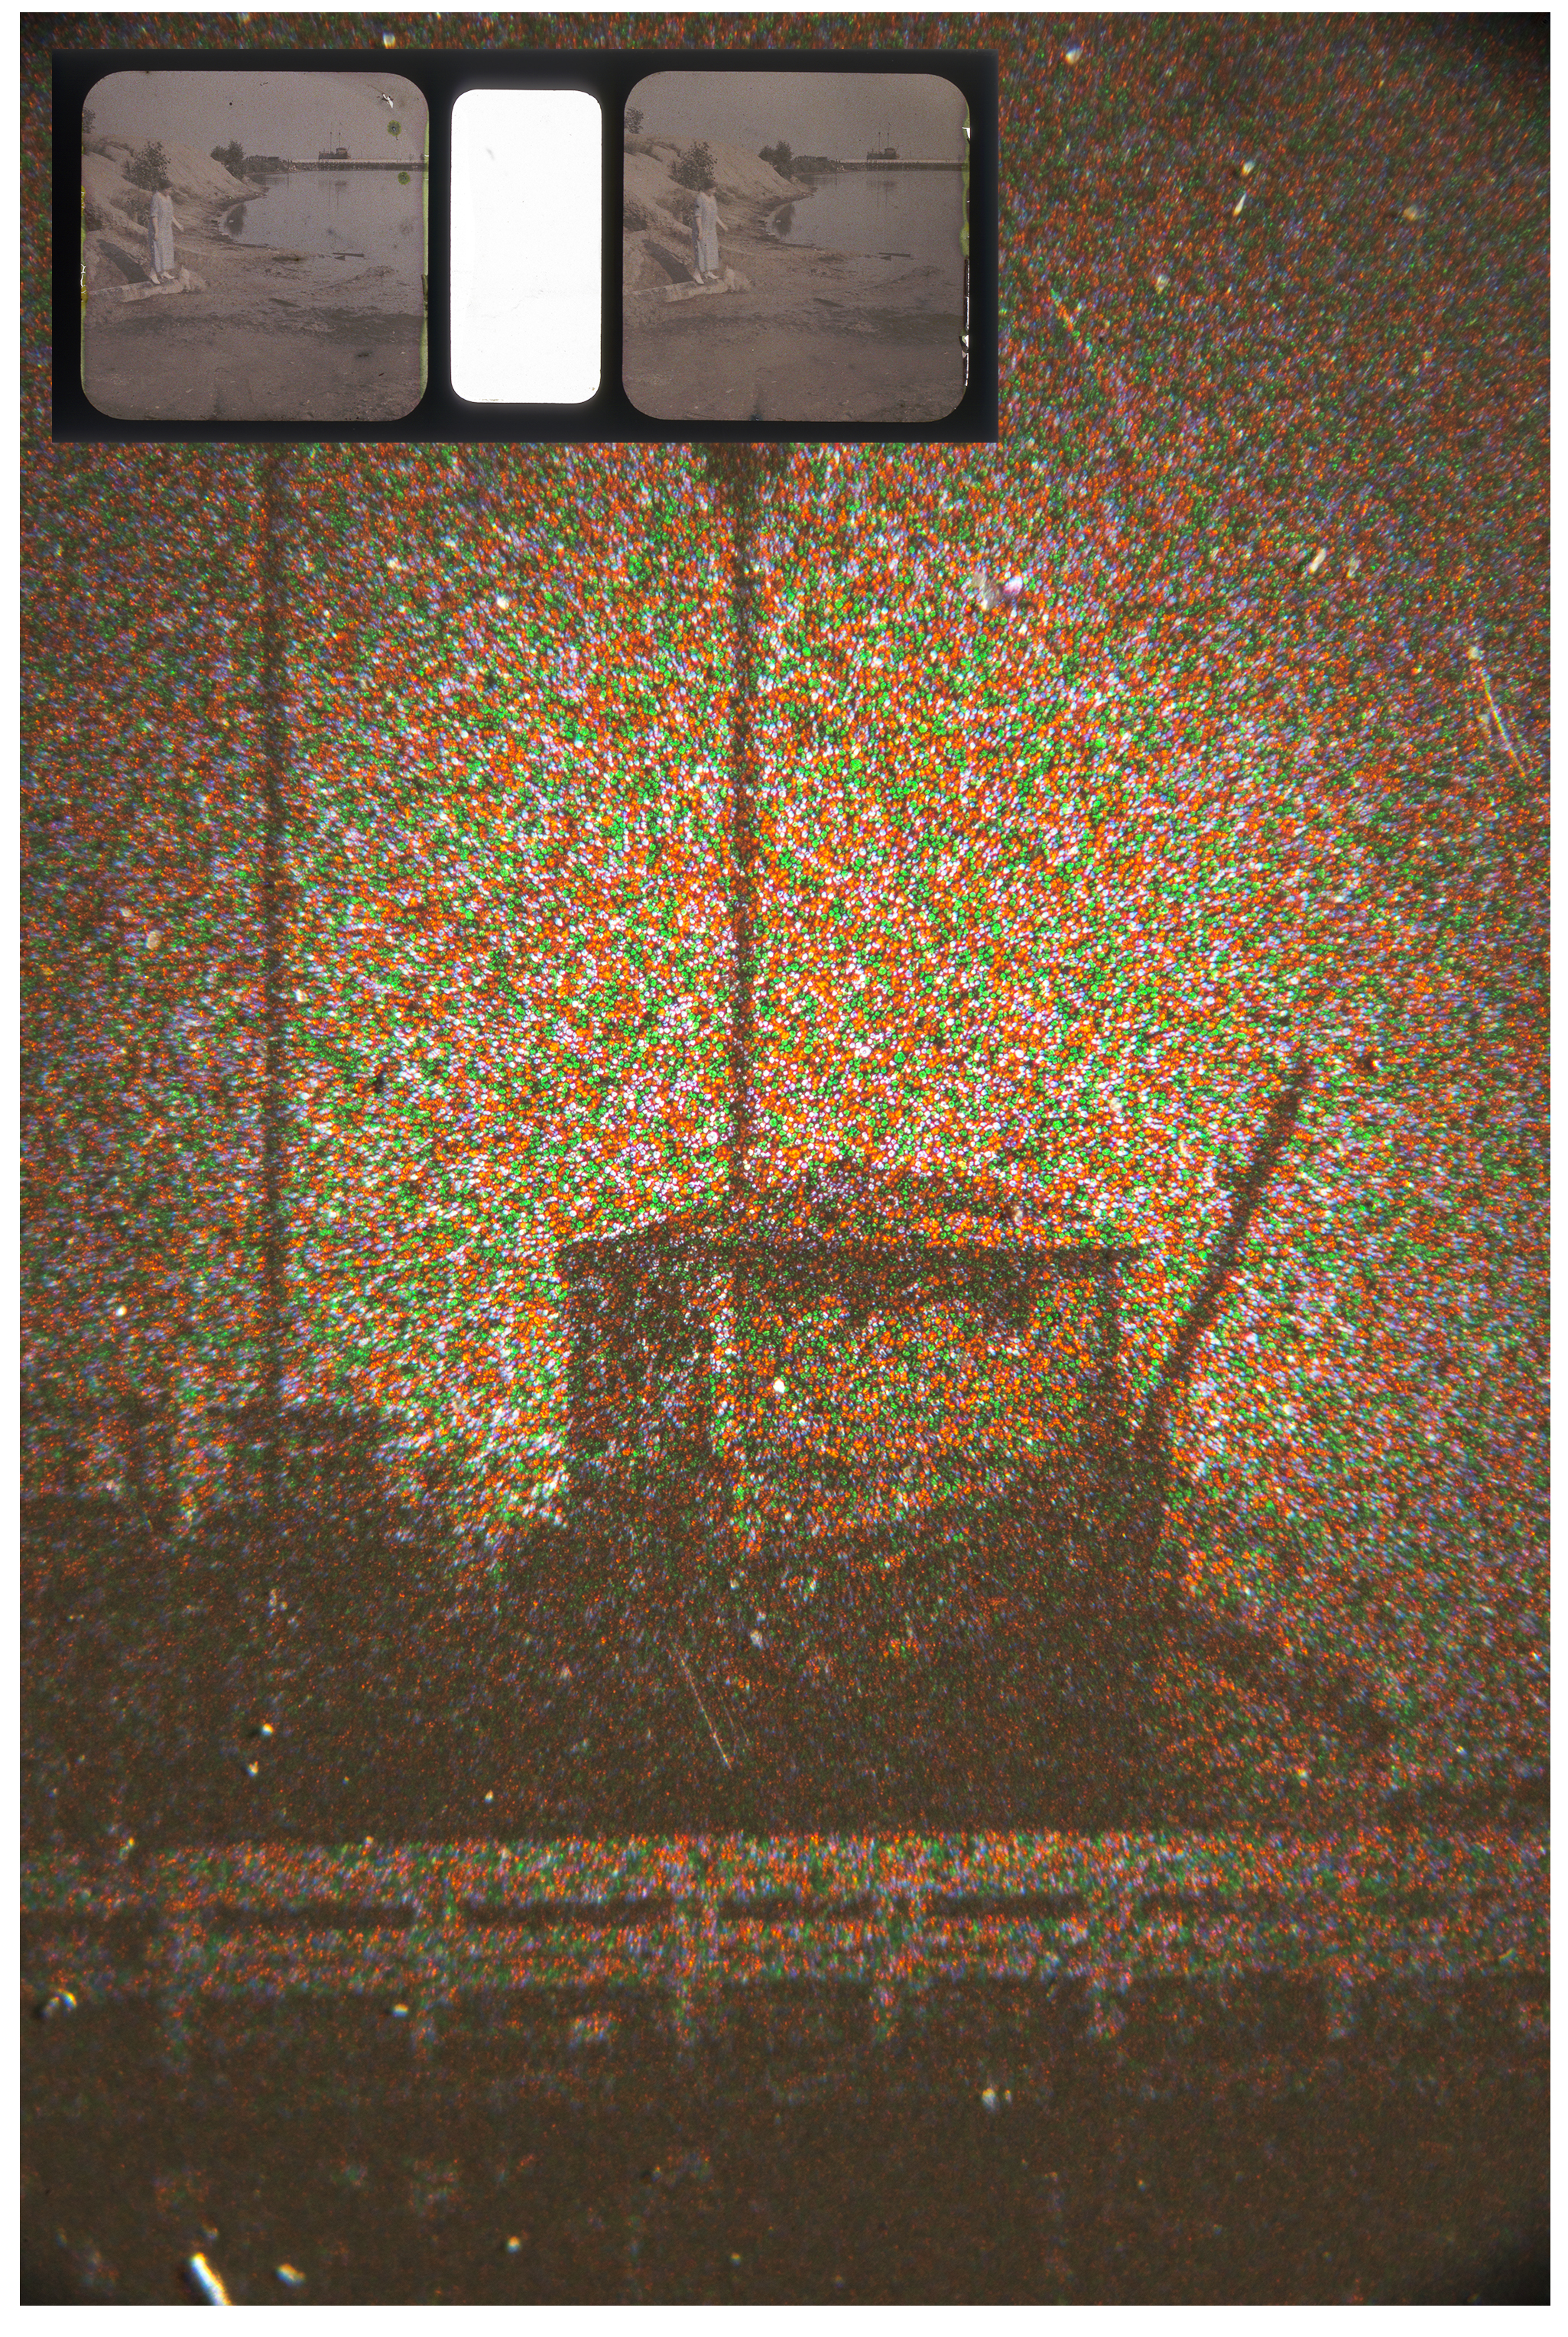
Direct positive photography was a very important part of commercial photography. Both of the early color photographic processes, Lumierre Autochrome and Kodak Kodachrome, were direct positive processes. The film you shot in the camera was put through several chemical baths and the product was positive color transparency or slide. This was particularly important for commercial color work because transparencies were easier to make color separations from for ink printing. Of course, Polaroid was a direct positive process as well and so were all those Super-8 movies. It was possible to use direct positive color paper, which was used for making color prints from transparencies and slides in the camera. Basically, the process was as described above but there was no safelight. So, in the moment you were making the shot, you were in the dark. This was interesting. Processing color paper is somewhat more difficult than processing black and white paper, but it wasn’t beyond what an amateur could do. Unfortunately, I can’t find anyone supplying direct positive color paper anymore. So it goes.

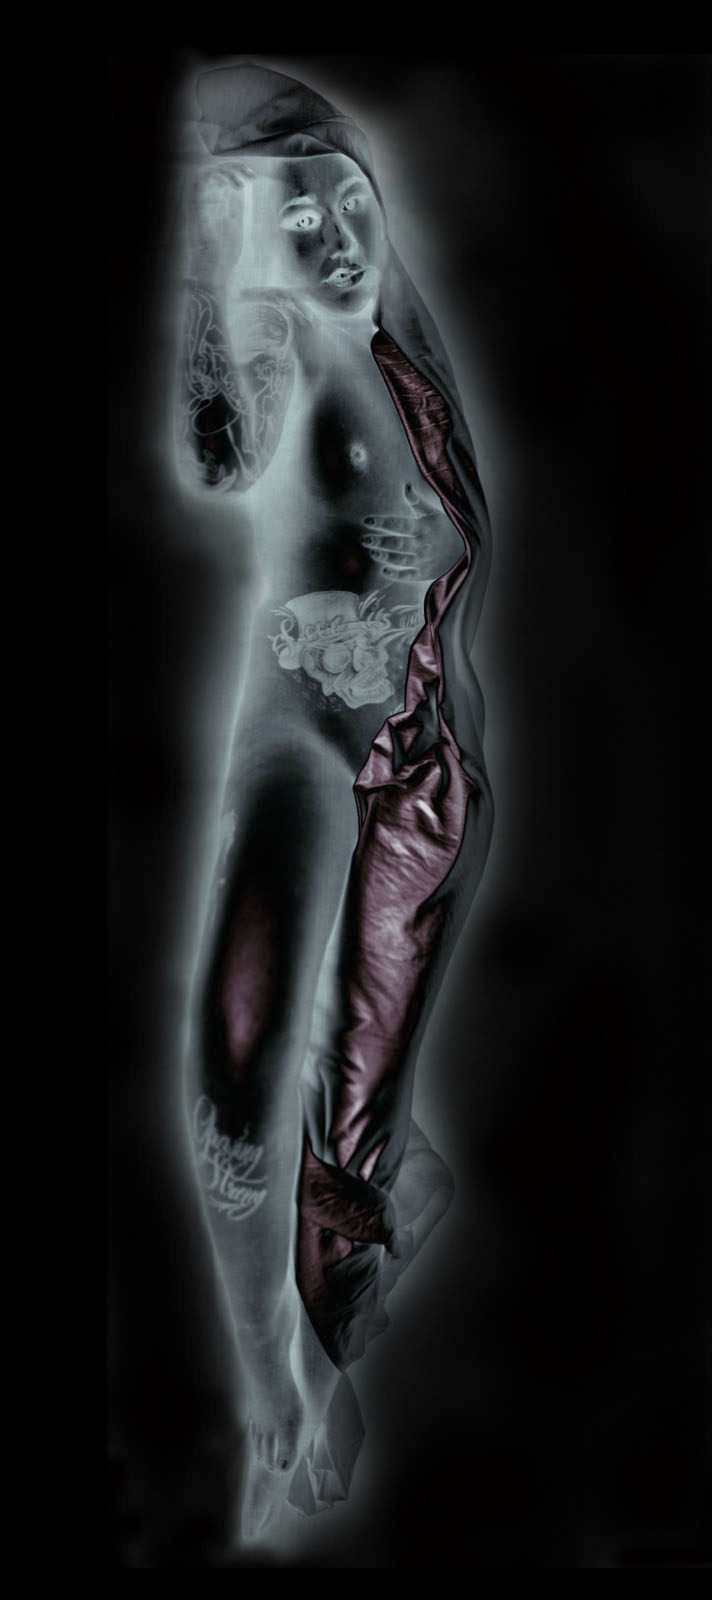
This shot was made by shooting Cibachrome print material in the camera. I did this shot more than 30 years ago. The print still looks fresh
A few links
Siskinphoto.Home
Introduction Page
Monument Valley
Taos Pueblo
Night Sky
Lightning
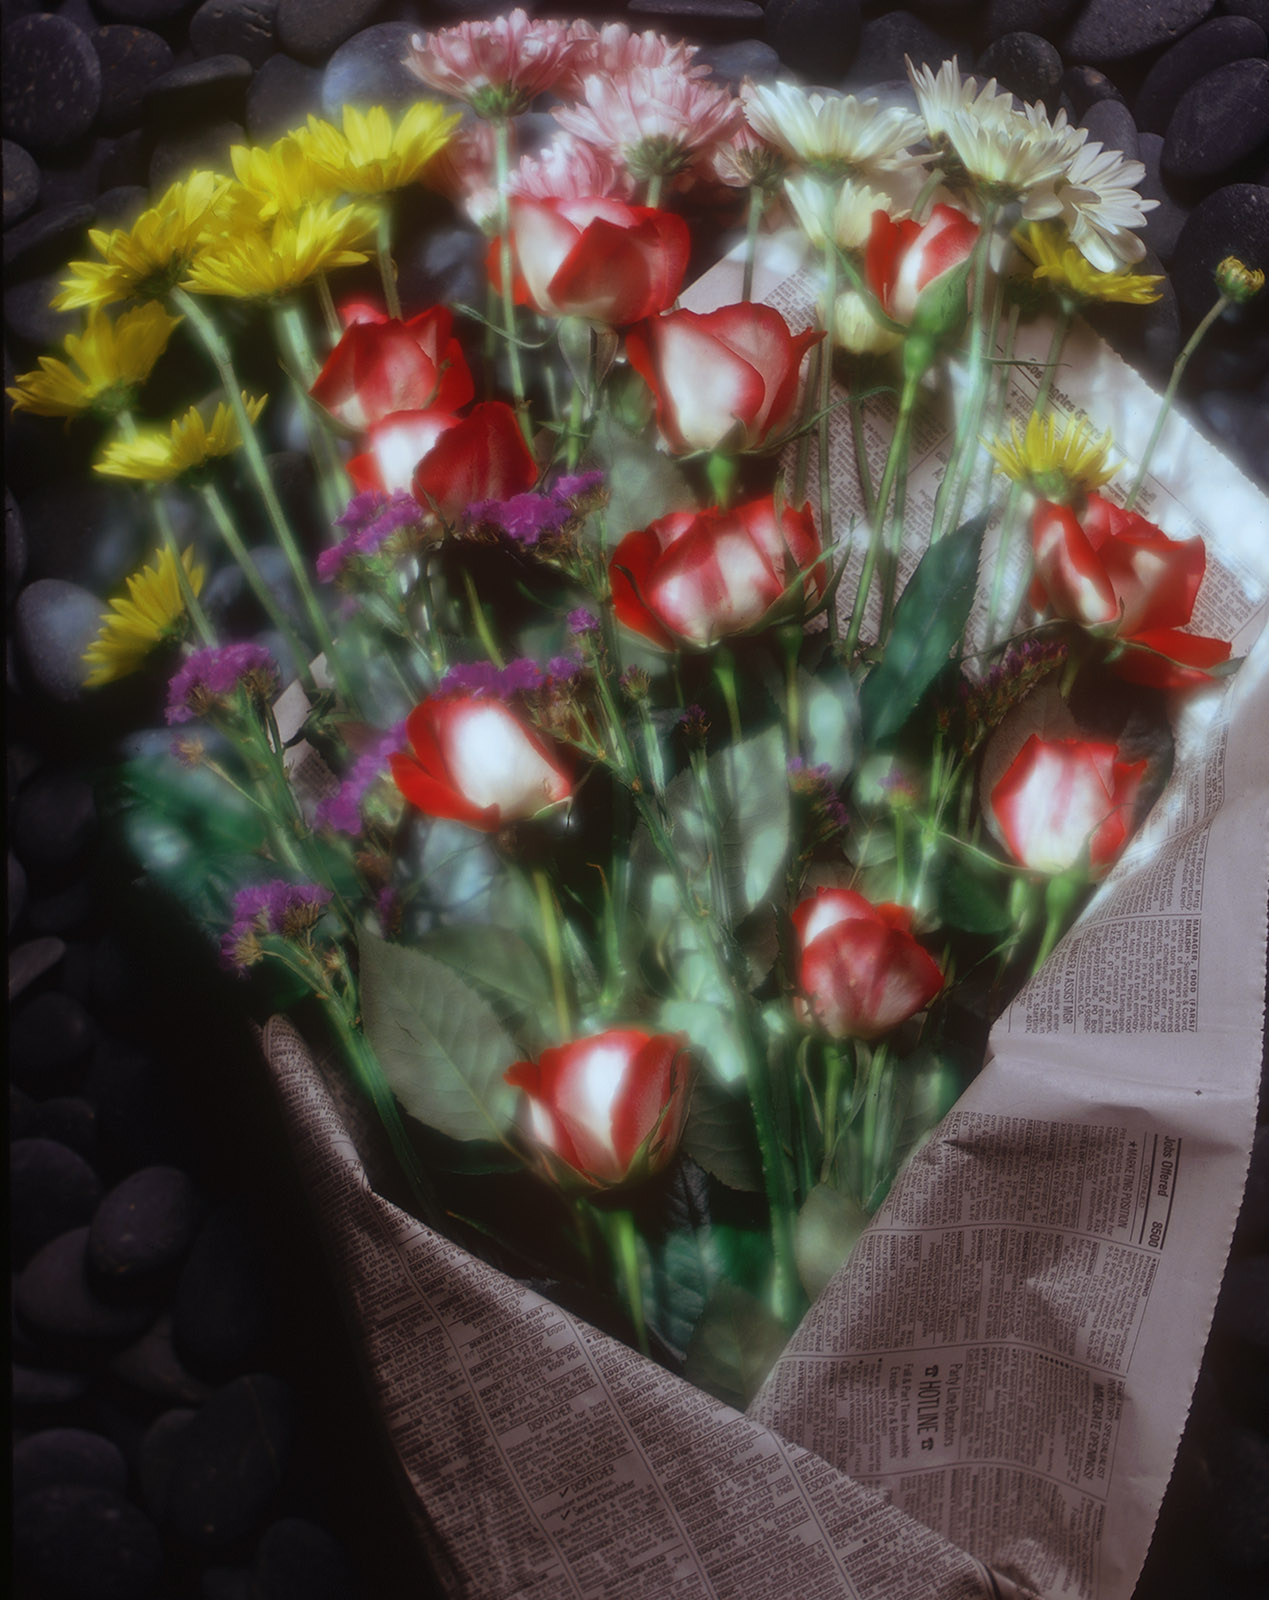
Flowers
Monastery Road
Petroglyphs
Rock
Ice and Snow
Tsankawi
Sugarite Campground
Churchs
El Morro National Monument
I did a large show when I was still in Indianapolis called Courting Chaos. The link will take you to the pages which describe the work and its evolution. These images are, well, chaotic and many of them are nudes. I hope you’ll find it interesting.
Links to my books, still available at Amazon!