Photo Notes A place to talk about making images.

December 30, 2015

Los Angeles Downtown #1

Los Angeles, Downtown #1

Los Angeles, Downtown #1

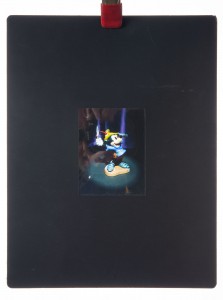
I’ve been stumbling through my archives as I prepare these posts and begin to put together the fine art pages for my website. Some of the images create an effect I like to call involuntary time travel; the pictures really take me back. I was surprised when I saw this image in my files. I though the original transparency was encapsulated in my portfolio. I used to get presentation pages made from my best shots that permanently held the transparencies. I thought the original was in one of these pages. The things looked great, if you happened to have a light box. It was a very effective way to present my portfolio, at the time anyway. For more information about portfolios you might want to check out my Portfolio Workshop. Anyway I found the original in my files, so this is a new scan. I really should consider more creative titles.

Encapsulated Portfolio Image, Mickey for Disney. Dick Duerrstein Art Director

Encapsulated Portfolio Image, Mickey for Disney. Richard Duerrstein Art Director

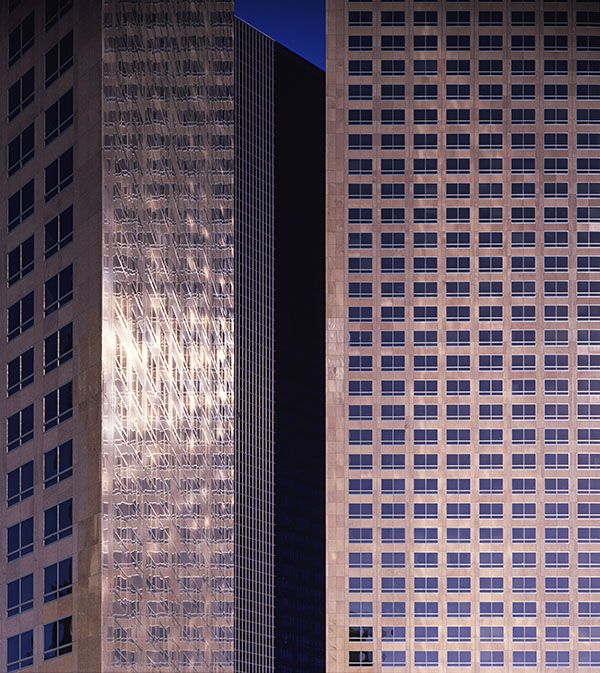
I remember taking this image. I think I was with Richard Risemberg, in fact I think he pointed out this composition. I learned a lot from Richard: he helped develop my fascination with lenses. The shot was taken on my Omega View Camera, really a cheap Toyo. I know that because the image is cut off on the top because of the considerable camera movement used to keep the subject straight. I guess this image was made with my Fujinon 210, f5.6 lens. This was one of the first really modern view camera lenses I had. It’s also possible I shot it with a 210 Komura, f6.3 I got from Bernie Sayers. This was a four element lens and really the first good view camera lens I had. I think I gave that lens to Jeri Grover when I got the Fujinon. I told you this shot triggered a trip down memory lane. I guess the shot was made in the mid-eighties. I can’t tell you much about the technical details, but I do know it was made on Fuji Film.

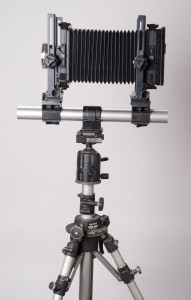
My Toyo 4X5 Camera-about the same size as my original Omega. 121mm Super Angulon Lens.

My Toyo 4X5 Camera-about the same size as my original Omega. 121mm Super Angulon Lens.

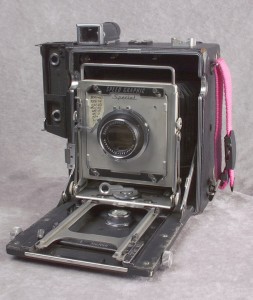
On one level this shot is sort of a basic straight view of a building detail, but what makes it special is the play of light and reflection in the buildings. Sometimes you get to make a special image just because you’re present and awake to the moment. Richard helped me learn that lesson here. I often talk about making images rather than just taking them, but sometimes you have the tools and subject at the same time, that’s good. In this case the camera was a 4X5 Toyo monorail camera, really a big camera. I haven’t used this camera for field work in many years; it was just too bulky. I’m glad I had it on this day because I couldn’t have made the same image with a Speed Graphic, they don’t have enough camera movements.

If you’d like to get a fine art print of Los Angeles, Downtown #1 you can click on the PayPal link below.  The image will be   almost 13 inches wide. It’s mounted and matted to 16X20 inches. The price, just $125, includes shipping in the United States. If you’d like to have me ship somewhere else, or order another size please contact me at john@siskinphoto.com.
You can buy one of my books at these links

December 29, 2015

Pacific Center #1, Los Angeles

Pacific Center #1, Los Angeles

Pacific Center #1, Los Angeles

Often the approach to an architectural image is to maintain a neutral perspective. So when you shoot the front of a building you try to keep the parallel lines in the subject parallel. When the lines come together, as they do in this shot, the effect is called key stoning. The thing is that often buildings are designed to impress, even intimidate, people. The neutral perspective tends to weaken or remove that effect. In this case I used my 65mm f8 Super Angulon, so that I could shoot close to the building. I did this for a couple of reasons, first I wanted to capture the imposing design of the entrance, and second I didn’t want to stand in the middle of the street. I used my Speed Graphic as the camera. Many people don’t know that the Speed will accommodate extreme wide angle lenses.

I’m not sure exactly when I shot this, but at least 20 years ago. Time flies when you’re making pictures. It’s always been a favorite of mine, in fact there’s a big print hanging in my office. One of the reasons I like this image so much is that I learned a lot printing it.

Photographers often talk about the zone system. This is a way of discussing the relationship between exposure, negative processing and final negative density. The system was first described by Ansel Adams and Fred Archer. One of the most important aspects of the system, and one that is often forgotten, is the way processing affects the contrast of the negative, and thus the final print. I mention this because one of the things I learned from this image is that even if you have a good negative, one that accurately reflects the tonal values of the subject, you may not be able to make a good print with normal printing processes. Black and white photographic paper comes in various contrast levels, from soft paper that has low contrast to hard paper that is very contrasty. The idea is that if you make a good negative you’ll be able to print it on a middle contrast paper. I learned that this isn’t always true when I tried to print this negative. While a print on middle grade paper showed all the tones of the negative, it was flat and not really effective. When I printed the image on a higher contrast paper the middle tones of the print looked much better, but much of the shadows and highlights were to far gone to see. In order to make a good print I needed to use high contrast paper and do considerable dodging and burning to maintain the highlights and shadows. Even when photographers shot film there was a lot of work done after you tripped the shutter.

Many of my images were first scanned quite a few years ago, so when I wanted to add this image to the fine art section of my site and blog, I went back to the original negative. Once again I had to do a lot of work to get the original scan to agree with the way I wanted to see the final print. I used several layers to change the contrast and exposure values in different areas of the image. I’ve learned a lot about working with an image in Photoshop over the years. For this image I choose a different color pallet from the one I normally use for black and white images. I usually add a little red to the shadows and some yellow to the mid tones. This creates a similar effect to the warm tone photo papers I used to use. In this case I added some red to the shadows, but I added a very small amount of blue top the mid tones. This creates an effect like a cold toned paper toned with selenium, which was the way I handled the original printed version of this image.

If you’d like to get a fine art print of this image you can click on the PayPal link below. As I’ve mentioned I hope to add alternative presentations of my images as I continue to review my fine art images. The current prints are almost 13 inches wide. They’ll be mounted and matted to 16X20 inches. The price, just $125, includes shipping in the United States. If you’d like to have me ship somewhere else, or order another size please contact me at john@siskinphoto.com.


You can buy one of my books at these links

December 28, 2015

Indianapolis Central Library #1

Indianapolis Central Library #1

Indianapolis Central Library #1

This shot was made at the Indianapolis Central Library. This was the second shoot I did at the library; the first shoot was for my book Photographing Architecture. The library has a classic look in front with a new glass and steel portion in the back, really an interesting location. I was attracted by the classic look of this shot, from the entrance to the reading room. It’s easy to see a shot like this, but it’s harder to capture the image. I did the shot with my Toyo 810M, which shoots 8X10 inch film. I did the shot in 2013, really quite recently. The image was part of a show I did at Indiana Landmarks called Buildings: Birth, Decay, Renewal. You can see some video from the show here. I thought this location was particularly suited to the title, because of the blend of new and old architectural styles. Since I did the shot on a half sheet of 8X10 film the image will print to a very large size. There is a print in my office that is 4 feet high.

According to my notes I made this shot with a 270mm f6.3 Schneider W.A. G-Claron. The exposure was at f32 for 8 seconds. I’m glad no one walked through the shot! This lens was originally on a stat camera. I’ve used it in various configuration, on my 4X5 camera, 8X10 and it’s currently mounted on a board for the 11X14 camera. One of the great things about large format photography is that a lens can be used in so many different ways. This is an extremely sharp and contrasty lens that has very wide coverage. I used my Reis tripod, a constant companion with the 8X10 camera, especially on location. The Reis is a wood tripod, or as I like to call it carbon fiber version 1.0.

I offered this shot in the show (mentioned that above) as a 4-foot print and as a VanDyke print. VanDyke prints are an old process that uses iron to achieve sensitivity, but the final image is actually silver. I’ll be adding more about the older processes as I begin to offer them through these posts and on my site. Currently you can get a fine digital print of this image for only $125. The image will be 14 inches tall and mounted and matted on 16X20 board. The price includes shipping in the United States. This is much less than any price I’ve had on this image in the past.


You can buy one of my books at these links

December 22, 2015

Suffix

Filed under: Fine Art,Fine Art Portfolio,Micro Photography — John Siskin @ 4:03 pm

Suffix

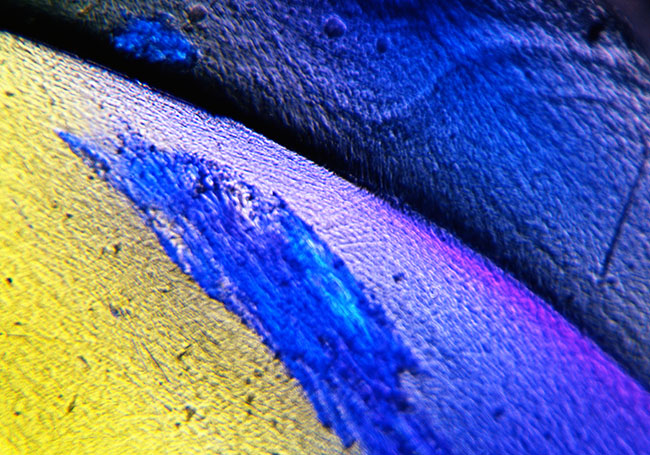
I like to explore color and shape. The micro-environment enables me to do this without being involved is shooting things. This image is about color, shape and texture; it doesn’t matter what the subject is! The image has an otherworldly quality, which is what I was looking for. This belongs to a group of images I call Parts of Speech, and all have names drawn from Latin grammar.

This is an image of light displayed by a plastic ice cube captured with some specialized equipment. I used to say fake plastic ice cube, but it’s real enough; they’re made as props. Anyway certain materials can be made to diffract light in interesting ways, and this is much more interesting if you can get really close to the subject. In this case I used a Toyo view camera with about two feet of bellows. I used a Zeiss 63mm Luminar as the lens. The lumiars are a special series of lenses Zeiss made for extreme micro work. This was pretty difficult to do with any film camera, but especially difficult with a view camera that didn’t have any meter. The area I photographed is much smaller than the image on the film, and of course much, much smaller than it is here. The image will print to at least 20X30, which would be more than 100 time life size.

It’s much better to do micro-photography with a digital camera than with a film camera. First the resolution of a digital camera is better than film would have. For technical reasons digital capture is better than even large film, say 8X10 inches. In addition it’s easier to control exposure, because the meter is in the camera and because you get instant feedback. I’ve mentioned various resources for micro photography in recent posts: https://siskinphoto.com/blog/?p=2988, https://siskinphoto.com/blog/?p=2978 and https://siskinphoto.com/blog/?p=2954. I hope you’ll take a look if you haven’t already.

I’m thinking about offering a workshop about shooting micro images. This would enable us to go far beyond what a standard macro lens can do. Most macro lenses go far enough to make the image the same size on the sensor it is in life. There is an interesting, and very affordable, toolkit that will enable you to go so much further. It’s quite possible to shoot 80 times life size onto the senor, and then multiply that by the size of the print! I hope to have detail of this workshop in the next two weeks. Please let me know what you’d like to see in this sort of workshop; anything from a one day demonstration to a couple of days with a microscope included! I’d like to do this during winter, when it’s good to have indoor subjects to explore. Keep an eye on my workshop page for updates.

As I’ve mentioned this blog is part of a series of entries about my fine art images. I’m doing this series as part of an update for the fine art pages on my website. I hope this series will make my images more accessible, both on line and as prints. If you’d like to buy a digital print of this image, mounted and matted on archival cotton rag board, please use the PayPal link below. The image will be about 16 inches wide mounted on 16X20 board. The price includes shipping in the United States, for other countries please ask first.


You can buy one of my books at these links

December 21, 2015

El Matador State Beach #2

Filed under: Do It Yourself,Film Technique,Fine Art,Landscape Photography — John Siskin @ 5:45 pm
El Matador State Beach, California #2

El Matador State Beach, California #2

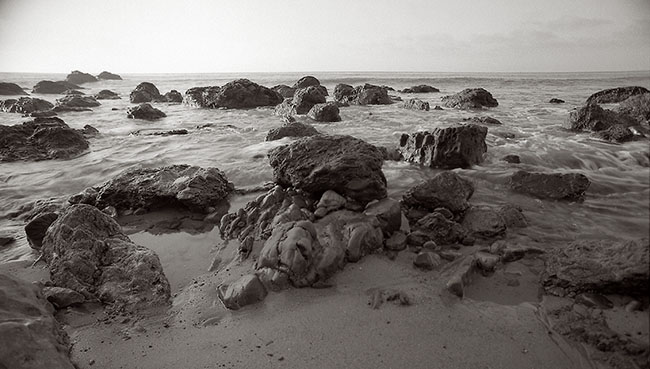
I like the texture and presence of the rocks in this shot as well as the action of the water. The shutter speed, about 1/30th of a second showed the water coming over the rock in an interesting way. The rest of the water shows a feeling of movement, which is good for surf. The camera is positioned quite close the rocks in the foreground which gives the image a more exaggerated point of view. I can do this because of the very wide coverage of this lens. I’m still playing with ways of presenting this image on line since horizontal panoramic formats seem to suffer on this blog format. I really liked shooting at El Matador State Beach because of the rocks and caves. I’ve added another image from El Matador here.

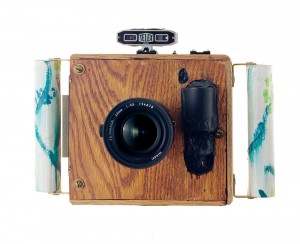
Part of being a creative professional is staying creative. I suppose that’s obvious when you say it, but it’s a challenge to do. I see through the eyes I’ve always used, and I need to continue to see fresh and new. Of course craft will make a beautiful image, and craft is essential for my professional work, but there is more to being creative than achieving great craft. One way I change my seeing is to change my tools. If I choose to shoot with my usual kit I go down roads I’ve seen before, but new tools create new paths. Often this is because of what a tool CAN’T do. So if I have a huge camera I’m forced to look for static subjects. You can’t shoot children playing with an 8X10 camera. Over the years I’ve built cameras that allow me to walk down different paths. I’ve been especially interested in shooting extreme wide angle views. Of course I could always do this with 35mm film cameras, but the combination of wide angle vies with the lower resolution of 35mm film was not satisfying. I’ve found that using extreme wide angle lenses with my digital camera is much better. I’ve also used other tools to achieve this point of view; one of the most successful is my super wide camera. This camera uses a special Nikon lens, with very wide coverage, and medium format film (6cm wide). I’ve written about this camera before: www.siskinphoto.com/camera3a.html. I’ve included a picture of the camera below.

Superwide Camera

Superwide Camera

As I’ve mentioned this blog is part of a series of entries about my fine art images. I’m doing this series as part of an update for the fine art pages on my website. I hope this series will make my images more accessible, both on line and as prints. If you’d like to buy a digital print of this image, mounted and matted on archival cotton rag board, please use the PayPal link below. The image will be about 16 inches wide mounted on 16X20 board. The price includes shipping in the United States, for other countries please ask first.


This image, and many others, is also available in my book B-Four. You can look at the book at this link, and order it as well. I hope you’ll take a look at the book.

You can buy one of my other books by clicking on the titles below:


December 18, 2015

Parrot Feathers #2

Filed under: Fine Art Portfolio,Micro Photography,Micro Photography — John Siskin @ 12:54 pm


Parrot Feathers #2

Parrot Feathers #2

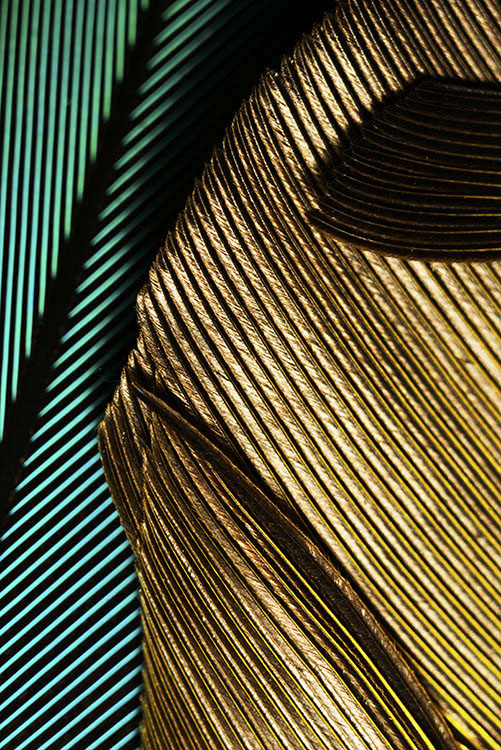
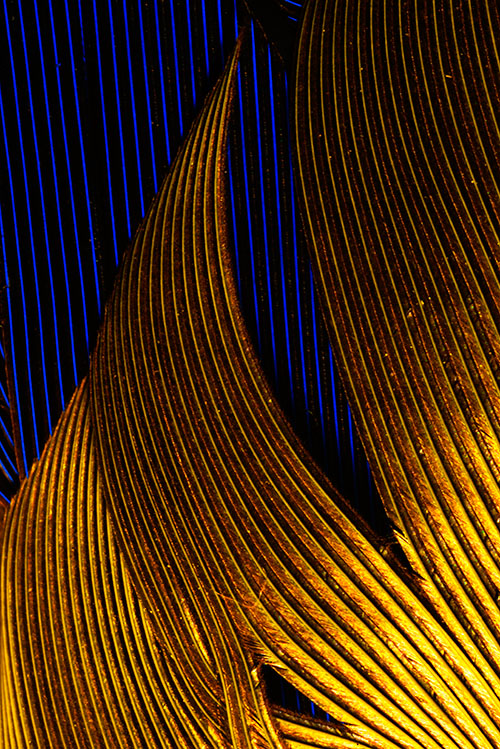
This image has wonderful color and depth. I like the pattern of the feathers and the contrast. The dark feathers near the top of the images help to give a relatively flat subject a sense of depth. It interests me that, although the lines lead away from the center of the image, my eyes keep coming back into the image. Most micro images don’t have a specific orientation, especially because I’m usually shooting straight down. I noticed that I didn’t like either landscape presentation of the image, but I do like both portrait presentations. I’m including another version of the shot upside down. This upside down version was the way the computer first presented the image.

Parrot Feathers #2, reverse orientation

Parrot Feathers #2, reverse orientation

This is the second image of the Parrot feathers I’m putting on the blog. This image was made in the same session as the Parrot Feathers #1. Please check out this link for more about how these images were made.

I have a lot of small things I use as subjects for micro photography. As I mentioned in the entry for Parrot Feathers #1, each time I work with very small subjects it’s like a journey. I may have ideas about what I hope to see, but I’m always open to surprises as well. I know that many people enjoy working with macro lenses outdoors, but I’m often surprised at how few people want to go even closer with some more specialized equipment. This equipment is not that expensive but it can be difficult to find. You might want to check this article I did for Photo Techniques, it has more information about micro photography: www.siskinphoto.com/magazine/zpdf/microscope.pdf. You can access many of my articles about photography at: http://www.siskinphoto.com/magazinearticles.php.

As I’ve mentioned this blog is part of a series of entries about my fine art images. I’m doing this series as part of an update for the fine art pages on my website. I hope this series will make my images more accessible, both on line and as prints. If you buy a print of this image you can choose to display it in any orientation you would like. If you’d like to buy a digital print of this image, mounted and matted on archival cotton rag board, please use the PayPal link below. The image will be about 13 inches wide mounted on 16X20 board. The price includes shipping in the United States, for other countries please ask first.


You can buy one of my books at these links

I’m going to be using my blog to add information about images to the fine art pages of my site. This part of the site isn’t functioning yet, but it will be. These posts will enable me to put up information about the shot and to add details about buying prints. I think it’s very useful to talk about the details of creating specific images. I hope to hear from you about this-use my e-mail to let me know: john@siskinphoto.com. Of course I hope you’ll also want to buy some prints. I’ll be offering more types and sizes of prints in the future.


December 16, 2015

Parrot Feathers #1

Filed under: Fine Art Portfolio,Micro Photography — John Siskin @ 5:04 pm
Feathers #1

Feathers #1

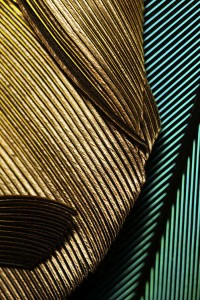
I love the saturation and pattern of these feathers. The lines of feathers can be very evocative. The glowing gold in the shot is really striking.

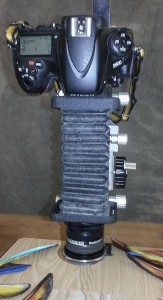
This image was made with my current digital camera a Nikon D800. This is a truly fine digital camera, and one of the finest overall cameras I’ve ever used. The files are truly spectacular, in size, color and sharpness. In addition the camera is easy to work with. I paired the camera with a Nikon PB-4 bellows for this shot. The PB-4 bellows is the only bellows Nikon ever made that allowed movements, both shift and swing. These movements allow the photographer to adjust the position of the lens relative to the sensor, which gives control over framing and depth of field.

Shot with my Rodenstock 80 f4. This is an enlarging lens. Many kinds of lens will work well with bellows, but of the best all around lenses are enlarger lenses. You’ll need an adapter that goes from 39mm (Leica Thread) to T-Mount and T-mount to your camera mount. Both of these are available at B&H and other photo retailers. I’ve attached a set-up shot. I used a desk lamp to light the subject.

Nikon PB-4 bellows and enlarging lens.

Nikon PB-4 bellows and enlarging lens.

I love working with equipment that allows me to see microscopic detail in a subject. This equipment allows me to go on a voyage without leaving the studio. For more on macro/micro photography check out these posts:
https://siskinphoto.com/blog/?p=424
https://siskinphoto.com/blog/?p=415
https://siskinphoto.com/blog/?p=405
https://siskinphoto.com/blog/?p=394

If you’d like to buy a digital print of this image, mounted and matted on archival cotton rag board, please use the PayPal link below. The image will be about 13 inches wide mounted on 16X20 board. The price includes shipping in the United States, for other countries please ask first.


You can buy one of my books at these links

I’m going to be using my blog to add information about images to the fine art pages of my site. This part of the site isn’t functioning yet, but it will be. These posts will enable me to put up information about the shot and to add details about buying prints. I think it’s very useful to talk about the details of creating specific images. I hope to hear from you about this-use my e-mail to let me know: john@siskinphoto.com. Of course I hope you’ll also want to buy some prints. I’ll be offering more types of prints in the future.

December 15, 2015

Gyroscope #1

Filed under: Digital Photography,Photographic Education — John Siskin @ 1:28 pm


Gyroscope #1

Gyroscope #1

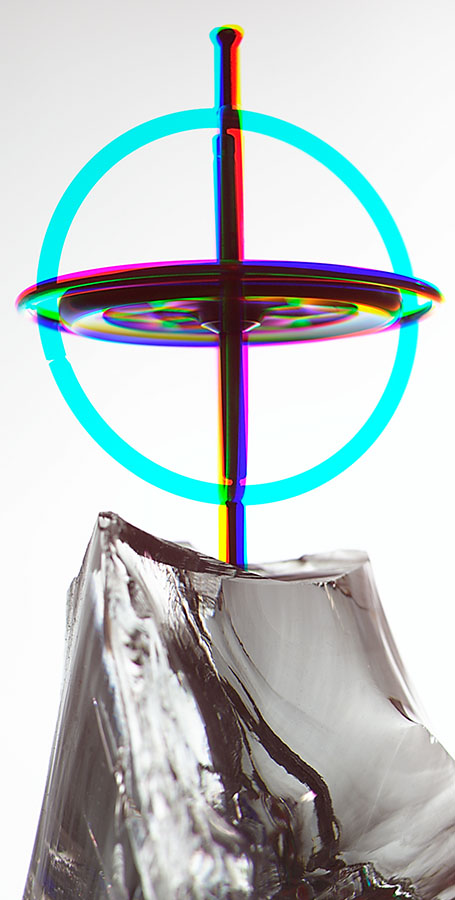
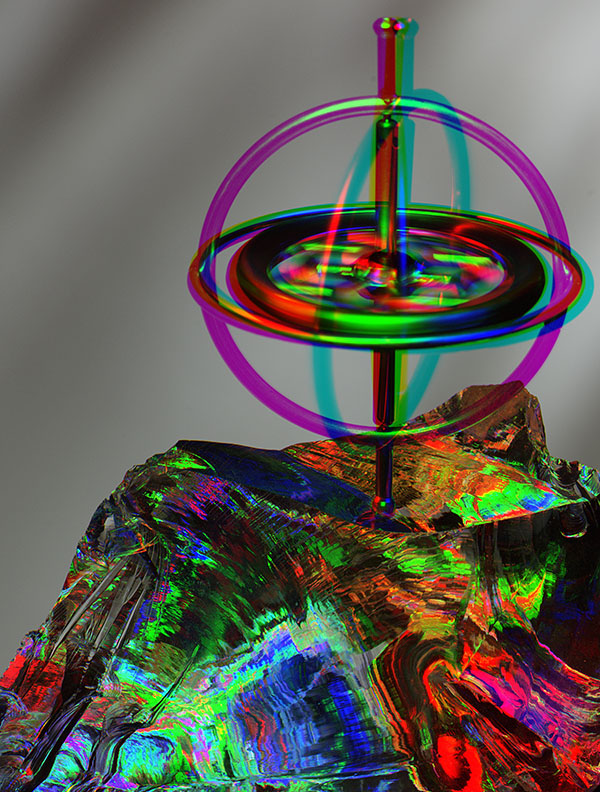
The images I’ve posted to this blog recently have all been shot on film. As I post more images for the fine art pages of my blog I’ll be posting more digital images. I wanted to start with this image because it’s one of the first digital fine art images I made. My first digital camera was a Leaf DCB II, which fit onto the back of Mamiya RZ camera. This was a real early digital capture device, sort of a bad marriage of a film camera and a digital camera. The Leaf back was actually only capable of recording a black and white shot. In order to make a color shot the camera shot three images through a red, green and blue filter. The software added the images together to make the color file. This was a HUGE PAIN IN THE BUTT. The position of files needed to be adjusted on each shot. Since the camera took three images it took quite a while to make each shot. You couldn’t take a shot of anything that moved. The camera needed to be tethered to a desktop computer, so it was a real problem to take on location. I was the second owner of the back, and it still cost $6000-six thousand dollars. The image was only three megapixels.

Gyroscope #11

Gyroscope #11

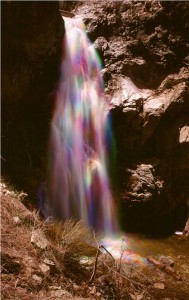
If the subject moved during the shot, or if the lights moved, the image changed. I’d all ready worked with images built of three exposures. I did this on location with waterfalls to add rainbows to the water. I’ve added a shot of Buckhorn Falls to this blog to show how this effect works. In the shot at the top of the blog (Gyroscope #1) I kept the light in the same shot but the outer frame of the gyroscope moved. In Gyroscope #11 I moved the light around between the three exposures. You can see how the light position changed the color of the clear glass I put the gyroscope on.

Buckhorn Falls #2 Shot on 4X5 Ektachrome

Buckhorn Falls #2 Shot on 4X5 Ektachrome

If you’d like to buy either of the Gyroscope images You can use the link below. I’ll mount and mat the images on 11X14 inch board, and the actual image will be just 10 inches tall. That’s as big as the files really want to print. Since these images are smaller you can get these images for only $80 by using the link below. Please tell me which image you want by e-mail (john@siskinphoto.com). I’ll make a special deal if you want both images. I’ll be putting up Buckhorn Falls #2 as a separate post soon, with it’s own sales link.


You can buy one of my books at these links

I’m going to be using my blog to add information about images to the fine art pages of my site. This part of the site isn’t functioning yet, but it will be. These posts will enable me to put up information about the shot and to add details about buying prints. I think it’s very useful to talk about the details of creating specific images. I hope to hear from you about this-use my e-mail to let me know: john@siskinphoto.com. Of course I hope you’ll also want to buy some prints. I’ll be offering more types of prints in the future.

December 11, 2015

Sea Cave, El Matador State Beach, California #1

Filed under: Basic Photo Technique,Film Technique,Large Format Photography — John Siskin @ 1:00 pm

Sea Cave, El Matador State Beach, California #1

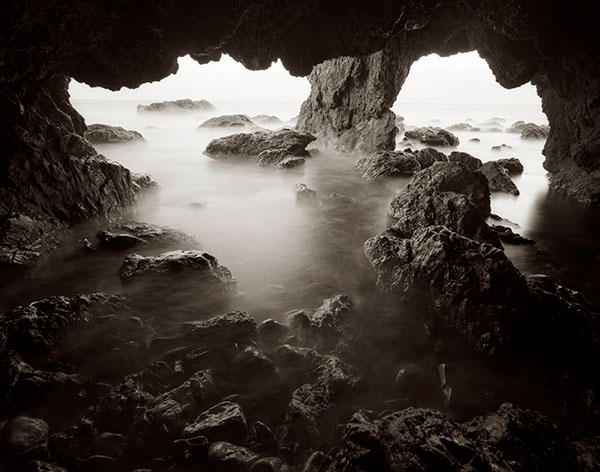
El Matador is my favorite beach. Many of the beaches around Los Angeles are large stretches of sand, good for surfing, or just lying in the sand, but not so interesting to photograph. El Matador has wonderful rocks and even caves. Of course I’m not the only one who likes El Matador: there are always photographers at El Matador. As you may guess from the title I’ve made several more images at El Matador: I’ll be posting them soon.

This photograph has been in several exhibits, and it was on display at the Huntington Library for years.

I wrote about the 65mm Super Angulon in my last post (https://siskinphoto.com/blog/?p=2958) and this is another shot I made with that lens. The lens is an extreme wide angle, equivalent to about an 18mm lens on a full frame 35mm camera. So the way the lens sees is very different from our normal perception. Since the lens is so close to the subject, in this case the camera is just above the water and inches away from the rocks in the image, the depth and shape of the subject is exaggerated. Wide-angle lenses show exaggerated perspective because of the position they are used in rather than because the lens actually distorts the subject. While this effect can be disconcerting in some architectural subjects it works very well here.

The lens is focused close to the camera, which is important with extreme wide-angle lenses in large format work. The aperture is at f22 to maintain focus through out the image. Since the cave is dark, and the aperture is set to such a small stop the exposure is long, several seconds. This evens out the movement of the water, which creates both transparent and fog effects with the moving water. Because of the lens and the long exposure it’s impossible to actually see the image as you take it. I have to internally visualize the image I want to make and use the camera to create that visualized image. It’s important to use pre-visualization even with a digital camera, otherwise you’re just recording the scene; pre-visualization enables you to interpret the image. This skill enables photographers to make images rather than just take pictures.

I really love working with wide-angle lenses. I use them a lot. Any extreme wide-angle lens creates challenges and opportunities for the photographer. This lens has a maximum aperture (wide open) of f8, so it’s quite dark. In addition it requires the lens to be very close to the film, which can make it difficult to manipulate the camera. It’s even important to arrange the camera so that the front of the camera isn’t in the picture. So the whole process of positioning the camera and visualizing the image was a challenge here, not to mention the fact that the cave is actually quite small. As with so many film shots, it was really exciting to see a good negative!

As with the last image I posted Union Station, Los Angeles #1, I’m offering this image at a special price until the end of the year, just $95. This price is for an archival digital print, mounted and matted on 16X20 cotton rag board. The image area is 11X14 inches. Shipping in the U.S. is included, if you’d like me to ship somewhere else please contact me at john@siskinphoto.com.


This image, and many others, is also available in my book B-Four. You can look at the book at this link, and order it as well. I hope you’ll take a look at the book.

You can buy one of my other books by clicking on the titles below:

I’m going to be using my blog to add information about images to the fine art pages of my site. This part of the site isn’t functioning yet, but it will be. These posts will enable me to put up information about the shot and to add details about buying prints. I think it’s very useful to talk about the details of creating specific images. I hope to hear from you about this-use my e-mail to let me know: john@siskinphoto.com. Of course I hope you’ll also want to buy some prints. I’ll be offering more types of prints in the future.
December 10, 2015

Union Station, Los Angeles #1

Union Station, Los Angeles #1

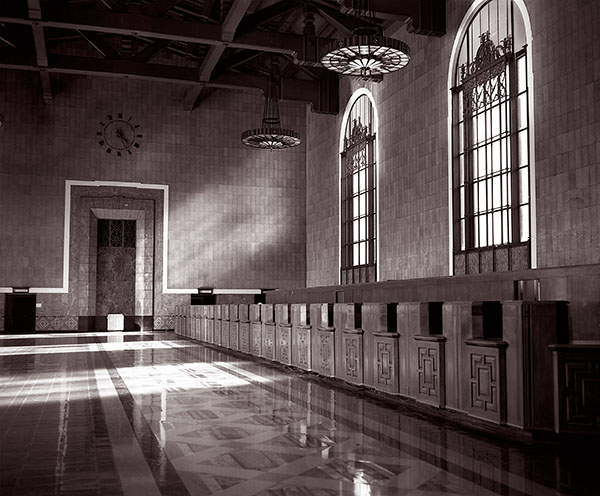
This is one of my favorite images. I love the look of the print. I have it above the desk in my office. Sometimes the experience of making an image is transformative: making this image changed the way I make pictures. I learned to take risks, even if the shot might not work. While this might seem natural with digital photography, it’s different with film. I shot this image on 4X5 film. Each sheet of film is individually loaded into a film holder. Five film holders, ten sheets of film, weighs more than a pound, and takes up a lot of room as well. Each exposure costs more than two dollars after processing. So on location each shot is precious. I made this shot with my speed graphic, which weighs almost seven pounds (I got out the scale to do this blog). This isn’t usually important, but Union Station, Los Angeles, won’t let anyone shoot with a tripod unless they have a permit. I made the shot with a Schneider 65mm f8 Super Angulon lens. I’d never made a really sharp image with this lens. So I hand held the camera at an exposure of 1/15 sec at almost f16. The light was beautiful, but I didn’t know if I could hold the camera still for the exposure.

There’s something that I didn’t know about using the Super Angulon lens, or any wide-angle lens on a large format camera. If you focus the camera on infinity and stop down the lens only the center of your shot will be sharp. In order to get a sharp image with this class of lenses you have to focus closer if you stop down the lens. So if you want to have the whole shot sharp, and you’re going to shoot at f16, you should focus at about eight feet from the camera. When I took this shot I was very careful, because I knew I needed to get as much depth of field as I could. So I focused closer, using the rule of thumb that depth of field extend a third in front of your focus point and two-thirds behind that point. To my surprise and delight the whole image is sharp edge to edge. I’ve posted a lot more about aperture and depth of field in these posts: https://siskinphoto.com/blog/?p=50, https://siskinphoto.com/blog/?p=56 and https://siskinphoto.com/blog/?p=68. Of course the fact that the image is sharp also means I held the camera steady at 1/15th of a second. Pretty good for a large format camera!

My Speed Graphic camera with the 135mm lens, not the 65mm Super Angulon.

My Speed Graphic camera with the 135mm lens, not the 65mm Super Angulon.

It’s always exciting to see your film images after processing, because, unlike digital, you don’t know you’ve got the shot until it’s processed. When I saw this negative, before I even made a print, I knew it was great. I still remember that moment. Regardless of how you make a photograph it’s exciting when you realize you’ve made something special. By the way, since this image is titled Union Station, Los Angeles #1, you can assume that there are more images of this fabulous site to come.

I hope that when I get the website updated I’ll be offering silver gelatin prints of this image in various sizes. Right now I’m offering archival digital prints of this image at a special price just $95, mounted and matted on cotton rag board, and shipped in the United States. The image will be about 11X13 inches and matted to 16X20.


This image, and many others, is also available in my book B-Four. You can look at the book at this link, and order it as well. I hope you’ll take a look at the book.

You can buy one of my other books by clicking on the titles below:

I’m going to be using my blog to add information about images to the fine art pages of my site. This part of the site isn’t functioning yet, but it will be. These posts will enable me to put up information about the shot and to add details about buying prints. I think it’s very useful to talk about the details of creating specific images. I hope to hear from you about this-use my e-mail to let me know: john@siskinphoto.com. Of course I hope you’ll also want to buy some prints. I’ll be offering more types of prints in the future.
Older Posts »

Powered by WordPress