Photo Notes A place to talk about making images.

March 22, 2021

Photography Through The Microscope!

Beginning with this post I am going to make prints of some of the images on my blog available. More information is posted at the end of this blog. Thanks for your support
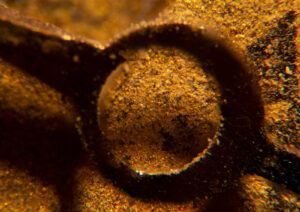
Watch face DSC-2184

In the book Zen and the art of motorcycle maintenance the author (Robert M. Pirsig) quotes an instruction booklet, that said “assembly of Japanese bicycle require great peace of mind.” Macro and micro photography require that your peace of mind increase in direct proportion to the reduction in the size of the object you are photographing. It gets more difficult, and it requires more patience, as you get closer.
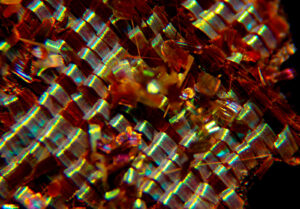
butterfly wing DSC-2184

Most people approach macro photography by purchasing some sort of macro lens which enables them to reproduce picture of an object at perhaps one quarter the size of the object in real life on the sensor of their camera, maybe even bigger.  So, one quarter reproduction means that if you had a 25 cent piece, a quarter in US language, you could take a picture four of them and stacked across the short distance of a full frame sensor sensor. And they would fit. The quarter is an inch wide and a full frame sensor is an inch wide (and an inch and a half long). If the quarter filled a full frame sensor it would be a 1:1 capture, or life size.
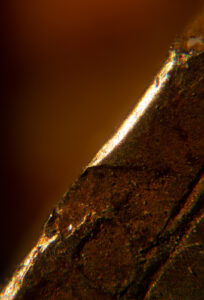
watch part  DSC2146

Macro photography is occasionally discussed in terms of where it begins and where it’s simply a close-up. I’m not sure that that’s terribly useful, but, when you are less than three feet from your subject with a more or less normal lens, you’re pretty close and it isn’t necessarily difficult to make that picture, depending upon the equipment you’re using. As you get within less than an inch of your subject it gets to be extremely difficult to shoot, and when you are within one or two millimeters of your subject, it becomes almost impossibly difficult to photograph. What I’m going to explain here is photography with the microscope, which is generally photography within less than an inch of the subject.
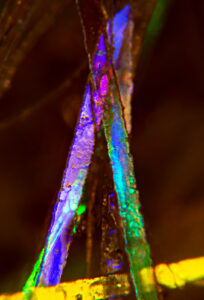
hair gel  _DSC2073

I will discuss other ways of doing close-up work in other postings. This posting is concerned with very, very close microscope work. This is not the usual way I approach this subject: in the past I’ve discussed macro photography and built up to micro and microscopic photography. That might make more sense. However, I’ve recently posted a lot of photographs made with the microscope, and so I hope that many people might be interested if I start there.
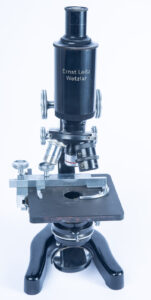
Leitz Microscope

The first thing about the microscope is to understand that the actual equipment that you need to do this kind of photography is easier to get, and less expensive, than you might think it would be. That’s important because one of the things I would hope that this discussion does is to encourage you to try this kind of micro photography or microscopy if you want to be more formal.
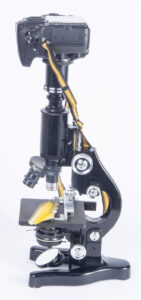
Leitz Microscope set-up

Before I write about the individual components of the camera/microscope combination, I’d like to give an overview of the set-up, from top to bottom. At the top is a digital SLR, the currently available cameras would be good for this. Next is a T-mount (more below) which connects the camera lens mount to a microscope adapter. This adapter is basically a hollow tube that fits between the camera and the eyepiece tube. The eyepiece is in the eyepiece tube, and it’s the first part for the optical system. The eyepiece tube is connected to the microscope head, where the lens or lenses are mounted. That lens is called the objective lens and it is the second part of the optical system. Below the objective lens is the stage, which is where you’ll place your subject. Under the stage there will often be an iris/condenser device, which can be used to change the quality of the light coming through the subject. Probably most scopes have a mirror below the condenser, but a few will have a light source. I think a mirror is more useful. At the bottom is the base, which is usually heavy to keep the whole thing stable.C14 The condenser, it helps to focus the light onto the subject
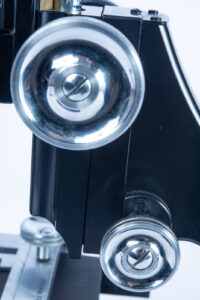
The large wheel is course focus and the small one is fine focus. They are often set up this way on modern scopes
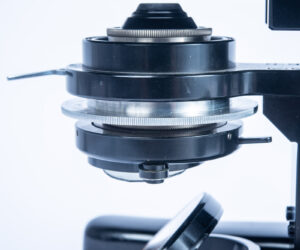
The condenser, it helps to focus the light onto the subject.

A decent student grade microscope can be had for around a hundred and fifty dollars. This will do the job. Of course, you can spend much more on a microscope, but since you are not trying to accurately reproduce pictures of cell division or tiny crystalline structures (at least I’m hoping you’re not) a student grade microscope is a good choice. A student grade scope has course focusing and fine focusing, two separate knobs. It takes standard interchangeable eyepieces and interchangeable objective lenses with a standard thread. I’ll put a link to a student scope, and the rest of the stuff, at the end of the post.
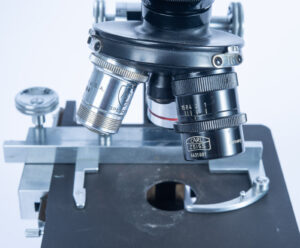
Objective lenses on Lens turret
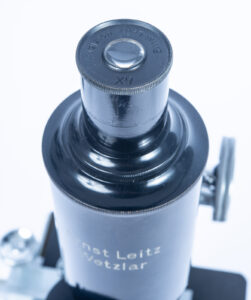
Eyepiece

In order to understand the reproduction ratio of a microscope for viewing it’s pretty simple. The eyepiece and the objective lens have numbers for their power, say 10x or 4x. Multiply the two numbers and you have the power of the system. So, if you have a 4X objective and 10X eyepiece, you would be viewing at 40 times life size, which is a nice range to work in. I’m not actually sure that this is exactly the power on your camera sensor, but whatever it is you’re damn close. When you make a print of the capture or reproduce it on your computer screen it gets larger still. So, you are frequently looking at things that may be a hundred, two hundred maybe even three hundred times life size on your computer screen, which is pretty impressive.
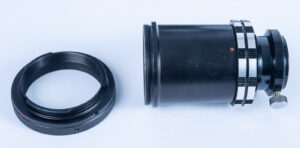
Microscope Adapter and T-mount

The adapters that you need to do this, in addition to the scope, are first a microscope adapter. This fits around the eyepiece tube on a standard microscope. Is available for less than $40. Surplus shed would be a good place to start looking for them. In addition, you will need a T-mount adapter. T-mount was an early interchangeable lens mount that is still used today. A T-mount lens could fit onto cameras with several different lens mounts, if you used the right adapter. And it remained unchanged and in use pretty much to this day. There are mounts for most current cameras, even mirrorless. T-mount is also used for telescopes and some other optical systems. You can also get old mirror lenses that use t-mount adapters. They can be a lot of fun. T-mounts are available from Surplus Shed and B&H Photo and any of a variety of suppliers.
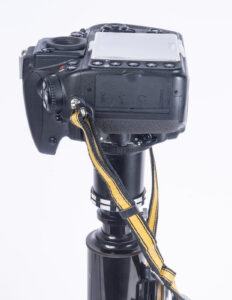
The camera on top of the scope
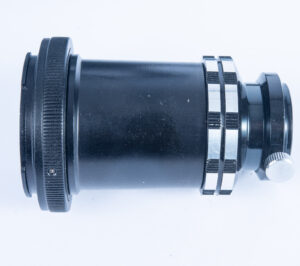
Microscope and T-mount attached. They are screwed together
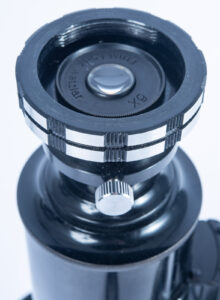
The microscope adapter is two pieces. It’s easier to mount the small piece on the scope and mount the larger piece onto the camera and then put them together on top of the scope.

You should start with the microscope arranged vertically. Most of the student grade microscopes, in fact, I think all of them, will tilt backwards to make it easier to sit and view your subject. Unfortunately, if you mount your camera on the microscope in this way, it will probably fall off the microscope and that would be a bad thing. So, you’ll set up the microscope vertically. Important safety tip. It is also very important to set the camera to use the self-timer. If you trigger the camera directly with the shutter release you will shake the camera and get fuzzy pictures. You could also use a remote release, but the self-timer works very well for microscope work.
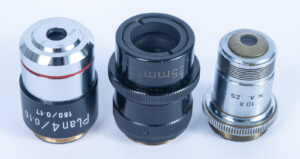
Microscope lenses- Shown are a 4X Plan, a 25mm Zeiss Luminar and a Spencer 10X. This is the group I’ll usually put onto the scope.

I would always start with a 4X objective lens. I say this because one of the problems that you’ll get into, as I mentioned earlier, is the closer you get to your subject the more difficult it is to manage taking a picture of the subject. With a 4X objective lens, the lens will end up being between a quarter and three-quarters of an inch from your subject. That gives you just enough room to light the subject from above. It also gives you room to put a filter on the lens; it gives you room to do a whole lot of things. A 10X lens will be less than 3 millimeters from your subject, which makes it impossible, or close to impossible, to light your subject from above. You’ll only be able to work with transparent subjects with the 10X or more powerful lens. It’s more difficult to manage the focusing or positioning with the 10X lens. When a professional microscopist uses a 100X lens she/he will usually add oil to the top of the subject and then put the lens into the oil. There’s less reflectivity if you do this. You would only be able to photograph transparent subjects with light transmitted from below the stage. I have not tried to do this, and, unless I find some transparent subject that seems absolutely compelling to me, I am unlikely to try it in the future.
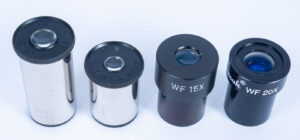
Eyepieces, Shown are a Leitz 6x and 10X and a Wollensak 15X and 20X

One of the things that may not come with a student-grade microscope is multiple eyepieces. And this is one of the things that you might very much want for photo microscopy such as I do. Since it’s so difficult to use more powerful objective lenses, you may find yourself wanting to change the eyepiece to change the power of the scope. Eye pieces come in a variety of strengths. I own a 4X eyepiece, a 10x eyepiece, a 15x eyepiece and a 20x eyepiece, which gives me some variety of reproduction powers. Surplus shed carries a number of different eyepieces and they would be a good place to start looking for eyepieces. A student grade microscope usually comes with a 10X eyepiece and that is a good place to start. Neither standard eyepieces or objective lenses are terribly expensive, compared to camera lenses. There are some special purpose objective lenses if you’d like an upgrade. If you find a PLAN objective lens it will be sharper than the lenses that come with most scopes. The biggest difference might be that an inexpensive objective lens will be more likely to be fuzzy at the sides of your image.
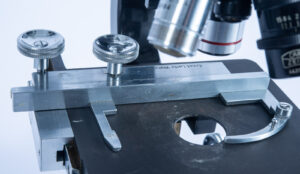
Geared stage

Most student microscopes have clips which will hold down a regular microscope slide. Then you position the slide, or other subject by moving it with your fingers under the scope. This is the biggest problem with inexpensive microscopes. Better scopes have a geared stage to move the subject around under the scope. If you really enjoy photo microscopy you might want to get a scope which has gears to control the position of the subject.
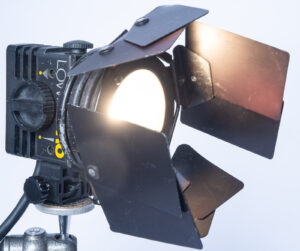
Lowell Pro light with Barn Doors
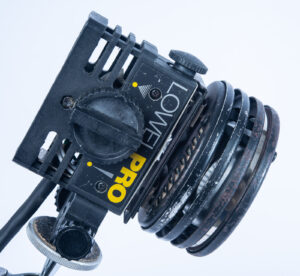
Lowel Pro light

The next thing you will need is a light source. Most student-grade microscopes and in fact most fancy microscopes only have a mirror below the lens. Most scopes also have a condenser between the mirror and the stage which changes the spread of the light that you’re using. I find that the condenser is not terribly useful to the way I approach microscopy, but you may find it helpful. Some student grade microscopes will not have a condenser. The actual light source that you use can be something as simple as a desk lamp or even the room light. And that will work very acceptably for an awful lot of work that you might do with the microscope. Look for a lamp that has a continuous spectrum or perhaps an LED light source. Stay away from fluorescent light sources because the spectrum can make it very difficult to get a true color reproduction or can change the color reproductions in unexpected ways. I find that I rarely look for accurate color in micro photography, especially because the images aren’t things we can usually see with the unaided eye. Often, I will use the 3200º Kelvin quartz light and either not compensate for the warm color shift of compensate in Adobe RAW when I open the image. A small light source gives you more control than a broad light source. At this point I am using a Lowel PRO quartz light, which provides much more light than any desk lamp. I like this a lot, but it’s not available new, there are generally several of them on eBay pretty inexpensively. Lowel still makes several more powerful quartz lights, like the Lowel Omni or Tota quartz light but these might be too hot for microscope work (they do get extremely hot).  A bright light source is especially important when I start to filter or modify the light because I will still have enough light to actually see the subject. Even without a filter it’s dark through a microscope; more so when the light has to go through the camera and into the viewfinder, after it leaves the microscope eyepiece. The next problem is to position the light source. The Lowel PRO quartz light can be attached to a regular light stand mount or it can be attached to a tripod mount. This enables you to use a ball head or another tripod head to position your lamp in relationship to your subject. This light also has barn doors which give you more control over the light. You can also move the microscope mirror which will help position the light; that is if you are lighting your subject from bellow. If you’re using a 4x objective lens you can also light a subject from above, which makes positioning the Lowel PRO light with a tripod head even more helpful. You can also use a strobe to light, even a dedicated camera flash. This can increase sharpness, because camera shake can be a problem, BUT, it’s very difficult to be sure what your subject will look like when you take the picture. Also, you’ll still need a bright light to focus.
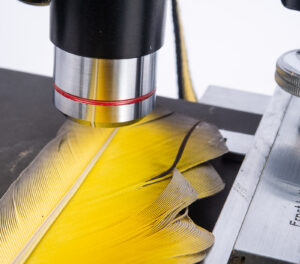
The 4X lens focused on a feather. You have a good amount of room between the lens and the subject.

If you are using the 4X objective lens you will find that most of the focusing can be achieved with the course focus wheel on your scope. The fine focus wheel is useful when you try to use that 10X lens. You will also find that the objective lens will stay at about the same distance from you subjects, so if you get a sense of that distance you can set the scope at about the right distance before you look through the camera. Your actual focus is achieved by looking through the camera viewfinder. Since your microscope is set up vertically, it may help to place the scope on a low table or get something to help you stand above the scope. As you might imagine depth of field, holding things at different distances form the lens in acceptable focus, doesn’t really exist with microscopes. With few exceptions, notably Zeiss Luminar lenses, microscope lenses do not have diaphragms, so there is no way to adjust depth of field, that is if you had any… What you can do is use Photoshop to do focus stacking. In order to do this, you need to take a several pictures at different focus points. Photoshop will enable you to combine these images into a single image with better focus. This can be a very helpful technique. While it is outside the scope of this particular post you will find that there are plenty of tutorials on line. Or, you could wait for me to do a post about modifying micro images in Photoshop. If you do take images for photo stacking, you’ll want to take them at the same exposure.
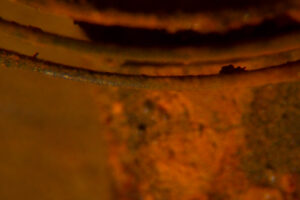
Image without focus stacking
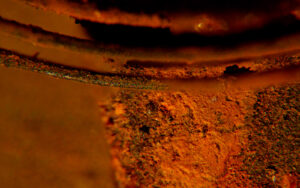
Image with focus stacking DSC2130

When I first worked with high magnification optical systems exposure was very difficult to calculate. I had to compensate for long bellows extension on the view camera as well as reciprocity failure form the long exposure times. It is still astonishing to me how much easier it is to get a great exposure with a digital camera. If you set your camera on aperture preferred, you’ll get a good exposure. You may want to add exposure compensation correction, if you want a darker or lighter exposure. You might want to see what an image looks like at different settings, just to get a better feel for how you can interpret your subject. Of course, you can also do a lot of interpretation after you capture the image in photoshop. These changes in exposure calculation are perhaps the biggest improvement in micro photography that I’ve seen in 40 years. The massive improvement in the amount of information that a sensor records, compared to 35mm film, is also very significant. I used to do micro photography with large format cameras and transparency film, which was really quite difficult.
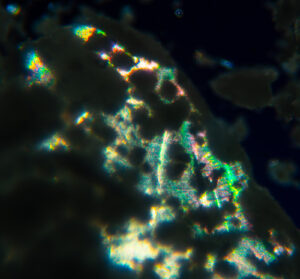
Sodium Thiosulfate

As you look at the pictures of the set-up and the various tools I use, you might want to begin thinking about subjects. I’ve recently done some nice work with old watches and some shiny goo meant for hair. Jerome Russel used to be a client and they made some very shiny hair care products with glitter and other reflective materials. I’ve included shots of both here.

Watch Parts
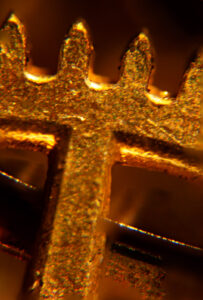
Old Watch Parts DSC2210
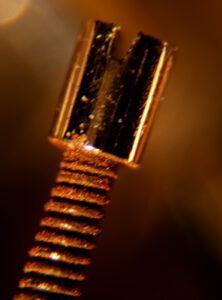
Old Watch Parts DSC2207

Jerome Russel Hair stuff:
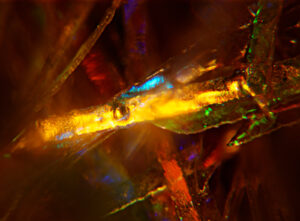
Hair goo-focus stacking DSC2069
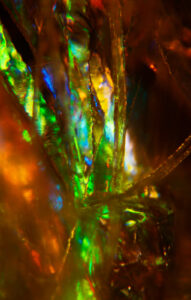
Hair goo-focus stacking DSC2061
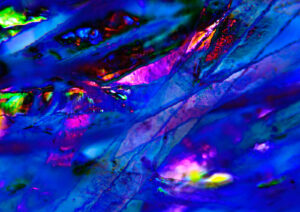
Hair goo-file heavily modified in Photoshop DSC2058

Of course, a lot of things have interesting colors. Below are a couple of shots of dried Selenium toner, which is used in the wet darkroom to add color to B&W prints.
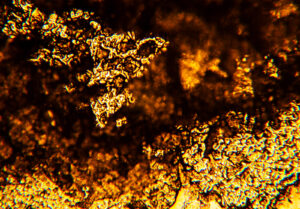
Selenium Toner DSC1999
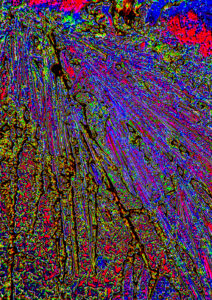
Selenium Toner-file heavily modified in Photoshop DSC2000

Let’s not forget living things. These are a couple of pictures of butterfly wings. Bet you didn’t visualize them looking like this.
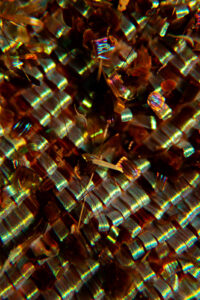
Butterfly wing DSC2050
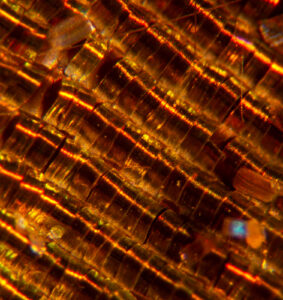
Butterfly wing DSC2046

I mentioned filters above. There’s a lot of science behind this trick, but I’m going to cut direct to the chase. Put certain transparent materials, things like plastics and sodium thiosulfate (B&W fixer from the wet darkroom) between two polarizing filters. As you rotate one of the filters colors will start to appear. FUN! But, as I mentioned above, you need a lot of light. These shots are of a plastic prop ice cube. You can get interesting results, but you’ll need to experiment. Frankly all of photo microscopy requires an experimental attitude.
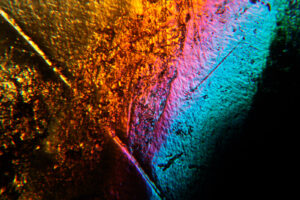
Plastic Prop Ice Cube-Dual Polarization
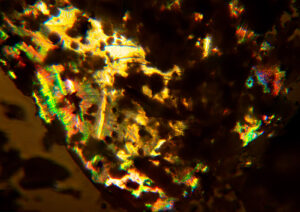
Sodium thiosulfate, fixer in the B&W darkroom-Dual Polarization DSC2025

As I mentioned at the top of this post, I am now offering prints of many of these images. If the caption has an index code like DSC1234 you can buy a print! Right now, all prints are set to fit on an 11×14 inch piece of paper. If the image is too thin it will have white paper on the sides. I am printing with an archival ink/paper combination. Prints are shipped by USPS priority mail to anywhere in the US that’s covered by Priority Mail service. The price is $75 for the first print and $60 for each additional print ordered at the same time. Please e-mail me at john@siskinphoto.com and include index code and your address. I will send you a PayPal request to arrange payment. I will be adding old and new images to this service. If you see an image on my site you would like to purchase please tell me where you found it and I’ll try to make it available to you. Thanks for your support!

A few links to the items mentioned in the post:

Student scope:

https://www.surplusshed.com/pages/item/T1480D.html

Microscope adapter:

https://www.surplusshed.com/pages/item/M1573D.html

Sony T-mount:

https://amzn.to/3s7xGOa

Nikon T-mount:

https://amzn.to/312M2DC

Canon T-mount

https://www.bhphotovideo.com/c/product/261256-REG/Celestron_93419_T_Mount_SLR_Camera_Adapter.html

And my books!
Understanding and Controlling Strobe Lighting: A Guide for Digital Photographers

https://amzn.to/3tH5Dp9

Photographing Architecture: Lighting, Composition, Postproduction and Marketing Techniques

https://amzn.to/3c8nLlU
October 3, 2020

Copying Artwork and Photographs

I wrote this a few years ago when I was teaching at BetterPhoto. Recently a friend asked about copy work, so I thought I’d re-post it here. The basic ideas are still valid, but today I would use different strobes to do the work. I hope you find it interesting…

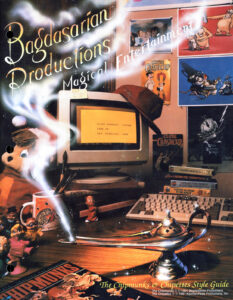
Wow, look at how old that computer is… The cover for the Style Guide for Bagadasarian Productions.

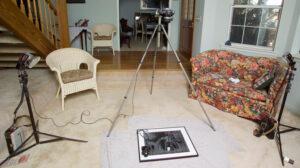
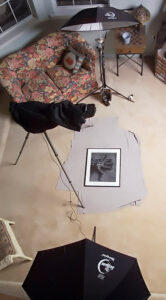
When I started my photography business a few decades ago my commercial client was Bagdasarian Productions. They made the Chipmunk animated cartoons, with Alvin, Theodore and Simon. They were working on a full-length movie about the adventures of the Chipmunks. One of the keys to animation, back in the eighties was high quality painting for backgrounds. Those paintings were done here in Los Angeles and then shipped to Korea for the character animation. My job was to make high quality copies of the backgrounds so that the background painters would be able to refer to them in order to maintain accurate color and style. Since then I have done copy work for businesses, artists and galleries. Copy work is pretty simple but it must be done very carefully in order to get the best results. I often do copy work in the living room, since I keep my finished work at home.

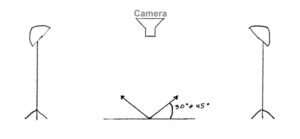
The basic layout of a copy job is to have the camera back, whether film or sensor, parallel to the original. The lights need to be between 30º and 45º from the plane of the original. In this range they light the original but you don’t see reflections of your lights in the original. You can even shoot through glass! The lights need to be far enough from the original to even out the lighting. In the example with this article the lights are about five feet from the center of the original. You need the lights further away from a larger original. The reason for this is that if the distances from the light to the corner of the original and to the center of the original are significantly different you will not be able to even out the light. The amount of light that makes it to the subject goes down as the distance from the light source increases. So, if the distances to different parts of the original are very different you will not be able to even out the light. In the example the difference between the light on the center of the shot and the corner is 1/10th of a stop, pretty small.

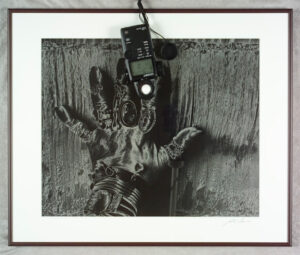
This is the one area of digital photography where I still use a light meter. When I set-up a copy job I put the lights an equal distance from the center of the original. I also point the lights at the original. Then I use the light meter to move the lights into the most advantageous position.

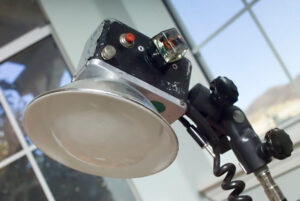
As I mentioned above, in this case I was able to get the lights to almost perfectly even. It is very difficult for the eye to see differences of less than 1/3rd stop, so if you can get your lighting even to the 1/3rd stop level your light will be even on the copy. I also use diffusion domes over my lights to make them more even.

You might need these if your lights are close to the original, as you move the lights further back, they don’t matter as much. I generally use them, but then I already have them. I will usually use the lights directly, to reduce the chance of reflection. If I am photographing a piece of art with an irregular surface I will probably use umbrellas to reduce the shadows on the irregular artwork. If I am including the frame in the copy I will also use the umbrellas to reduce the harsh light on the frame.

The kinds of lights for copies are also important. The easiest lights to use are strobes. Strobes have a color balance that is the same as daylight; this is a big advantage if you are using film to make copy slides. You can use strobes in a room that has existing light; the room light will be so much less than the light from the strobes (if you have reasonably powerful strobes) that the room light won’t affect your shot. If you can remove existing light from your location (including daylight) you can shoot with quartz lights. These lights are designed for photography and they have the qualities to make good copies. I would avoid the tungsten photo bulbs that look like regular light bulbs; they change color too quickly. I would not use any fluorescent lights for copy work, although digital cameras can balance for them reasonably well, they do not have a continuous spectrum. Consequently you will probably have problems achieving accurate color everywhere in your image.

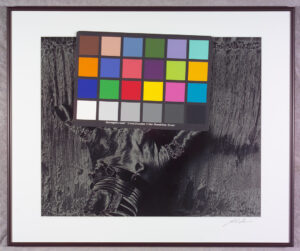
Whatever light source you decide to use you will need to do a color balance if you are using a digital camera and a color test if you are shooting transparency film. The key to doing a good balance with a digital camera is to use an accurate grey sample. I use a GretagMacbeth ColorChecker, to keep things accurate.

I use the grey samples on this card to set my balance on the digital camera and the whole card to test my film. Getting the color set accurately is a very important part of copying, so it will be important to check the best way to do this on your digital camera.

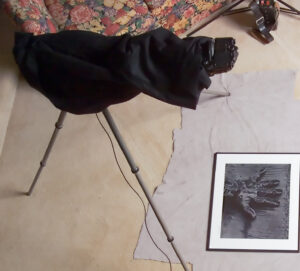
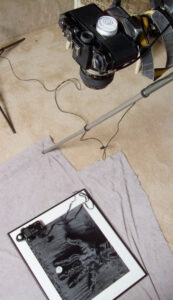
There are popular copy stands for doing small copies, say 11X14 inches at the largest. These are faster than using than my tripod set-up. If you are copying a large amount of originals from 4X6 inch to 11X14 inch you should check these out. However, if you are doing larger originals or doing copy work less often you should consider a Side Arm attachment for your tripod. I use a Bogen/Manfotto 3059 with my Gitzo tripod; you can mix and match in this area. The side arm mounts on the tripod legs and then the tripod head mounts on the side arm. I cover the side arm with black Duvateen fabric when I am shooting products under glass or very glossy originals.

There can be enough light spilling onto the side arm for it to reflect in the picture. The key to keeping your copy square is to be able to get the original parallel to the camera back. Before you do the leveling get the camera into about the right position, because if you have to move the camera you may have to level it again. I use two surface levels to make the camera parallel to the original. I place one on the original and one on the camera back. This is generally a part of the procedure that requires some patience. The object is to get the two bubbles in precisely the same place.

I have used several different types of levels over the years, these little round levels work pretty well. The key is to not be in a hurry, and to double check if you move the camera. Remember you can move the original as well as the camera. If you are copying an original mounted on a wall, then the levels won’t help you. The way to get your camera positioned is to make the original square in the frame by moving the camera. This also requires patience.

You can use any lens to do copy work, but if you want to have a high quality copy, some lenses are better. You should probably avoid zoom lenses, they do not copy flat objects as well as fixed focal length lenses, and they often do not focus close enough.  One inexpensive alternative is 50mm lens. The best lenses for this work are macro lenses; they are designed to shoot a flat field. I use an older Nikon 55mm f3.5 macro lens. It does not have any automatic features when I use it with my camera, but those features don’t do me a lot of good with copy work. I have exposure information since I used the meter to set my lights. Auto focus often doesn’t work well on artwork, since there may not be enough contrast to focus on, and I don’t want to reposition my camera to focus. I usually place a coin or other object on the original to help me focus by eye with the macro lens. I can check my focus on the computer. Of course, when I am using a film camera it is a little easier to focus, since the viewfinder is designed for manual focus. One of the other problems with focus is that I have to stand on a stepladder to focus. I wouldn’t have to do that if I shot the original mounted on a wall, but it is much harder to get the sensor parallel to the original!

I hope you’ll also check out my books, use the links below:


One more thing, there are more than14,000 people subscribed on this blog. Wow! Thanks everyone.

March 15, 2018

A Do It Yourself LED light!

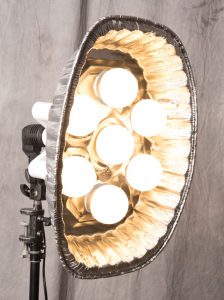
I’ve been watching the evolution of LED lighting for some time. As with any light source I’m interested in a couple of things, first how much actual light can I get? Second what does the spectrum look like? Third what is the color temperature of the light? Fourth what is quality of the light, and by this I mean how hard or soft is the light? Fifth what is the portability of the light? Finally, I’m interested in the price. In this post I’ll present a Do It Yourself light that presents a satisfactory solution to these problems.

How much light? I compared this light to a Lowell Omni light with the 420 watt EKB bulb. The DIY LED bulb had 1/3 of a stop less light that the Omni did if the Omni was set to throw a broad light. When the Omni was set to throw a spot then the Omni was 2-1/2 stops brighter. You should note that the LED light is a broad light, so the comparison to the Omni set for spot is not realistic.

I looked at the spectrum with my homemade spectrometer. The spectrum is continuous from red to blue. I can’t tell accurately if the cut off is different from a tungsten light source, but I don’t see a difference. The earlier LED light sources I tested did not have a continuous spectrum; so this is a real improvement.


I tested the light with a Konica Minolta Color Meter III F. This is a very accurate meter. The DIY LED had a color balance of 2930K. If you prefer the light needed an 82B filter AND a CC9 magenta filter to match 3200K. 3200K is, of course, the standard professional movie color temperature, which is the color temperature the Lowell Omni light is designed for. This means the DIY LED is a little warmer and a very little bit green. With a ¼ CTB filter over the unit the light had a temperature of 316, essentially even with the 3200K standard. There was still a small amount of green color that could be corrected with a CC10 G filter. This is a small correction, which could be ignored in many situations. I should point out that my various quartz lights show a color spread from about 2900K to 3300K, so there is normally variation in standard quartz lights. You can see the variation in these images.

The left test is a Quartz light with a DYS bulb, the center is the LED with a ¼ CTB filter and the right side is the uncorrected LED.

When corrected in Photoshop all the files look pretty much the same as you can see in the image below.

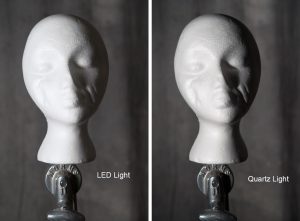
The DIY LED light acts like a small soft box. If you’re not worried about a specular highlight that might reflect the multi bulb set up, it’s really quite nice. Especially if you use it close to the subject. If the multi bulb design creates a problem in your image you can use it with a fabric cover. You can also use it with a light panel to make it even softer. You can see the difference between the LED light on the left and the Lowell Omni light on the right below. Both lights were set in the same position, about 5 feet from the wig head and about 45º to the left side of the camera. The version from the Lowell light has harder transitions and deeper shadows.

My design for the light is quite light weight, but a little bulky. The turkey roasting pan is easily pushed out of shape, which could be a problem. The good part is that the light will run for quite a while on a 12volt battery with a 120volt converter.

With out a filter the light will cost you about $45. NICE PRICE! Of course this doesn’t include a light stand. The filter is about $7 to $10 depending on which manufacturer makes it. Since the front of the lights are cool you won’t need to worry about burning or melting the filter.

Please note that I am looking for other color temperature bulbs that would work with this design. At this time these are the best balanced bulbs I’ve found. They will work well with a DSLR set to Tungsten. And in many cases can be mixed with other tungsten light sources. I am doing other tests as well, so look for updates. The daylight balanced bulbs I’ve tried are not very close to daylight or strobe.

Here’s the parts list:

The bulbs are Feit 100 Watt Dimmable. I got them at Costco, which was about half the price of the bulbs at this Amazon link.

The 7-bulb holder is available at Amazon. Here’s the link:

The socket, which has an on/off switch, is on Amazon at this link:

I should point out that this socket fits onto a standard light stand. There are several versions of this device. All are a little flimsy. The one in the link has a bigger tightening knob. I think this is better than the one I actually bought, mine slips.

I bought the turkey roasting pan at the Dollar Store. You can get them at Amazon, but you have to get a bunch of them. The pan was just a dollar that the Dollar Store.

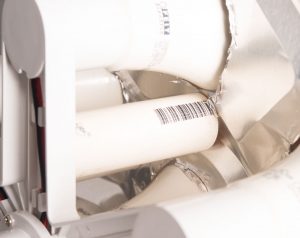
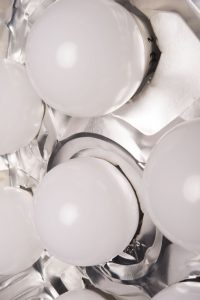
The only trick to assembling the thing is to get the roasting pan to sit at the base of the bulbs. I used a couple of feet of pvc pipe to push the pan against against the base of the bulbs. I attached the pvc parts with pvc glue. I’m sure other things would work as well. Keep in mind that the base of the bulbs does get pretty warm, so you probably don’t want to glue the roasting pan to the bulbs. Take a look at the picture to see how I assembled it.

This shot shows how deep the bulbs are set into the turkey roasting pan.

I hope you’ll also check out my books, use the links below:

One more thing, there are now more than 7500 people registered on this blog. Wow! Thanks everyone.

August 22, 2017

Dedicated Strobe Test

Over the years I’ve written and taught many times about lighting gear. I believe that any photographer who is wholly dependent on finding good light, rather than being able to make and modify light, when making a picture is limited in ability. While I recognize that there are many photographic artists who work in this manner, it is just not acceptable for a commercial photographer to be limited in this way. I should point out that you still purchase my book on this strobe lighting, just click on the link below.

The tools of light are evolving, as are all the tools of photography. When I first started making pictures on camera electronic flash was pretty new. It was also not very good. Now there are many fine lighting tools that work with digital cameras. Of course this doesn’t solve the biggest problem of portable flash units: you can’t see the light you’re actually photographing. An on camera flash makes light at your camera, so, if you’re not careful, you’ll get the dear in the headlights effect and red eyes. Any lighting unit is only as good as the visualization or lighting control of the photographer. Automation doesn’t make good pictures, just properly exposed pictures. It takes a photographer to make good pictures.

Since I started teaching at the Art Institute of Indianapolis I’ve had to discuss lighting tools almost constantly. The tools I’ve used for decades aren’t practical or available for the students. It seems ridiculous to suggest that twenty something students buy strobes older than they are. So I’ve been evaluating many of the current products. I have just a couple of important parameters for evaluating a flash: light and price.

Flash Fill using the Godox TT685

It may seem obvious that I would evaluate a flash based on actual light output, but I’ve had a couple of conversations lately that make me think it’s not obvious.

Photographers have told me that, since their cameras make very fine images at very high ISO setting, they don’t need a lot of strobe power. I’ll admit that a high ISO is a wonderful thing and that it does change they way you can use lighting tools in many situations but it can’t solve every problem. And that is the issue: not light quantity but light problems. A little bit of light can improve the images you take at an event even if you’re shooting at ISO 1600, but that’s not the only problem you’d like to solve with a camera amounted flash. The biggest problem for a dedicated flash is flash fill in sunlight. I refer to this as the ribbon-cutting problem. Your job requires you to shoot a group of people outdoors in the middle of the day, say an opening of a new store. There is a group of people standing around. You can’t change the light on the group or change the angle, simply because they have to be shot in front of building, and right now. The folks look a little like raccoons because of the shadows created by their brows, chins and so on. There isn’t any way to solve this problem with a reflector, unless the reflector is the size of a truck. You can solve this problem with a flash. The technique is called flash fill. The idea is to use a strobe that will fill in your shadows. You need ¼ to ½ the amount of light from your strobe that you get from daylight to make the ribbon-cutting shot work. In other situations you may use much less or, perhaps, even more fill flash. The Daylight 16 Rule states that you set your shutter speed to match your ISO and shoot at f16 for a full daylight shot: ISO 100, 1/100 and f16. Since this is a group you’ll be about 10 feet from all of them. In order to make this work you’ll need an exposure f11 from your strobe, or if you can shoot at 1/200 then f8. This would put your flash power at ½ the daylight exposure, or 1 stop less than daylight. This level of light will do a good job of filling your shadows.

You may be thinking, but the new strobes allow me to sync at higher speeds, so I’ll just raise the sync speed and then I can use less strobe. Doesn’t work. As you use higher sync speed the strobe has to fire more times so you get less total light in the shot. The power drops off very fast, so the fastest speed you can use for the ribbon cutting shot is they original sync speed of your camera, probably around 1/200 for a modern digital camera. Raising the ISO just raises the shutter speed, so that doesn’t work either.


No Flash

Flash Fill using the Godox TT685

So it would be very useful if we knew what aperture we could use with a flash at 10 feet from the subject with ISO 100. Good news and bad news on this subject. The good news is that most dedicated flash units are evaluated using a metric called guide numbers. Guide numbers are often done in feet and in meters, for our purpose the guide number measured in feet is the most useful. The guide number in feet is the aperture the strobe would give you at 10 feet from the subject at multiplied by 10. So if your flash is 10 feet from the subject, and the exposure is f5.6, your guide number is 56. Of course this is measured without any other light source. If the f-stop at 10 feet is f8-1/3 then the guide number would be 90. This isn’t rocket science, and using this information we can see that we’d need at least a guide number of 80 and we’d like to have 110. Now the bad news: while the manufactures usually list guide numbers for flash units they lie about the numbers.

I don’t mean they lie just a little, they lie A LOT! I tested the Sunpak 120J II. The manufacturer’s listed guide number is 177. The actual guide number is 50. The difference is about 4 stops. That means the unit has about 1/8th the power that Sunpak says it does. If I took the unit to the ribbon cutting I would fail. While Sunpak lies a lot, most of the manufacturers are lying by 2 or more stops. One notable exception here, the NIKON SB910 has a guide number of 111 according to Nikon and my test says that’s true. I also tested the Youngnuo YN685, which had a real guide number of 70; the Bolt VS570, which had guide number of 90, and the Polaroid PL190, which had a guide number of 60. I also tested a couple of classic strobes, Norman 200B, guide number of 120: the original Quantum Turbo, guide number 90, and some other things.

The second consideration I mentioned above is price. There are quite a number of dedicated flash units priced between $100 and $200. I like this price point for a couple of reasons: first it’s doable for my students at the Art Institute. Second it allows you to buy several units for what one Nikon unit would cost: $597.00. While a little extra power is good, several units will allow more creative lighting and offer back up when something breaks.

So what did I find out? The best unit for price and power is the Godox TT685. It has a guide number of about 90. It costs $119 at B&H or Amazon.
I would like t than B&H. I’ve ordered half a dozen different flash units, tested them and returned them. They are just great about returns. I couldn’t have afforded to test so many units without the returns department at B&H. Thanks folks!

Using the Godox TT685

No Flash

I’ll be writing more about working with the Godox soon! By the way the shots are from the Indiana State Fair.

Oh, and one more thing, you can get my book on Photographing architecture at this link:

October 10, 2015

Tool Kit

Of course I’m thinking about the workshop next weekend. There are only two spaces left, so you should SIGN UP NOW!

Samantha will be one of the models for Sunday October 18th.

Samantha will be one of the models for Sunday October 18th.

One of the things I want to examine at the workshop is the lighting tool kit for a photographer. The equipment manufacturers want us to buy everything; they’re not exactly on our side. Many of the available tools are of little use, or totally redundant. So I hope that this workshop will actually help you to save money by experimenting with the tools. I’ve seen a lot of people who work with hammers: carpenters, roofers and neurologists. The all use different kinds of hammers; purpose built for their applications. When we choose our tools we need to exercise the same care a carpenter does when he buys a hammer.

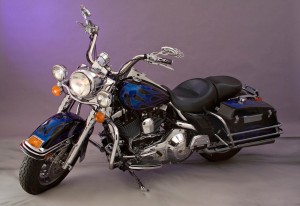
harley

The main tools we use as photographers are designed to work for a large variety of applications. So my Nikon D800 is a terrific camera to fit onto a microscope or use for architectural photography or even an auto race. While the camera will work well in all those applications, I’ll need to use different lenses for each situation. This is one of the great strengths of camera design: a good camera can be adapted to different situations. Can you imagine buying a whole new camera everything you needed a lens or even a filter? Strobe lights are the same way: a basic strobe can be used for a lot of applications, if you have the light modifiers for the job. This is one of the good aspects of strobe lights over movie lights, which are purpose built. Over the years I’ve worked with many light modifiers for strobes, everything from large soft boxes to fiber optics. These modifiers are designed to make the lights useful in all kinds of applications. Some of modifiers have been good, some bad; some work in a lot of situations and some are only good for one kind of job. I hope one of the things you’ll receive from the workshop is a better way to choose your tools.

The first step in adding a tool to your kit is identifying the reason you need or want that tool. So I may choose a new light because I didn’t have the lights I felt I could use at my last job, but I may also choose a tool because it inspires me. I think this second reason is really important. I often get tools because they make me want to work, or because they open up new ideas for shots. I also get tools because they replace or upgrade or back up the tools that I have. Of course one problem is that I now have too many tools to take on location.

When i shoot a motorcycle i need to use large light modifiers to build good light.

When I shoot a motorcycle I need to use large light modifiers to build good light.

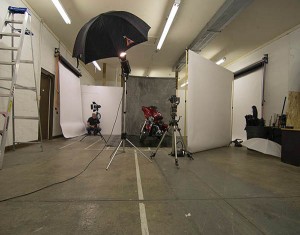
I’ve got a large studio so I have some tools that are only useful in a full time studio. One of the best is my Broncolor Hazylight. I picked up the frame in a studio sale, and adapted a Norman head to fit the frame. Then I put the whole thing on a camera stand, so it’s easy to position in my studio. Most photographers don’t have a space for a light modifier this big. If you’re going to use a smaller studio you might want to use light panels. The panels are cheap to make and incredibly adaptable.

Here's a shot that mixes hard light, soft light and continuous light effectively.

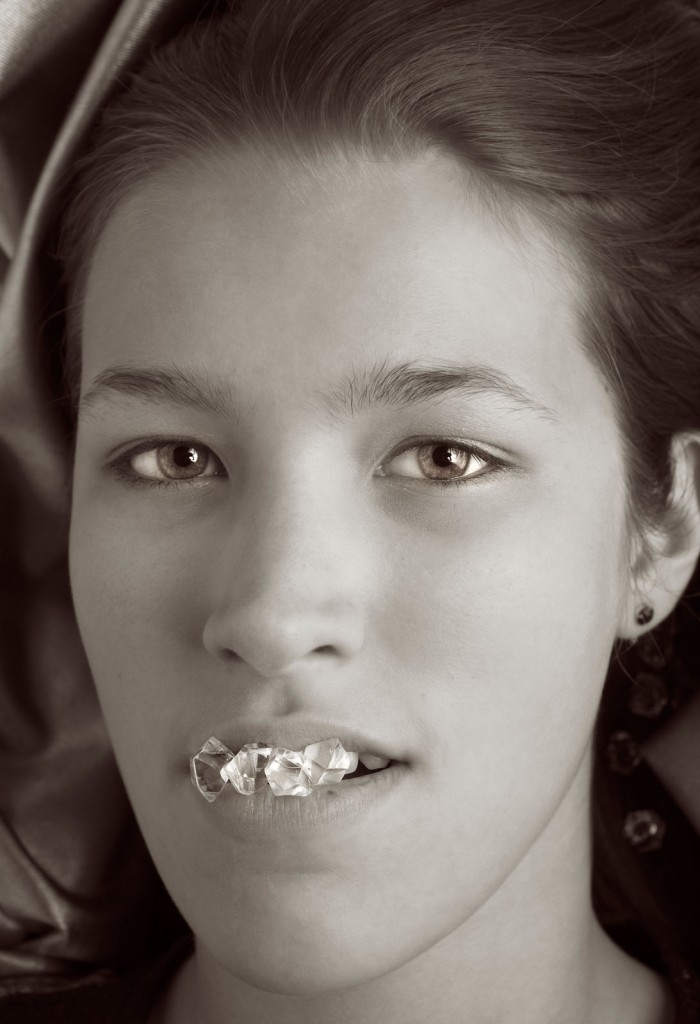
Here’s a shot that mixes hard light, soft light and continuous light effectively. Effective catch lights as well.

One of the important aspects of a portrait is the catch light in the eyes. The catch light, which is really just a small reflection of you’re the light, can change the whole quality of a portrait. If you don’t see a catch light, or if you see an umbrella, or just a tiny pin prick of light, it can damage an image. There are all kinds of light sources for portraits shooting that address this problem. I’ve used quite a few: portrait dish, soft box, octabox, umbrella and so on. One of the things that makes better catch lights is a large circular light source, which will make a round catch light in the subject’s eyes. For this reason I’ve got a cover with a circular cut out for my Hazylight. I would build a similar cover for a soft box, if I were using one. I also use a light panel and a snoot to make a circular light source. I can use the snoot to put a circle of light onto the panel. I can use these tools to make other shapes and control the direction of the light. This gives me a round catch light, or I can change the angle of the snoot and get many different shapes on the light panel. So both the snoot and the light panels are at the top of my list for light modifiers. I also use the snoot as a hard light source in my shots. I’ve found that the snoot is an incredibly fun tool to have in my lighting kit.

Just a guy using thee right tool for the job!

Just a guy using thee right tool for the job!

I also like using a set of barn doors with my light for illuminating the light panels. The barn doors can even crate a strip with the light panel. I also like the barn doors for shooting architecture. I can control a bounce off a ceiling or other surface, to keep the light out of my image. Of course the barn doors can help to place a highlight in a subject, say a hair light or a rim light. Both the snoot and the barn doors are small light sources, so the position of the light is important, but if you use the snoot or the barn doors with a modifier like the light panel you can make a large light source.

It really doesn’t matter whether you make light with a mono-light or a dedicated strobe. What matters is controlling just a few things: the color of the light, the power of the light, the size and shape of the light source and the position of the light. The color and power of the light really only matter relative to other light sources in your shot. So if you were using just one light you could change the ISO or the aperture to control the amount of light, but if you have two lights they have to be balanced. Not necessarily the same power, but a balance that suits your vision for the shot. Similarly you might want all the lights in a shot to have the same color balance, but you might also want one light to be warmer. A warmer light might give the effect of sunlight coming into your shot. You can control the color of one light in your camera, but the camera won’t make one light warm and another cool. Controlling power and color are tools that you use to build your shot. The size of the light source, relative to your subject, affects the quality of the light: hard or soft. The larger your light source is the less that the position of the light matters; consider how the light comes from the whole sky on an overcast day, no shadows and no direction.

F2359911

The image should start in your mind. If you have an idea of how to position a model, or how to light a face, or a room, or a product, then you can start to build that shot. If you start with the same light each time, or only use existing light, then you have much less control over your shot. So it’s important to understand how each tool works, how you can use the tools together, to build the images you want to make. One of my heroes is Felix the Cat, because whenever he gets in a fix, he reaches into his bag of tricks. As photographers we need a big bag of tricks. Here are a couple of things I have in my bag of tricks whenever I go on location: umbrellas (white, silver, gold all with black covers) gaffers tape, magic arm and super clamp, small tripod, large tripod, lighting filters (Rosco gels) light stands, maybe even a reflector or two. Of course I’ve also got some interesting strobes on location, mine work with both ac and dc power. The heads are small enough to fit almost anywhere. I’ve been doing this for more than forty years, which means a couple of things: I’ve got multiple kits for different location work. I can grab just one box if I’m shooting an executive portrait, but I’ll add a couple of boxes to this, if I’m making room shots. The time I’ve spent shooting also means that the way I use the tools, and the tricks I use, have evolved over the years. Part of being a creative photographer is learning to see what could be, not just what is. I want to help you to build the images that could be.

This is shot made with just a snoot.

This is shot made with just a snoot.

Of course I want to see you at the lighting workshop on October 17 & 18. You can sign up here. You can also see another post about the workshop here. There are only two spaces left for the shoot on Sunday. You can also sign up for just Saturday, which will be demonstrations and explanations. Of course if you just can’t make it to the workshop, you can still get my books.

May 14, 2015

One on One Workshops

It’s been a while since I got to blog. As some of you may know I had problems with nerve pain that kept me in bed. Anyway it’s great to be back. I’m so grateful to be able to stand and walk. I’ve been working for a few clients: Alter’d States & National Gypsum, and I have a shoot for the Future Farmers of America next week. I’m also glad that my books are still selling; both are in the top 100 of their categories today. Pretty good performance since the last one was published three years ago. I really liked working with Amherst Media, and I’d just like to say: Thanks for those royalty checks!” So buy one more copy today. They make great gifts. I’d also like thank the over 2,700 people who are registered subscribers to this blog. I’d just like to ask why?

_dsc6923

I got to do a One on One workshop with a student from Illinois just after I got back on my feet. I really like the chance to work with individuals in these workshops. The two of us worked together in the studio, doing demonstrations and applications. When I started working with lights I heard all sorts of things about how different the tools worked, but I only learned how to predict my shots by doing shots. It took a long time because I didn’t test each tool individually. When I started testing each of my tools I was able to see how the tool would work in my mind. I’d like to add here what my student said about the workshop: “I just wanted to drop you a line to thank you for the one-on-one Studio class that I attended with you a week or so ago. This was a great adventure in lighting and I cannot tell you how much I learned about the subject. I think the concept of how to see the light and how you must know how  each lighting tool (i.e.: snoots, barn doors, umbrellas, etc.) modifies the light has been extremely helpful in my understanding of the whole concept of total lighting of a subject, be it a person or an object. Your concept of pre-visualizing what you want the finished product to look like is absolutely necessary. Since my return home I have been trying to do just that with some really great results. I only wish that we could have spent some more time in a hands on practicing mode, but the entire day was spent on the above concepts. Well worth the time spent. I think if I can work it out, I will try to schedule another day with you for the experience of actual putting in practice the concepts that were taught in the class I just completed. I must say that anyone who would like to understand and light people and/or object will be very pleased  with a day, or better yet two days, with you in a one-on-one day . Thanks again for your time and knowledge.”
It’s always nice to hear good things about what I do!


_dsc6936

If you can visualize how your lighting tools work you can build a shot in your mind before you even pick up your lights. This is one of the ways a photographer pre-visualizes an image. The process of building a photograph in your mind enables another level of creativity than finding and recording a shot. I like to work with people who want to build photographs and give them tools and techniques that help.

_dsc6917

I’ve included a couple of test shots from the workshop. You might want to see if you know what tools we used for each test shot. The important thing is to test your own tools so that you really know how they light.

_dsc6912

If you want to do a One on One workshop please get in touch. My e-mail is john@siskinphoto.com. We can discuss what you want to do in your workshop. You might also want to check out the workshop page of my site: www.siskinphoto.com/workshop.php and this earlier blog entry: www.siskinphoto.com/blog/?p=2703 about the One on One Workshops. The cost is still only $425, which is a great deal since you get personal attention and all the facilities of my studio.

_dsc6909

Speaking of learning opportunities, I posted another of the lessons I offered through BetterPhoto. You can download these lessons for free at the workshop page of my site: www.siskinphoto.com/workshop.php. If you want to have me critique your assignments there is a small charge.

February 10, 2015

Working With A Cucoloris

Filed under: Basic Photo Technique,Do It Yourself,Lighting Technique — John Siskin @ 4:18 pm

My books and my classes give me a reason to keep doing this blog. If you’re in Indiana I hope you’ll consider taking my Portfolio Workshop. You can see a little more information about this workshop if you check out this blog post. Thanks so much for your attention.

Matthews Cucoloris

Matthews Cucoloris

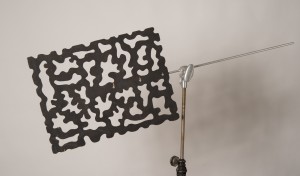
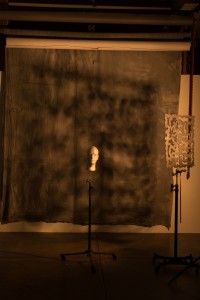
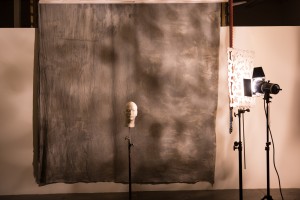
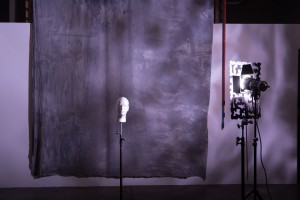
I just bought a used Matthews Cucoloris. Now this is certainly a piece of equipment you could build, but I didn’t. Basically it’s a piece of plywood, about 18X24 inches, with a bunch of irregularly shaped holes in it. It fits on a C-stand or even a standard light stand with a grip head. The idea is to use the cucoloris to make shadows. You can put it in front of a light with a bowl reflector or perhaps a snoot. By moving the cucoloris around you can change the position and shape of the shadows. You can also change the size and edge sharpness of the shadows by moving the cucoloris closer or further from the light source. On the whole a really useful tool as you can use it on a subject or on the background. I’ve attached some examples.


With CTO filter

With CTO filter

There’s a kind of a calculation in deciding whether to buy or build a piece of equipment. Money is a part of it: if I only wanted one light panel I might buy it; but I’ve got five light panels, so I saved a few hundred dollars by making my panels. There are things like a chain-pod or my fish-eye camera  that aren’t available commercially. I’ve also built things, like my mono-pod, when I didn’t know if I would really like working with them. One problem, when you build your own gear, is that it doesn’t always perform well. Of course building gear is also time consuming, for instance I still haven’t completed my darkroom.

Bastard Amber Filter

Bastard Amber Filter


Pale Lavender Filter

Pale Lavender Filter


If you’re going to save time by buying gear instead of building it you should use some of that time practicing with your new gear. I’m sure I’ve written before that photographers don’t practice enough. Most good musicians practice everyday and many photographers don’t practice at all. We may learn about techniques or tools but most of the time we don’t do the kind of repetitive practice that a musician does when playing scales. So as soon as I got the cucoloris I grabbed a strobe and the wig head and started to experiment.


Background with even light

Background with even light

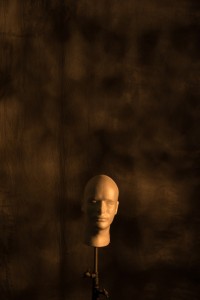
I have a mottled gray muslin background on each side of my studio. Neither of them is particularly lovely, but they get better if you light them creatively. So I used the cucoloris and various Rosco gels to see how I could change the background. I am very pleased with the results. I usually work with CTO filters when I want to warm up the light, but this time I also tried bastard amber, which was quite nice. I also tried a pale lavender, which looked more neutral than I expected. I was really pleased with how easy it is to make changes in the appearance of the background, both color and pattern, with the cucoloris. I’m sure I’ll be using the cucoloris to create better backgrounds in the future.

_dsc6802

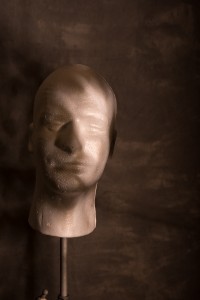
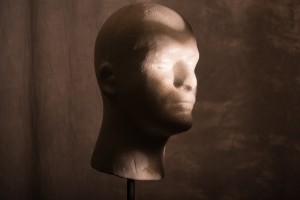
Of course you can also use the cucoloris on a subject rather than the background. In order to practice I brought out a wig head as a test subject. If you’ve looked at my Intro to Lighting class you’ll know that I think the wig head is a great test subject. By keeping the strobe close to the cucoloris I was able to create some interesting shadows on the subject. I’m sure that there will be opportunities to use this.

_dsc6787

When I look at any test I learn how the image actually looks, rather than how I think it will look. I also get ideas for more testing. In this case I want to see how the cucoloris will perform if I put a snoot on the strobe. Also I have diffusion domes that fit over my strobes. These are designed to make the light from modeling light look more like the light from the strobe tube. I want to try working with the dome because the visual presentation with the modeling light didn’t really look like the image the camera captured with the strobe light. This isn’t surprising because the difference in the shape of the tube and the modeling light can be important when the strobe is used close to the cucoloris.

_dsc6759

January 5, 2015

Free Photo Classes!

My books and my classes give me a reason to keep doing this blog. If you’re in Indiana I hope you’ll consider taking my Portfolio Workshop. You can see a little more information about this workshop if you check out this blog post. Thanks so much for your attention.

I taught Photographic Lighting and other subjects at BetterPhoto for about eight years, and it was a wonderful experience. I got to work with emerging photographer from all over the world as well as the other experienced pros who also offered courses at BetterPhoto. BetterPhoto is charting a new course that won’t involve any of the interactive classes that I, or the other instructors offered. I hope that Jim Moitke and the rest of the BetterPhoto crew do well with this venture.

I’ve been thinking about what to do with my classes. They’ve done well for me at BetterPhoto where I supported them with photo critiques, responses to questions and regular e-mails. Since the classes were priced around $200, I was compensated for this work. I’ve decided to make the lessons available on line for free, but if you want critiques and other support for the lessons I’ll charge a per lesson, rather than per class, fee of $25. This will give interested people a chance to use the course material and get help when they need it. I hope you’ll understand that I don’t have time to support these classes for free.

I’ll be putting up the lessons over the next few months. I hope to post a new one weekly. They’ll also be available at the workshop page of my site. So please check pack for more lessons. There is a PayPal link with each lesson so you can choose to get critiques of the assignments, or if you just want to support the lessons.

An Introduction to Photographic Lighting

Photographic Lighting, Lesson 1.pdf


Photographic Lighting, Lesson 2
Photographic Lighting, Lesson 3
Photographic Lighting, Lesson 4
An Introduction to Product PhotographyProduct Photography, Lesson 1

Product Photography, Lesson 2

October 20, 2014

Junk Man

My books and my classes give me a reason to keep doing this blog. If you’re in Indiana I hope you’ll consider taking my Portfolio Workshop. You can see a little more information about this workshop if you check out this blog post . I’ve listed my BetterPhoto classes at the end of this post. Thanks so much for your attention.


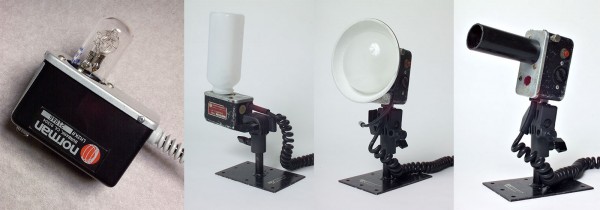
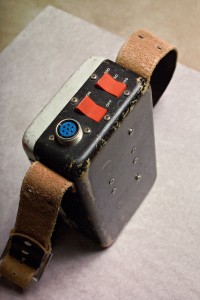
I’m a junk man. I think that it’s better to have more gear than newer gear. So I have a lot of Norman 200B strobes. Norman 200Bs haven’t been made in about 20 years, long time. Norman still makes a 200C, which costs about $1200, while a used, well used, 200B can be had for around $100 on eBay. So, if I can find them I can get a used unit for less than 10% of a new one. The used one weighs more, which is too bad, but it has some actual advantages. The 200B recycles quicker than almost any other strobe; the best 200Bs recycle to full power in a second. Norman 200Bs use 12-volt power, so you can run one off a cigarette lighter socket in your car, you can use a cheap lead acid 12V battery, you can even use a car battery. I don’t know of any other strobe that has so many inexpensive power options. A Norman 200B is pretty powerful, with a guide number around 114 with a standard reflector. The thing is that a Norman reflector spreads light a lot wider field than a Canon or Nikon strobe. The reflector isn’t built in so there are a lot more ways to modify the light, you can even use the bare tube (bare bulb) alone. I’ve also checked and with a big soft box, say 3X3 foot the 200B is about the same brightness as the much more expensive Canon or Nikon units. Now a 200b, even a 200C is a manual strobe: you can control the output, but the strobe won’t automatically change the output. If you’re designing the light for your shot this won’t be a problem, but if you want to have the flash make your choices a Norman 200B, any manual strobe, is not the way to go.


A Norman 200B Head (called an LH2) bare bulb and with some accessories

A Norman 200B Head (called an LH2) bare bulb and with some accessories

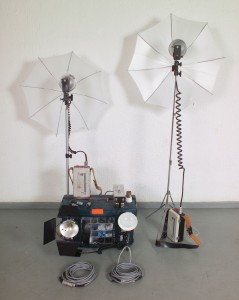
If I’m shooting interiors, for an architect or a designer I’ll take 7 of the 200B strobes with me. There are so many places that you might need to put light when shooting interiors, so sometimes even 7 strobes isn’t enough. It’s better to have a lot of strobes, even if they’re junk, than not enough lights. With architectural lighting power isn’t as important as having light where you need it. If I was shooting people or product I might not take as many lights, but I would still grab the 200Bs first.

Norman 200B power pack

Norman 200B power pack


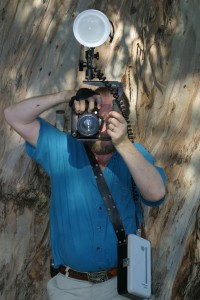
If I’m shooting an event, and frankly I’d rather not, I grab a different strobe: the Sunpak 120J. Another piece of old junk. A 120J has a little more than half as much power as a Norman 200B, but it has automatic exposure! This is an earlier version of strobe automation, not the current ttl system. Still it’s accurate most of the time. Here’s a couple of things I like about the 120J: it uses the same strobe tubes as a 200b and the same reflectors. It can hold its own batteries or use a high voltage battery pack. Also it mounts on a hot shoe or a 1/4X20 thread. Oh yeah, they’re cheap, well reasonably priced. Quantum made some similar units that are worth checking out. The current Quantum strobes are probably worth having if you shoot a lot of events.

A 200B rig for flash fill

A 200B rig for flash fill


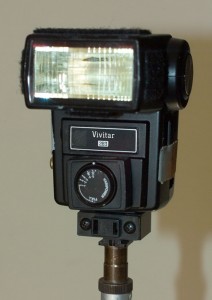
There are a couple more classic (old) strobes I should mention, first the Vivitar 283. They made millions of these and you can consistently find them for less than $30. I owned a couple of these modified with an extra capacitor to have a stop more power and there were a lot more modifications and accessories. The high voltage battery packs were really quite helpful because they reduced the recycle time a lot. Another strobe from the same time period is the Sunpak 411. I still use these because the head was so well designed it moved up and down as well as side to side. Unfortunately you don’t often see a 411 in good shape.

Norman kit for location

Norman kit for location


Of course there are a lot of other good used strobes available, and I should mention Lumedyne in particular. These are manual strobes, similar to the 200B, but can produce much more light. With the right accessories you can get up to 2400watt-seconds from these battery powered units. Lumedyne strobes are available new and used, and a little pricier than the Norman 200B. Still if you need battery powered strobes with as much light as a studio strobe this might be the way to go.

Vivitar 283-with manual power control and 2nd capacitor modification

Vivitar 283-with manual power control and 2nd capacitor modification


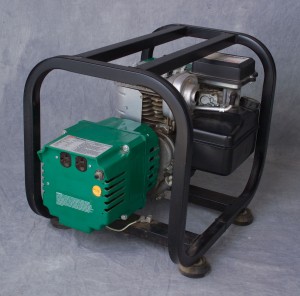
If you need a lot of light on location there are a couple of ways to go. First there are battery packs that you can plug a mono-light or a studio strobe into. Many companies offer these now, and they can be quite helpful. I prefer to use a gas generator. While it is much heavier you can shoot all night and day with just a few gallons of gas! Of course you may need an assistant to lug the thing around. Gas generators start at less than $150.00, batteries for mono-lights are generally more expensive.

Gas generator for location work

Gas generator for location work

d/I could discuss the new stuff on the market, but not in this entry. There’s a lot more information about strobes in my book: Understanding and Controlling Strobe Lighting: A Guide for Digital Photographers
If you’re interested in how to light interiors and other architectural shooting you might want this book: Photographing Architecture
Or you can check out my classes at BetterPhoto:
An Introduction to Photographic Lighting
Portrait Lighting on Location and in the Studio
Getting Started in Commercial Photography


September 23, 2014

One On One Photography Workshops!

A lot of class promotions start with the term: learn at your own pace. I’m offering you an opportunity to learn at your own pace, one on one, with the instructor. You choose the material we’ll go over. I provide the studio, the equipment, heck I might even buy lunch! Here’s the deal: A day in the studio with me. One on one. Pick a day. Pick the material. You set the pace. While we could discuss anything I think we should stick to photography, since that’s the subject I usually teach. This is a fabulous deal, and it will only last a short time. Just $425 for the studio, the equipment and me! Keep in mind the studio generally rents for $200 a day, so the studio, the equipment and me is a fabulous deal.

Some people have had schedule problems people with past courses, but now You Pick the Date! I hope we’ll have at least six hours together, but the class will fit your schedule. We could even do a second day for just a little more money. Let me know what you want to learn and when you want to come by. Also if you’d like to bring another person we can arrange that for a little more. Of course there’s no extra charge if you want to bring a model.

For my portrait class at BetterPhoto.com

For my portrait class at BetterPhoto.com

Now I know that you wouldn’t want to spend a day in the studio with just anyone. So I have to tell you about my accomplishments. Anyway I do this it’s going to sound like I’m blowing my own horn, but here goes: I was 15 when I had my first photography job, as an assistant to a commercial photographer in Los Angeles. His name is Steve Berman and he also taught at one of the best photography schools in LA: Art Center. I learned a lot! In the more than 40 years since then I’ve worked as a photographer and taught photography. In Los Angeles I’ve shot for Disney, Munchkin and General motors as repeatedly. Since I’ve moved to Indianapolis I’ve shot for the Hilton, BMW Construction, Mid West Studio and more. I’m currently teaching three classes at BetterPhoto.com: An Introduction to Photographic Lighting, Portrait Lighting on Location and in the Studio, and Getting Started in Commercial Photography. BetterPhoto has sent me students from all over the world. I’ve done two books for Amherst Media: Understanding and Controlling Strobe Lighting: A Guide for Digital Photographers and Photographing Architecture. Both are available from Amazon and also local camera stores. I’ve done a couple of dozen articles for photography magazines including Shutterbug, Photo Techniques, Studio Photography and View Camera. You can learn a lot more about me by visiting my website: www.siskinphoto.com. You’ll find most of my articles on the magazine page at my site. Of course I’ll answer any questions about my experience, just call 317.473.0406 or e-mail to john@siskinphoto.com

I also want to introduce you to my studio, because it is a terrific place to experiment and learn. I have more than twenty strobes, including a strobe powered projector! There are another half dozen quartz lights, various types. In addition there are umbrellas, light panels and soft boxes, even a ring light and a beauty dish. So you’ll have the opportunity for hands on learning with any equipment you might want. The shooting space is 24X45 feet with a 12 foot ceiling. Of course we could also arrange to do a location shoot, even an architectural shoot.

Shot of the Irving Theater for a workshop in Indianapolis.

Shot of the Irving Theater for a workshop in Indianapolis.

This is a custom learning opportunity. You can choose the material we cover. Here are some ideas, these can be a class or a starting point: How Light Works, Portraiture Lighting, Product Lighting, Shooting Jewelry, Commercial Photography, One Light Shooting, Location Shooting and whatever else I can help you with. For many subjects we can begin with a structured program or we can experiment and discover together.

Shot with a group of Ivy Tech students in my studio.

Shot with a group of Ivy Tech students in my studio.

The price for your day in the studio is just $425.


Remember you can choose a date that fits your schedule.
Shot with a class from The Learning Tree University in Los Angeles

Shot with a class from The Learning Tree University in Los Angeles

The pictures are from workshops and classes I’ve presented over the last few years.

If you’re in Indiana I hope you’ll also consider taking my Portfolio Workshop. You can see a little more information about the Portfolio Workshop if you check out this blog post .
 

Please visit my site to see my other workshops and to check out the Free On Line Classes!

Older Posts »

Powered by WordPress