Photo Notes A place to talk about making images.

April 24, 2021

Photographic Seeing and Interpretation


Apache Mountain Spirit Dancer at Museum Hill Santa Fe, by Craig Dan Goseyan

I made this picture Wednesday on Museum Hill in Santa Fe. The subject is a sculpture titled Apache Mountain Spirit Dancer, and it was made by Craig Dan Goseyan. It’s a very impressive piece. One of the things I hope this image captures is the effect created by the very large size of the work. Regardless of how I interpret the piece, and all photography of 3 dimensional objects, is interpretation, the effect of seeing a photograph is not the same as seeing the thing itself. If you see a photograph of the Grand Canyon, you haven’t seen the Grand Canyon. I think most people who have ever tried to photograph the Grand Canyon have discovered how photographs do not convey the effect of seeing the canyon.

I wanted to mention this because I have a related problem with sharing my images on computer screens. The effect of seeing the image on screens is not the same as seeing a print. First, as in the image of this sculpture, you do not have actual scale of the work. This sculpture must be close to 20 feet tall. If you’re looking at the image on a phone, you simply have no idea, and you also miss texture and much more. I’ve made many big prints over the years, some over 6 feet tall. In fact, one of the reasons I shoot large format film is that I can make big prints. The original size of the digital file of this image is 4 foot 6 inches tall at 300dpi. Actually, I could make an even bigger scan of this negative. If I were to make a traditional darkroom print of this shot, I could make it 9 feet tall, which would help convey the size of the sculpture. Of course, it would be an incredibly difficult thing to make such a print. A few old friends may remember that I once made an enlarger to make such huge prints. Another aspect of my interpretation of this sculpture is that I shot it in black and white. Any black and white image is certainly an interpretation of the original, since most of us see in color. Cole Weston was quoted as saying to his brother Brett “I see in color, don’t you?” I choose to shoot in black and white much of the time because I’m more interested in the shape and feel of my subjects and I want to push the viewers’ eye to see that way. That doesn’t mean I don’t use color; this image like most of my black and white images is subtly toned, which I hope affects the mood of the image. Of course, a print would allow me more control over the tone of an image because it wouldn’t be dependent on how you set up your monitor.

Often, I feel that sharing my images as small digital files is like listening to Tales From the Topographic Oceans done by the band Yes in 1973 on the original speaker of a 1967 Chrysler.  The sound that you hear are related to what the band recorded, but perhaps not closely related. Another disappointing aspect of sharing images this way is that the images from digital phones, and every other image making device out there, are the same size and on the same monitor as images that I crafted with large cameras and processed, painstakingly, in my darkroom.

When I began doing photograph, in the very early seventies, much of what we were taught was actually print making. In those days we were taught to print on silver chloride and silver bromide papers. In more recent times I’ve also learned to make Vandyke and cyanotype prints, both of which involve hand coating paper. I could scan and share these prints but you would lose just about every aspect of the prints which makes them special. Except for the cyanotypes which are a strong blue color. In addition to these types of prints I’ve also made type C prints and Cibachromes, both of which are color prints as well as a couple of platinum prints which are black and white. Print making is an art and craft which was once an integral part of photography; you could not learn to be a photographer without learning to be a print maker. Even when I started doing photography, by which time commercial color printing for amateur photographers was ubiquitous, photo classes always taught printmaking as part of the course. I was talking to another photographer, a guy who is really serious about it. He’s really into wet plate work, tin types and ambrotypes, but he has never actually seen a platinum print or a Vandyke print or an albumen print. These are all beautiful ways of presenting and interpreting a photographic image. One of the reasons that I like to shoot black and white film, rather than make wet plate negatives, is that I can print them in all these different ways. Truth be told, you can also convert your digital images into black and white negatives and print them out onto transparent media. You can make all these print types with these digital negatives. For a variety of reasons, I’ve made digital negatives of film images before printing them, this method works very well.

There are many very fine digital printers on the market and some very lovely papers designed for them. I certainly do not want to take anything away from the current Epson and Canon high end printers. I can’t think of any reason why I would want to make a color print using an enlarger and a darkroom. The simple fact is that these are better prints. Not only is the color spectacular, but the long-term stability of digital prints, if you do it right, is at least as good as prints made from color negatives using type C papers. The fact is that you can purchase one of these printers for much less than a 4×5 color enlarger would have cost you in 1980, in actual not corrected for inflation dollars, is fabulous. While people often mention the cost of paper and ink for these printers, you should have seen what paper and chemicals cost for color darkroom printing. I really like the Canon Pro 100 printer I use these days and I would certainly consider buying another printer from either Canon or Epson. These are terrific tools for color printing. They will also make a fine black and white print. But… the digitally printed black and white image is different from a darkroom print. The dyes or pigments used for the prints are different, and look different, from the silver halides used in traditional black and white prints. The digital prints will also look different, sometimes very different, from the various hand coated prints: Vandyke, cyanotype, platinum and so on. Still it’s no reason not to try and make black and white prints with an ink jet printer, and it might lead to hand made printing.

One more thing about digital printing: it’s really easy to make a bunch of prints. Thousands… So, I’ll sell a digital print for $75, but I won’t sell any darkroom print for less than $300, and some prints would be much more expensive. If you see any prints that you’re interested in on my site, or that I’ve posted, please contact me about buying a print!

In addition to buying images from me, PLEASE buy some photo books. I was looking around my office today and I have over 375 photo books, just in my office. You can look at the images of other photographers on line, and that will improve your seeing, but books allow the photographer to have greater control over the size color and presentation of the images. I believe that spending time with images, especially images the maker cared about, is the best way to improve your own image making.

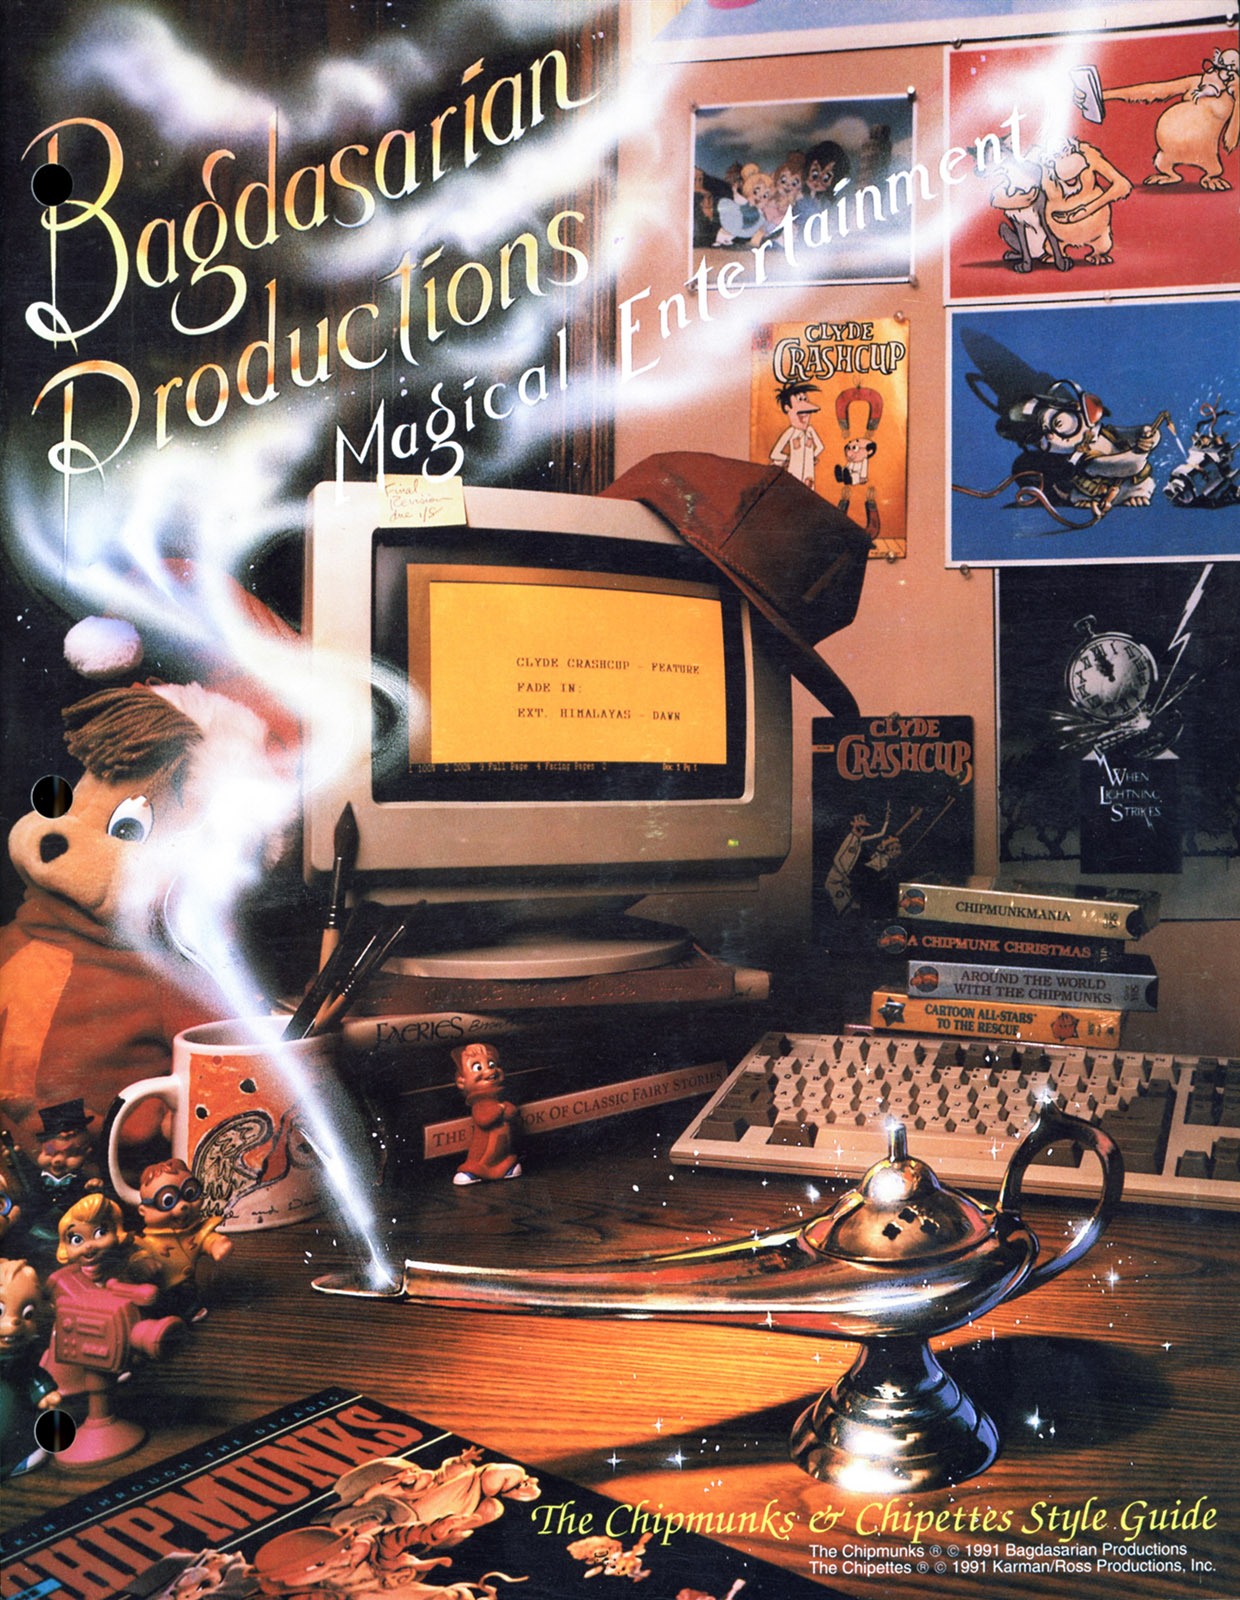
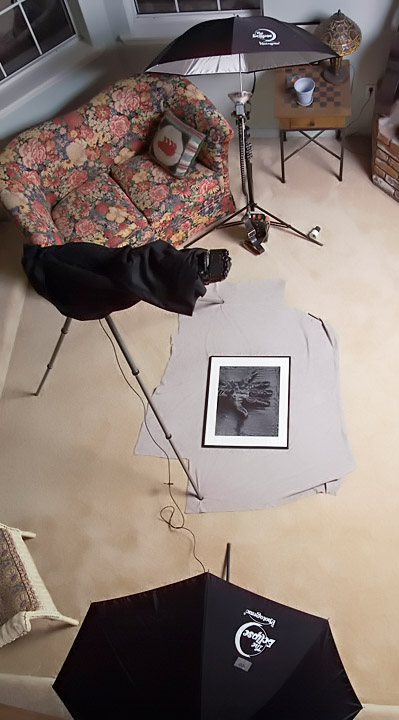
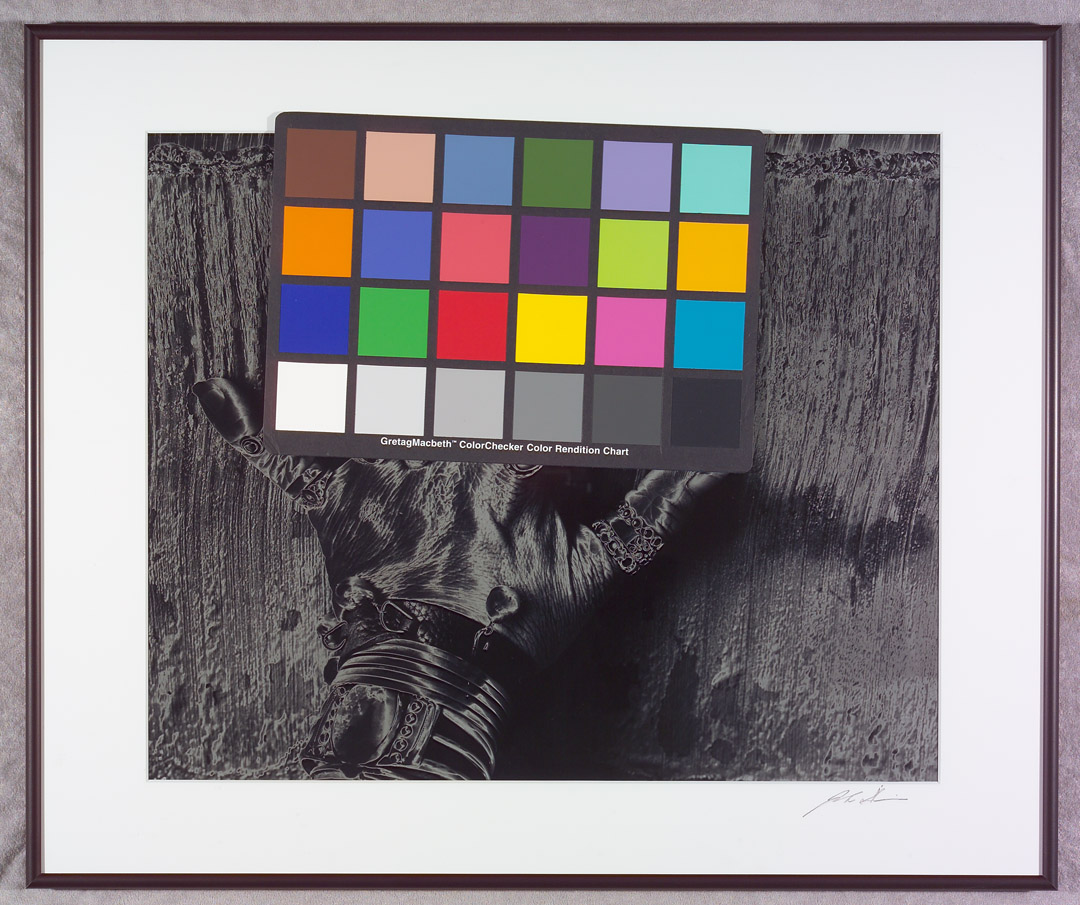
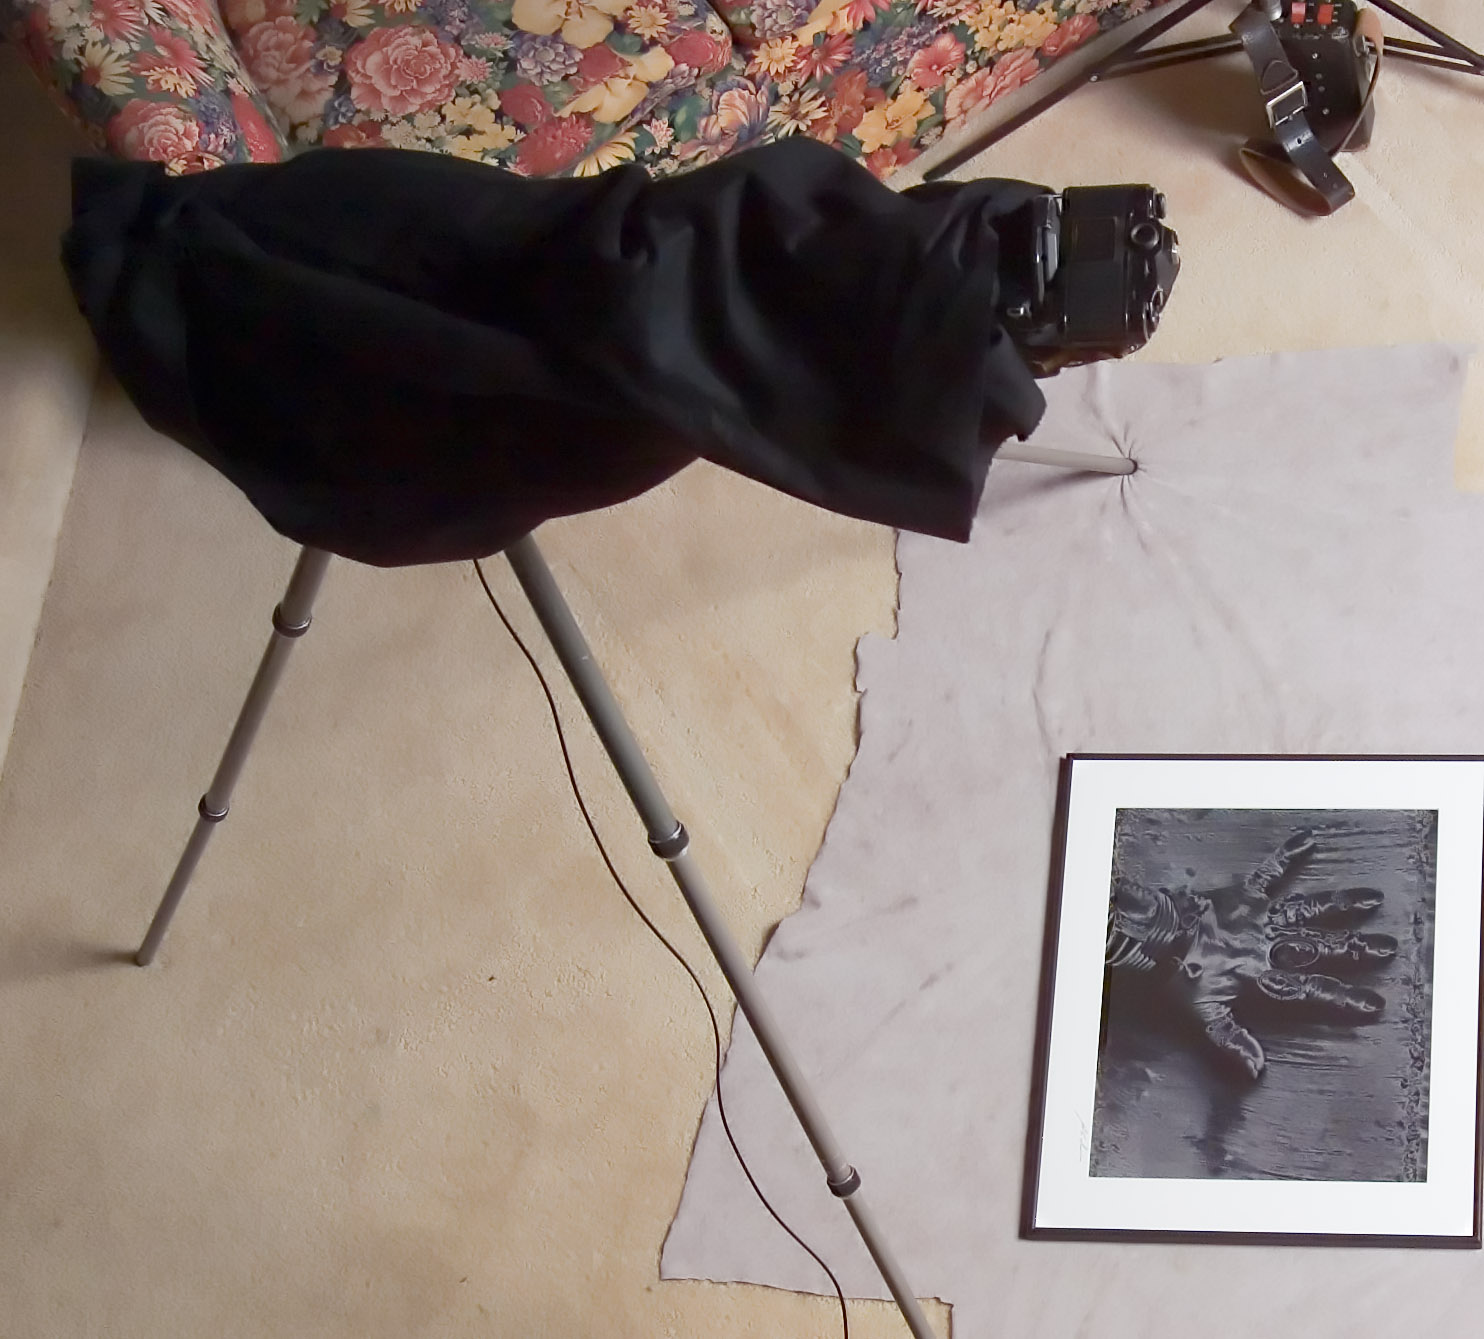
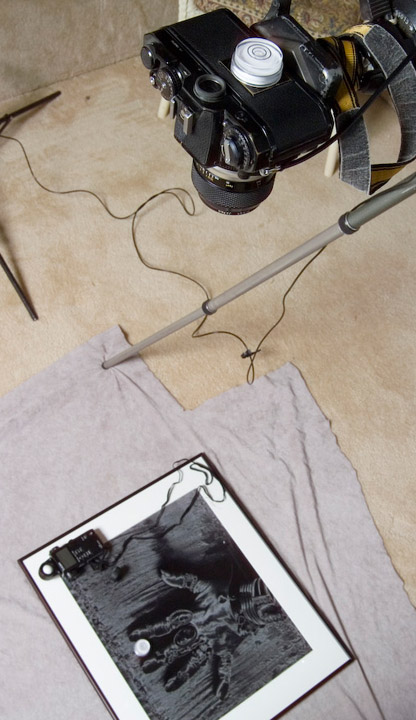
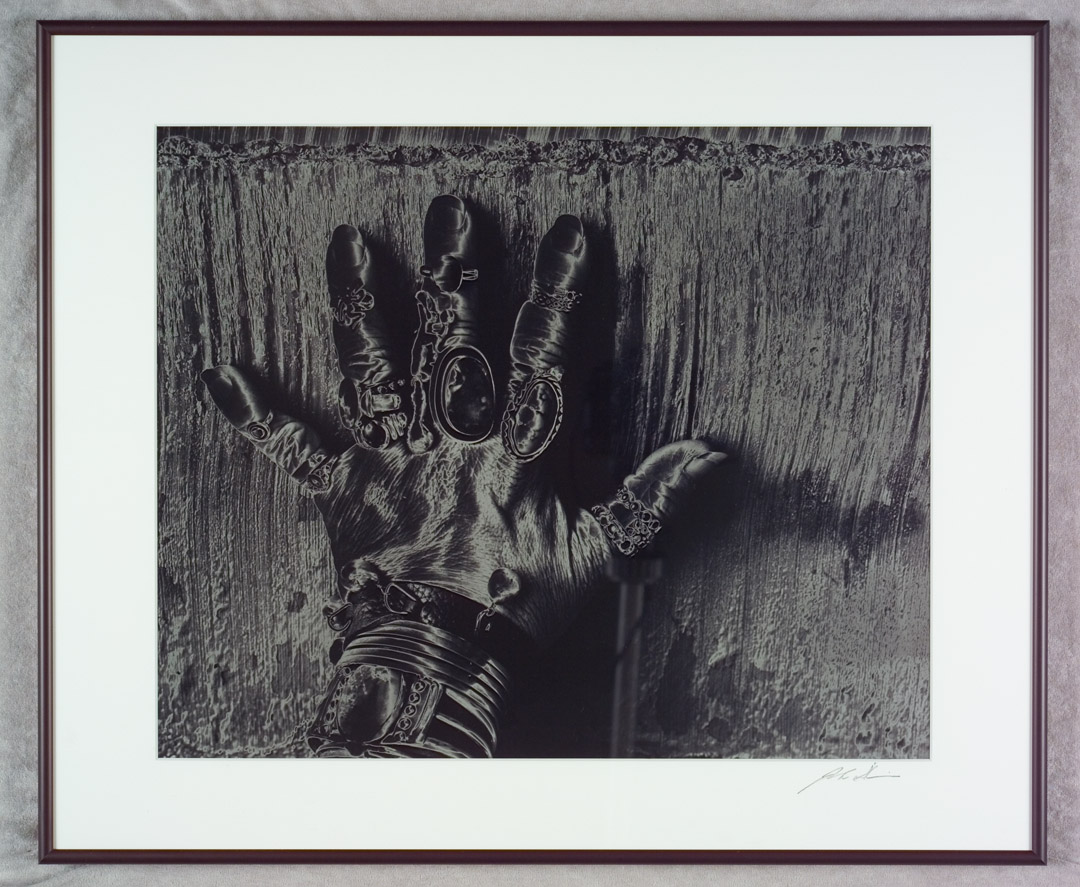
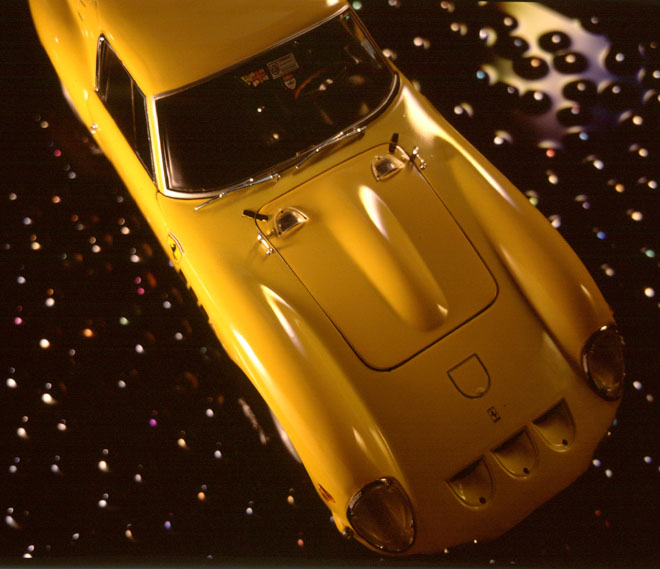
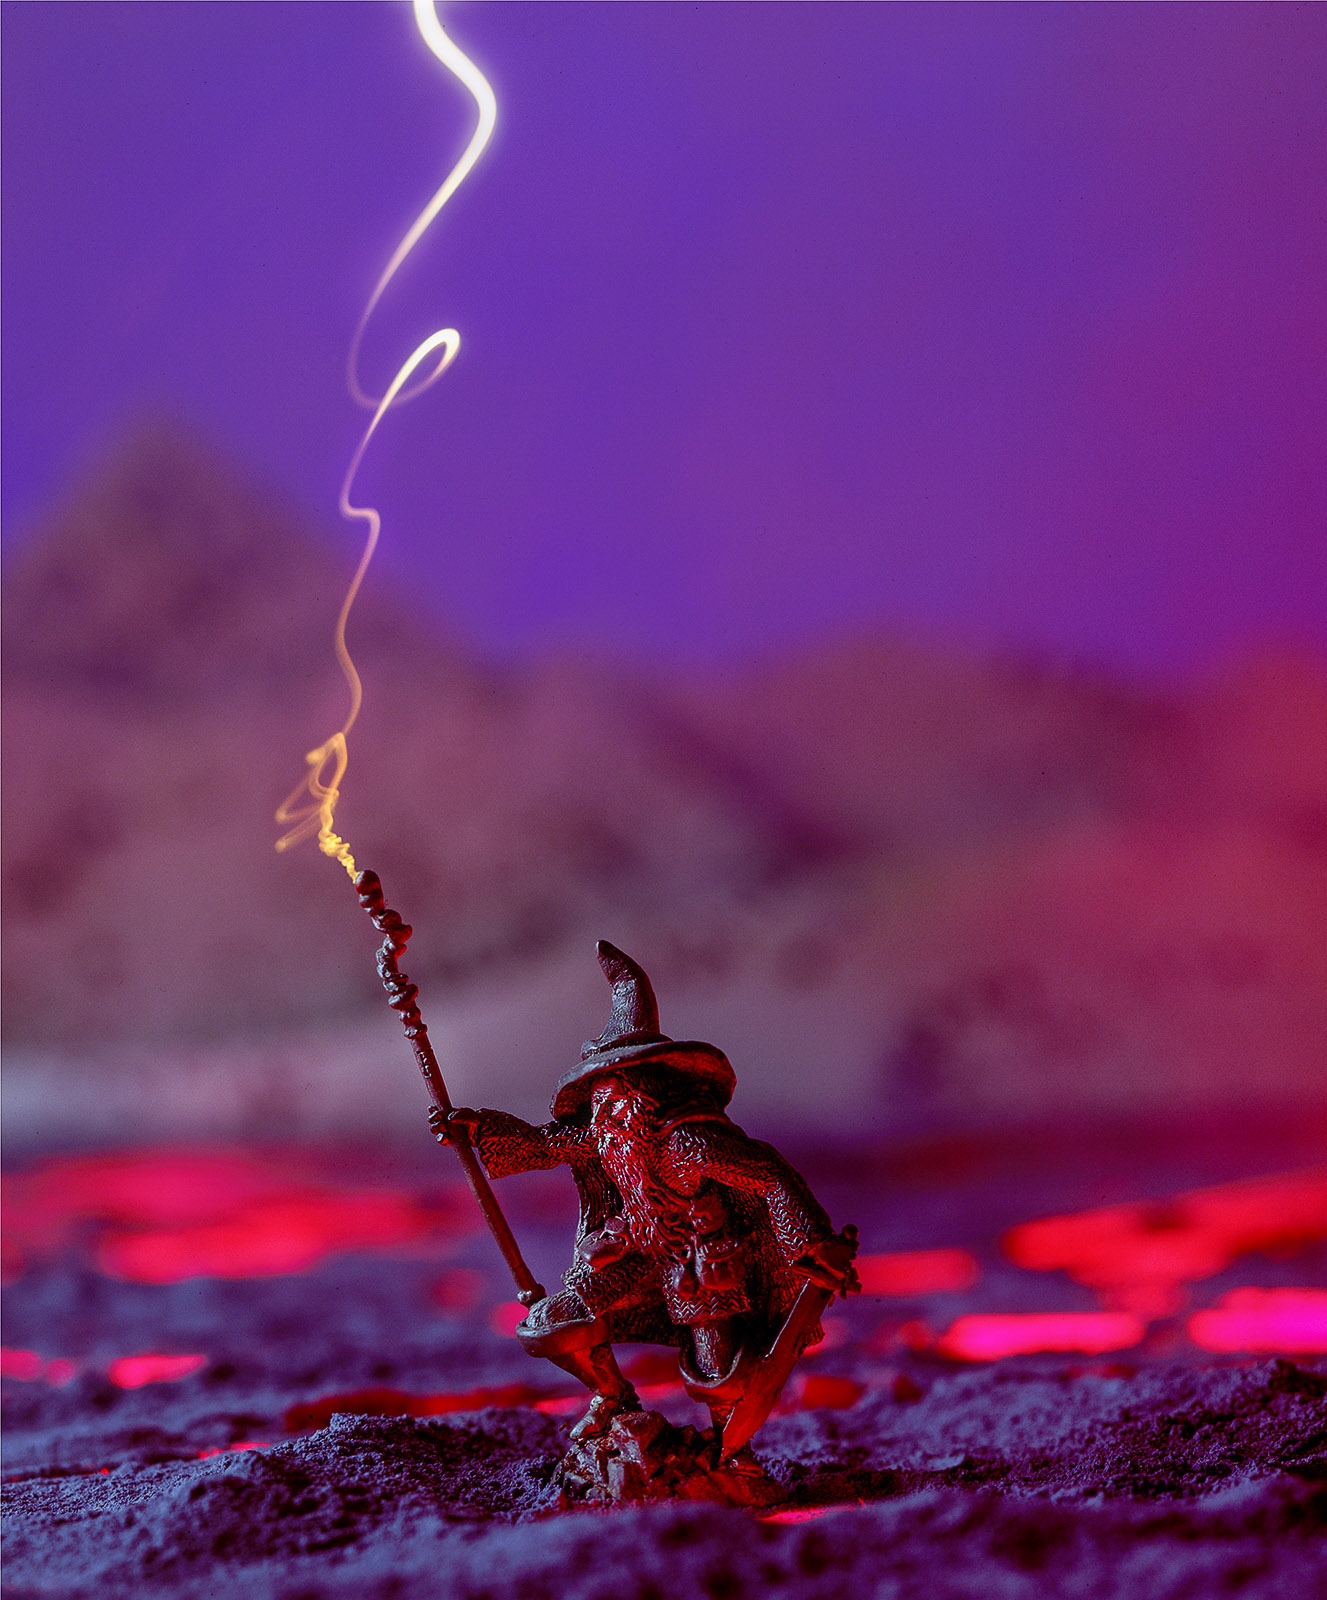
I thought it might be good to close this post with another image of a sculpture. By way of contrast with the first image in this post, this piece is 3 inches high. It’s a monochromatic piece of work. So, I added color and built a background for the piece in this shot. Also, if you’re interested, I made this image BEFORE Photoshop. The shot was done on a single piece of film using light, multiple exposure and props, old school!

Check out my books at Amazon. I’m not sure the links will work, but you can search for me at Amazon. A digital print of Apache Mountain Spirit Dancer is available for $75 which includes shipping the U.S.A. Such a deal. Please e-mail me at john@siskinphoto.com to order this or another print. Thanks for your attention!

Understanding and Controlling Strobe Lighting: A Guide for Digital Photographers

https://amzn.to/3tH5Dp9

Photographing Architecture: Lighting, Composition, Post production and Marketing Techniques

https://amzn.to/3c8nLlU

October 3, 2020

Copying Artwork and Photographs

I wrote this a few years ago when I was teaching at BetterPhoto. Recently a friend asked about copy work, so I thought I’d re-post it here. The basic ideas are still valid, but today I would use different strobes to do the work. I hope you find it interesting…

Wow, look at how old that computer is… The cover for the Style Guide for Bagadasarian Productions.

When I started my photography business a few decades ago my commercial client was Bagdasarian Productions. They made the Chipmunk animated cartoons, with Alvin, Theodore and Simon. They were working on a full-length movie about the adventures of the Chipmunks. One of the keys to animation, back in the eighties was high quality painting for backgrounds. Those paintings were done here in Los Angeles and then shipped to Korea for the character animation. My job was to make high quality copies of the backgrounds so that the background painters would be able to refer to them in order to maintain accurate color and style. Since then I have done copy work for businesses, artists and galleries. Copy work is pretty simple but it must be done very carefully in order to get the best results. I often do copy work in the living room, since I keep my finished work at home.

The basic layout of a copy job is to have the camera back, whether film or sensor, parallel to the original. The lights need to be between 30º and 45º from the plane of the original. In this range they light the original but you don’t see reflections of your lights in the original. You can even shoot through glass! The lights need to be far enough from the original to even out the lighting. In the example with this article the lights are about five feet from the center of the original. You need the lights further away from a larger original. The reason for this is that if the distances from the light to the corner of the original and to the center of the original are significantly different you will not be able to even out the light. The amount of light that makes it to the subject goes down as the distance from the light source increases. So, if the distances to different parts of the original are very different you will not be able to even out the light. In the example the difference between the light on the center of the shot and the corner is 1/10th of a stop, pretty small.

This is the one area of digital photography where I still use a light meter. When I set-up a copy job I put the lights an equal distance from the center of the original. I also point the lights at the original. Then I use the light meter to move the lights into the most advantageous position.

As I mentioned above, in this case I was able to get the lights to almost perfectly even. It is very difficult for the eye to see differences of less than 1/3rd stop, so if you can get your lighting even to the 1/3rd stop level your light will be even on the copy. I also use diffusion domes over my lights to make them more even.

You might need these if your lights are close to the original, as you move the lights further back, they don’t matter as much. I generally use them, but then I already have them. I will usually use the lights directly, to reduce the chance of reflection. If I am photographing a piece of art with an irregular surface I will probably use umbrellas to reduce the shadows on the irregular artwork. If I am including the frame in the copy I will also use the umbrellas to reduce the harsh light on the frame.

The kinds of lights for copies are also important. The easiest lights to use are strobes. Strobes have a color balance that is the same as daylight; this is a big advantage if you are using film to make copy slides. You can use strobes in a room that has existing light; the room light will be so much less than the light from the strobes (if you have reasonably powerful strobes) that the room light won’t affect your shot. If you can remove existing light from your location (including daylight) you can shoot with quartz lights. These lights are designed for photography and they have the qualities to make good copies. I would avoid the tungsten photo bulbs that look like regular light bulbs; they change color too quickly. I would not use any fluorescent lights for copy work, although digital cameras can balance for them reasonably well, they do not have a continuous spectrum. Consequently you will probably have problems achieving accurate color everywhere in your image.

Whatever light source you decide to use you will need to do a color balance if you are using a digital camera and a color test if you are shooting transparency film. The key to doing a good balance with a digital camera is to use an accurate grey sample. I use a GretagMacbeth ColorChecker, to keep things accurate.

I use the grey samples on this card to set my balance on the digital camera and the whole card to test my film. Getting the color set accurately is a very important part of copying, so it will be important to check the best way to do this on your digital camera.

There are popular copy stands for doing small copies, say 11X14 inches at the largest. These are faster than using than my tripod set-up. If you are copying a large amount of originals from 4X6 inch to 11X14 inch you should check these out. However, if you are doing larger originals or doing copy work less often you should consider a Side Arm attachment for your tripod. I use a Bogen/Manfotto 3059 with my Gitzo tripod; you can mix and match in this area. The side arm mounts on the tripod legs and then the tripod head mounts on the side arm. I cover the side arm with black Duvateen fabric when I am shooting products under glass or very glossy originals.

There can be enough light spilling onto the side arm for it to reflect in the picture. The key to keeping your copy square is to be able to get the original parallel to the camera back. Before you do the leveling get the camera into about the right position, because if you have to move the camera you may have to level it again. I use two surface levels to make the camera parallel to the original. I place one on the original and one on the camera back. This is generally a part of the procedure that requires some patience. The object is to get the two bubbles in precisely the same place.

I have used several different types of levels over the years, these little round levels work pretty well. The key is to not be in a hurry, and to double check if you move the camera. Remember you can move the original as well as the camera. If you are copying an original mounted on a wall, then the levels won’t help you. The way to get your camera positioned is to make the original square in the frame by moving the camera. This also requires patience.

You can use any lens to do copy work, but if you want to have a high quality copy, some lenses are better. You should probably avoid zoom lenses, they do not copy flat objects as well as fixed focal length lenses, and they often do not focus close enough.  One inexpensive alternative is 50mm lens. The best lenses for this work are macro lenses; they are designed to shoot a flat field. I use an older Nikon 55mm f3.5 macro lens. It does not have any automatic features when I use it with my camera, but those features don’t do me a lot of good with copy work. I have exposure information since I used the meter to set my lights. Auto focus often doesn’t work well on artwork, since there may not be enough contrast to focus on, and I don’t want to reposition my camera to focus. I usually place a coin or other object on the original to help me focus by eye with the macro lens. I can check my focus on the computer. Of course, when I am using a film camera it is a little easier to focus, since the viewfinder is designed for manual focus. One of the other problems with focus is that I have to stand on a stepladder to focus. I wouldn’t have to do that if I shot the original mounted on a wall, but it is much harder to get the sensor parallel to the original!

I hope you’ll also check out my books, use the links below:


One more thing, there are more than14,000 people subscribed on this blog. Wow! Thanks everyone.

May 23, 2018

Selling Food Photography

Filed under: Commercial Photography,Marketing,Photographic Education — John Siskin @ 2:28 pm

There are a lot of times I wish I could write really dramatically. I would like to add a Hunter Thompson flair to this post, something that would make it actually readable. However…

I want to write a little about marketing and pricing and working here. I hope this will be of use to my students and to others. Whenever you are doing photography for money, and that is the very definition of professional photography, you need to think about the work the way your client thinks about the work. Maybe this is easy if you’re doing retail photography, shooting family portraits and so on, but it can be more difficult when you shoot for commercial clients.

I’d like to consider a couple of difficult clients and compare them to a current offer I’ve received. So let’s talk about Realtors. In general this is a group of people who believe that their sales skills have a large impact on their success. That could certainly be true. In addition they do not get any money until the sale is completed. This is important. Individually they see the money they spend marketing a property as coming directly from their own pocket. If they are selling, they believe that getting the owner to the right price will create a sale. In general they believe that price is the most important aspect of selling a property. This may be true. In addition they are never going to sell the same property again, or hardly ever. So a realtor is likely to want to reduce any investment made in selling a property. In addition realtors are very skilled negotiators. The result is a group of potential clients who will not put much value on your work and will be very likely to work with the lowest bidder for services. I did this sort of work for a couple of years and this was my experience. In addition, and this is important, because there is a big market, and because realtors require other services, such as printing and web posting, there are companies that offer a whole package, and they contract photographers, often all over the country. The result is that the photographer’s price is forced down and there is little regard for quality.

There are other groups that can be almost as difficult. I used to do a lot of work for art gallery owners. They had similar limited use for the images and they also considered themselves to be very skilled negotiators. I can tell you, if you want to work with these clients, Be Firm.

Now about food: food is one of the few areas where there are a great many new clients entering the market in the last twenty years or so. Back in the 1980s a restaurant had little or no use for pictures of food. There was no place to put them. A caterer or a hotel might have use for photos, and of course chain restaurants needed photos. The only good jobs in this area were magazines and cookbooks that wanted only first rate work. As a result the photographers who did this work were usually highly skilled professionals, and good food stylists were also in demand. Today even a food truck needs pictures! Any food shot, whether for a restaurant, a chef, a caterer or what ever else, might be used in social media, video, web sites, menus, mailers, email and even a cookbook! So it’s clear to me that food shots have a lot of potential value to a client. In addition food shots can be used over time to make many, many sales. If you’re shooting a pizza or a martini that shot could be used by a restaurant in dozens of ways for years. Your work has a grate deal of value to this group of clients. Quality is still a big issue, but now we have both digital cameras and Photoshop so many more photographers can achieve quality images. While a restaurant or a food truck may place some value on a half eaten burrito posted on Facebook, they will probably place a high value on a quality shot of the same burrito in a condition that looks actual appetizing.

There are ways in which restaurants and realtors are similar. One is that they often need help in many marketing areas rather than just photography. Also, most smaller food purveyors don’t have anyone with the skill and time to devote to marketing. As a result there are companies that are trying to offer a whole group of marketing services to these businesses including photography. I’ve recently been approached by a couple of these places. They want a photographer to go to a location, shoot the food and do some editing and file prep. Then they’ll use the photos to market the restaurant. This is a good idea. The market exists. There is one problem these companies don’t want to pay enough. It is unlikely that a single location can be shot and prepared with less than two hours, and more like three, of a photographer’s time. You have to schedule, load equipment, drive, unload equipment, shoot, load equipment, drive, prepare files and upload files at the very least. Surely any photographer competent to do this work ought to get more than $100 for doing this. Just saying…

Of course I’ve been through this sort of thing before. I’ve been told there will be enough volume to make it worth my time. I’ve been told it will provide me with contacts and a network. I’ve been told that it’s really easy and so on. Here’s what I want to say: IT’S WORTH MORE TO THE CLIENT. The client needs good work.

I’ve put a lot of my food photography into this post. Well, I’m not above doing my own marketing. I’ve also put in a couple of restaurant interior shots; your clients will need that as well.

I hope you’ll also check out my books, use the links below:

One more thing, there are almost 8000 people registered on this blog. Wow! Thanks everyone.

August 22, 2017

Dedicated Strobe Test

Over the years I’ve written and taught many times about lighting gear. I believe that any photographer who is wholly dependent on finding good light, rather than being able to make and modify light, when making a picture is limited in ability. While I recognize that there are many photographic artists who work in this manner, it is just not acceptable for a commercial photographer to be limited in this way. I should point out that you still purchase my book on this strobe lighting, just click on the link below.

The tools of light are evolving, as are all the tools of photography. When I first started making pictures on camera electronic flash was pretty new. It was also not very good. Now there are many fine lighting tools that work with digital cameras. Of course this doesn’t solve the biggest problem of portable flash units: you can’t see the light you’re actually photographing. An on camera flash makes light at your camera, so, if you’re not careful, you’ll get the dear in the headlights effect and red eyes. Any lighting unit is only as good as the visualization or lighting control of the photographer. Automation doesn’t make good pictures, just properly exposed pictures. It takes a photographer to make good pictures.

Since I started teaching at the Art Institute of Indianapolis I’ve had to discuss lighting tools almost constantly. The tools I’ve used for decades aren’t practical or available for the students. It seems ridiculous to suggest that twenty something students buy strobes older than they are. So I’ve been evaluating many of the current products. I have just a couple of important parameters for evaluating a flash: light and price.

Flash Fill using the Godox TT685

It may seem obvious that I would evaluate a flash based on actual light output, but I’ve had a couple of conversations lately that make me think it’s not obvious.

Photographers have told me that, since their cameras make very fine images at very high ISO setting, they don’t need a lot of strobe power. I’ll admit that a high ISO is a wonderful thing and that it does change they way you can use lighting tools in many situations but it can’t solve every problem. And that is the issue: not light quantity but light problems. A little bit of light can improve the images you take at an event even if you’re shooting at ISO 1600, but that’s not the only problem you’d like to solve with a camera amounted flash. The biggest problem for a dedicated flash is flash fill in sunlight. I refer to this as the ribbon-cutting problem. Your job requires you to shoot a group of people outdoors in the middle of the day, say an opening of a new store. There is a group of people standing around. You can’t change the light on the group or change the angle, simply because they have to be shot in front of building, and right now. The folks look a little like raccoons because of the shadows created by their brows, chins and so on. There isn’t any way to solve this problem with a reflector, unless the reflector is the size of a truck. You can solve this problem with a flash. The technique is called flash fill. The idea is to use a strobe that will fill in your shadows. You need ¼ to ½ the amount of light from your strobe that you get from daylight to make the ribbon-cutting shot work. In other situations you may use much less or, perhaps, even more fill flash. The Daylight 16 Rule states that you set your shutter speed to match your ISO and shoot at f16 for a full daylight shot: ISO 100, 1/100 and f16. Since this is a group you’ll be about 10 feet from all of them. In order to make this work you’ll need an exposure f11 from your strobe, or if you can shoot at 1/200 then f8. This would put your flash power at ½ the daylight exposure, or 1 stop less than daylight. This level of light will do a good job of filling your shadows.

You may be thinking, but the new strobes allow me to sync at higher speeds, so I’ll just raise the sync speed and then I can use less strobe. Doesn’t work. As you use higher sync speed the strobe has to fire more times so you get less total light in the shot. The power drops off very fast, so the fastest speed you can use for the ribbon cutting shot is they original sync speed of your camera, probably around 1/200 for a modern digital camera. Raising the ISO just raises the shutter speed, so that doesn’t work either.


No Flash

Flash Fill using the Godox TT685

So it would be very useful if we knew what aperture we could use with a flash at 10 feet from the subject with ISO 100. Good news and bad news on this subject. The good news is that most dedicated flash units are evaluated using a metric called guide numbers. Guide numbers are often done in feet and in meters, for our purpose the guide number measured in feet is the most useful. The guide number in feet is the aperture the strobe would give you at 10 feet from the subject at multiplied by 10. So if your flash is 10 feet from the subject, and the exposure is f5.6, your guide number is 56. Of course this is measured without any other light source. If the f-stop at 10 feet is f8-1/3 then the guide number would be 90. This isn’t rocket science, and using this information we can see that we’d need at least a guide number of 80 and we’d like to have 110. Now the bad news: while the manufactures usually list guide numbers for flash units they lie about the numbers.

I don’t mean they lie just a little, they lie A LOT! I tested the Sunpak 120J II. The manufacturer’s listed guide number is 177. The actual guide number is 50. The difference is about 4 stops. That means the unit has about 1/8th the power that Sunpak says it does. If I took the unit to the ribbon cutting I would fail. While Sunpak lies a lot, most of the manufacturers are lying by 2 or more stops. One notable exception here, the NIKON SB910 has a guide number of 111 according to Nikon and my test says that’s true. I also tested the Youngnuo YN685, which had a real guide number of 70; the Bolt VS570, which had guide number of 90, and the Polaroid PL190, which had a guide number of 60. I also tested a couple of classic strobes, Norman 200B, guide number of 120: the original Quantum Turbo, guide number 90, and some other things.

The second consideration I mentioned above is price. There are quite a number of dedicated flash units priced between $100 and $200. I like this price point for a couple of reasons: first it’s doable for my students at the Art Institute. Second it allows you to buy several units for what one Nikon unit would cost: $597.00. While a little extra power is good, several units will allow more creative lighting and offer back up when something breaks.

So what did I find out? The best unit for price and power is the Godox TT685. It has a guide number of about 90. It costs $119 at B&H or Amazon.
I would like t than B&H. I’ve ordered half a dozen different flash units, tested them and returned them. They are just great about returns. I couldn’t have afforded to test so many units without the returns department at B&H. Thanks folks!

Using the Godox TT685

No Flash

I’ll be writing more about working with the Godox soon! By the way the shots are from the Indiana State Fair.

Oh, and one more thing, you can get my book on Photographing architecture at this link:

December 27, 2016

On Editing

Griffith Observatory

I have been a working professional photographer for several decades. I actually started taking pictures much earlier. In all that time I’ve never lost my love of actually making an exposure. There is a hopefulness about each exposure: maybe this one will be great or maybe this one will please the client. The actual moment of creation is special.

The thing is, taking a picture is a personal moment. Inevitably there is something left out of the frame. It might be the experience of getting to the shoot or something completely unrelated. If I had a great breakfast before the shoot that part of my experience will never be part of the picture. Perhaps this is obvious, put most people taking pictures seem to miss this fact. One of the signs that the experience is outside the frame of the picture is when the photographer needs to explain the shot. Since most people take pictures to make a sort of visual diary of there lives this is a natural part of picture taking. Most people take picture to capture a part of there experience: this is what my child looked like at three or this is where I stayed on my last vacation. I think that this has a lot to do with the popularity of selfies. Of course I occasionally take pictures to capture moments of my life, but such pictures are not my business.

I make a lot of photograph for clients and for art. When I make a photograph I am shooting to communicate with the viewer of the photograph rather than trying to save a personal experience. This means that I must understand the way a viewer will see my photograph. The viewer will never have the experience of pushing down the shutter button. He or she comes to the photograph with a whole different set of expectations and experience than I had when I made the image. First the viewer expects to be shown something interesting. When I make photographs I am always involved in a process of discovery. I am trying to find what is interesting, compelling or just effective in an image. The viewer expects to be shown what I found; they do not expect to make their own journey of discovery. While it might be interesting to create art that requires such a journey on the part of the viewer, effective photographs present the viewer with the discovered.

Editing is the process of choosing what to share with the viewer. What I choose to share depends on the viewer. If I am working for other creatives, for instance an ad agency or a graphic designer I might share everything. Such people expect to go on to do their own process of discovery in my images. However if the images are for other uses, whether for business or for art, I need to choose images that will communicate with the intended viewers. I need to see my images as other people will see them. It can be very difficult to see images in this way. I must pay attention to what is in the frame, and how others see that content, and just what a photograph can actually communicate. This is a difficult process. Many good photographers are unable to make the shift to editor. I’ve often been shown images that represent something very special to the photographer, but weren’t effective in communicating to any one else. I’ve done this myself: tried to explain what was great about an image I made, only to realize that my audience was only concerned with the actual image.

When I edit my first step is to get rid of all the images that are so technically flawed that nothing can be done with them. While I don’t actually destroy any digital files or negatives, I don’t keep such images in the folder I’m editing. If I’m working with digital files my next step is to do basic corrections for color and exposure on any images that will benefit. Usually I can do this in batches, so it doesn’t take very long. If I’m working with another creative, or a client that wants to see everything, I may present all these images. I only present images at this stage if the client wants to be part of the editing process. The client often has special information they want to display or special insights into how they present their images. I never know everything a client knows; they always have special expertise. It’s important to use that information. So it can be very important to engage the client in the editing process. If I’m working for a client that wants to see only choice images I need to start to see like the client, and I have to start making more difficult picks.

On another pass through the images I’ll pick out any image that is particularly effective. At this point I am always looking for what is good about an image. I’m still trying to be inclusive. So I might keep an image that has a particularly effective portion, even if part of the image is flawed. If I have several images that are redundant this is the point where I’ll let some of them go. I’ll also pick out images that are grouped for special handling, say a group of shots that were made for HDR or focus staking. No part of photography is divorced from the technology of image making, but this process of examining images is effective if I’m using a loupe and grease pencil on a proof sheet or Lightroom. In fact I usually use Adobe Bridge and Adobe Raw to handle digital images.

At this point I begin to edit the actual image rather than the editing the shoot. This is a very important transition. Of course I’m going to continue to throw out images, for technical and esthetic reasons, but the next step is to begin edition the individual images. At this point it’s even more important to look at the images as a viewer would. Remember that the viewer won’t recreate the moment of capturing the image. Just like a client you have special information, but it may not be possible to express that experience in your photograph. So it’s time to get rid of the stuff that doesn’t work in an image. This means crop your image. There was an idea among photographers that you should crop the image in camera; that the actual image captured in the camera was almost sacred. One of the reasons for this was that we shot a lot slides, which were used for projection. You couldn’t edit these images, without a great deal of special handling: what you shot was what you showed. With current digital cameras there is no technical reason to shoot this way. In fact there are good reasons to shoot a little extra around your image, for instance you may need to do perspective control or compensate for lens distortion. It is also possible that an image may work best in another shape. There is nothing special about the 2:3 ratio of most digital sensors, square images or different rectangles may work better. It’s even possible that a circle or oval might be the best choice for the image. It’s important to be guided by the image rather than by a frame size or print size. If I end up with a special size image I can always mat the image for a standard frame.

Cropping is so important. It tells the viewer what to look at and keeps the viewer’s eye engaged with the photograph. I have seen so many images that would benefit from a little judicious cropping. There are probably a number of technical things I’ll do to an image when I first open it in Adobe Raw, but nothing is more important to the finished image than cropping. I may crop as a multi-step process, doing a rough crop in Adobe Raw and doing my final cropping in Photoshop. Of course this two-step process is particularly important if I’m going to be doing a perspective crop.

I think that Photoshop has had a more significant and lasting affect on image making than digital cameras have. The previous technology: either wet darkroom or offset printing, didn’t allow for much image manipulation, at least not without extreme costs. Photoshop allows us to get into the image and perfect it. As photographers we should use these tools to create a better visual experience for the viewer. There are so many ways to do this that are beyond the scope of this essay. However it’s important to be open to utilizing this tool kit. Whether you choose to do become a Photoshop expert or to send out your retouching you need to have an idea of the possible. There are limits for photojournalistic images, but those limits don’t apply to personal work, however it’s still important to keeps the viewer’s experience in your mind. Keeping a sense of the real is important to engaging a viewer.

If you’re still reading this you may want to share it. That’s ok with me, but please attribute it to me, for good or ill. If you have another opinion I’d like to hear it. You can e-mail me at john@siskinphoto.com.

My home page is at

http://www.siskinphoto.com/index.php

If you’re interested in more information from me you can find my workshops at:

http://www.siskinphoto.com/workshop.php

There are a couple of free classes that I used to offer through BetterPhoto, on the page as well.

You can read my magazine articles at:

http://www.siskinphoto.com/magazinearticles.php

There are a couple of dozen of them at that link, all free.

You can also find my books at Amazon, of course you’ll have to pay for them:

Understanding and Controlling Strobe Lighting: A Guide for Digital Photographers

Photographing Architecture

My blog is at

https://siskinphoto.com/blog/

and I’ve posted this essay at the blog.

And just for fun here’s a link to my do it yourself page

http://www.siskinphoto.com/cameraeqp.php


September 23, 2014

One On One Photography Workshops!

A lot of class promotions start with the term: learn at your own pace. I’m offering you an opportunity to learn at your own pace, one on one, with the instructor. You choose the material we’ll go over. I provide the studio, the equipment, heck I might even buy lunch! Here’s the deal: A day in the studio with me. One on one. Pick a day. Pick the material. You set the pace. While we could discuss anything I think we should stick to photography, since that’s the subject I usually teach. This is a fabulous deal, and it will only last a short time. Just $425 for the studio, the equipment and me! Keep in mind the studio generally rents for $200 a day, so the studio, the equipment and me is a fabulous deal.

Some people have had schedule problems people with past courses, but now You Pick the Date! I hope we’ll have at least six hours together, but the class will fit your schedule. We could even do a second day for just a little more money. Let me know what you want to learn and when you want to come by. Also if you’d like to bring another person we can arrange that for a little more. Of course there’s no extra charge if you want to bring a model.

For my portrait class at BetterPhoto.com

For my portrait class at BetterPhoto.com

Now I know that you wouldn’t want to spend a day in the studio with just anyone. So I have to tell you about my accomplishments. Anyway I do this it’s going to sound like I’m blowing my own horn, but here goes: I was 15 when I had my first photography job, as an assistant to a commercial photographer in Los Angeles. His name is Steve Berman and he also taught at one of the best photography schools in LA: Art Center. I learned a lot! In the more than 40 years since then I’ve worked as a photographer and taught photography. In Los Angeles I’ve shot for Disney, Munchkin and General motors as repeatedly. Since I’ve moved to Indianapolis I’ve shot for the Hilton, BMW Construction, Mid West Studio and more. I’m currently teaching three classes at BetterPhoto.com: An Introduction to Photographic Lighting, Portrait Lighting on Location and in the Studio, and Getting Started in Commercial Photography. BetterPhoto has sent me students from all over the world. I’ve done two books for Amherst Media: Understanding and Controlling Strobe Lighting: A Guide for Digital Photographers and Photographing Architecture. Both are available from Amazon and also local camera stores. I’ve done a couple of dozen articles for photography magazines including Shutterbug, Photo Techniques, Studio Photography and View Camera. You can learn a lot more about me by visiting my website: www.siskinphoto.com. You’ll find most of my articles on the magazine page at my site. Of course I’ll answer any questions about my experience, just call 317.473.0406 or e-mail to john@siskinphoto.com

I also want to introduce you to my studio, because it is a terrific place to experiment and learn. I have more than twenty strobes, including a strobe powered projector! There are another half dozen quartz lights, various types. In addition there are umbrellas, light panels and soft boxes, even a ring light and a beauty dish. So you’ll have the opportunity for hands on learning with any equipment you might want. The shooting space is 24X45 feet with a 12 foot ceiling. Of course we could also arrange to do a location shoot, even an architectural shoot.

Shot of the Irving Theater for a workshop in Indianapolis.

Shot of the Irving Theater for a workshop in Indianapolis.

This is a custom learning opportunity. You can choose the material we cover. Here are some ideas, these can be a class or a starting point: How Light Works, Portraiture Lighting, Product Lighting, Shooting Jewelry, Commercial Photography, One Light Shooting, Location Shooting and whatever else I can help you with. For many subjects we can begin with a structured program or we can experiment and discover together.

Shot with a group of Ivy Tech students in my studio.

Shot with a group of Ivy Tech students in my studio.

The price for your day in the studio is just $425.


Remember you can choose a date that fits your schedule.
Shot with a class from The Learning Tree University in Los Angeles

Shot with a class from The Learning Tree University in Los Angeles

The pictures are from workshops and classes I’ve presented over the last few years.

If you’re in Indiana I hope you’ll also consider taking my Portfolio Workshop. You can see a little more information about the Portfolio Workshop if you check out this blog post .
 

Please visit my site to see my other workshops and to check out the Free On Line Classes!

April 10, 2014

Strobe Lighting Workshop! April 27th

Filed under: Commercial Photography,Indianapolis,Lighting Technique — John Siskin @ 2:57 pm

If you’re close to Indiana this will be a great workshop, if not you can take an online class with me at BetterPhoto.com. The shots this week are demonstration images and diagrams from my classes and books.

It’s sometimes useful to remember that we don’t actually photograph things or people or places; we photograph the light reflected off people or things or paces. For instance if you take a picture of someone under a blue light that person will be blue, also you can’t take a picture without light. So, in a very real sense all photography is painting with light. Like painting a photographer can choose to make a straight recording of a subject, but also like painting, a photographer can choose to manipulate and interpret the subject. I think that manipulation is part of want makes an image a photograph rather than a snap shot. Manipulating the light is one way the photographer can change an image, and it’s a powerful way to manipulate an image. Creating light can allow you to build a shot that isn’t part of the world and to take a shot where the light is wrong or just insufficient.

A house painter uses a different tool kit than a portrait painter. I don’t think portrait painters ever use rollers! Of course there are different tools for creating different kinds of light for photographs. You might use a dedicated flash to open up the shadows in an outdoor portrait, but if you try to do a studio portrait with the same flash you’ll be disappointed with the results. A good artist, with any medium, knows how each tool will affect the picture. This workshop is designed to give you greater confidence and ability with the tools of lighting.

Strobes are fantastic tools for lighting still pictures. You can get a dedicated strobe that will do a good job shooting 500 pictures at an event powered by just a few batteries. You can carry the thing in a pocket. When a movie crew shows up there is at least one truck entirely full of lights; a movie light with the same power as a good strobe is hard for one person to lift. There is only one problem with strobe lights: the photographer can’t see the light that will make the picture. The light is only on for 1/1000th of a second while the shutter is open. So to make good shots with these lights we have to be able to predict, pre-visualize, what our strobes will do. That’s what this workshop is about.

Automatic or dedicated strobes are good tools when you need to get a good exposure quickly, say if your shooting a wedding or other event, but automation doesn’t give you complete control over the light. It’s more like painting by numbers that painting with light. In addition to a light we need the right tools to modify the light: to get quality light rather than just quantity light. It’s a big problem for photographers to choose good tools. The manufacturers of the gear want to sell you more things rather than help you make better pictures, so they don’t always give you enough information. So one goal of this workshop is to help you decide what tools would be best for you. My studio is a kind of test kitchen for light modifiers. You’ll be able to see the light that different tools make. Other goals are to learn how to use several lights together and how to use strobe with ambient light.


Strobe Lighting! April 27th
This workshop will take place on Sunday the 27th of April. We’ll meet at my studio: 971 North Delaware, Unit B, Indianapolis. We’ll be starting at 10:00 am, and we’ll be working together all day. The cost will be $225. There are only three spaces left. You can sign up for either workshop at the workshop page on my site: http://www.siskinphoto.com/Workshop.html, or give me a call (317) 473-0406.

If you control the light in your picture you are doing so much more to build the image than when you just record the light. Finding light is good, but building light is fabulous. The idea is to understand how to control and create light to build your own vision.


I post on this blog mostly to promote my classes at BetterPhoto and my books. I’m lucky enough to have students from around the world. If you’re interested in taking one of these classes here are the links:

An Introduction to Photographic Lighting

Portrait Lighting on Location and in the Studio

Getting Started in Commercial Photography

And here are the books:

I’ll mention a couple of more resources that might interest you on my website: my magazine page has two-dozen of my articles on subjects from lighting to lens building that appeared in such magazines as Shutterbug, Photo Techniques and View Camera. Check it out at: http://www.siskinphoto.com/magazinearticles.php. And if you like to build some of your own equipment you can check out the projects here: http://www.siskinphoto.com/cameraeqp.php. You can check out my page at facebook: https://www.facebook.com/JohnSiskinPhotographer. Or my website: www.siskinphoto.com and of course you can probably find traces of me at places like LinkedIn, Behance (www.behance.net/siskin), Flicker and even Twitter (twitter.com/JohnSiskin).
Thanks for your attention!

John
john@siskinphoto.com
www.siskinphoto.com

April 4, 2014

Working With Clients

Filed under: Commercial Photography,Marketing,Post-Processing — John Siskin @ 1:51 pm

Please check out my on-line classes at BetterPhoto: An Introduction to Photographic Lighting, Portrait Lighting on Location and in the Studio and Getting Started in Commercial Photography, take a look at my site for workshops in Indianapolis and check out my books:

I’ve been doing commercial photography for several decades. One of the problems with what I do is communication with my clients. Often they haven’t worked with photographers, and really don’t have an idea about the process. I’ve been wanting to update the information I give them about the jobs I do. Most of my clients are businesses rather than ad agencies, so this is particularly important. As I thought about this I realized it might be a good thing to put this on the blog because I’d like to get feedback about how you work with clients. As you read this keep in mind that my clients are looking for shots of their jobs and products rather than weddings and babies. I like working with businesses; there is more variety in the work and businesses come back for more work sooner than families. I’ve included a couple of pictures just to keep things interesting.

The most important thing in creating an effective image for a client is to engage the client in building that image. Without an ad agency the client is the only source of expertise on the subject. I have shot things the size of a pinhead and subjects about as big as a city block. I have literally shot everything from cuticle cream to parts for a submarine. While I find it’s useful to know a little about a lot of things the only subjects I know in depth are photography and lighting. So if I can’t get the client to help me tell the story many jobs will be worse off. Whenever possible I want the client, or their representative, at the shoot. Certainly someone should be at the first shoot, after that I will know more about the product and the client’s taste. However the results are usually better when the client is engaged. I have a wireless system for showing the images to the client as the shoot progresses.

Before I can begin a job there needs to be a shot list. The client and I need to agree on a time and place for the shoot, and of course the price. It’s at this point that I explain to the client that my price is largely based on the amount of time that will be involved doing the client’s shoot. In three hours I might have finished shooting a bank’s board of directors, but I’d still be doing the set up for a motorcycle shoot in my studio. One of the problems of negotiating with a client is that they often think that the prep, shot and clean up happen in almost no time at all. I’ll just walk in with a camera and shoot. Not only is this a problem when we’re negotiating the price, it can be difficult to get the client to block out enough time for the shoot. If you don’t address this issue before the shoot you might have trouble during the shoot. In addition the material needed for the shoot, assistant and the location will affect the price.

Before I can give the client a price the client and I need to agree on what will be delivered when. My preference is to give the client an edited low-res version of most of the files. Then I hope the client will choose the files they’re most interested in and final retouching can be done on those files. I will include the time to prepare the edited version of the files in the original estimate. When I do the editing I will remove images that are just bad and others that are redundant. I will open each file in Adobe Camera Raw and adjust such things as color, exposure, cropping, sharpness and lens distortion. While this only take a few seconds on a single image, a shoot with 500 images can take a while to edit. I reduce the size of the files to them easier to review. I spend the time to prepare this set of files because I want to show the client a good version of my work, obviously this group of images will reflect on my talents. The difficulty is that the client doesn’t always review these files. I don’t know if I should reduce the number of files I send or make other changes. Regardless I will deliver whatever version of the files the client wants, but I do try to keep the mistakes to myself. The client can even have my Raw files if they want, but since most clients can’t open these files I generally don’t deliver them. I will give the client an estimate for image editing, if any, before I do any additional work to a particular file. This is all part of the negotiation with the client. We need to define just what the client will get and when.

I’ll get a deposit from the client before the day of the shoot. Generally the deposit is 50% of the estimate. I try to deliver the first version of the files to the client in 48 hours or less, and I’ll include a bill for the balance with these files.

If you know what usage means to a photographer you are in the minority. Of course this can make it difficult or impossible to charge a usage fee to a client, and most of the time I don’t. Usage is simply the way the image is used, say in a magazine or on a web site. By extension it is a license, for a fee, to use the image in a specific way. If a photographer sells a photo from his/her files to be used once in a magazine and then sees it used on a billboard or a national advertising campaign the photographer has been cheated and the usage agreement has been violated. This can result in litigation. My policy is the when the client pays me to create a custom photograph, rather than buying an image from my files, that purchase includes the right to use the photograph to aid the client’s business for as long as the client feels the image is useful, with few exceptions. The client can’t sell the photograph, as a photograph and not part of packaging, to a third party. So a contractor can’t sell a photo to a window manufacturer with out negotiating compensation for me. If the client chooses to give the image away, well that’s the clients business. Any stock images that I license a client to use have specific limits on usage. I hope that my clients will be successful, and that they will return to me for more photographs. I also do consulting for businesses setting up in house photographic systems. I expect that the material I create for these businesses will not be shared outside the business. In addition to my concerns about how my images are used I understand that the client has concerns about how I use the images. My policy is that I don’t offer client images for sale to other clients or third parties. Specifically I don’t license client images through any stock agency. I will use the images to promote my business: in print, on line and in magazine articles. However I appreciate that some images have proprietary information so I will give the client a chance to review images before I use them.

There are things I’m still thinking about, for instance weather and working hours. When I had a business in Los Angeles years would go by without a weather conflict. That isn’t true in Indiana. I would prefer that a client reschedule a job if the weather is predicted to be unworkable two days in advance. If the client insists and the job can’t be done then there’s a problem.  I haven’t been able to use the time in another way and I think I should charge the client. Any thoughts? In addition I wonder about what hours I’m expected to keep? A wedding photographer expects to work weekends and evenings, as an architectural photographer I might have to be on site a dawn to shoot a building. Should I charge extra for special hours? Should I charge extra if I have to do rush work on the files? Of course I do charge extra for a day that is more than 10 hours long. I fyou’d like to let me know what you thing please (john@siskinphoto.com) or register with this site.

There’s no such thing as a package job around here. At least the first job with any client requires us to create a mutual understanding of possibilities and responsibilities
Of course, if you can’t come to Indianapolis you can still get my books or take my classes. And I hope you will!
Books:
Understanding and Controlling Strobe Lighting: A Guide for Digital Photographer

Photographing Architecture

My Classes at BetterPhoto.com:

An Introduction to Photographic Lighting
Portrait Lighting on Location and in the Studio

Getting Started in Commercial Photography


October 30, 2013

Studio Open House!


To start I just want to remind you about the classes: An Introduction to Photographic Lighting, Portrait Lighting on Location and in the Studio and Getting Started in Commercial Photography and the books:


I’m going to be having an opening for my studio on Friday November 1. The address is 971 North Delaware Street, Suite B, here in Indianapolis. Please come by if you can. I’ll be showing photographs of buildings in my studio and at the building in front: Re/Max Metro. The text for this blog entry is from recent correspondence and the photos are from a job for BMW Contractors. Thanks for your attention!


A couple of things about rim light, first most of your shots won’t work. Positioning the light is very critical, and even when you have an assistant, most of the time the light or the model won’t be in the right place. I much prefer the snoot as a tool for rim light. Norman has a wider “stovepipe” snoot that I prefer to the smaller ones like the Alien Bee. What I do most of the time to get rim light is put a bare bulb strobe, no reflector at all behind directly behind the subject. This works more often. This will put light on the background so sometimes I put a gel on the back of the light to change the color of the background. The position and power of the light both affect the outcome, so you have to experiment. I like to avoid discussing things in terms or ratios for several reasons: the most important is that ratios stop people from paying attention to the results. I set up my shots with a tethered computer so that I can evaluate the shot better. The bare bulb allows for more movement in the subject, but you have to keep the subject between you and the light. You can also use a large reflector on the side to bring some of the light to the front.


I really like to use at least one very large light modifier, usually a light panel, for a portrait. It creates a very soft gradation.

I don’t like the term “natural light.” It is a value term, and it often gives the idea that ambient or found light is generally or always better than light you design and create. This isn’t true. Many people have no idea how to make good light, but that is no reason to think that found light must be better. Photography comes from the Greek and means “write with light” if you can’t design good light are you writing with light or copying light?


You need to look at several things when you examine light. The first is the color. Often people don’t notice how warm or cool a light source is. The color of a subject will shift with the light, but because our eyes compensate for color, we don’t always notice.


The transition from light to shadow is a function of the size of a light source. So if you have light from the sky coming into a room you get a large light source, very long transition from light to dark. You need a big light source, at least as big as a window, to reproduce this light. Hard light makes very short transitions, which look like sunlight especially if you add warm filtration to the light.


Watch a person’s eyes in prints or when you are shooting. You can often see the reflection of the light source there. A small reflection come from a hard light, a bigger reflection is a large light source. The large reflection won’t be as bright. The eyes can also tell you about the placement and direction of light sources.


Balancing light is the essential trick with strobes, to evaluate and change our images by searching for the right levels on our lights and our exposures. With the histogram and the proof image on camera or in the computer we have better tools for creating the right exposure than any meter could give us, but it does take repeated testing. If you use a hand-held meter you will get an answer, but very often it will be profoundly wrong.


In addition to the new image stabilization equipment, there are some standard suggestions about holding the camera more effectively. Cradle the lens in your left hand, thumb pointing away from your body. The left hand supports the lens and the camera. The right hand guides the camera and controls the camera. Relax your body and breath out half way when you shoot. Lean against a tree or a wall. You might also consider a mono-pod or a chainpod to help stabilize your camera.

I hope people are interested in these posts, but I really don’t know. If you want to leave a comment you have to log in. I’m sorry about that, but I was getting a huge amount of spam posts, so I had to change to registration. If you’d like you can send me an e-mail with your comments, john@siskinphoto.com. Also please remember the classes and the books!

An Introduction to Photographic Lighting
Portrait Lighting on Location and in the Studio
Getting Started in Commercial Photography.


October 1, 2013

Bike Shot in the Studio

I’ve been working on the studio, no surprise there. I’m finally happy with the current situation, while there’s more to do, it doesn’t have to be done now. I’ve moved in the lights: 20 or so strobes, another half-dozen quartz lights and an armful of projectors. I think I have 10 tripods, not sure how that happened. Booms and light stands, umbrellas, soft boxes and light panels, and all the things that come from a life spent in photography. Of course the important thing now is to get the studio busy. That means shooting, and I just got a couple of new customers! I also want to rent out the studio and offer classes here. What I want to do in this blog is to show you the studio at work, shooting and teaching. Ginny Taylor-Rosner brought a few of her advanced student from Ivy Tech in for a motorcycle shoot. This entry has a lot of large shots; I hope you will follow it to the end. Here’s the studio plan:

It’s easy to get large subjects into this studio, as you can see. I used a gray muslin on the back wall and black plastic muslin on the floor, so the set was really inexpensive.

The first thing I did was pull down white seamless along the side walls. I installed seamless holders on the side walls so that I could use them for very large reflectors with white paper, and so I could pull down black paper to reduce bounce light. It worked really well in this shot. In the shot marked Side Lights I only have the lights that are on the side seamless on, not the light on the front seamless. The light on camera left was placed at the front of the seamless to rake across the paper. This creates a very big light source. On camera right I place a light set at 750 watt-second at the back of the seamless. It spread across the side seamless and onto the diagonal seamless.

I put another roll of seamless on a pair of seamless stands on a diagonal in front of the bike. Once again I used a strobe raking across the seamless to give me a big light source. This light was set at only 400 watt-seconds. You can see what this light added in the image marked Front Light. This image has the all three of the large light sources. It’s important to have barn doors on the lights when you are bouncing light off seamless paper. The barn doors keep the light from spilling directly onto the bike and the background. I had to use cine-foil, black aluminum foil, in addition to the barn doors, for the front light because of spill light.

Only the light on the diagonal seamless.

I made some small changes in the position of the lights that rake across the paper. It’s much easier to move the lights than it is to move the bike or the paper. We also moved in a gobo (large black light panel) at the back of the bike to make the light on the saddlebag more even. Then I put a bare bulb light set at 200 watt-seconds, covered with a pale lavender gel, behind the bike. This added the highlight below the bike and put a little color into the background. If I’d used a darker background we could have added more drama with this light. This shot is marked Last Light.

Added a small strobe behind the bike. Bare bulb with a gel.

In this shot, Final Set-Up, you can see the position of most lights in the set. I added the light panel in front of the bile late in the shoot. It helps to open up the tire and to even some of the reflection on the front of the bike.

I was a little concerned about the density of the engine and the high light from the light behind the bike, so I made a couple of bracketed exposures. I used these captures to give me a little more control over these areas by using them as layers in Photoshop. I did a few other quick touch-up to make my Final Image.

Thanks for visiting the studio here in the blog. If you’re in Indianapolis give me a call and come by 317.473.0406. If you need to rent a studio I’m ready. Special price for October: $275 for the day! I hope to have classes available in the next few weeks. If you need a private session let me know as well. The Portfolio Class is meeting on TUESDAY OCTOBER 15. This class will help you present your work. There’s more information, and a sign-up link here. I hope to see you soon!


Here are a couple more images from the shoot!

Shot by Terry Pitman

Don’t forget about the classes at BetterPhoto and my books!
: An Introduction to Photographic Lighting
Portrait Lighting on Location and in the Studio
Getting Started in Commercial Photography


Older Posts »

Powered by WordPress