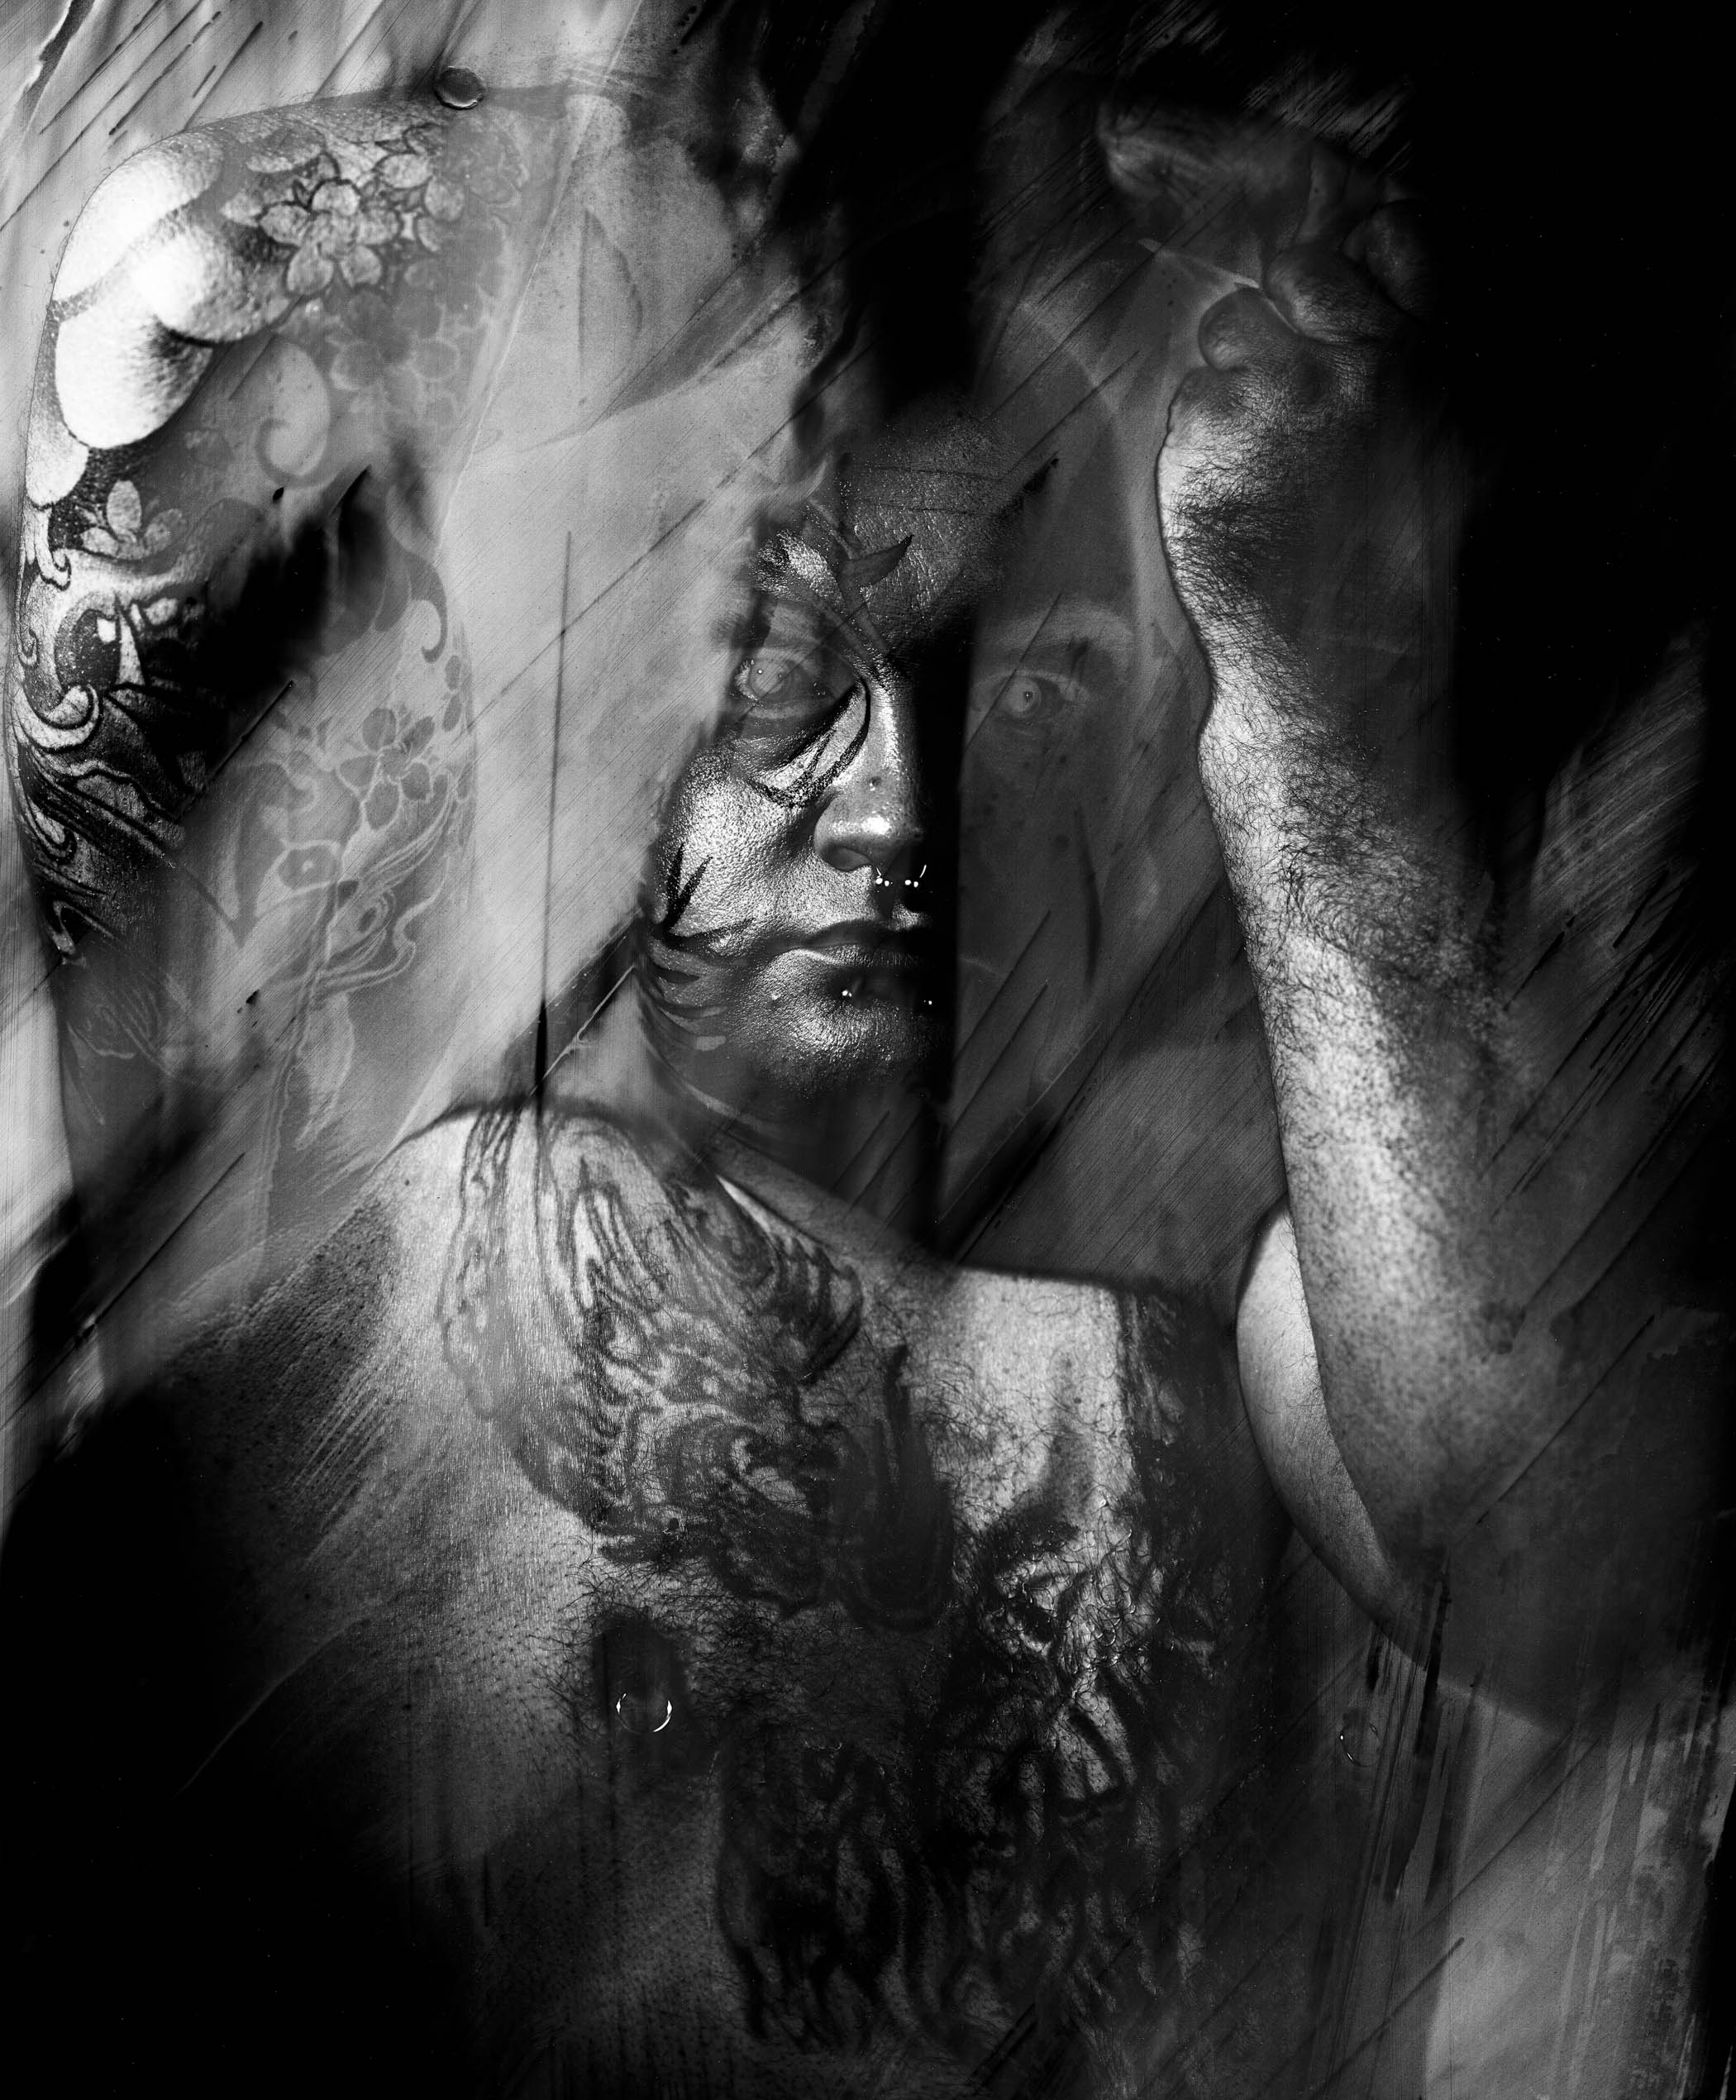
Curt #5
Published in Black and White Magazine
This post is about my Courting Chaos images, a group of images I made over more than two years, while I was working and teaching in Indianapolis. Black & White Magazine is going to publish one of these images in a few weeks! The work evolved over more than a dozen shoots with an 11×14 camera. The first show of this work was on November 2nd 2018 at Indiana Landmarks (1201 Central Ave, Indianapolis, IN 46202). Before I get any further, I should thank David Kidwell for assisting all through this project and Julie Powers for make-up and models. This work wouldn’t have happened without them.

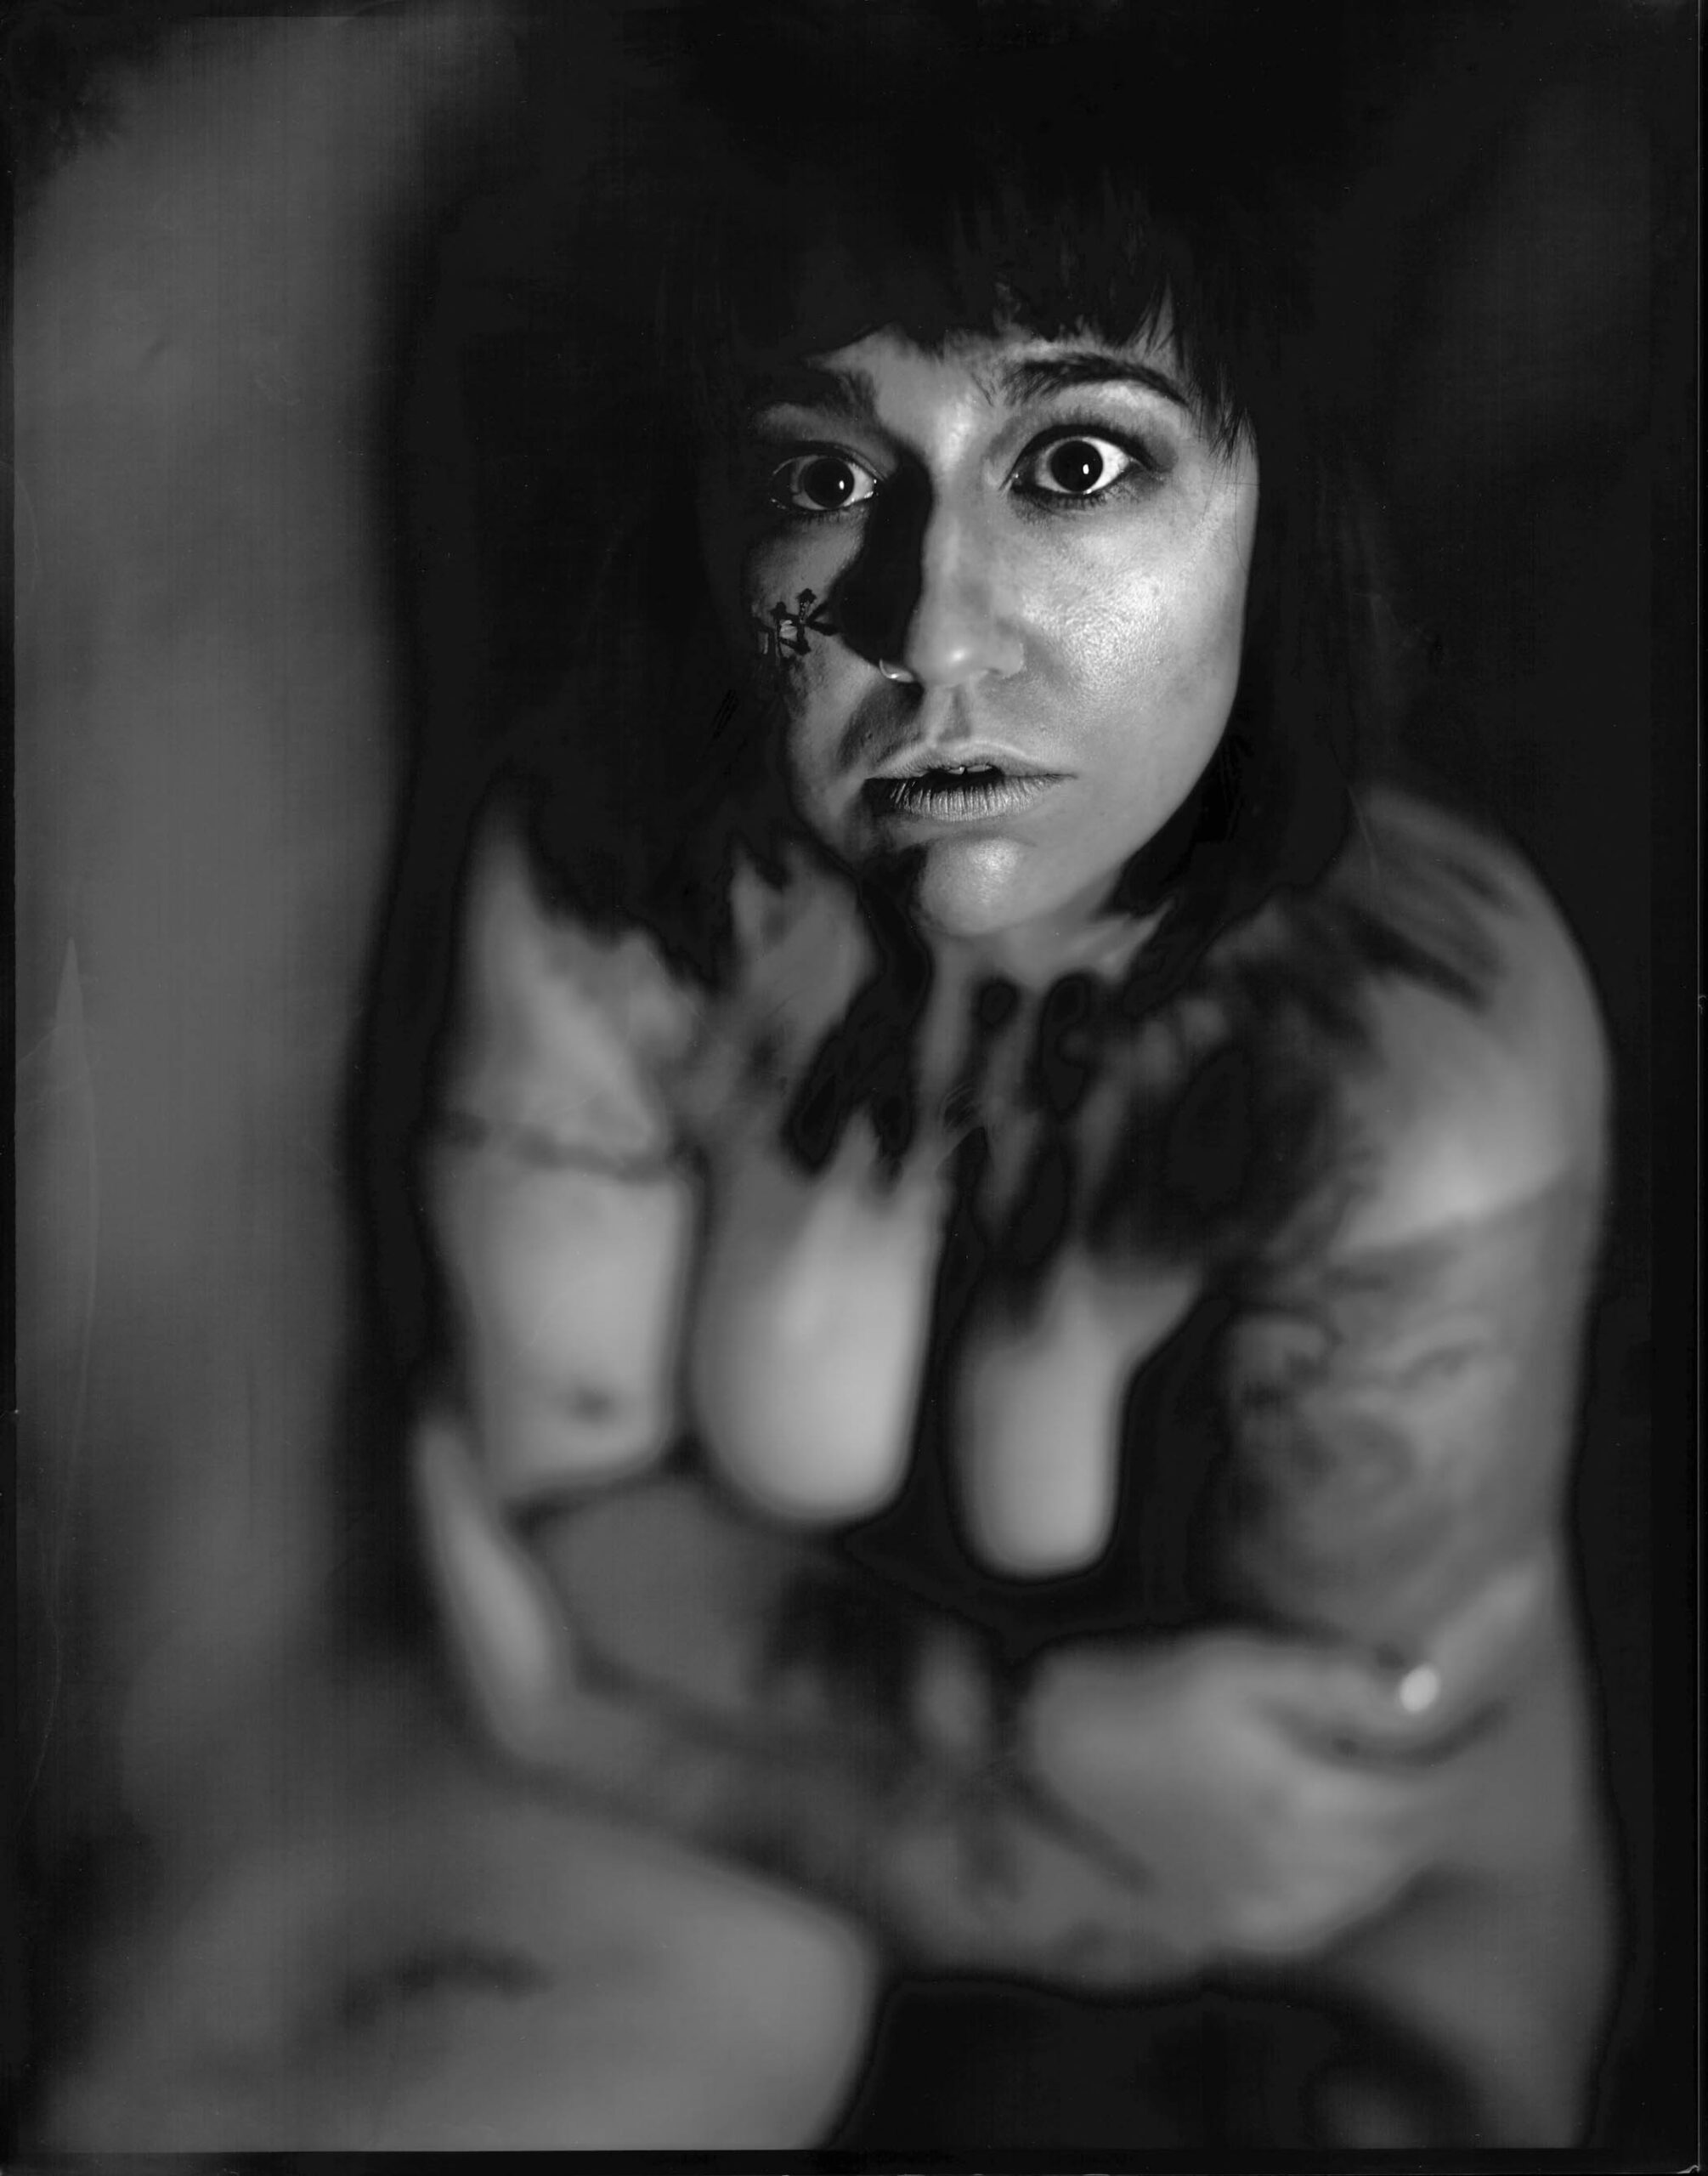
Andrea #5
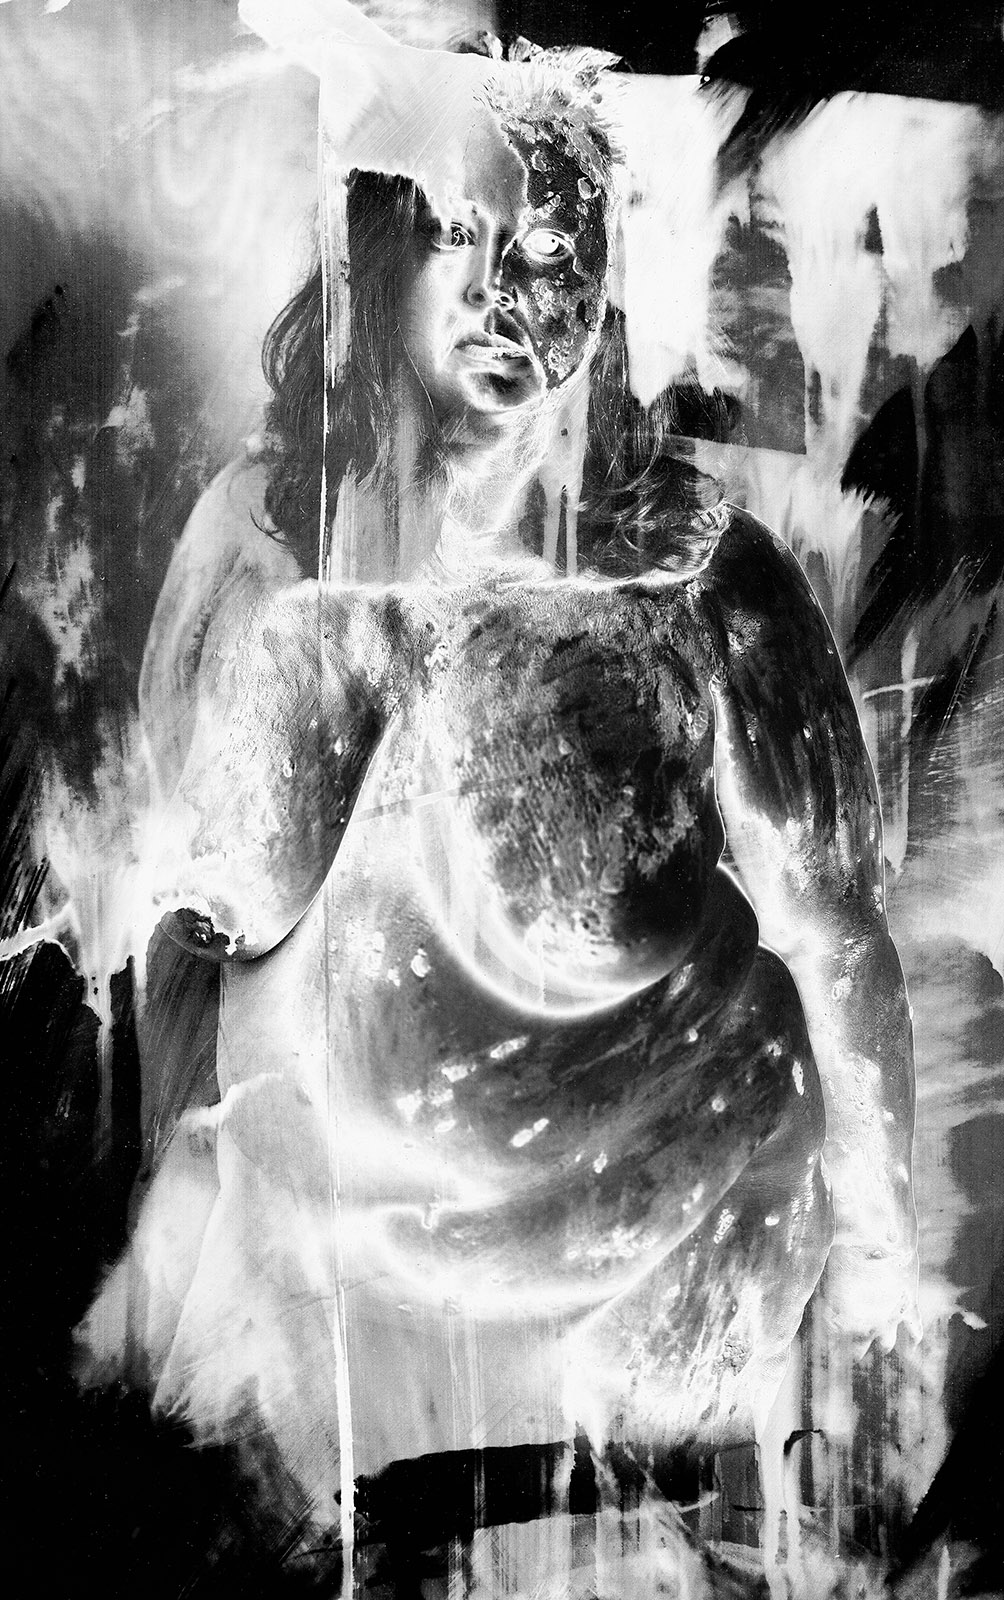
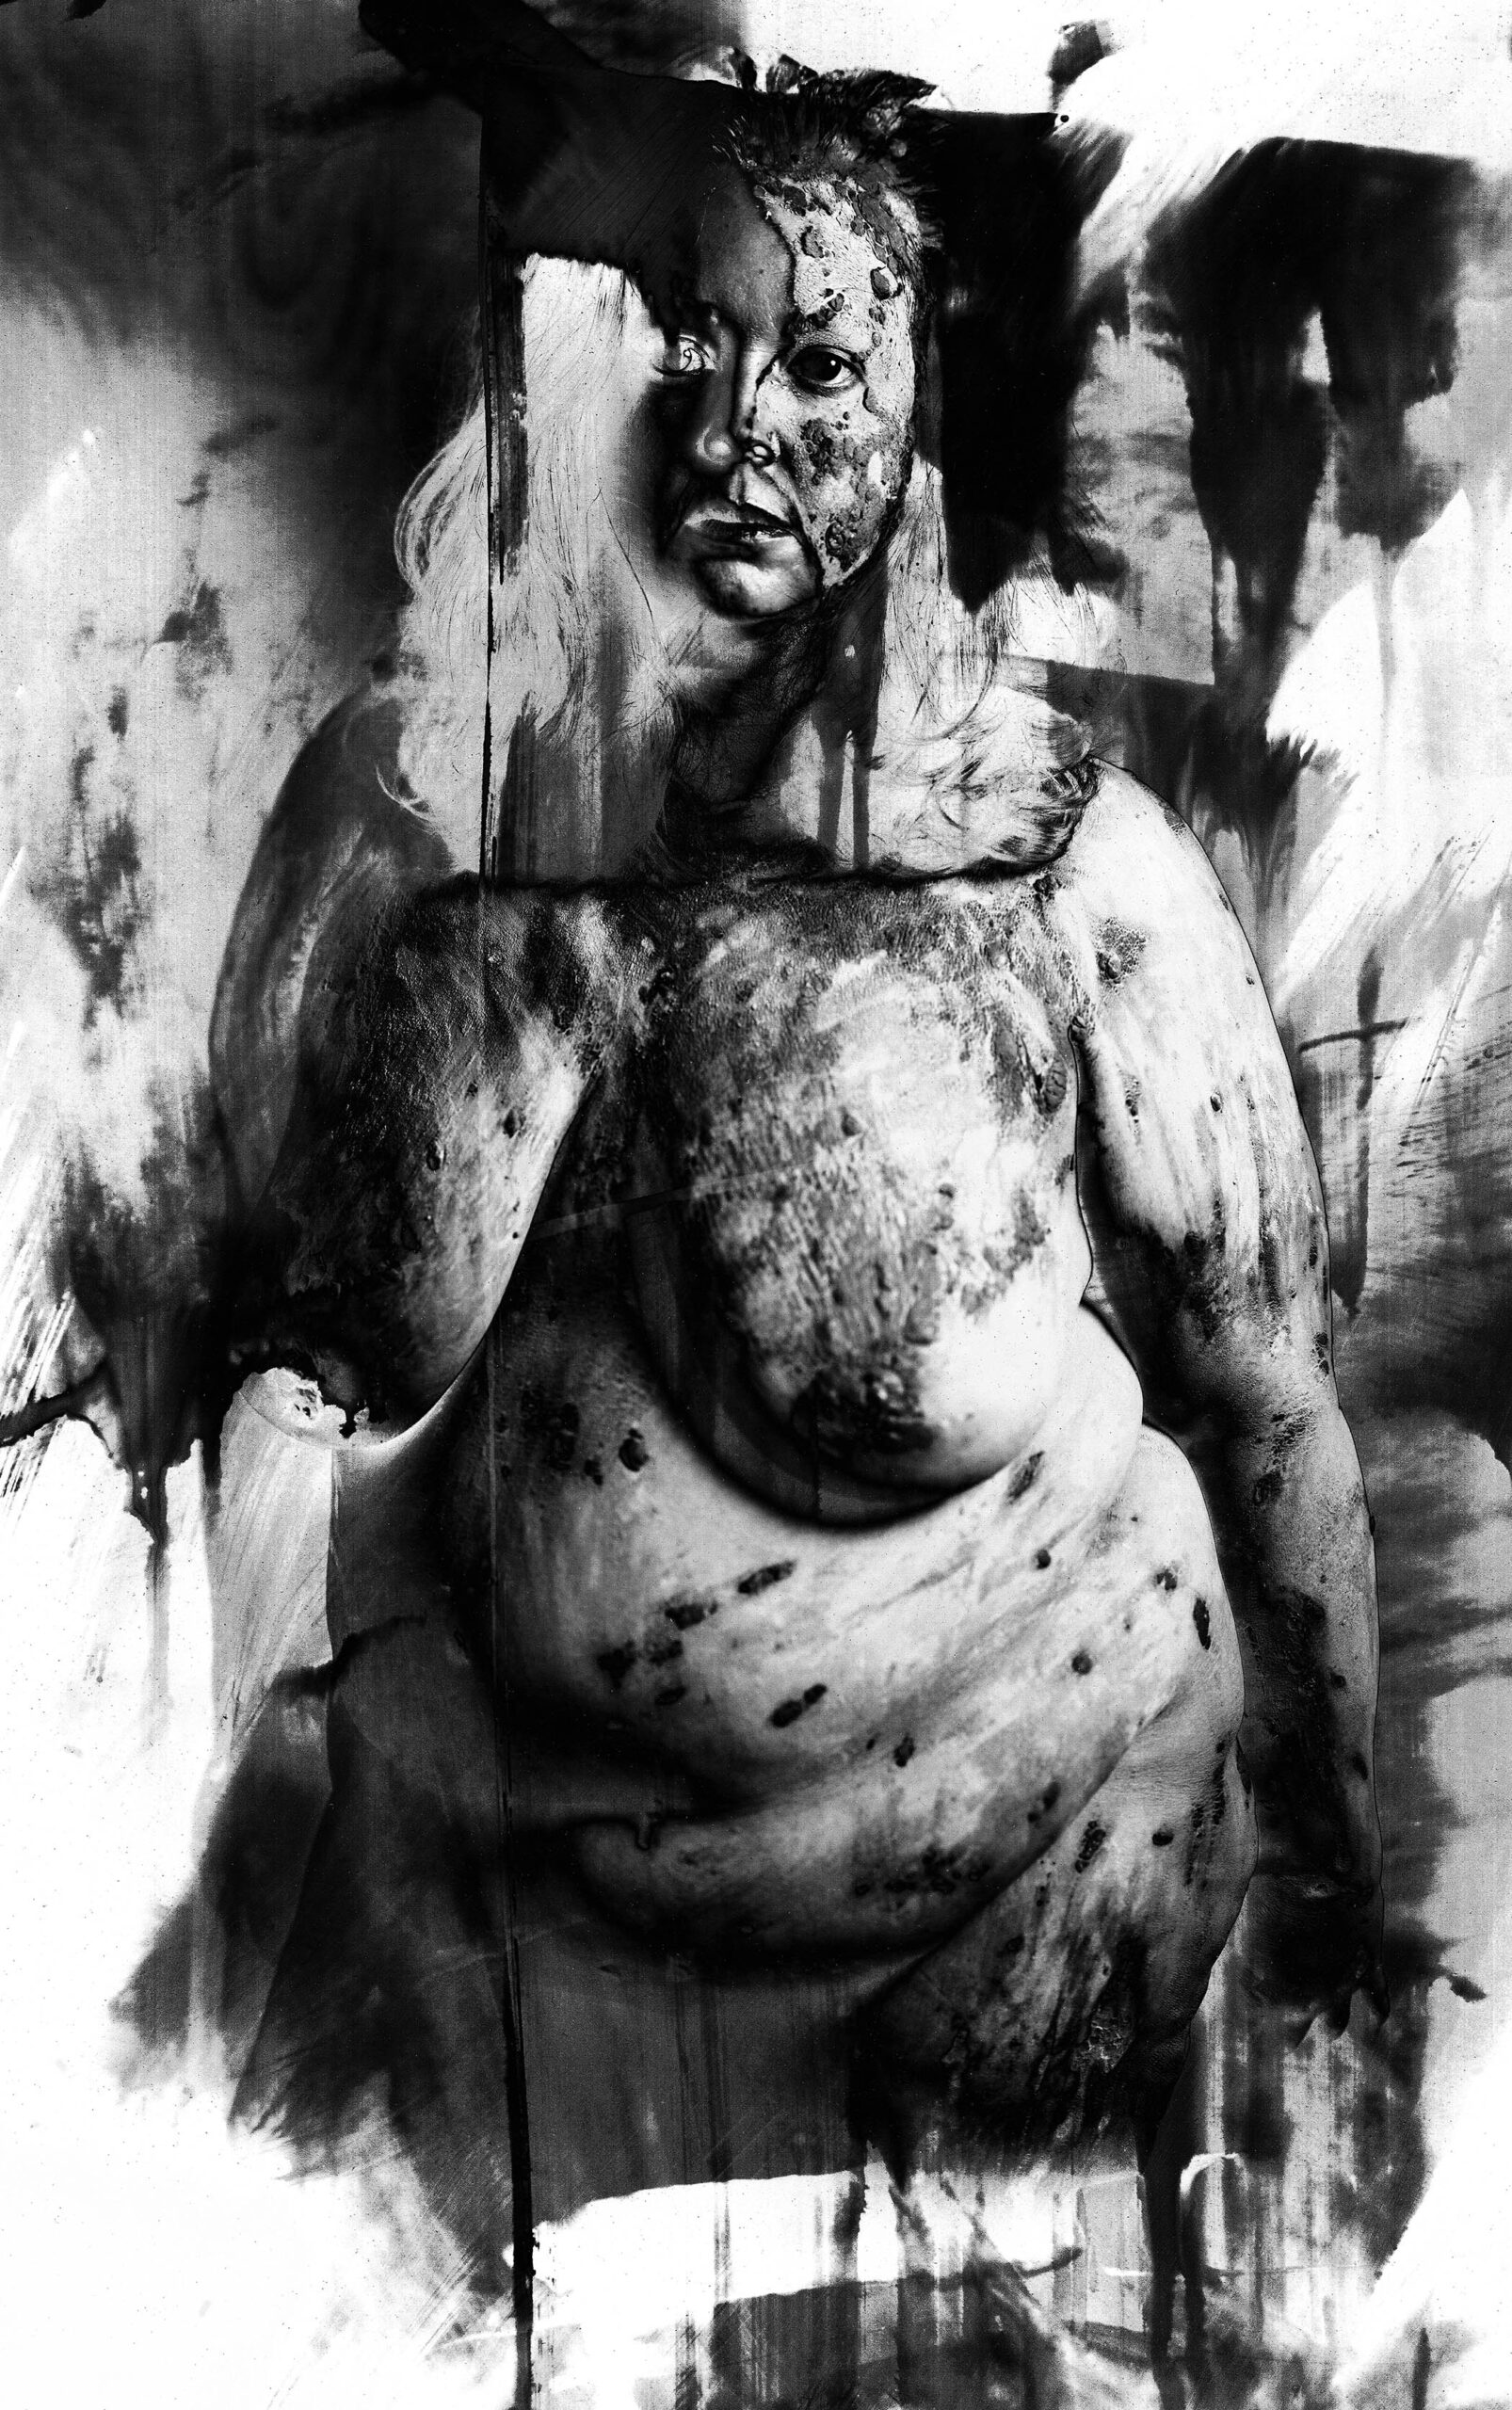
These images are figure studies handled with a very unusual and chaotic photographic process described below. Many of them are nudes and several of them are disturbing. I’m writing about the process in this post and also some thoughts about the results. I’ve enjoyed the entire project as a voyage of constant discovery. I really had no idea how the project would evolve when it began. My response to the images continues to change. I hope the images invite the viewer to create a narrative from them. My narrative involves ideas about escape. I hope you’ll find them interesting. My perception of the project continues to evolve.

Cassie #14
There are a lot of places I could begin to explain this work, because this project integrates traditional photographic techniques that I learned in high school with digital image manipulation techniques I’ve learned as recently as a few months ago. The project integrates inspiration from my first trip to Europe in 1971 and my visual inspiration continues to evolve to today. The greatest challenge, for me, is coming to accept chaos to be a co-creator in my photography. As a commercial photographer, for more than four decades, I’ve been fighting chaos. A commercial photographer generally wants to control and direct images to produce effective visual communication. In this project I’ve used special processes to push the images into shapes I couldn’t predict or control. The results have been the most surprising images of my career.
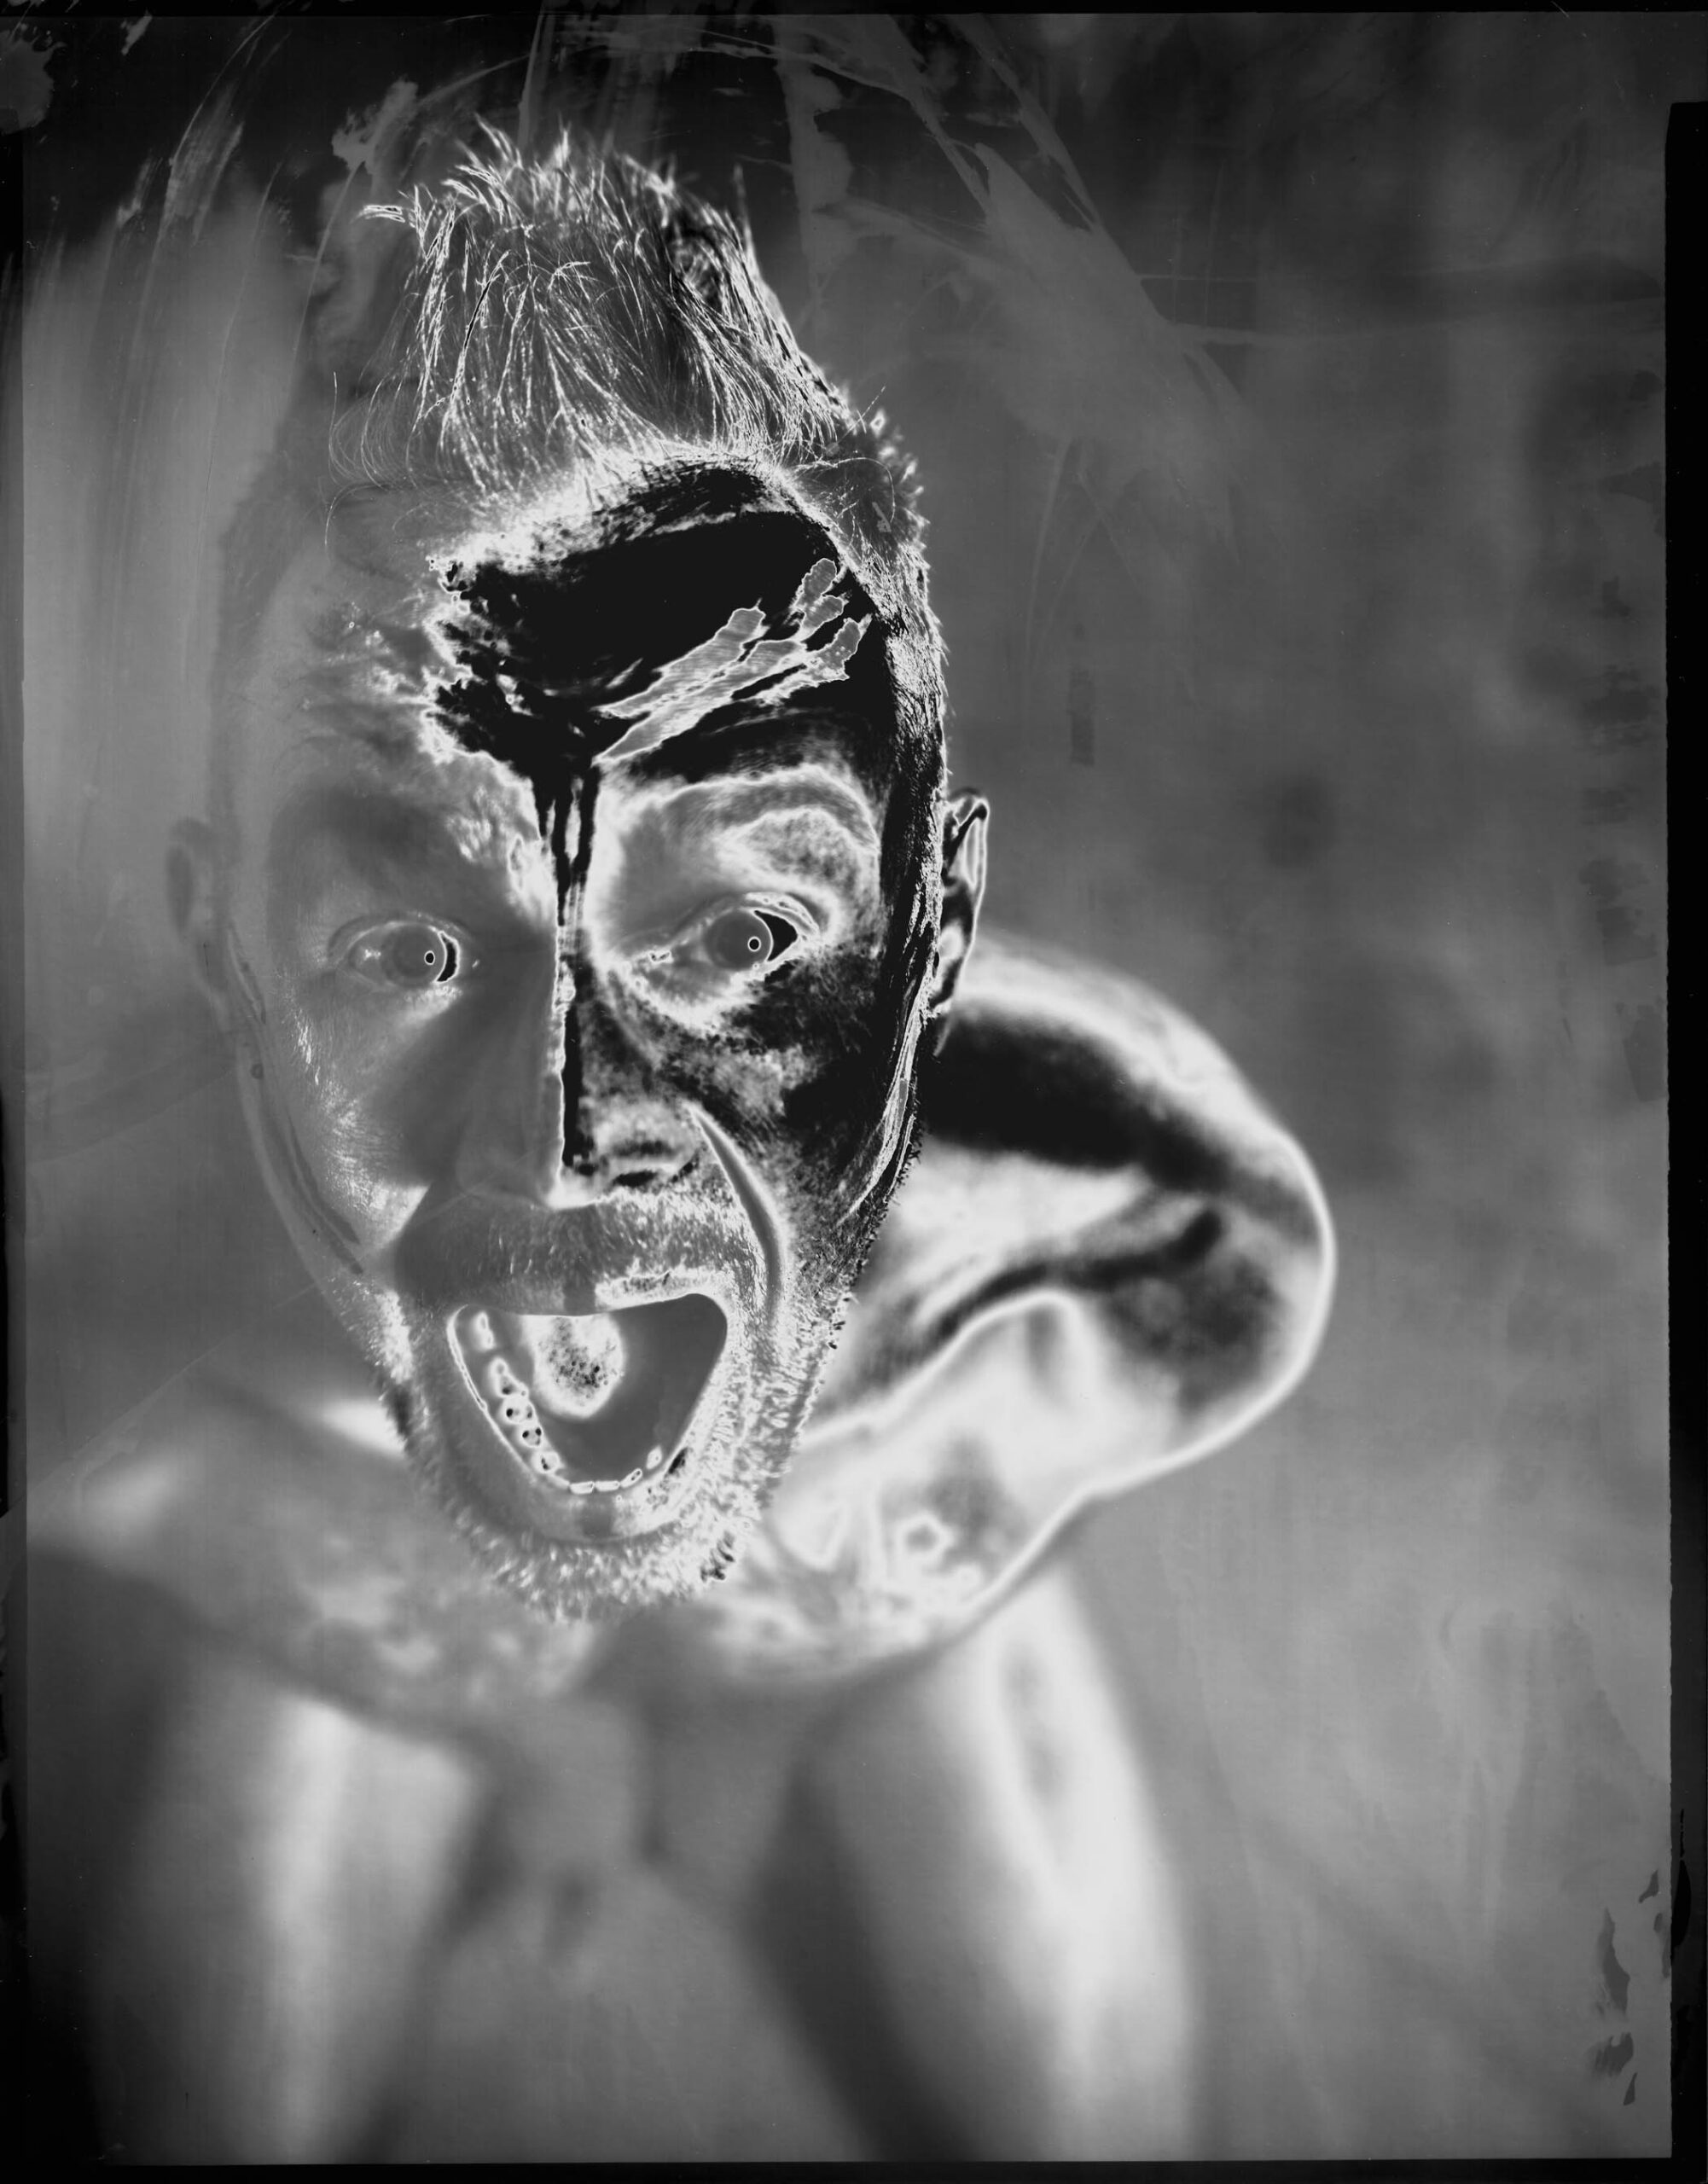
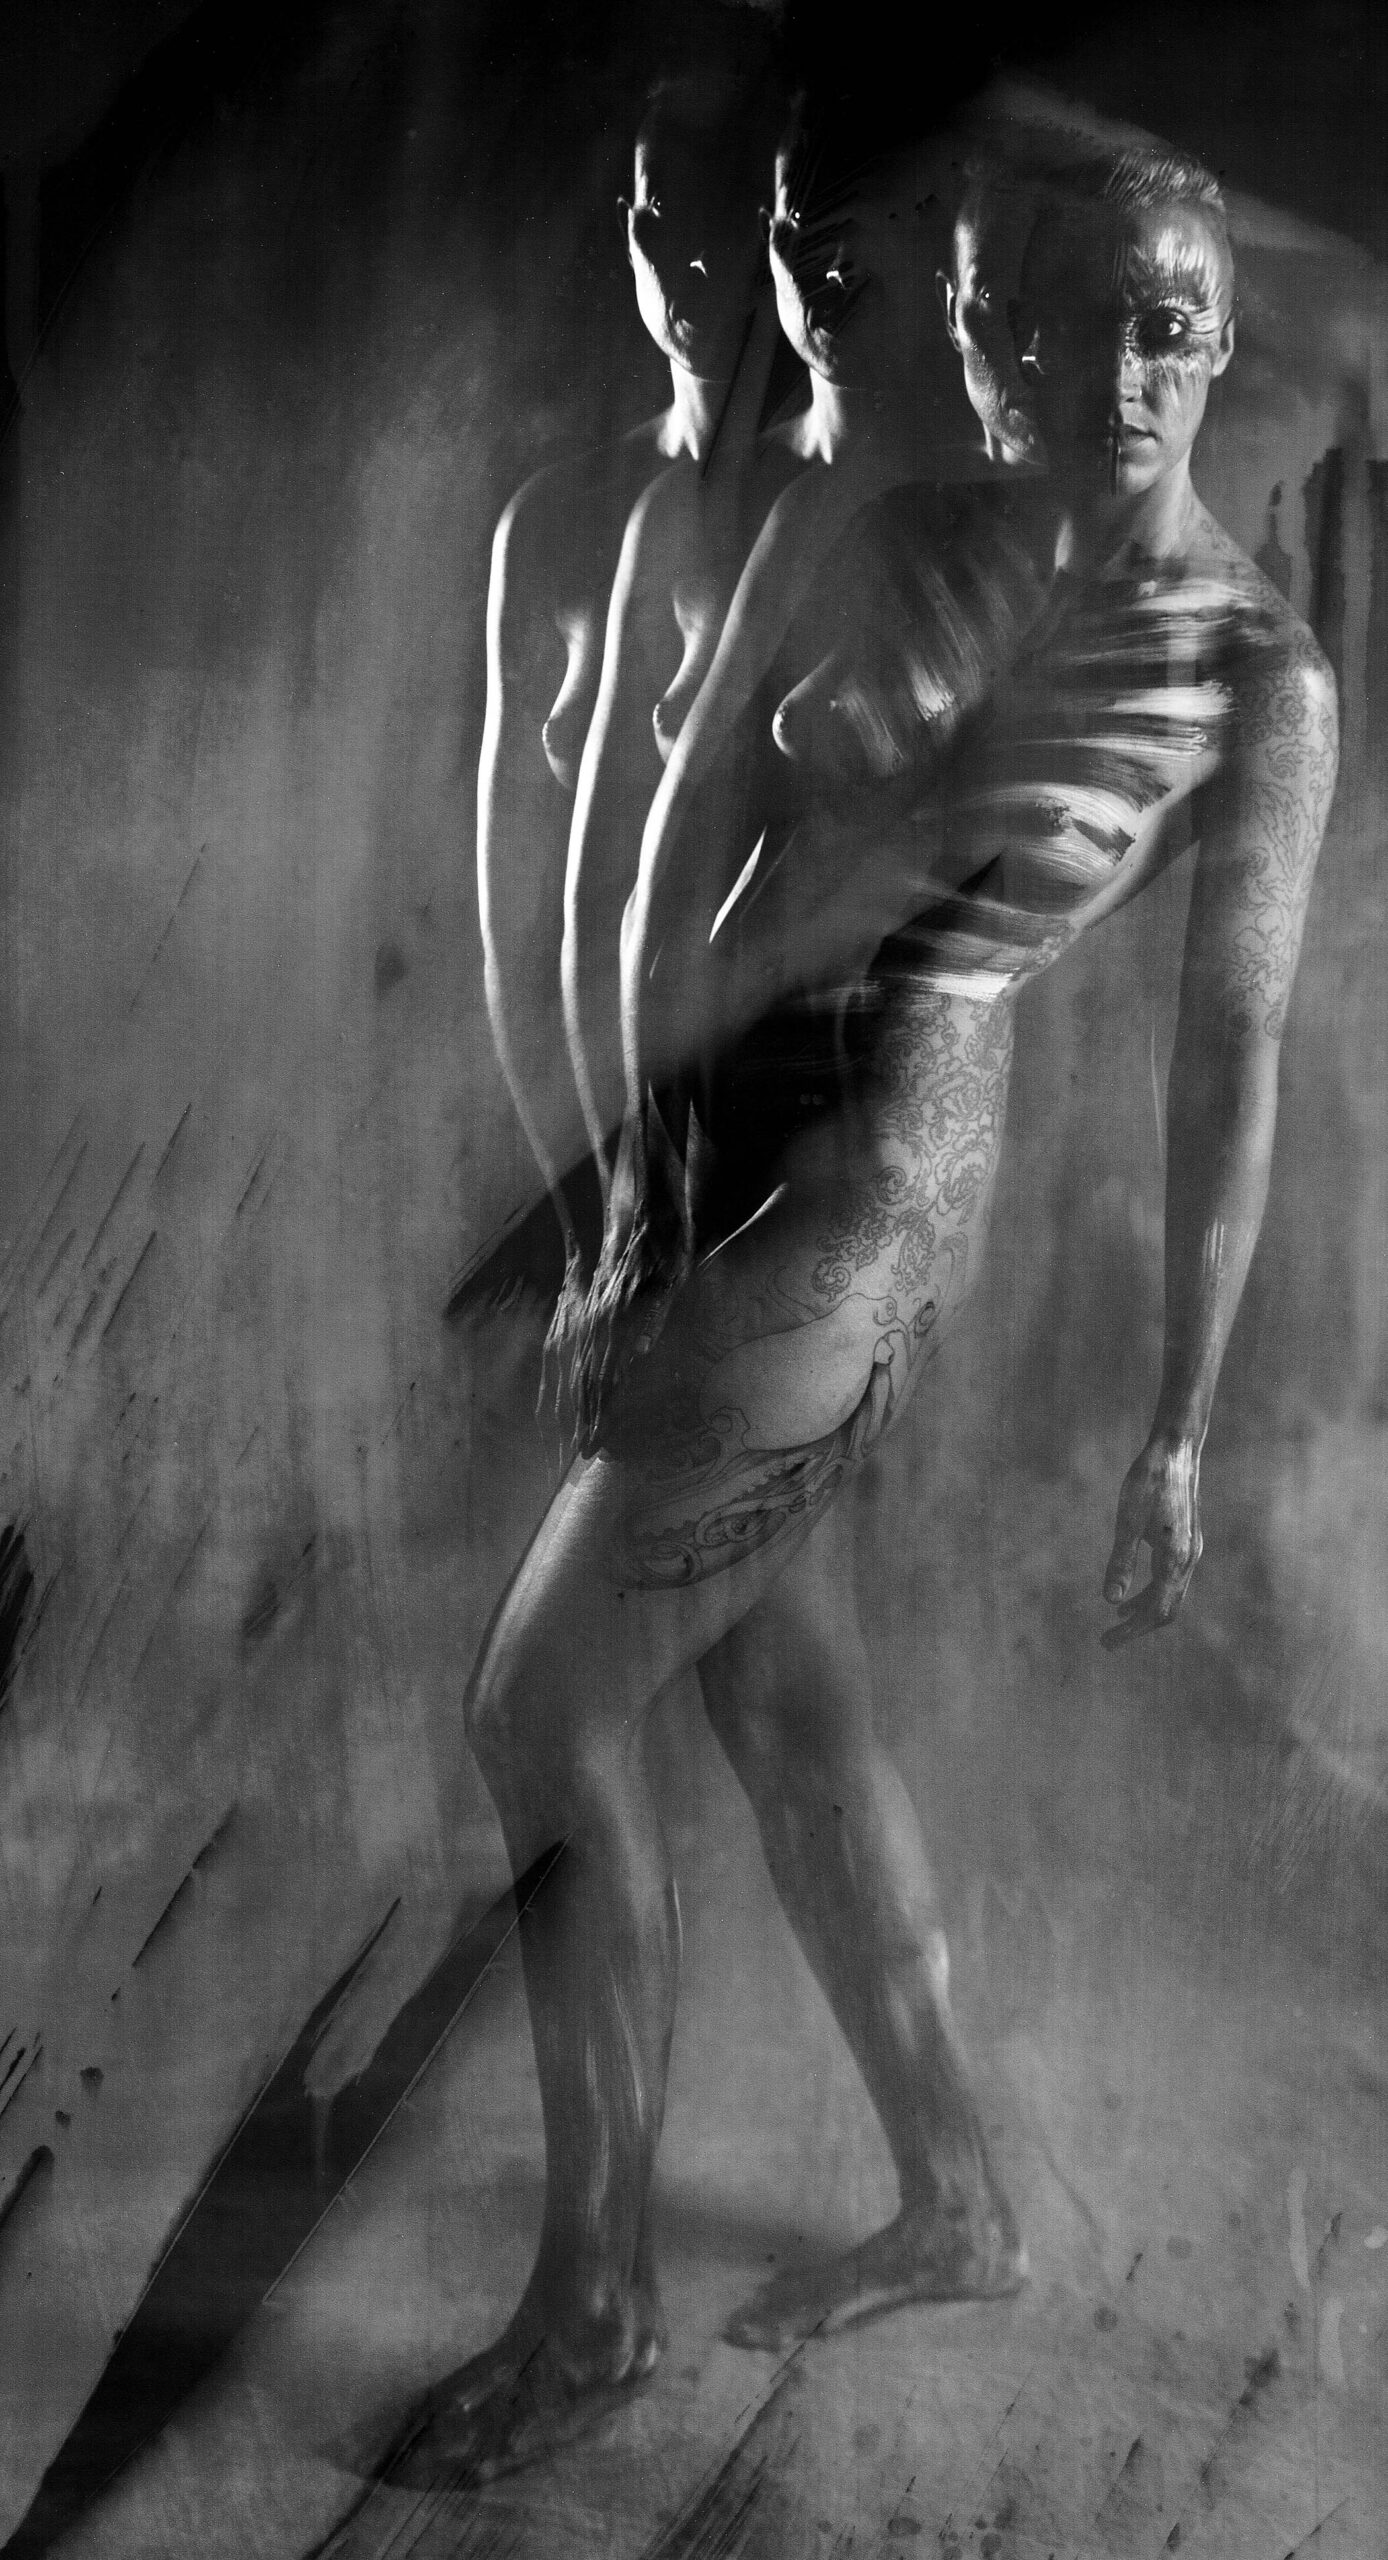
Gordon #1
I saw a series of sculptures by Michelangelo called the Prisoners when I was in Europe in 1971. I was about fifteen at the time. At first these images appear unfinished, especially in comparison with the David sculpture which was in the same museum. When I continued to stare at the pieces they seemed to be struggling to escape from the marble. The effect was quite surprising to me at the time: the seemingly unfinished sculpture conveyed movement while David sculpture remained a single moment of time. It’s now almost fifty years later and I still remember the effect and the details of these sculptures.
Bree #11
I remember seeing an Edward Weston photograph of a pepper just a few years after I saw the Prisoners. This image also had a lasting effect on my development as a visual artist. The design of the image was beautiful, but the medium: a silver gelatin photograph was also gorgeous. Of course, I had seen photographs before, but this was a contact print from a large format negative. Weston’s excellent craft created particularly beautiful prints. Over the years, in my classes and in working with photography, I’ve often met people that assume photographs are somehow independent of the medium in which they’re presented. For example, a person might think that they’ve seen “Moonrise Over Hernandez” by Ansel Adams because they’ve seen it on-line or in a magazine or a book, but a fine photographic print, made by Ansel himself, has a different effect than an image from an offset press or a computer display. In order to appreciate any creative work, it helps to see the work as the artist intended. Of course, there are many posters of paintings by Van Gogh or Monet and so many others, but is seeing these posters equivalent to seeing the original painting? It was the effect of the actual Weston print that allowed me to see beauty of the medium. I hope to share the actual prints of Courting Chaos again soon.

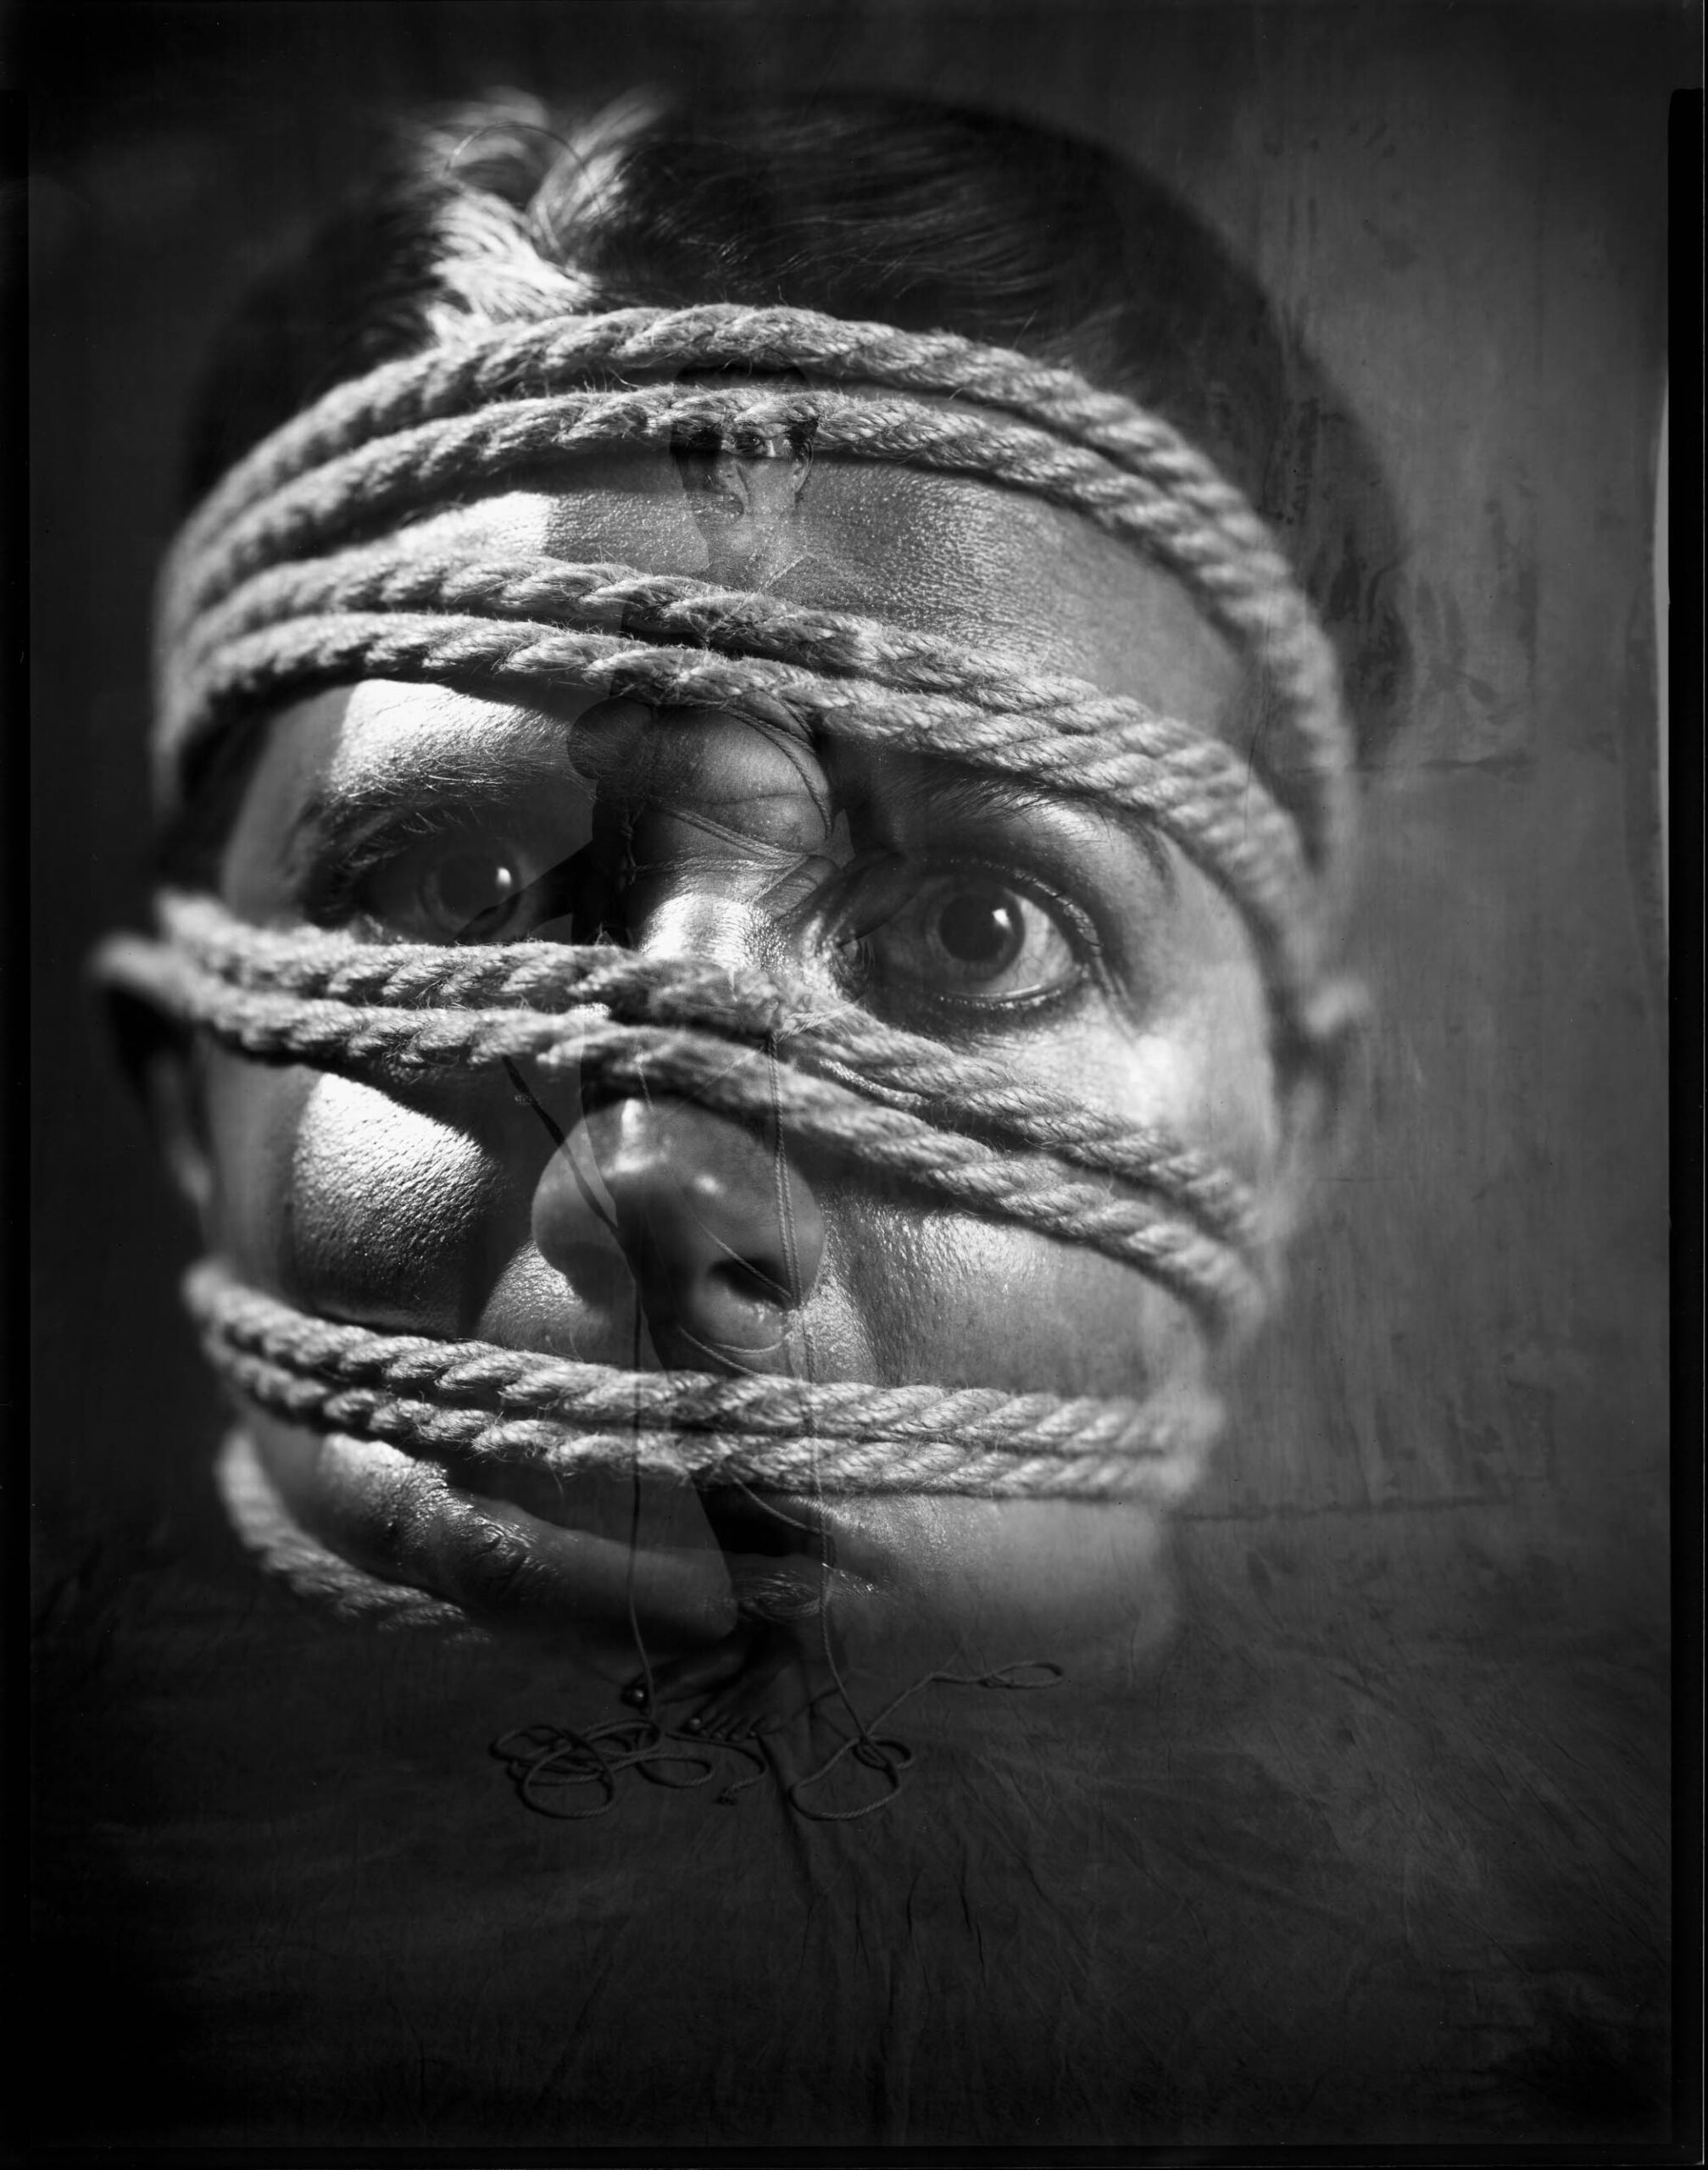
Wayne #2
Framed silver gelatin print for the show
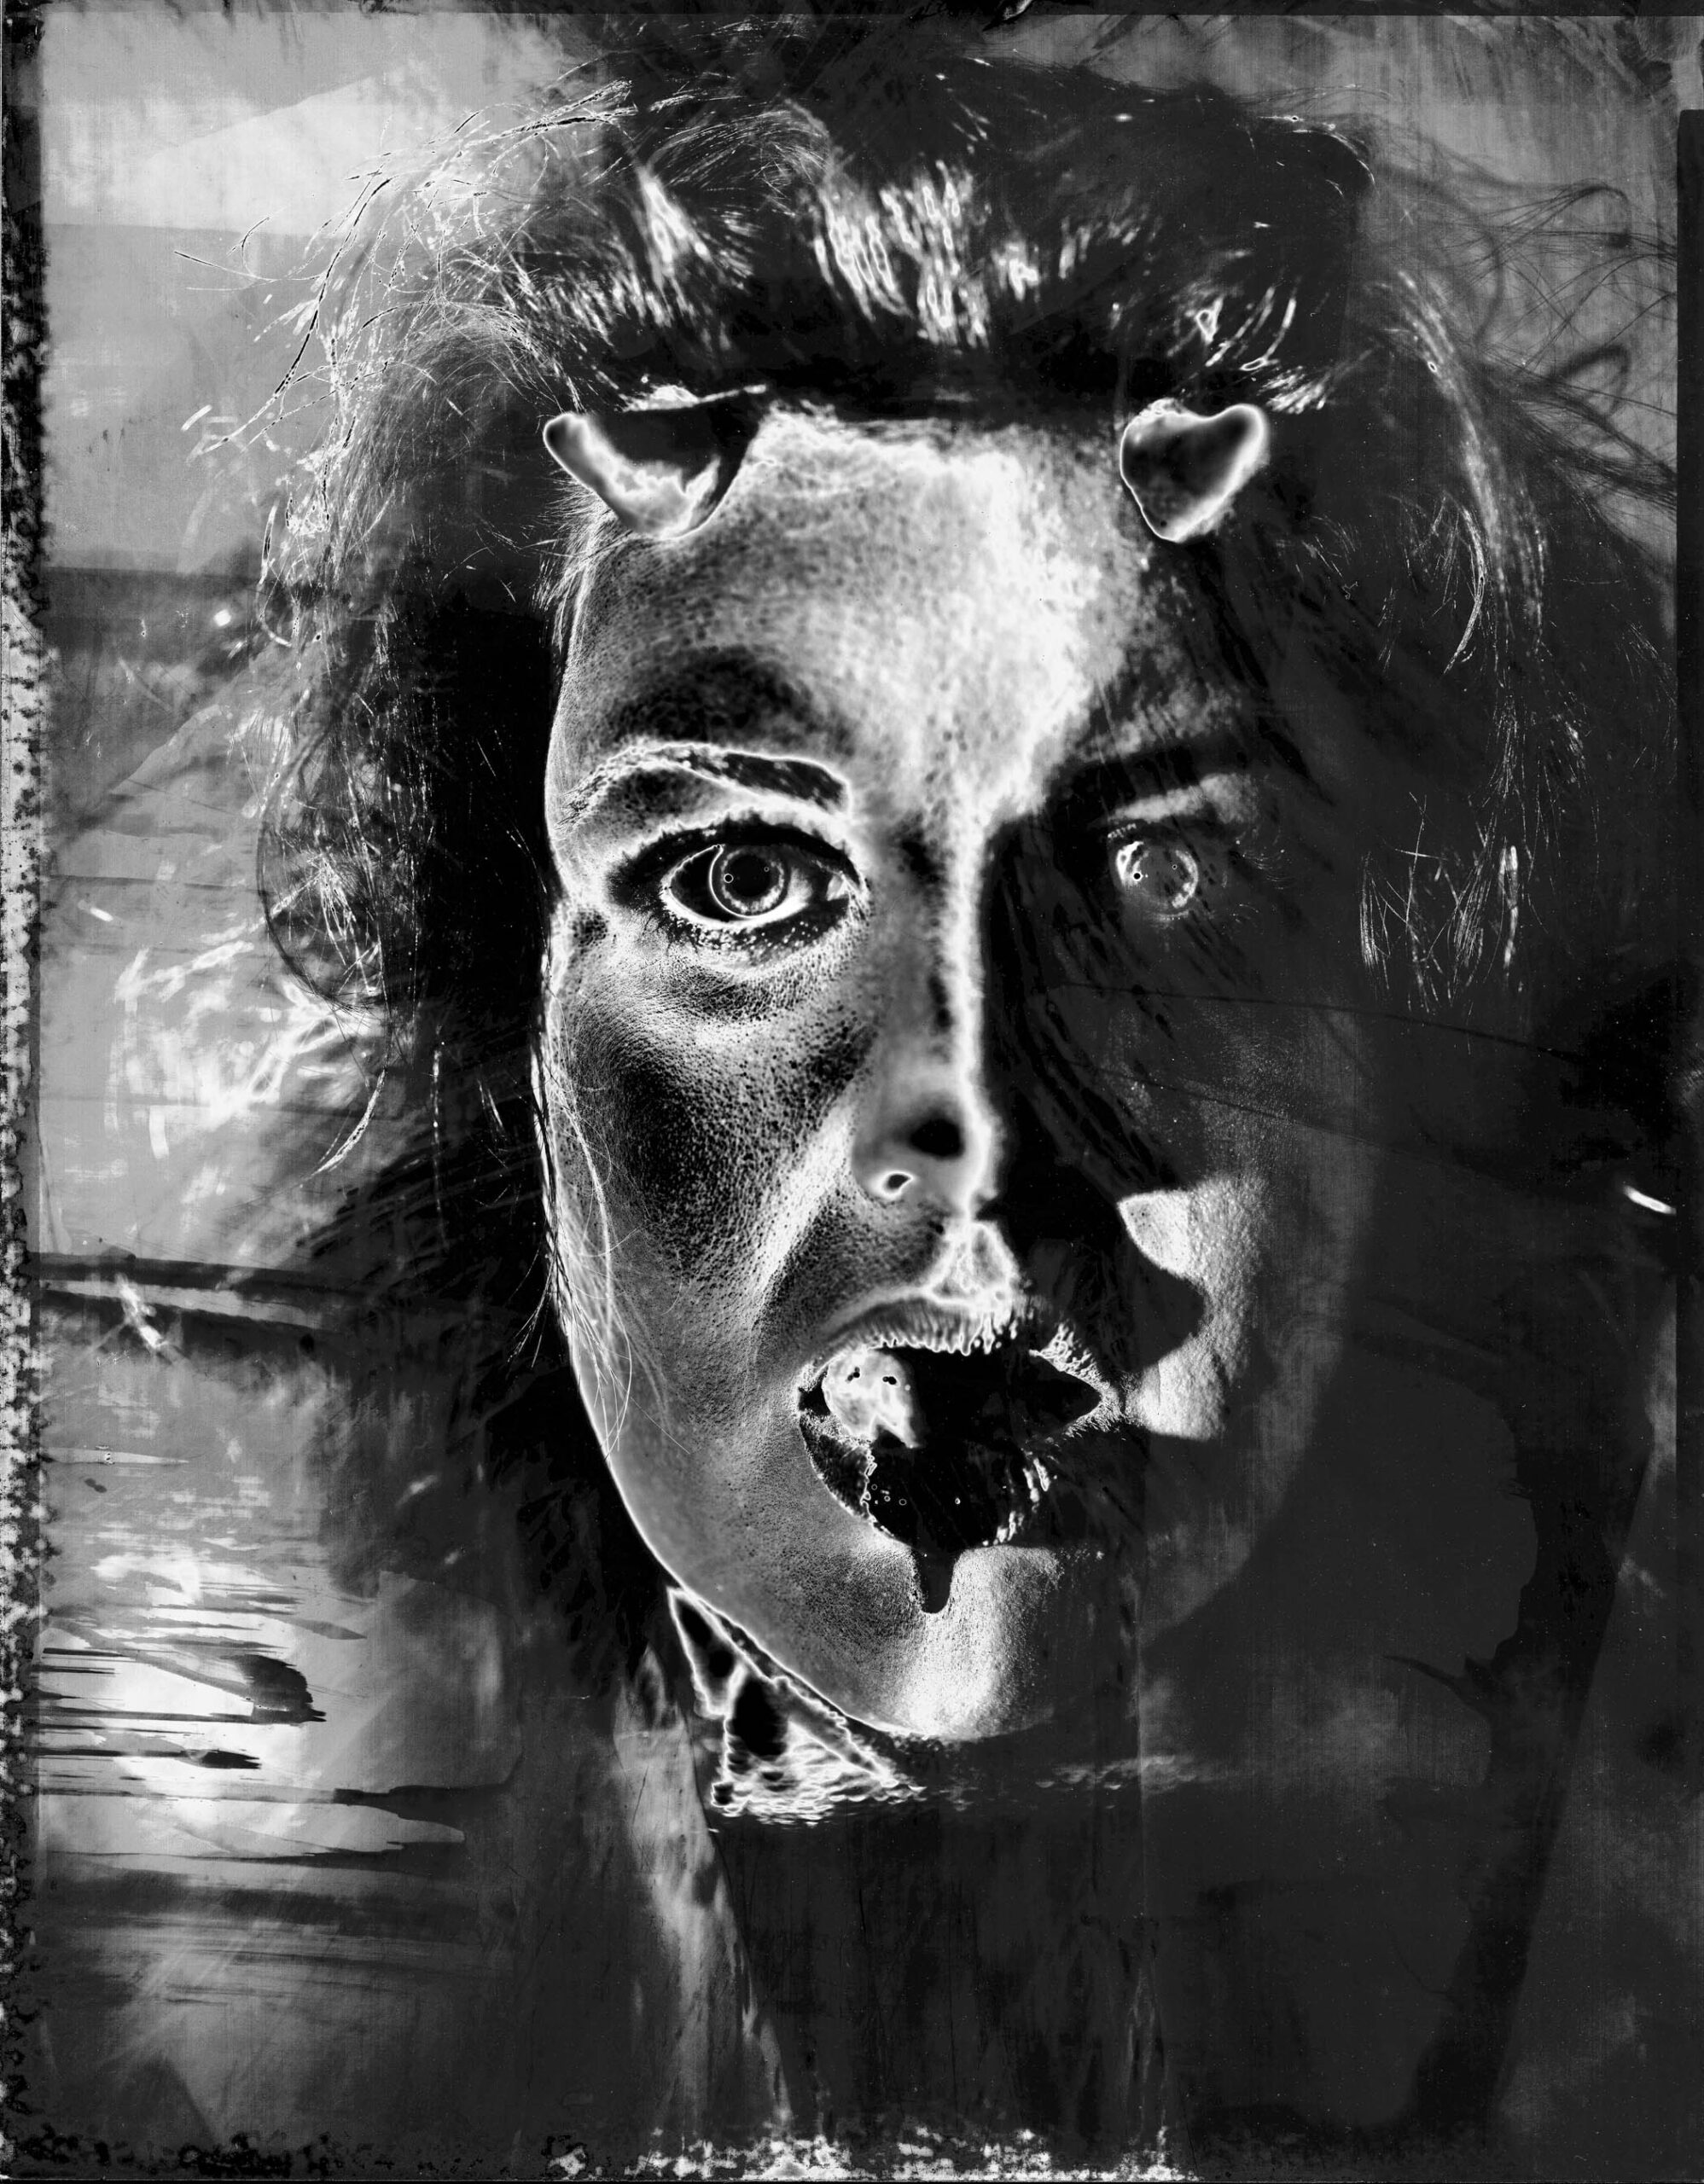
Of course, there are so many images that affected my way of seeing, and these images in particular, but the work of Man Ray is most important for this project. Man Ray worked in a variety of media: doing sculpture, painting and photography. My perception of his work changed when I saw original pieces at the Getty in Los Angeles. One aspect of his images was important to this project: he was solarizing his negatives in a way I had never seen before. The way that Man Ray integrated innovative technique with creative images is spell binding.

Pernicamera
On another level this project began when I purchased an 11X14 inch camera. While it’s not necessarily difficult to think about scaling up a camera “it’s just the same thing only bigger” the reality is pretty impressive. A full frame dSLR uses a sensor that is 1X1.5 inches, regardless of how high the sensor resolution; it’s a small area. The camera for this project has a capture area of 11X14 inches. In addition, while the sensor may have high resolution, film resolution is on the molecular level. The total amount of information you can capture is mind blowing. The costs of the thing are pretty impressive as well; a single sheet of 11X14 inch film costs eight dollars. Adams used 4X5 inch camera much of the time; Edward Weston used an 8X10; Brett Weston did use an 11X14 camera occasionally. The problems of using a camera this size are not just expense and weight, it also needs a lot of light. So, when I got the camera, I wasn’t sure that I would use it much, maybe just a couple of times to prove I could master the thing. Then, after a lot of thinking, I came up with a way of using the camera to make images that I couldn’t create with any other camera. I decided to explore solarizing (re-exposing) the negatives.
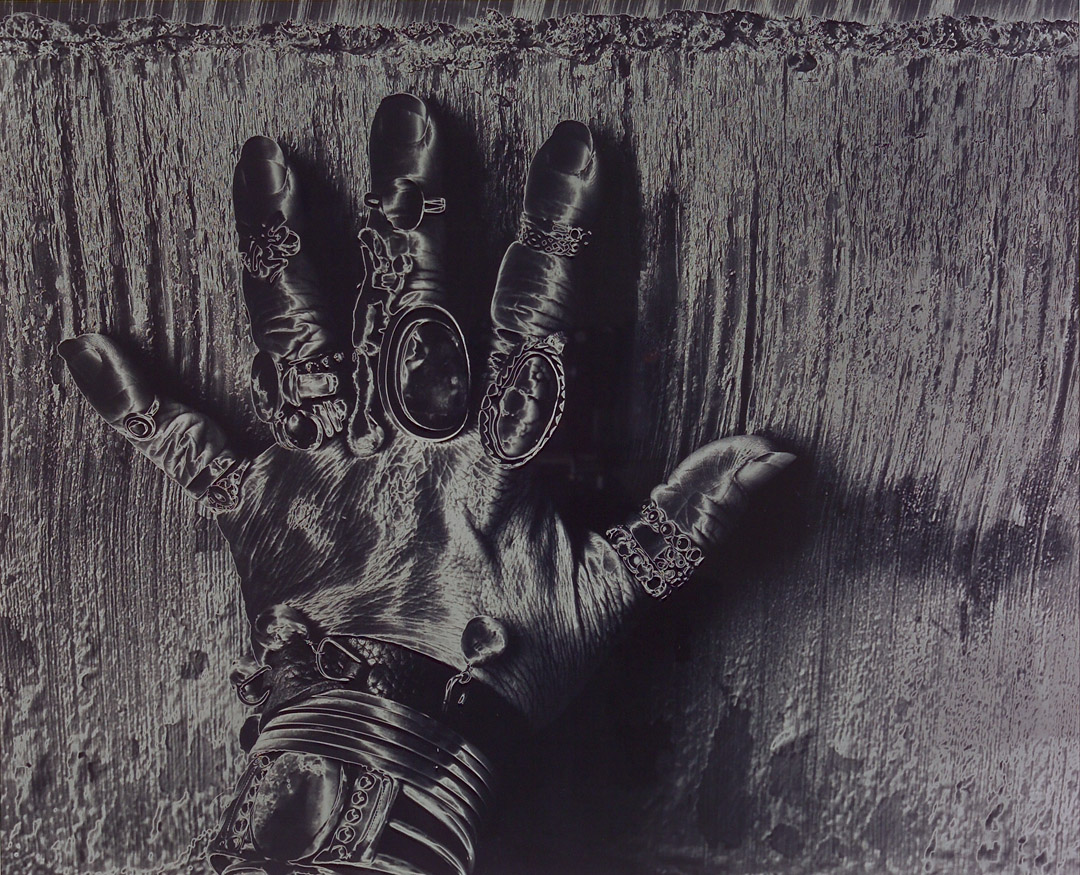
Bonnie Hunt, Hand
Print Solarization
This is similar to what Man Ray did, during the processing of his film he re-exposed the negative to light. This creates a reversal effect. This was a pretty common process when I was in high school, but we solarized prints rather than negatives. When you solarize a print the white area of the print black or gray, which can look pretty compelling. It’s impossible to entirely predict what will happen, and even if you do the same thing twice, the results will be different. The thing about Man Ray’s solarization process is that he turned the black areas of the image white AND he could make multiple prints that were the same. This was because he solarized the negative rather than the print. This creates another big problem: you have to process modern film in total darkness (yes, even black and white film) so you can’t see what you’re doing. When Man Ray did this people used orthochromatic films; films that couldn’t record red light, so he could see what he was doing. I realized that I could shoot 11×14 photographic paper, which can be used under safelight. Since I have an 11×14-inch scanner I could take these negatives, which were on paper, and scan them. This enables me to interpret the images in Adobe Photoshop. The large area of the negative is an advantage with this process because you can choose to re-expose and re-develop specific parts of the image. As I mentioned, what actually happens to the image when you re-expose and re-develop is chaotic, almost totally unpredictable. Thus, I am courting chaos in making these images.
Mindy K #7
Original Negative Scan
A great advantage of shooting the photographic paper, rather than film, is that the processing is quick and easy. You can develop the RC paper in about a minute. Even with re-exposure it was only about 5 minutes from exposing with the camera to seeing the negative in white light. Almost as quick as Polaroid! In addition, since the large scanner was in the studio I could scan and reverse the images in short order, so the subject was able to leave with digital prints! This project benefited immensely from the immediacy of this medium. For many of the models, this was their first experience in seeing photos develop.
Cassie #1
This project is also the result of the work of David Kidwell, assistant extraordinaire, and Julie Powers, makeup artist for angels and devils. Julie did a couple of really remarkable things for this project: first she designed the make-up for all the models. This is tougher than it might appear because the Multigrade paper doesn’t react to color in an even way: reds and yellows are very dark while blues are brighter that you would suppose. Julie also arranged for all the models, THANKS! David managed set up and kept me on my feet all through the shoots. Now that I’m in my sixties I couldn’t have done it without him! Each of the models was special. It can be difficult to come to terms with normal pictures of yourself, it’s more of a challenge when you’re teaming up when chaos. You know that all of the images will present you in unpredictable ways. My thanks and gratitude to all!
Rachel #10
In another way this project began at University High School in Los Angeles, specifically in bungalow L79. At sort of the end of the campus was the photography classroom. I first learned about photography in that classroom. The instructor was Arnold Rubinoff. Arnold was teaching things that really weren’t common in high school photography, back then. I remember learning to make color prints from him. One of the things we learned was how to do solarization. He also introduced us to Cyanotype prints. Half of the show was printed as cyanotype images. You can see those prints at this link: https://siskinphoto.com/blog/?p=3630.

Cassie 1 #5
Framed cyanotype print for the show
There are a number of important technical insights that led to this project. One of the first problems that had to be solved was the cost of film; if film is too expensive it keeps the photographer from taking risks. One other advantage of the paper is that it has good light sensitivity: Ilford Multigrade is about ISO 100. Another important moment was when I realized that I had an oversized scanner. My original thought was to remove the emulsion from the paper and put it onto a clear base, which would have been very difficult. Scanning the images was easy and quick. I was then able to make new negatives on clear film using a digital printer. These prints, both silver and cyanotype, are much more beautiful than the digital prints. For this show I used multiple coats of cyanotype chemistry on blotter paper. The images have a very dark maximum tone as a result. Because the prints are hand coated each cyanotype print is different, even if made form the same negative. Cyanotype prints do change over time, which is part of the charm. For the silver gelatin prints (check here to see: https://siskinphoto.com/blog/?p=3571) I used Ilford Multigrade Warm Tone Fiber base paper. Fiber base papers use a barium clay coating called baryta that produces the white tones. In addition, when you air dry a glossy fiber-based paper the surface looks fabulous. I also toned all the silver gelatin prints with selenium, which makes a more agreeable print color as well as adding to the stability of the final print.
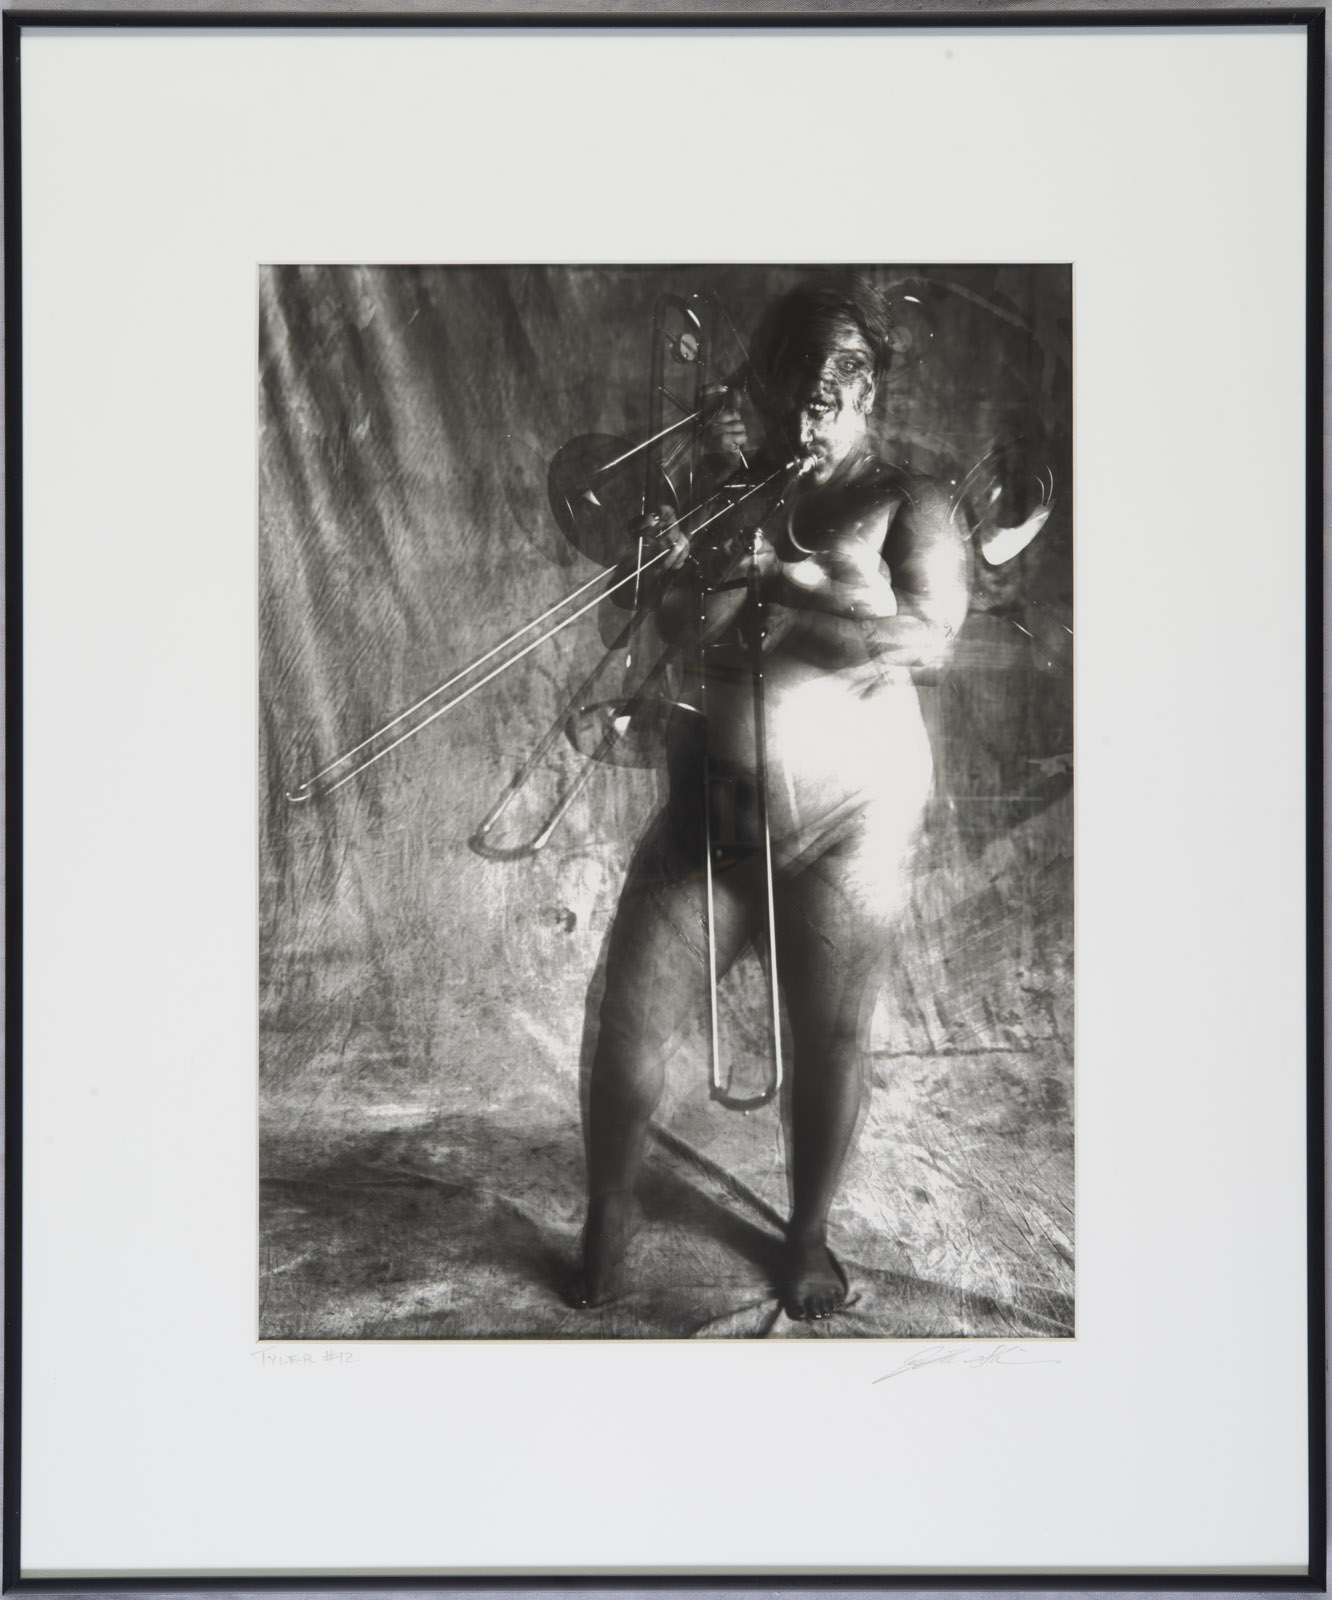
Tyler #12
Framed silver gelatin print for the show
Actually shooting with the camera is pretty tricky. Some things are like working with any large format camera, for instance the image is upside down and backwards on the ground glass. Over the years I’ve become used to that. One problem that particularly affects the 11X14 is bellows extension. The closer your lens is to the subject the further it is from the film. I know this seems exactly backwards, but trust me it’s the way it works. What might not be obvious is that as the lens gets further from the film, there is less light on the film. If you are shooting a head and shoulders portrait with a 35mm camera you don’t have any bellows extension; if you’re shooting with 4X5 film you might lose half stop to bellows extension; with the 11X14 camera you’ve lost about 2 stops of light to bellows extension. This means it’s dark on the ground glass when you’re focusing and composing AND you need a lot of light to make the exposure. Most of the time I was using between 5000 and 7000 watt-seconds of strobe power to make the exposure. My lens was generally set between f11 and f16. While this seems like it would give you plenty of depth of field on a digital camera, on the 11X14 it gives you only a matter of millimeters of focus depth. So, focus is critical, which makes it very important for the model to stay in place! Another aspect of bellows extension is the way it affects your lens choice. The normal lens, if there is one, for an 11X14 camera is about 450mm, or 18 inches. If you were shooting like you do with a full frame digital camera, you’d need about 1000mm (39 inches) of bellows to bring the lens into focus. That makes the camera really difficult to keep stable and to adjust. The answer is to shoot with shorter lenses, which bring the camera closer to the subject. My favorite lenses for this project were a 12 inch red dot Artar from Goerz (f9) and a 14 inch gold dot Dagor (f8) made by Kern for Schneider. I use the 12 inch Artar for head and shoulders and the 14 inch Dagor for full body shots. I used a few other lenses on occasion including a 48cm Goerz Dogmar (f5.5) and a 270mm Wide Angle G-Claron from Schneider (f6.3), but they just didn’t keep the subject/camera distance in a good range.
Mindy #7
The negative for this image is above
The camera itself has some basic challenges. The fact that it’s a working 11X14 camera must be in its favor but it’s built out of parts from other cameras. It’s built on top of a drawer, like something out of a card catalog. This allows it considerable expansion, but it also means the camera isn’t portable. It weighs a lot, so the tripod needs to be a beast. The focus skips out of alignment, which is annoying. The bellows sag. There is a plaque on the camera proclaiming it as the Pernicamera Model Number 0001, built in 1995 to 1997. I’d like to meet the person who built it. I don’t use a shutter with the camera at all. I keep the lens open, but all the illumination, once the paper is loaded, is from safelights. I trigger the strobes with a radio slave to make the exposure. This makes it easier to do multiple exposures and to move the subject between the exposures.
Leslie #6
I hope you’ll enjoy looking at more of the images from the first show.
Part 1, Silver Gelatin Show Prints:
Part 2, Cyanotype Show Prints:
Part 3, Color Glossy Show Prints:
If you examine more of this blog you’ll see information about many other aspects of photography. If you’d like to look at some of my articles about photography, from View Camera, Photo Techniques and shutterbug, please look at this link: http://www.siskinphoto.com/magazinearticles.php
You can see my main site at: http://www.siskinphoto.com/
If you have any questions regarding these images or my photography please contact me at john@siskinphoto.com.
I generally post current work on Facebook. Perhaps you’d like to look me up there at https://www.facebook.com/john.siskin
I’ve written a couple of books. They’re available at Amazon. Here’s my author page there: https://www.amazon.com/John-Siskin/e/B004N73O36/ref=dp_byline_cont_pop_book_1

Wayne #13
Wayne #13