Photo Notes A place to talk about making images.

October 31, 2010

Involuntary Time Travel

Filed under: My Books!,Photography Communication — John Siskin @ 10:00 pm

I’ve been doing a lot of editing lately, as a result of the book projects I’ve been working on. Lately I’ve needed to look in the old files. I have film files going back to the early 1970ies at least. I have black and white negatives, color negatives and transparencies. I have 35mm, 120, 4X5, 8X10 and Minox, and don’t forget the stereo slides. I have multiple filing cabinets. By now I must have thousands of CDs and DVDs as well as floppies and what not. I can find things, but not everything is in the first place I look. The really heartbreaking this is when you find something that has been damaged over the years. I didn’t always use archival materials to store my originals.

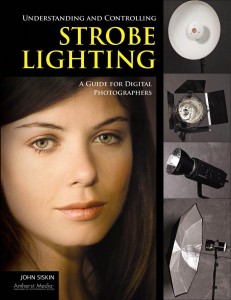
The biggest problem is what I call Involuntary Time Travel. When you find an image that takes you back to college, or even to high school. Or you do nothing but wonder about what that person is doing now, a quarter century later. When I start looking through the files I visit my past. A good image can evoke powerful feelings. Photography is a really important way to diarize a life; to enable us to revisit the past. But it is much more than that, because we can create images that allow us to communicate with others. My goal is to help people improve their communication skills. To help others speak more clearly.To that end I just finished two more books! My first book is about lighting photographs: Understanding and Controlling Strobe Lighting: A Guide for Digital Photographers. It’s on sale now. The link is to Amazon. I hope you’ll pick up a copy. You can see some of the book at Amazon, this link is to the chapter on Portraiture. I just finished a second book for the same publisher on lighting interiors, this book will be available in about a year.
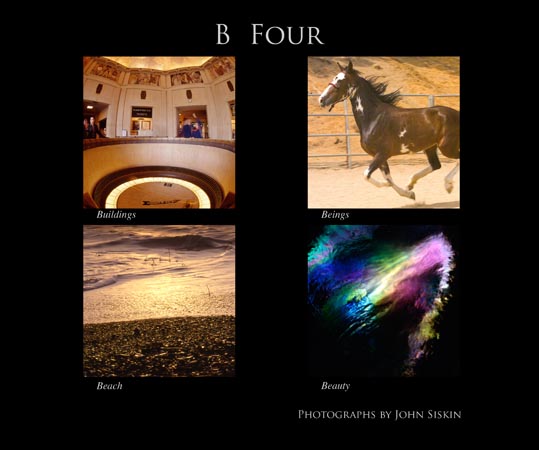
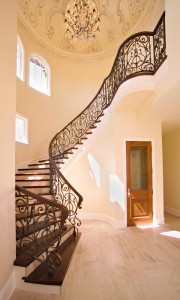
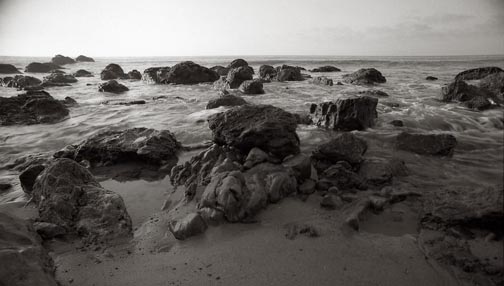
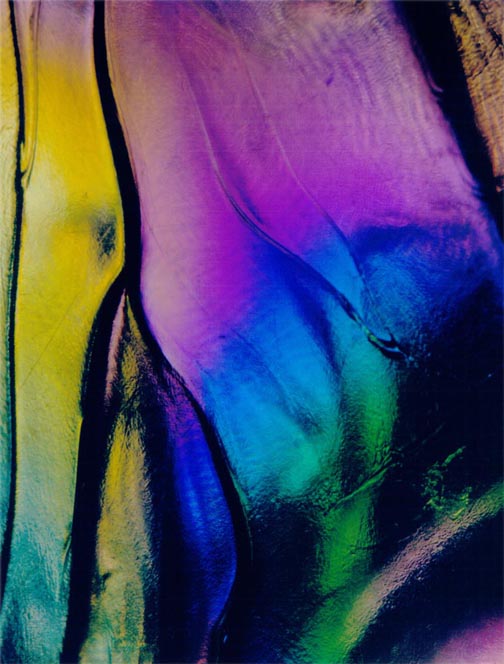
The book that really sent me time traveling is a collection of personal images called B Four. The images are from the beach, buildings, being and beauty. There was a lot of editing involved. I really hope you’ll take time to look at the book, and of course it would mean a lot if you bought a copy. I did the book with blurb so that I could make the decisions about content. I’ve included a few of the images from B Four with this blog.

Please consider taking one of my classes, or even recommending them. I have three classes at BetterPhoto:
An Introduction to Photographic Lighting
Portrait Lighting on Location and in the Studio
Getting Started in Commercial Photography

BetterPhoto.com, The better way to learn photography

October 24, 2010

Book to Book to Book?

Filed under: Looking at Photographs,My Books! — John Siskin @ 8:20 pm

The first book, Understanding and Controlling Strobe Lighting: A Guide for Digital Photographers, is on sale now, but it may only be at Amazon. Hopefully it will be in a book store near you soon. I’ve heard good things from a few people who have already received it. It is really fabulous to look myself up at Amazon.

The second book is FINISHED!!! Lighting spaces, a photographers guide to lighting architecture, commercial and other big spaces with flash and ambient (light), the title is still kind of wordy. I think we’ll shorten it soon. I shipped the files off to the publisher Amherst. Look for this book in the fall of next year, 2011. My last two blog entries were from this book, I hope you’ll check them out.

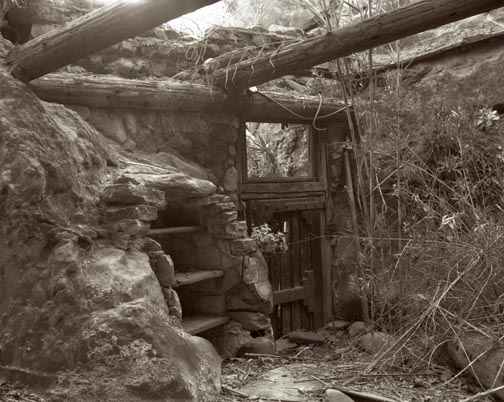
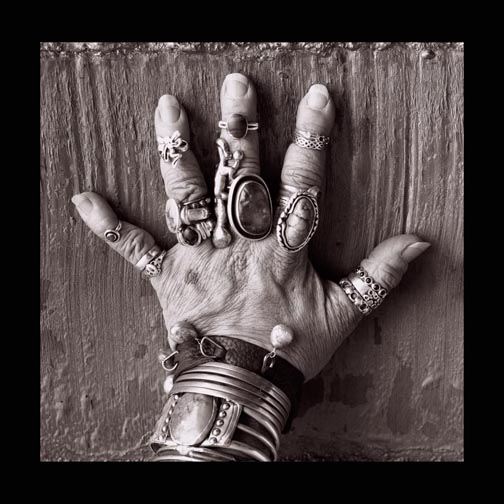
And NOW, I felt the need to share some pictures that are beautiful. Images not made for clients and not made for profit. I’ve been gathering images, while making the second book. So in a few days you’ll be able to get a book of my favorites. I’m calling it B-Four, because it is pictures of beaches, beings, beauty and buildings. There will probably be two versions of this from Blurb. I really hope you’ll consider purchasing a copy. It is nice to share some of pictures that I find compelling. I expect that the book will be ready to order in about a week. I’ve chosen the images, but I have to finish gathering files. I trust the book will be worth your attention. Here are a few images:

Beach

Beauty

Buildings

Beings

Please consider taking one of my classes, or even recommending them. I have three classes at BetterPhoto:
An Introduction to Photographic Lighting
Portrait Lighting on Location and in the Studio
Getting Started in Commercial Photography

BetterPhoto.com, The better way to learn photography

October 18, 2010

Photographing an Entry

Filed under: Architectural Lighting,My Books! — John Siskin @ 10:59 am

This is another section of my second book. This book will be out in a bout a year. You can get my first book in stores any day, or order it here: Understanding and Controlling Strobe Lighting: A Guide for Digital Photographers.  Thanks for your interest!

This shot really helped to create an important relationship with a client. The house had just been completed and was empty. Most of the other shots I took of this house were just empty rooms, for that matter so is this shot. But the way the angle defines the staircase and the door frame really gives the shot a feeling of drama and completion. I have gone on to do literally thousands of images for this client.

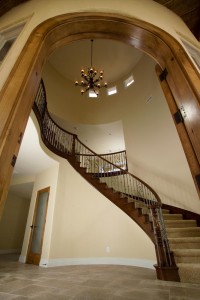
This is the image at the beginning of the shot.

I started with the camera a little too close and just ambient light. All the important aspect of this shot don’t have enough light. You can see that the windows will contribute a little light, and there is light on the entry.

So I started to add light. In this version I have a light outside, but it is too hard. You can see the small hard reflection on the door frame. I tried to use a small shoot through umbrella outside, because of the wind. Umbrellas are bad in the wind. I changed to a larger umbrella outside later in the evolution of the shot and added a sandbag. I also added a light in the hallway on the left of the shot, and a light on the second floor landing.

The lighting is better, but not even enough. Also I don’t like the highlight on the right side of the doorway.

The light on the stairway and the floor isn’t really bright enough. So I added a light inside the doorway on the left side. When I took the shot I though it was this light inside that was reflection onto the doorway. Reflections can be hard to figure out. The tethering program on this camera doesn’t allow you to back up quickly. This means it is really important to do a complete examination of the shot at each stage. I could have saved time if I had realized that the next light wasn’t causing the reflection.

I added a light inside the doorway that helped a lot.

The light on the second floor landing is not lighting the ceiling as evenly as I would like, so I moved the light back. The light in the hallway is a little bright in this shot also. There isn’t as much shape in the entry room because the light is even and the shadow of the banister is a little too intense. One of the problems with making a shot is deciding when it is done. When do you say “Oh this is just what the client needs” and when do you decide to work a little longer? That is an important consideration in every job. In this case I know that I could make the door  frame better. I suppose that there are jobs where you could keep making minor changes forever. In most cases I think it is important to take a few moments to really look at all of the shot. This is one of thee reasons that tethering your camera to a laptop is so important. Without the larger image on the laptop it is really hard to evaluate the image effectively.

Here the light is working pretty well, except for the highlight on the door frame.

In this version the light on the second floor landing is nice and smooth. It is really defining the shapes up there. I like the light in the hallway now. One of the things it does is define the curve at the top of the hallway. This shot is all about curves, so keeping the lines strong is really important. You can see that I am still struggling with the highlight on the door frame. This is the problem that stood out for me in this shot. Often there is a simple answer, but sometimes we all miss it. In this case the answer was to move to a larger softer light for the exterior. I had been using a small shoot through, as I mentioned earlier, but I finally changed to a 45-inch umbrella.
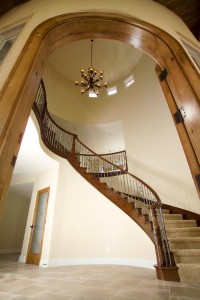
As you can see I also pulled the camera back a bit. For me this was the change than made the shot. I really like the wood and the curve at the top of the shot. It creates a frame around the image. The shapes are good. There is a nice sense of openness and light that certainly wasn’t there at the beginning. And the door frame looks fine! I also added a light at the top left side of the shot, on the second floor. You can see a little bit of the light in the upper left window. I also put in a light in a hallway on the bottom right of the shot. This hallway light really didn’t affect the shot very much, but it did seem to bring a little light to the banister.

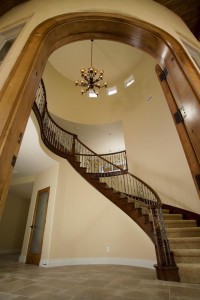
Here is the final capture. The light is smooth and the door frame looks great!

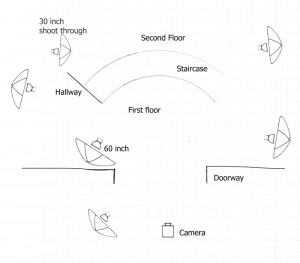
This diagram shows where the lights ended up.

This diagram shows where the lights ended up.

The umbrellas, except where noted are 45-inch umbrellas. Except for the shoot through on the second floor all the umbrellas have black backs.
Most of the lights had 45-inch umbrella, but the umbrella inside the doorway was a 60-inch and the one on the top left of the landing was a 30-inch shoot through. Except for the shoot through umbrella all the lights had black backs, so they only lit the shot by reflection.
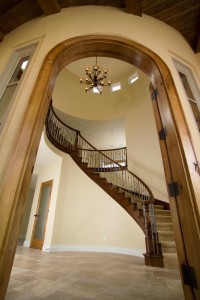
There was a little left to do in Photoshop. When I opened the image in Adobe RAW, I made the shot about 250ºK warmer with the color temperature slider. I also brighten the exposure by about one third of a stop. There really wasn’t anything else to do. However there were a few things to do in Photoshop. First I used the cropping tool with the perspective box clicked on. I put the top corners of the cropping box closer together. This made the door frame stand up a little straighter. While I didn’t feel it needed to be straightened completely, opening it up made the shot work better. I also cropped a little bit of the floor, because the change in perspective made the shot a little too thin. I removed the power outlet and few odds and ends from the second floor ceiling. I didn’t think they brought anything to the shot. I also put some density back into the window on the upper left.

This is the final shot after a color change in Adobe RAW and some minor work in Photoshop.

My first book: Understanding and Controlling Strobe Lighting: A Guide for Digital Photographers will be in stores any day! Or get it from Amazon with the link. I am really pleased with the way the book turned out.

Please consider taking one of my classes, or even recommending them. I have three classes at BetterPhoto:
An Introduction to Photographic Lighting
Portrait Lighting on Location and in the Studio
Getting Started in Commercial Photography

BetterPhoto.com, The better way to learn photography

October 6, 2010

Strobes and Layers

Filed under: Architectural Lighting,My Books!,Post-Processing — John Siskin @ 6:13 pm

This blog entry is a chapter from the book I’m working on now. This book will be about lighting interiors. Of course I hope you’ll look for it in about a year. In the mean time my first book will be out any day: Understanding and Controlling Strobe Lighting: A Guide for Digital Photographers

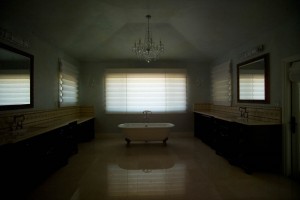
Shots in the bath are always difficult. The room is generally small and there are a huge number of reflecting surfaces. So it is always a special pleasure to be able to shoot in a bath that is really large. You still have reflective surfaces, but you also have more options for dealing with the problems. This was a really fun bath to shoot.

One of the things that made it particularly great was the assistant. I am often lucky enough to often have assistants who are great photographers in their own right. Mike had a different approach for shooting this room. In the end we did it both ways. He was really interested in a version with ambient light and I preferred a shot made with strobes. I always think in terms of how to light a subject, even when I end up using ambient light as the primary light.

In this case a 60-inch umbrella, near the camera, was all the light I needed. Of course this is usually the way I start, and sometimes finish. Although the light was ok, I didn’t like the camera position. Not only was the camera tilted, but the doorway was also cutting into the cabinets.
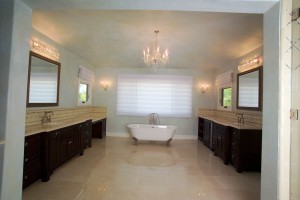
The first capture with the strobe. 1 mono light at half power with a 60-inch umbrella.

I’m not really happy with the balance between my light and the ambient light. I thought that more ambient light would be more attractive. There are artifacts from my sensor on the lights, which is often the case. But there are no large reflection problems and the color in the shot is pretty good. So change the camera position and use a longer shutter speed, for a better shot. In the next image the shutter speed was half a stop longer.

Here I’ve moved the camera and made the shutter speed a little longer.

When I opened the shot in Adobe RAW I changed the color temperature slider to a warmer setting. I used the recovery slider to brighten the shadows and cabinets a little. As I generally do I raised the Vibrance and Saturation levels slightly, but really I didn’t change much. Here is the shot after these changes:
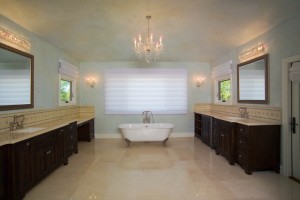
I warmed up the color in Adobe RAW, and adjusted the recovery slider.

I didn’t have much to do in Photoshop. Cleaned up sensor dirt and the artifacts from the lights first. I also did a little sharpening.
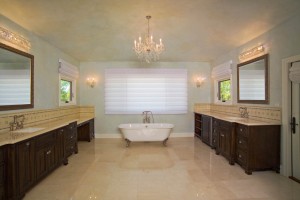
The final shot. 1 strobe with 375 watt-seconds, and a 60 inch umbrella. Shutter at 1/10 and aperture at F9.5, ISO 100.

I really like the way the ambient light and the strobes work together in this shot. The final shot was made at F9.5 and 1/10 of a second, so you can see, because of the long exposure, how much of the ambient light I used. The light was a 750 watt-second mono light set to 1/2 power. The brightness of the open windows on the sides of the shot and the window with the covering in the back creates a nice feel for the light.

I shot quite a few versions of the shot with out any lights on. I wanted to see what I could do with an HDR version of this shot first. I ended up using 4 files for the HDR:

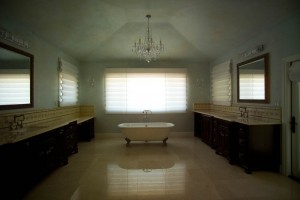
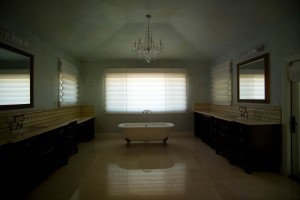
I used all four of these versions to create an HDR of the image.
I used the Equalize Histogram to convert from 32 bit depth to 8 bit depth. When I used HDR with the raw files the corrections to the color disappeared. The result looks like this:
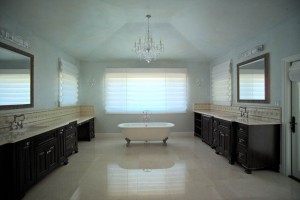
I'm not happy with this version, but I wasn't really shooting for HDR.

I don’t like this version all that much. I could certainly fix the color, but the shot doesn’t have much sparkle. I really don’t like the way the windows work and there is some movement in the chandelier.

However Mike wasn’t thinking about using HDR. He had in mind using layers to manually bring the different versions of the shot together.

This is the bright version of the shot again. Most of the final image comes from this version.

This dark image will give me the detail I need in the windows.
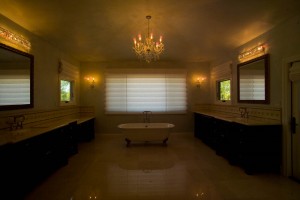
This version will give me the lights in the chandelier. You can see how much overall color the lights created in the ambient light version of the shot.

This version will give me the lights in the chandelier. You can see how much overall color the lights created in the ambient light version of the shot.
The brightest layer will be the main layer of the shot. I used the dark layer to recover the windows and the layer with the chandelier lit to put the lights back into the shot. I also used the recovery slider (in Adobe RAW) on the bright layer to open the dark areas of the cabinets a little. I also used Vibrance and Saturation. I didn’t feel that I needed to change the overall exposure. Oh, as I mentioned above, I had already warmed up the color on the light and dark files. I made the color on the file with the chandelier lights on a little cooler. You can see, in that version, how much the lights change the overall color of the shot.

I started mixing the windows with a large soft eraser and pulled detail back into the window. I worked on the center of the shot and the mirrors on the sides. I used a 500 pixel brush with 12% opacity for the overall work. I also added just a little bit of density to the chandelier so there would be more contrast when I added the lights.

I added a lot more detail to the back window and the mirrors in this shot.

First I did the bulbs on the chandelier. I used a much small brush for the bulbs. I also used more opacity: 20%. Then I switched to a broad soft brush over the whole chandelier, at 5% opacity. The chandelier looks reasonable, but I prefer the version in the shot with the strobes. Of course all of this retouching is a mater of creating results that work for you and for your client. There are no actual rules. I could have pulled up the lights over the mirrors, but I didn’t like the effect of these lights.
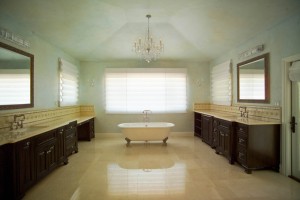
Of course I needed to clean up sensor dirt and do some straightening with the crop tool. I also did a little sharpening in this last version.
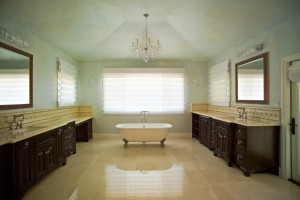
I like the version made with the strobes better. For one thing the room seems brand new in that shot. I feel that the greater opacity in the back window, of the strobe shot, also makes the room seem more private, which is good for a bath. If I had a subject, such as a person in the shot, the cooler version made with ambient light might have worked better. One more thing, the cabinets look better in the shot I made with strobes.

Please consider taking one of my classes, or even recommending them. I have three classes at BetterPhoto:
An Introduction to Photographic Lighting
Portrait Lighting on Location and in the Studio
Getting Started in Commercial Photography

BetterPhoto.com, The better way to learn photography

Powered by WordPress