I wrote this a few years ago when I was teaching at BetterPhoto. Recently a friend asked about copy work, so I thought I’d re-post it here. The basic ideas are still valid, but today I would use different strobes to do the work. I hope you find it interesting…
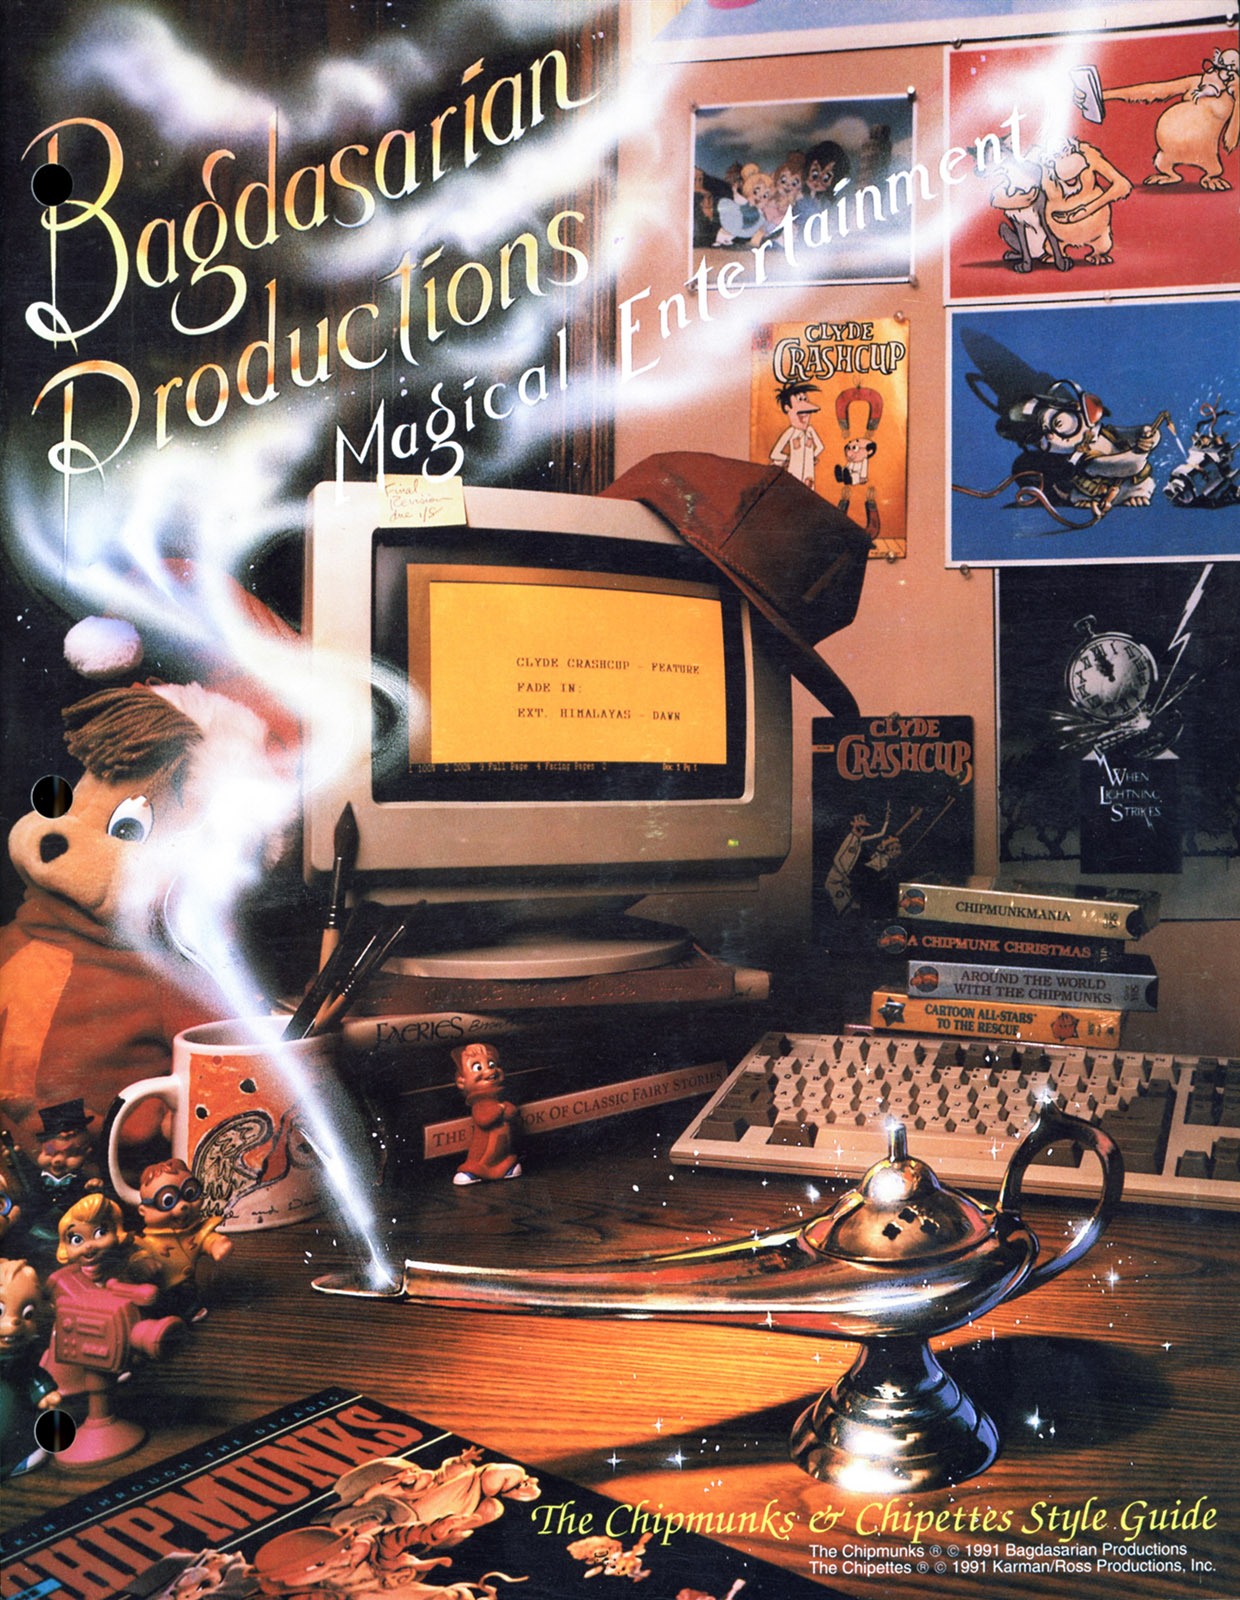
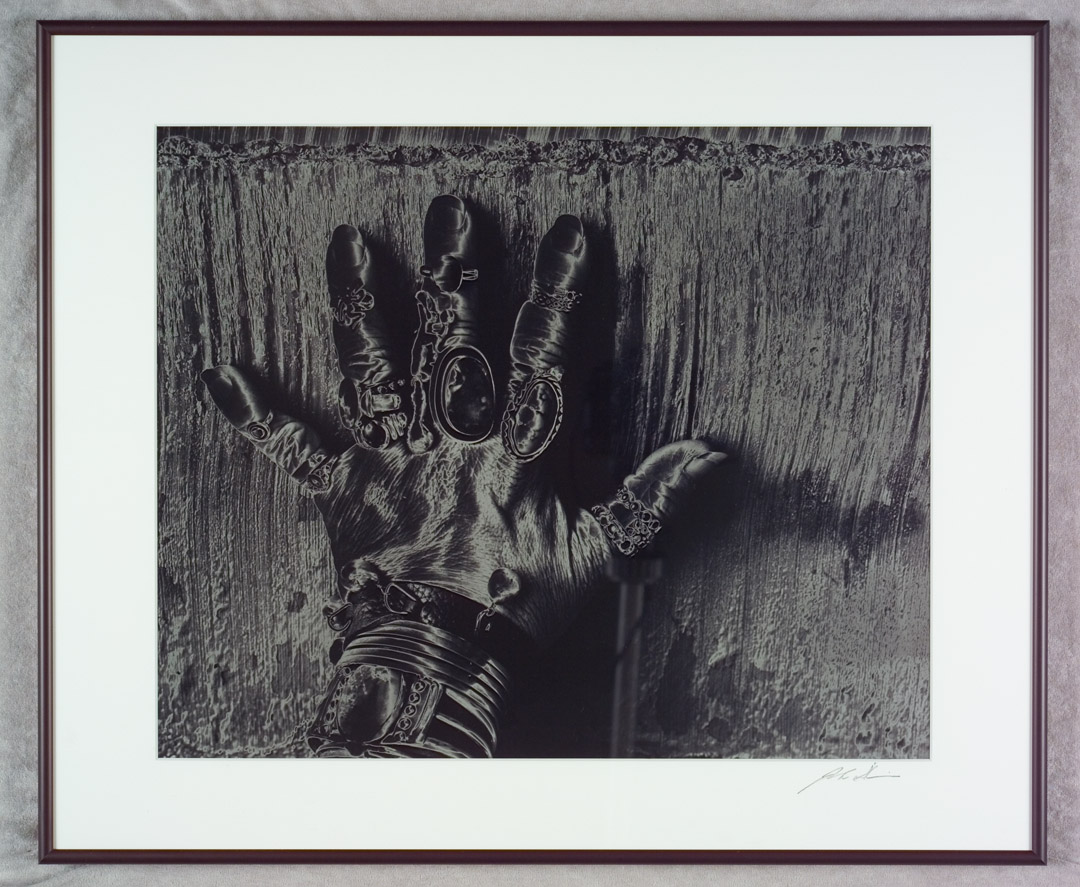
Wow, look at how old that computer is… The cover for the Style Guide for Bagadasarian Productions.
When I started my photography business a few decades ago my commercial client was Bagdasarian Productions. They made the Chipmunk animated cartoons, with Alvin, Theodore and Simon. They were working on a full-length movie about the adventures of the Chipmunks. One of the keys to animation, back in the eighties was high quality painting for backgrounds. Those paintings were done here in Los Angeles and then shipped to Korea for the character animation. My job was to make high quality copies of the backgrounds so that the background painters would be able to refer to them in order to maintain accurate color and style. Since then I have done copy work for businesses, artists and galleries. Copy work is pretty simple but it must be done very carefully in order to get the best results. I often do copy work in the living room, since I keep my finished work at home.
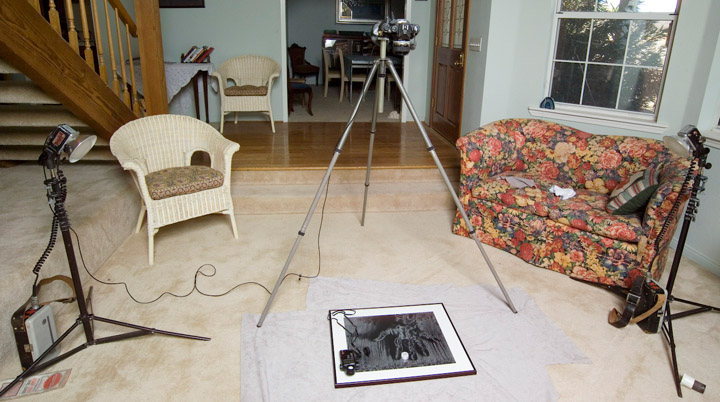
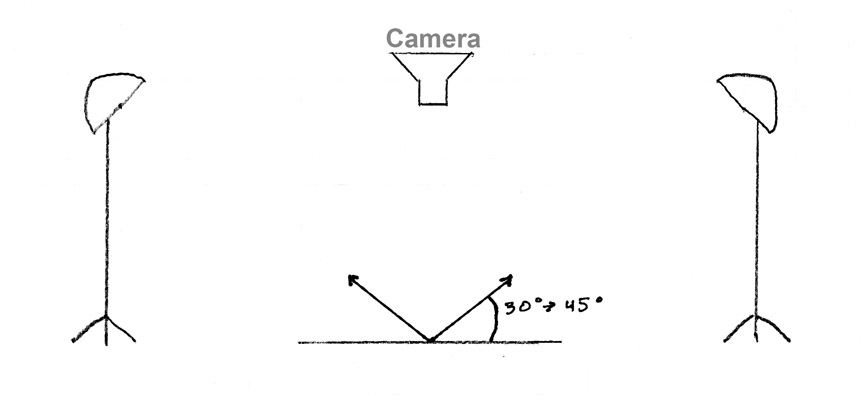
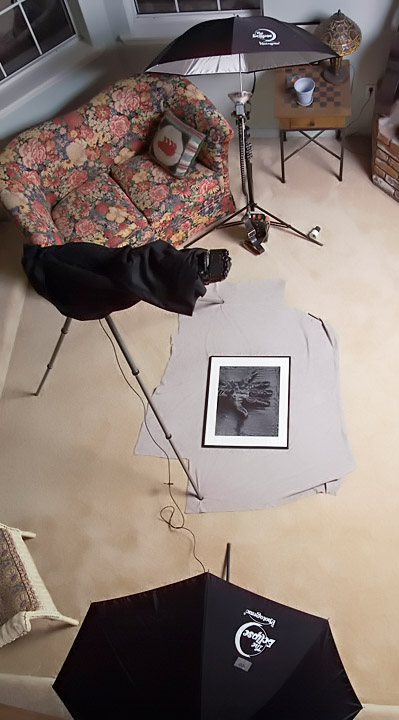
The basic layout of a copy job is to have the camera back, whether film or sensor, parallel to the original. The lights need to be between 30º and 45º from the plane of the original. In this range they light the original but you don’t see reflections of your lights in the original. You can even shoot through glass! The lights need to be far enough from the original to even out the lighting. In the example with this article the lights are about five feet from the center of the original. You need the lights further away from a larger original. The reason for this is that if the distances from the light to the corner of the original and to the center of the original are significantly different you will not be able to even out the light. The amount of light that makes it to the subject goes down as the distance from the light source increases. So, if the distances to different parts of the original are very different you will not be able to even out the light. In the example the difference between the light on the center of the shot and the corner is 1/10th of a stop, pretty small.
This is the one area of digital photography where I still use a light meter. When I set-up a copy job I put the lights an equal distance from the center of the original. I also point the lights at the original. Then I use the light meter to move the lights into the most advantageous position.
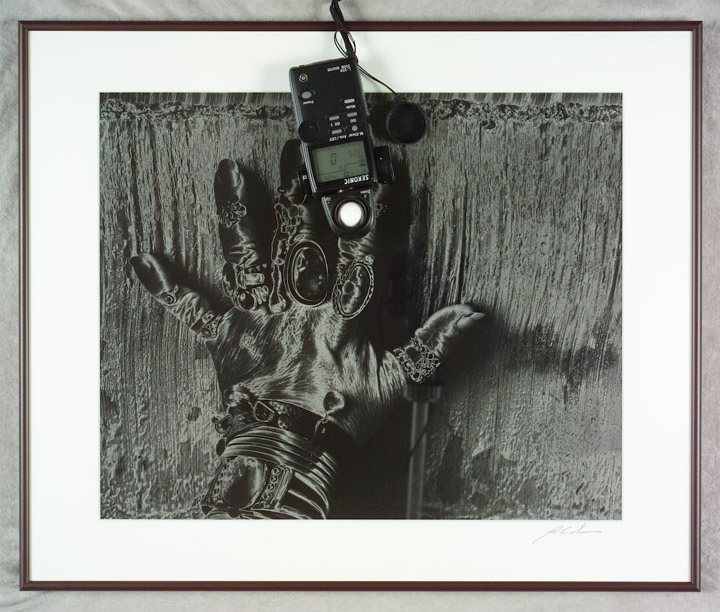
As I mentioned above, in this case I was able to get the lights to almost perfectly even. It is very difficult for the eye to see differences of less than 1/3rd stop, so if you can get your lighting even to the 1/3rd stop level your light will be even on the copy. I also use diffusion domes over my lights to make them more even.

You might need these if your lights are close to the original, as you move the lights further back, they don’t matter as much. I generally use them, but then I already have them. I will usually use the lights directly, to reduce the chance of reflection. If I am photographing a piece of art with an irregular surface I will probably use umbrellas to reduce the shadows on the irregular artwork. If I am including the frame in the copy I will also use the umbrellas to reduce the harsh light on the frame.
The kinds of lights for copies are also important. The easiest lights to use are strobes. Strobes have a color balance that is the same as daylight; this is a big advantage if you are using film to make copy slides. You can use strobes in a room that has existing light; the room light will be so much less than the light from the strobes (if you have reasonably powerful strobes) that the room light won’t affect your shot. If you can remove existing light from your location (including daylight) you can shoot with quartz lights. These lights are designed for photography and they have the qualities to make good copies. I would avoid the tungsten photo bulbs that look like regular light bulbs; they change color too quickly. I would not use any fluorescent lights for copy work, although digital cameras can balance for them reasonably well, they do not have a continuous spectrum. Consequently you will probably have problems achieving accurate color everywhere in your image.
Whatever light source you decide to use you will need to do a color balance if you are using a digital camera and a color test if you are shooting transparency film. The key to doing a good balance with a digital camera is to use an accurate grey sample. I use a GretagMacbeth ColorChecker, to keep things accurate.
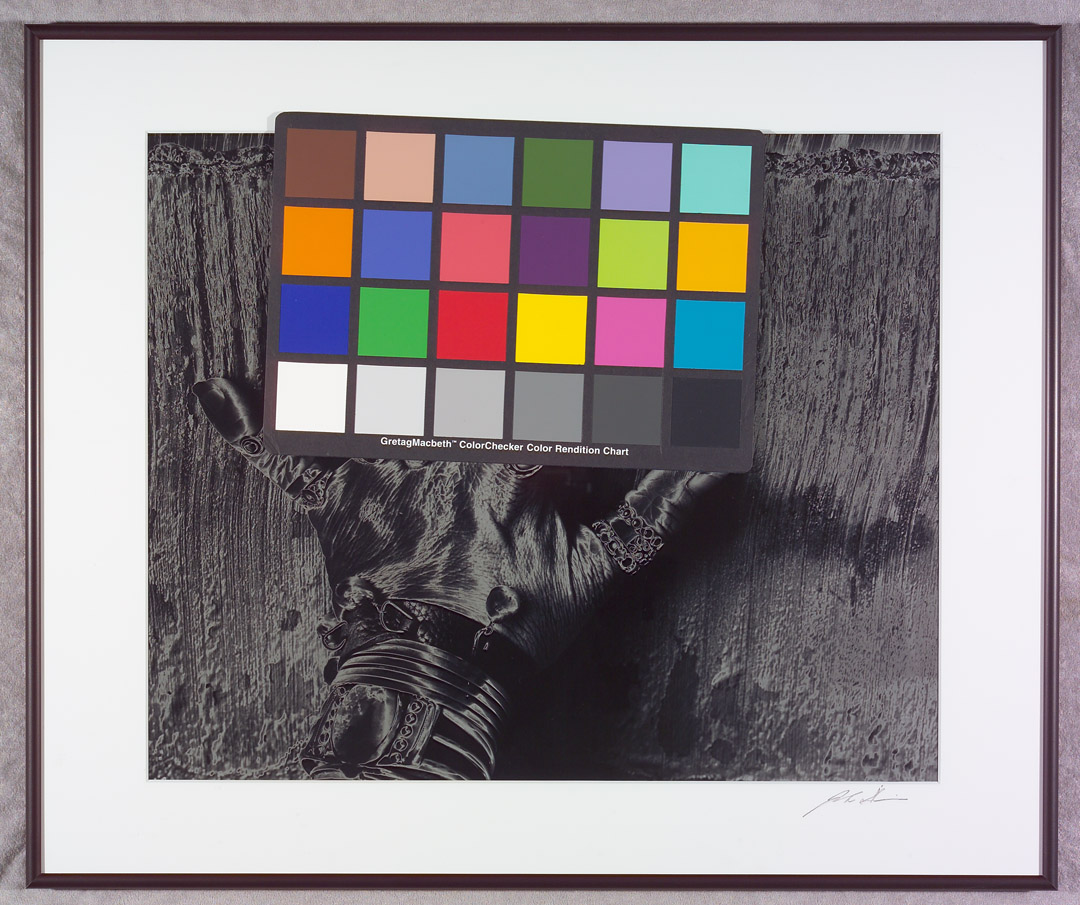
I use the grey samples on this card to set my balance on the digital camera and the whole card to test my film. Getting the color set accurately is a very important part of copying, so it will be important to check the best way to do this on your digital camera.
There are popular copy stands for doing small copies, say 11X14 inches at the largest. These are faster than using than my tripod set-up. If you are copying a large amount of originals from 4X6 inch to 11X14 inch you should check these out. However, if you are doing larger originals or doing copy work less often you should consider a Side Arm attachment for your tripod. I use a Bogen/Manfotto 3059 with my Gitzo tripod; you can mix and match in this area. The side arm mounts on the tripod legs and then the tripod head mounts on the side arm. I cover the side arm with black Duvateen fabric when I am shooting products under glass or very glossy originals.
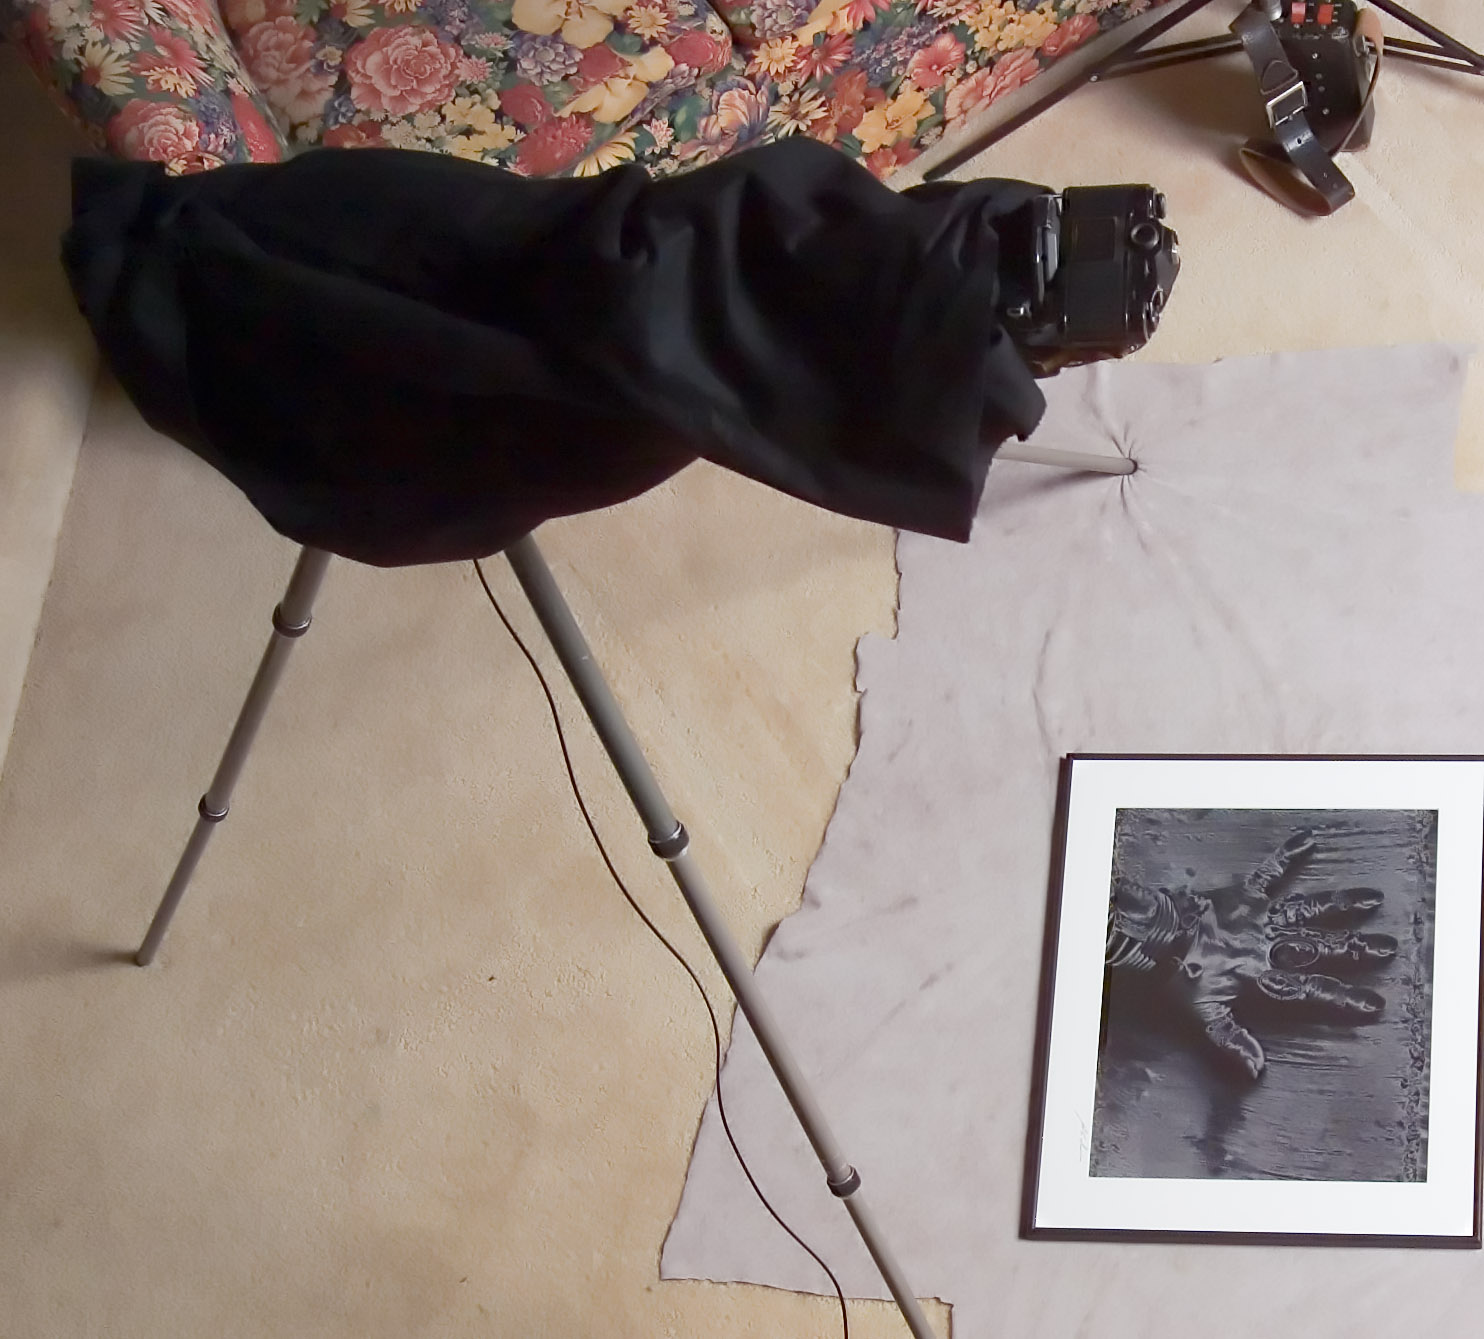
There can be enough light spilling onto the side arm for it to reflect in the picture. The key to keeping your copy square is to be able to get the original parallel to the camera back. Before you do the leveling get the camera into about the right position, because if you have to move the camera you may have to level it again. I use two surface levels to make the camera parallel to the original. I place one on the original and one on the camera back. This is generally a part of the procedure that requires some patience. The object is to get the two bubbles in precisely the same place.
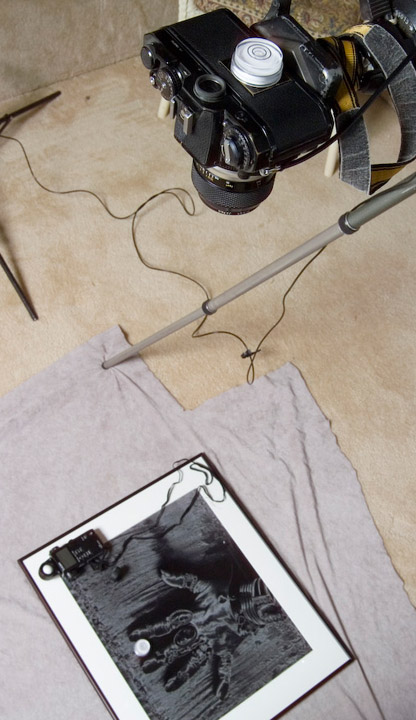
I have used several different types of levels over the years, these little round levels work pretty well. The key is to not be in a hurry, and to double check if you move the camera. Remember you can move the original as well as the camera. If you are copying an original mounted on a wall, then the levels won’t help you. The way to get your camera positioned is to make the original square in the frame by moving the camera. This also requires patience.
You can use any lens to do copy work, but if you want to have a high quality copy, some lenses are better. You should probably avoid zoom lenses, they do not copy flat objects as well as fixed focal length lenses, and they often do not focus close enough. One inexpensive alternative is 50mm lens. The best lenses for this work are macro lenses; they are designed to shoot a flat field. I use an older Nikon 55mm f3.5 macro lens. It does not have any automatic features when I use it with my camera, but those features don’t do me a lot of good with copy work. I have exposure information since I used the meter to set my lights. Auto focus often doesn’t work well on artwork, since there may not be enough contrast to focus on, and I don’t want to reposition my camera to focus. I usually place a coin or other object on the original to help me focus by eye with the macro lens. I can check my focus on the computer. Of course, when I am using a film camera it is a little easier to focus, since the viewfinder is designed for manual focus. One of the other problems with focus is that I have to stand on a stepladder to focus. I wouldn’t have to do that if I shot the original mounted on a wall, but it is much harder to get the sensor parallel to the original!