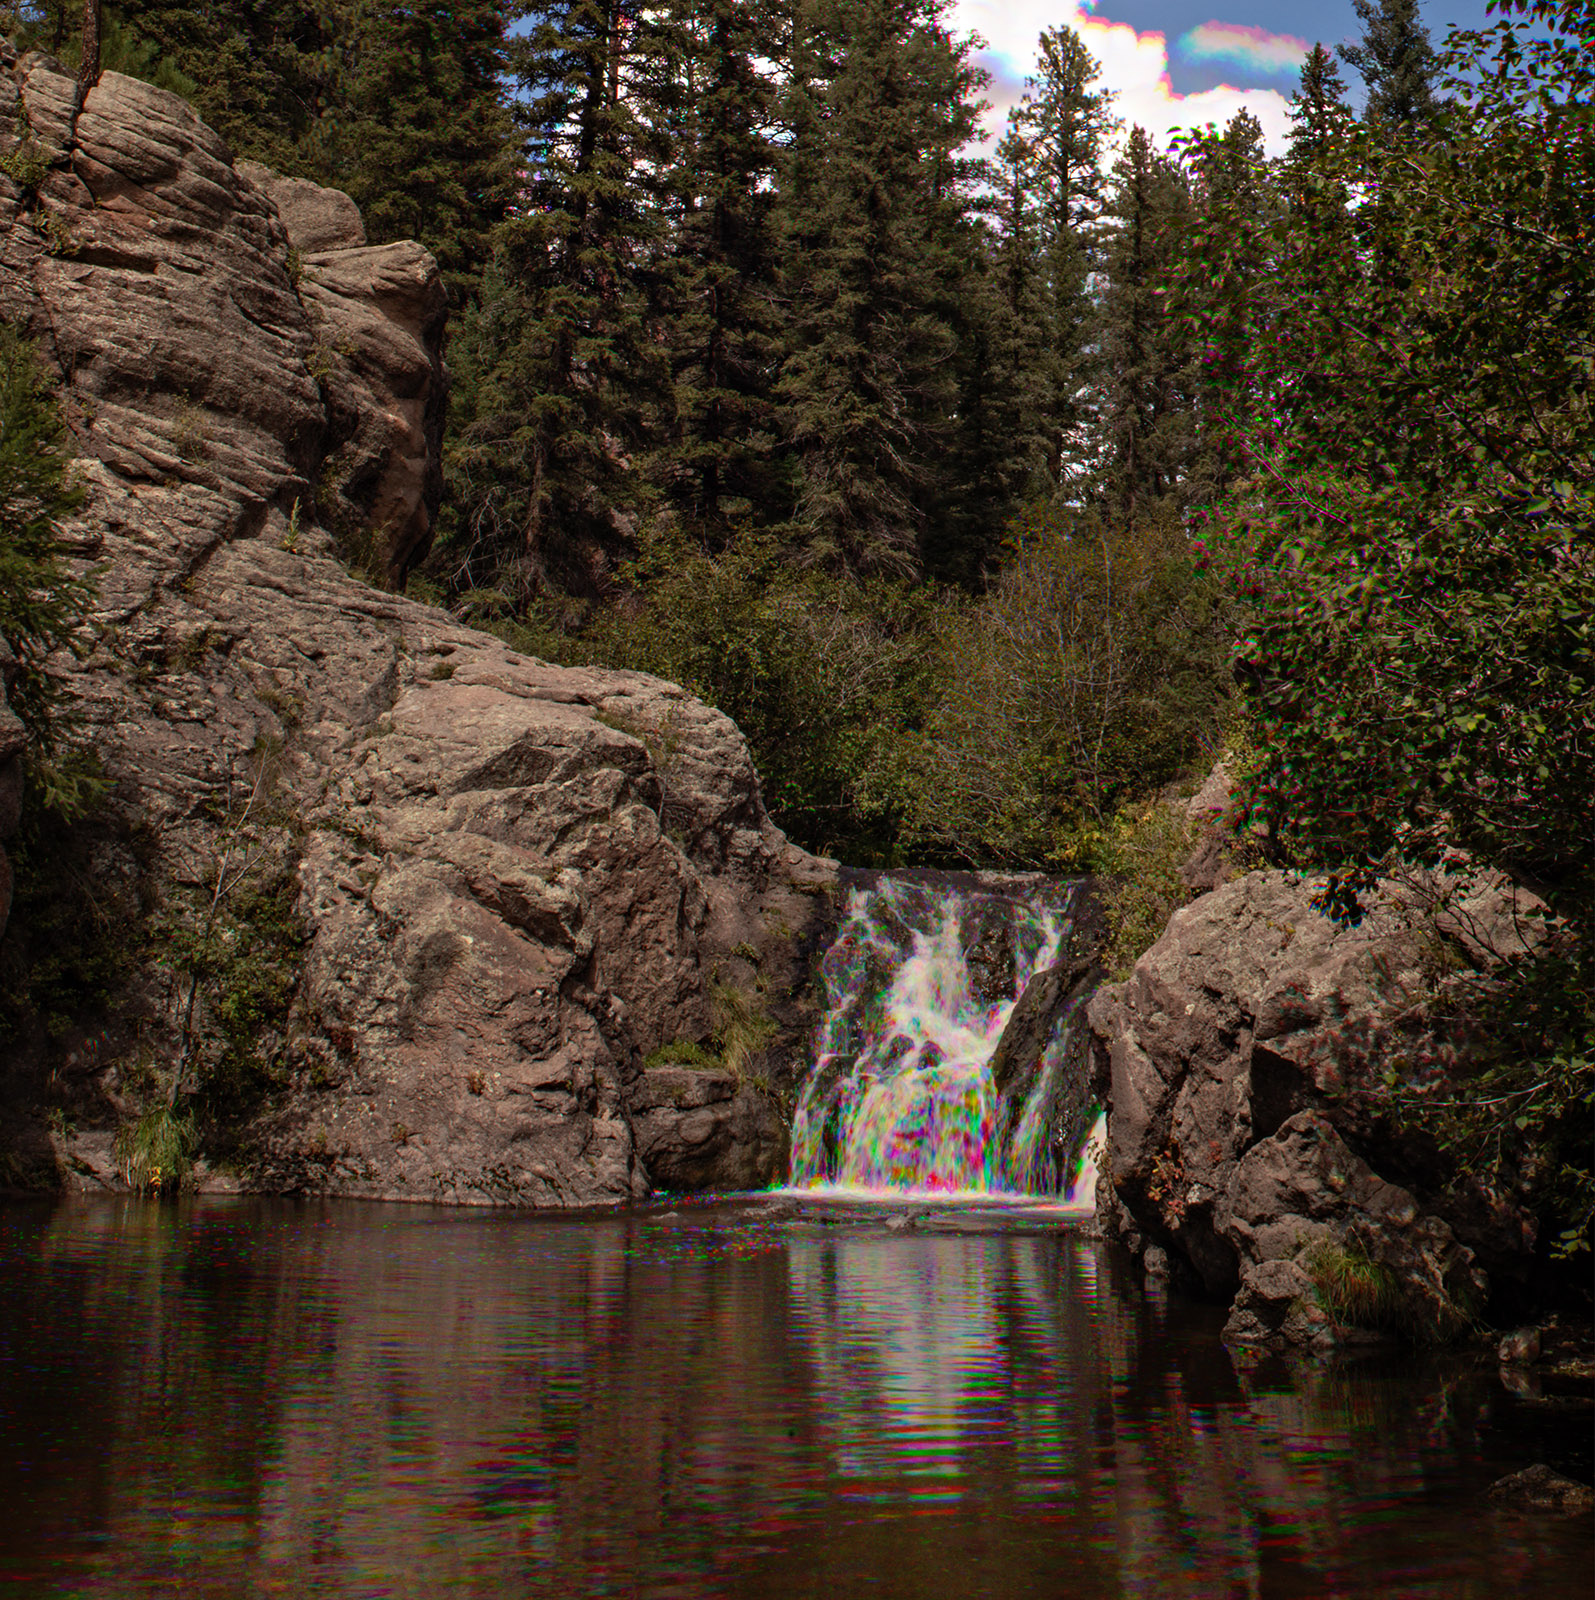
Jemez Falls, Rainbow Water
This is an interesting technique, and works with any image where parts of the image move, but a large part of the image remains stationary. It has always worked best for me with flowing water.
First take 3 or more shots of the same thing, use the same exposure. USE A TRIPOD. In other image stacking using Photoshop, you can get photoshop to align the images. That doesn’t work with this technique, so you have to use a tripod. Make sure the camera is locked down tight. I use the self-timer to trigger the camera, you might use a remote trigger or a cable release, but it’s important the camera does not move. I think it’s probably a good idea to shoot in camera raw.
I use Adobe Bridge and Photoshop. I am going to describe how to do this technique with those programs. I do not know if this is doable with Lightroom or on your phone.
I select all the images I want to combine in Bridge and click on them so they open in Camera Raw. I select all the images and apply the same correction in Camera Raw to all the images, things like clarity, color correction and so on. Then click on open, so all the images come up separately in Photoshop.

Camera Raw, choose all the images

Open Photoshop
Start with any single image and look at the Channels Pallet. Click on the eye on two of the colors to turn off those colors. In this case I turned off Red and Green. The eye icon on RGB will also turn off. You will see a black and white image that represents the blue color in your image.
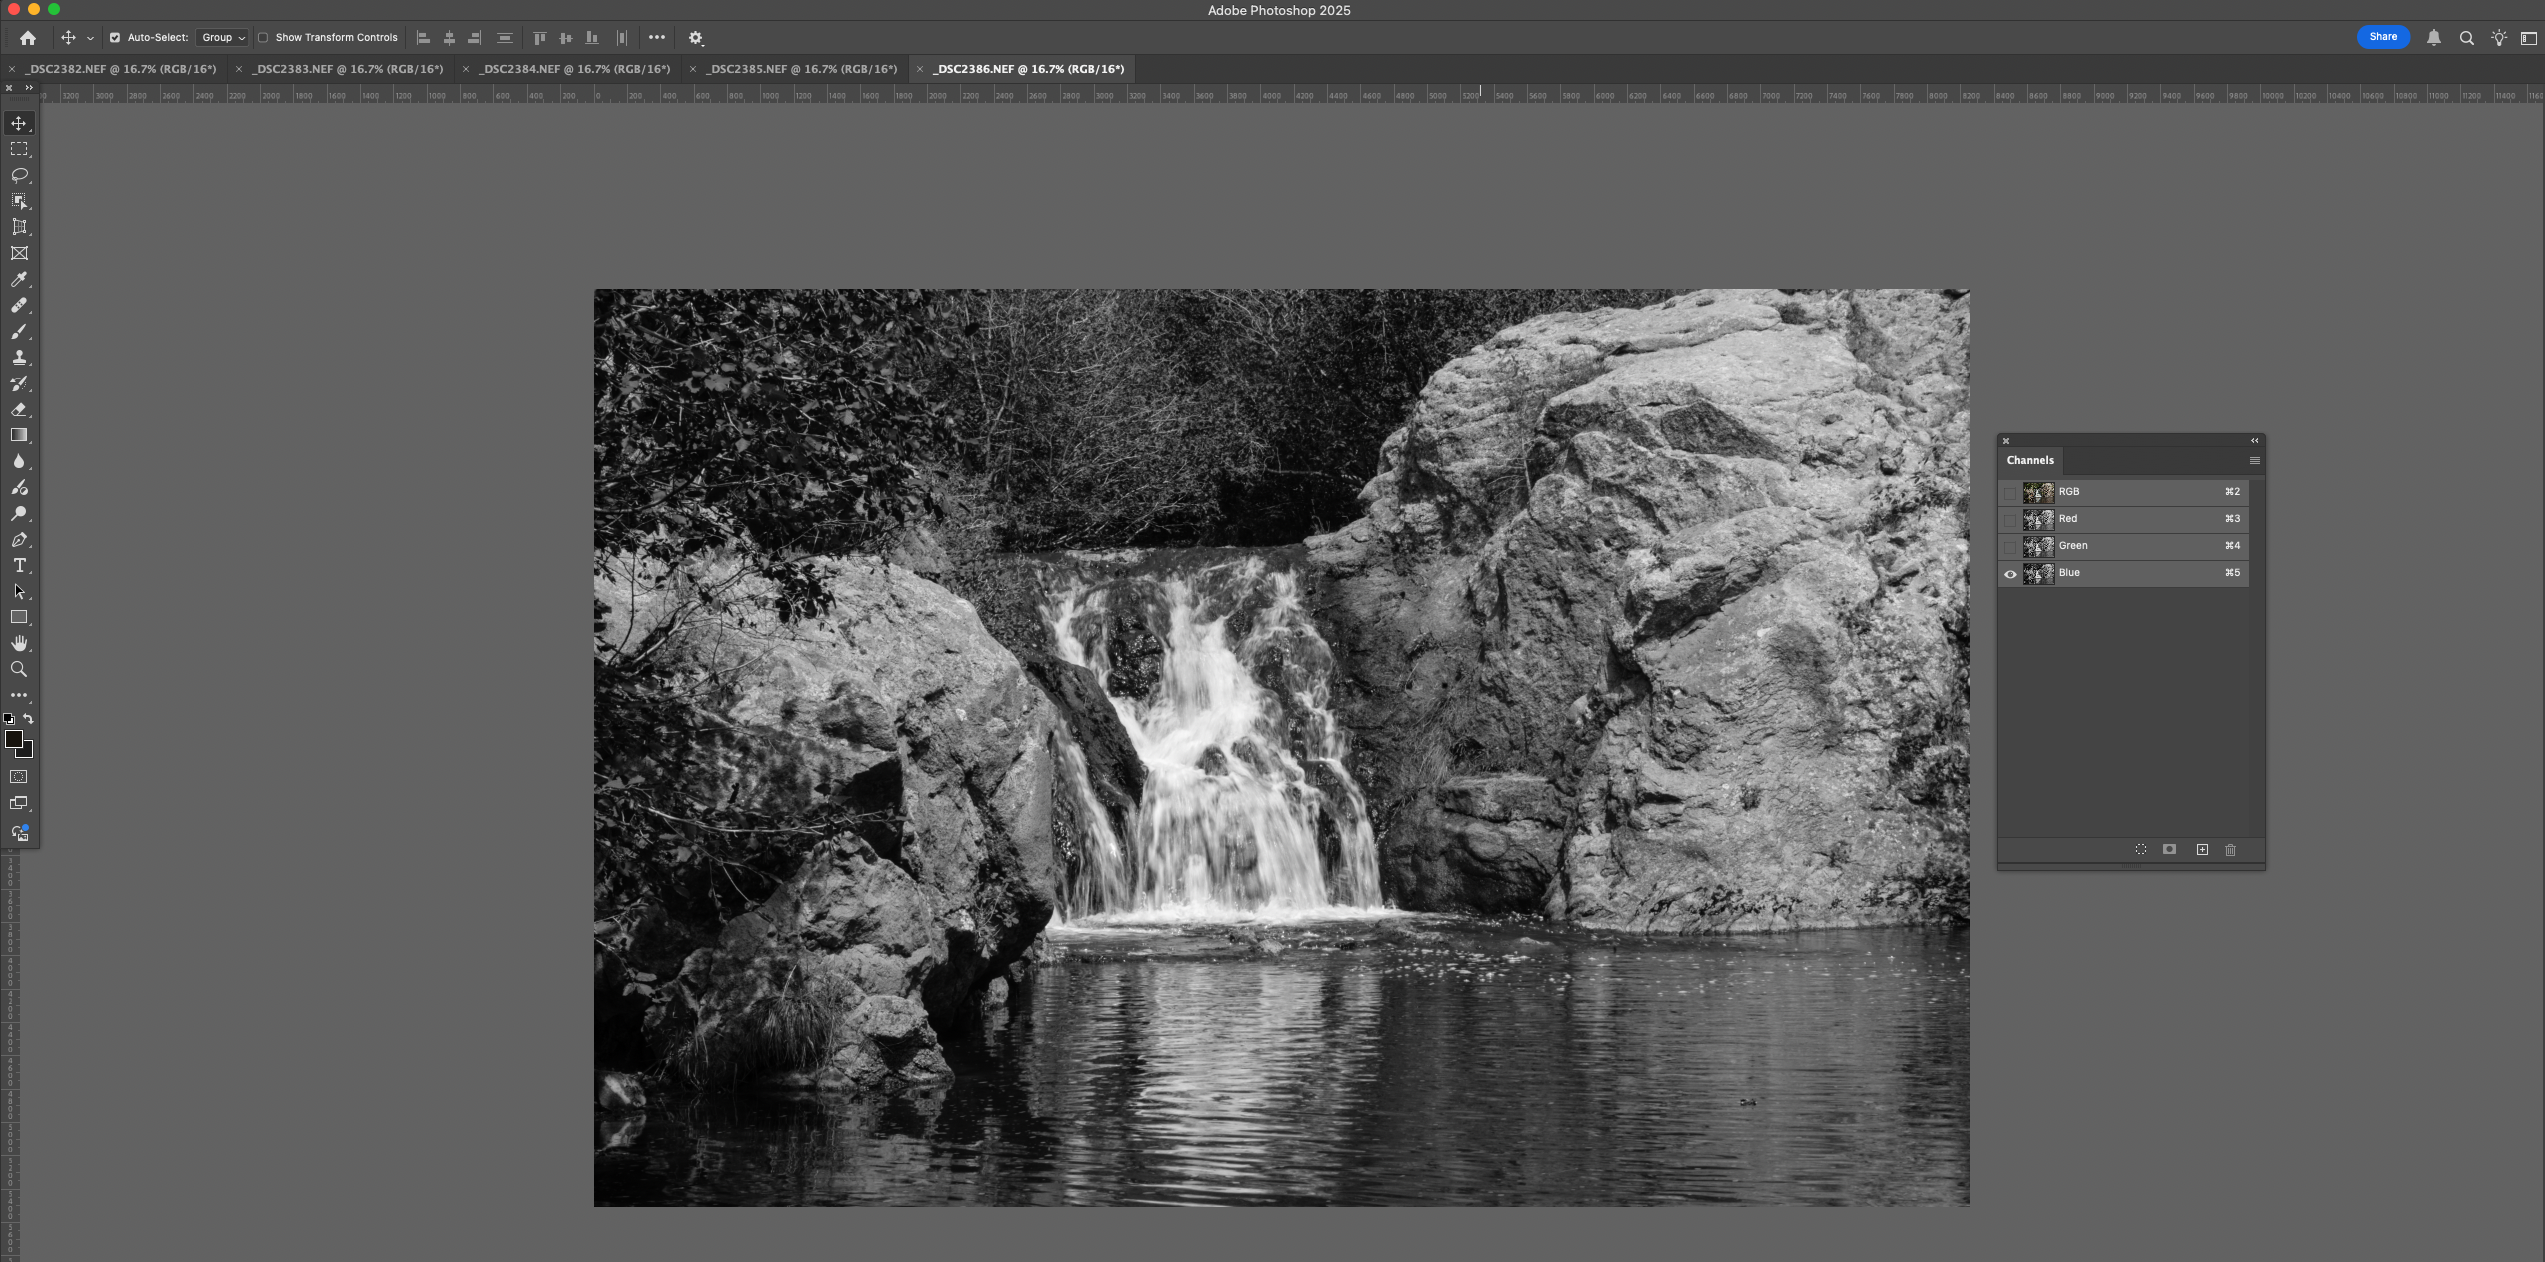
Copy the Blue Channel
Select All and copy the image in the image pallet.
Go to another of your original images and open the Color Pallet again. Click on the Blue channel and then paste the copied image into the blue channel.

Paste the blue channel
Now go to a third image and copy and copy another color channel. In this case I copied the Green channel.
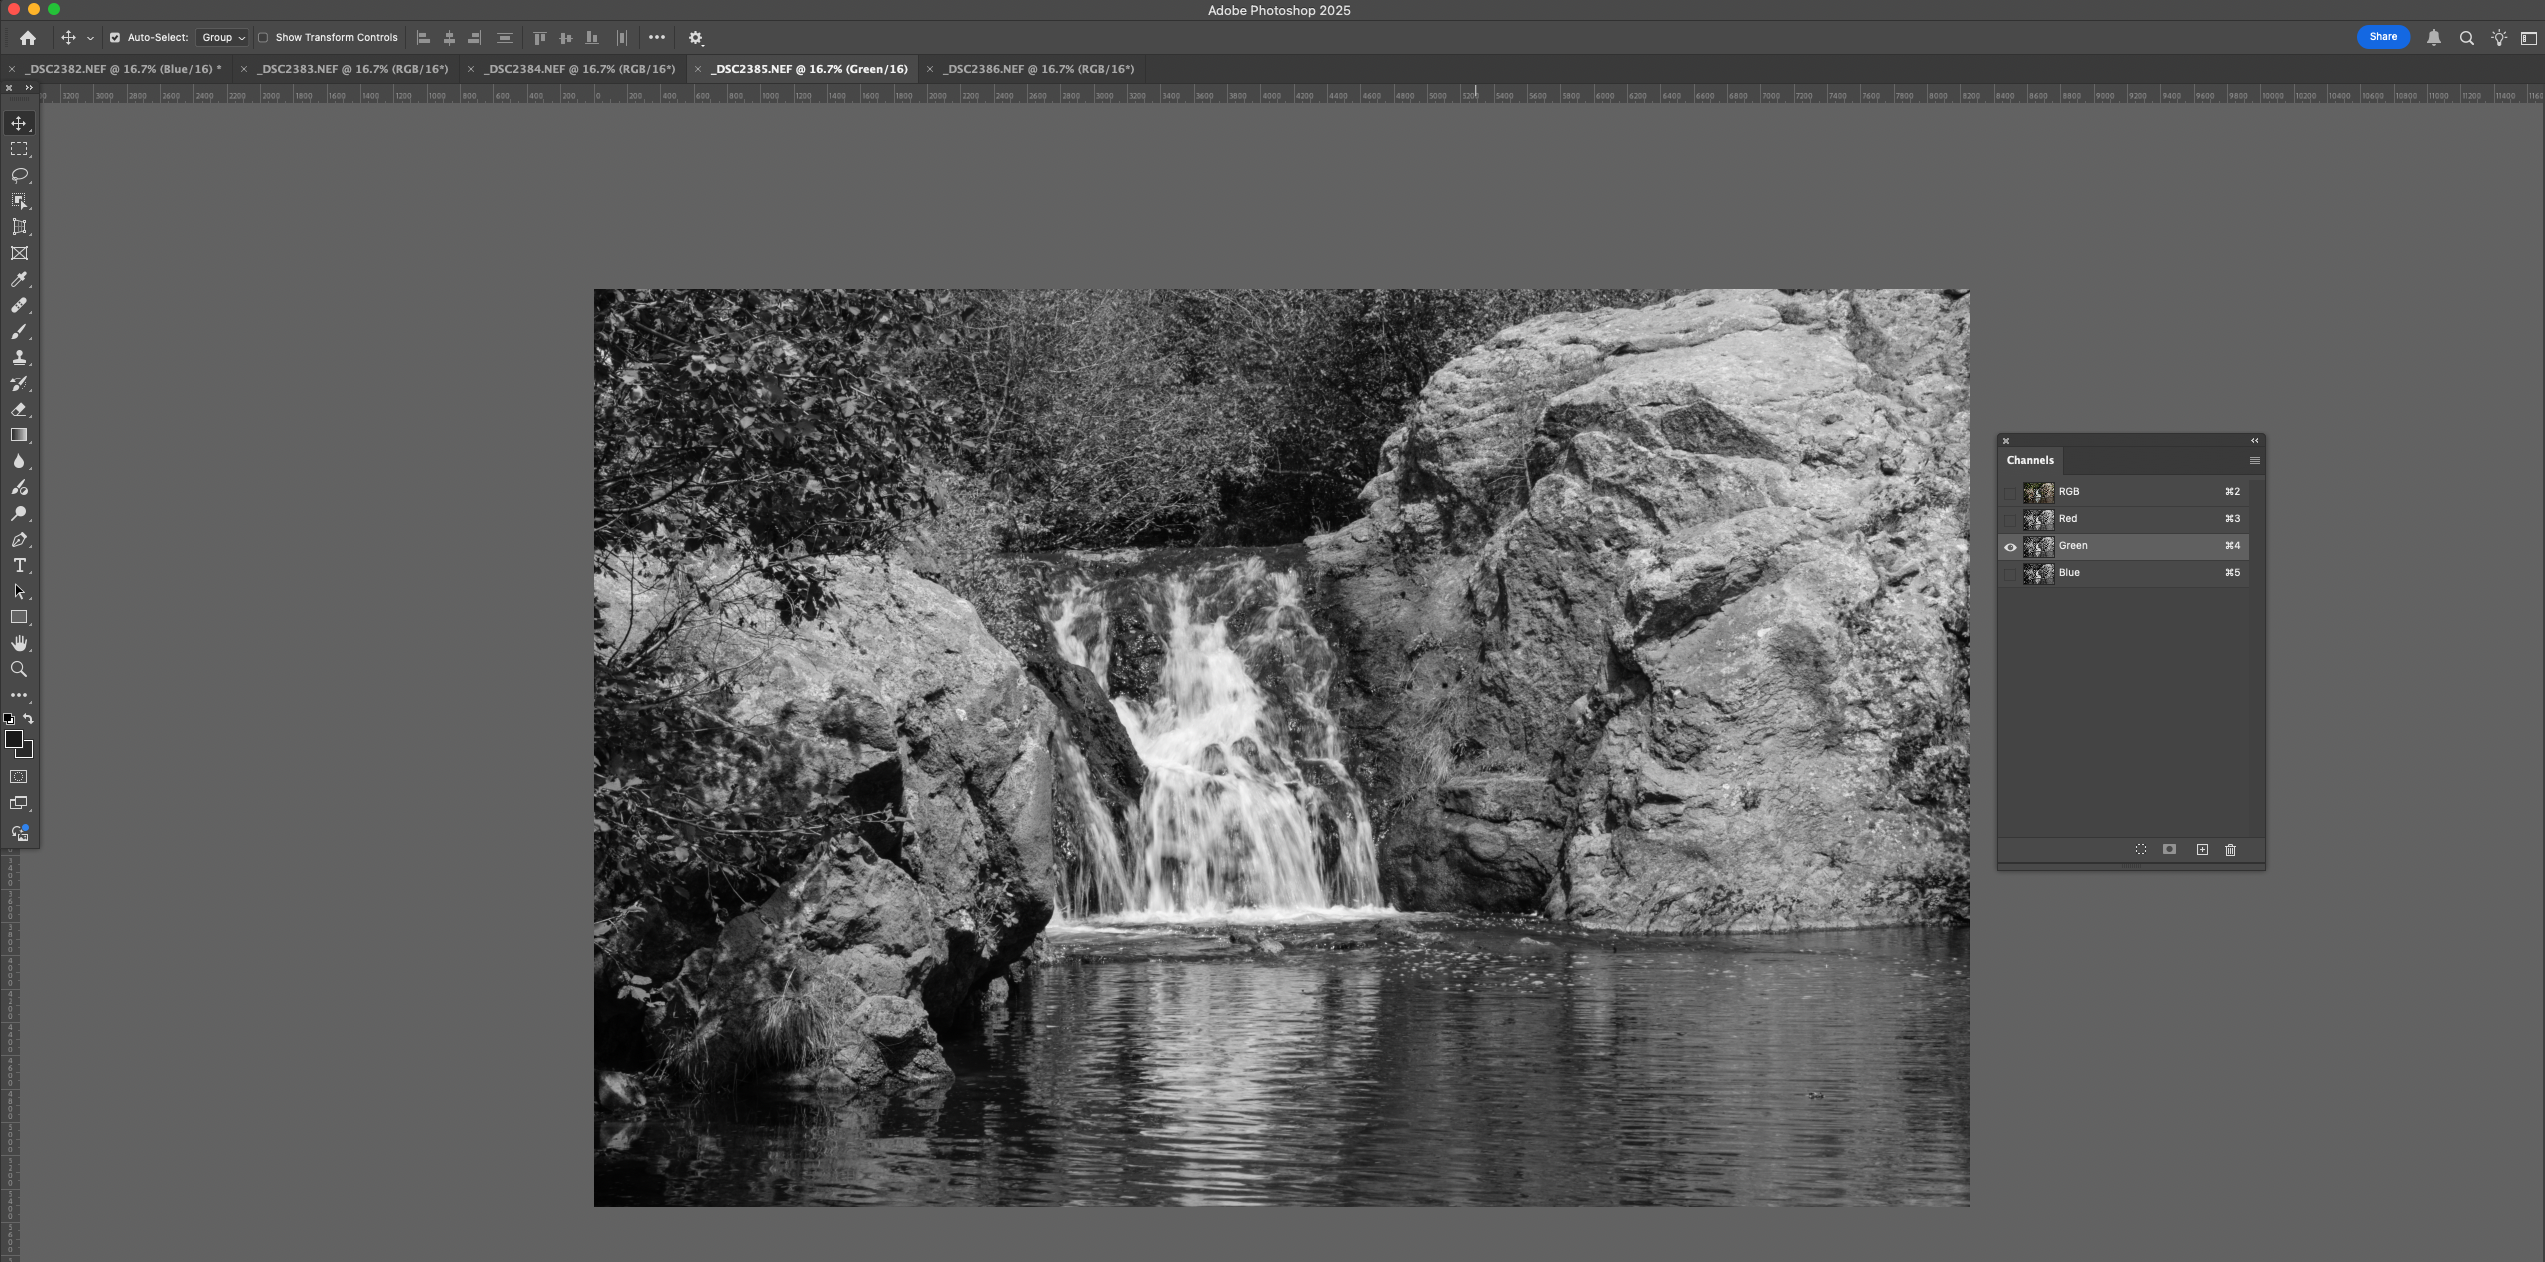
Select and Copy the Green Channel
Go back to the second image you opened, where you pasted the blue channel, and click on the green channel. Paste the new green channel into the image.
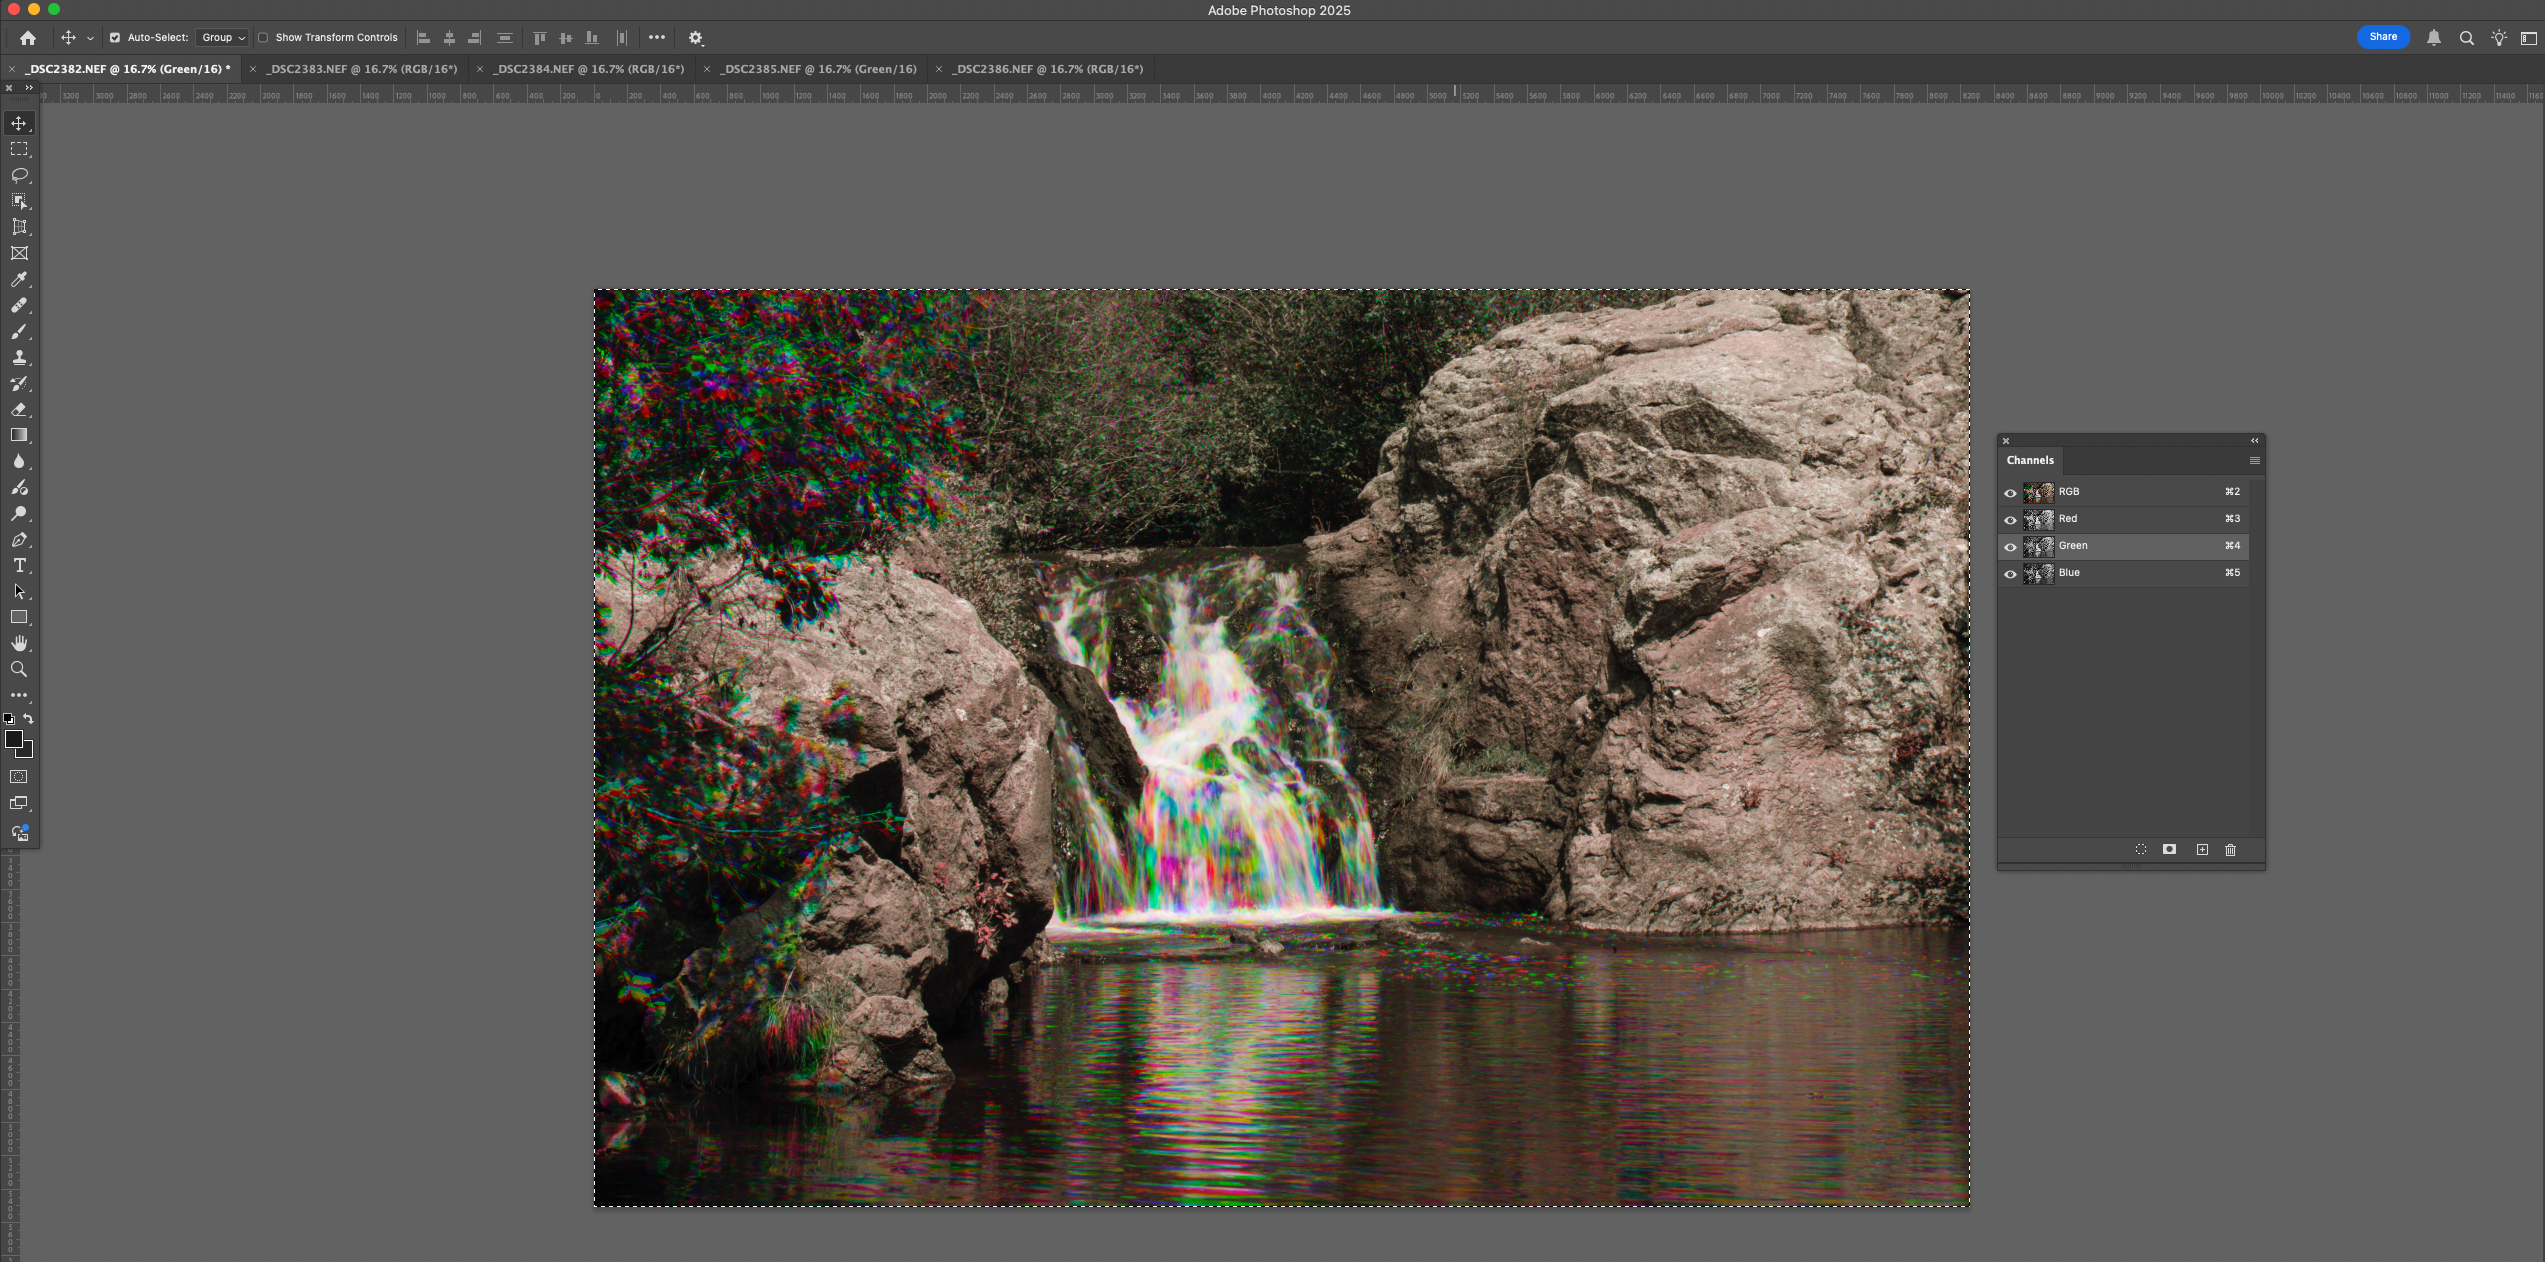
You now have Rainbow water!
I’d suggest that you rename and save the file, so as to keep it separate from your original files.
Some thoughts: If you shoot more that 3 images you can do the same thing with the other originals and have alternate versions. You can also do the same thing in the CMYK color space. I tried it with LAB color, but it didn’t seem to do much.

CMYK version
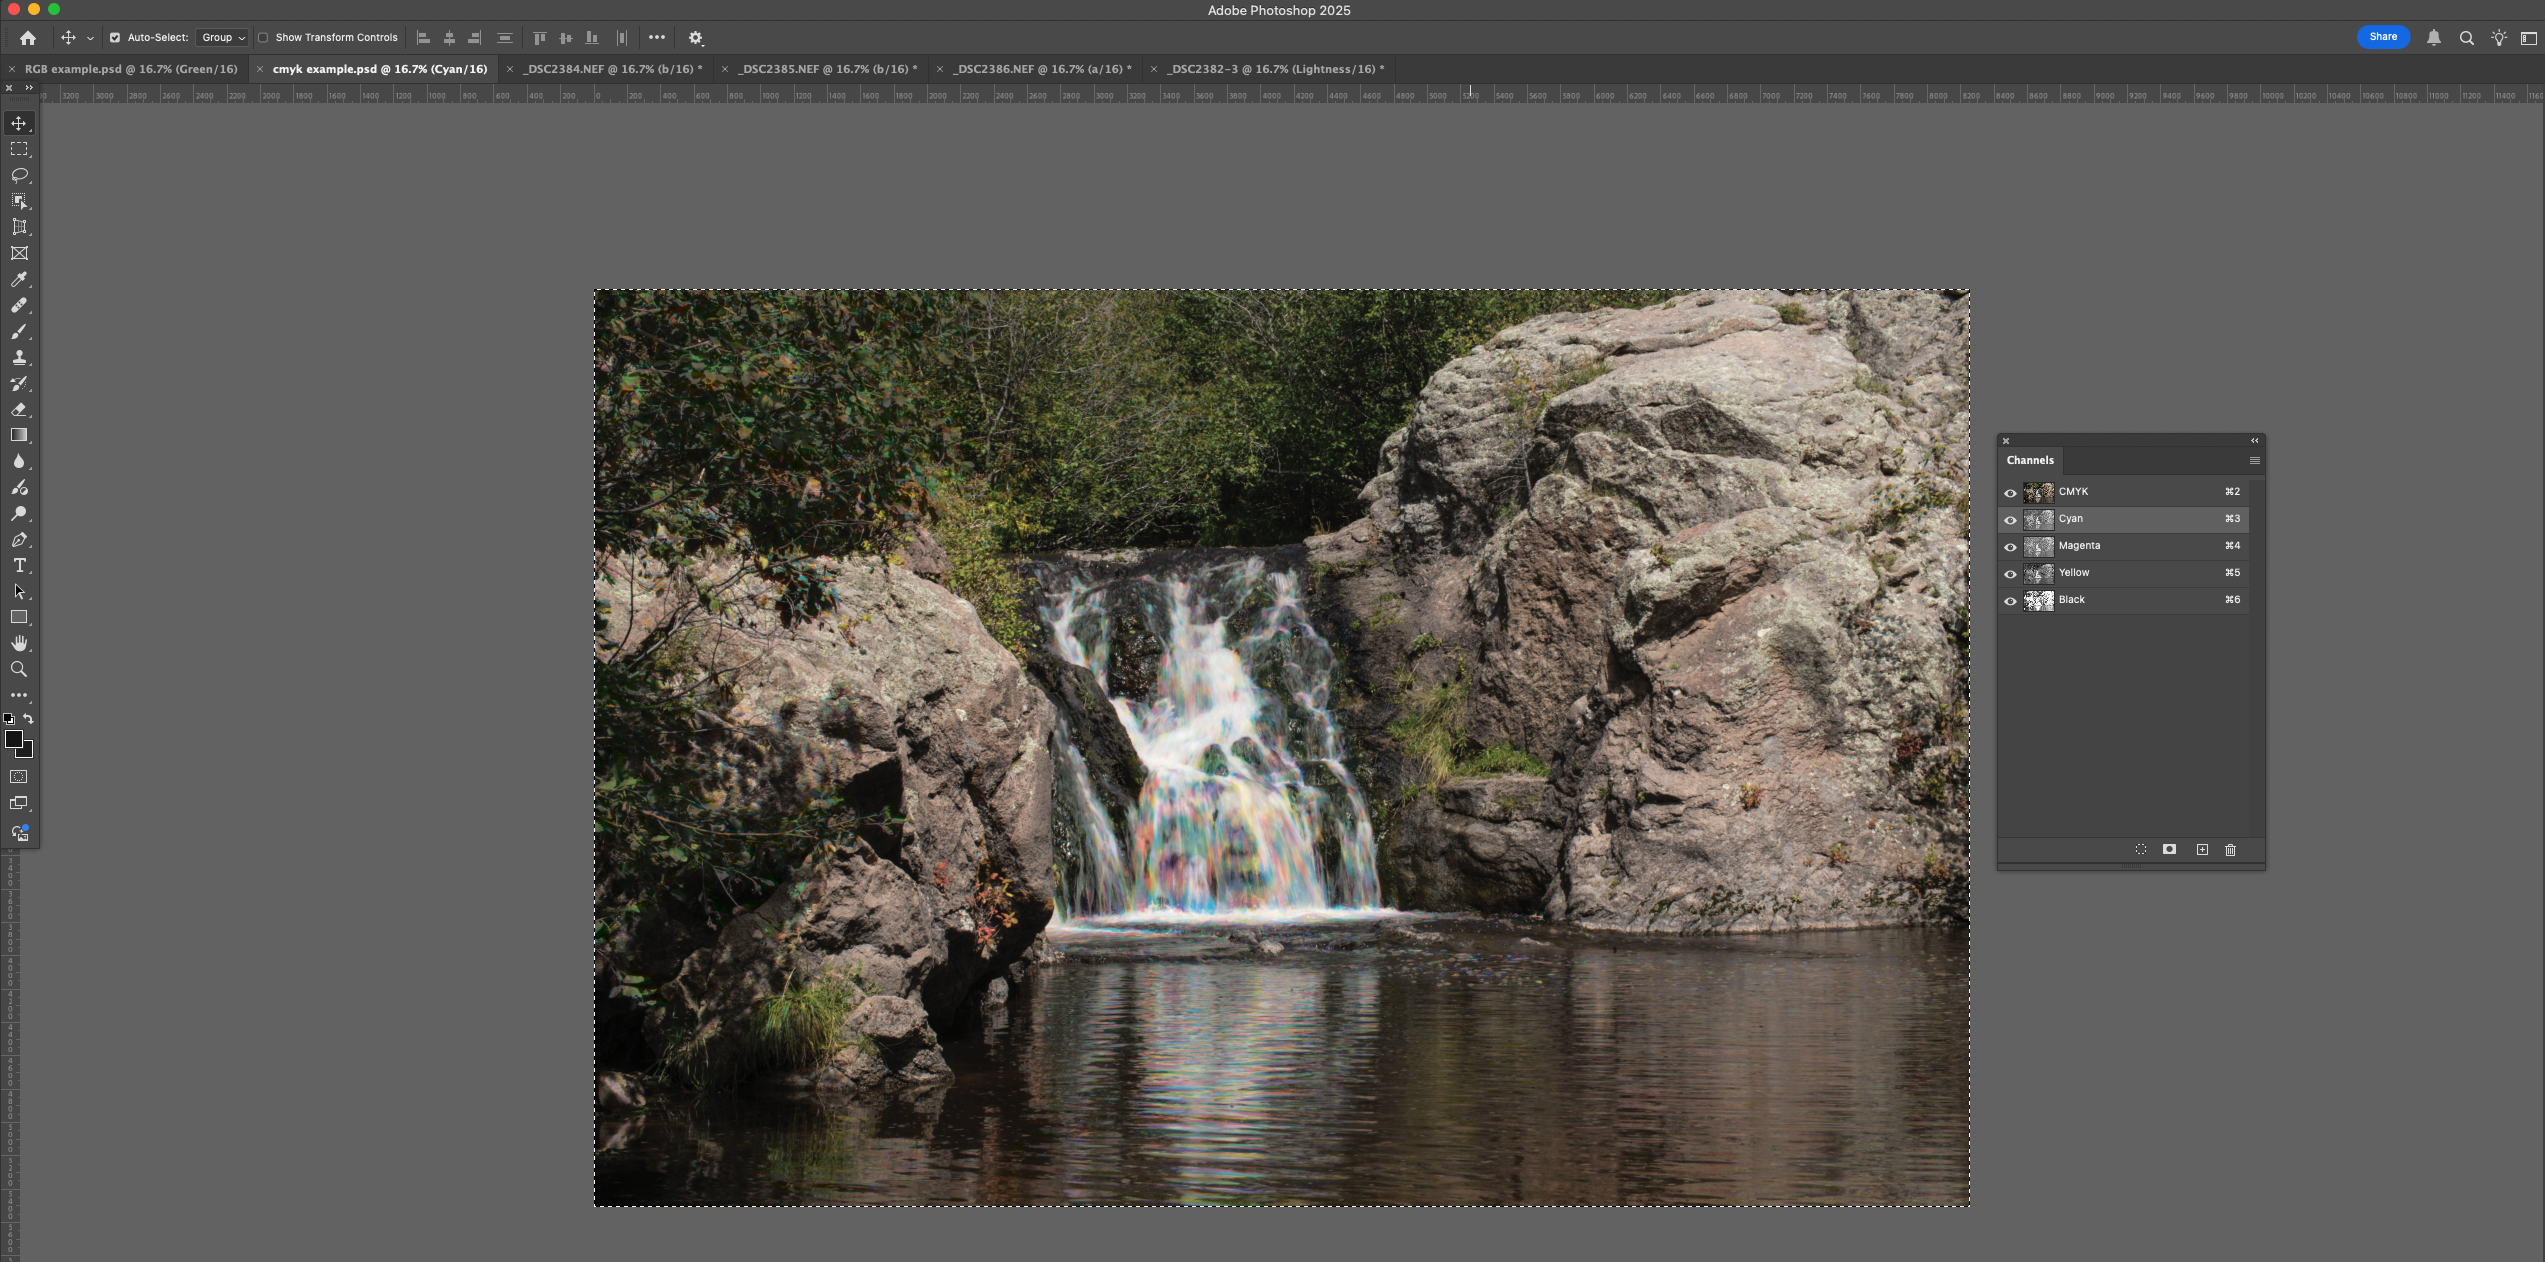
CMYK Channel Pallet
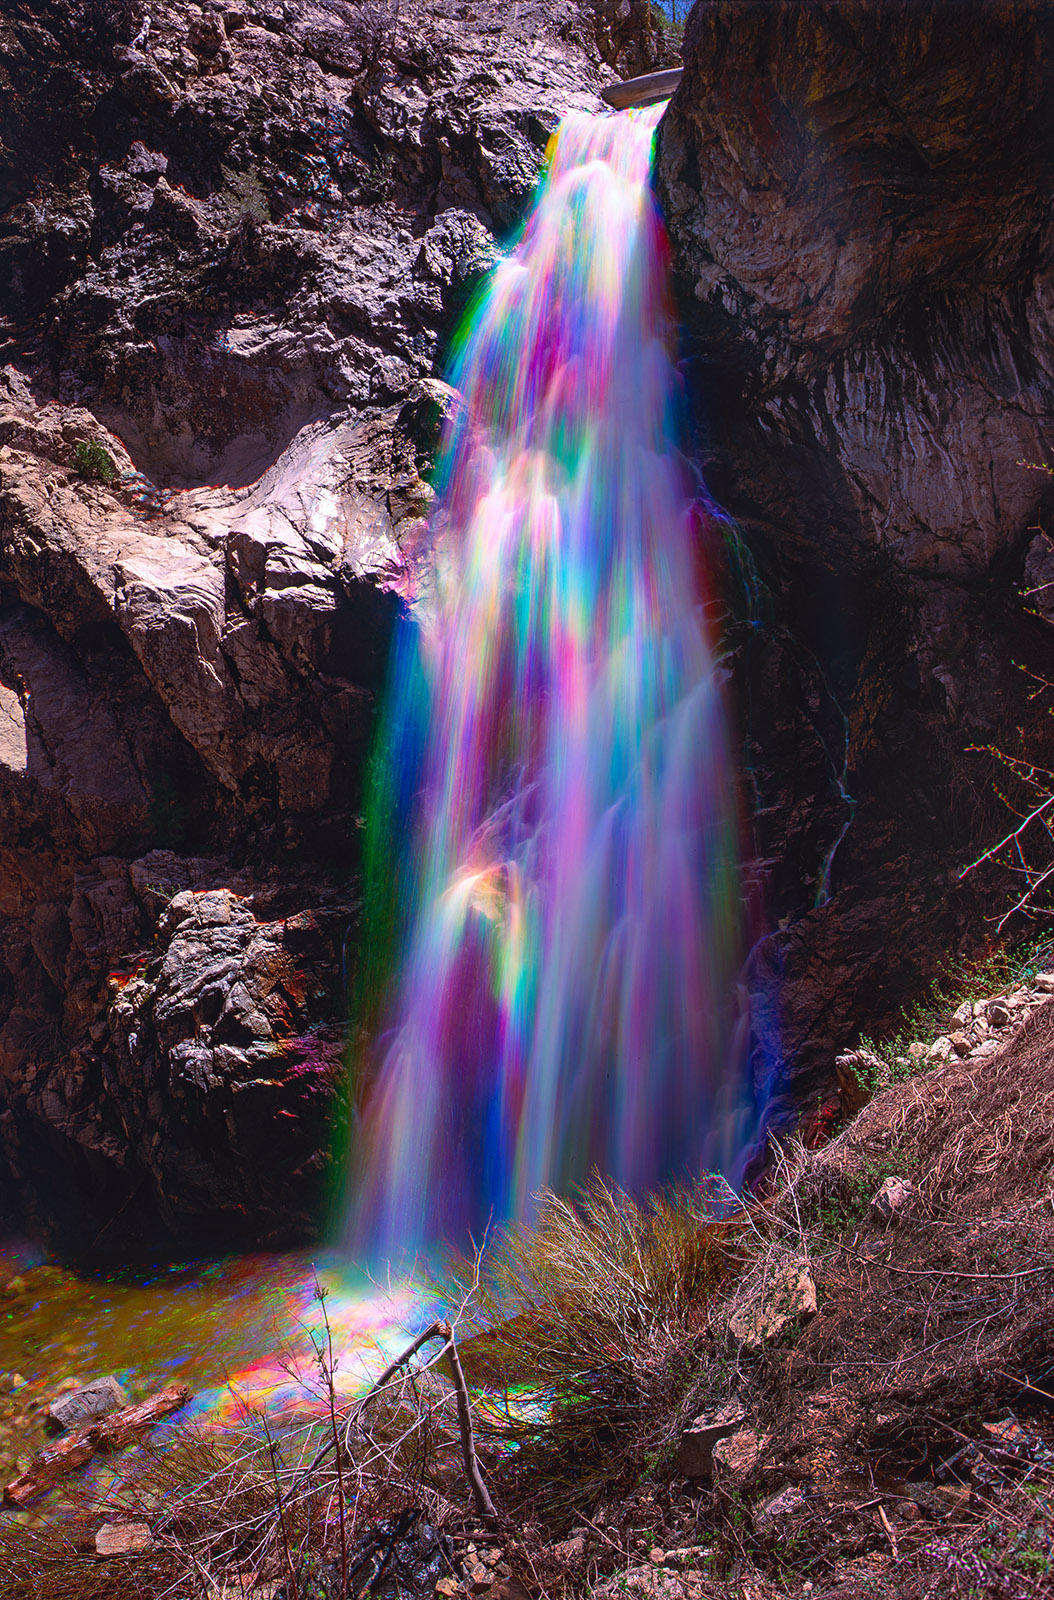
I prefer the effect when I start with long exposure images. It is more subtle. In addition to a tripod, it can help to have a neutral density filter to enable you to use longer exposures.
Long exposure 1/30 second

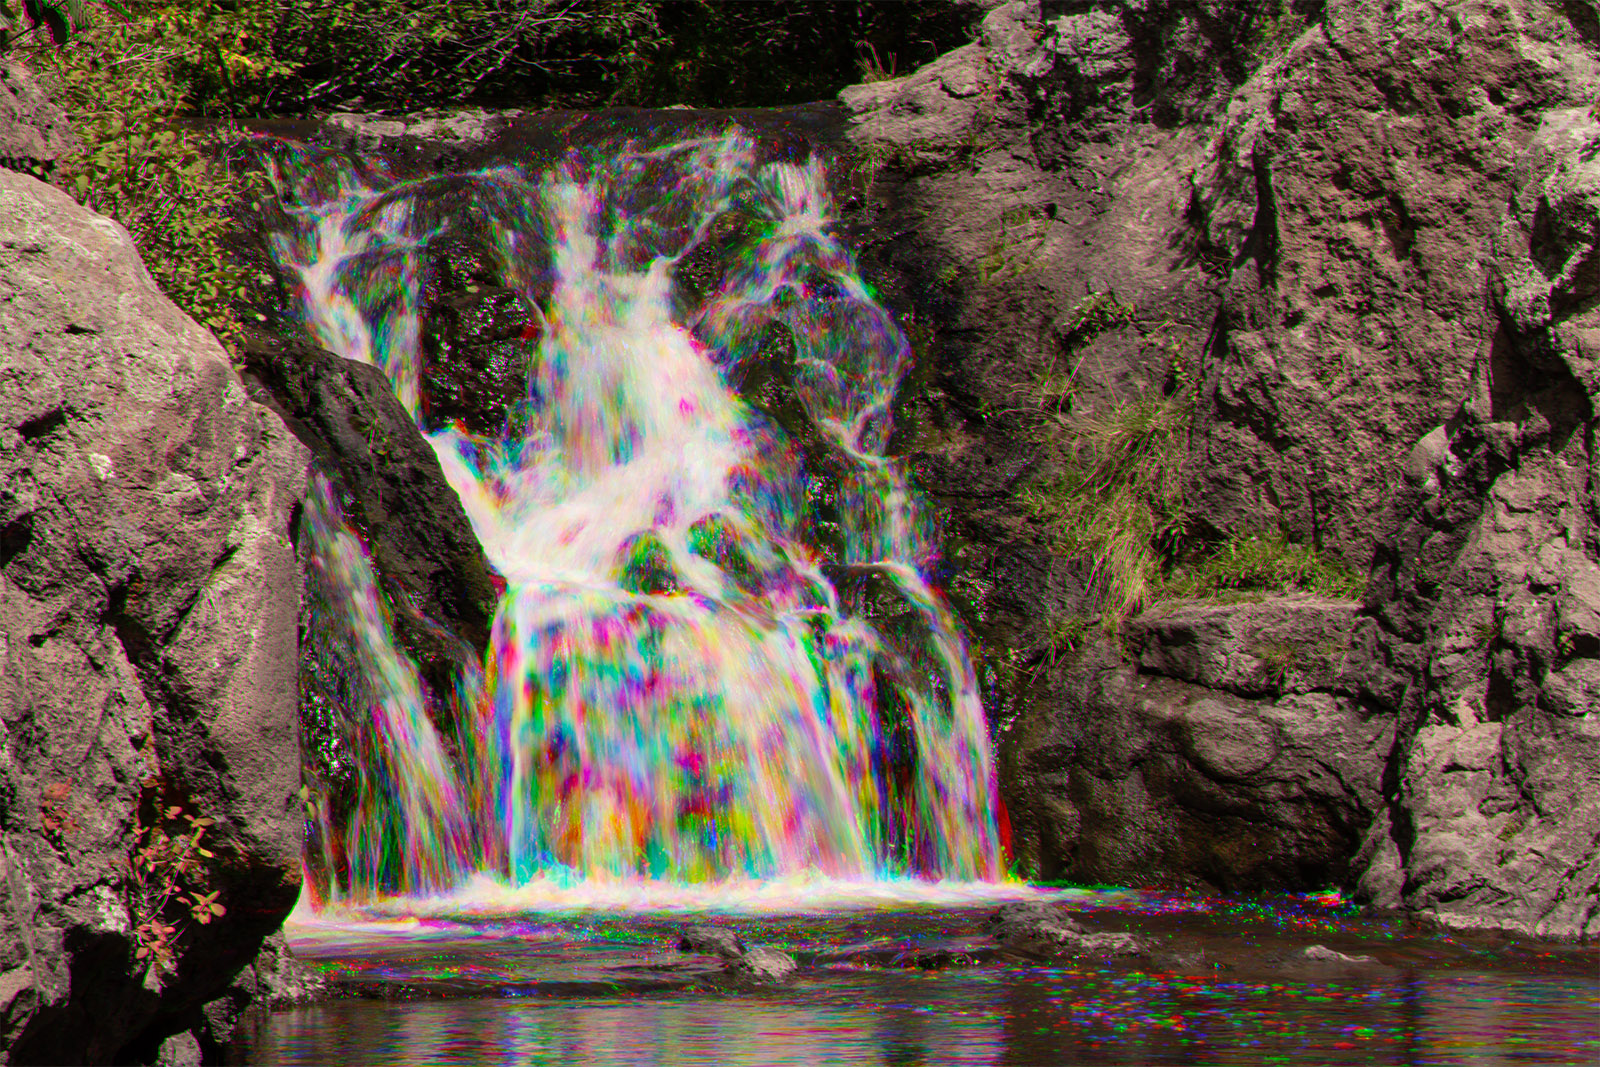
Shorter Exposure 1/125 second
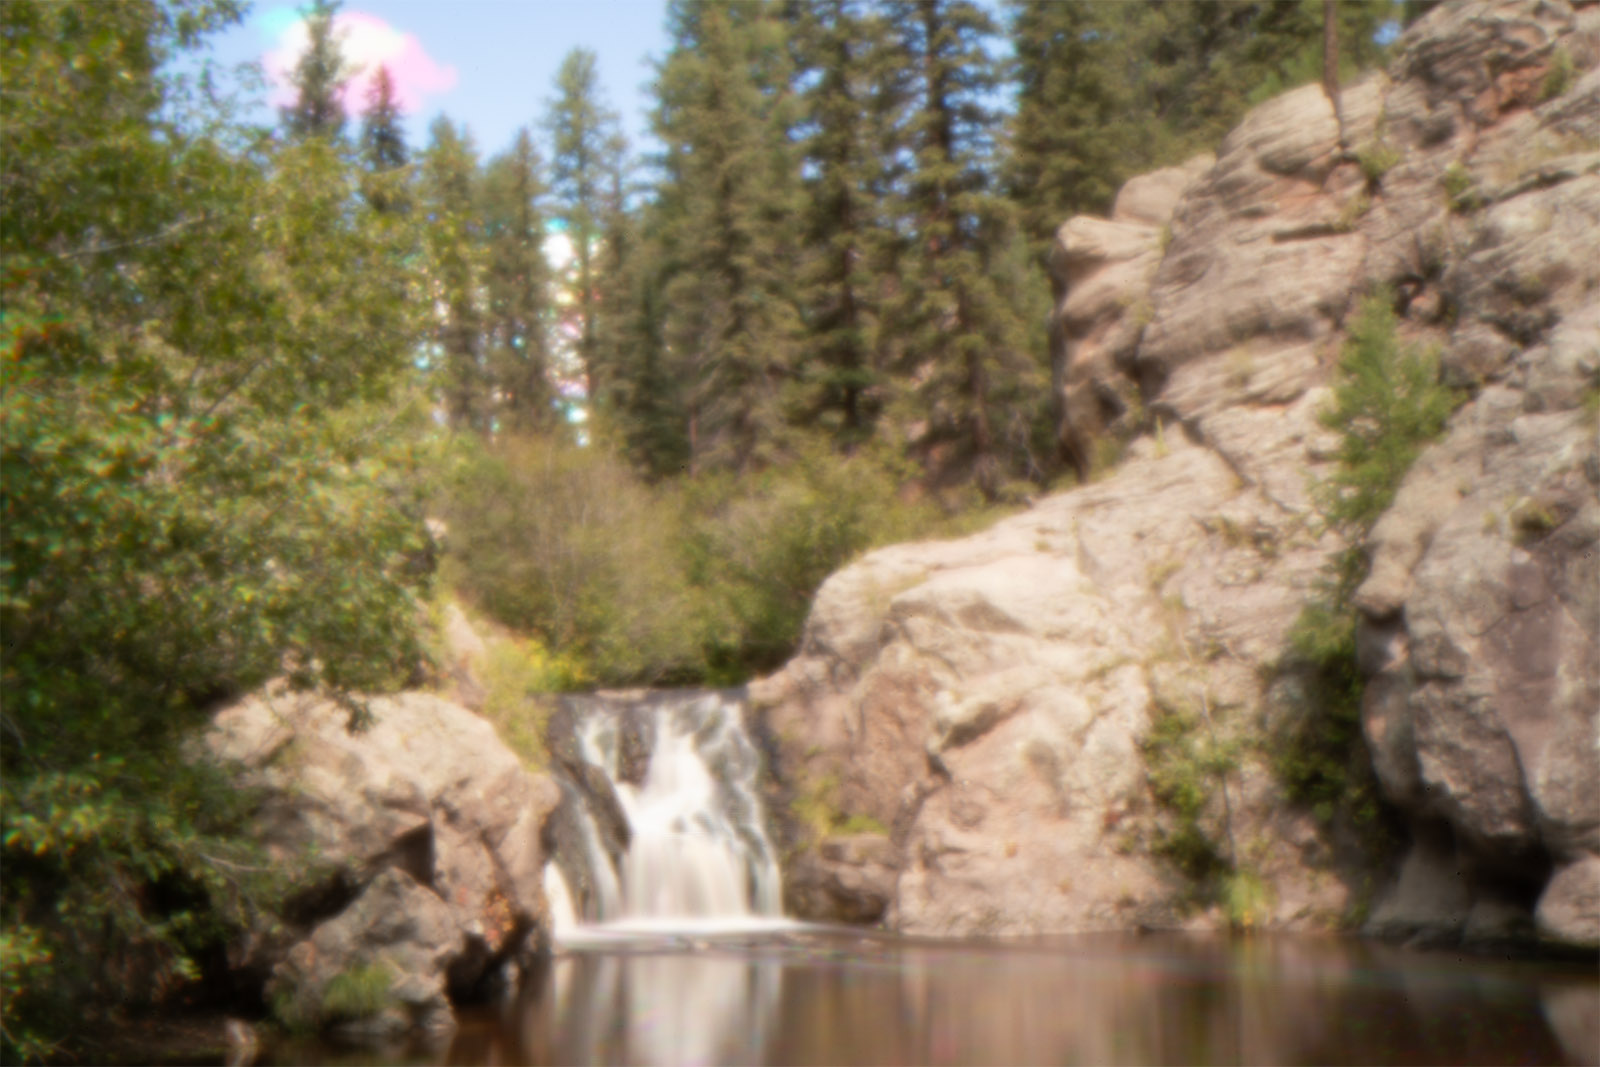
Here is an image I did with a pinhole rather than a lens. It made for a much longer exposure.
I first learned about this trick back in the 1970s in Nikon School. In those days we did multiple exposures on a single piece of film through Red Green and Blue filters.
Cooper Canyon Falls, made with 4×5 film
If you are still here, thanks for your attention. I haven’t done a technical post in quite a while. If there’s a problem with it, please let me know at john@siskinphoto.com.
Ps. I added a few pictures to my lightning blog (https://siskinphoto.com/blog/?p=5655) after I finished this. It occurred to me that I used the tripod to take the lightning shotw without repositioning the camera, so that I might be able to use the separate color channels with those shots as well. Turned out to be a pretty good idea. For the shot below I made a rainbow shot as above but then I used it as a layer under one of the three original images. I used the brush to merge the two layers selectively. Pretty successful picture. Thanks!
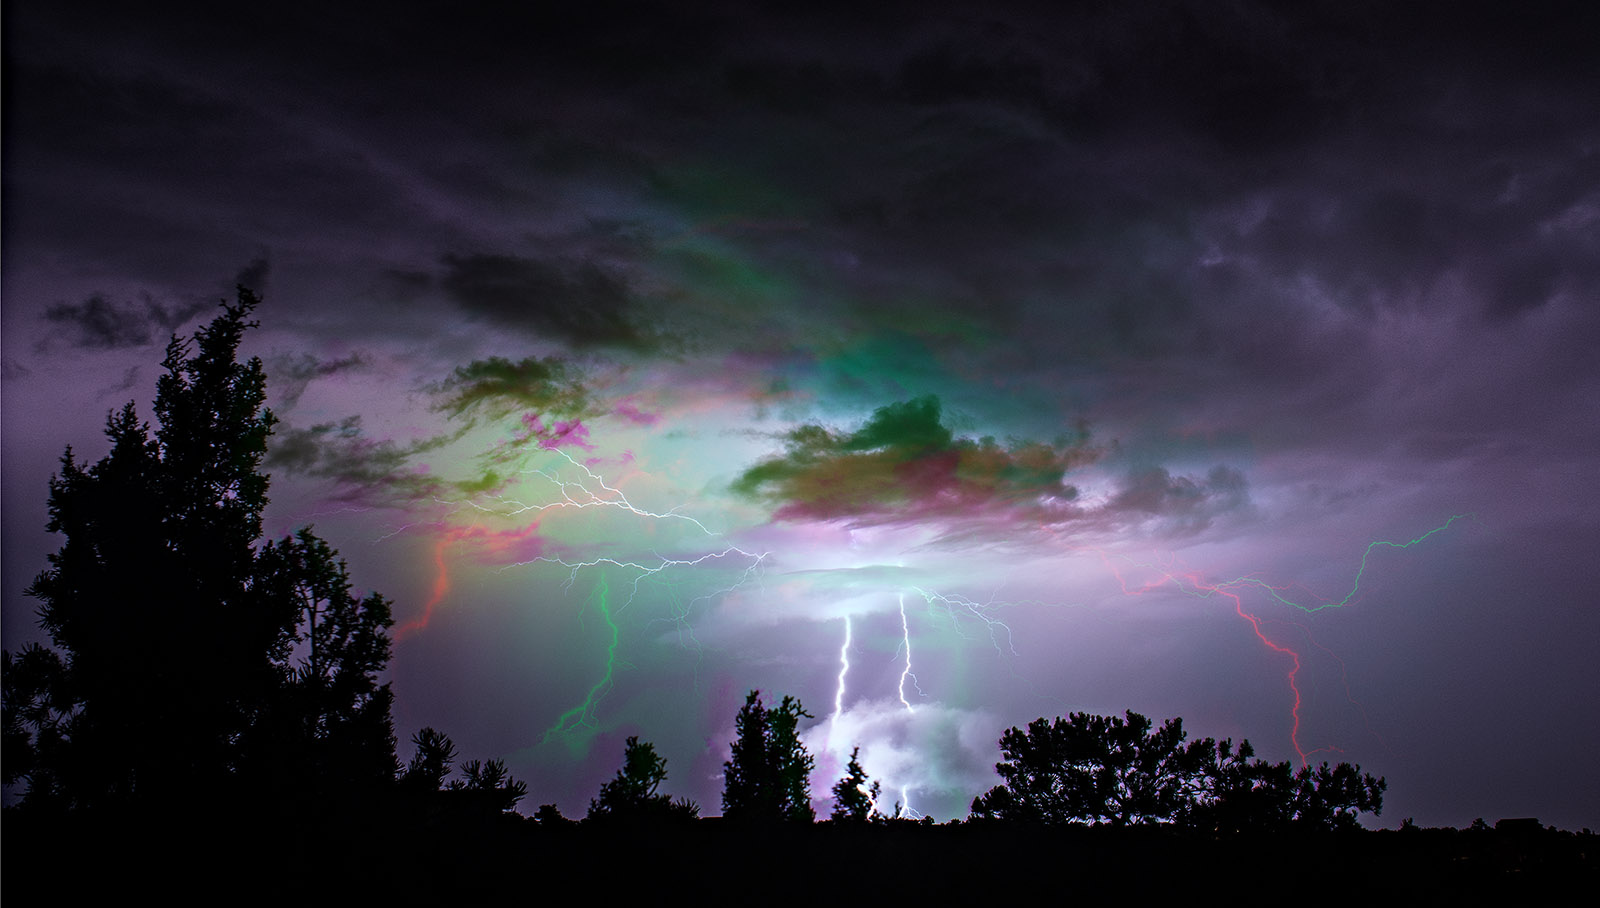
Lightning
There are a lot of earlier technical posts here on the blog, why not look around? I’m also attaching a couple of links to posts with some of my recent images from New Mexico.
I did a large show when I was still in Indianapolis called Courting Chaos. The link will take you to the pages which describe the work and its evolution. These images are, well, chaotic and many of them are nudes. I hope you’ll find it interesting.
Links to my books, still available at Amazon!