I’ve been watching the evolution of LED lighting for some time. As with any light source I’m interested in a couple of things, first how much actual light can I get? Second what does the spectrum look like? Third what is the color temperature of the light? Fourth what is quality of the light, and by this I mean how hard or soft is the light? Fifth what is the portability of the light? Finally, I’m interested in the price. In this post I’ll present a Do It Yourself light that presents a satisfactory solution to these problems.
How much light? I compared this light to a Lowell Omni light with the 420 watt EKB bulb. The DIY LED bulb had 1/3 of a stop less light that the Omni did if the Omni was set to throw a broad light. When the Omni was set to throw a spot then the Omni was 2-1/2 stops brighter. You should note that the LED light is a broad light, so the comparison to the Omni set for spot is not realistic.
I looked at the spectrum with my homemade spectrometer. The spectrum is continuous from red to blue. I can’t tell accurately if the cut off is different from a tungsten light source, but I don’t see a difference. The earlier LED light sources I tested did not have a continuous spectrum; so this is a real improvement.
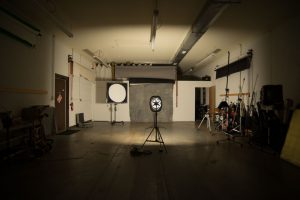
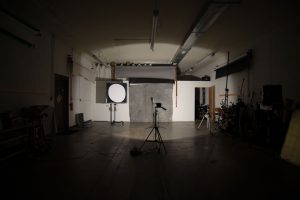
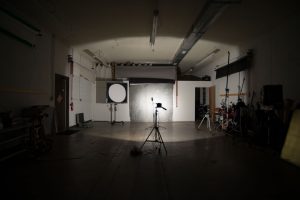
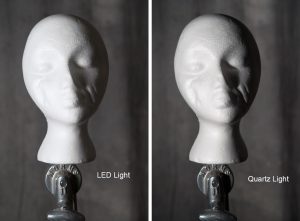
I tested the light with a Konica Minolta Color Meter III F. This is a very accurate meter. The DIY LED had a color balance of 2930K. If you prefer the light needed an 82B filter AND a CC9 magenta filter to match 3200K. 3200K is, of course, the standard professional movie color temperature, which is the color temperature the Lowell Omni light is designed for. This means the DIY LED is a little warmer and a very little bit green. With a ¼ CTB filter over the unit the light had a temperature of 316, essentially even with the 3200K standard. There was still a small amount of green color that could be corrected with a CC10 G filter. This is a small correction, which could be ignored in many situations. I should point out that my various quartz lights show a color spread from about 2900K to 3300K, so there is normally variation in standard quartz lights. You can see the variation in these images.
The left test is a Quartz light with a DYS bulb, the center is the LED with a ¼ CTB filter and the right side is the uncorrected LED.
When corrected in Photoshop all the files look pretty much the same as you can see in the image below.
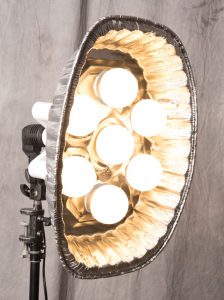
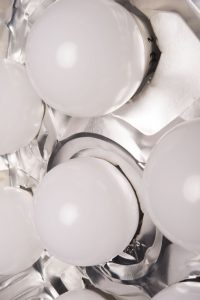
The DIY LED light acts like a small soft box. If you’re not worried about a specular highlight that might reflect the multi bulb set up, it’s really quite nice. Especially if you use it close to the subject. If the multi bulb design creates a problem in your image you can use it with a fabric cover. You can also use it with a light panel to make it even softer. You can see the difference between the LED light on the left and the Lowell Omni light on the right below. Both lights were set in the same position, about 5 feet from the wig head and about 45º to the left side of the camera. The version from the Lowell light has harder transitions and deeper shadows.
My design for the light is quite light weight, but a little bulky. The turkey roasting pan is easily pushed out of shape, which could be a problem. The good part is that the light will run for quite a while on a 12volt battery with a 120volt converter.
With out a filter the light will cost you about $45. NICE PRICE! Of course this doesn’t include a light stand. The filter is about $7 to $10 depending on which manufacturer makes it. Since the front of the lights are cool you won’t need to worry about burning or melting the filter.
Please note that I am looking for other color temperature bulbs that would work with this design. At this time these are the best balanced bulbs I’ve found. They will work well with a DSLR set to Tungsten. And in many cases can be mixed with other tungsten light sources. I am doing other tests as well, so look for updates. The daylight balanced bulbs I’ve tried are not very close to daylight or strobe.
Here’s the parts list:
The bulbs are Feit 100 Watt Dimmable. I got them at Costco, which was about half the price of the bulbs at this Amazon link.
The 7-bulb holder is available at Amazon. Here’s the link:
The socket, which has an on/off switch, is on Amazon at this link:
I should point out that this socket fits onto a standard light stand. There are several versions of this device. All are a little flimsy. The one in the link has a bigger tightening knob. I think this is better than the one I actually bought, mine slips.
I bought the turkey roasting pan at the Dollar Store. You can get them at Amazon, but you have to get a bunch of them. The pan was just a dollar that the Dollar Store.
The only trick to assembling the thing is to get the roasting pan to sit at the base of the bulbs. I used a couple of feet of pvc pipe to push the pan against against the base of the bulbs. I attached the pvc parts with pvc glue. I’m sure other things would work as well. Keep in mind that the base of the bulbs does get pretty warm, so you probably don’t want to glue the roasting pan to the bulbs. Take a look at the picture to see how I assembled it.
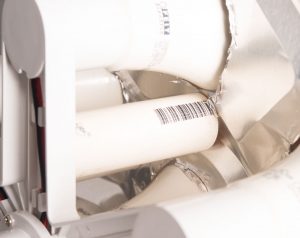 This shot shows how deep the bulbs are set into the turkey roasting pan.
