Photo Notes A place to talk about making images.

August 22, 2010

Awareness, Knowledge and Experience

Filed under: Photographic Education — John Siskin @ 7:55 pm

Shot 0

According to dashboard this is the fiftieth issue of this blog. Imagine my overwhelming enthusiasm, or not. Of course the problem with blogging is that you never know if anyone is reading. Which is related to problems with photography and teaching: is there anyone out there? I was talking to a paper conservator this week, she works on photographs and illuminated documents and works on paper, really cool stuff. Although she has done a lot of teaching, or maybe because she has done so much teaching, she is really disillusioned with students. I often have a similar problem with my classes. Of course the problem is not as visible, because I teach on-line. So I don’t see students falling asleep. But I do see assignments that are poorly done, and I notice students who just don’t respond.

Shot 1

Shot 2

I

I_think it is helpful to break learning down into three levels. The first is awareness. If I take a class or read an article the first thing I ask myself about information is: will I use this? I may find out about a fabulous technique, but I have no intention to use it anytime soon. For instance there are lots of things in Photoshop that are really great, but of no use for my work. The same thing is true about methods of alternative printing. I am aware of gravure printing, but I have no plans to do it. When I encounter information for something I’m aware of my first concern is does it change my view of the usefulness of this process or tool. It is pretty rare that a new piece of information changes my evaluation of something. The second level is knowledge, at this level I’ve decided that I want and NEED to know about something. To get the knowledge. I will pay attention, maybe take notes. Certainly I will ask questions. One of the good parts of on-line classes is that you can ask questions at any time, even three a.m. Knowledge is a very important possession for any human: people are often judged by their knowledge.

Shot 3

With many sorts of things knowledge is enough. So if you have knowledge of plant biology that may be all you need to teach plant biology. However, with most things it isn’t enough. For instance knowledge of plant biology probably isn’t enough to be a profitable farmer. Would you like to fly in a plane with a pilot who just has knowledge of flying a plane? The most important level of

Shot 4

knowing, for most things, is experience. That is especially true for photography. It is very hard for people to get this idea, because the manufacturers go to great lengths to tell you it is a matter of pushing buttons. There may be an automatic feature on you camera and strobes that will allow you to balance two dedicated strobes, but doesn’t it automatically place these strobes. Or tell you how to create the quality of light you want. It only helps with quantity of light.
I provide my students with a plan for a lighting laboratory. It costs about $20. You can begin to get experience in this

Shot 5

environment: learning practical things about quality and placement. It saddens me that most of my students either don’t use the lab, or use it just enough to do a minimum level assignment. Just like you can’t achieve mastery of flight without practice, you really won’t become a master of light without practice. There is no button to push to make good light. Consider another analogy I use: playing music. Playing a keyboard instrument is not that different from typing, you start by knowing which key makes a note or a letter. I wouldn’t pay to listen to the music of a pianist who knows where the notes are, but I would pay to listen to a pianist with experience, subtlety and grace.
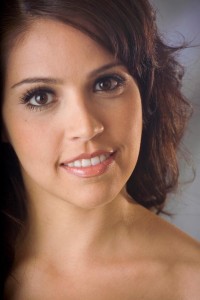
This week I attached shots that show the evolution of a recent image. Shot 0 is the first capture. Keep in mind that I had already set up a couple of lights. In shots 1 and 2, I refined the placement of the lights and changed some aspects of the room. Shot three is the final capture. Shot 4 shows the changes made in Adobe RAW and shot 5 is the final image after work in Photoshop. You can click on shot 5 for a larger image.
I teach a class in commercial photography , as well as classes in lighting and portraiture at BetterPhoto.com. I hope you will check out the classes soon. My first book: Understanding and Controlling Strobe Lighting: A Guide for Digital Photographers will be published in the fall you can pre-order it. I have a new magazine article coming out in September about strobe power. You can see it in Photo Technique Magazine.
Thanks, John
Branded 2 468x60

August 16, 2010

Understanding New Equipment

Filed under: Architectural Lighting — John Siskin @ 2:33 pm

Last week I was testing some new equipment. If you don’t know what it does I’m going to be able to use it effectively. Being able to predict and control your results is critical to being a good photographer. You need to know what your actual results are in order to do that. A pro may not take the best picture of a subject, but a pro had better always take a really excellent picture of the subject. For instance I have been at friends’ weddings, not as a shooter but as a friend. There are times when I took a picture the bride liked best, but I didn’t take a picture of the bride and groom and the bride’s mother, nor of the bride and groom and the ring bearer and so on and on and on. Shooting the event, if that is your job, means not one great shot but dozens of good shots. Shooting a home means, not a great shot of the living room, you should get that, but shots of every room. Anyway, I spent time on Saturday shooting with my new reflector, with a live subject. I included a couple of shots here. The device gives a very bright hard light, which mixes in an interesting way with softer light.
I’ve also been working on my next book, about lighting interiors. I really like the challenges of this kind of lighting. I’m going to attach a couple of paragraphs and a picture or two:

When you first look at a room, what forms your first impression? For some it will be color, and others will see the space, still others will be impressed by the contents. When you photograph a room you effectively miniaturize the room, so you need to pay attention to the original feel of a space, or you’ll lose the effect in the photograph. Architectural photography requires a great sensitivity to the feel of a place, in addition to an appreciation for detail.

Architectural photography is most often client driven photography, that is you find yourself working for a client. So in addition to your perception of the space you need to be concerned with the way the client sees the space, and what particularly interests the client. If your client is an interior designer he/she may see a room differently from a painting contractor. Consequently communication is one of the most important skills an architectural photographer will need. You will have to get your client to understand what can be done and what choices will need to be made.

I teach a class in commercial photography , as well as classes in lighting and portraiture at BetterPhoto.com. I hope you will check out the classes soon. My first book: Understanding and Controlling Strobe Lighting: A Guide for Digital Photographers will be published in the fall you can pre-order it. I have a new magazine article coming out in September about strobe power. You can see it in Photo Technique Magazine.
Thanks, John
Branded 2 468x60

August 10, 2010

Suggestions for Better Photographs

Filed under: Basic Photo Technique — John Siskin @ 12:18 pm

A couple of days ago Jim Miotke asked me for some short suggestions for photographers, I think he asked the other instructors at BetterPhoto also. Here are a couple I gave him:
Practice, test and evaluate. You can’t use a technique effectively until you are really familiar with it.
Practice, musicians do. It is difficult to keep a skill fresh if you don’t use it.
Look at books and prints of classic photographs, monitors make everything the same size and don’t show the artists intent as well as an original print. You need to look at what others have done to train your eye. It improves seeing.
Edit ruthlessly. Don’t show work with problems.
So, the first two are ways of saying the same thing: you need to treat your photography as passionately as a musician treats music: not just working at it when there is an audience, but also when you’re alone. There are several things you should do: practice with camera features you don’t normally use. So one day I practiced with the microphone that holds makes image notes on my camera. I still don’t use it. But I do use the exposure compensation controls, and I can find them with the camera at my eye. I practice with my lights. I just got a special new reflector for my portable Normans. I have photographed the pattern of the reflector in several ways. In the next few days I’ll shoot a model with the reflector to see how it works in practice. I won’t wait until I need it to use it. One more way to practice: when your walking around think about how you would frame photographs, what would you put in and what would you leave out?
I think the third suggestion is even more important. Everybody looks at photographs every day. We are part of an on going visual discussion, but we don’t pay attention. Great photographers not only had a lot to say in the conversation, but they were conscious of how their photographs worked. So  I look at images by Edward Weston, Edward Steichen, Alfred Stiegiltz, Margaret Bourke-White, Annie Liebovitz, Ansel Adams, Linda Butler, Eliot Porter, Jerry Ulesmann…. I wish I could afford original prints from all these photographers, but I can afford their books. Books that were designed with the artists’ active participation, so that they represent the way the artist wants to present their work. Looking at great work gives me higher goals and improves the way I look at my subjects.
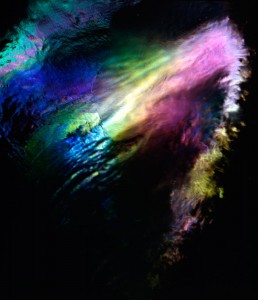
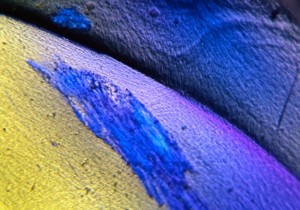
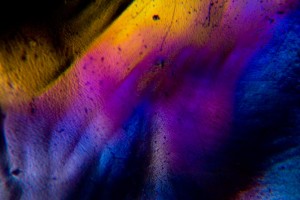
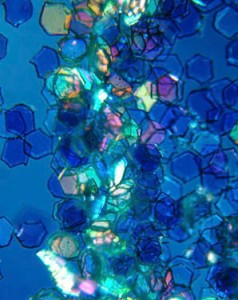
Finally, editing. People see your work as you show it to them. If you show an image with a long explanation about where your were, or how you took the picture, you will generally bore the audience. If an image pleases you, because of the circumstances of its creation that’s fine, but you shouldn’t show it unless it will really interest the audience. I’ve attached several images made with my microscopes. I hope you find them interesting.
I teach a class in commercial photography , as well as classes in lighting and portraiture at BetterPhoto.com. I hope you will check out the classes soon. My first book: Understanding and Controlling Strobe Lighting: A Guide for Digital Photographers will be published in the fall you can pre-order it. I have a new magazine article coming out in September about strobe power. You can see it in Photo Technique Magazine.
Thanks, John
Branded 2 468x60

August 1, 2010

Photography For Business

Filed under: Commercial Photography — John Siskin @ 8:20 pm

All of my clients are businesses. I would estimate that three quarters of my students at BetterPhoto, or more, want to be professional photographers. The strange thing is that almost none of my students want to work for businesses. The business model that most photographers have involves working for individuals doing portraits and events, like weddings. There are a number of reasons that I don’t go after that business: first your clients don’t do much repeat business. Second your clients have limited budgets, because they aren’t making any money off your photographs. Third you do the same kind of jobs all the time.
Any business needs to communicate with its clients. While a family might want a new portrait every couple of years many businesses HAVE to make a catalog four times a year. Even if a business only has a dozen clients it needs to tell them things about capabilities and products. So I get more business from a business client then I would from any individual. I help businesses to show what they do, how they do it and what they can do; these are important stories for any business.
While any healthy business is very concerned about the bottom line, it is the bottom line not the actual expense that should concern them. So, while the costs of doing a printed catalog may be large, the potential profit is also large. Businesses value experience over price. They want to know that the provider has delivered in the past. Both these attitudes make my job more profitable. Since I have worked with a lot of different businesses I bring a lot of experience and capability to the table. If you are starting out you’ll need to offer attractive prices and perhaps prove yourself with a sample shoot. Still getting any new business client can be important for any photograph, so it is usually worth any extra effort.
My favorite part of commercial photography is the variety of work I can do for clients. I have experience in shooting, products, portraits and microscopy. If I shot for individuals I would rarely get to do more than portraits and events. I find shooting the same sorts of work is boring.
I use a variety of tools to find my clients. I think my favorite is html mail. You can see samples here and here . This gives me a way to show clients what I do in a professional way. Also I can help businesses to use the same tool. I also use direct mail and the phone, but not as much as I used to. You can see samples of html mail here and here.
I teach a class in commercial photography, as well as classes in lighting and portraiture at BetterPhoto.com. I hope you will check out the classes soon. My first book: Understanding and Controlling Strobe Lighting: A Guide for Digital Photographers will be published in the fall you can pre-order it. I have a new magazine article coming out in September about strobe power. You can see it in Photo Technique Magazine.

Thanks, John
Branded 2 468x60

July 22, 2010

Balancing Light

Filed under: Architectural Lighting,Lighting Technique — John Siskin @ 2:40 pm

This just came up for discussion in my Commercial Photography Class. I think this is a basic concept, but I’ve been lighting things for a few decades now, so my point of view isn’t average. When you light a subject each light source should bring the right amount of illumination to the party, too much or too little and the shot doesn’t look right. In addition the color of the light source must be right, for the circumstances, or the shot won’t look good. Of course you can do some of this in Photoshop, and I do, but I think that I get a more natural feel when the light is actually in the shot.
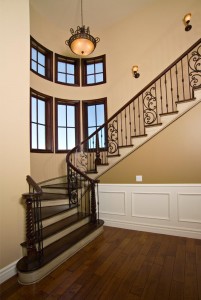
In this shot I used five lights. The idea is to keep the light the room even and to make the light from the widows feel like a natural part of the shot. Of course the actual available light in the room didn’t match the window light, so I had to bring in all those strobes. You can see an article that discusses the lighting here, as well as an alternative version with HDR. In order to make the lighting work in this shot I had the camera tethered to a laptop. I can not stress enough that you just won’t be able to do really creative controlled lighting without feedback. While the camera back is good a larger device, like a laptop is MUCH better. I set up my lights for a portrait with the camera connected to the computer. When the set up is done. I disconnect and shoot the portraits. For architectural shot and for product shots I keep the camera tethered. Before digital, I used a lot of Polaroid material, usually in the same camera that I was shooting, to make sure the light was right. I need positive visual feed back even when I shoot with continuous light, just have to see how the camera sees.
In this shot there is only one strobe, but as before it has to be balanced with the light from outside. Strobes make that easier than it would be with a continuous light source. You can change your shutter speed and change the amount of light from all the continuous sources in a shot, but the shutter won’t affect the amount of light from the strobe. The strobe only stays on for 1/1000th of a second, so the shutter doesn’t affect it. If you’d like more information about this check this article. One more thing to mention about this shot, the color of the interior and exterior light in the shot are a good match. Strobes match to daylight, but you can filter them to match other sources. The soft quality of the light also fits in well with the shot, if I’d used harder light the shot wouldn’t have worked as well.
So to balance light you have to be aware of all the qualities of light: quantity, color and how hard the light is. Each light in a shot should be fit to the others, including any ambient light.
I hope you’ll consider taking one of my classes:
An Introduction to Photographic Lighting
Portrait Lighting on Location and in the Studio
Getting Started In Commercial Photography
Or buy my book: Understanding and Controlling Strobe Lighting: A Guide for Digital Photographers(ok it won’t be out until November, but you can order it now).
Thanks John
Branded 2 468x60

July 12, 2010

Filtering Lights

Filed under: Lighting Technique — John Siskin @ 6:24 pm

Branded 2 468x60
So many people seem to think that filters are something in Photoshop, rather than something we use on a light or in front of a lens. Certainly Photoshop gives us many creative tools that offer wonderful ways to manipulate an image, but there are many reasons to use filters when you take a picture. The first one is that you preserve the idea you had for an image. If you think when you make a shot that it would be great if the left side was blue and the top of the frame was darker you will be disappointed when you see the image as a raw file. You may think, now why did I take that shot? Another consideration: if you are shooting a hundred shots of a model in the studio do you want to have to change the color of the background in every shot? Filters give you a way to control the light in a shot as you make the shot.

The background color is added with a filter

Used a warm filter to color the background

Mel, the background was lit with a warm light

Used a warm light to create the background color

Here are a few ways I use filters: I like to filter the light on a background. I can add any color to a background with gels. I use a mottled gray background most of the time, but I can change the color all over the spectrum. When you do this try to reduce the amount of light from your subject that falls on the background. The less white light you have the more saturated your color will be.

Used a blue filter over the lights to warm up the background

You can also change the color of your lights then remove the color in Photoshop. Why would you want to? Well this allows you to change the color of the continuous lights in the shot. So add a 1/2 CTB to your strobes then filter the blue out in Photoshop. All the ambient light will be much warmer, really a simple way to filter ambient light.
Polarizers allow you to control reflections, especially with daylight. This is much easier than using the cloning tool to fix a shot.
I like to use warm filters over some of my strobes when I shoot a portrait. This give the hard light a feeling of being sunlight.

I used warm filters on several of the lights to give a sunlight feel to the shot

The kit I use for my lights includes several warm filters, and a couple cool filters. I also have color filters that I mostly use for backgrounds. I generally get filters from Rosco: they have a tremendous selection and their filters don’t burn. Filters are a great inexpensive way to bring more control to your images.

For more thoughts about photography please take one of my classes:
An Introduction to Photographic Lighting
Portrait Lighting on Location and in the Studio
Getting Started In Commercial Photography

Or buy my book: Understanding and Controlling Strobe Lighting: A Guide for Digital Photographers(ok it won’t be out until November, but you can order it now).
Thanks John

June 15, 2010

Photographic Communication

Filed under: Photography Communication — John Siskin @ 2:00 pm

Branded 2 468x60
I’m traveling today, and that gives me an opportunity to catch up on this blog. I’ve been doing a lot of work for a contractor client. You can see new work here and here.

I’ve been thinking about visual communication for the last few days. I wrote about photography as a language back at the beginning of this blog. Images have been important to communication since someone painted on the walls of Lascaux. Since it used to be difficult to make images you only saw them in Churches and castles for much of history. Oil paintings have never been cheap. When I was young photographs were common, but people put value on them. So my mother didn’t send pictures of my brother and me to her mother. As prints became relatively cheaper people exchanged prints more often. I remember the first time I received a picture of the bride and groom from their wedding. I didn’t know what to do with it, am I supposed to keep this, or what?

I wrote about the difference between taking and making pictures, but I haven’t really figured out what the ubiquity of visual communication will do. The Jetsons had a picture phone, but all it did was show a picture of the person talking. I was at an event the other day where they sang happy birthday to a person who wasn’t there. This performance was recorded on a phone and sent to the person celebrating the birthday. Not only wouldn’t this have been possible in 1980, but personally I would never have thought of doing such a thing.
So I am interested in how you are incorporating tools like the phone, Facebook and other media into your day-to-day communication. Do you send pictures frequently? What sort of pictures? Do you send much video? The idea is that you take photographs to make a personal visual diary of your life. Do you make that public? How public? How do you share this with others. I am really curious about how people are working with these tools, and how they are sharing the images of their lives.
Thanks, John Siskin

Ps. I don’t have a lot of images on this laptop, so I’m just adding some that I have. Better than pictures of the Burbank Airport.  John

Please check out my classes:

An Introduction to Photographic Lighting

Portrait Lighting on Location and in the Studio

Getting Started In Commercial Photography

May 30, 2010

Terra Incognita

Filed under: Photographic Education,Photography Communication — John Siskin @ 12:57 pm

Branded 2 468x60

Film solarization

Some years ago a friend, who had moved from making photographs to making ceramics, explained that ceramics is a mature art form. He meant that, after thousands of years of making ceramics, everything that could be done had been done. Photography is still changing because, in part, the technology is still changing. The interaction between light, subject and sensor or film is still not completely mapped out. I’ve included a couple of my favorite experimental images this week.

As artists we approach the whole territory in different ways. A person can choose to make images by using craft, the tools of the known territory. These skills can enable the artist to produce commercial art and fine art. The idea is to map the unknown by starting from the known and using the known tools. Personally I am comfortable with this approach. The alternative is to begin and try to understand the territory from the inside. This is a more intuitive, less empirical, approach to the unknown. Clearly there are people who work well in this way, but it is difficult. There will be a lot of repetition and failure. Really very few artists have the strength to endure this method. Yet many people try it, often becoming quite frustrated.

One of the reasons that people want to work intuitively is that photography has a large intellectual component compared to other arts. For instance the harp is a very simple instrument: you pluck a string and you hear a tone. Assuming the harp is in tune the next time you pluck the string you will get the same tone. A concert harp will have pedals to control the how long the note sustains. A camera has more complex choices than a harp. To carry the analogy a little further, both tools belong to larger fields of understanding: music and imaging. Both fields have a tremendous amount of experience and information about what makes good art. But photography, as a small part of imaging generally, also has a huge amount of technical information about capturing an image. Certainly there are musical instruments that have this kind of technical component, but not the harp.

Made with an early Leaf back

The harp, indeed any musical instrument, requires practice so that you can translate musical ideas into the performance of music. Certainly the camera also requires practice. In both photography and music one of the advantages of practice is that it allows you to work more intuitively, translating ideas into music or images quickly and confidently. A big part of what a music teacher does is to guide your practice. Photography requires more than practice: you need to develop a personal map of the known territory. While you can create without the map there will be a lot of frustration. Fortunately there are many good maps in books and classes available.

Personally after more that thirty-five years of active photography I am still refining my map. And I am still walking on trails I haven’t traveled before.

You can see some of the territory I’ve mapped out: you can read my articles here and pre-order my book here. If you would like to see some more of my map please consider taking one of my classes.

An Introduction to Photographic Lighting

Portrait Lighting on Location and in the Studio

Getting Started In Commercial Photography

May 20, 2010

A Mixed Bag

Filed under: Commercial Photography — John Siskin @ 5:23 pm

Branded 2 468x60

A few ideas and images I thought I might share. The photos are from cameras I built, check out the links and this one as well:

Shot with the super wide camera I built.

I like generators better than battery packs. They weigh more, but will work for hours on a tank of gas. Easy to refill. They don’t recycle slower as the day goes on. You can get a two-stroke generator for about $100.00 at Home Depot.

The more advertising there is in your cases the more likely they are to be stolen, whether it is advertising for you or the case manufacturer. It is always best to keep a low profile. Military surplus cases can be very good. Don’t pack anything you can’t lift.

If you are going to do any complex lighting find a way to tether your camera to a laptop. There is just no way to really evaluate the details of your image on the back of the camera. Viewing size matters.

Keep model releases in your camera bag.

Keep a chain-pod and a shoe cover in the bag as well. You never know.

You can always crop into an image, but you can’t create more space around the image, so leave a little room.

If you’re going to shoot kids keep cheap toys around to give them. Bribery is your best way of motivating children. Come to think of it, it works on adults as well.

Remember to thank people, especially assistants.

Remember the Odd Couple? Felix Unger was a photographer. It is important to be obsessed with detail; it is your job.

Shoot in raw. Always.

Learn to pre-visualize. Look at people and things and decide how you would light them. Imagine your sensor is an empty canvas, what do you want to put in it?

If you don’t practice you won’t be able to shoot well. Musicians practice. Masters of martial arts practice. You need to practice seeing, which you can do without a camera, but you also need to practice technique which requires any equipment you plan on using. Lighting requires more practice than most aspects of photography.

You might even consider taking a class, perhaps one of mine?

An Introduction to Photographic Lighting

Portrait Lighting on Location and in the Studio

Getting Started In Commercial Photography

May 11, 2010

Learning Photography?

Filed under: Photographic Education — John Siskin @ 12:51 am

Branded 2 468x60


Done with a u-shaped curve.

I have discussed the idea that photography is a language in the past, back at the beginning of my blog. I have also written about the difference between taking and making pictures. Making pictures is about control and taking pictures is about finding images. Both are important skills. I did a couple of blog entries about basic skills for a photographer. This week I wanted to talk about learning to make pictures. I’m adding a few shots, just to keep it interesting.

I have been a photo teacher for a long time, something like twenty years. Before I discuss what others are doing , I have to say a few things about how I learned photography and what I hope to do. My education has been self-guided and guided by the jobs I’ve had. I was very fortunate to work for a commercial photographer, Steve Berman,when I was sixteen. I was particularly fortunate that he was an instructor at Art Center College. I was also fortunate to work at Russ’ Camera in Santa Barbara when I went to university. Of course both these jobs were back in the ‘70ies, so they aren’t on my resume anymore. You can see a current copy of my resume here, this includes a list of publications and shows. I’ve included this link because it is my goal to do more teaching, so I want to display my experience. If you need to consult an experienced photographer, or you would like to have a photographer teach or guide a workshop please contact me. Of course you can take my classes at BetterPhoto.com:
An Introduction to Photographic Lighting
Portrait Lighting on Location and in the Studio
Getting Started in Commercial Photography

Self-Guided Learning: This is how I’ve learned photography. I don’t call it self-taught because, with the exception of William Henry Fox Talbot,  no one started from scratch and invented everything. You learn from sources that you find or seek out. The biggest problem with learning this way is that you never know what you still need to learn. There is no graduation. I am still learning new things, in part that is because of the technical changes in photography, but is also because I’m still fascinated by photography. You clearly learn things you don’t need, and you learn a lot of things the hard way, by making mistakes. If you’re going to learn this way it helps to be a good reader.


Photo College: I have met some very accomplished photographers who went to photo college. The good news is that somebody packages the information into a several year long course of study. One hopes that the graduates are expert craftspeople as well as creative individuals. I think that anyone who wants to evaluate a school should be evaluating the instructors first. If the staff members that teach commercial photography aren’t doing commercial photography, what can they know? If the people teaching fine art don’t exhibit regularly how would you know if you want to study with them? This is an expensive way to learn, but if the teachers are good, it might be a good value.
On-Line Classes: I teach on line, so I might have a bias. I also work very hard to do good classes. I send out a lot of e-mail in addition to the lessons. I try to respond to my students very quickly. I also call as many students as I can each session. An on line class can be personal. Still you have to be willing to do a lot of reading. But you can ask questions and get good feedback on your work. Classes are reasonably priced, you don’t need to travel, and they fit into any schedule. Check out BetterPhoto.com.

Lecture: Some guy stands there and talks. This might be good for learning about calculus, not so good for photography.
Illustrated Lecture: Slides or other images added to a lecture. Depending on the image and the speaker this can be really good. I have been to illustrated lectures that really improved my photography. I have also taken some naps.

Lecture/Demonstration: This is my favorite thing to go to, might be my favorite way to teach. Instructor comes in with gear and shows you how to set-up and how to do the project. He/she explains what is happening and why. The student should be able to examine the results and look at the gear. A good demonstration should take the mystery out of the subject under discussion.

Workshop: Lets get this straight: a workshop is where the participant actually makes images or other projects in the workshop. Not the instructor, the participant. So, when I teach a cyanotype workshop, the students coat paper, expose paper and process paper. I’ve seen workshops offered where the student sat in a chair and watched. This is not enough. In a landscape photography workshop landscape should be photographed, with the instructor there to help.

I alluded to this above, but you should check out an instructor. There are a lot of ways to evaluate an instructor, but I would suggest look at what they’ve published. Of course you should see a lot of good images, especially of the type you want to make. You should also look for articles and books. If a photographer can create good articles it means that they might be organized enough to do be a good teacher. It will also enable you to decide if you’re interested in the subjects that the instructor is expert in. Here’s a link to some of my articles, and my first book is coming out in November. Know anybody who needs a workshop?
Thanks, John

« Newer PostsOlder Posts »

Powered by WordPress