Photo Notes A place to talk about making images.

November 25, 2010

Do It Yourself: Mono pod

Filed under: Do It Yourself — John Siskin @ 3:49 pm

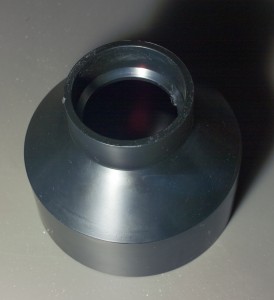
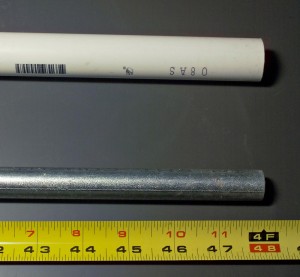
Tubing used for Building a Mono pod

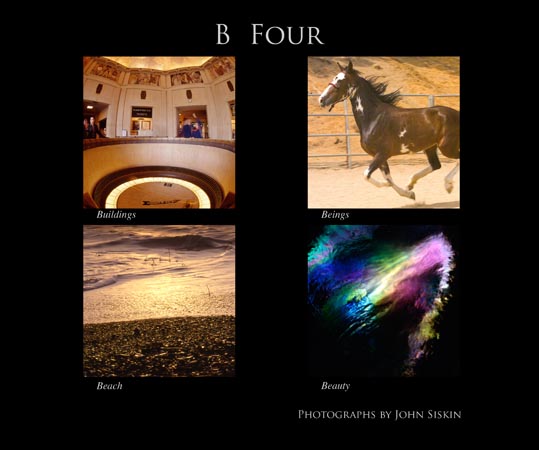
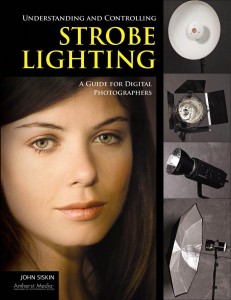
So here are the shameless plugs at the beginning of this blog. My book Understanding and Controlling Strobe Lighting: A Guide for Digital Photographers is on Amazon.com. It got as high as number 15 in photographic lighting books! And there was much rejoicing! But is is dropping now, so you need to buy a couple of copies for holiday presents. Here is a sample chapter. Of course I still hope that you will consider purchasing my fine art book B Four: pictures of beach, beauty, beings and buildings. Frankly purchases of this book mean a lot to me, and it is also a fine gift for the holidays.  I really hope that people will consider this work. And you know that I teach for BetterPhoto.com, they have discontinued most of my courses. I really hope you’ll sign up for the one that is left:  An Introduction to Photographic Lighting.

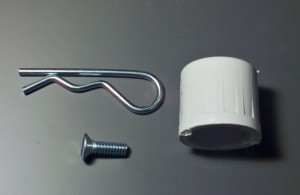
A PVC cap, a 1/4X20 bolt and a hitch pin. The small parts for the mono pod

There are a number of good reasons for do it yourself projects, not the least of which is cost. For instance the light panel project will save you around hundred dollars per panel, a very effective do it yourself project! Another example, closely related to today’s project is the chain pod. You’ll want to build this, because there is no widely available version in stores. That is also true of the modified umbrella, which is very useful for architectural lighting. Dean Collins once wrote:
“photographic equipment evolution
year 1-5 build everything
year 6-10 buy everything

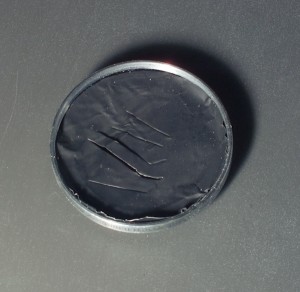
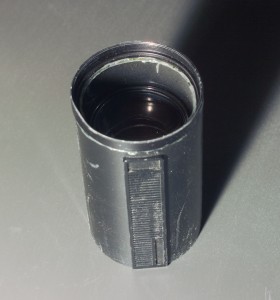
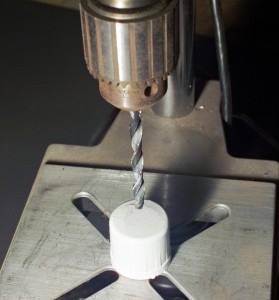
Drilling the cap. This will attach the mono pod to the camera.

year 11-15 build everything
year 16 sell everything and get a real job…”
So you should probably build something.

I decided to make a mono pod, but saving money wasn’t the primary reason for doing this project. I have always used the chain pod where others use a mono pod, and it does a good job. But I have an 80 to 200mm f2.8 lens that is frankly a pig. I wanted something that would take weight off my arms and the chain pod won’t do that. I don’t have any experience with mono pods, but I figured some of what I know about tripods would apply. I think that tripods are inexpensive because they last for a really long time. Some of mine are 50 or more years old. So it seems to me that it is a good idea to buy a good mono pod, because it might be with me for a long time. But I don’t know if I am going to like mono pods and I don’t know what will be important to me. So I decided to build one first. I should say that I haven’t worked with the

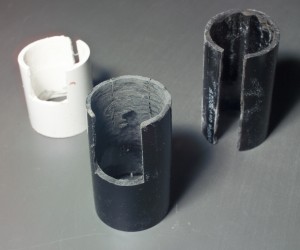
The EMT tubing is inside the PVC to the holes will line up.

home built pod long enough to make a decision about whether or not to buy one.

I already had a couple of parts lying around the shop. I have a lot of junk and sometimes it turns out to be good stuff. In this case I had 4 feet of PVC tubing and the same amount of EMT, which fits inside the PVC. I had a 1/4X20 bolt. I needed a cap for the PVC and a hitch pin. Total cost of about $1.50. All these things can be found at a home improvement store or a hardware store.
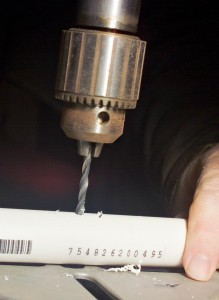
I used a drill press for this project, mostly because it was a lot easier to take pictures of. You could use a regular electric drill, but you do need to be careful since you’re going to drill into a curved surface. Please use eye protection and take it slow if you aren’t experienced with drills. I drilled a hole through the end cap for the 1/4X20 bolt to fit through. I made sure the bolt didn’t extend too far. I put epoxy on the bolt and put it into the cap. I used JB Weld, but you could use another product. You need an epoxy that fills gaps, so super glue won’t do the job. I put this aside to dry.
I put a line on the EMT, and an arrow on the PVC. This would

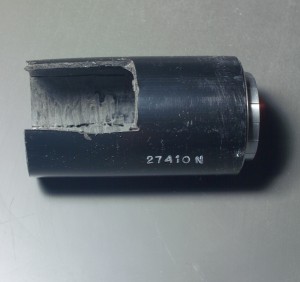
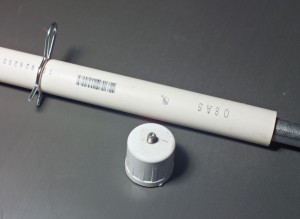
The cap and the EMT inside the PVC with the hitch pin

enable me to get the two aligned so that I could put in the hitch pin later. I figured out a good height for the first setting and marked it. I drilled a hole through both tubes that the hitch pin would fit through. Then I drilled a couple of more holes through the EMT, so I could change the height. So you have one hole through the PVC tube and a couple through the EMT. This allows you to change the height. It is easier if you keep all the holes on the EMT aligned the same way on the tubing.

The cap will just press onto the PVC. This means that I can attach the cap to the bottom of the camera and press it onto the tubing. Which is an easy way to assemble the mono pod. The hitch pin will keep the

Using the Mono pod

monopod at the right height. I don’t know how long this will last, but I expect to be able to tell if I like mono pods with this tool.

BetterPhoto has discontinued two of my classes, but I still have one left. I hope you’ll consider taking it.
An Introduction to Photographic Lighting
Have a great Thanksgiving and a wonderful holiday season!
Thanks, John

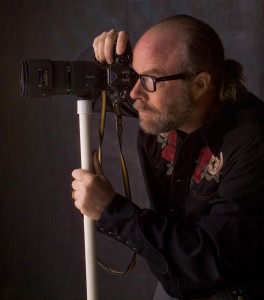
It is easier to hold the lens with the mono pod.

BetterPhoto.com, The better way to learn photography

November 17, 2010

Strobes: What Do You Need?

Filed under: Lighting Technique — John Siskin @ 3:15 pm

I’m going to continue puting the shameless plugs at the beginning of this blog again this week. My book Understanding and Controlling Strobe Lighting: A Guide for Digital Photographers is on Amazon.com. It got as high as number 15 in photographic lighting books! And there was much rejoicing! But is is dropping now, so you need to buy a couple of copies for holiday presents. Here is a sample chapter. Of course I still hope that you will consider purchasing my fine art book B Four: pictures of beach, beauty, beings and buildings. Frankly purchases of this book mean a lot to me, and it is also a fine gift for the holidays.  I really hope that people will consider this work. And you know that I teach for BetterPhoto.com. I’ll leave those links to the end of the blog.
I think I must have had my first strobe back in high school. I had a couple of cameras that used flash bulbs before that, but I never had any bulbs. I can’t remember what it was. I got my first good strobe when I was in university, a Sunpak 411. I still have it. It is a terrific strobe. It works automatically at 4 f-tops, but it also had manual control. Full power down to 1/32 power and you could move the flash tube to face left and right and up and down. I also still have a Sunpak 611 that I use pretty frequently. The thing that I want to point out about these strobes is that there best features are not the automatic features, but the manual features. Most of the time, when I use any lights, especially strobes, I need to use manual control. This is because I am adding light to a shot. I am making an image that is different from the image I see. So I need to preview that shot and I need to control to have control over the light in the shot. When you use a strobe automatically you are asking the strobe to change the image, rather than record the image. Auto control of strobe works well with flash fill and sometimes for events, but it is not the best way to make other kinds of shots.

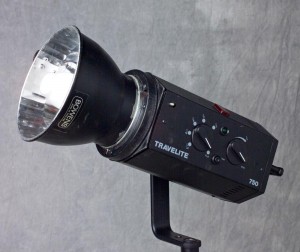
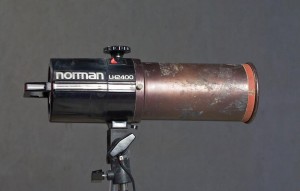
A 750 watt-second mono light.

I suppose the question I get most often in my lighting classes is what lights should I buy. The answer varies depending on the kind of work that someone wants to do, but there are some things I recommend a lot. If you’re going to shoot portraits or people in general or product or architecture you can probably do anything you want to with mono lights.These are strobes, generally with a significant amount of power, that use regular AC power. This makes them easy to use on location or in the studio. You can control the amount of light from these without significantly changing the color. You don’t have this kind of control with any continuous light source. A good mono light is bright enough to make daylight into a secondary light source, that is a considerable amount of power.

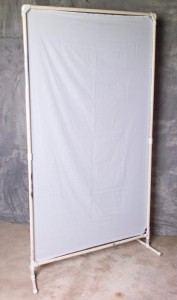
Light Panel with white cotton cover.

Here is a one light kit that I have often suggested. I would suggest that you start with one light. You will understand lights better if you do that. As soon as you add a second light you more that double the potential problems.
Alien Bee B1600
A 50º or 60º reflector. This is the standard reflector, often 6 to 8 inches. Usually a manufacturer has one or two metal bowl shaped reflector that control the spread of light to cover what a normal lens might capture.
A 45 inch white satin umbrella with a removable black back. An umbrella with covered ribs would be better.
2- light panels with 2-white cotton or nylon covers and a black cover and a sliver cover.
Light stand. At least 8 feet tall, 10 is better
Perhaps a background stand and a neutral or mottled gray muslin background. If you’re shooting product a couple of

rolls of seamless paper would be better.
Chinese Radio Slave.

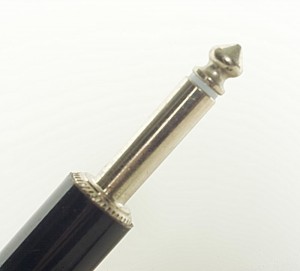
Sync Connector, this connector is used on a lot of strobes, but not all.

You can get these from eBay, search digital radio slave. Look for one that has a plug like OLD headphones, .25 X 1.5 inch. For more on sync connections check out this article.
With a second light, which might be lower in power based on your work. So if you were shooting portraits you could probably get a second light that had lower power, but if you were shooting architecture you would want a light that had as much power as your first light. I would also get:
50º or 60º reflector
Barn doors and/or snoot
Light stand, similar to what you got with the first light.
2- umbrellas, one matching the one you got with the first light and the other a 60 inch umbrella.
Very short light stand, this can be used for a background or hidden in a shot.

A Snoot, this tool allows you to put light into a small area of a shot.

If you add a third light, and this would depend on what you needed to light, I would get
60º reflector
1 more light panel with a gold cover, if you are shooting portraits. Just a white cover if you are shooting product. You probably don’t use the light panels very often if you shoot architecture.
Light stand
Barn doors or snoot whichever one you don’t have.
45 inch umbrella.
I hope this helps.
Please consider taking one of my classes, or even recommending them. I have three classes at BetterPhoto:
An Introduction to Photographic Lighting
Portrait Lighting on Location and in the Studio
Getting Started in Commercial Photography

BetterPhoto.com, The better way to learn photography

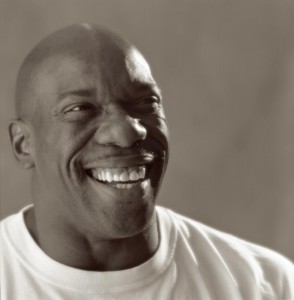
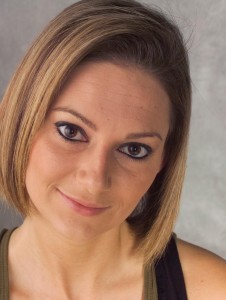
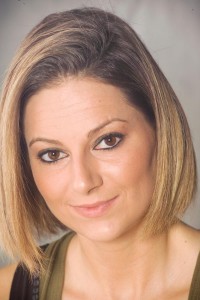
A few portraits made with strobe:

There is more information about this image in my book!

I used both hard and soft light on this subject.

November 6, 2010

Gaining Perspective

Filed under: Basic Photo Technique,Photographic Education — John Siskin @ 6:14 pm

Usually I put the shameless plugs at the bottom end of this blog, but not this week. My book Understanding and Controlling Strobe Lighting: A Guide for Digital Photographers is on Amazon.com at number 16 in photographic lighting books! And there was much rejoicing! Here is a sample chapter.   Of course I still hope that you will consider purchasing my fine art book B Four: pictures of beach, beauty, beings and buildings. Frankly purchases of this book mean a lot to me. I really hope that people will consider this work.  And you know that I teach for BetterPhoto.com. I’ll leave those links to the end of the blog.
There are a few ways to change the shape of the face. The one I talk about most is with lighting. You can use light to  shape the face in a two dimensional medium. The more you use large light sources, particularly the light panel/umbrella combination the less strong shadowing you will have, and the less definition you will get.
The second consideration is perspective. This really means where you stand. If you are 2 feet from a persons face the contours of the face are exaggerated. If you shoot at 10 feet from a subject the face is flat. Consider it this way, the distance from your lens to the nose is say 24 inches, then the distance to the ear will be close to 29 inches. The difference between these two numbers is a significant percentage of the total. If you are 72 inches (6 feet) from the nose than you will be about 77 inches from the ear, the difference is insignificant. So if you want to make a shot with a flatter perspective you need to move further away from the subject. This will require a longer lens, to keep the subject the same size in the image.  On my full frame camera I generally don’t use anything less than a 100mm lens for a headshot of an average face. For a face with extreme contours I’ll use a 200mm lens. Since most people use smaller chips they will need to convert these numbers, but for instance a 50mm lens is pretty short (about 80mm converted) to use for an average face. Perhaps an 85mm lens might be better, for an average face and you might want 135, for an extreme face. In these two shots I used a 50mm lens on my full frame camera and a 200mm lens. The lighting is the same. You can see a difference in the way the face looks. I think he 200mm shot is ok, but the 50 is certainly too exaggerated.

Shot with a 50mm lenms on a full frame camera.

Shot with a 200mm lens. I think the face looks much better.

This is why it is important to move your camera rather than rely on a zoom lens when you do portraits. If you’re to close or too far away the zoom won’t fix that it will just change the perspective.
Of course changing the angle of the face can also change the shape. If you shoot a profile a strong nose or chin will be very visible.
Please consider taking one of my classes, or even recommending them. I have three classes at BetterPhoto:
An Introduction to Photographic Lighting
Portrait Lighting on Location and in the Studio
Getting Started in Commercial Photography

BetterPhoto.com, The better way to learn photography

Just a couple more from B Four;

October 31, 2010

Involuntary Time Travel

Filed under: My Books!,Photography Communication — John Siskin @ 10:00 pm

I’ve been doing a lot of editing lately, as a result of the book projects I’ve been working on. Lately I’ve needed to look in the old files. I have film files going back to the early 1970ies at least. I have black and white negatives, color negatives and transparencies. I have 35mm, 120, 4X5, 8X10 and Minox, and don’t forget the stereo slides. I have multiple filing cabinets. By now I must have thousands of CDs and DVDs as well as floppies and what not. I can find things, but not everything is in the first place I look. The really heartbreaking this is when you find something that has been damaged over the years. I didn’t always use archival materials to store my originals.

The biggest problem is what I call Involuntary Time Travel. When you find an image that takes you back to college, or even to high school. Or you do nothing but wonder about what that person is doing now, a quarter century later. When I start looking through the files I visit my past. A good image can evoke powerful feelings. Photography is a really important way to diarize a life; to enable us to revisit the past. But it is much more than that, because we can create images that allow us to communicate with others. My goal is to help people improve their communication skills. To help others speak more clearly.To that end I just finished two more books! My first book is about lighting photographs: Understanding and Controlling Strobe Lighting: A Guide for Digital Photographers. It’s on sale now. The link is to Amazon. I hope you’ll pick up a copy. You can see some of the book at Amazon, this link is to the chapter on Portraiture. I just finished a second book for the same publisher on lighting interiors, this book will be available in about a year.
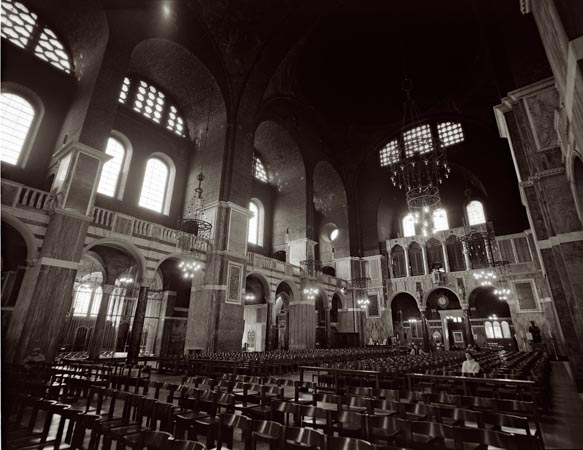
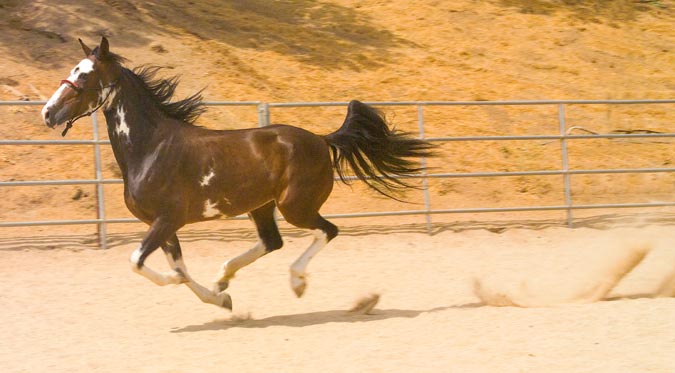
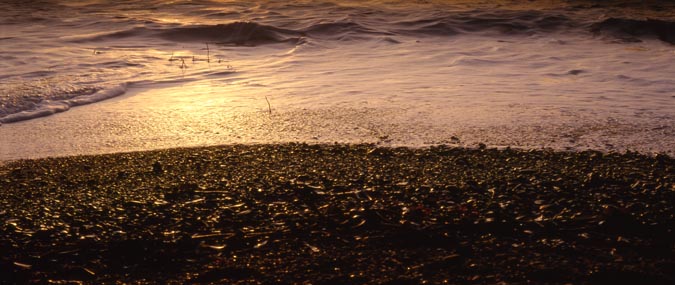
The book that really sent me time traveling is a collection of personal images called B Four. The images are from the beach, buildings, being and beauty. There was a lot of editing involved. I really hope you’ll take time to look at the book, and of course it would mean a lot if you bought a copy. I did the book with blurb so that I could make the decisions about content. I’ve included a few of the images from B Four with this blog.

Please consider taking one of my classes, or even recommending them. I have three classes at BetterPhoto:
An Introduction to Photographic Lighting
Portrait Lighting on Location and in the Studio
Getting Started in Commercial Photography

BetterPhoto.com, The better way to learn photography

October 24, 2010

Book to Book to Book?

Filed under: Looking at Photographs,My Books! — John Siskin @ 8:20 pm

The first book, Understanding and Controlling Strobe Lighting: A Guide for Digital Photographers, is on sale now, but it may only be at Amazon. Hopefully it will be in a book store near you soon. I’ve heard good things from a few people who have already received it. It is really fabulous to look myself up at Amazon.

The second book is FINISHED!!! Lighting spaces, a photographers guide to lighting architecture, commercial and other big spaces with flash and ambient (light), the title is still kind of wordy. I think we’ll shorten it soon. I shipped the files off to the publisher Amherst. Look for this book in the fall of next year, 2011. My last two blog entries were from this book, I hope you’ll check them out.

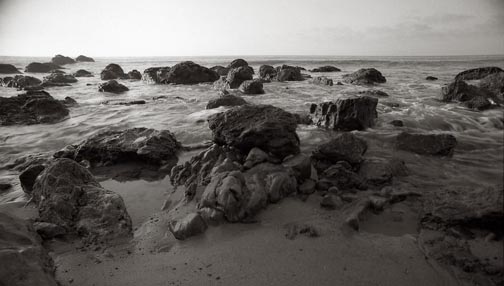
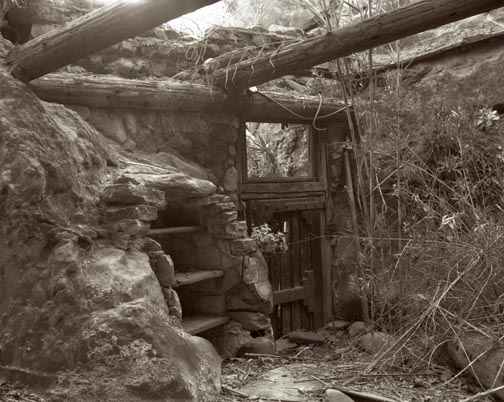
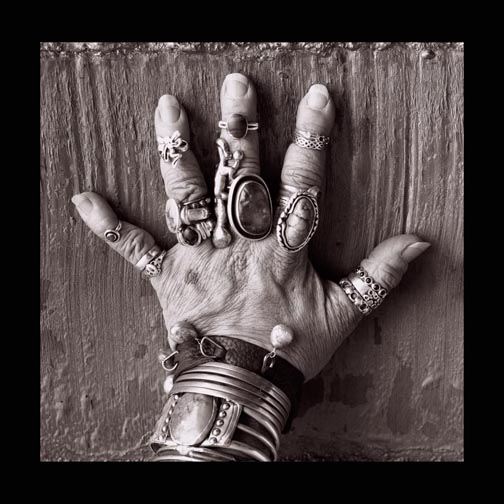
And NOW, I felt the need to share some pictures that are beautiful. Images not made for clients and not made for profit. I’ve been gathering images, while making the second book. So in a few days you’ll be able to get a book of my favorites. I’m calling it B-Four, because it is pictures of beaches, beings, beauty and buildings. There will probably be two versions of this from Blurb. I really hope you’ll consider purchasing a copy. It is nice to share some of pictures that I find compelling. I expect that the book will be ready to order in about a week. I’ve chosen the images, but I have to finish gathering files. I trust the book will be worth your attention. Here are a few images:

Beach

Beauty

Buildings

Beings

Please consider taking one of my classes, or even recommending them. I have three classes at BetterPhoto:
An Introduction to Photographic Lighting
Portrait Lighting on Location and in the Studio
Getting Started in Commercial Photography

BetterPhoto.com, The better way to learn photography

October 18, 2010

Photographing an Entry

Filed under: Architectural Lighting,My Books! — John Siskin @ 10:59 am

This is another section of my second book. This book will be out in a bout a year. You can get my first book in stores any day, or order it here: Understanding and Controlling Strobe Lighting: A Guide for Digital Photographers.  Thanks for your interest!
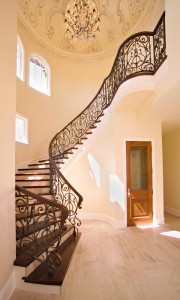
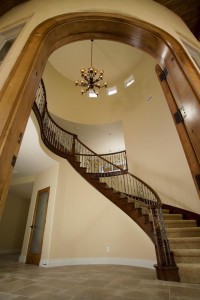
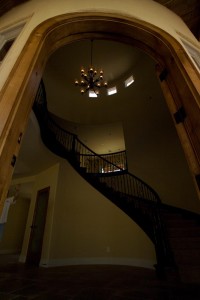
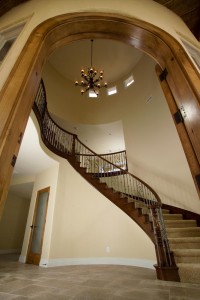
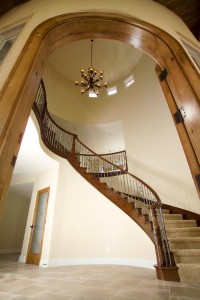
This shot really helped to create an important relationship with a client. The house had just been completed and was empty. Most of the other shots I took of this house were just empty rooms, for that matter so is this shot. But the way the angle defines the staircase and the door frame really gives the shot a feeling of drama and completion. I have gone on to do literally thousands of images for this client.

This is the image at the beginning of the shot.

I started with the camera a little too close and just ambient light. All the important aspect of this shot don’t have enough light. You can see that the windows will contribute a little light, and there is light on the entry.

So I started to add light. In this version I have a light outside, but it is too hard. You can see the small hard reflection on the door frame. I tried to use a small shoot through umbrella outside, because of the wind. Umbrellas are bad in the wind. I changed to a larger umbrella outside later in the evolution of the shot and added a sandbag. I also added a light in the hallway on the left of the shot, and a light on the second floor landing.

The lighting is better, but not even enough. Also I don’t like the highlight on the right side of the doorway.

The light on the stairway and the floor isn’t really bright enough. So I added a light inside the doorway on the left side. When I took the shot I though it was this light inside that was reflection onto the doorway. Reflections can be hard to figure out. The tethering program on this camera doesn’t allow you to back up quickly. This means it is really important to do a complete examination of the shot at each stage. I could have saved time if I had realized that the next light wasn’t causing the reflection.

I added a light inside the doorway that helped a lot.

The light on the second floor landing is not lighting the ceiling as evenly as I would like, so I moved the light back. The light in the hallway is a little bright in this shot also. There isn’t as much shape in the entry room because the light is even and the shadow of the banister is a little too intense. One of the problems with making a shot is deciding when it is done. When do you say “Oh this is just what the client needs” and when do you decide to work a little longer? That is an important consideration in every job. In this case I know that I could make the door  frame better. I suppose that there are jobs where you could keep making minor changes forever. In most cases I think it is important to take a few moments to really look at all of the shot. This is one of thee reasons that tethering your camera to a laptop is so important. Without the larger image on the laptop it is really hard to evaluate the image effectively.

Here the light is working pretty well, except for the highlight on the door frame.

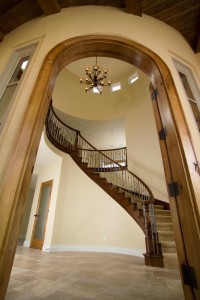
In this version the light on the second floor landing is nice and smooth. It is really defining the shapes up there. I like the light in the hallway now. One of the things it does is define the curve at the top of the hallway. This shot is all about curves, so keeping the lines strong is really important. You can see that I am still struggling with the highlight on the door frame. This is the problem that stood out for me in this shot. Often there is a simple answer, but sometimes we all miss it. In this case the answer was to move to a larger softer light for the exterior. I had been using a small shoot through, as I mentioned earlier, but I finally changed to a 45-inch umbrella.
As you can see I also pulled the camera back a bit. For me this was the change than made the shot. I really like the wood and the curve at the top of the shot. It creates a frame around the image. The shapes are good. There is a nice sense of openness and light that certainly wasn’t there at the beginning. And the door frame looks fine! I also added a light at the top left side of the shot, on the second floor. You can see a little bit of the light in the upper left window. I also put in a light in a hallway on the bottom right of the shot. This hallway light really didn’t affect the shot very much, but it did seem to bring a little light to the banister.

Here is the final capture. The light is smooth and the door frame looks great!

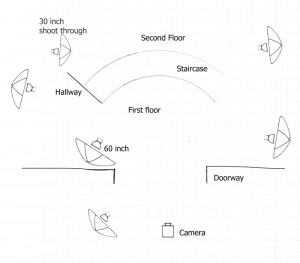
This diagram shows where the lights ended up.

This diagram shows where the lights ended up.

The umbrellas, except where noted are 45-inch umbrellas. Except for the shoot through on the second floor all the umbrellas have black backs.
Most of the lights had 45-inch umbrella, but the umbrella inside the doorway was a 60-inch and the one on the top left of the landing was a 30-inch shoot through. Except for the shoot through umbrella all the lights had black backs, so they only lit the shot by reflection.
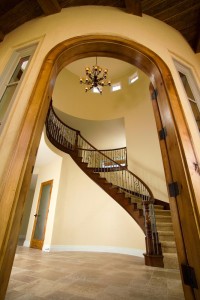
There was a little left to do in Photoshop. When I opened the image in Adobe RAW, I made the shot about 250ºK warmer with the color temperature slider. I also brighten the exposure by about one third of a stop. There really wasn’t anything else to do. However there were a few things to do in Photoshop. First I used the cropping tool with the perspective box clicked on. I put the top corners of the cropping box closer together. This made the door frame stand up a little straighter. While I didn’t feel it needed to be straightened completely, opening it up made the shot work better. I also cropped a little bit of the floor, because the change in perspective made the shot a little too thin. I removed the power outlet and few odds and ends from the second floor ceiling. I didn’t think they brought anything to the shot. I also put some density back into the window on the upper left.

This is the final shot after a color change in Adobe RAW and some minor work in Photoshop.

My first book: Understanding and Controlling Strobe Lighting: A Guide for Digital Photographers will be in stores any day! Or get it from Amazon with the link. I am really pleased with the way the book turned out.

Please consider taking one of my classes, or even recommending them. I have three classes at BetterPhoto:
An Introduction to Photographic Lighting
Portrait Lighting on Location and in the Studio
Getting Started in Commercial Photography

BetterPhoto.com, The better way to learn photography

October 6, 2010

Strobes and Layers

Filed under: Architectural Lighting,My Books!,Post-Processing — John Siskin @ 6:13 pm

This blog entry is a chapter from the book I’m working on now. This book will be about lighting interiors. Of course I hope you’ll look for it in about a year. In the mean time my first book will be out any day: Understanding and Controlling Strobe Lighting: A Guide for Digital Photographers
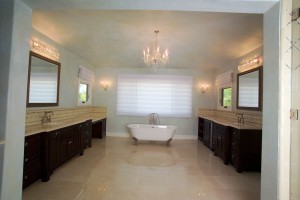
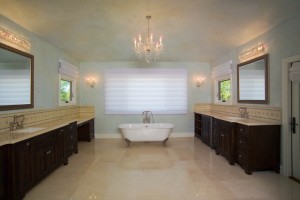
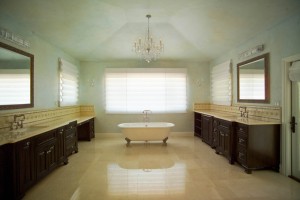
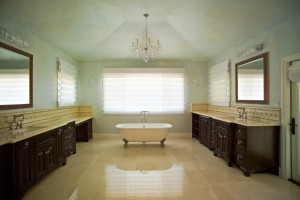
Shots in the bath are always difficult. The room is generally small and there are a huge number of reflecting surfaces. So it is always a special pleasure to be able to shoot in a bath that is really large. You still have reflective surfaces, but you also have more options for dealing with the problems. This was a really fun bath to shoot.
One of the things that made it particularly great was the assistant. I am often lucky enough to often have assistants who are great photographers in their own right. Mike had a different approach for shooting this room. In the end we did it both ways. He was really interested in a version with ambient light and I preferred a shot made with strobes. I always think in terms of how to light a subject, even when I end up using ambient light as the primary light.

In this case a 60-inch umbrella, near the camera, was all the light I needed. Of course this is usually the way I start, and sometimes finish. Although the light was ok, I didn’t like the camera position. Not only was the camera tilted, but the doorway was also cutting into the cabinets.

The first capture with the strobe. 1 mono light at half power with a 60-inch umbrella.

I’m not really happy with the balance between my light and the ambient light. I thought that more ambient light would be more attractive. There are artifacts from my sensor on the lights, which is often the case. But there are no large reflection problems and the color in the shot is pretty good. So change the camera position and use a longer shutter speed, for a better shot. In the next image the shutter speed was half a stop longer.

Here I’ve moved the camera and made the shutter speed a little longer.

When I opened the shot in Adobe RAW I changed the color temperature slider to a warmer setting. I used the recovery slider to brighten the shadows and cabinets a little. As I generally do I raised the Vibrance and Saturation levels slightly, but really I didn’t change much. Here is the shot after these changes:

I warmed up the color in Adobe RAW, and adjusted the recovery slider.

I didn’t have much to do in Photoshop. Cleaned up sensor dirt and the artifacts from the lights first. I also did a little sharpening.

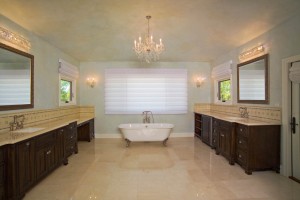
The final shot. 1 strobe with 375 watt-seconds, and a 60 inch umbrella. Shutter at 1/10 and aperture at F9.5, ISO 100.

I really like the way the ambient light and the strobes work together in this shot. The final shot was made at F9.5 and 1/10 of a second, so you can see, because of the long exposure, how much of the ambient light I used. The light was a 750 watt-second mono light set to 1/2 power. The brightness of the open windows on the sides of the shot and the window with the covering in the back creates a nice feel for the light.

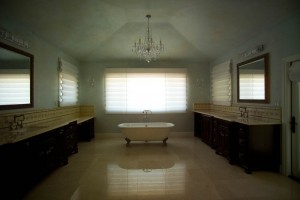
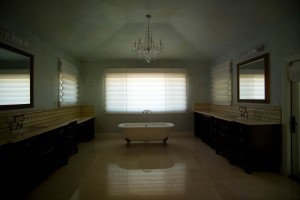
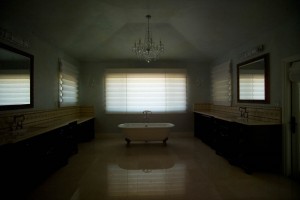
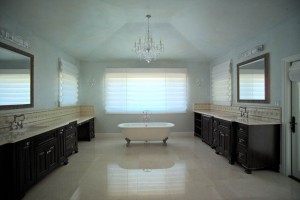
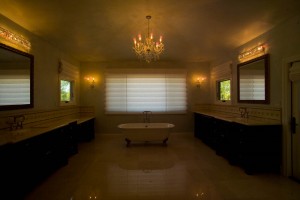
I shot quite a few versions of the shot with out any lights on. I wanted to see what I could do with an HDR version of this shot first. I ended up using 4 files for the HDR:


I used all four of these versions to create an HDR of the image.
I used the Equalize Histogram to convert from 32 bit depth to 8 bit depth. When I used HDR with the raw files the corrections to the color disappeared. The result looks like this:

I'm not happy with this version, but I wasn't really shooting for HDR.

I don’t like this version all that much. I could certainly fix the color, but the shot doesn’t have much sparkle. I really don’t like the way the windows work and there is some movement in the chandelier.

However Mike wasn’t thinking about using HDR. He had in mind using layers to manually bring the different versions of the shot together.

This is the bright version of the shot again. Most of the final image comes from this version.

This dark image will give me the detail I need in the windows.

This version will give me the lights in the chandelier. You can see how much overall color the lights created in the ambient light version of the shot.

This version will give me the lights in the chandelier. You can see how much overall color the lights created in the ambient light version of the shot.
The brightest layer will be the main layer of the shot. I used the dark layer to recover the windows and the layer with the chandelier lit to put the lights back into the shot. I also used the recovery slider (in Adobe RAW) on the bright layer to open the dark areas of the cabinets a little. I also used Vibrance and Saturation. I didn’t feel that I needed to change the overall exposure. Oh, as I mentioned above, I had already warmed up the color on the light and dark files. I made the color on the file with the chandelier lights on a little cooler. You can see, in that version, how much the lights change the overall color of the shot.

I started mixing the windows with a large soft eraser and pulled detail back into the window. I worked on the center of the shot and the mirrors on the sides. I used a 500 pixel brush with 12% opacity for the overall work. I also added just a little bit of density to the chandelier so there would be more contrast when I added the lights.

I added a lot more detail to the back window and the mirrors in this shot.

First I did the bulbs on the chandelier. I used a much small brush for the bulbs. I also used more opacity: 20%. Then I switched to a broad soft brush over the whole chandelier, at 5% opacity. The chandelier looks reasonable, but I prefer the version in the shot with the strobes. Of course all of this retouching is a mater of creating results that work for you and for your client. There are no actual rules. I could have pulled up the lights over the mirrors, but I didn’t like the effect of these lights.

Of course I needed to clean up sensor dirt and do some straightening with the crop tool. I also did a little sharpening in this last version.

I like the version made with the strobes better. For one thing the room seems brand new in that shot. I feel that the greater opacity in the back window, of the strobe shot, also makes the room seem more private, which is good for a bath. If I had a subject, such as a person in the shot, the cooler version made with ambient light might have worked better. One more thing, the cabinets look better in the shot I made with strobes.

Please consider taking one of my classes, or even recommending them. I have three classes at BetterPhoto:
An Introduction to Photographic Lighting
Portrait Lighting on Location and in the Studio
Getting Started in Commercial Photography

BetterPhoto.com, The better way to learn photography

September 22, 2010

Odds & Ends

Filed under: Commercial Photography — John Siskin @ 1:11 pm

The blog is back up! I’m just adding a few recent shots and some information about them. I’ll be adding more information soon. Thanks for your attention.

This shot is for Chusid Associates. It reminded me how difficult it is to work with dry ice. Some version of this shot will be a magazine cover. You can visit the client’s blog for more information on this entertaining shoot. Please visit the clients site at www.chusid.com and www.BuildingProductMarketing.com, particularly if you work with building materials.
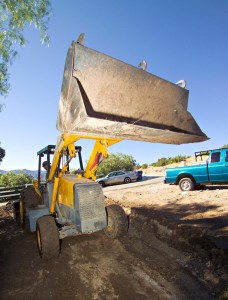
Moving the Earth

This shot is for Terry Beeler and Son Contractors Inc. you can see their site at www.beelerbuildsembetter.com. I hope you will take a look at the site because there are thousands of my photographs there. This shot was taken with a wide-angle lens and a strobe to create a little more drama.

Finally this is a shot of an egg on a white piece of paper. Just goes to prove how much you can do with light. This shot was part of an article on lighting with projectors. The article was in Photo Techniques Magazine.  I have an article in the current issue of Photo Technique magazine. I hope you’ll check it out at a local bookstore. You can see more of my articles here.

Please consider taking one of my classes, or even recommending them. I have three classes at BetterPhoto:
An Introduction to Photographic Lighting
Portrait Lighting on Location and in the Studio
Getting Started in Commercial Photography

I saw the first copy of my book last week. What a thrill! It really looks great. I hope you’ll pre-order the book: Understanding and Controlling Strobe Lighting: A Guide for Digital Photographers

September 5, 2010

Controlling the Viewers’ Eyes

I’ve written several times about making and taking photographs. My main goal in making a photograph is to keep the viewer engaged with the photograph. If a person looks at an image and says “picture of a motorcycle” and moves on, you haven’t really got any attention. If they look at the shot, and spend time staring at the motorcycle, that’s much better.

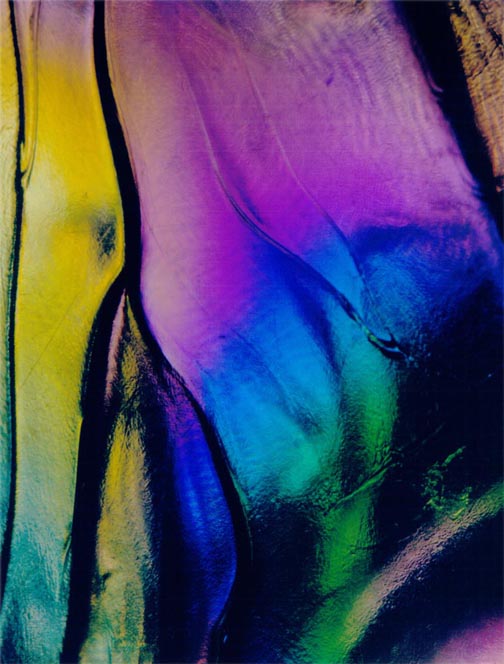
One of the ways to keep a viewer engaged in a shot is to give them color and line and shape, but not give them a recognizable object. I enjoy making images of this sort. As you may know, from this blog and my magazine articles, I make a lot of abstract images with the microscope.  I was asked to participate in a show last week, and I will probably bring these abstract images.

There are other ways to keep the viewer engaged. One is to place the subject on the left side of the frame, since the viewer’s eye often enters the frame from the upper left it is a good idea to have the subject near that corner of the shot. The eye starts in this corner because this is how people are taught to read English, I have had students who learned to read in the opposite direction, and they seemed to frame in the opposite direction way. Still, people often shoot the subject on the right side of the frame. They scan from the left finally find something on the right and hit the shutter. People could make better pictures if they took more time to re-frame the image.

Another way to influence the viewers’ eye is the use of sharp focus and soft focus in the image. Since the eye is looking for a subject it will naturally look for the sharpest areas of the image. The eye will also look at lighter areas of the image, so you can use these ideas to make better portraits, product shots and even action shots. You can manipulate the focus in an image after you shoot it, with Photoshop or another image manipulation tool. I also like doing this in camera. I use depth of field, dragging the shutter or panning the camera to give different effects. Depth of field is the area that is in focus in front of and behind the actual point where the lens is focused. The amount of distance, that is in focus, is changed by the aperture: a smaller aperture gives more depth of field and a larger aperture gives less. So a wide aperture would allow you to use depth of field to isolate the subject of your shot. There is more information about the aperture in an earlier blog entry.

Shutter drag, or dragging the shutter, is a way to mix the instantaneous light from a strobe with a long exposure of the ambient light. This gives me a chance to mix the image from instant and continuous light. The process of dragging the shutter is less controllable than some of the effects I use so it is good to shoot a lot of frames if you do this. Basically the idea is to use a strobe, which is only on for about 1/1000th of a second, and a long exposure for the ambient light, say a 1/4 second. I have often found this technique effective for shooting people working.

You also use a long exposure for panning. The idea is to move the camera along with the subject. That way the subject is sharp but the background is blurred. As with the shutter drag this doesn’t always work, so you need to take a lot of shots. This is also easier with a range finder camera, since you can see through the viewfinder when the shutter is open.  With a dSLR the viewfinder is black when the shutter is open.

Of course there are other ways to accomplish soft and sharp focus, maybe we’ll get to some of them next week. One thing I’m doing different this week: I the links are connected to copies of the images at BetterPhoto. I really don’t know how well this will work for non-members, so if you can’t use the links please let me know.
My article on strobe power is in the current Photo Technique Magazine. I hope you’ll get a copy.
Please consider taking one of my classes, or even recommending them. I have three classes at BetterPhoto:
An Introduction to Photographic Lighting
Portrait Lighting on Location and in the Studio
Getting Started in Commercial Photography

BetterPhoto.com, The better way to learn photography

August 28, 2010

Art and Craft

Filed under: Looking at Photographs,Photographic Education,Uncategorized — John Siskin @ 5:40 pm

When I was in college I used to have arguments with my roommate about whether or not photography is an art. Neither of us were armed with the history of this argument, so no direct hits were scored. If you find this argument interesting you might want to study Alfred Stieglitz, who argued the topic with the Museum of Modern Art in New York.
Today, as I have in the past, I want to discuss the craft of photography. Craft is something you can discuss in a more objective way than art. I don’t think I would want an artist to frame my house, but I would want good craftspeople framing my house if I was building one. One of the key aspects of good craft is that it can perform to a plan; art often doesn’t do that.
One of my favorite artists is Man Ray. When I first saw reproductions of his work I thought he had great ideas and poor craft. Over the years I bought better quality books and saw original work. I realized that I had been wrong. He was a consummate craftsman. What I didn’t see at first was quality because of poor reproductions, and the experimental nature of his images. Experimentation allows an artist to walk into the unknown. Continued experimentation allows the artist to map the area. The map really allows the artist to add craft to the experiments. For instance Man Ray’s work with solarization is the best I have ever seen. There are many images that I can’t explain, because I don’t have that craft.
I teach classes at BetterPhoto.com, as many who read this blog regularly know. I am not trying to teach art. I try to teach craft, and frankly I am often frustrated. In order for a person to learn craft they must practice, build their own map. In one of my classes: An Introduction to Photographic Lighting, I tell people how to build a kind of a lighting laboratory. They can run their own experiments in this environment. I can tell when a student has really experimented and when they just did a shot. I wish that I could find a way to get more students to do more experiments; there is so much to learn. I know that many people present lighting as do this and this and you’ll get great results. I call this cookie-cutter lighting. If you are going to be good you need your own map. You need to know how to build a custom environment for each subject. This is the attitude of a good craftsperson and an artist.
The greatest advantages of digital photography are in this area of practice and mapping. A digital camera will allow you to practice for free; you couldn’t do that with film. Your results from digital are available instantly, and film wouldn’t do that either. So we should be seeing more good craftspeople ant ever before.
I wanted to add something from the book on interior photography I’m working on. I think it also has bearing on this discussion.
“When I started doing photography I thought there was a rule book. Of course I didn’t have a copy of the rules, and I didn’t know where to get a copy. Frankly I had the same idea about things other than photography. I went to school for a long time, they taught me a lot of rules, mostly about things that didn’t matter. There are supposed to be a lot of right ways to do things in photography, and there are. But they are the right way to do a particular thing for a particular reason. So in this chapter we’ll start with a picture that is taken from a wrong angle. The client is very happy with, I’m very happy with it, in fact I use it on some of my business cards.


This is a picture of the same doorway taken from a more usual angle. Both are good pictures, but one is much more dramatic.”


I teach a class in commercial photography , as well as classes in lighting and portraiture at BetterPhoto.com. I hope you will check out the classes soon. My first book: Understanding and Controlling Strobe Lighting: A Guide for Digital Photographers will be published in the fall you can pre-order it. I have a new magazine article coming out in September about strobe power. You can see it in Photo Technique Magazine.
Thanks, John

« Newer PostsOlder Posts »

Powered by WordPress