So here are the shameless plugs at the beginning of this blog. My book Understanding and Controlling Strobe Lighting: A Guide for Digital Photographers is on Amazon.com. It got as high as number 15 in photographic lighting books! And there was much rejoicing! But is is dropping now, so you need to buy a couple of copies for holiday presents. Here is a sample chapter. Of course I still hope that you will consider purchasing my fine art book B Four: pictures of beach, beauty, beings and buildings. Frankly purchases of this book mean a lot to me, and it is also a fine gift for the holidays. I really hope that people will consider this work. And you know that I teach for BetterPhoto.com, they have discontinued most of my courses. I really hope you’ll sign up for the one that is left: An Introduction to Photographic Lighting.
There are a number of good reasons for do it yourself projects, not the least of which is cost. For instance the light panel project will save you around hundred dollars per panel, a very effective do it yourself project! Another example, closely related to today’s project is the chain pod. You’ll want to build this, because there is no widely available version in stores. That is also true of the modified umbrella, which is very useful for architectural lighting. Dean Collins once wrote:
“photographic equipment evolution
year 1-5 build everything
year 6-10 buy everything
year 11-15 build everything
year 16 sell everything and get a real job…”
So you should probably build something.
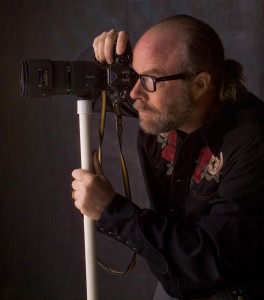
I decided to make a mono pod, but saving money wasn’t the primary reason for doing this project. I have always used the chain pod where others use a mono pod, and it does a good job. But I have an 80 to 200mm f2.8 lens that is frankly a pig. I wanted something that would take weight off my arms and the chain pod won’t do that. I don’t have any experience with mono pods, but I figured some of what I know about tripods would apply. I think that tripods are inexpensive because they last for a really long time. Some of mine are 50 or more years old. So it seems to me that it is a good idea to buy a good mono pod, because it might be with me for a long time. But I don’t know if I am going to like mono pods and I don’t know what will be important to me. So I decided to build one first. I should say that I haven’t worked with the
home built pod long enough to make a decision about whether or not to buy one.
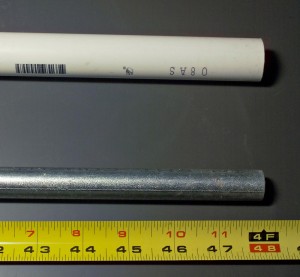
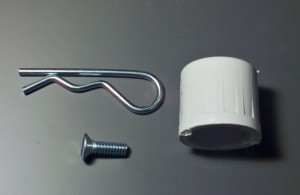
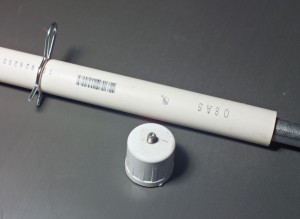
I already had a couple of parts lying around the shop. I have a lot of junk and sometimes it turns out to be good stuff. In this case I had 4 feet of PVC tubing and the same amount of EMT, which fits inside the PVC. I had a 1/4X20 bolt. I needed a cap for the PVC and a hitch pin. Total cost of about $1.50. All these things can be found at a home improvement store or a hardware store.
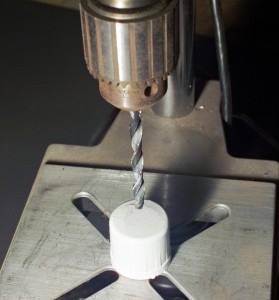
I used a drill press for this project, mostly because it was a lot easier to take pictures of. You could use a regular electric drill, but you do need to be careful since you’re going to drill into a curved surface. Please use eye protection and take it slow if you aren’t experienced with drills. I drilled a hole through the end cap for the 1/4X20 bolt to fit through. I made sure the bolt didn’t extend too far. I put epoxy on the bolt and put it into the cap. I used JB Weld, but you could use another product. You need an epoxy that fills gaps, so super glue won’t do the job. I put this aside to dry.
I put a line on the EMT, and an arrow on the PVC. This would
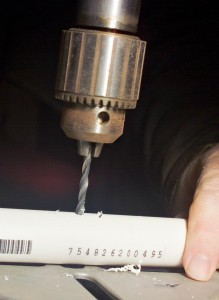
enable me to get the two aligned so that I could put in the hitch pin later. I figured out a good height for the first setting and marked it. I drilled a hole through both tubes that the hitch pin would fit through. Then I drilled a couple of more holes through the EMT, so I could change the height. So you have one hole through the PVC tube and a couple through the EMT. This allows you to change the height. It is easier if you keep all the holes on the EMT aligned the same way on the tubing.
The cap will just press onto the PVC. This means that I can attach the cap to the bottom of the camera and press it onto the tubing. Which is an easy way to assemble the mono pod. The hitch pin will keep the
monopod at the right height. I don’t know how long this will last, but I expect to be able to tell if I like mono pods with this tool.
BetterPhoto has discontinued two of my classes, but I still have one left. I hope you’ll consider taking it.
An Introduction to Photographic Lighting
Have a great Thanksgiving and a wonderful holiday season!
Thanks, John
