Photo Notes A place to talk about making images.

October 31, 2011

New Classes At BetterPhoto!

Filed under: Lighting Technique,Photographic Education,Uncategorized — John Siskin @ 6:27 pm

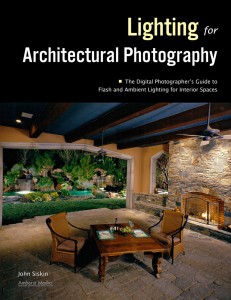
Some important updates: first BetterPhoto has brought back two of my classes. So I hope you’ll sign up for either Portrait Lighting on Location and in the Studio or Getting Started in Commercial Photography. These classes, particularly the portrait class, were popular before. I hope they will be again. If you want any information on the classes, that isn’t on the links, please e-mail me: john@siskinphoto.com. Of course you can take my other class at BetterPhoto: An Introduction to Photographic Lighting. I’m pleased to say that my first book continues to sell well. Please pick up a copy of Understanding and Controlling Strobe Lighting: A Guide for Digital Photographers. Another update: my second book will be out in February. You can visit the sale page for Lighting for Architectural Photography. Finally I have a fine art book that I made at blurb, please check out B Four.
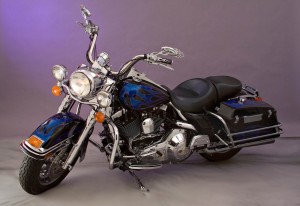
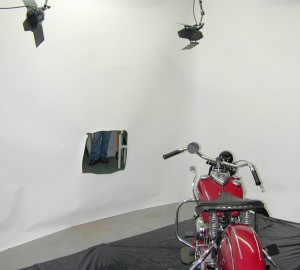
I was evaluating the photo equipment in an old photograph for the Indiana Historical Society. There’s an old 8X10 stand camera and a 4X5 and so on, but I found the lighting set up kind of interesting. Now, if you looked at the shot, you’ll know that it’s impossible to be sure of everything that is going on in the set up. But it looks like there is an opening cut for a vignette in a white wall half way down the studio. The wall has to be lit from the camera side in order to keep the vignette white. It looks like some clamp lights were added at some time to help with this. The subject would be lit from behind the wall. This got me thinking; because it is similar to the way I light motorcycles. I want to try lighting the back side of a wall, as I would with a motorcycle, and then bounce the light into a human subject. As with the motorcycle shot I would use white seamless paper for the wall.

Click on the shot for an article about lighting motorcycles

It’s cheap and much easier to work with than drywall. I would probably use two strobes pointed at the wall. It would be good to keep any direct light from these strobes from falling onto the subject. This should create a very soft even light, virtually shadowless. You could vary the lighting somewhat, by changing the brightness of the strobes behind the wall, and by changing the placement. This should do a lot of what people expect from a large ring light. As a lot of my students know a ring light doesn’t really create shadowless light, except when you are extremely close to the subject. In general a lighting set up like this won’t give you much sparkle, or a catch light in the eye, but it could give shape and make most fabrics look great. So maybe a bare bulb, or a light behind the subject would work well as a third light. I haven’t had a chance to work on this, so I’ll be interested to see if anybody, who reads this blog, does an experiment. I would keep the hole in the wall close enough to the camera, and big enough, so that there won’t actually be a vignette. I would guess that the close wall would be 3-6 feet from the camera, and there would be at least 8 feet between the walls. I don’t think I would try to add much hard light to the shot. It would be much easier to design a shot with hard light using the light panels, because they are much easier to move around. Any really large light source, which will create shadowless light, is pretty flattering to persons with skin issues.

I’m thinking about some workshops for next year. Please let me know what would interest you. Thanks, John
BetterPhoto.com, The better way to learn photography

October 2, 2011

Seeing and Lights

What you do affects the way you see. I don’t suppose this comes as any particular surprise. And yet I often find that I forget that I see through a filter of commercial photography. This means that my images are designed to read quickly. As I have been learning more about Indianapolis I have been seeing photographs that are very different from my way of seeing. There are a couple of reasons for this: first I am going to several camera clubs. This means I see other peoples’ photographs more often, which is good. Of course I look at a lot of student photos at BetterPhoto, but a lot of those are wig head shots. Another thing that is changing my way of seeing is that I am still lost a lot of the time. So I have to watch where I am going. I expect that my images might begin to change in the next few months.

The tools you use change the way you see. I can remember using a tripod for every shot as an exercise. Shooting this way slows you down and makes you pay attention to composition. Using a view camera changed the way photographers see, because you were always viewing the image upside down and backwards. Instead of paying attention to the overall composition I paid attention to the relationships between parts of the composition. I miss view cameras. One of the best sorts of tools to change the way you see is light. With lights, even just a dedicated strobe, you can change the relationships between sunlight and shadow. With a couple of mono lights you can create light that defines a subject in a new way. You can simulate room light by using soft light from above. You can make something completely different by lighting from below or by using a snoot. Of course I hope you are interested in learning how to use light, that’s the subject that I teach. You can take my class at BetterPhoto, or, if you’re near Indianapolis you can take the workshop I’m giving in a couple of weeks. One of the questions I often get, in my classes, is what should I buy? First, start with just one light. If you get several lights, at one time, you’ll have a tougher time learning to make it work. This is the list I give people in my classes:
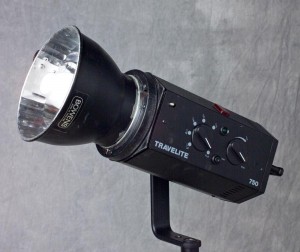
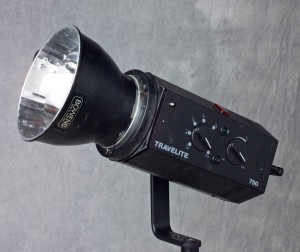
Alien Bee B1600 or Calumet Travelite 750. There are other good brands as well. The important thing is getting enough power to enable you to use lights in a variety of ways. You can always reduce light output, but you can’t get more than you bought.
50º or 60º metal bowl reflector. This is the standard reflector, usually 6 to 8 inches. It spreads light over the angle covered by a normal lens.
1-45 inch umbrella, white satin with a removable black back. An umbrella with covered ribs would be better. The size and style of umbrellas is important.
2- light panels with 2-white cotton or white nylon covers. Also get or make a black cover and a sliver cover. Instructions for making light panels  are at the Camera Design page on my website.
Light stand. At least 8 feet tall, 10 is better.
Perhaps a background stand and a neutral muslin background.
Get a chinese Radio Slave. You can get these from eBay, search digital radio slave. Look for one that has a plug headphones or a guitar. For more on connections check out this article. The radio slaves from China are very attractively priced.

When you get a second light, you may get something with less power depending on what you shoot.
I would also get: A second metal bowl reflector, the same as above.
Barn doors and/or snoot Light stand, as above
2- umbrellas, one matching the one you already have, and the other a 60 inch umbrella.
Very short light stand.

If you add a third light I would get Metal bowl reflector, as above.
1 more light panel with a gold cover.
Light stand, maybe with a boom arm.
Barn doors or snoot if you didn’t get it before.
45 inch umbrella.

I’m still doing experimenting with marketing here in Indianapolis. Yesterday I went out and shot a charity event. While this isn’t the kind of thing I do often, it can be a good way to meet some new folks, and hand out a few business cards. I’ll be going to a couple of camera clubs this week. I need to check out the chamber of commerce here in Indianapolis. Of course I am still sending out e-mail, over a thousand sent out so far! I really hope you can take my workshop but if you’re not around Indianapolis you can take my class at BetterPhoto. I also work with a few people privately using the phone and e-mail. Please contact me if you’re interested. And let’s not forget the book: Understanding and Controlling Strobe Lighting: A Guide for Digital Photographers! I hope you take good photos. Thanks, John
September 26, 2011

Workshop In Indianapolis!

Filed under: Indianapolis,Photographic Education — John Siskin @ 3:49 pm

I think that I have some important news in this issue of the blog. I’m offering a live workshop here in Indiana. This is the first time I have done a live class in a couple of years, so I hope you will appreciate that this is a special opportunity. One of my students from BetterPhoto is here in Indianapolis, and she is opening up a new rental studio in the Stutz Building. This is great for me because it offers me an opportunity to teach here in Indianapolis. It also means that my students will have an opportunity to check out the new studio. Even better: each person, who signs up for the workshop, will get two hours to work in the studio on their own. Of course you can get more hours or work with another student. This time will give you a chance to get hands on experience with lights.

The workshop is set up over two days. The first day, October 15, will be lecture and demonstration. Because there are only ten students in the class, you’ll have the opportunity to learn the material in a way that suits you. We’ll have a model so that you can really see how light affects a person. I hope that everyone in the class will ask questions and get a chance to examine everything we do. Over the next two weeks each student will visit the studio individually, or with another student, and work with the studio and lights themselves. If you do team up with another student I’ll try to come by during your studio time. Finally, we’ll meet again on October 29. During this session we’ll review the work each student did and discuss any issues that came up during the shoot.

We are going to cover several topics in depth. How lights work. How to manipulate and control light. How to control color. The differences between hard light, soft light and projected light. How to achieve a sense of three-dimensionality with light. We’ll discuss how to light the face, products and spaces. You should gain an understanding of how the basic tools of light can be applied in a variety of situations to create the image you want to make. Most people take pictures, they point the camera at a subject and press the button. Photographers MAKE pictures: they control light and image to make a photograph that is more than just a record. This workshop will give you the tools that you need to take control!

One more thing that you’ll get from the class a copy of my book: Understanding and Controlling Strobe Lighting: A Guide for Digital Photographers. The book will help you integrate the ideas from the class in the pictures that you make.

Please visit here to sign up using PayPal, at the bottom of the page. Or you can call me to ask questions or to reserve a space: (317) 473-0406. I really hope you’ll join me for this great opportunity to learn how make the photographs you want by controlling light! The class is just $295, so I hope you’ll reserve a space now.

September 17, 2011

Updates and Marketing

Filed under: Indianapolis,Marketing — John Siskin @ 11:59 am

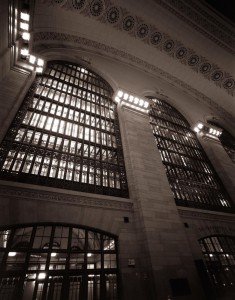
I really like the long tonal range created by the windows in this shot. This is Grand Central Station in New York. I like this angle because it makes the window look monumental.

I’m going to try putting the shameless plugs at the end of this message.  I hope you’ll take time to read them.

I sent off more images for my architecture book this week. I’ll do whatever the editor wants. I’ve used some of these additional images here in the blog. I don’t know if anybody out there has much experience with blogging, but I have an issue: I get a couple of spam posts to a few of my old posts every day. These are annoying to remove. Any suggestions?

I went back to two photo clubs this week. I will be doing live presentations at both of them soon. I guess I should practice my presentation. I’m hoping to do a workshop soon, somewhere here in Indianapolis. I’m still sending out e-mail on a daily basis. I’m going to try to get to a chamber of commerce function next week. I know that soon I’m going to have to pick up the phone and actually call ad agencies and designers, but I am still putting that off. Agencies are supposed to take time to learn about creatives in their area, but that doesn’t always make them receptive. The other thing I need to do is contact the schools that teach photography around here, maybe next week. It’s always difficult to present yourself to strangers.

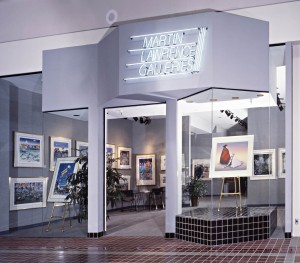
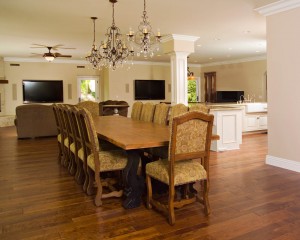
The room is really just a background for the lifestyle shot. You often need to light a space to create a shot that tells a specific story. In this case the shot advertises a small winery.

One of the clubs I’m attending had a print competition last night. On the whole the images were quite good. I know that this is a very important part of any group of photographers, but I wonder if photography is inherently a competitive art form. Actually I wonder if art should be competitive? Regardless I wanted to a few thoughts about competitions. First, if you can, get information about your judges. I’ve known judges who just seem to like versions of the same thing; reflections or patterns for instance. Second, most competitions have a lot of images; one way to make your image stand out is to make it big. Last night the images where presented to the club, the 8X10 images were too small to see. In a group of images a small shot is at a disadvantage.

I took a design class in college that talked about three kinds of space: positive, negative and equivocal. I have a friend who shoots wonderful images that are mostly equivocal space. They can be fascinating, but you have to spend time relating to the image. You can’t just get a quick gestalt of the image. These images, while great, aren’t going to win any prizes. If you want a prize build a strong image, with good graphic qualities. Then add detail to keep the eye entertained.

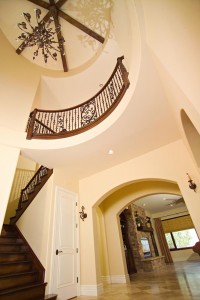
This is the entry of a new home. The low angle defines the height of the entry way very effectively. This was a very difficult angle because of the many interesting aspects of the room.

One more thing: consider entering contests that have fees. They usually publish the list of judges and they often have better judges. Keep in mind that most gallery owners and other taste makers have better things to do than look at the thousands of pictures that may be in a good contest. So they get paid. Also a fee keeps people who don’t really believe they have great images from entering. I don’t enter contests often, but when I do I pay a fee.

I also like contests that judge prints. Lot’s of things look good on my monitor, but when I print them, not so much. High quality prints have a resolution several times as high as a monitor. So you can really see more detail, for good or ill. When I want to see the work of a photographer I want to see prints, not just phosphors on a screen. I have hundreds of photo books so I can see the detail in a good reproduction. Looking at a classic photograph on a screen is very disappointing. Unfortunately there are fewer print competitions than there used to be.

I suggested an alternative to competition to the club: giving the members a chance to present a small portfolio. Perhaps two or three members would present at each meeting. That way the members would have more of a sense of what the other members do. But I do know they love their competition.

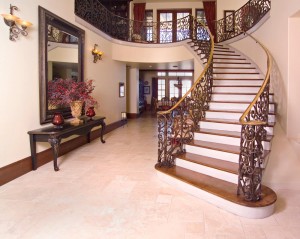
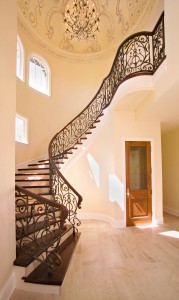
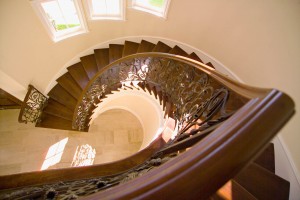
This is a really dramatic room, particularly the staircase. Because the room is shot with a very wide lens the staircase looks a little more dramatic than it does in the room. There are lights on both floors and at the back of the room, so a shot like this takes a while to set up.

First in the list of shameless plugs: it looks like I will be offering a workshop here in Indianapolis. I might have a location lined up, I’ll know next week. I hope to do this in October. It’ll be about lighting. If you’re interested please let me know what you’d like to learn. More information soon! Here are some plugs for my books and classes: you can get the books from Amazon: Understanding and Controlling Strobe Lighting: A Guide for Digital Photographers and the class is at BetterPhoto.com. Here is a sample chapter from the book. There has been nothing but good feedback on this book, so I would guess that you’ll like it. Of course I still hope that you will please consider purchasing my fine art book B Four: pictures of beach, beauty, beings and buildings. Purchases of B Four mean a lot to me, and it is also a fine gift for any occasion. I lowered the price a couple of weeks ago, and that has helped. As you know I teach for BetterPhoto.com. I really hope you’ll sign up my class: An Introduction to Photographic Lighting. Remember that the books and the class keep me updating this blog. My new book, Lighting For Architectural Photography will be out in February.
BetterPhoto.com, The better way to learn photography

September 8, 2011

Now In Indianapolis!

Filed under: Indianapolis,Marketing — John Siskin @ 1:13 pm

Here are some plugs for my books and classes: you can get the books from Amazon: Understanding and Controlling Strobe Lighting: A Guide for Digital Photographers and the class is at BetterPhoto.com. Here is a sample chapter from the book. There has been nothing but good feedback on this book, so I would guess that you’ll like it. Of course I still hope that you will please consider purchasing my fine art book B Four: pictures of beach, beauty, beings and buildings. Purchases of B Four mean a lot to me, and it is also a fine gift for any occasion. I lowered the price a couple of weeks ago, and that has helped. As you know I teach for BetterPhoto.com. I really hope you’ll sign up my class: An Introduction to Photographic Lighting. Remember that the books and the class keep me updating this blog. My new book, Lighting For Architectural Photography will be out in February.

Dodie

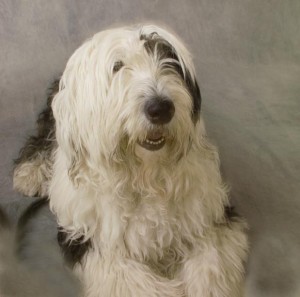
I am now in Indianapolis. The transition from Los Angeles has been very difficult. Our dog, Dodie, an old English sheep dog, passed away on our trip. I still find myself turning around to look for her. I keep hearing her. She was a very good dog.

I had hoped to be further along with marketing and networking by now. And so it goes. I have been to a few photo related events, including a club out in Carmel. Also I have made some connections with instructors at Ivy Tech College. The most important thing I’ve done is to set up my office. I know that many people work well in a sort of chaotic state, but that leads to chaotic work habits for me. So, while much of our stuff is in boxes, my office is pretty nice. I have a local phone number: (417)473-0406. I though about leaving it off the blog, but I spent hours updating all the pages of my web site with the number, so it’s not hard to find. If you haven’t checked out my web site you can see it at www.siskinphoto.com. I hope you’ll take a look, after all this blog is about promoting what I do.

I am going to get more serious about marketing this week. I have already sent out an e-mail introduction to some local advertising agencies. This week I started contacting people involved in construction businesses. I wish that businesses would find me in some magical fashion, but that isn’t likely. One of the biggest problems is how to let people who might need your services know about them without being too annoying. I’ve tried a lot of things over the years: mail pieces, cold calling and so on, but e-mail is basically free and you can contact a lot of businesses at one time. I’m attaching a screen capture of one of my e-mails. Keep in mind that all of the pictures are linked to the web site when you get the actual message.

Photography is more than just a fine art. Just like English is more than just poetry. It is a language that communicates directly with almost any viewer. It makes sense to use visual skills to communicate with potential clients. In the piece I’m sending out I’m SHOWING people that I make images for their kind of business. I’m not going to tell them I make great pictures of saxophones, odds are they don’t care. If I can’t communicate with potential clients, how can I help them to communicate?

I’m going to a camera club this evening. I hope to find out more about photography classes and about suppliers locally. I am also wondering about rental studios and labs. All of this is sort of fun, but it’s also a little intimidating.

I spent some time reviewing and editing the version of my second book the publisher sent. I think it’s working quite well. There is now going to be some material about shooting exteriors of buildings. This should make the book more useful. I did a shot of the exterior of the Indianapolis library at several different time of the day to show how the light changes. The book will be published in February now, rather than November. I hope you’ll get a copy.


When I teach a class I ask people to practice. I suggest that they work with a Styrofoam wig head and cheap flood lights. The wig head is all white, which makes it easy to see the shadows. The flood lights are easy to see and to manipulate. This gives you a sort of a lighting lab where you can practice and experiment. I still use the wig head when I get a new piece of lighting gear. I know I’ve said this before: musicians practice so they can play, why shouldn’t we? If you can only practice with a live model you won’t be able to take the same risks you can with a hunk of Styrofoam. Most models don’t have the patience of the wig head. So, if you’re thinking about a lighting class why not mine?

BetterPhoto.com, The better way to learn photography

July 27, 2011

Moving Time!

Filed under: Indianapolis — John Siskin @ 1:32 pm

I just wanted to mention that I am relocating to Indianapolis, Indiana. Of course I will continue my work with BetterPhoto after I get there. I also hope to do more workshops and to teach classes. I’ll be doing more books when I get there. My next book: Lighting for Architectural Photography will be out in November. You can pre-order at Amazon. My first book: Understanding and Controlling Strobe Lighting: A Guide for Digital Photographers, is also at Amazon and better camera stores I am moving so that I can live with my wife, who now has a job in Indianapolis. I expect to stay in touch through these messages and my website and this  blog. I am sure that the changes in landscape and culture will change the way I see. It will certainly be quite an adventure. If you would like to suggest any contacts for teaching or for commercial photography I would appreciate it. I am leaving in less than a week, and I hope to have the office set up by the 20th of August. Have a fabulous summer and make good photographs!

Thanks, John


BetterPhoto.com, The better way to learn photography

July 6, 2011

Portraiture

Filed under: Lighting Technique,Portraits — John Siskin @ 3:31 pm
Here are some plugs for my books and classes: you can get right away from Amazon: Understanding and Controlling Strobe Lighting: A Guide for Digital Photographers which is at Amazon.com and other places. You can get a Kindle version or a Nook version also. The Kindle version looks OK, but the pagination is a little weird on my reader. Here is a sample chapter from the book. There has been nothing but good feedback on this book, so I would guess that you’ll like it. Of course I still hope that you will please consider purchasing my fine art book B Four: pictures of beach, beauty, beings and buildings. Purchases of this book mean a lot to me, and it is also a fine gift for any occasion. I lowered the price a couple of weeks ago, and that has helped. As you know I teach for BetterPhoto.com. I really hope you’ll sign up my class: An Introduction to Photographic Lighting. Remember that the books and the class keep me updating this blog. My new book, Lighting For Architectural Photography will be out in the fall.
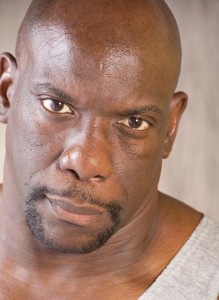
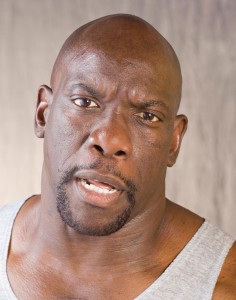
I have the idea that many of the people who take my classes, read the books or even just look at this blog are interested in taking portraits. I don’t get much actual feedback about most of the work I put out, so I could be wrong about this. But no matter, this issue of the blog will be about portraiture. I just did a shoot for Randy, a friend of mine. He is a good subject in that he has strong features and is patient. Actually there is a shot of him in my book on page 88. There are a couple of things about this shoot that might be instructive, at least I hope so.

First, the light is harder than I might use for many portraits. This works well for this subject. You would not want to have this level of reflectivity in the skin if the person had a very light complexion. The density and shininess of the skin should effect the decisions you make about light. The light should be adjusted for each subject. I often use the same tools for portraits but I use them differently. In this case I used a light panel very close to the subject. The panel was about three feet from the subject. It was on the subject’s right side. Often I use a light with an umbrella behind the panel, but in this case I used a strobe with barn doors. The barn doors keep the light from spilling out the sides of the light panel. Using the light directly on the panel gives you a harder effect. The light was at the top of the panel pointed down the panel. This created a gradated light across the panel. I think this gives the face a little more shape.

I had a second light with a beauty dish behind and above the camera. It was on the right of the camera. I was using my old Norman strobes. The Norman beauty dish is about 2 feet across and painted white. I like the catch light it makes in the eye. Also, because of the size of the dish, it is a moderately hard light. Finally I placed a light panel with a gold cover on the subject’s left side. The large size of this reflector means that the position isn’t very critical. The harder, or smaller, a light source is the more critical the position of the light is.

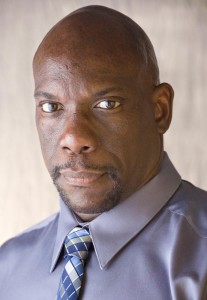
If I was shooting a person with a much lighter complexion I could use shadow to add shape to the face. Randy is quite dark, perhaps a little darker than he actually appears in the first two shots, so if I used a lot of shadow I would actually lose shape. The mid tones of a photograph are much better at expressing information about the subject than the highlights or deep shadows. So, for this subject, I wanted to use highlights to impart shape more than shadow. There are also cultural aspects of this: for reasons I don’t actually understand reflections are not considered flattering to many European skin tones. I think the reflectivity in Randy’s skin is quite flattering and quite effective. I am pleased with the strong sense of three-dimensionality in these shots.

I used a light gray background illuminated with a 1/2 CTO filter to give a warm look in back of the subject. I like the warm color for Randy, which is why I used a gold reflector on his left side. I would avoid a dark background for this subject. First it would have made it tougher to delineate the shape of his head and it might have made him look much more menacing. I dislike portraits where a black background seems to swallow the subject. I included two versions of this image so that you can see the difference expression makes.

In the third shot I moved the gold reflector. It blocked most of the light from the beauty dish. This changes the light on the face, and, importantly, it changes the catch lights in the eyes. I think this creates a more powerful look for Randy, which works well with the more formal shirt and the tie. I think the having the right side of the photograph darker is very effective.

The lights were three Norman LH2400. The power pack was a Norman P1250D. The light behind the light panel had 375 Watt-second and the light on the background had the same. I used a snoot on the background light to control spill. The light with beauty dish was set to 250 watt-seconds. The light panel on the left of the camera had one layer of white cotton broad cloth.

When I teach a class I ask people to practice. I suggest that they work with a Styrofoam wig head and cheap flood lights. The wig head is all white that makes it easy to see the shadows. The flood lights are easy to see and to manipulate. This gives you a sort of a lighting lab where you can practice and experiment. I still use the wig head when I get a new piece of lighting gear. I know I’ve said this before: musicians practice so they can play, why shouldn’t we? If you can only practice with a live model you won’t be able to take the same risks you can with a hunk of Styrofoam. Most models don’t have the patience of the wig head. So, if you’re thinking about a lighting class why not mine?
BetterPhoto.com, The better way to learn photography

June 26, 2011

Investing In Photo Gear

Filed under: Lighting Technique,Photographic Equipment — John Siskin @ 5:29 pm
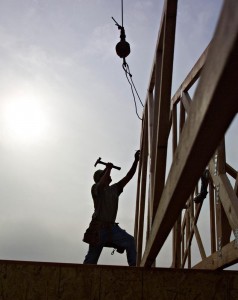
I went through some older blog entries I did for an earlier blog at BetterPhoto. I think this is useful information about understanding the cost of photographic tools. I did make a few updates. All the pictures are from my new book: Lighting for Architectural Photography. The book will be out in the fall, but you can pre-order now at Amazon. That’s where the link goes. Here are some more plugs for my other books and classes: If you would rather order something you’ll get right away try my first book Understanding and Controlling Strobe Lighting: A Guide for Digital Photographers which is at Amazon.com and other places. You can get a Kindle version or a Nook version also. I have no idea what they look like. Here is a sample chapter from the book. There has been nothing but good feedback on the first book, so I would guess that you’ll like it. Of course I still hope that you will please consider purchasing my fine art book B Four: pictures of beach, beauty, beings and buildings. Purchases of this book mean a lot to me, and it is also a fine gift for any occasion. I lowered the price a couple of weeks ago, and that has helped. As you know I teach for BetterPhoto.com. I really hope you’ll sign up my class: An Introduction to Photographic Lighting. Remember that the books and the class keep me updating this blog.

I was thinking about how photo gear endures. I used to think about wearing out equipment, and I still do. But I don’t think about wearing out my camera. Technology will force me to replace it long before it wears out. I am on my fourth digital camera system and, as with the others, it will be retired before it stops working. That wasn’t the case with film cameras. I have a Speed Graphic, still my favorite film camera, that isn’t worn out after fifty years, but it has needed some parts.

I still use it when I want to do personal work with a large negative. It was a pleasure to use. My first digital camera was a Leaf back, a DCB 2 that fit on a Mamiya RZ67. I really disliked that camera. It made 3 separate exposures in order to make a color shot. It was very slow and awkward to work with. I was glad to see it go. But, when it did go it was a working camera, a technological dinosaur. I wanted to write about this topic not to whine about digital cameras, but to discuss the expected life times of photoproducts; and how that should affect the way we buy them. For instance, I think that we should buy cameras that have been on the market for a while; my business can’t stand a recall, or other problem with a new product. I also think that I might need a camera with a large file. I nope to do some business with display prints. As a consequence I believe that a camera has a lifetime between 3 and 5 years. It needs to pay for itself quickly!

When I think about lenses, I have different considerations. Current lenses will wear out: the motors that make the lens auto focus will not work forever. Also the focus tracks are very lightweight, they will have wear problems. The tracks are built this way in order to allow auto focus to function quickly. I would guess that the lenses I use frequently are going to last between five and ten years, not too bad. I can make an investment in a lens that will pay off more slowly, even buying specialty lenses that I might not use more that once a month. So I can easily make a case for buying quality lenses.

Tripods last for decades. I would not be surprised to see my current tripods, I have five, last for more another fifty years. So the cost of a tripod is very inexpensive because the cost is amortized over such a long time. By the way I have five tripods because I have small medium and large cameras. My 8X10 camera requires a tripod that is much larger tan I would need for my digital camera. If you buy a good tripod it may outlast ten cameras, a poor tripod may be lousy from the first day.

One of my goals for these blog entries is to talk about lights. In my discussions about strobes I often hear how expensive they are. An investment in strobes is like buying a tripod, since strobes last such a long time. I have some Norman equipment that I bought new in 1983, that’s almost 25 years. The tubes haven’t broken and the strobes still work. Not bad. More to the point, of the photos I’ve made for money since 1983, most required strobes. More than any other piece of equipment, lights separate the assignment photographer from people who are more hobbyist than professional. So, although it may not seem that way when you right the check, strobes are cheap; they will be with you for a long ling time. Good strobes help make professional photographers!

When I teach a class I ask people to practice. I suggest that they work with a Styrofoam wig head and cheap flood lights. The wig head is all white that makes it easy to see the shadows. The flood lights are easy to see and to manipulate. This gives you a sort of a lighting lab where you can practice and experiment. I still use the wig head when I get a new piece of lighting gear. I know I’ve said this before: musicians practice so they can play, why shouldn’t we? If you can only practice with a live model you won’t be able to take the same risks you can with a hunk of Styrofoam. Most models don’t have the patience of the wig head. So, if you’re thinking about a lighting class why not mine?
BetterPhoto.com, The better way to learn photography

June 8, 2011

More Product Photography

Filed under: Commercial Photography,Photography Communication — John Siskin @ 5:30 pm
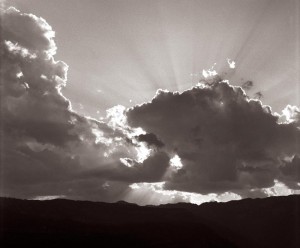
Big news here in the land of self promotion! My next book, Lighting for Architectural Photography, is now listed on Amazon. Of course you can’t get a copy yet, but you can order. And there was great rejoicing!  If you would rather order something you’ll get right away try my first book Understanding and Controlling Strobe Lighting: A Guide for Digital Photographers which is at Amazon.com and other places. You can get a Kindle version or a Nook version also. I have no idea what they look like. Here is a sample chapter from the book. There has been nothing but good feedback on the first book, so I would guess that you’ll like it. Of course I still hope that you will please consider purchasing my fine art book B Four: pictures of beach, beauty, beings and buildings. Purchases of this book mean a lot to me, and it is also a fine gift for any occasion. I lowered the price a couple of weeks ago, and that has helped. As you know I teach for BetterPhoto.com. I really hope you’ll sign up my class: An Introduction to Photographic Lighting. Remember that the books and the class keep me updating this blog. I’ll be writing about product photography again this week. This could be the topic for book three, so I would appreciate your feedback.

Any photograph may evoke a feeling or a memory, that is something photography does well. A beautiful sunset over the ocean always makes a good photograph. It will always mean more to those who remember than sunset, but it will stir memories of sunsets in other people. But, in a product shot, this kind of emotional connection is not the first goal of the photograph, sometimes, such as with a new product, it isn’t possible. I think the first goal of a product shot is always to make the product real. So if the product is a toothbrush you need good detail on the bristles. You’ll want to make the plastic handle look clean and shiny. You can’t count on the imagination of the viewer to make your product look good. When NASA makes an artists rendering of what a rover will look like on Mars, it isn’t really a lot different from a shot of a BMW taking a tight curve in Big Sur. The idea is to make the object real, and then really exciting.

The first thing is focus, and you need enough depth of field to keep the whole product sharp. I have seen a lot of fuzzy product shots on eBay, and they don’t add a romantic look to a strobe or a pocket watch. Second you want the product to separate from the background, don’t put a blue product on a blue background. While I think about it, it is usually bad to make the background more vibrant than the subject. If your subject is neutral color and you put it on a bright red background then all that people will see is the background. Finally pick an angle that will give a sense of depth to the product. If you shoot a box of corn flakes shoot it so that you can see a little of the side and some of the top. This way you’ll show a box rather than just the front. You don’t want to make a shot you could get with a flat bed scanner.

The light is important. You can do a good product shot in open shade. Open shade is outside where the subject is lit by the sky, but not by the sun. This will create little or no shadowing on your product. The one problem is that open shade is that the light is blue; after all it comes from the sky not the sun. Sometimes you can get a better effect if you use the cloudy day setting on a camera or phone. Yes you can do a useable product shot on a phone. You can build better lighting in a studio. In this case you can control the shadows in a way that will help define the shape of the product. A really good product shot gives the item a sense of three-dimensionality.

One other thing that can make a product jump off the page is clipping it from the background. I find this a very tiresome chore. I usually use a company called Deepetch for this, you can also find them on Facebook. They just did a very complex job clipping parts of a house for me. It turned out great.

I did an article that discusses how to control reflection, very important in product shots. You can download it here (www.siskinphoto.com/magazine/zpdf/reflections.pdf). You can see some of my other articles here (www.siskinphoto.com/magazinearticles.php). I hope they will make you consider buying my books or taking my class at BetterPhoto (www.betterphoto.com/courseOverview.asp?cspID=172). Of course I also do business consulting. Let me know if you need help.

It looks like I will be relocating to Indianapolis in a few weeks or months. If you have any contacts, with clubs or business that you could share I would be grateful. If you would like to attend some lighting workshops in the Mid-West drop me a line at john@siskinphoto.com. You can find me on Facebook and Linkedin, just in case you’re looking.

When I teach a class I ask people to practice. I suggest that they work with a Styrofoam wig head and cheap flood lights. The wig head is all white that makes it easy to see the shadows. The flood lights are easy to see and to manipulate. This gives you a sort of a lighting lab where you can practice and experiment. I still use the wig head when I get a new piece of lighting gear. I know I’ve said this before: musicians practice so they can play, why shouldn’t photographers? If you can only practice with a live model you won’t be able to take the same risks you can with a hunk of Styrofoam. Most models don’t have the patience of the wig head. So, if you’re thinking about a lighting class why not mine?

BetterPhoto.com, The better way to learn photography

May 16, 2011

Natural Light Again?

Filed under: Lighting Technique,Photography Communication — John Siskin @ 12:30 pm

Before we get to the blog, here is the self promotion: my book Understanding and Controlling Strobe Lighting: A Guide for Digital Photographers is on Amazon.com. Here is a sample chapter from the book. There has been nothing but good feedback on this book, so I would guess that you’ll like it. Of course I still hope that you will please consider purchasing my fine art book B Four: pictures of beach, beauty, beings and buildings. Purchases of this book mean a lot to me, and it is also a fine gift for any occasion. I lowered the price a couple of weeks ago, and that has helped. As you know I teach for BetterPhoto.com. I really hope you’ll sign up my class: An Introduction to Photographic Lighting.Remember that the books and the class keep me updating this blog.

I would guess that I have written about the words natural and artificial as they apply to light in the past. Every so often somebody says or writes something that makes me want to revisit the topic. When I’ve written about this topic in the past I have included images lit by strobes, this time I’m including daylight images.

Click on the image for information about the super wide camera that made this shot. This camera usees the Nikkor 28mm shift lens.

There are many places where the terms natural and artificial make sense, say with food or even gem stones. We put a high value on natural food and an even higher value on natural rubies. Which is better: natural granola or sugar frosted flakes? Would you be happier if someone gave you a one carat natural ruby, or a ten carat ruby grown in a lab? So the terms natural and artificial have an emotional value associated with them. I know several photographers who say that they are natural light photographers. I do not know anyone who uses that phrase who is also an expert at creating fine light with strobes. There are plenty of people who are good at using ambient light and at using strobes, but they seem to avoid the term natural light photographer.

I think the mercury vapor lights are bad light sources for making photographs. I don’t think I have ever made a good photograph with mercury vapor lights. When I look at these lights with my spectrometer I see only a green, blue and orange line. I have a bad attitude towards these lights. However if I wanted to work in black and white I might be able to do good work with these lights. A big part of why I don’t use these lights is my attitude. It might also be that you typically find these lights used as streetlights. Mercury vapor light doesn’t occur in nature.

The natural light sources that I see used in photographs are the sun, fire and rarely lightning. Bio-luminescence is also natural light, but I have never seen a photograph made with a hundred thousand lightning bugs in a really big jar.

Shot with my digital camera. The hazy sunlight is one of mt favorite types of sunlight.

Lava also counts, but it is somewhat difficult to control. Glowing wires do not occur in nature nor do tubes filled with fluorescent chemicals. As I have mentioned before, for most photographers it would be easier to differentiate between found light and light that you controlled (found light and made light?) or perhaps more usefully continuous light and instantaneous light. Most photographers have a much easier time using continuous light because they can see how the light interacts with the subject. Instantaneous light, this means strobes, but it would apply to the old flash bulbs too, requires an understanding of how light works before it can be used effectively.

There is nothing inherently different about how the light from a strobe works than how light from the sun works. However the strobe is much more portable and much easier to use with accessories. It is very tough to put the sun over head at midnight, even if you go to Alaska. A photographer needs to learn how to control and manipulate light so that you can start with an idea and capture it with a camera. In order to do this we have to practice and improve our tool kits.

Sometimes sunlight is quite good!

If you choose a tool, based on the manufacturer’s recommendation, and then take it to a shoot, you have a good chance of having problems. You need to test it first. Remember the goal of people who make lighting and camera gear is to sell you more gear, NOT to make you a better photographer. Recently I’ve had people telling me that shift/tilt lenses and soft boxes will solve photographic problems they have. I have these things, and have used them, and don’t recommend them. I note that the people interested remained interested despite my comments. Personally, I do not trust equipment manufacturers. I guess others do.

When I teach a class I ask people to practice. I suggest that they work with a Styrofoam wig head and cheap flood lights. The wig head is all white that makes it easy to see the shadows. The flood lights are easy to see and to manipulate. This gives you a sort of a lighting lab where you can practice and experiment. I still use the wig head when I get a new piece of lighting gear. I know I’ve said this before: musicians practice so they can play, why shouldn’t we? If you can only practice with a live model you won’t be able to take the same risks you can with a hunk of Styrofoam. Most models don’t have the patience of the wig head. So, if you’re thinking about a lighting class why not mine?
BetterPhoto.com, The better way to learn photography

« Newer PostsOlder Posts »

Powered by WordPress