Photo Notes A place to talk about making images.

April 12, 2012

Back To Basics

Filed under: Basic Photo Technique — John Siskin @ 2:07 pm
Sky & Sun

Sky & Sun

I was talking with a few old friends who are also photographers. Both of them were complaining about younger photographers who don’t know anything, as they would have it. Now neither of the guys teaches or interacts with new photographers in any regular way. One of them explained to me that you couldn’t really learn Photoshop without experience working in a chemical darkroom. I am older than either of these guys and I don’t believe any of this. The reason is that I actually interact with new photographers all the time. Teaching here at BetterPhoto will do that.


Inspired by my old friends, I want to go over the basics. Cameras, regardless of whether they are digital or film share some characteristics, these are like the language of the machine. For instance whenever you use a variable size aperture in a lens, what we refer to as an f-stop, you introduce changes in the distances that are in sharp focus. We call this depth of field, not really a very good name.

Speaking of bad terminology, I will start with the word STOP. Now we all know what that means, but not moving has nothing to do with the term in photography. In photography it means a relative change in exposure: if you have twice as much light in your shot as you did previously you have one stop more light. It doesn’t matter if the change is caused by changing your aperture or shutter speed or because the sun cleared the horizon, if you have twice as much light that is one stop more light. If you have four times as much light that is two stops, well you only doubled the amount of light twice. If you have 1/8th as much light you have three stops less light, maybe the sun just went under the horizon.

I know that a lot of people don’t want to talk about math, but it is the key to controlling the pictures you take. You can take all the pictures you want on automatic, but if you want to MAKE pictures you need to understand the controls on the camera.

March 26, 2012

Doing Business with Interior Designers

Filed under: Architectural Lighting,Commercial Photography,Marketing — John Siskin @ 10:18 am


Amazon is shipping copies of my second book: Photographing Architecture. This is really exciting! Of course you can also get my first book Understanding and Controlling Strobe Lighting. You can download copies of most of my articles and some do it yourself projects. I teach three classes at BetterPhoto: Portrait Lighting on Location and in the Studio, An Introduction to Photographic Lighting and Getting Started in Commercial Photography. I hope you’ll check them out.
I was asked to write something about how to hire a photographer for a thread at Linkedin. The group is from the National Kitchen & Bath Association. I spoke to one of the chapters last year. I thought it might be good to start with a few things about how to do business with a designer and post it here. If you came here from the Linkedin group you’ll notice that some of this was posted there.

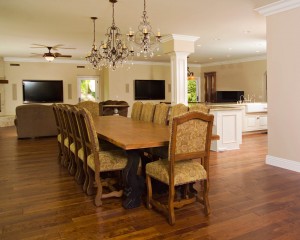
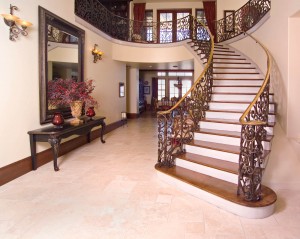
I’ve included a lot of kitchen and bath photos I made for Terry Beeler and Son Contractors, Inc.
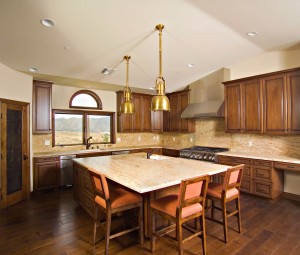
If you’re a designer there are a few things you want to know before you start contacting photographers. First, what do you want from the shoot. Is the shoot for your portfolio only? Are you going to use the shot on a web site? Do you want to submit it to a contest or a magazine? What will you do with the shot? Do you want to hire a photographer who has a relationship with a magazine? This can increase the chances of publication. Is there a particular time or day when this project needs to be shot? Does the weather matter? What is your budget? Exactly what needs to be done? If you only designed the kitchen, then that is what needs to be done. If you also designed a bath or a second floor kitchen tell the photographer up front. What you’re really asking yourself is how are these photographs going to fit into my overall marketing plan?
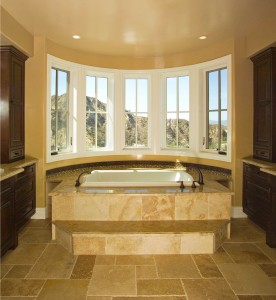
For both photographers and designers: large portfolios are very impressive. I had a client with a 16X20 inch portfolio; it was very effective. The person buying the kitchen or bath shouldn’t be asked to make an important decision off a 4X6 inch print or your ipad.
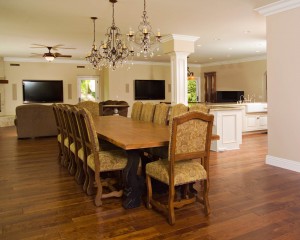
Questions to ask the photographer:

Are you available to do the shoot? This is a question about time, location and date.

Do you have experience with this kind of job? If you’re shooting a kitchen a photographer should be able to show you sample interiors. Honestly, if you don’t really like what you see don’t hire the person.

Ask to see a print the size you use for your portfolio. Prints require much more resolution than screen shots to look good. If you don’t see a print you don’t know what the photographer can provide.

How does the photographer charge? How much of a deposit? Is there a late cancellation fee or a weather cancellation fee? Can the photographer provide prints or books or web sized image or other services?

Tell the photographer you want to receive the RAW files (if technology changes you may want RAW files, if not they are probably useless to you) of the shots as well as converted files. You’ll probably want the converted files as jpg.

Your shots will require work in Photoshop. You want to know how the photographer charges for Photoshop work. Photoshop work can be difficult or impossible to estimate before a shoot. Things that seem to be easy are not always easy.

Understand your rights. You are not only paying for photographs you are paying for the right to use them. If your client copied the kitchen you designed into another house you would feel cheated. The photographer has rights to images even after the bill has been paid. Both sides can be unreasonable about this. I believe that a client should be able to use the images in a portfolio or on the web for as long as he/she would like. If my photographs are used in a magazine article I expect credit printed in the magazine and at least five copies of the magazine; I may also expect compensation. If you expect to use the images in a magazine or television ad it will affect the work I do on the images and it will affect your costs. If an image I made is sold to a third party I expect compensation. I want the right to sell the image to the contractor or other interested companies. In general I really want you do anything that will make you more successful, as I think it may lead to more work.
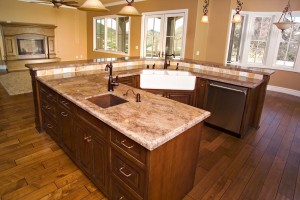

Everybody involved in this sort of a job should understand that time is important. Generally you’re going to be in someone’s home and you don’t want to inconvenience the homeowner more than necessary. Everybody should be on time. Designers need to understand this clearly: if you make the photographer wait for two hours, or twenty minutes, while you adjust things in the photograph it will add to the cost of the photography, often quite a lot. I have arrived at shoots and been told: “Oh, sorry not ready. Can you come back tomorrow?” Maybe I’ll come back after you pay 100% of today’s charges. Honestly, this shouldn’t happen as often as it does. If you’ve hired a photographer to work, at a given time and place, be ready. Photographers tell your client the are paying for your time: day rate or hourly, so be ready for the shoot.
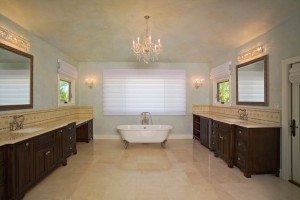
Photographers:
Ask for a list of suppliers and contractors who worked on the job. If the designer will give it to you up front be willing to offer a substantial discount. If anyone on the list wants an extra shot, or a shot of a different room, clear it with the designer and the homeowner. If there is any chance of magazine or ad publication get a property release. Additional sales of these images can be very profitable. In addition these contacts can lead to additional jobs.
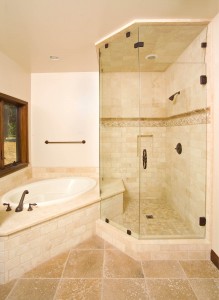
Be very specific with the client about their needs and how they will use the image. Write this down and get the client to sign. If the client says the shot is for the web and then tries to print it in a magazine that low-res file will be a problem. You need to be able to show the client that you delivered what was ordered. Don’t promise what you can’t deliver! Deliver on time. If the client busts the budget tell them how and why.
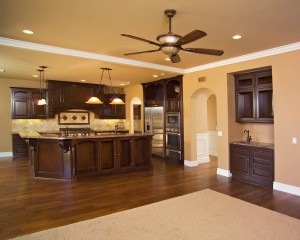
You should have a written agreement with the client, and it should include the following information:

Client’s name and contact information

Date and time of the shoot

Address of the shoot

A description of the photographs you will make.

What kind of files and how many files will be delivered.

Projected delivery date of the final images

Cost and the size of the deposit. When the balance is due.

Inform the client that images may be sold to contractors and suppliers if you have discussed this.

Any information that is particular to this job, including the client’s rights to use the photos.
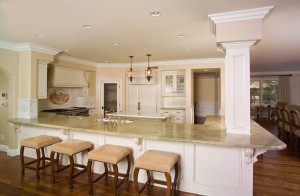

Well that’s it. Back to a plug for BetterPhoto classes. Seriously folks take a class, please.
Thanks, John

I teach three classes at BetterPhoto:

Portrait Lighting on Location and in the Studio

An Introduction to Photographic Lighting

Getting Started in Commercial Photography

I hope you’ll check them out. I have been told that prices are going up this year at BetterPhoto, so you might want to sign up soon.

March 14, 2012

Shooting the Irving Theater!

Filed under: Architectural Lighting,Indianapolis,Lighting Technique — John Siskin @ 3:53 pm

I was talking about the workshop at the Irving Theater is the last blog as well. This week I’m going to show you the steps in the shoot.  This was the actual shoot for the Irving so the participants got to see the actual process rather than a staged version of the shoot. I’ve been teaching for a couple of decades and I’ve discovered that many students like to see the way shoots actually work, and the actual problem solving that goes into a shoot. This blog will help those who couldn’t attend. Of course not every moment in this kind of a production is good entertainment. Personally, I sometimes feel as though I’m making a bad landing in front of an audience. Especially if I’m shooting in a theater. I hate to start with a bad shot, but most things begin in the dark. This is the progression of shots that led to the final shot from the Irving Theater on March 4. More than twenty people were present for the experience. There is a short equipment list at the end of the blog. For more information please check out my books. The links are at the top of the page.

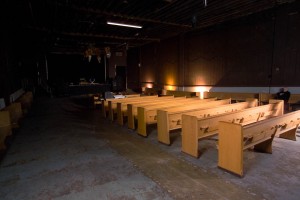
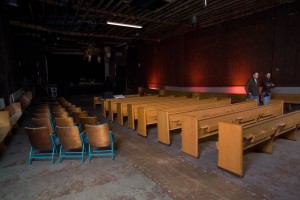
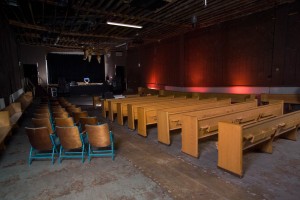
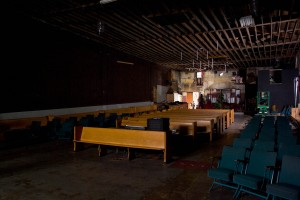
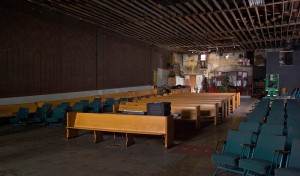
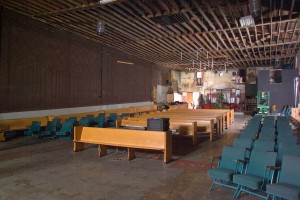
Irving 01: Ambient light, the place is a cave with little light. Exposure: 1/90 at F8, which was the exposure for all these shots. The differences are in the light.


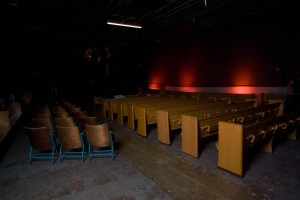
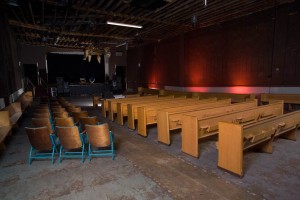
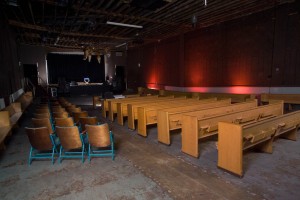
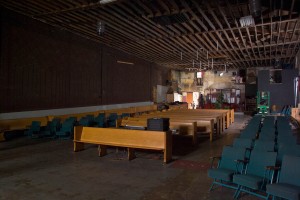
Irving 02: Two lights, a Norman LH2400 with 500 watt seconds on the right side of the frame into an Alien Bee parabolic reflector, and a Norman 200B pointed at the back wall. Both of these are tests.

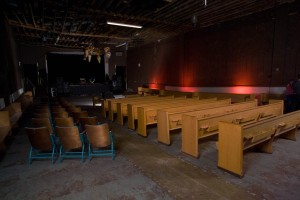
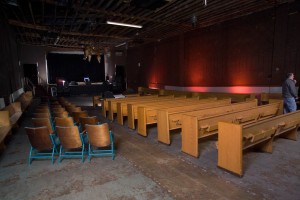
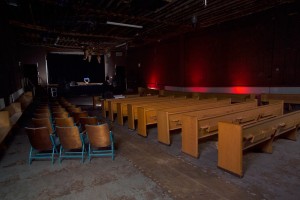
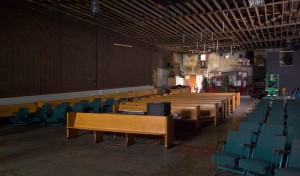
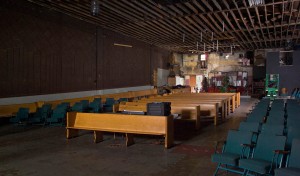
Irving 03: I added a 45 inch umbrella with a Calumet 750 watt-second Travelite near the camera. The Travelite is set to 1/2 power. I added two more Norman 200B units to the back wall with full CTO gels on each. The CTOs are filters to make the light warmer.


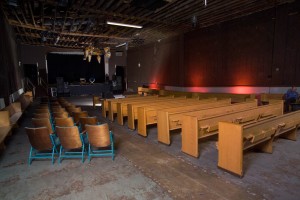
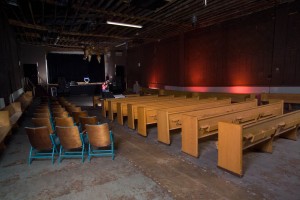
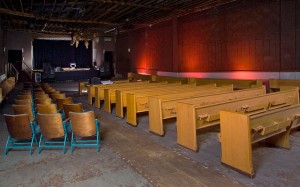
Irving 04: I put a Norman LH2400 in the front of the room, just in front of the first pew. The light has about 500 watt-seconds. I put barn doors on the light to control the spill. The spill is bad in this shot.


Irving 05: The Travelite and the Norman 200Bs are the only lights that fired. The CTO gels have been replaced by red gels, looks better. A shot with fewer lights makes it easier to balance the 200B units, but I didn’t plan it. I had problems with the slaves. The chairs appeared.


Irving 06: The Normans at the back and at the front fired. Better! I abandoned the Alien Bee Parabolic reflector and used a 60-inch umbrella on the Norman. This umbrella has a much larger and softer spread. I had hoped the Parabolic umbrella would give me some sort of spot on the stage, this was obviously way to optimistic.


Irving 07: More power in the Travelite and the Norman LH2400 at the right of the camera. Things look better. The red lights have been slightly repositioned.


Irving 08: Another bad slave shot, the light in front didn’t fire. I had radio slaves on the 200Bs and the Travelite near the camera; the other strobes had optical slaves. Slaves can be a problem.Here’s an article about slaves.


Irving 09: I kicked up the power on the strobes. The light at the front ended up with 750 watt-seconds. It has more in this shot. The Travelite was at almost full power. The LH2400 on the right had 1200 watt-seconds. The Norman 200Bs ended up at 100 watt-seconds, which was less then they started with.


Irving 10: The LH2400 in front of the pews was reduced in power to the final 750 watt-second. Norman 200Bs were added on the stage. The one on stage left has a 30” shoot through umbrella. This didn’t work: too much light out the back, 200 watt-seconds. The one on the right had  a metal 8” parabolic reflector to throw a spot on the chair, I25 watt-seconds.


Irving 11: The 30” umbrella on the stage was replaced by a shoe cover. Shoe covers are very useful. One of my assistants, Jeff or Jeff put a jacket between the speakers to help hide the light on the stage.


Irving 12: So we get the idea that slaves don’t work every time. This is particularly true with optical slaves in a room with dark walls.


Irving 13: Basically the final shot, but the fluorescent light is on. I think this is the same as #11, but without people.


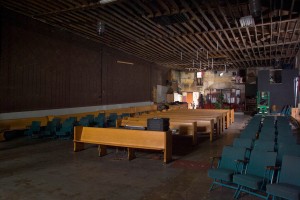
Irving 14: The final capture! The fluorescent has been turned off, so we are in the dark.


Irving 15: The shot after retouching. For more on the retouching please see my last blog entry.

Norman LH2400: these are studio strobes. Lights have to be plugged into a power pack to work. The power pack is plugged into the wall. My lights are Norman’s 900 series. I have 8 heads and three power packs, 1-2000 watt-second and 2-1250 watt-second units.

Norman 200B: These are location strobes. The have separate power packs, both AC and DC so they are very flexible. Maximum output is 200 watt-seconds. I used DC packs on the wall and AC packs on the stage. I have 7 heads and 5 packs. This is a very flexible system.

Calumet Travelite 750. A 750 watt-second mono-light. This is a self-contained unit that plugs directly into the wall.

Alien Bee 86 inch parabolic umbrella: Let them describe it. They do a better job: http://www.paulcbuff.com/plm-silver.php.

Norman 8-inch parabolic reflector. This throws a very tight spot. For a little more information on Norman’s reflectors for the 200B: http://normanlights.com/battery_reflectors.asp.

Well that’s it. Back to a plug for BetterPhoto classes. Seriously folks take a class, please.
Thanks, John

I teach three classes at BetterPhoto:

Portrait Lighting on Location and in the Studio

An Introduction to Photographic Lighting

Getting Started in Commercial Photography

I hope you’ll check them out. I have been told that prices are going up this year at BetterPhoto, so you might want to sign up soon.

March 8, 2012

Retouching the Irving Theater

Filed under: Indianapolis,Photographic Education,Post-Processing — John Siskin @ 4:52 pm

I did a workshop at the Irving Theater in Indianapolis on March 4.  I offered 25 tickets and had a sell out. I shot the Irving with the participant and the owner and a couple of assistants. This was the actual shoot for the Irving so the participants got to see the actual process rather than a staged version of the shoot. I’ve been teaching for a couple of decades and I’ve discovered that many students like to see the way shoots actually work, and the actual problem solving that goes into a shoot. Of course not every moment in this kind of a production is good entertainment. Personally, I sometimes feel as though I’m making a bad landing in front of an audience. Especially if I’m shooting in a theater.

The next step in this process is to discuss post-production. What you do after the shot can be as important as what you do in front of the camera. I should point out that the images here will enlarge if you click on them. The next shots are the before and after Photoshop for the first shot:

Original Capture


Final Version

I used eight lights to make this shot. The theater lights were turned off.

In this next shot I used only 4 lights, plus a little daylight co ming through the windows. I’m going to walk through the steps of post-production with this shot.


Version 1: The raw file is converted to jpg without adjustments. There are four lights: 2 behind the camera each at 800 watt-seconds with a 45-inch umbrella. One mono-light on the right side of the frame, which you can see. It has about 600 watt-seconds with a 45 inch umbrella. Finally a 500 watt second light hidden at the back of the shot. This had a shoe cover over the strobe.


Version 2: Raw file converted with Fill Light adjustment at 9, blacks at 1, Vibrance at 15 and Saturation at 10.


Version 3: Same as above with 1 stop higher exposure and blacks set at 0. This version might be used to create lighter areas in the finalversion. Under other circumstances I might make a dark file as well as a light file. This was the last work done with the RAW files.


Version 4: I took the dark version and put it over the light version in Layers. I used the eraser tool set at opacity 15%. This gave me a way to lighten the image selectively. I can vary the size and softness of the eraser tool for good control. This works better than dodging for me. I wanted the ceiling dark. The walls are just a little lighter and I kept the floor dark. I lightened the pews just a bit. When things looked good I flattened the file. You need to do any work in layers before you work with cropping.


Version 5: This is all the cropping. First I use lens correction because my light has slight barrel distortion. I usually have this set around 3. Then I do the cropping and change the perspective with the cropping tool. I do the cropping incrementally that works better for me than one big correction. You‘ll notice I cropped out the light on the right side of the frame.


Version 6: Next I used the burn tool. In some circumstances I would build another layer from raw (not after cropping) but the details of this shot don’t require it. I had the tool set between 8% and 20% for this and I changed the size of the tool as needed.


Version 7: I usually do unsharp mask twice, once to increase contrast in the image. This time my settings were Amount 10 and Radius 40 for that. My second sharpening was Amount 35 and Radius 2.5, this actually sharpens the image. Of course how you do this is going to depend on your camera and lens.


Version 8: This image is a little grainy, especially on the wall. I made a duplicate layer and removed the noise on that version. The settings were Strength 9, Preserve Details 10, Reduce color noise 90 and no sharpening. This is a lot, but this isn’t the layer we’ll look at. Then I used the eraser tool, as did I above, to custom blend the two versions. The eraser tool was very big, 900 pixels, so that I could fix areas of the shot.


Version 9 (Final): I’m going to look at the image at 100%. I’ll fix dust and problems in the image like the hanging fluorescent lights. This will take a while. I kept the reduced noise layer for this, so I can also spot fix noise. This is the image I’ll hand to Dale at the Irving Theater. He may want additional cropping or other changes, but I’ll do these after I consult with him.

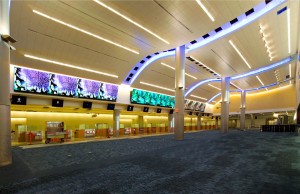
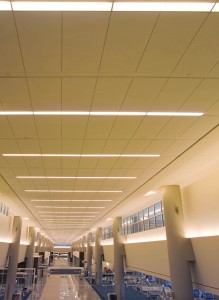
Now maybe you don’t want to do this. or perhaps there are jobs you don’t have the skills to retouch. That happens to me frequently. I use a company called Deepetch.com when I need extra help. You can see that there were a lot of ceiling tiles missing in the first version of this shot. This is from my recent airport shoot.

Version 1

Version 2: fixed ceiling tiles


In Version 2 all the tiles suddenly appeared. Deepetch did the job in just a day and for an extremely reasonable price. As photographers it is our responsibility to get the job done right, but that doesn’t mean we have to do everything ourselves.
I teach three classes at BetterPhoto:

Portrait Lighting on Location and in the Studio

An Introduction to Photographic Lighting

Getting Started in Commercial Photography

I hope you’ll check them out. I have been told that prices are going up this year at BetterPhoto, so you might want to sign up soon.

February 21, 2012

Location Work

Filed under: Architectural Lighting,Photographic Equipment — John Siskin @ 7:04 pm


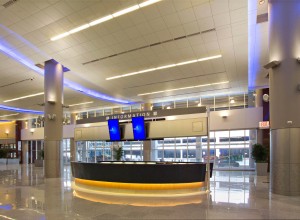
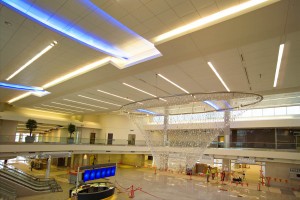
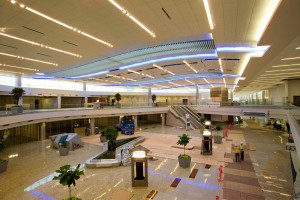
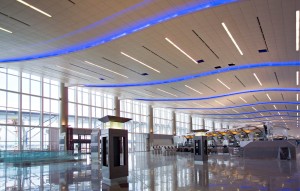
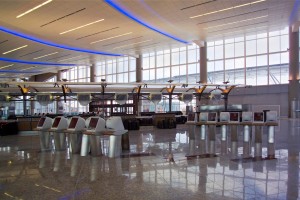
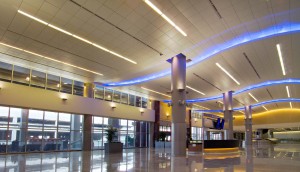
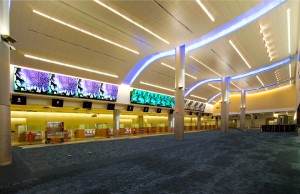
I’m doing a workshop here in Indianapolis on March 4. This one will be about shooting interiors, so it will go over some of the same information as my new book: Photographing Architecture . Here’s a link to more information about the workshop. The workshop is free, but tickets are limited.  Of course you can also get my first book Understanding and Controlling Strobe Lighting.   I had a great experience shooting the airport. The images in this blog entry are all from that shoot. I did this shoot for Chusid Associates one of my Los Angeles clients. Chusid Associates is a marketing consultant specializing in architectural and building products. Their blog offers good tips on the value of photos as sales and marketing tools. The project is an expansion of Hartsfield–Jackson Atlanta International Airport and, as you can see, it is still under construction. The photos are for Ceilings Plus a leading producer of architectural ceiling and wall panels. My instructions were to capture how the ceiling panels help to express the architecture of the facility. I am glad to have the chance to work with Chusid Associates again after my move. I have always had good experiences working with them, and the chance to work with very interesting clients. Much of the micro work on my site is work I’ve done for Chusid Associates.

The shoot reminded me of a couple of things I want to add to this blog; this week I’ll be writing about location shooting. There are two kinds of locations: the first is the one you can drive to. I’ve done thousands of this kind of location shoot. In fact every time I get a new car I drag out the equipment to figure out an efficient way to load the new vehicle. I have a lot of lighting gear, eighteen strobes and the quartz lights, so it takes up a lot of space. Space is the first thing I think about with a vehicle, the second is how beat up the car looks. I like a car to have a certain level of urban camouflage. If the thing looks too good it will draw thieves, better to avoid attention. As you can imagine I mostly end up with used pick-up trucks and vans. I prefer the vans because they are easier to load.

Of course for the airport shoot I had to fly in. This brings a whole different challenge to location work. When I drive to a shoot I can bring everything and the kitchen sink. If I did that on this shoot my luggage charge would have been staggering. When I got off the plane I wouldn’t have been able to get the gear to a rental car. So the key here is to bring just what you need and some back up. This shoot was largely ambient light, but a few shots would require strobes. I knew that I would be using several captures to make my final image (see this earlier blog for details https://siskinphoto.com/blog/?p=621) so a good tripod would be absolutely essential. I took my Gitzo legs and a Manfrotto 3025 head. I’ve had the Gitzo legs for at least fifteen years, so I know I can rely on them. The 3025 is not my favorite head, but it’s sturdy, light weight and small, a terrific combination for travel. I also took a five-gallon portable shower. This is basically a heavy-duty plastic bladder I can fill with water. I use this to make my tripod heavier. Weight makes the tripod more stable, which is essential if you want to make several captures from exactly the same place. Too often people buy lightweight tripods that don’t provide enough stability. I have several tripods and heads for different cameras and situations. As I have mentioned in other places tripods are very inexpensive because they will last for decades. So it makes sense to get good ones. One other thing I liked about the Gitzo legs for this job: they fit inside my Pelican case. The Pelican is one of the few cases I’ll check into airline luggage. Of course I also took a chain-pod to stabilize the camera.

I took some of my Norman 200B units to handle whatever lighting needs I would have. It turned out that I needed the Normans to shoot a picture of the ducts behind the ceiling, a bathroom and one of the ceiling shots. While these weren’t the most important shots of the day, they were critical for the client. The 200B units are very sturdy. They produce a lot of light and they recycle incredibility quickly. I used to recommend them all the time, but, as they haven’t been made in about 20 years, I’ve stopped suggesting them. Norman has a new unit called a 200C, which is nice but awfully expensive. They also brought out a 400B that is twice as powerful as the 200B. If you really need a very fast portable unit I would look at this. However I now recommend the LumoPro 160 when I recommend a battery unit. They produce a useful amount of light, and are small and inexpensive. One of the reasons I like the Normans is that they work like the studio strobes I started with, the LumoPros work like dedicated strobes, which is very helpful to people who started with digital equipment.

In addition to the 200B units, which need power packs to run the heads, I needed reflectors, umbrellas, shoe covers as well as light stands. The light stands are always the biggest problem on a job like this. I think that light stands are the most difficult problem. They take up a lot of space and they weigh a lot. I haven’t seen a light stand I really like. What I want is a stand that extends to ten feet, collapses to two feet and weighs about two pounds. I’m not going to get that. I do have one small stand that was meant to be a light stand, but it only goes to about 6 feet. I have a couple of stands that were collapsible music stands. I cut the tops off of them. They are small, but they don’t get that tall and are kind of flimsy. The other thing I carry is a 1/4X20 stud adapter. This allows a tripod to be used as a stand. I also have a vice grip that has 1/4X20 threads welded to it, and the adapter fits on that. This isn’t the same thing, but I might buy one of these. I take some other stuff when I go on location. The last things I pack are clothes, which I use to pad everything else.

I teach three classes at BetterPhoto:

Portrait Lighting on Location and in the Studio

An Introduction to Photographic Lighting

Getting Started in Commercial Photography

I hope you’ll check them out. I have been told that prices are going up this year at BetterPhoto, so you might want to sign up soon.

January 31, 2012

Reflectors 2

Filed under: Basic Photo Technique,Lighting Technique,Photographic Equipment — John Siskin @ 5:19 pm

Amazon is shipping copies of my second book: Photographing Architecture. This is really exciting! Of course you can also get my first book Understanding and Controlling Strobe Lighting. You can download copies of most of my articles and some do it yourself projects. I teach three classes at BetterPhoto: Portrait Lighting on Location and in the Studio, An Introduction to Photographic Lighting and Getting Started in Commercial Photography. I hope you’ll check them out. I have been told that prices are going up this year at BetterPhoto, so you might want to sign up soon.

So it’s taken me a while to get back to this blog. No real surprise there. As mentioned I have some samples of what reflectors do for you. Before I get to that I want to mention a few things I have coming up. I will be in Atlanta this weekend. I am going down a few days early for a shoot at the Hartsfield-Jackson airport on Monday. I’d make a joke about shooting in an airport, but the security people have no sense of humor. It’s pretty exciting to be shooting a large public space for a client. I’ll post the results when I have them.

I also want to say something about testing. I took a while to get back to this blog because I needed to test a bunch of reflectors. I still don’t have a studio here in Indianapolis, so this is a pain in the neck. I couldn’t get the reflectors as far from the seamless as I would like. I only shot half of the pattern of the light. None of this matters. Since I hadn’t done this in a while, and I have some new reflectors, I learned things. It is vitally important to test your gear. Not only do you learn about how well it works, you learn about how it works. The strobe manufacturer can tell you about the spread of a reflector, soft box or umbrella, but you won’t know how it actually looks until you do the test. I notice that very few of my students have ever tested their strobes. I encourage them to do a test, and so should you.

Norman LH 2400 strobe 6 in reflector. This is the light I choose to base other power settings on. So neutral power, large coverage


Norman LH 2400 Stove pipe snoot small coverage neutral power


Norman LH 2400 22 in Beauty Dish. Very wide coverage, smooth gradation. -2/3 power


Norman LH 2400 6 in grid spot. Very very small coverage. -1 & 1/3 power


Norman LH2 5 inch reflector. Actually the coverage is surprisingly small. A +5 the power is quite high


Norman Lh2 Glass Dome reflector. long coverage, with soft gradation. -1/3 power


Norman LH 2 Parabolic reflector, small coverage from a very shiny focused reflector. +6 power


Norman LH2 Parabolic w/shoe cover. The cover diffused the light a lot, so long coverage. Neutral power


Norman LH2 6 in/2Q reflector, an alternative basic reflector. Larger coverage w/fast gradation. +3 power

Norman LH2 Homemade black snoot. Small coverage. with -1 power (negative)

BetterPhoto.com, The better way to learn photography


January 7, 2012

Reflector or Reflector?

Filed under: Lighting Technique,Photographic Equipment — John Siskin @ 11:51 am


Amazon is shipping copies of my second book: Photographing Architecture. This is really exciting! Of course you can also get my first book Understanding and Controlling Strobe Lighting. You can download copies of most of my articles and some do it yourself projects. I teach three classes at BetterPhoto: Portrait Lighting on Location and in the Studio, An Introduction to Photographic Lighting and Getting Started in Commercial Photography. I hope you’ll check them out. I have been told that prices are going up this year at BetterPhoto, so you might want to sign up soon.
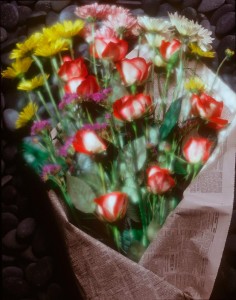
I’ve often said that I believe that strobes are the best lights available for still photography. The reason I like strobes is that you can make the light work in a large number of different ways. You can make a small spot or a broad light; you can make hard light or soft light; you can even project images (www.siskinphoto.com/magazine/zpdf/strobeprojector.pdf). There are a number of different sorts of tools that give you this control; many of them are called reflectors, which is a problem. Entirely different sorts of tools are called reflectors. Tools which probably should be called reflectors aren’t. I hope to add a little clarity to this situation in the next couple of postings of this blog. I have students that this information will help. I hope it will be more broadly useful.

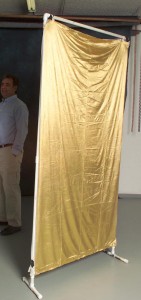
This is a large bounce reflector. The gold color creates warm light.

So let’s begin with the most basic problem: a large flat device to bounce light is called a reflector and the bowl shaped device that fits onto a mono-light or studio strobe is called a reflector. The large panel reflectors are very useful. They can be used in the studio, indoors and outside. They can reflect continuous light like the sun and strobe with equal ease. I really like using them in the studio and indoors, but not so much outdoors. I find that they are difficult to keep properly oriented outdoors. Often the effect of a panel reflector is so subtle that you can’t tell if one was used.

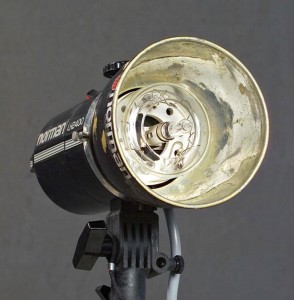
Bowl shaped reflector that fits onto a Norman LH2400

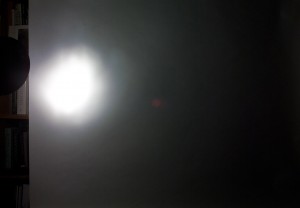
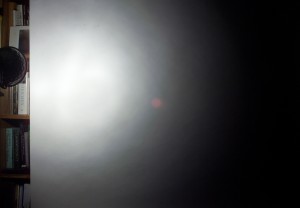
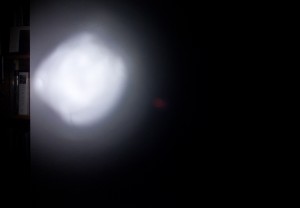
The bowl shaped reflector makes the strobe more efficient by putting more of the light in one direction. It also makes the strobe much more useful by keeping light from going where you don’t want it. Different reflectors give you different patterns of light. For instance the five-inch reflector I often use on my Norman LH2400 spreads light over 130º, a very broad spread. A larger ten-inch reflector spreads light over only 60º. When you use most dedicated strobes, like the Nikon SB900 or the Canon 580II EX there is actually a reflector built into the strobe. The spread of the built-in reflector can be changed by changing the setting from wide to telephoto. In addition to changing the spread of the light reflectors can also change the amount of light that reaches the subject. The standard reflector 2D for my Norman 200B spreads light over 60º, The telephoto reflector spreads light over a much smaller area, but is about 2.5 stops brighter. In the next blog I’ll be providing more examples of the styles and light patterns of reflectors. Most studio strobes and mono-lights only use bowl shaped reflectors made by the manufacturer. So when you buy strobes one thing you want to check on the reflectors and other accessories available from the manufacturer.

I just want to add a quick update about my marketing here in Indianapolis. Some of the connections I made through the clubs are starting to bear fruit: I have a catalog shoot that will start in a few weeks. Also I am supposed to meet with someone from the local community college about a teaching position. I went to the Indiana Home and Garden show yesterday. I met dozens of new people and handed out a lot of cards. It was a great place to show off the new book!

Click on the image to download an article about this shoot.

I’m trying to schedule a new lighting workshop. Please let me know if you would like to attend!
Thanks, John

BetterPhoto.com, The better way to learn photography

December 16, 2011

New Book: Photographing Architecture!

Filed under: Architectural Lighting,Lighting Technique,My Books! — John Siskin @ 6:44 pm

I just got the advance copies of my second book: Photographing Architecture. It appears that Amazon will actually be able to ship the book before Christmas, so order now. Pretty darned exciting!! All of the pictures in the blog this week are from Photographing Architecture. Of course you can also get my first book Understanding and Controlling Strobe Lighting.
Also as sort of a continuing gift you can download copies of most of my articles
and some do it yourself projects. I wrote most of what follows for my Portrait Lighting on Location and in the Studio class at BetterPhoto.com. I teach two other classes at BetterPhoto: An Introduction to Photographic Lighting and Getting Started in Commercial Photography. I hope you’ll check them out. I have been told that prices are going up next year at BetterPhoto, so you might want to sign up soon. I have opinions about the value of proprietary strobes versus various kinds of manual strobes. They are based on my experience. Reasonable people can hold other opinions. I can only hope that these opinions are based on actual experience. Lighting is more of a language than an art. At it’s most basic level manipulating light can be discussed with numbers. We might call this a machine language. I began to learn this language decades ago. It was relatively difficult to learn because it was not described in a logical manner. I try to describe the language in a relatively coherent manner in my class An Introduction to Photographic Lighting. I think that the manufacturers of cameras would rather you didn’t learn this language. First they think you don’t want to learn and second it would reduce their profits. You can purchase a manual strobe that does what the Canon or Nikon proprietary strobe does for less than half the cost of the proprietary unit. While clearly the extra electronics do add to the cost of the thing, I wouldn’t guess that the extra cost would be very high. In addition these proprietary systems keep you from buying alternative products. I should say that dedicated strobes are great for flash fill and events: areas where auto exposure is particularly useful. When you shoot a wedding your goal is good and fast; when you shoot almost anything else your goal should be great photos. Also when proprietary strobes are used with larger light modifiers they could make a good quality of light. Since one of the best features of these lights is portability people often won’t carry large light modifiers. You can use manual lights with dSLR camera, from Nikon Canon and other companies. When you want to set up a shot with either dedicated strobes or manual strobes you need to be able to see what you’re doing. The idea that you can use the same settings on your lights and positions for the lights all the time, will greatly limit the kind of images you can make. This means that you need to pay attention when you design the light for a shot. It also means that, whenever humanly possible, you will want to do your set-ups tethered to a laptop computer or a tablet. Remember we want to take great photos, and so we need to see what we are doing. I shot a lot of film, and people often ask how I did that with just a meter. The answer is I didn’t. I used Polaroid for every shot I made: thousands of dollars worth of Polaroid in a year. I usually disconnect the camera from the laptop after I have perfected the set-up, it makes it easier and quicker to shoot. When you’re looking at an image, on your laptop, that you made with dedicated strobes you’ll want to examine the how much light you get from each light, the direction of each light, the quality of the light and the way the strobe light interacts with the ambient light. If you need to change the power of one or more of the off camera lights you’ll be able to do that from the camera. You can also adjust the balance between strobe and ambient light. The other things will probably require you to walk to the strobe units. If you need to change the power of a manual strobe you’ll probably need to walk to the strobe and adjust the power or the position. The biggest problem with automation is that people assume that the right amount of light is also the right light. Quantity of light is easy, but the quality of light: how hard or soft and color, require some practice to get right. One more thing, I use a lot of lights. I regularly go out on a shoot with eight lights. Not only do the manual lights I use cost less they use cheaper slaves. It isn’t that I didn’t spend as much on lights as other people, it is that I got more lights. I’m happy with the tools I have. I hope everyone has a great season of celebration! And a wonderful picturesque New Year for us all! Thanks, John
BetterPhoto.com, The better way to learn photography

November 29, 2011

Kodachrome at Eastman House

Filed under: Film Technique,Lighting Technique,Looking at Photographs — John Siskin @ 8:15 pm

I wanted to post some information about my experience at The George Eastman House in Rochester. It’s been over a week since I got back, so I have had a chance to think about things a bit. I really wasn’t very interested in taking pictures of the house, so if you want to see the place, visit the site. The collection is huge and only a small amount is on display. You can see much more of the collection by making a request. I wanted to see large format Kodachrome, and the staff were kind enough to let me see dozens of example of 8X10 Kodachrome. Most of this blog will be devoted to what I learned. I wish I had some Kodachrome images to attach to this blog, but the scanner is still missing from the move. Besides you should look at original Kodachrome transparencies, the image on a computer is not the same. The computer makes everything the same size and removes other individual characteristic of images. So I’m just attaching a couple of food images.

Kodachrome was developed in the Kodak labs by a couple of musicians named Leopold: Mannes and Godowsky. The Kodak labs were run for most of the twentieth century by C. E. K. Mees. The Kodak lab was arguably the first industrial research lab. Kodachrome was a huge step forward in capturing color. The previous methods used a filter over a single emulsion, which is very similar to how digital cameras capture color. Kodachrome used three separate emulsions that captured individual colors. This captures much more detail. In addition, with a Kodachorme image, the color went where the silver molecules were. As a consequence Kodachrome images last much longer than other color processes. This was something I wanted to see.

Most of my first color shots were made on Ektachrome color film in the middle seventies. These images are beginning to fade. The Kodachrome shots I saw at Eastman House were from the fifties. The color was as vivid and as crisp as if they were made yesterday. As with other Kodachromes that I’ve seen, the images had no visible grain. Certainly, in large format sizes, Kodachrome was capable of capturing more information than most current digital cameras. of course you wouldn’t see this on print sizes less than 11X14, and probably not on print sizes  less then 20X30 inches. Unfortunately all sizes of Kodachrome, and processing for Kodachrome film, are discontinued.

I also learned a lot about shooting food. The images I saw were made by Nickolas Muray. Almost all of them were images of food. I was interested to see how much hard light he used to make his shot. The food had shape and sparkle as a result of this. I was also interested to see the design of the shots. Many of his images included items that a current stylist would never use. These shots were probably made in the fifties and early sixties and our ideas of how food should look have changed. It must have been difficult to shoot the food for several reasons. 8X10 cameras heed to shoot at a small stop, perhaps f64 or smaller, which means you need a lot of light. He used quartz lights, so heat would have been a consideration especially with food. He had no Polaroid proofing, so I don’t know how he tested his lighting and exposure. Perhaps he set up the day before and ran a test sheet of film overnight. It was really a pleasure to look at the very fine work that Nickolas Murray shot.
You can learn a lot more about lighting in my BetterPhoto.com classes: An Introduction to Photographic Lighting, Portrait Lighting on Location and in the Studio and Getting Started in Commercial Photography You might also want to check out my book: Understanding and Controlling Strobe Lighting: A Guide for Digital Photographers. Here’s a sample chapter that discusses portraiture.

BetterPhoto.com, The better way to learn photography

November 11, 2011

Shadow!

Filed under: Lighting Technique,Photographic Education,Photographic Equipment — John Siskin @ 9:52 am

The strong shadows in this image make the portrait more effective.

I teach lighting courses at BetterPhoto.com. Some days I think I should teach a course in shadowing. Somewhere photographers acquired the idea that shadows are bad. I’m not sure when that happened. The classic Hollywood portraits used dramatic shadows very effectively. Look at the work of George Hurrell . Shadow is an important part of his palette. Shadow creates shape in an image. Part of what makes a good photograph is the sense of three-dimensionality that shadowing creates in an image. You can make shadows strong and hard. These shadows add drama to an image. You can also make soft subtle shadows that bring out the shape of an object. Whether a shadow is soft or hard is really a function of how close your light source is and how big it is. A bigger closer light source is always softer.

The hard shadows and unusual angle of the light give this image an interesting feel.

I’m not sure how the shadows are bad thing got started. I would guess that it has something to do with the fact that it is more difficult to work with small hard lights than large soft lights. Since a misplaced hard shadow can be really annoying, many people would rather work with soft lights. Not only is it easier, because light position is less critical, but also because a large light is more pleasant for the subject. I think that using just soft light for a portrait is often very dull: soft light doesn’t create much drama. This article is about the differences between hard and soft light and using them together.

I think that the way the manufacturers sell lighting gear has a lot to do with the popularity of large light sources. When I checked at B&H they had hundreds more soft boxes for sale than snoots. There are more types of umbrellas than grid spots. Also umbrellas and soft boxes fit most lights

This shot wouldn't work as well without highlight and shadow. Flat light creates flat images.

while snoots, barn doors and grid spots are designed for specific lights. This means that a manufacturer can sell soft light devices to more users than hard light modifiers. So, naturally, the people who build these things will spend more money on advertising soft boxes. This makes people think that they have to have them. Here’s a link to an article about lighting tools, in case some of these terms are unfamiliar.

Don’t get me wrong: I like soft light. I just like to use it with hard light when I can. My favorite tool for making soft light is a light panel . The light panel can be used in many different ways, while the soft box is less flexible.

You can learn a lot more about lighting in my BetterPhoto.com classes: An Introduction to Photographic LightingPortrait Lighting on Location and in the Studio and Getting Started in Commercial Photography You might also want to check out my book: Understanding and Controlling Strobe Lighting: A Guide for Digital Photographers. Here’s a sample chapter that discusses portraiture.

BetterPhoto.com, The better way to learn photography

« Newer PostsOlder Posts »

Powered by WordPress