Photo Notes A place to talk about making images.

July 10, 2009

Understanding the Aperture

Filed under: Basic Photo Technique — John Siskin @ 1:14 pm
This shot uses short depth of field to bring the viewers' eye to the soup.

This shot uses short depth of field to bring the viewers' eye to the soup.

There is no other subject in teaching photography that is at the same time so basic and so important as understanding aperture and still so confusing and hard to explain. I want to start with a simple comparison to shutter speed: as the shutter speed number increases the amount of light let in by the shutter decreases. This is because the number is a fraction, and we are talking about the bottom number of the fraction, called the denominator. The number we use to discuss the aperture is also the bottom number of a fraction and as this number gets bigger the amount of light transmitted by the lens gets smaller. So for instance f16 lets less light reach the sensor than f8. Two stops less light, but we will get to that soon.

The aperture is a hole, which can be varied in size, in the middle of the lens. It blocks some of the light coming through the lens. The aperture number is actually the focal length of the lens divided by the width of the lens. So if you have a simple one-element lens that is one inch wide and has a focal length of 8 inches the lens aperture would be f8. If the lens had a one inch diameter and had a focal length of 4 inches that the aperture would be f4. Please don’t make me do this in metric, the relationships works but the math is more annoying. That wasn’t so bad was it? Here’s where it gets tricky, if you want the aperture to increase the light coming through the lens by one stop you have to double the area of hole in the middle of the lens. If you double the diameter (distance across the lens) you will increase the area of the circle to 4 times the originals size, or two stops. Instead of doubling the diameter of the lens you have to divide by the √2 (square root of two) which is approximately 1.4. This is similar to converting a focal length from your sensor size to what it would be in full frame 35mm. So 8÷1.4=5.714, which we refer to as f5.6. If you want to decrease the amount of light reaching the sensor by one stop you need to multiply by 1.4, remember the number must be smaller to let in more light. So 8 X 1.4=11.2, which we refer to as f11. It is important to remember that since we are working with fractions, things get turned around.

Please forgive me for all of this, but I didn’t make it up. As you may find it difficult to multiply by 1.4 in your head you may want some help on how to manipulate and use these numbers. There are a number of important applications that I will probably blog about later. In the mean time you might want to try to remember the full stops: 1, 1.4, 2, 2.8, 4, 5.6, 11, 16 and 22. You may notice that every other number is double; this helps to memorize the numbers.

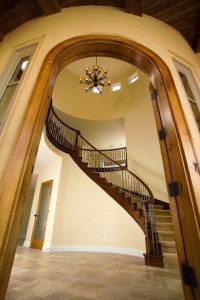
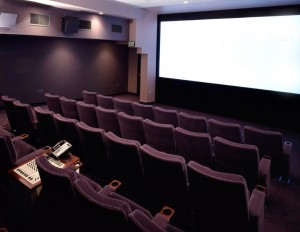
This shot uses long depth of field to keep the control panel and the room in focus

This shot uses long depth of field to keep the control panel and the room in focus

I also want to mention that small numbers isolate focus and large numbers increase the area. This is called depth of field. I wanted to mention it so that I can put pictures into this blog.
I am going to write about using the aperture to control the depth of field very soon, but I thought this was enough confusion for one week. People often tell me that they don’t need to know these things, and that is certainly true. But I want to control what happens in my pictures; I want to make pictures rather than just take pictures. If I understand how my camera records light I will, inevitably, have more control over my pictures.

July 1, 2009

Two and a Half Things About Lighting

Filed under: Lighting Technique — John Siskin @ 2:25 pm
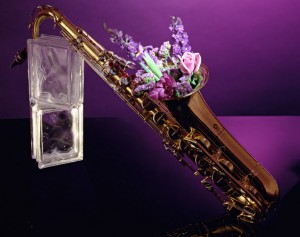
Purple Sax

Purple Sax

This is basic stuff on lighting. I am going to send some of it out to refresh my students in my new Commercial Photography class at BetterPhoto.

I find that many people decide to avoid working with strobes because they do not understand them. In my experience most people cannot understand strobes until they work with some kind of a light. Even in live classes where there is demonstration in front of the students, many will not understand strobes. But when someone sets up the lights, for themselves, and does a shot, perfects the exposure, and creates a photograph all becomes clear. This is why I have students use cheap clamp lights in my class An Introduction To Photographic Lighting . So the best way to learn lighting, as with so many things is practice.

There are two and a half important things about any light source: Color; the size and distance of the light source relative to the size of the subject or the product; and, finally the direction of the light is half important. While a digital camera can control color it doesn’t have the ability to adjust two different colors of light in the same shot. If we want to work with a yellow light like tungsten and a blue light like daylight we have to use filters over one of the light sources to make it match. A filter over the camera won’t fix this. The size of the light source affects the transition from light to shadow. A big light will have softer shadowing than a small light. Consider the light on a sunny day where the light comes from a very small part of the sky and an overcast day where light comes from everywhere. There aren’t any shadows on an overcast day, are there? Finally the position of a small light source is critical since it defines where the highlights and shadows are, but with a big light source position is less important. It doesn’t matter, in terms of shadowing, where a subject stands on an overcast day.

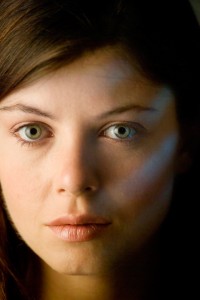
Mixed light colors. I particularly like wghat happens in the eyes.


Mixed light colors. I particularly like wghat happens in the eyes.

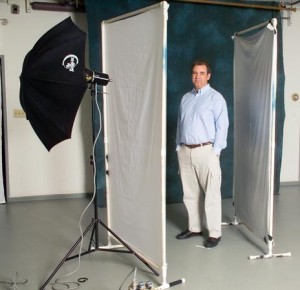
One of the things that confuses people about large light modifiers is that they think the purpose is to spread the light over a larger area. Actually you can spread light over a large area just be changing the reflector or leaving it off. The reason we use these modifiers is to soften the quality of light. A large light modifier lights each point on the subject from each point on the modifier. This means that an area of the subject that wouldn’t be lit by a small light source is often lit by a part of a larger light source, so an area that would be in shadow is merely darker.A one light set-up for a portrait

The reflections from a large light source are a bigger problem than the reflections from small sources. Of course this is because of the size. Before Photoshop controlling these reflections was very important, often it made the choice of which tool to use. Before Photoshop retouching a reflection was difficult and expensive. This is the biggest reason why soft boxes became popular. Now it is pretty easy to retouch. Reflections of the light source are much more of a problem in product photography than in portrait photography. The spherical shape of the eye tends to make reflections smaller, where a product will often show larger reflections.

Finally photography is both a craft and an art. In order to improve your craft you will need to practice. You will also take bad pictures in pursuit of good pictures. Something to keep in mind, even Eric Clapton and Luciano Pavarotti practiced.

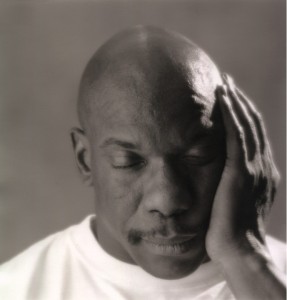
Light and lens make this shot effective.

Light and lens make this shot effective.

I think that lighting is the most important skill I can teach a photographer, first because there are relatively few people who teach this skill. Also because it gives you control over your photographs that no other skill, even mastery of Photoshop, can give you. I approach teaching this skill from a flexible and technical point of view, if those two things are not incompatible. Flexible, because I don’t think that lighting formulas are the most effective way of approaching lighting. Technical, because I believe that lighting is a skill that is dependent on using tools effectively. While I have heard it said, “A workman is only as good as his tools,” the opposite is often said about photographers: he/she could make good pictures with any camera. I think that statement is basically stupid. I have enjoyed the work of many photographers over the years, and they have always been excellent at craft as well as people of great vision. I do try to show examples and explain how I did them. This seems like a reasonable way to approach teaching online to me. You may also want to check out my class Portrait Photography Lighting On Location And In The Studio .

Classes start on July 1, but you can join as late as July 6, and of course there is always next month!

Thanks, John Siskin

June 26, 2009

Controlling the Shutter

Filed under: Basic Photo Technique — John Siskin @ 10:54 pm
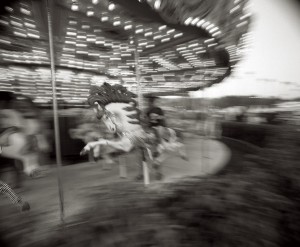
A 1/20th of a second, paned with the horse.

A 1/20th of a second, paned with the horse.

I talked about the shutter and what it does, a couple of weeks ago. This time I am going to discuss aspects of how to use it.

Since DSLR cameras are so small and light that we often hand hold them, they are designed to be used this way some of the time. Unfortunately too often we use them at longer shutter speeds than we can hold steady. This causes blurred pictures. Many years ago Kodak did a study on blurred photos and fond that this is the biggest reason for blurred images. I think that many people have more trouble with this now than when we used film cameras. There are a couple of reasons for this; first digital SLR cameras are heavier than film cameras were. Second since the sensors are smaller than film lenses bring subjects closer than they did with film cameras. For instance a 50mm lens has about a 45º angle of view on a full frame camera and about a 30º angle of view on a Canon D30. Not only does this mean that the subject appears to be closer to the camera, but it also means that camera shake is increased. You can see this for yourself if you want to do a simple experiment. Cut a small hole in a piece of paper, say a circle about an inch in diameter. Now if you hold the paper close to your face and look through it you will be able to keep it pretty steady. If you hold the paper a couple of feet from your face it will be a lot tougher to keep steady. A telephoto lens is like the piece of paper a few feet from your eye, tough to keep steady. There use to be a rule of thumb that you could hand hold 1/the focal length of a lens. So if you were using a 250mm lens you could hand hold a 1/250th of a second. If you were using a 60mm lens you could hand hold a 1/60th of a second. Basically this is now wrong. Unless you have a camera or lens with image stabilization you should not try to hand hold anything less than 1/twice the focal length of the lens. So if you have a 250mm lens don’t hand hold anything less than 1/500th.

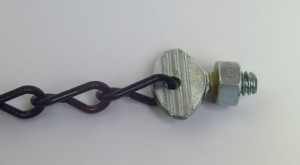
There are a couple of ways around this short of image stabilization. Everyone knows about tripods, the only problem is that you have to carry them. By the way, if you are using a lightweight tripod you might want to use the self-timer to trigger the camera, this will reduce vibration. You can also get a monopod, which is like tripod that is missing two legs, this will reduce shake on shots that are not so long. Finally you can build a chain-pod. This costs almost nothing, weighs a couple of ounces and takes up less room than a 35mm film can. Chain-pods are he simplest and best piece of photo equipment you can build. It works like a monopod. To build it drill a small hole in 1/2 inch 1/4X20 (that is a thread size) thumbscrew. Attach about 6 feet of chain to the hole (more if you are really tall). Next put a nut onto the thumbscrew and position it so that the screw can’t go too deep into you tripod socket and glue the nut in place. To use attach the thumbscrew to the base of your camera drop the chain and step on it. Now pull up against the chain. Steady!

This shows how you build a chain pod.

This shows how you build a chain pod.

June 19, 2009

Marketing Commercial Photography

Filed under: Marketing — John Siskin @ 10:19 pm
Photo for a Contractor

Photo for a Contractor

I’ve been working on my new class at BetterPhoto.com It’s starting July 1, and will be called Business to Business: Commercial Photography. Rather than blogging about technical issues, I though I would add some information about marketing to my blog. Next week, more technical stuff. Please check out the class!

Getting business might be the hardest part of doing business. I don’t have all the answers, so what I am going to share are some answers, the one I think might work now. I really want this to be a give and take part of the course, so I have stated a thread called marketing on the Q&A section of the class. I will post information about how to send html mail there, so that is a good incentive to visit the thread (this is the blog, not the course. So no thread, sorry). I am going to break the problem down into parts; I hope that will help.

The first problem is: who are you going to do business for? While you might be skilled in a number of different types of photography, no one is skilled at everything. If you do an honest inventory of your skills it will help you to find clients that are a good fit. At the same time you should look at how businesses use images: advertising, websites, annual reports, documentation and so on. Remember that you are a resource to a business; it is better if you can be an expert resource.

I suggest that you start by looking for businesses. You should use the net, looking at chamber of commerce site and business searches. You should also check out the phone book. Collect information as you do this, particularly addresses, e-mail addresses, web sites and contact names. Your clients are not going to find you spontaneously; you have to do the work to find them.

Passive advertising
The yellow pages used to be a very important part of my marketing. I don’t do any advertising in them any more. In my market, Los Angeles, the yellow pages are useless for commercial photography. They may still work in your market. See who is advertising in the pages, and how big the ads are. Yellow page ads are expensive, and they bill you even if you don’t get clients.

Your web site is very important. If your site makes you look like a fine art photographer it will work against you, as a commercial photographer. It’s possible a fine art site can help you book weddings. If you plan on doing family portraits and working for business you will probably need two websites. Display work that seems to fit your prospective clients’ needs. I prefer a relatively simple site. You can visit my site: www.siskinphoto.com

Portfolio sites, there are a bunch of these. Like goportfolio.com and portfolios.com. I don’t know if any of these sites are worth the time spent uploading to them. I am on a few, without results. If you know of any that work please send me the names.

Bidding sites, these are sites that companies list jobs on. You enter a bid. For most jobs the work will be done inexpensively overseas, but occasionally a local job comes up. Check out guru.com and getafreelancer.com. If you know of any others please share. I have gotten work off of one of these, and you don’t have to bid on things you don’t want.

Craig’s List, it doesn’t take a lot of time to do an ad for the list. I have one at my ftp space that I post to the list. I have gotten a number of jobs from Craig’s list, and it’s free.

Active advertising:
Html e-mail, this is my favorite method. Use all those e-mail addresses you found and send basically web pages. You can send a page where the pictures are where you intend them to be and the page has live links to your webpage. Just a great way to promote yourself. I will send out a sample during the class (sorry but this is the blog, not the class)

Social networking, this probably helps with weddings. I don’t know about commercial work. I am on facebook, I hope it is helping me reach more students. I think a key is to update frequently. I am still new at this. Suggestions are welcome.

Post cards, these do work. Probably the best thing you can use as direct mail is a post card. This is expensive, but if you have the capital worth considering. Check out Modern Postcard.

Cold calling, frankly I hate doing this. Also it is noxious to receive cold calls, BUT, at ad agencies and other places where they buy photography, it is some bodies’ job to talk to you. If you are able to do this, remember that your call may not be important to someone. Get off the phone before you annoy someone unnecessarily

Visiting clients, this can work if the circumstances are right. For instance if there is a convention of target clients, you can visit and hand out cards. In Los Angeles there are several buildings where the people in certain businesses are located. So there is a fashion building and a place where home designers are located. If you can walk through and hand out cards it would be good. Of course basic politeness should be observed.

June 12, 2009

Using the Shutter

Filed under: Basic Photo Technique — John Siskin @ 8:18 pm
fast shtter speed

fast shtter speed

So I discussed what a stop is in photography. This week we’ll talk about the shutter; among other things we’ll see how the shutter is controlled in stops. But first a quick explanation of the shutter: in all DSLR cameras and many of the fixed lens cameras the shutter is a physical object that moves over the sensor. It is important to remember this, since it explains some of the limitations of the shutter. There are two curtains on a shutter, one uncovers the sensor and the second covers it up again. Both must move at exactly the same speed for the entire time they are moving over the sensor or your exposure will be uneven. It is really quite amazing how well shutters work, considering the difficulty of the job.


Each full shutter speed is separated by one stop from the shutter speed on either side. So if you have a one second shutter speed the speed with one stop less light will be 1/2 second and the speed with one stop more light will be 2 seconds. That makes sense, since as I said last week one stop more light is double the amount of light you had and one stop less is half the amount of light you had. The same principal applies at the higher shutter speeds: one stop more light than a 1/250th of a second is a 1/125th of a second, and one stop less light is 1/500th of a second. Modern shutters also have 1/2 stop intervals so you would actually see speeds in this order 1/125, 1/180, 1/250, 1/350, 1/500. There might be an advantage in memorizing these numbers, but I don’t know what it would be. It is pretty easy to double or halve a number is you need to know what the full stop change will be.

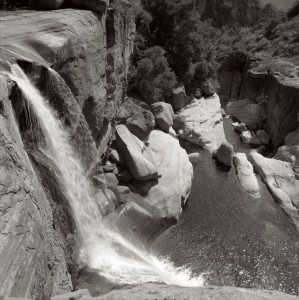
The change in the shutter speed affects the way the camera sees time. A short shutter speed, say a 1/250th of a second freezes time and a long shutter speed, say a second blurs time together. So for shooting sports you almost always want a high shutter speed to capture the action. If you are shooting waterfalls, you may want to shoot a different shutter speeds in order to get the look you want. Soon I’ll post information about hand holding shutter speeds.

Long shutter speed

Long shutter speed

June 5, 2009

Seeing Photographs

Filed under: Looking at Photographs — John Siskin @ 10:42 am
They show fish here.

They show fish here.

I thought I would be writing about learning to write in photography again this week, but there is something else to talk about. I went to a show at The Annenberg Space for Photography here in Los Angeles. This is a new museum space for photography here in the center of Century City. The location and the building are wonderful. What happens inside the doors of the space is not so good.


A photograph is a way of capturing a moment, some photographs are several moments smeared together. Some moments are captured more quickly than we can see. Photographs see time differently than we do. Photographs also display time differently than other communication. They show stopped time; the same stopped time any time we choose to look at them. I have a photograph of a rainbow near my monitor; it is the same rainbow whenever I choose to look at it. In addition a good print allows me to get closer, to have a more intimate relationship with the image. This intimacy is one of the reason I still make prints in the wet darkroom, black and white prints made this way have special qualities.

Most of the display space at the Annenberg was devoted to monitors. The images were displayed as constant slide shows, with constant sound tracks. The images could have been displayed as well on the computer in my office. The viewers’ relationship with the image is defined by the timing of the video show. If I wanted to see a shot a moment longer, that couldn’t happen. As with all screens, when I got too close to the screen the image falls apart, there is a bar to this intimacy.

There were some prints. Many of the prints were placed opposite to a wall of windows, so the reflections were annoying. This Space for Photography seems more interested in displaying video than photographs.

I can remember seeing an original Edward Weston print when I was in high school. Honestly this experience changed my life. I don’t think I’ve seen anything on a screen that has had as much impact. If you haven’t seen real photographic prints, made by masters of the art, you should give yourself this experience. Just looking at images on the screen is not the same. I would also suggest that you look at high quality books, perhaps those from Adams, Weston, Sexton or Butler. You will see more than just a well designed image, you will have an invitation to a different kind of intimacy with an image.

May 29, 2009

A Basic Understanding

Filed under: Basic Photo Technique,Film Technique — John Siskin @ 11:43 pm
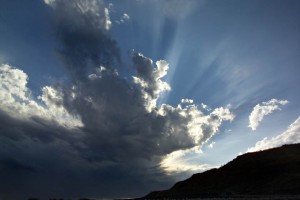
Sky & Sun

Sky & Sun

I was talking with a few old friends who are also photographers. Both of them were complaining about younger photographers who don’t know anything, as they would have it. Now neither of the guys teaches or interacts with new photographers in any regular way. One of them explained to me that you couldn’t really learn Photoshop without experience working in a chemical darkroom. I am older than either of these guys and I don’t believe any of this. The reason is that I actually interact with new photographers all the time. Teaching here at BetterPhoto will do that.

Inspired by my old friends, I want to go over the basics. Cameras, regardless of whether they are digital or film share some characteristics, these are like the language of the machine. For instance whenever you use a variable size aperture in a lens, what we refer to as an f-stop, you introduce changes in the distances that are in sharp focus. We call this depth of field, not really a very good name.

Speaking of bad terminology, I will start with the word STOP. Now we all know what that means, but not moving has nothing to do with the term in photography. In photography it means a relative change in exposure: if you have twice as much light in your shot as you did previously you have one stop more light. It doesn’t matter if the change is caused by changing your aperture or shutter speed or because the sun cleared the horizon, if you have twice as much light that is one stop more light. If you have four times as much light that is two stops, well you only doubled the amount of light twice. If you have 1/8th as much light you have three stops less light, maybe the sun just went under the horizon.

I know that a lot of people don’t want to talk about math, but it is the key to controlling the pictures you take. You can take all the pictures you want on automatic, but if you want to MAKE pictures you need to understand the controls on the camera.

May 22, 2009

Memory

Filed under: Film Technique,Photography Communication — John Siskin @ 10:18 pm

Hand in HandThis week I want to talk about making pictures and taking pictures. An incredibly large percentage of the population will take pictures in the next year. They will point the camera at something and press the button. People do this because we have a real need to capture the stuff of memory and keep it with us. This is a very personal communication, from me to me. Like a personal time capsule. If I were to take out my memory photos and show them to you, they wouldn’t mean as much to you. We all take these pictures, written in the language of our own experience.
A photographer is called to do something more, to make a picture. To use the tools of craft and the skills of design to make an image that speaks to many, if not all. So a photographer need to have a command of the language, which is a product of craft, and a sense of how to shape an image, which is design. What separates a photograph that is made from one that is taken? In addition to skill and design, clearly intent is an important aspect. You need to think the image through, how are you going to make that image communicate?

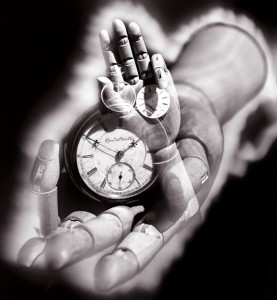
The shot I attached this week works on both personal and on a more universal level. I was working with the hands and the watches and watch faces to make an image that would create a feeling of impermanence and transition. I think I accomplished much of that. The image is also personal, because I remember the experience of making the image. While this is often a part of an image for me, here it is a larger part. I did some things with the camera, and the processing, that I really only did successfully this one time. This shot is made on one piece of film. I actually did a double exposure and did a controlled solarization of the film! So, at least for this photographer, it is possible to make a photograph and still have it be personal.

May 15, 2009

Syntax

Filed under: Photography Communication — John Siskin @ 12:23 pm

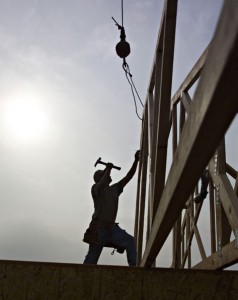
constructionLast week I wrote about how we use photography as a language to communicate. Like a language there is an underlying structure that makes communication possible. As an example in English, Bob hit Bill is different from Bill hit Bob, because, in English word order is a critical part of structure. In Latin the word endings define which word is the subject and which is the object so word order isn’t critical. William Crawford wrote a fine essay on this subject in his Book Keepers of Light.

While some of what we might call syntax in photography might be so subtle that we could argue over it, some is pretty clear. There is a great deal of photographic syntax that is based on the technology of photography. So when you look at the work of Carlton Watkins you will see open shadows, hard flat water, and fine detail. These, and other aspects of his images, are characteristic of the large glass plates he used to make his images. The size of the plates captured great detail. The fact that the plates were only sensitive to blue light opened the shadows and the low sensitivity of his plates meant he could only make the very long exposures that flatten detail in water.

Clearly, digital technology has radically changed our photographic syntax. I think that the two most important changes are digital proofing and the zero per unit cost of an image capture. Both of these mean that we can take risks with digital pictures that we might not have taken with film. Since there is instant feedback on the camera back I can work on an image and know how it will appear. I used to spend thousands of dollars on Polaroid materials each year for the same information. And now, each picture has no cost, until I print it. Each image used to have a specific cost, and different types of commercial photography integrated those costs differently. Wedding photographers used to keep the number of shots low in order to improve profitability, while fashion shooters word make a lot of images in order to improve their profitability. I would guess that we will continue to see more and better editing programs as we integrate this new syntax into our photography.

May 9, 2009

Speaking About Photography

smart-dodie3One way to understand photography is as a way of communicating. So I could tell you about a spark plug, but if I show you the spark plug you know more. The plug could be from an engine, and then someone who knows cars could tell you the car is running rich. From just a picture of the plug. I could tell you a story with a picture, or I could give you an image that communicates like a poem. We can use photographs to communicate about facts, things actions, ideas and emotions. What a wonderful medium.

Photography is a universal language, although I can’t communicate equally well with everybody. Certainly it is at least very difficult to communicate with the visually impaired. However, since I teach on line, I have had the opportunity to work with students from Finland to Bangladesh. This experience has helped me to believe that almost everyone can read a photograph. I have even had my dog react to photographs; photographs can communicate across species. I can remember seeing a cover of National Geographic that was shot by a Gorilla.

One of the strange things about photography is how much easier it is to read than to write. Most people take pictures. These images are intensely personal, and often only communicate well to the photographer. So a picture from your vacation, or of your child, may be very evocative to you and meaningless to me. These images are really a personal diary, and like a diary, mean little to anyone else. Modern cameras are very good at creating these personal documents.

Photographers will want to do more, to make images that can communicate easily with other persons. We photographers will want to make documents that do more than just document. We will want to create those images that are more than just beautiful; we will want to tell stories, and to make poems. The key for us is to do more than take photographs; we will want to MAKE photographs

« Newer Posts

Powered by WordPress