Photo Notes A place to talk about making images.

September 25, 2009

Understanding Strobes

Filed under: Lighting Technique — John Siskin @ 9:45 pm
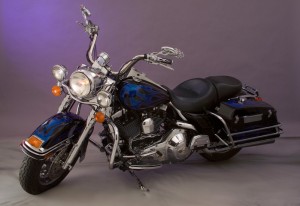
Click for video about shooting this bike!

Click for video about shooting this bike!

When I started taking photographs an automatic camera was one that stopped the lens down to a pre-selected aperture when you pressed the shutter button. This allowed you to view, and compose your image with the lens wide open. So it was an important and useful feature. It wasn’t until the mid seventies that built in meters that actually set the aperture of the shutter speed became common; of course this feature was called automatic exposure. At about the same time the first automatic strobes were introduced.

Automatic exposure worked pretty well back then, and it still does. I suppose the biggest reason is that people don’t usually choose to make pictures of the kind that will screw up a meter: say, white cows in the snow. Still, even with today’s cameras, if you want to make a picture that is supposed to be mostly dark, or mostly light, the meter will probably screw up. The meter can’t see the picture, it just tries to capture a pre-set amount of light, and then close the shutter. Since we now have digital cameras with instant feedback and raw capture, so that we can tweak images, almost all pictures can be properly exposed.


Portrait Lighting on Location and in the Studio Class

Portrait Lighting on Location and in the Studio Class

Automatic strobe has not worked out nearly as well. The big reason is that we are looking at the light we want when we shoot ambient light, but with any kind of strobe we can’t see how the light will look. Consider this scenario: bride and groom’s first dance. The ballroom has twenty-five lights, including recessed lights, spots and a couple of chandeliers. You come in, with your strobe on the camera, and the camera set to the sync speed. Now the ballroom has one light, a little tiny light on top of your camera, you overpowered all the existing light in the room. Your shot looks terrible: hard shadows and glare spots on the bride. This is why so many people think that strobe light is bad. I have seen many pictures of parties in which the hosts must have handed out miners’ helmets, as the only illumination for the party. Everyone looks more or less like a deer caught in the headlights. The problem is not caused by strobe light: it’s caused by having all the light come from just above the camera and from a tiny light source.

An Introduction to Photographic Lighting Class

An Introduction to Photographic Lighting Class

Light looks better when it comes from more angles; the shadows are softer. So a bigger light source looks better, the same way putting a lampshade over a bulb looks better. Strobe, even automatic strobe, will never be as effective as automatic exposure, simply because we aren’t taking a picture of what we see, but of the light we brought. The reason I teach lighting is to give photographers control of light through understanding how it works.

Business to Business: Commercial Photography Class

Business to Business: Commercial Photography Class

September 18, 2009

Available Solutions

Filed under: Lighting Technique — John Siskin @ 1:44 pm
9 lights, strobes with orange filtration iside and quartz outside.

9 lights, strobes with orange filtration iside and quartz outside.

I often mentioned that there are two and a half important things about light, and the first is color. If you have any one quality light source: continuous spectrum and flicker free, you can get excellent color with a digital camera. You can even get decent color with fluorescent and mercury vapor lamps, at least some of the time. However, when you mix color, you can’t get good color. The reason is simple, the color isn’t really mixed, but bluer here and yellow here. The camera does an overall balance, not pixel by pixel.

I don’t bring this up in order to discuss the problems this causes but to discuss the process of solving the problem. Over the years I have acquired a lot of equipment and supplies that give me control over this problem. I have BCA bulbs, which have a color temperature of 4800ºK. These are 250 watt bulbs with a standard base. I also have BBA bulbs, same wattage and base but 3200ºK. Both these bulbs are useful if I am lighting a long room that has no place to hide a light on the far side. There are problems with heat with these bulbs, so you can’t run them for more than a few minutes. Another solution is a roll of half orange gel from Rosco. I can put this on the outside of a window; you don’t see the tape if you put it outside. This will make the sunlight warmer, closer to the interior color. I could also buy full orange and 1/4 orange, but at $93 for a 4’X25’ roll, I get by with the 1/2 orange. Generally I want the outdoor light to be a little cooler than the interior light, but only a little. Both the bulbs and the Rosco gel, don’t get used much, only when I think they might be needed.

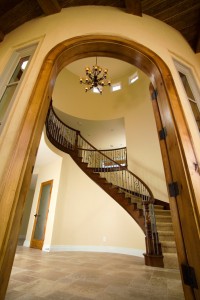
Stevenson Ranch Home, Staircase

Calumet Travelite and 5 Norman 200B strobes

I have a lot of strobes, and at least some of these go on most jobs. I have very powerful Norman series 900 strobes: 8 heads and three power packs. I use these much less with my digital camera than I did with large format film. I have one Calumet Travelite monolight that goes on a lot of jobs. I also have my Norman 200B units 7 heads and 5 power packs, at least some of these go on almost all jobs. Of course all the strobes have a color balance of about 5000ºK, daylight. In the cases with the strobes I have pieces of Rosco Gel, in full, 1/2, 1/4, 1/8 orange as well as the blue for cooler lights and the greens to make the light look more like fluorescent.

Of course I have stands, big one small ones and boom arms. I have many ways to attach lights, filters, modifiers and so on. I was just discussing with a student that I have 6 tripods. I even have a generator. Part of the reason that I have all of this is that I have been shooting professionally for a long time.

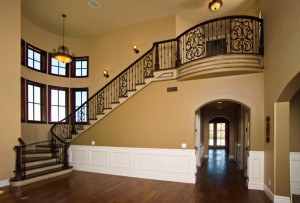
Norman 90-0 series light, sith orange filters and existing light.

Norman 900 series light, with orange filters and existing light.

Another reason for having all this gear is that it all solves some problem. But it creates a problem as well; unless I rented a U-haul I couldn’t possibly take all of this stuff on location at any one time. So, when I am at my office, I have a huge number of ways to solve a problem. If I have enough time before a job I may even be able to buy a few new solutions. However, as soon as I pack to go on location I only have the solutions that I bring with me. One of the most important things you can do, before a job, is a site visit. That way your available solutions match the problems on the job.

Norman 900 series lights, 4X5 film

Norman 900 series lights, 4X5 film

September 8, 2009

Talking About Light

Filed under: Lighting Technique,Photography Communication — John Siskin @ 4:06 pm
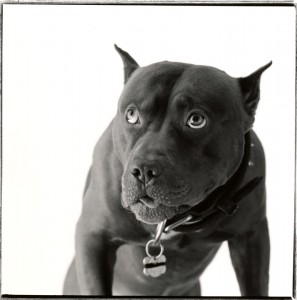
The difference in light between the two sides of the dog's face add three-dimensionality to the shot.

The difference in light between the two sides of the dog's face add three-dimensionality to the shot.

This started out as a response to a student in one of my classes, but I think it picked up too much attitude. I’m not sure if anyone is reading the blog, so I decided to use it here.

I’ve been teaching lighting for about a quarter of a century. I often find myself frustrated because people don’t want to learn how a thing works, or why a thing works, just what should to do. The problem grows worse because the manufacturers of equipment create gear that does nothing more than the gear from last year, or even twenty years ago, but they want to tell you that it is new and better and you must have it. So, for instance an octabox is in no significant way better than a soft box or an umbrella, but I have worked with many people, going back at least fifteen years who bought these because of the marketing. Most of the lights I use on location are Norman 200B units; these haven’t even been made in more that fifteen years (there is a new version the 200C). So you can see that I don’t think that buying new gear solves lighting problems. Lighting problems have gotten easier to solve since digital capture became standard, you just don’t need as much power. When I did architectural work with a view camera I needed to work at f22 or smaller, on my digital camera I can do as good a job at f5.6, which is 1/16th as much light. Of course I still need as many lights, just less powerful.

Another problem with teaching is language, often I can’t get people to agree on what they mean by various terms. For years I fought using the term flash, that should be reserved for single use bulbs that make light by burning an aluminum filament is a bulb filled with oxygen, a flash bulb. If the instantaneous light built into your camera, and the instantaneous light attached to the camera, and the instantaneous light on a stand with a soft box on it, all use the same technology to make light why is one a flash and another a strobe? This creates confusion especially when people don’t like the results they get from an on camera strobe, and assume that is a problem with the technology of the light, and not the way the light is modified. Some years ago I read a book about lighting in which the author kept referring to soft creamy light. I know what soft light is, that’s where there is a long transition from light to shadow, but what is creamy light. Does it have anything to do with a cow? Soft light comes from a large light source, is creamy light bounced off a cow? I know this seems pedantic, but if we can’t agree on how we describe light won’t it be hard to discuss it?

Discussing light is the real problem. Let me provide an example: people talk about light ratios. I take this to mean that one side
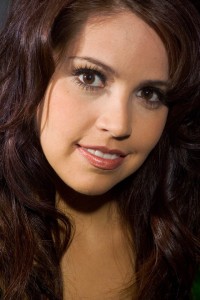
The main light had twice as much power as the fill, which is a 3:1 ratio. You can clearly see the difference in light between the two sides of the face.

The main light had twice as much power as the fill, which is a 3:1 ratio. You can clearly see the difference in light between the two sides of the face.

of the face is some number of times brighter than the other side of the face.  But I have seen many images in which the face is lit evenly, or mostly evenly, while the photographer is still talking about ratios. There are two questions, first don’t people notice that the shot they claim has a 3:1 ratio looks the same on both sides of the face; and second, what went wrong? The answer to the first question is probably not. The answer to the second is they used big light sources, probably soft boxes. A big light source creates a long gradation so you don’t get a shift in the light on the two side of the face; you get a soft gradation across the face. This is not bad, but there is no ratio between the sides of the face, just a gradation. So here we have a basic lighting concept, that people talk about all the time, yet they haven’t actually looked at the results. If you look at images from before strobes you’ll see a lot of shots with real light ratios, if you look at current shots you won’t see this kind of light. I don’t think that ratio light is all that attractive, I’ve done it, and there is sample with this blog. The reason I bring it up is that it is a good example of the problems that we have with talking about light. We are often using terms that don’t actually describe our pictures. For more on hard and soft light please check out this article: Hard Decisions and Soft Light.

So if people don’t discuss light what do they do? They either copy themselves, doing light the way they did it last time, or they copy others. I knew a fashion photographer who always did the same thing, not because it was good, but because he was afraid to try anything else. He’d look at stuff I had
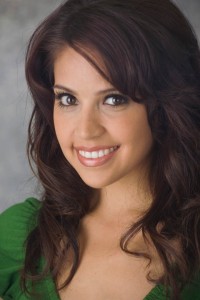
In this shot the lights are in the same place, and have the same relative values, but there is no difference between the light on the two sides of the face because the light sources are larger.

In this shot the lights are in the same place, and have the same relative values, but there is no difference between the light on the two sides of the face because the light sources are larger.

done, admire it, ask about it, but for the next shoot it was the same light all over again. It was his light, and he thought it was part of his creative talent. If you do the same thing all the time where is the creativity? Also, don’t you think you should have some test shoots, in addition to business shoots?

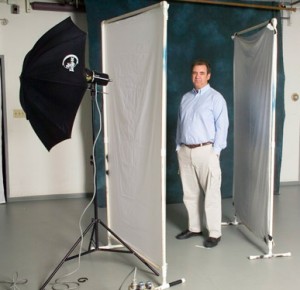
If I am in the studio, or in a home or business, and I need to do something quick, I use a big light source, either a light panel or an umbrella. A single big light source, like a 60-inch umbrella can do a good job of lighting a portrait, even bringing light to the background. If I have a couple more minutes I will put a single hard light on a bracket on the camera. I will set this light so that it brings much less light to the face than the large light. Both lights are lighting pretty much the whole face. The hard light will bring texture and sparkle into the image, that is what hard light brings to your pictures. In much the same way the sun brings sparkle to a diamond. If I have a lot of time I will use snoots and grid spots to bring out the details of the subject, but this means the subject has to stay in more or less the same place. But, of course, I may do something entirely different based on the circumstances of the image. I really wish that more people would build light that creates detail and shape, rather than just illuminates.
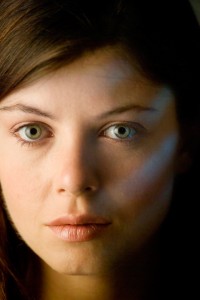
Mixed soft and hard light. The hard light comes from a slide prjector.

Mixed soft and hard light. The hard light comes from a slide prjector.

I hope you’ll consider taking one of my classes, to learn about making pictures.

An Introduction to Photographic Lighting

Portrait Lighting on Location and in the Studio

Business to Business: Commercial Photography

Please check out the rest of my site (www.siskinphoto.com) to see more photographs I’ve made and for more information.

Thanks, John
September 3, 2009

Making and Taking

Filed under: Looking at Photographs,Photography Communication — John Siskin @ 12:02 pm

Charlie C.Years ago I heard that photography is the most popular hobby in the world. I suppose that is still true. What that means is that a whole lot of people take a whole lot of pictures. The key word in the last sentence is take. Most people using cameras see something that interests them, point and shoot. The photographs made this way enable the taker to bring back memories of the moment that are vivid and meaningful. The images become a diary of the takers experience. This is an incredibly important use for photography. Still there are difficulties with these images: most importantly they are personal. They rarely communicate effectively to anyone but the shooter. So you’ve taken a photograph of your child at the beach, when you see it you remember the vivid blue of the water the hot sand and the sounds of the day. When I see it I see an overexposed mess.

What is it that makes someone a photographer, rather than a picture taker? First a photographer makes pictures

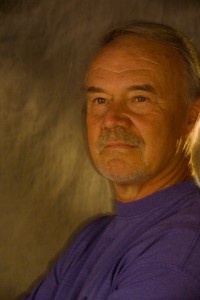
Strong side light creates a good feeling of shape

Strong side light creates a good feeling of shape

rather than takes them. One of the most important skills for making a photograph is pre-visualization. Basically the process of seeing the scene and then seeing the way the photograph should look. Then you make the photograph using the tools that will enable you to make the photograph you visualized. Ansel Adams discussed this process of pre-visualization extensively, primarily referencing tools of exposure and development. There are other important tools, some of them unavailable to Adams. The tools I use most in making a shot are lighting, exposure and position. After the shot I do more work with exposure and use filtration, contrast and saturation. The key is that I think about all these tools, and sometimes a few more, as I am making the pictures. It is also important to have the tools that enable me to make the picture I see. So I almost always have lights, often battery powered 200 watt-second strobes, more powerful than proprietary strobes. I think that lights is the most powerful tools in my kit, my control of lighting enables me to make photographs others can’t. Lights are important, not just in the studio, but at most locations also. I teach lighting because I want to enable others to make better pictures. I hope you’ll consider taking one of my classes, to learn about making pictures.

An Introduction to Photographic Lighting

Portrait Lighting on Location and in the Studio

Business to Business: Commercial Photography

Please check out the rest of my site (www.siskinphoto.com) to see more photographs I’ve made and for more information.

Thanks, John
Here the strobe opens up the face, back light would otherwise make the face dark.

Here the strobe opens up the face, back light would otherwise make the face dark.

August 27, 2009

Filtering Lights

Filed under: Lighting Technique — John Siskin @ 12:56 pm
4 lights, 3 with warming filters

4 lights, 3 with warming filters

A few weeks ago I started this series of blogs about what sorts of controls transferred from film cameras to digital cameras, consequently I written about shutter speed and aperture quite a bit. There is another area I’d like to mention in connection with this theme: filters. Now I have over a hundred filters I used to use to do accurate color correction with film, this was particularly tricky with copy work. Most of those filters now sit unused, but that doesn’t mean that I don’t use filters. There is one area where filters are particularly important, balancing lights. It is sometimes confusing to a digital camera user why you need to do this; after all doesn’t the camera have white balance? The problem is that the camera can only accurately balance to one type of light. So if you are shooting a living room at night with existing tungsten lights and you fill with strobe light the colors will not match well. The result is either an accurately colored room with yellow lights or a blue room with accurate lights. If you use a gel designed to correct strobes to tungsten balance over your strobe you can bring all the light into the same general color, which is much more pleasing. The gel I would pick in this case is called a CTO or a full orange. There are several companies who make filters for lights including Rosco (www.rosco.com). One thing to be sure of is that the filters you buy won’t burn, the heat from modeling lights can cause poor quality filters to melt and burn. The heat from hot light can really fry a filter.

I used a blue filter and a cucoloris to create the blue light in the side of the face and the highlight in the eye.

I used a blue filter and a cucoloris to create the blue light in the side of the face and the highlight in the eye.

You can also use filters to adjust the mood of a shot, mixing colored light with light that is accurately balanced. This can be a very effective tool in creating an image. I will use normally balanced light for a large light source, and use warm light, say a 1/2 orange for a hard light to define the side of the face. You can make a very effective portrait in this way. I will also use a filter to change the color of my background. In one of images I’m including with this blog I used one large light source and three hard light sources. The hard light sources were all lower power and all were filtered. I am also including an image where a filter was used to make more dramatic color and one image with a filtered background.

Bird's nest, made with flowers

This shot was made in the studio with a gray background. I used a colored gel to make the blue in the background. It is easier to make a saturated background if you start with a darker background.

August 24, 2009

Lenses and Perspective

Filed under: Basic Photo Technique — John Siskin @ 8:15 pm

Custom Camera with a Fish-eye lensThe important thing to remember is that changing the focal length of your lens does not change where you stand it only changes the way your picture is cropped. So if you take a picture of a person’s face with your widest angle lens you will be inches from the subject if you fill the frame with just the face (unless you don’t own a wide angle lens). If you frame the shot the same way with your longest lens you may be more than 10 feet from the same subject, depending on how long a lens you own. You should really do this exercise and compare the results. In the image with the wide-angle lens your subject will probably look extended and strange. The telephoto image will look flat. The difference isn’t the lens it is where you stand. If you took a third image with the wide-angle lens, but standing where you stood with the telephoto lens and blew up the image to match the telephoto image, besides fewer pixels, you would notice the same flatness you saw with the telephoto lens. If you want to make images have a greater three-dimensionality stand closer to your subject and use a wider lens. If you want your images to be compressed stand further back and use a telephoto. No amount of new lens technology will change this. People often stand to far away from a person to make an intimate portrait, they find being close to the subject embarrassing. This causes a flatter look in the portrait. I use an 80-100mm lens on my full frame camera for portraits. I make more pictures with wide-angle lenses, 18mm to 40mm on my full frame camera, than often than telephoto lenses.

I’ve included a picture of a friend, Lance, made with a 28mm lens and with a  200mm lens. I tried to keep the size of the head the same. You can see the huge changes in the way the face appears, the charges are a result of the difference in camera position. With the 28mm lens I am just inches from the subject and with the 200mm lens I am almost 10 feet from the subject. You should try this for yourself.

Lance with a 28mm lens

Lance with a 28mm lens

Lance with a 200mm lens

Lance with a 200mm lens

August 13, 2009

Editing


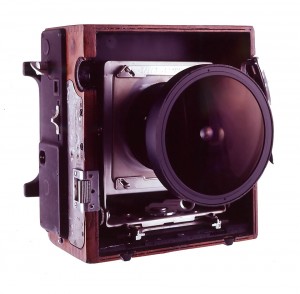
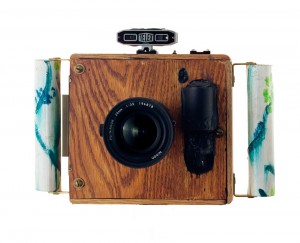
A hand built super wide camera

A hand built super wide camera

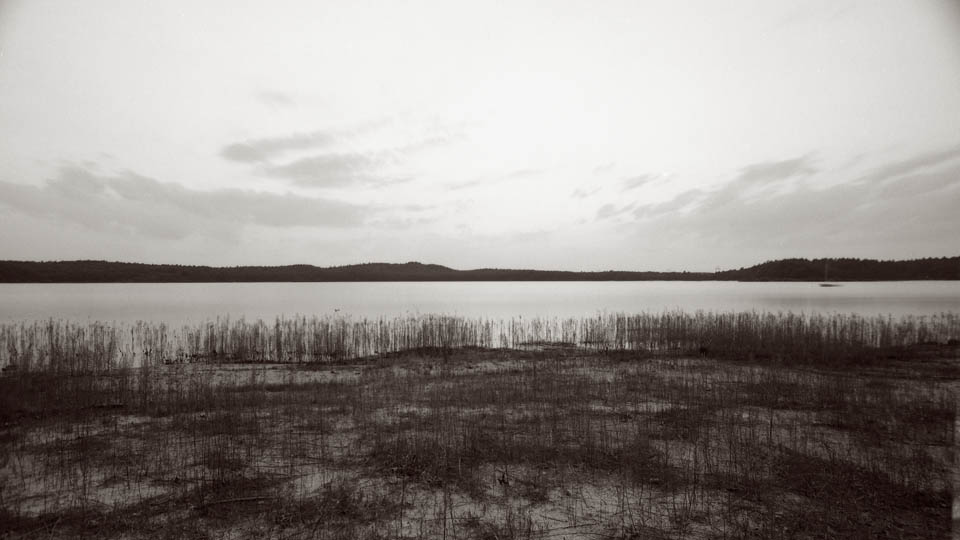
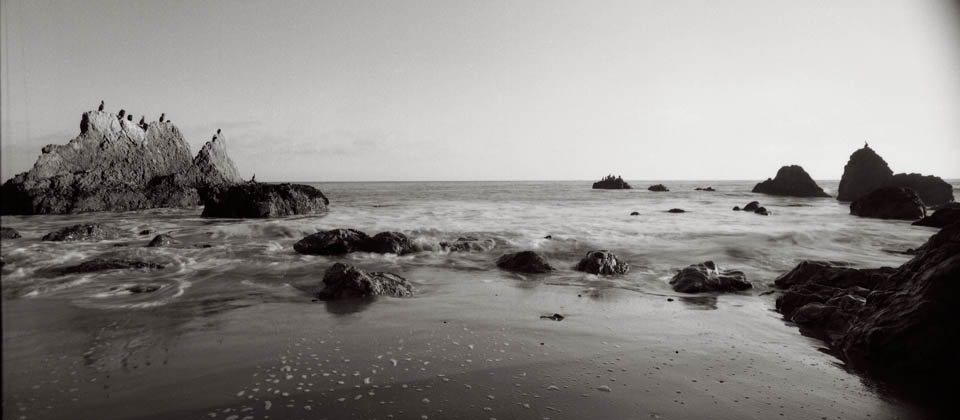
Editing photographs is not only difficult, sometimes it is heart wrenching. Often each image seems a special and unique expression of your creative vision, how can you bare to part with even one? Get over it; this feeling is personal. No one else will ever experience your photographs the way you do. You remember the day, what happened before and after, you remember the client and you remember whether you got paid. The viewer doesn’t experience any of this, and for the photograph to be effective for the viewer you have to give him/her an image they can perceive in their own terms. That is the purpose of editing. I am going to attach a photographs I made to this blogl. I designed and built the camera that made the image. Because of that intimacy no one else will ever perceive the shot in the way I do. I hope they will like it, but they will inevitably have a different feel for the image. You may think editing is time consuming, and it is, but it will make you a better photographer.

Made wirth the Super Wide camera

Made wirth the Super Wide camera

The first step in editing is shooting. You need to shoot a lot of images. The last head shot job I did was around 300 images, on a product job I might shoot only 20 images. Since we are now working in digital it is important to always shoot that extra image, or extra dozen images. It is always easier to shoot more than it is to go back. Although Eisenstaedt was famous for just taking a few shots, we will do better not to emulate him in this.

Made with the Super Wide camera

Made with the Super Wide camera

In order to edit effectively we need to be ruthless. The first step is to remove everything that is clearly a mistake. With a portrait type job this is generally pretty easy. A mistake is an image that has no real subject. A mistake is an image that is out of focus. A mistake is an image that is not focused on the subject. A mistake cuts into important parts of the subject, like the hands. If you shoot in raw a shot doesn’t have to be perfectly exposed, but if the shot is two stops from perfect exposure the shot is a mistake. If the strobes didn’t go off it is a mistake. Get rid of all this stuff, you should have plenty more images. I understand the Photoshop CS 15 will be able to fix everything, but that hasn’t happened yet. Photoshop 16 will be able to make your entire childhood perfect. Yes there are many mistakes you could fix, but you could spend days working in Photoshop. It is better to move through the process quickly. But you might as well save these images somewhere. This is why we have terabyte hard drives.

Made with the Super Wide Camera

Made with the Super Wide Camera

Step two is to get rid of everything that makes the subject look like a doofus. So that shot where the subject is checking out your shoes? Gone. At the same time you should part with all the shot where you awkwardly cut off body parts, hands cut in half and so on. Yes a lot of these shots could be saved. If you shot enough you shouldn’t need to save them.


Made with the Super Wide Camera

Made with the Super Wide Camera

If I am giving the client a proof disc, that is a disc with all the acceptable images, I will take the images at this point and convert them to jpg with the proprietary program. The proprietary program is often simple than Adobe Raw for this kind of large batch processing.

This should do it for negative editing; that is removing images because of problems. With any luck you have removed any where from 20 to 50 percent of your shots. Good. The other thing you have done is to look at all of the images that are left at least twice; well you went through the images twice didn’t you? That familiarity with your images is going to help a lot in the next go round. When you look through the images this time, look for images that are particularly fine, not just acceptable. They should have something special they may need cropping or other minor work, but the quality of your vision should be apparent. Also you want to look at the images as if you didn’t shoot them, as if you were seeing them not editing them. Look for an image that really connects. Certainly you can keep images you are unsure about, but you should end up with less than 10 percent of the images you started the third go around with.

I do this in Adobe Bridge, but there are certainly other good programs. As I go through each step I display the images larger, so that I get a better feel for the shots. The next step is to bring the images into Adobe Raw. Raw gives me a better look at each image, and I can begin the image processing. In raw I can do batch corrections on color, contrast, saturation and so on. I can also crop my images and do a variety of individual corrections. I will do my final choices on editing in raw. An image may get left behind at this point for a variety of reasons. Sometimes it is something I could fix, but don’t want to, or perhaps two images very similar.

Finally I will open up all of the images that made it through Raw in Photoshop. While I will rarely remove an image form the group in Photoshop I will perfect the images in Photoshop. This is where I will sharpen and do other detail work. Now finally, if the client asks for just there shots (not likely on a head shot) and I don’t have any personal reasons to make a choice, I can say enie minie moe….

August 2, 2009

Location Tips

Filed under: Commercial Photography — John Siskin @ 10:29 pm

Shoot From Different Angles!

I’ve been doing a lot of location work recently, among other things this has put me behind with this blog. I thought this might be a good time to say a few things about working on location, before I go back into technical stuff. Consider this a sort of tip sheet for location work.

1)   Work with an assistant. Not only does this make your life easier, it gives you time to concentrate on the client. Remember that sweating and swearing as you take two hundred and fifty pounds of lighting gear in and out of the location will not make you look more professional.

2)   Don’t lose your temper. Just don’t.

3)   Bring as much back-up gear as possible. Now I understand that you may not have a second laptop computer, but you can have an extra sync cord and a back-up cord to connect the camera to the computer.

4)   Always bring tape, at least gaffers tape. I have tape all over my cases, so I can always grab some off the case.

5)   Always have extra batteries. While a charger is grand, extra batteries are better. You don’t need to wait for them. And don’t forget extra batteries for the computer and lighting equipment.

6)   Extra memory cards, even if you have a big one.

7)   If you bring food you don’t need to take equipment down or lock it up. Still delivery pizzas are tasty!

Closer is more dramatic!

8)   On any job communication with the client is the best way to keep the client.

9)   Even when you have an assistant, don’t pack any equipment case you can’t lift. Better to have several small cases that one you need help with.

10)   At least some of your cases should be tough enough to stand on. It is simpler than bringing a stepladder.

11)    A laser pointer will give you camera something to focus on when the target has no contrast.

12)   A compass will tell you where the sun is going to go.

13)   Make sure your sensor is clean before you leave.

14)   Bring a flashlight. Packing up at night can be a real problem.

15)   I always pack my gear so that it is ready to go out on the next job. I prepare for the next job as the current job is ending. Also this enables me to be sure I haven’t left anything. MY gear is always stored in the location cases.

The job isn’t over when you get back to the home or office. I don’t relax until certain things are taken care of:

1)   First I copy the images onto my hard drive. If I have been shooting tethered the images are already on the drive. Next I copy the images onto a second hard drive.

2)   I start charging the batteries. I always take care of the tools as soon as possible. The next job is as close as the next phone call.

3)   I pull out any gear that didn’t perform well. Either for repair or replacement.

4)   Pay the assistant. I like to do that AFTER the gear is unloaded.

5)   Catch up on my blog and critiques.

All pretty obvious, I guess, but these things have helped me a time or two.

Details Are Important!

July 25, 2009

Aperture III

Filed under: Basic Photo Technique — John Siskin @ 1:29 pm


This shot was focused mid-way through the image to hold focus back to front. Shot made with a Toyo 4X5 camera.

This shot was focused mid-way through the image to hold focus back to front. Shot made with a Toyo 4X5 camera.

Well I hope I haven’t lost too many readers by going on about aperture for three blogs, but it is really important to understand this in order to make good pictures. The idea is that the use of the right aperture allows the photographer to control what part of an image the viewer concentrates on.

The next part of understanding aperture I want to discuss is the hyper focal distance. This is the point at which you focus and stop down in order to create the most depth of field possible in a shot. Of course it is different with different focal length lenses, as we saw last week. Of course it is also different at different apertures. The thing to keep in mind, regardless of aperture and focal length is that in order to maximize depth of field you would not focus on infinity. Two thirds of the depth of field exists behind the focus point and one third in front. You would not be using the depth of field efficiently if you focused on the furthest point that the lens could focus on, something closer would make better use of depth of field. Also if everything in you shot is effectively at infinity then depth of field doesn’t matter.

There is a button on most cameras to help you figure that out, and sometimes it does help. The reason I say sometimes is that this button causes the lens to stop down, and that makes the picture darker, but you can see the depth of field. The darker image in the viewfinder can mean that the image is hard to see, which can make the preview pretty useless especially indoors. Modern cameras are set up to let you look through the lens at its widest opening, which makes focusing much easier. The lens stops down to the working aperture at the moment you activate the shutter, this system works very well. Under the right circumstances, usually bright, the depth of field button can give you an indication of how the depth of field will look.

I promised that memorizing the apertures would be helpful, the reason is that these numbers apply to any time that you are

Careful use of aperture and focus point keep the whole image in focus.

Careful use of aperture and focus point keep the whole image in focus.

working with the area of a circle. For instance when working with light. If you have a light at 5.6 feet from a subject and you bring it closer, to say 4 feet that the light on the subject will be one stop brighter. You went from f5.6 to f4, a one-stop increase in light. Similarly if you had a light at 8 feet from a subject and dragged it back to 11 feet from the subject you would lose one stop of light. Wedding photographers used to use manual strobes like the Norman 200B, they would use this principal to rapidly figure changes in exposure. The same principal made it possible to figure bellows extension, but I won’t trouble you with that now.


The depth of field keeps the whole shot in focus.

The depth of field keeps the whole shot in focus.

July 18, 2009

More on Aperture

Filed under: Basic Photo Technique — John Siskin @ 1:37 pm
This image uses short depth of field to give the image a sense of three-dimensionality.

This image uses short depth of field to give the image a sense of three-dimensionality.

When I left off last time I had just suggested the concept of depth of field, and we will start with that this in this blog. The real problem is that the language is confusing here: what does “depth of field” mean? Obviously we aren’t talking about how much acreage you might have planted in corn. What we are taking about is how much of your image, closer and further from the lens, is in sharp focus. So if I want an image that will concentrate the eye on just part of the face, of a subject, I would say that I need a very narrow depth of field. In order to get this I will use a wide aperture (small number, say 2) that will let in a lot of light through the lens. This will create an isolated zone of focus. How low will depend on the focal length of the lens. For instance f2.8 is extremely short depth of field on a 200mm lens while it provides significant depth of field on an 18mm lens.

The focal length of the lens is one of the factors that affects the depth of field. If you use a long lens you see more details in the subject than you would with a short lens at the same distance. The need to use a smaller aperture (bigger number like 16) to achieve sufficient depth of field is related to this increase in detail. If you shoot with a 28mm lens at a distance of 10 feet from the subject many of the details of the subject are no more than specs, so you wouldn’t expect to see detail in them. If you shoot the same subject, from the same distance with a 150mm lens many of the parts of the subject that were specs in the 28mm shot will have visible detail, and thus need to be sharp. For this reason you can expect to need more depth of field with a longer lens. I should point out that the 150mm lens will see much less of the subject.

Another factor with depth of field is visualizing what will be sharp and how the soft areas will appear. This is covered by a rule that is usually referred to as the one third, two thirds rule. It is also know as the Scheimpflug rule, but since this name is hard to pronounce it doesn’t get used much. Regardless of what you call it the idea is that as you stop down the lens 1/3rd of the extra depth of field exists in front of the point you focus on and 2/3rds of the additional sharp focus area is behind the focus point. Think about this, if you want a lot of stuff in focus, don’t focus on the front of the image, but midway through the image. You will use the depth of field you have, at any give aperture, more effectively. Of course if you don’t have enough depth of field, for an image that needs it, the point of focus won’t save you; you need to use a smaller aperture.

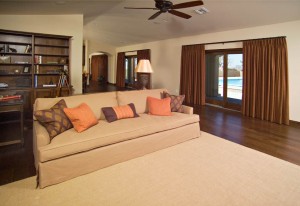
This shot uses long depth of field to keep the whole room in focus.

This shot uses long depth of field to keep the whole room in focus.

« Newer PostsOlder Posts »

Powered by WordPress