Photo Notes A place to talk about making images.

April 10, 2014

Strobe Lighting Workshop! April 27th

Filed under: Commercial Photography,Indianapolis,Lighting Technique — John Siskin @ 2:57 pm

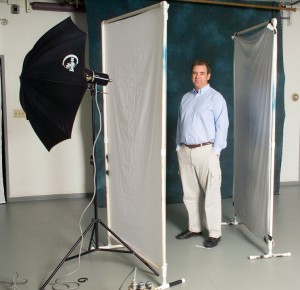
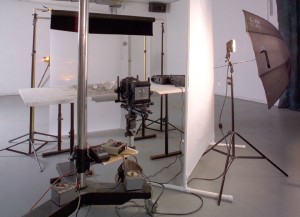
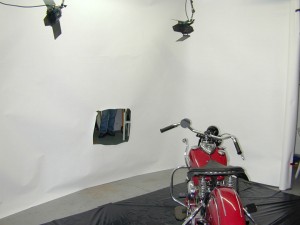
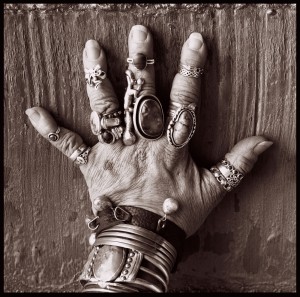
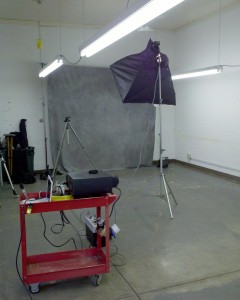
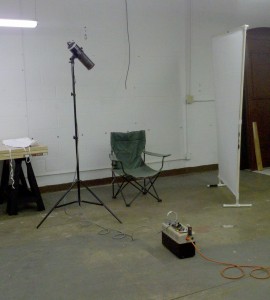
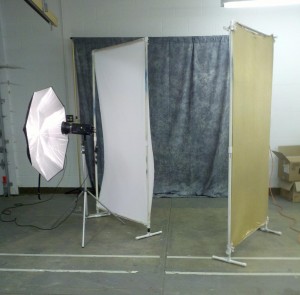
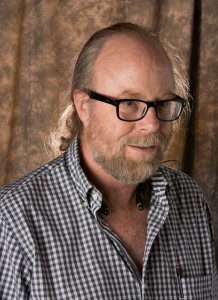
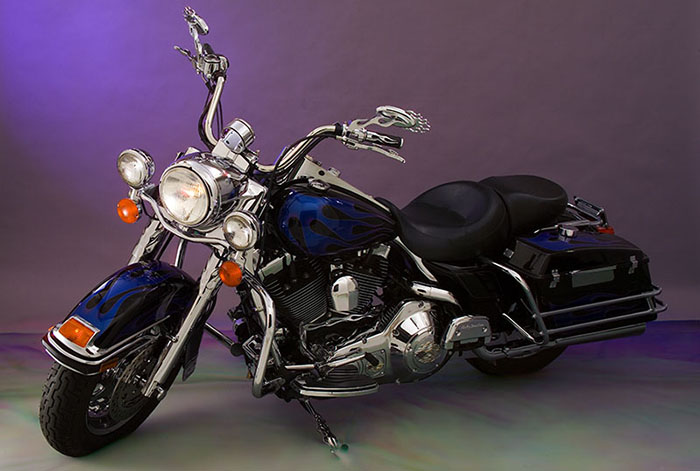
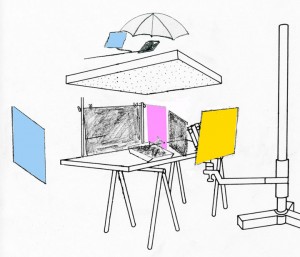
If you’re close to Indiana this will be a great workshop, if not you can take an online class with me at BetterPhoto.com. The shots this week are demonstration images and diagrams from my classes and books.

It’s sometimes useful to remember that we don’t actually photograph things or people or places; we photograph the light reflected off people or things or paces. For instance if you take a picture of someone under a blue light that person will be blue, also you can’t take a picture without light. So, in a very real sense all photography is painting with light. Like painting a photographer can choose to make a straight recording of a subject, but also like painting, a photographer can choose to manipulate and interpret the subject. I think that manipulation is part of want makes an image a photograph rather than a snap shot. Manipulating the light is one way the photographer can change an image, and it’s a powerful way to manipulate an image. Creating light can allow you to build a shot that isn’t part of the world and to take a shot where the light is wrong or just insufficient.

A house painter uses a different tool kit than a portrait painter. I don’t think portrait painters ever use rollers! Of course there are different tools for creating different kinds of light for photographs. You might use a dedicated flash to open up the shadows in an outdoor portrait, but if you try to do a studio portrait with the same flash you’ll be disappointed with the results. A good artist, with any medium, knows how each tool will affect the picture. This workshop is designed to give you greater confidence and ability with the tools of lighting.

Strobes are fantastic tools for lighting still pictures. You can get a dedicated strobe that will do a good job shooting 500 pictures at an event powered by just a few batteries. You can carry the thing in a pocket. When a movie crew shows up there is at least one truck entirely full of lights; a movie light with the same power as a good strobe is hard for one person to lift. There is only one problem with strobe lights: the photographer can’t see the light that will make the picture. The light is only on for 1/1000th of a second while the shutter is open. So to make good shots with these lights we have to be able to predict, pre-visualize, what our strobes will do. That’s what this workshop is about.

Automatic or dedicated strobes are good tools when you need to get a good exposure quickly, say if your shooting a wedding or other event, but automation doesn’t give you complete control over the light. It’s more like painting by numbers that painting with light. In addition to a light we need the right tools to modify the light: to get quality light rather than just quantity light. It’s a big problem for photographers to choose good tools. The manufacturers of the gear want to sell you more things rather than help you make better pictures, so they don’t always give you enough information. So one goal of this workshop is to help you decide what tools would be best for you. My studio is a kind of test kitchen for light modifiers. You’ll be able to see the light that different tools make. Other goals are to learn how to use several lights together and how to use strobe with ambient light.


Strobe Lighting! April 27th
This workshop will take place on Sunday the 27th of April. We’ll meet at my studio: 971 North Delaware, Unit B, Indianapolis. We’ll be starting at 10:00 am, and we’ll be working together all day. The cost will be $225. There are only three spaces left. You can sign up for either workshop at the workshop page on my site: http://www.siskinphoto.com/Workshop.html, or give me a call (317) 473-0406.

If you control the light in your picture you are doing so much more to build the image than when you just record the light. Finding light is good, but building light is fabulous. The idea is to understand how to control and create light to build your own vision.


I post on this blog mostly to promote my classes at BetterPhoto and my books. I’m lucky enough to have students from around the world. If you’re interested in taking one of these classes here are the links:

An Introduction to Photographic Lighting

Portrait Lighting on Location and in the Studio

Getting Started in Commercial Photography

And here are the books:

I’ll mention a couple of more resources that might interest you on my website: my magazine page has two-dozen of my articles on subjects from lighting to lens building that appeared in such magazines as Shutterbug, Photo Techniques and View Camera. Check it out at: http://www.siskinphoto.com/magazinearticles.php. And if you like to build some of your own equipment you can check out the projects here: http://www.siskinphoto.com/cameraeqp.php. You can check out my page at facebook: https://www.facebook.com/JohnSiskinPhotographer. Or my website: www.siskinphoto.com and of course you can probably find traces of me at places like LinkedIn, Behance (www.behance.net/siskin), Flicker and even Twitter (twitter.com/JohnSiskin).
Thanks for your attention!
John
john@siskinphoto.com
www.siskinphoto.com

March 20, 2014

New Classes!

Filed under: Indianapolis,Lighting Technique,Marketing — John Siskin @ 3:30 pm

Please check out my on-line classes at BetterPhoto: An Introduction to Photographic Lighting, Portrait Lighting on Location and in the Studio and Getting Started in Commercial Photography and my books:

When I’m not shooting, and who can shoot all the time, I’m marketing. Frankly I’d rather be shooting, but If I don’t let people know about my photography I won’t be doing much shooting. I just made a couple of pdf files that I’m hosting on my site. I can send people a link to these files, like this http://www.siskinphoto.com/acontractor.pdf and this http://www.siskinphoto.com/aportrait.pdf. I’m using these with e-mail and with facebook, and they seem to be working. I really need to redo my website, but I’m not quite ready to get into that project. If you’d like to get mailings from me about classes I teach or my photographic services please send me an e-mail: john@siskinphoto.com. I’ve added a few shots to this entry that might make it into the next pdf file.

I’m offering some classes here at my studio that I hope you’ll want to take. The first is the Portfolio Workshop. This is an ongoing group that gets together to discuss each others’ work and give encouragement. Here’s some information from the website: “Since portfolios are the tools photographers use to present their vision it’s really important to know how people perceive your work. In many ways it’s like a resume: it’s a detailed introduction for a person in fine arts or commercial art.” Come join us it’ only $20 per meeting. The next meeting is April 7 at my studio. Check out www.siskinphoto.com/Workshop.html to sign up.

I’m also offering a Lighting Workshop on April 27. Here’s some information about that class: The cost will be $225. There are only going to be 5 participants, so you can get a real hands on experience! We’re going over these topics:
How to use strobes.
Kinds of light.
What different light modifiers do to the light and why.
Using different kinds to lights together.
Balancing the light from different strobes.
You can sign up at the workshop page on my website: www.siskinphoto.com/Workshop.html. And I hope to see you on the 27th. Since this is such a small class it’ll fill up soon.

Of course, if you can’t come to Indianapolis you can still get my books or take my classes. And I hope you will!
Books:
Understanding and Controlling Strobe Lighting: A Guide for Digital Photographer

Photographing Architecture

My Classes at BetterPhoto.com:

An Introduction to Photographic Lighting
Portrait Lighting on Location and in the Studio

Getting Started in Commercial Photography


October 30, 2013

Studio Open House!


To start I just want to remind you about the classes: An Introduction to Photographic Lighting, Portrait Lighting on Location and in the Studio and Getting Started in Commercial Photography and the books:


I’m going to be having an opening for my studio on Friday November 1. The address is 971 North Delaware Street, Suite B, here in Indianapolis. Please come by if you can. I’ll be showing photographs of buildings in my studio and at the building in front: Re/Max Metro. The text for this blog entry is from recent correspondence and the photos are from a job for BMW Contractors. Thanks for your attention!

A couple of things about rim light, first most of your shots won’t work. Positioning the light is very critical, and even when you have an assistant, most of the time the light or the model won’t be in the right place. I much prefer the snoot as a tool for rim light. Norman has a wider “stovepipe” snoot that I prefer to the smaller ones like the Alien Bee. What I do most of the time to get rim light is put a bare bulb strobe, no reflector at all behind directly behind the subject. This works more often. This will put light on the background so sometimes I put a gel on the back of the light to change the color of the background. The position and power of the light both affect the outcome, so you have to experiment. I like to avoid discussing things in terms or ratios for several reasons: the most important is that ratios stop people from paying attention to the results. I set up my shots with a tethered computer so that I can evaluate the shot better. The bare bulb allows for more movement in the subject, but you have to keep the subject between you and the light. You can also use a large reflector on the side to bring some of the light to the front.


I really like to use at least one very large light modifier, usually a light panel, for a portrait. It creates a very soft gradation.

I don’t like the term “natural light.” It is a value term, and it often gives the idea that ambient or found light is generally or always better than light you design and create. This isn’t true. Many people have no idea how to make good light, but that is no reason to think that found light must be better. Photography comes from the Greek and means “write with light” if you can’t design good light are you writing with light or copying light?


You need to look at several things when you examine light. The first is the color. Often people don’t notice how warm or cool a light source is. The color of a subject will shift with the light, but because our eyes compensate for color, we don’t always notice.


The transition from light to shadow is a function of the size of a light source. So if you have light from the sky coming into a room you get a large light source, very long transition from light to dark. You need a big light source, at least as big as a window, to reproduce this light. Hard light makes very short transitions, which look like sunlight especially if you add warm filtration to the light.


Watch a person’s eyes in prints or when you are shooting. You can often see the reflection of the light source there. A small reflection come from a hard light, a bigger reflection is a large light source. The large reflection won’t be as bright. The eyes can also tell you about the placement and direction of light sources.


Balancing light is the essential trick with strobes, to evaluate and change our images by searching for the right levels on our lights and our exposures. With the histogram and the proof image on camera or in the computer we have better tools for creating the right exposure than any meter could give us, but it does take repeated testing. If you use a hand-held meter you will get an answer, but very often it will be profoundly wrong.


In addition to the new image stabilization equipment, there are some standard suggestions about holding the camera more effectively. Cradle the lens in your left hand, thumb pointing away from your body. The left hand supports the lens and the camera. The right hand guides the camera and controls the camera. Relax your body and breath out half way when you shoot. Lean against a tree or a wall. You might also consider a mono-pod or a chainpod to help stabilize your camera.

I hope people are interested in these posts, but I really don’t know. If you want to leave a comment you have to log in. I’m sorry about that, but I was getting a huge amount of spam posts, so I had to change to registration. If you’d like you can send me an e-mail with your comments, john@siskinphoto.com. Also please remember the classes and the books!

An Introduction to Photographic Lighting
Portrait Lighting on Location and in the Studio
Getting Started in Commercial Photography.


October 1, 2013

Bike Shot in the Studio

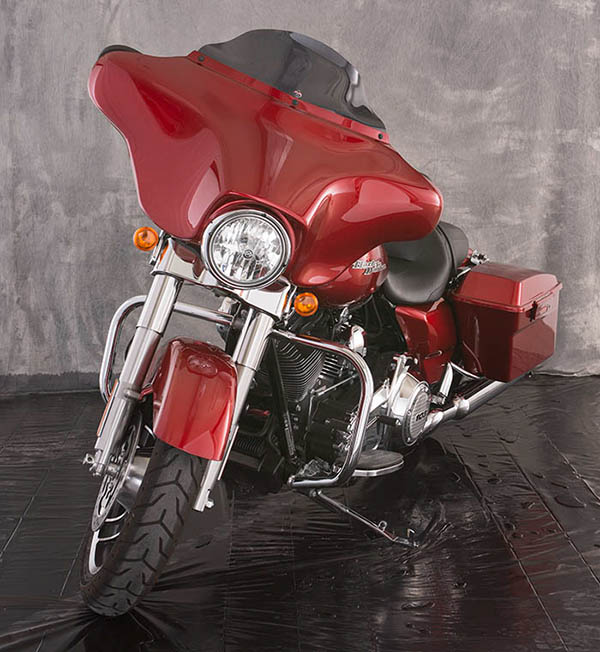
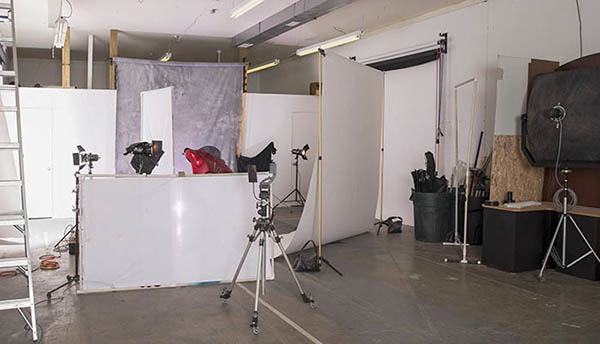
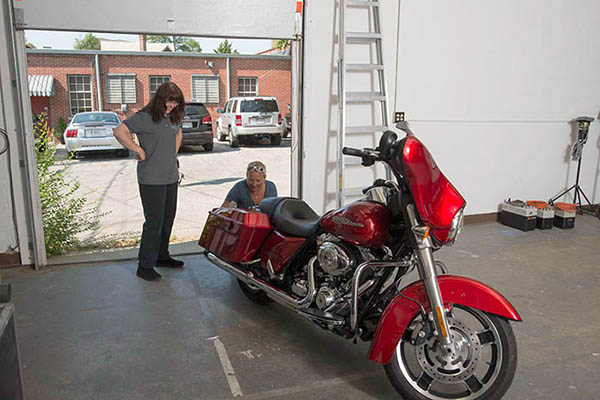
I’ve been working on the studio, no surprise there. I’m finally happy with the current situation, while there’s more to do, it doesn’t have to be done now. I’ve moved in the lights: 20 or so strobes, another half-dozen quartz lights and an armful of projectors. I think I have 10 tripods, not sure how that happened. Booms and light stands, umbrellas, soft boxes and light panels, and all the things that come from a life spent in photography. Of course the important thing now is to get the studio busy. That means shooting, and I just got a couple of new customers! I also want to rent out the studio and offer classes here. What I want to do in this blog is to show you the studio at work, shooting and teaching. Ginny Taylor-Rosner brought a few of her advanced student from Ivy Tech in for a motorcycle shoot. This entry has a lot of large shots; I hope you will follow it to the end. Here’s the studio plan:

It’s easy to get large subjects into this studio, as you can see. I used a gray muslin on the back wall and black plastic muslin on the floor, so the set was really inexpensive.

The first thing I did was pull down white seamless along the side walls. I installed seamless holders on the side walls so that I could use them for very large reflectors with white paper, and so I could pull down black paper to reduce bounce light. It worked really well in this shot. In the shot marked Side Lights I only have the lights that are on the side seamless on, not the light on the front seamless. The light on camera left was placed at the front of the seamless to rake across the paper. This creates a very big light source. On camera right I place a light set at 750 watt-second at the back of the seamless. It spread across the side seamless and onto the diagonal seamless.

I put another roll of seamless on a pair of seamless stands on a diagonal in front of the bike. Once again I used a strobe raking across the seamless to give me a big light source. This light was set at only 400 watt-seconds. You can see what this light added in the image marked Front Light. This image has the all three of the large light sources. It’s important to have barn doors on the lights when you are bouncing light off seamless paper. The barn doors keep the light from spilling directly onto the bike and the background. I had to use cine-foil, black aluminum foil, in addition to the barn doors, for the front light because of spill light.

Only the light on the diagonal seamless.

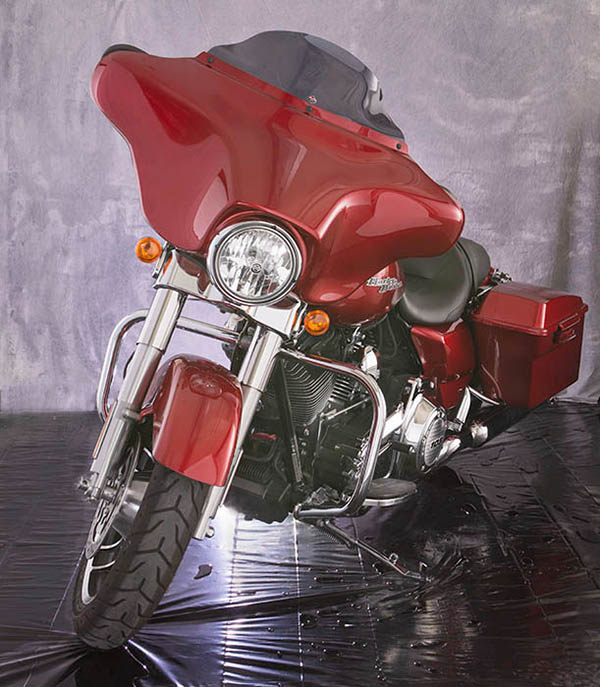
I made some small changes in the position of the lights that rake across the paper. It’s much easier to move the lights than it is to move the bike or the paper. We also moved in a gobo (large black light panel) at the back of the bike to make the light on the saddlebag more even. Then I put a bare bulb light set at 200 watt-seconds, covered with a pale lavender gel, behind the bike. This added the highlight below the bike and put a little color into the background. If I’d used a darker background we could have added more drama with this light. This shot is marked Last Light.

Added a small strobe behind the bike. Bare bulb with a gel.

In this shot, Final Set-Up, you can see the position of most lights in the set. I added the light panel in front of the bile late in the shoot. It helps to open up the tire and to even some of the reflection on the front of the bike.

I was a little concerned about the density of the engine and the high light from the light behind the bike, so I made a couple of bracketed exposures. I used these captures to give me a little more control over these areas by using them as layers in Photoshop. I did a few other quick touch-up to make my Final Image.

Thanks for visiting the studio here in the blog. If you’re in Indianapolis give me a call and come by 317.473.0406. If you need to rent a studio I’m ready. Special price for October: $275 for the day! I hope to have classes available in the next few weeks. If you need a private session let me know as well. The Portfolio Class is meeting on TUESDAY OCTOBER 15. This class will help you present your work. There’s more information, and a sign-up link here. I hope to see you soon!


Here are a couple more images from the shoot!

Shot by Terry Pitman

Don’t forget about the classes at BetterPhoto and my books!
: An Introduction to Photographic Lighting
Portrait Lighting on Location and in the Studio
Getting Started in Commercial Photography


September 3, 2013

The Studio is Open!

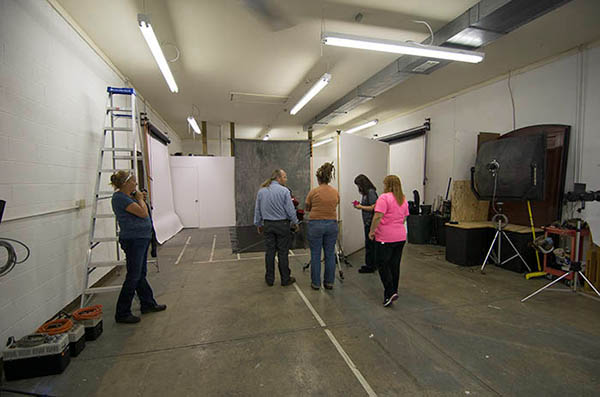
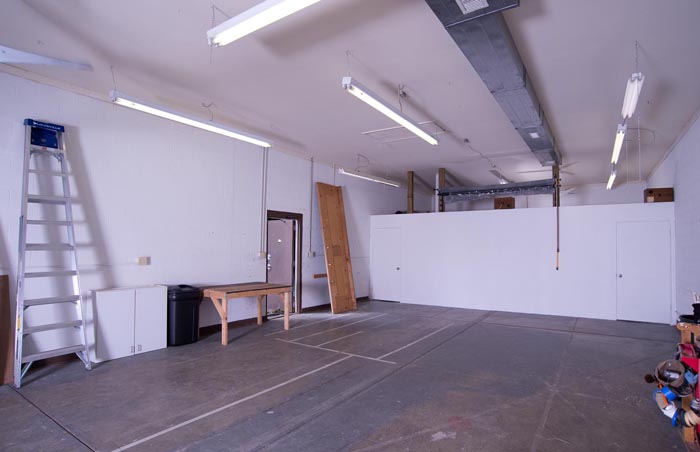
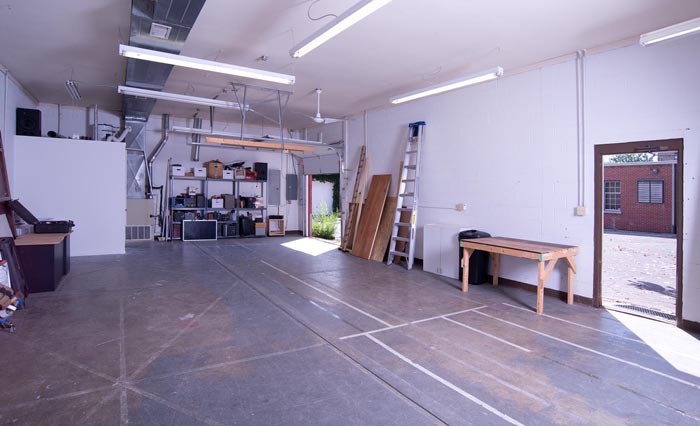
I’m going to keep thins simple in this entry: just a bunch of pictures of the new studio. It’s possible to shoot here, but not everything is put in the right place yet. The shooting space is about 42X24 feet, pretty damn large. The background holders are up. I’m going to put some more holders on the sides so that I can pull down white or black to add or subtract bounce fill. I need a little help to finish, some things are to big to lift. If you’re local maybe you could help me out, or help with a shoot. I’m trying to set up a shot of a Mini-Cooper, maybe for this weekend. You can also arrange to drop by and have a look. Thanks for your attention! I’ll just remind you about the BetterPhoto classes: An Introduction to Photographic Lighting, Portrait Lighting on Location and in the Studio and Getting Started in Commercial Photography and the books:
 

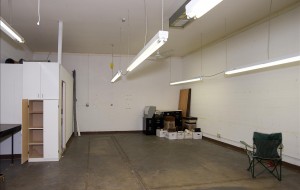
The shooting wall. You can see the background holders above the wall.

Another view of the shooting wall.

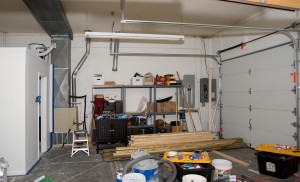
The back of the studio. You can see the cargo door.

This is the outside. It's a separate building. There is parking, particularly on evenings and weekends.

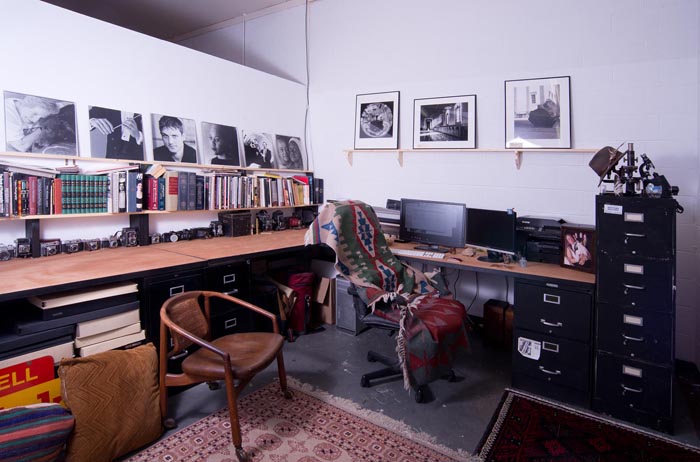
My office. I'm very happy about the way it turned out.

August 13, 2013

Building the Studio

Filed under: Indianapolis — John Siskin @ 10:34 am

My new studio is coming along. I’m adding a few notes about the process. First, I’ll just remind you about the classes: An Introduction to Photographic Lighting, Portrait Lighting on Location and in the Studio and Getting Started in Commercial Photography and the books:


I just wanted to add a few notes about the new studio. There are a lot of things to arrange, as you can imagine. I’ve got the utilities set up. I had to pay hundreds of dollars in deposits to do this. I also got business insurance. Right now I just have liability insurance. I’ll have to do an inventory of equipment pretty soon. When I do that I’ll also add pictures of the equipment that should be in each case, so I can make sure I take everything back from a location shoot. I’ve also arranged a decent internet hook-up, which you can imagine is important.

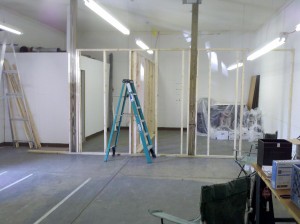
This is the wall that will define the offices. Note the posts to hold backgrounds.

I’ve included pictures of the construction. The first thing that needed to happen was rebuilding the bathroom. It’s finally finished!! The landlord paid for this. I’m also getting a couple of walls built to create some office space. I’ve built walls myself over the years, but I wanted them to actually look good. I’m paying for this part of the construction myself. Photography is a business about images, and I want the studio to have a good image! The pictures are all of the construction; no prizes will be awarded for guessing which one was taken with my phone.

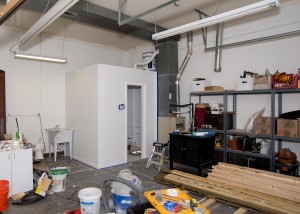
The bathroom is finished!!

I’ll need to do a few more things. First I’ll need to arrange background rollers. You can see that there are some large posts that are being built into the wall. These posts will be for the seamless rollers. I’ll also upgrade my computer and monitor before I finish with the office. I want to move some of the fluorescent lights out of the way as well. I’ll build a box around the shelves in the back; lots of little things need to happen.

Before the office wall was built. The small office on the left side of the shot was already in the studio

The shelves are already starting to fill with equipment!

The portfolio class will meet again next week. If you’re in the Indianapolis area I hope you’ll consider joining us! You can find more information at the workshop page on my website: http://www.siskinphoto.com/Workshop.html. The class will meet at the studio. There’s plenty of parking, at least in the evening. This class exists to help you create a more coherent body of work. Please remember the classes and the books!
An Introduction to Photographic Lighting

Portrait Lighting on Location and in the Studio
Getting Started in Commercial Photography.


August 4, 2013

Using the Studio!

Filed under: Indianapolis,Lighting Technique,New Studio! — John Siskin @ 1:00 pm

I’m back a little quicker this time around. I’ll just remind you about the classes: An Introduction to Photographic Lighting, Portrait Lighting on Location and in the Studio and Getting Started in Commercial Photography and the books:


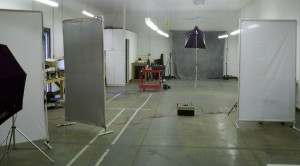
Three different one light set ups in the new studio. Taken with my phone.

Things at the studio are progressing nicely. I had a group over from the Irvington Photo Club. I gave them a chance to play with a couple one light set-ups. I’ve included a couple of shots of the set-ups I took with the phone. I also did some consulting with a couple of other students that wanted to work with portrait set-ups. So a couple of people have seen what’s going on at the North Delaware Studio. I am still taking suggestions for studio names.


One soft box 3X3 foot. Positioned above and in front of the subject.

I can’t say anything is finished. The bathroom is going to be rebuilt, which is a really great thing. I’m going to be building a couple of offices at one end of the space, another nice up grade. I brought in some industrial shelves and put them at the back of the studio. I’ll enclose them in a few days. This will give me a place for lights and cameras. I’ll store the light stands in trashcans, probably at the back of the studio.


The goal is to have a large empty space. The whole studio is about 24X60 feet. When I’ve finished the shooting space should be 24X40, or close to that. There’s a roll up garage door at one end of the studio, which is really useful.


A set-up with a snoot.

I did three set-ups for the Irvington Photo club. The first one is a 3X3 foot soft box placed in front and above the subject. This is an easy light to set up. It gives you soft shadows under the nose and chin, which gives some shape to the face. The second one was a hard light set-up using just a snoot. This gives dramatic light, but the position of the light is really important. Finally I did a set-up with three light panels. This is a set-up I use frequently because it provides such nice soft light. I wrote about this light design in this article: www.siskinphoto.com/magazine/zpdf/Portrait.pdf.


I used the light panels the next day, with two

I did a one light set-up with two light panels.

students, and I added a bare bulb light behind the subject. In this case the bare bulb light, as well as the light from the umbrella, bounces off the reflector. In addition you get rim light and hair light from the bare bulb. So both lights are doing a lot of work in this set-up. One more thing: the bare bulb light puts light on the background. I put a warm gel (Rosco full CTO) over the back of the bare bulb light, so the light going forward had a daylight balance, but the light on the background was a tungsten balance.


I hope people are interested in these posts, but

With the light panels and the bare bulb

I really don’t know. If you want to leave a comment you have to log in. I’m sorry about that, but I was getting a huge amount of spam posts, so I had to change to registration. If you’d like you can send me an e-mail with your comments, john@siskinphoto.com. Also please remember the classes and the books!
An Introduction to Photographic Lighting

Portrait Lighting on Location and in the Studio
Getting Started in Commercial Photography.


June 25, 2013

Building: Birth, Decay Renewal

Filed under: Indianapolis — John Siskin @ 10:47 am

I hope you’ll check out my books: Photographing Architecture and Understanding and Controlling Strobe Lighting. Please get copies, if you haven’t already. Of course you know that one reason for this blog is introduce the books and get you to consider one of my classes at BetterPhoto.com: An Introduction to Photographic Lighting, Portrait Lighting on Location and in the Studio, Getting Started in Commercial Photography

This is just a short note to remind you that you have just a few more days to see The show Buildings:  Birth, Decay, Renewal  at Indiana Landmarks. I did this show with Ginny Taylor Rosner, and it turned out very well. You can see a video version of the show below, but I hope you’ll see the real thing. A more substantial entry soon!
Thanks, John

Video Link: Building: Birth, Decay, Renewal

Please check out my classes at BetterPhoto.com:

An Introduction to Photographic Lighting,

Portrait Lighting on Location and in the Studio,

Getting Started in Commercial Photography

May 30, 2013

Print Types

I hope you’ll check out my books: Photographing Architecture and Understanding and Controlling Strobe Lighting. Please get copies, if you haven’t already. Of course you know that one reason for this blog is introduce the books and get you to consider one of my classes at BetterPhoto.com: An Introduction to Photographic Lighting, Portrait Lighting on Location and in the Studio, Getting Started in Commercial Photography

The second portfolio class was great. Please let me know if you want to be on the mailing list. Here’s some more information the next meeting is Tuesday June 18, 2013, 6:30 pm. We may be meeting at my new studio. Stay tuned for more about that! The class is a great opportunity to make a greater commitment to your work and learn more about how others see your work. Still only $20. I look forward to seeing you if you’re near Indianapolis.
I’m going to discuss the kinds of prints I’ll be using in my show at Indiana Landmarks. The opening is on June 7 at 6pm. I hope I’ll see you there! For more information check this link. Most of the images in this week’s blog are going to the show at Landmarks. Please keep in mind that images on your screen aren’t good representations of what real prints look like. The images are linked to the fine art part of my website, which you can use to buy a print. The prints available on my website are made on the Moab Entrada rag paper discussed below.

I’ll start with silver gelatin prints because in many ways they’re my favorites. These were the most common black and white prints for most of the twentieth century. The black part of the image is silver and the emulsion is made of gelatin, which is probably the reason for the name. One of the most beautiful aspects of these prints is the bright whites created by a layer of barium clay called baryta. This layer is on most prints made on a paper base, usually called fiber based paper. This layer was replaced by a titanium layer when resin coated papers were introduced. I think resin papers aren’t as beautiful because they don’t have the baryta layer.

Fiber based silver gelatin papers are still available ready to use. The prints are exposed in a darkroom with an enlarger. Processing time is over an hour; most of this is wash time. If the prints are properly handled, particularly given through washing, they will last for at more than a hundred years. There are many examples of prints that have lasted longer than a hundred years. The photographer has considerable control over the print; in addition to changing density the photographer can also change contrast tone and local density.

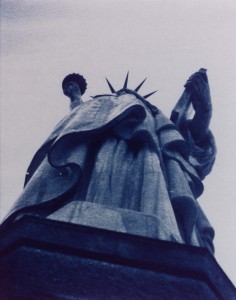
Cyanotypes have bright blue images on a base that is the color of the paper or other material you print on. Sir John Herschel invented the process in 1842. The light sensitive chemistry is iron based, and the final image is an iron compound. The final dye is called Prussian blue. The chemistry is mixed by hand and brush coated on the paper. Multiple coatings add to the saturation of the image, which is why I usually triple coat the paper I use for cyanotypes. Processing is just a long wash.


Cyanotype, Vandyke and other processes are usually referred to as alternate processes or alt process. The idea is that these are different from the more commercial photographic processed used for most photography. These processes are much more personal, for instance the paper is hand coated by the photographer. The processes are not very sensitive to light so enlargers can’t be used. Most often the original camera negative is pressed right against the hand coated paper. An alt process print is a handmade object and each print will be unique. Of course the photographer has to exercise considerable care when preparing and processing these prints in the darkroom.

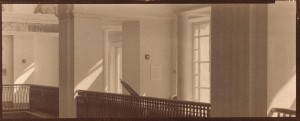
The Vandyke process produces a brown toned image. The image is made of silver, but the light sensitivity is based on iron chemistry, like cyanotypes rather than silver chemistry like a silver gelatin print. This process is often referred to as Kallitype. The sensitizer contains Ferric Ammonium Citrate, Tartaric Acid and Silver Nitrate. Processing includes considerable wash time as well as a bath in sodium thiosulfate. Properly processed Vandyke images have lasted for about a hundred years.


From the time that George Eastman introduced the Kodak camera with the slogan “You press the button, we do the rest” there have been places to get your processing work done for you. In some cases, for instance Kodachrome processing, there was literally no way to do it yourself. In addition much processing can’t be done economically unless you do a lot of printing everyday. Certainly many people have noticed that their ink jet printers don’t work well after sitting unused for several weeks. There are several things that are important to the photographer and the viewer with all of these processes; first is how much control does the photographer have over the images. The printer that I am using allows me to manipulate the image files in Photoshop. This gives me incredible control over the final print. Another consideration is how long will the prints last. While none of these processes have been around long enough to prove durability, prints can tested using light and heat.

Fuji Type R Paper was actually used when photo labs had enlargers. The R stood for reversal. It allowed the lab to maker a print directly from a slide or a larger film positive. So you could make prints from Kodachrome or Ektachrome without making an inter negative. Labs generally used enlargers to work with this paper, so you could do dodging and burning, but there was not much other control. I am not sure if anyone is still making Type R paper. These prints had good saturation and good durability.

Moab Entrada Rag 290 Bright paper is made to high standards and designed for specialized ink jet printers. It is a rag paper and has no acid or lignin. The Epson Ultrachrome inks are used. These are pigment inks so they will last for an exceptionally long time. I find that these prints have a very long tonal scale and very fine color. These prints are made from files that have been prepared with Photoshop. Both color and black and white prints can be made on this paper.

I am showing a 20X50 inch print of this image! It looks great.

Fuji Crystal Archive Matte paper is a color photographic paper designed to be used with digital enlargers. Prints are made from files that have been prepared with Photoshop. This kind of paper is usually used to make color prints. I often use it to make mono-chrome images with a warm tone. Prints made with this product are expected to last more than twenty years.

Please check out my classes at BetterPhoto.com:

An Introduction to Photographic Lighting,

Portrait Lighting on Location and in the Studio,

Getting Started in Commercial Photography

Thanks, John


March 13, 2013

Candlelight Home Tour #2

I hope you’ll check out my books: Photographing Architecture and Understanding and Controlling Strobe Lighting. I hope you’ll get copies, if you haven’t already. Of course you know that one reason for this blog is introduce the books and get you to consider one of my classes at BetterPhoto.com: An Introduction to Photographic Lighting, Portrait Lighting on Location and in the Studio, Getting Started in Commercial Photography


This week I shot another home for the Candle Light Tour of Indianapolis’ Old North Side. This is also a fabulous home, but why would anybody put a home on a tour that wasn’t fabulous? The interior of this home is very different from the last home, more of an Italian flare, and less of a period piece.

I knew that there would be less time to do this shoot, which reduces what can be done. It’s hard to set up to light a room, do the shot and clean up in two hours, which was all the time I had. In this case I did one very difficult shot that included several rooms and a simple shot of the kitchen. And I did leave the house in the required two hours.

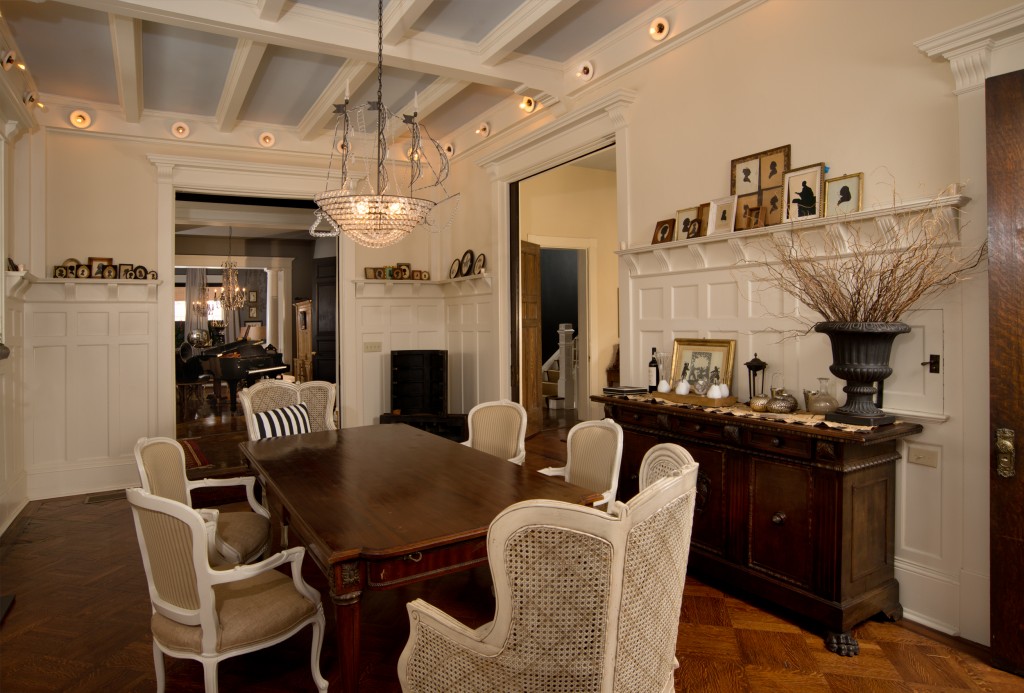
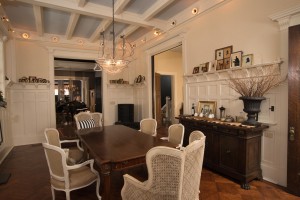
This is the final version of the dining room shot. The exposure was 1/30th of a second at f11
and an ISO of 400. Six strobes were used.

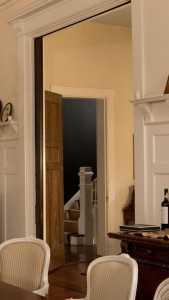
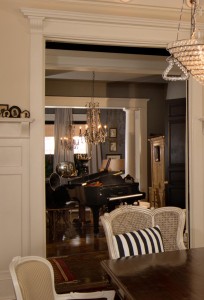
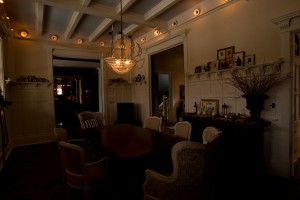
This is the first shot. As you can see the dining room opens onto two other rooms, one with a piano and another room on the right. To add difficulty both these rooms open onto other rooms. The room on the right opens onto a stairway and the music room open onto a front parlor, at least that’s what I think it is. Because I knew I had very little time I brought less lighting gear, just three Norman LH2 heads, three power packs (the 200B units) and a pair of Sunpak 120J strobes. Of course I also brought the camera, and a bag of assorted stands, tripod and umbrellas.

I set up the camera at the far end of the dining room, so that I could see into all the rooms I mentioned. The first light was a 200B placed at the opposite corner of the dining room. I used the 60-inch umbrella on this light to give a softer look to the light in the dining room. I also held a Sunpak 120J in my outstretched arm above the camera to help light the dining room. The Sunpak 120J strobes have about half the power of a Norman 200B, but they do have simple automation and can be set to much lower power settings then the 200B. One nice thing is that the two strobes use the same strobe tubes and can use the same accessories. I placed a shoe cover over this 120J; it was a quick way to modify the light.


In the room on the right I set up another Norman 200B. I used a 30-inch shoot through umbrella because it threw light in every direction. Even so my original placement of the light, to the left of the door, didn’t work because the light was visible in the shot. So I placed the light to the right of the door. Perhaps it would be easier to say nearer the camera? Anyway this hid the strobe. This light also gave enough light to show the stairway. The strobe was set to full power. I used a 1/4 CTO filter to give warmth to this light and add separation from the dining room.


Now the biggest problem is the room with the piano. At first I thought the slave wasn’t working because the room stayed so dark. The problem was that room was really dark. The walls are medium gray and the piano is black, so you can see this might be a challenge. I started bouncing light off a white satin umbrella, but wasn’t happy with the shot until I took the umbrella off and used light directly from the strobe onto the room. Even after this I had to lighten this area a little in post-production. By the way this light had a 1/8-CTO filter for the same reasons as I mentioned above.

So that brings us to the front parlor. If you’ve been keeping track you’ll know that the only light I have left is a Sunpak 120J. So I put that on a stand. I used it bare bulb, no reflector at all. I though it would help the separation between the front parlor and the music room. I think it did help. No filter on this light.

If I had more lights I would have used a second more powerful light in the music room, maybe my Calumet 750 Travelite. I would have had lights on either side of the music room. At the time I would have used two lights with umbrellas for the front parlor, but now I’m not sure it would be better. The bare bulb was good, and it didn’t show in the mirror. Did I mention the large mirror in the front parlor? I’m sorry there’s no diagram for this shot, but the diagram was becoming as complex as the shot.

Here’s the shot with the lights turned off. I think lighting makes the picture. Most of the post-production was dodging and burning. I also adjusted the perspective a little and removed a few things at the edges. You can see the image without these fixes below.

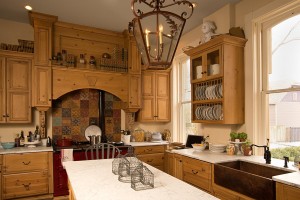
I had a few minutes left so I dragged the 60-inch umbrella into the kitchen. I liked this kitchen because it fit into the overall design of the house so well. As people who have taken my class: An Introduction to Photographic Lighting will certainly know kitchens can be a challenge to shoot.

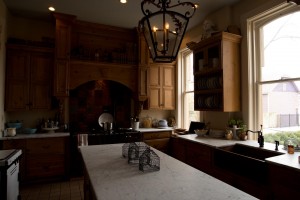
The strobe, with the large umbrella is on the left side of the camera if you’re looking into the shot. I used the full 200 watt-seconds with this light and a 1/4-CTO filter to warm up this side of the shot. I used a shutter speed of 1/30th of a second to keep the windows bright. The view out the windows wasn’t very interesting. I had to adjust the angle of the chandelier in the picture several times to remove reflections. As before I did a little dodging and burning, as well as fixing the perspective. I also warmed up the shot a bit; I like warm kitchen shots. I think the lighting really helped the shot; below is a version without my light.


« Newer PostsOlder Posts »

Powered by WordPress