I’m back a little quicker this time around. I’ll just remind you about the classes: An Introduction to Photographic Lighting, Portrait Lighting on Location and in the Studio and Getting Started in Commercial Photography and the books:
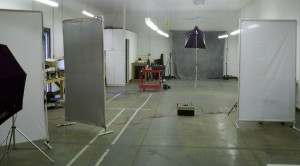
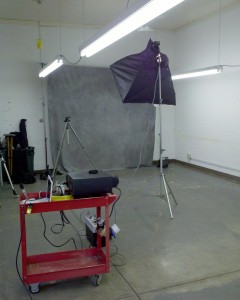
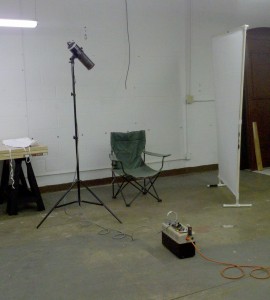
Things at the studio are progressing nicely. I had a group over from the Irvington Photo Club. I gave them a chance to play with a couple one light set-ups. I’ve included a couple of shots of the set-ups I took with the phone. I also did some consulting with a couple of other students that wanted to work with portrait set-ups. So a couple of people have seen what’s going on at the North Delaware Studio. I am still taking suggestions for studio names.
I can’t say anything is finished. The bathroom is going to be rebuilt, which is a really great thing. I’m going to be building a couple of offices at one end of the space, another nice up grade. I brought in some industrial shelves and put them at the back of the studio. I’ll enclose them in a few days. This will give me a place for lights and cameras. I’ll store the light stands in trashcans, probably at the back of the studio.
The goal is to have a large empty space. The whole studio is about 24X60 feet. When I’ve finished the shooting space should be 24X40, or close to that. There’s a roll up garage door at one end of the studio, which is really useful.
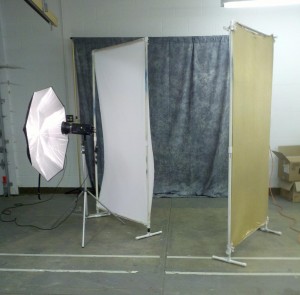
I did three set-ups for the Irvington Photo club. The first one is a 3X3 foot soft box placed in front and above the subject. This is an easy light to set up. It gives you soft shadows under the nose and chin, which gives some shape to the face. The second one was a hard light set-up using just a snoot. This gives dramatic light, but the position of the light is really important. Finally I did a set-up with three light panels. This is a set-up I use frequently because it provides such nice soft light. I wrote about this light design in this article: www.siskinphoto.com/magazine/zpdf/Portrait.pdf.
I used the light panels the next day, with two
students, and I added a bare bulb light behind the subject. In this case the bare bulb light, as well as the light from the umbrella, bounces off the reflector. In addition you get rim light and hair light from the bare bulb. So both lights are doing a lot of work in this set-up. One more thing: the bare bulb light puts light on the background. I put a warm gel (Rosco full CTO) over the back of the bare bulb light, so the light going forward had a daylight balance, but the light on the background was a tungsten balance.
I hope people are interested in these posts, but
I really don’t know. If you want to leave a comment you have to log in. I’m sorry about that, but I was getting a huge amount of spam posts, so I had to change to registration. If you’d like you can send me an e-mail with your comments, john@siskinphoto.com. Also please remember the classes and the books!
An Introduction to Photographic Lighting
Portrait Lighting on Location and in the Studio
Getting Started in Commercial Photography.


John,
I enjoy reading your blog. I appreciate you sharing your studio journey. Good luck with getting it completely up to speed.
Steve Miller
Comment by sjmiller — August 6, 2013 @ 6:59 am
Thanks Steve! Good to hear. I think the bathroom should be fixed this week, offices are next. I’m glad to know you’re seeing the blog.
Thanks, John
Comment by John Siskin — August 6, 2013 @ 7:07 am