Photo Notes A place to talk about making images.

October 1, 2022

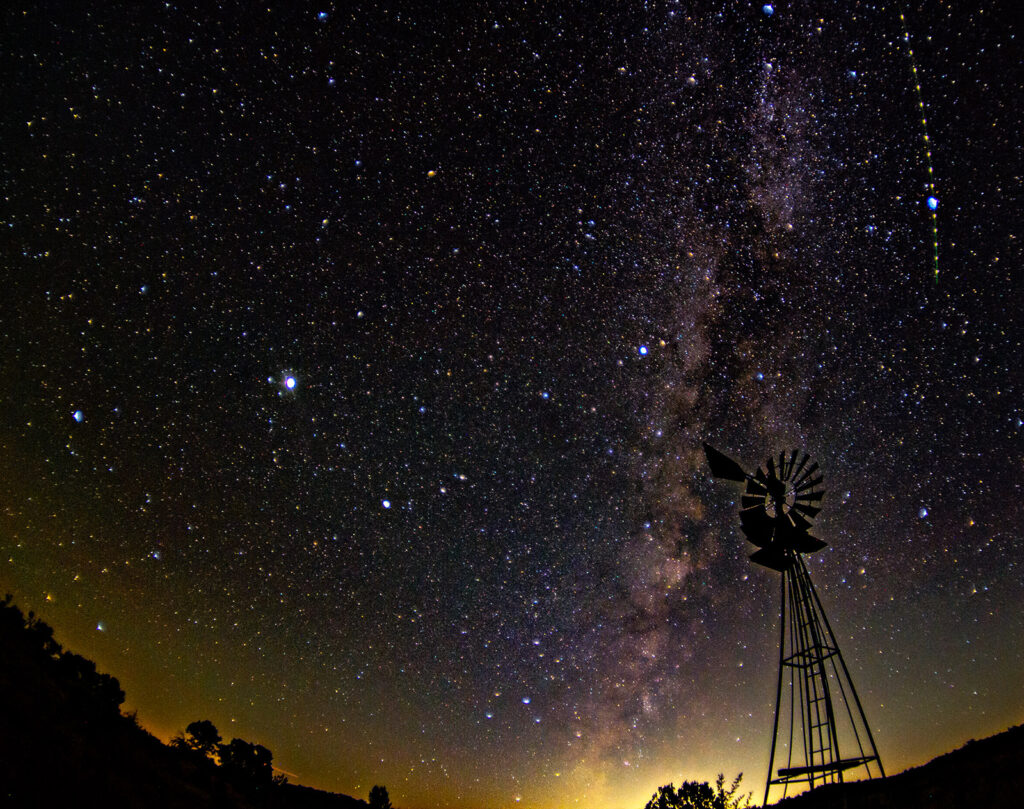
Night Sky

Filed under: Fine Art,Fine Art Portfolio,Landscape Photography — John Siskin @ 2:10 pm

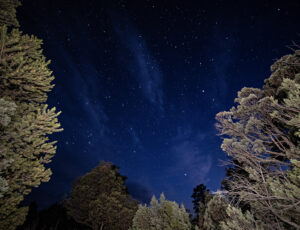
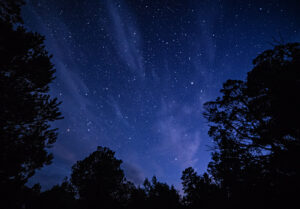
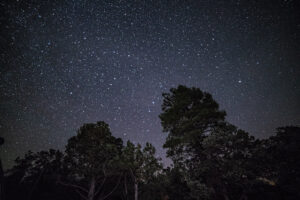
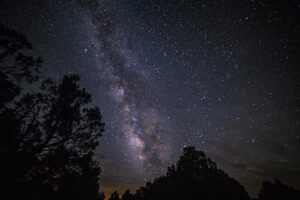
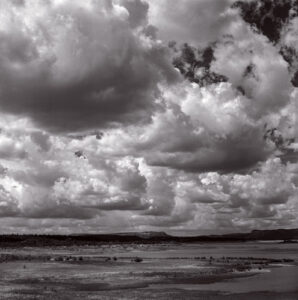
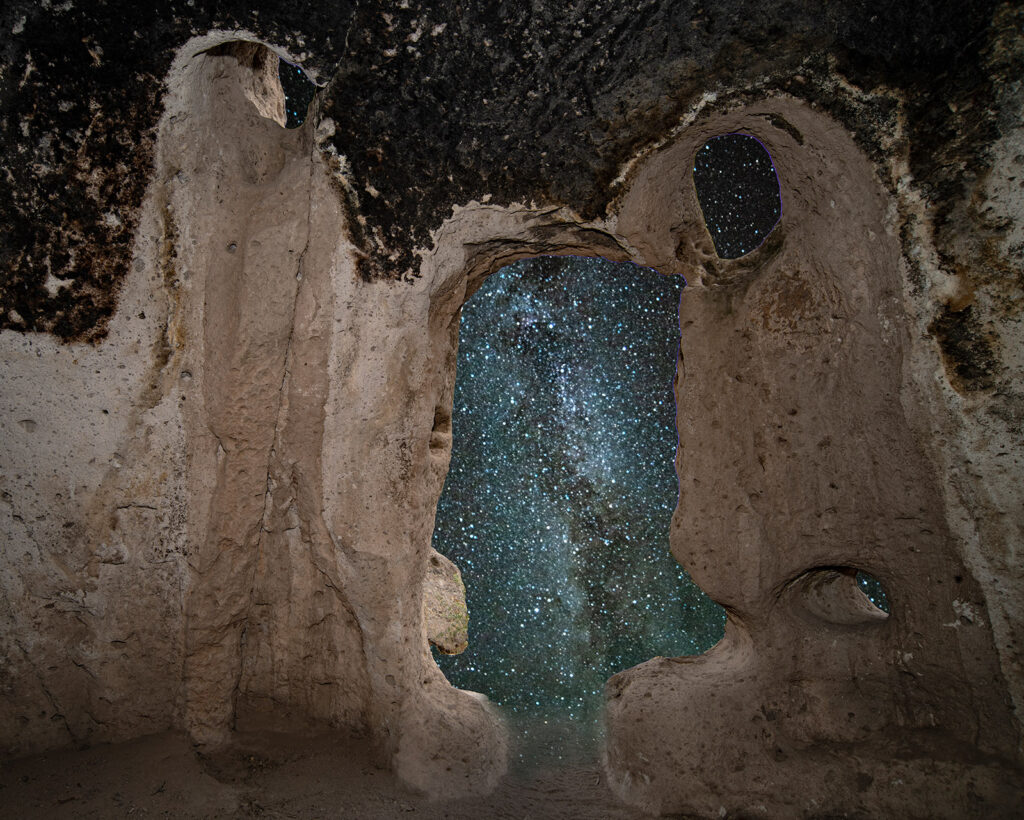
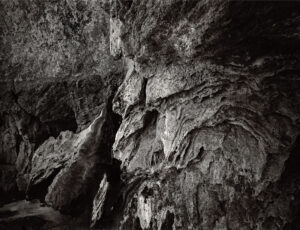
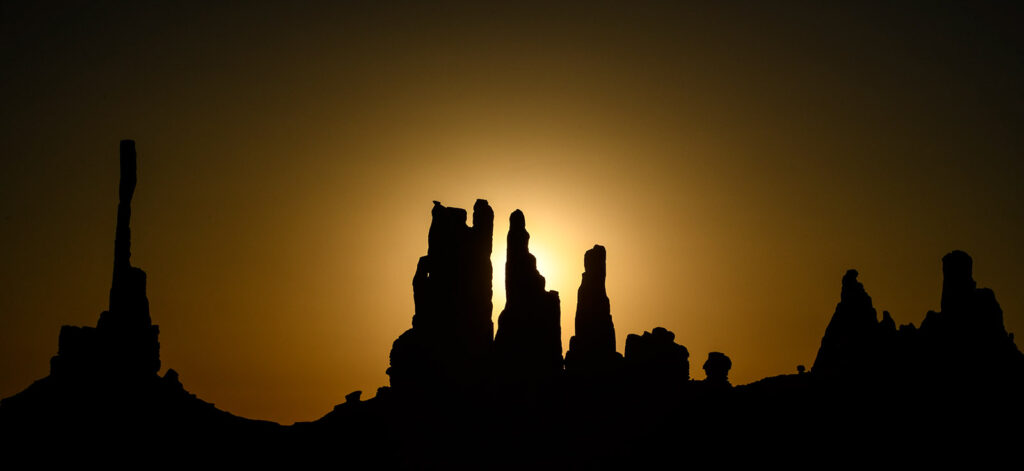
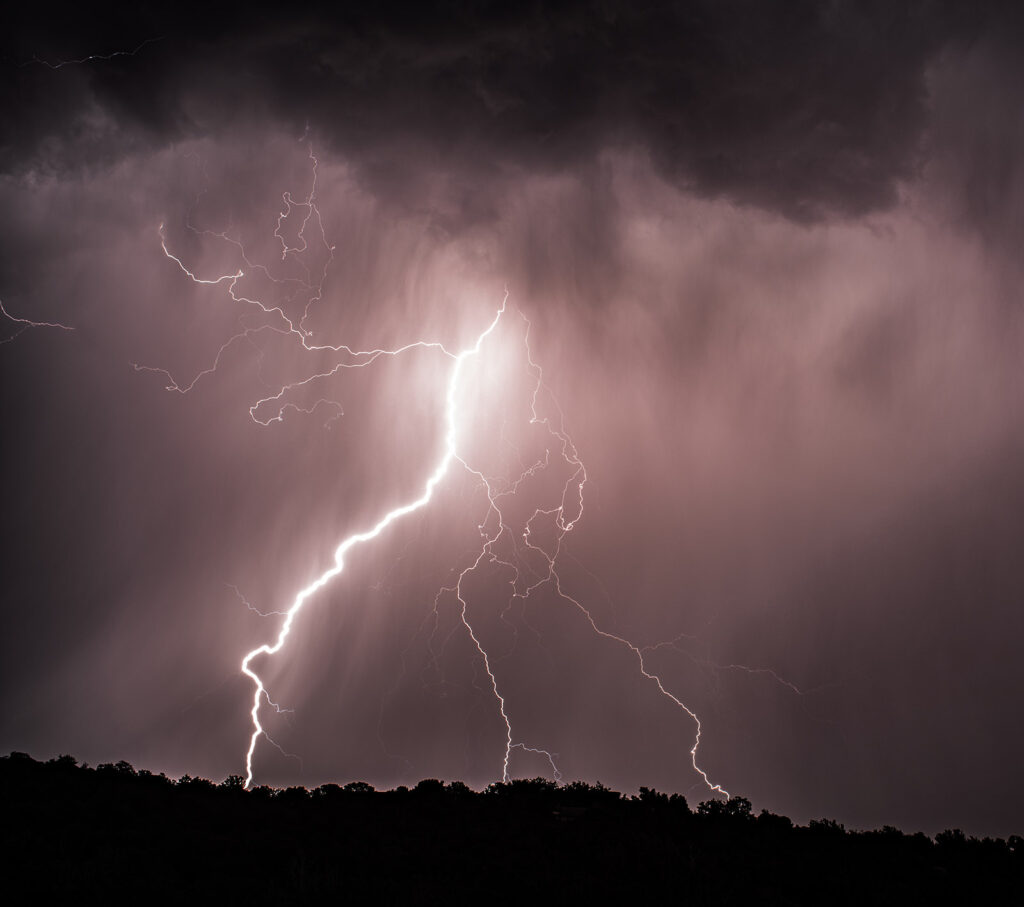
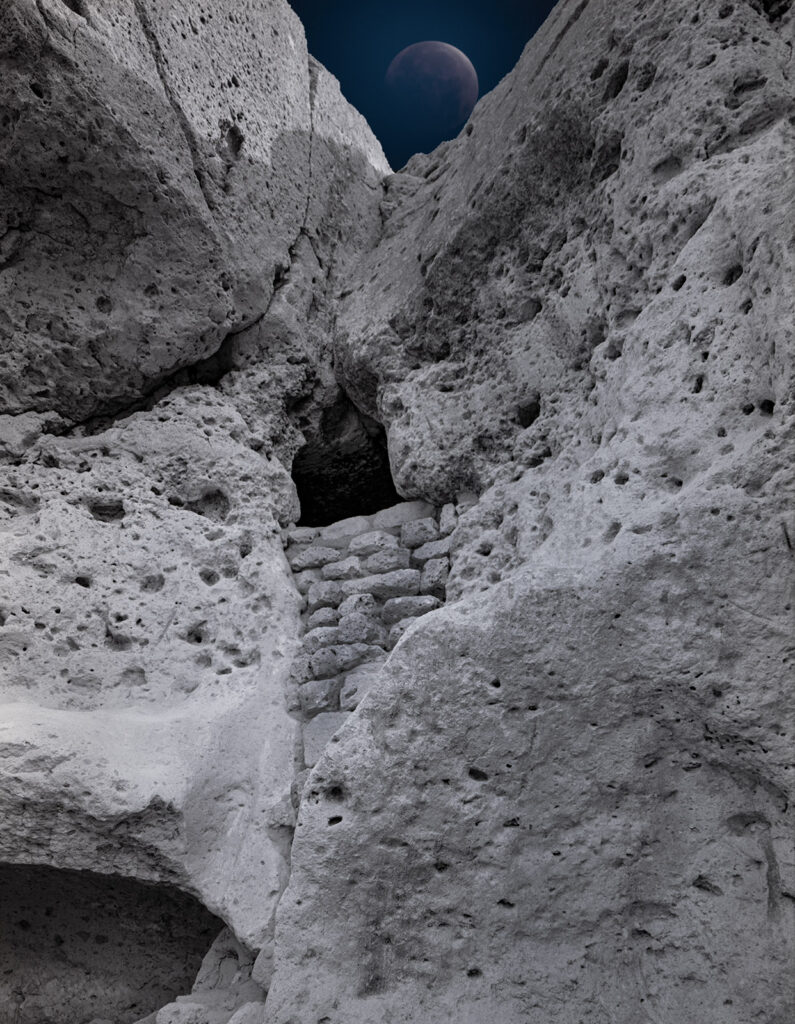
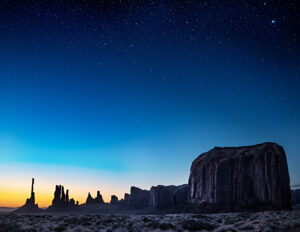
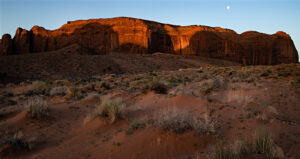
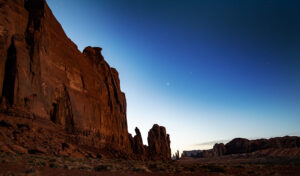
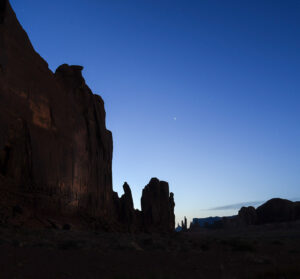
Since I’ve been out here in New Mexico I’ve done a lot of sky images. It’s big sky country! I will be posting other groups, but I wanted to start with some night sky images. I’ll leave the astrophotography details to those more interested in them. I’ve used a couple of lenses, each has it’s interesting features for this work: an old Nikkor 35mm f2.8 Perspective Control lens, a Rokinon 14mm f2.8 and a Soviet era 16mm Fisheye Lens.  Regardless most of the images were made with my Nikon digital cameras: the D800 and the D850. Anyway, I really enjoy this work, and I hope you do also. Thanks so much for your continued attention!

As you might imagine I’d prefer that these pages don’t get filled with a great deal of text. If you’d like information about a specific image, please e-mail me at john@siskinphoto.com and I’ll let you know what I know. Of course, if you have specific requests about an image you’d like to purchase please use the same address. If you’d like to go ahead and purchase an image, please use the Paypal link below and give me the browser link to the image and your shipping address.

I am also trying a couple of things that will give people an opportunity to support this work. While I am fortunate to have enough money to continue to do this work, some things are pretty expensive. For instance 11×14 film is hard to get and costs about $300 for just 25 shots and a 120 roll of Ilford Delta 400 is close to $9. I have put in a link to Roberts Camera/Used Photo Pro that may get me a few dollars. I’ve bought a bunch of my used cameras from Used Photo Pro. They’ve been great! Roberts, basically the same place, is one of my go to suppliers for film. When I was living in Indianapolis their store was just a couple of blocks from my studio. So, I know them well enough to really recommend them. If you want to help me out, please use the link below to check out their stuff!

 
A few linksSiskinphoto.HomeIntroduction PageMonument Valley

Taos Pueblo

Night Sky

Flowers

Monastery Road

Petroglyphs

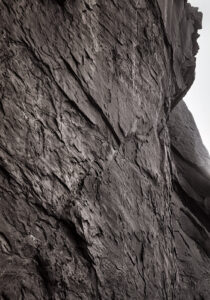
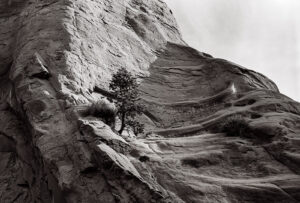
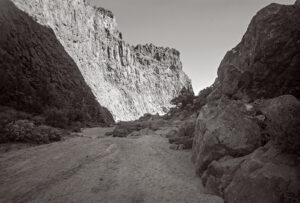
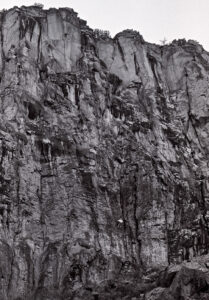
Rock

Ice and Snow

Tsankawi

I did a large show when I was still in Indianapolis called Courting Chaos. The link will take you to the pages which describe the work and its evolution. These images are, well, chaotic and many of them are nudes. I hope you’ll find it interesting.

Links to my books, still available at Amazon!
Flowers

Filed under: Animals,Fine Art,Fine Art Portfolio,Micro Photography — John Siskin @ 2:10 pm

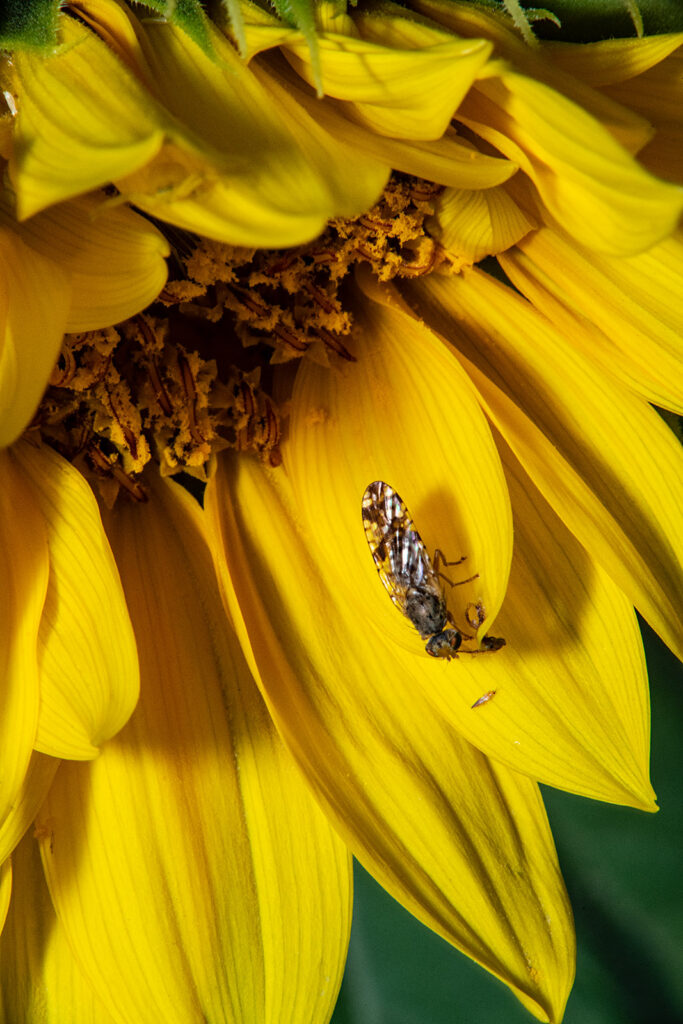
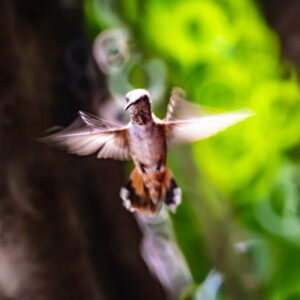
Since I’ve been out here in New Mexico I’ve done a lot of images of flowers, no surprise there. As you may know from other posts, I use a lot of interesting, even strange macro/micro equipment. I particularly like the Medical Nikkor (old version), Vivitar 90-180 Series 1 Flat Field Zoom and the Nikkor 60mm F2.8 Micro. Regardless most of the images were made with my Nikon digital cameras: the D800 and the D850. Anyway I really enjoy this work, and I hope you do also. Thanks so much for your continued attention!


As you might imagine I’d prefer that these pages don’t get filled with a great deal of text. If you’d like information about a specific image, please e-mail me at john@siskinphoto.com and I’ll let you know what I know. Of course, if you have specific requests about an image you’d like to purchase please use the same address. If you’d like to go ahead and purchase an image, please use the Paypal link below and give me the browser link to the image and your shipping address.

I am also trying a couple of things that will give people an opportunity to support this work. While I am fortunate to have enough money to continue to do this work, some things are pretty expensive. For instance 11×14 film is hard to get and costs about $300 for just 25 shots and a 120 roll of Ilford Delta 400 is close to $9. I have put in a link to Roberts Camera/Used Photo Pro that may get me a few dollars. I’ve bought a bunch of my used cameras from Used Photo Pro. They’ve been great! Roberts, basically the same place, is one of my go to suppliers for film. When I was living in Indianapolis their store was just a couple of blocks from my studio. So, I know them well enough to really recommend them. If you want to help me out, please use the link below to check out their stuff!


A few linksSiskinphoto.Home

Introduction Page

Monument Valley

Taos Pueblo

Night Sky

Flowers

Monastery Road

Petroglyphs

Rock

Ice and Snow

Tsankawi

I did a large show when I was still in Indianapolis called Courting Chaos. The link will take you to the pages which describe the work and its evolution. These images are, well, chaotic and many of them are nudes. I hope you’ll find it interesting.

Links to my books, still available at Amazon!
April 24, 2021

Photographic Seeing and Interpretation


Apache Mountain Spirit Dancer at Museum Hill Santa Fe, by Craig Dan Goseyan

I made this picture Wednesday on Museum Hill in Santa Fe. The subject is a sculpture titled Apache Mountain Spirit Dancer, and it was made by Craig Dan Goseyan. It’s a very impressive piece. One of the things I hope this image captures is the effect created by the very large size of the work. Regardless of how I interpret the piece, and all photography of 3 dimensional objects, is interpretation, the effect of seeing a photograph is not the same as seeing the thing itself. If you see a photograph of the Grand Canyon, you haven’t seen the Grand Canyon. I think most people who have ever tried to photograph the Grand Canyon have discovered how photographs do not convey the effect of seeing the canyon.

I wanted to mention this because I have a related problem with sharing my images on computer screens. The effect of seeing the image on screens is not the same as seeing a print. First, as in the image of this sculpture, you do not have actual scale of the work. This sculpture must be close to 20 feet tall. If you’re looking at the image on a phone, you simply have no idea, and you also miss texture and much more. I’ve made many big prints over the years, some over 6 feet tall. In fact, one of the reasons I shoot large format film is that I can make big prints. The original size of the digital file of this image is 4 foot 6 inches tall at 300dpi. Actually, I could make an even bigger scan of this negative. If I were to make a traditional darkroom print of this shot, I could make it 9 feet tall, which would help convey the size of the sculpture. Of course, it would be an incredibly difficult thing to make such a print. A few old friends may remember that I once made an enlarger to make such huge prints. Another aspect of my interpretation of this sculpture is that I shot it in black and white. Any black and white image is certainly an interpretation of the original, since most of us see in color. Cole Weston was quoted as saying to his brother Brett “I see in color, don’t you?” I choose to shoot in black and white much of the time because I’m more interested in the shape and feel of my subjects and I want to push the viewers’ eye to see that way. That doesn’t mean I don’t use color; this image like most of my black and white images is subtly toned, which I hope affects the mood of the image. Of course, a print would allow me more control over the tone of an image because it wouldn’t be dependent on how you set up your monitor.

Often, I feel that sharing my images as small digital files is like listening to Tales From the Topographic Oceans done by the band Yes in 1973 on the original speaker of a 1967 Chrysler.  The sound that you hear are related to what the band recorded, but perhaps not closely related. Another disappointing aspect of sharing images this way is that the images from digital phones, and every other image making device out there, are the same size and on the same monitor as images that I crafted with large cameras and processed, painstakingly, in my darkroom.

When I began doing photograph, in the very early seventies, much of what we were taught was actually print making. In those days we were taught to print on silver chloride and silver bromide papers. In more recent times I’ve also learned to make Vandyke and cyanotype prints, both of which involve hand coating paper. I could scan and share these prints but you would lose just about every aspect of the prints which makes them special. Except for the cyanotypes which are a strong blue color. In addition to these types of prints I’ve also made type C prints and Cibachromes, both of which are color prints as well as a couple of platinum prints which are black and white. Print making is an art and craft which was once an integral part of photography; you could not learn to be a photographer without learning to be a print maker. Even when I started doing photography, by which time commercial color printing for amateur photographers was ubiquitous, photo classes always taught printmaking as part of the course. I was talking to another photographer, a guy who is really serious about it. He’s really into wet plate work, tin types and ambrotypes, but he has never actually seen a platinum print or a Vandyke print or an albumen print. These are all beautiful ways of presenting and interpreting a photographic image. One of the reasons that I like to shoot black and white film, rather than make wet plate negatives, is that I can print them in all these different ways. Truth be told, you can also convert your digital images into black and white negatives and print them out onto transparent media. You can make all these print types with these digital negatives. For a variety of reasons, I’ve made digital negatives of film images before printing them, this method works very well.

There are many very fine digital printers on the market and some very lovely papers designed for them. I certainly do not want to take anything away from the current Epson and Canon high end printers. I can’t think of any reason why I would want to make a color print using an enlarger and a darkroom. The simple fact is that these are better prints. Not only is the color spectacular, but the long-term stability of digital prints, if you do it right, is at least as good as prints made from color negatives using type C papers. The fact is that you can purchase one of these printers for much less than a 4×5 color enlarger would have cost you in 1980, in actual not corrected for inflation dollars, is fabulous. While people often mention the cost of paper and ink for these printers, you should have seen what paper and chemicals cost for color darkroom printing. I really like the Canon Pro 100 printer I use these days and I would certainly consider buying another printer from either Canon or Epson. These are terrific tools for color printing. They will also make a fine black and white print. But… the digitally printed black and white image is different from a darkroom print. The dyes or pigments used for the prints are different, and look different, from the silver halides used in traditional black and white prints. The digital prints will also look different, sometimes very different, from the various hand coated prints: Vandyke, cyanotype, platinum and so on. Still it’s no reason not to try and make black and white prints with an ink jet printer, and it might lead to hand made printing.

One more thing about digital printing: it’s really easy to make a bunch of prints. Thousands… So, I’ll sell a digital print for $75, but I won’t sell any darkroom print for less than $300, and some prints would be much more expensive. If you see any prints that you’re interested in on my site, or that I’ve posted, please contact me about buying a print!

In addition to buying images from me, PLEASE buy some photo books. I was looking around my office today and I have over 375 photo books, just in my office. You can look at the images of other photographers on line, and that will improve your seeing, but books allow the photographer to have greater control over the size color and presentation of the images. I believe that spending time with images, especially images the maker cared about, is the best way to improve your own image making.

I thought it might be good to close this post with another image of a sculpture. By way of contrast with the first image in this post, this piece is 3 inches high. It’s a monochromatic piece of work. So, I added color and built a background for the piece in this shot. Also, if you’re interested, I made this image BEFORE Photoshop. The shot was done on a single piece of film using light, multiple exposure and props, old school!

Check out my books at Amazon. I’m not sure the links will work, but you can search for me at Amazon. A digital print of Apache Mountain Spirit Dancer is available for $75 which includes shipping the U.S.A. Such a deal. Please e-mail me at john@siskinphoto.com to order this or another print. Thanks for your attention!
Understanding and Controlling Strobe Lighting: A Guide for Digital Photographers

https://amzn.to/3tH5Dp9

Photographing Architecture: Lighting, Composition, Post production and Marketing Techniques

https://amzn.to/3c8nLlU

March 30, 2021

Changes in Seeing

The made this image in the Gallisteo Basin, just a couple of miles from where I live. I expect to go back out there later this week. I’m not sure what gear I’ll bring with me. I’m challenging myself to work with different cameras and films to improve my ability to interpret what I see in different ways. Interpretation of a subject is part of making a photograph rather than just taking one.

New version
Gallisteo Basin 12-8-2020-2

I’m putting two versions of this on my blog. The original version I did just after making the photograph. I opened the shot again yesterday, a few months after I did the original version, and made a new version. Of course, I like the new version better, right now… It’s easier to see and re-interpret an image when you’ve put a little time between you and the original shot. There is always more to see.

Original version
Gallisteo Basin 12-8-2020-2

I am now offering prints of many of these images. The index codes for these images are: 46A 3-12-2021 #2. you can buy a print! Right now, all prints are set to fit on an 11×14 inch piece of paper. If the image is too thin it will have white paper on the sides. I am printing with an archival ink/paper combination. Prints are shipped by USPS priority mail to anywhere in the US that’s covered by Priority Mail service. The price is $75 for the first print and $60 for each additional print ordered at the same time. Please e-mail me at john@siskinphoto.com and include index code and your address. I will send you a PayPal request to arrange payment. I will be adding old and new images to this service. If you see an image on my site you would like to purchase please tell me where you found it and I’ll try to make it available to you. Thanks for your support!

And my books!
Understanding and Controlling Strobe Lighting: A Guide for Digital Photographers

https://amzn.to/3tH5Dp9

Photographing Architecture: Lighting, Composition, Postproduction and Marketing Techniques

https://amzn.to/3c8nLlU

March 28, 2021

Testing a Graflex XLSW

Testing a Graflex XLSW 46A 3-12-2021 #2

This shot is made with a Graflex XLSW. I was testing it out here at the house. There are a couple of cameras built around the Schneider 47mm Super Angulon f8 lens. Brooks made two versions of the Veriwide, and Graflex made a special version of their medium format XL camera that was designed for this lens. I’ve posted a lot of shots I made with a camera I assembled out of parts of a Brooks Veriwide and a Graflex XLSW. This is actually a whole Graflex XLSW. I wanted to see if it’s significantly different from the camera I’ve been using. The test negatives from both cameras are very good. Not sure what I’m going to do with two such similar cameras, maybe get one of them ready to sell… I really like the lens and having a small, super wide camera that shoots 6X9cm film. If you’re interested in a Superwide roll film camera send me a message at john@siskinphoto.com. Thanks for your interest and support!

I am now offering prints of many of these images. The index code for this image is: 46A 3-12-2021 #2. you can buy a print! Right now, all prints are set to fit on an 11×14 inch piece of paper. If the image is too thin it will have white paper on the sides. I am printing with an archival ink/paper combination. Prints are shipped by USPS priority mail to anywhere in the US that’s covered by Priority Mail service. The price is $75 for the first print and $60 for each additional print ordered at the same time. Please e-mail me at john@siskinphoto.com and include index code and your address. I will send you a PayPal request to arrange payment. I will be adding old and new images to this service. If you see an image on my site you would like to purchase please tell me where you found it and I’ll try to make it available to you. Thanks for your support!

And my books!
Understanding and Controlling Strobe Lighting: A Guide for Digital Photographers

https://amzn.to/3tH5Dp9

Photographing Architecture: Lighting, Composition, Postproduction and Marketing Techniques

https://amzn.to/3c8nLlU

March 26, 2021

Hair Goo with the Microscope

Filed under: Fine Art,Fine Art Portfolio,Micro Photography,Micro Photography — John Siskin @ 12:58 pm

Another image of hair care product from Jerome Russel. DSC2978

This is a picture of a hair care product from Jerome Russel. This product would put multicolored streamers into the hair. Jerome Russel was a client about 20 years ago, so I wouldn’t recommend putting this particular batch of stuff onto your hair, but it looks great through the microscope. I used two captures and focus stacking to make this shot. For more on using the microscope check out this post: https://siskinphoto.com/blog/?p=4421  Thanks for your interest and support!

I am now offering prints of many of these images. If the caption has an index code like DSC1234 you can buy a print! Right now, all prints are set to fit on an 11×14 inch piece of paper. If the image is too thin it will have white paper on the sides. I am printing with an archival ink/paper combination. Prints are shipped by USPS priority mail to anywhere in the US that’s covered by Priority Mail service. The price is $75 for the first print and $60 for each additional print ordered at the same time. Please e-mail me at john@siskinphoto.com and include index code and your address. I will send you a PayPal request to arrange payment. I will be adding old and new images to this service. If you see an image on my site you would like to purchase please tell me where you found it and I’ll try to make it available to you. Thanks for your support!

And my books!
Understanding and Controlling Strobe Lighting: A Guide for Digital Photographers

https://amzn.to/3tH5Dp9

Photographing Architecture: Lighting, Composition, Postproduction and Marketing Techniques

https://amzn.to/3c8nLlU

March 22, 2021

Photography Through The Microscope!

Beginning with this post I am going to make prints of some of the images on my blog available. More information is posted at the end of this blog. Thanks for your support

Watch face DSC-2184

In the book Zen and the art of motorcycle maintenance the author (Robert M. Pirsig) quotes an instruction booklet, that said “assembly of Japanese bicycle require great peace of mind.” Macro and micro photography require that your peace of mind increase in direct proportion to the reduction in the size of the object you are photographing. It gets more difficult, and it requires more patience, as you get closer.

butterfly wing DSC-2184

Most people approach macro photography by purchasing some sort of macro lens which enables them to reproduce picture of an object at perhaps one quarter the size of the object in real life on the sensor of their camera, maybe even bigger.  So, one quarter reproduction means that if you had a 25 cent piece, a quarter in US language, you could take a picture four of them and stacked across the short distance of a full frame sensor sensor. And they would fit. The quarter is an inch wide and a full frame sensor is an inch wide (and an inch and a half long). If the quarter filled a full frame sensor it would be a 1:1 capture, or life size.

watch part  DSC2146

Macro photography is occasionally discussed in terms of where it begins and where it’s simply a close-up. I’m not sure that that’s terribly useful, but, when you are less than three feet from your subject with a more or less normal lens, you’re pretty close and it isn’t necessarily difficult to make that picture, depending upon the equipment you’re using. As you get within less than an inch of your subject it gets to be extremely difficult to shoot, and when you are within one or two millimeters of your subject, it becomes almost impossibly difficult to photograph. What I’m going to explain here is photography with the microscope, which is generally photography within less than an inch of the subject.

hair gel  _DSC2073

I will discuss other ways of doing close-up work in other postings. This posting is concerned with very, very close microscope work. This is not the usual way I approach this subject: in the past I’ve discussed macro photography and built up to micro and microscopic photography. That might make more sense. However, I’ve recently posted a lot of photographs made with the microscope, and so I hope that many people might be interested if I start there.

Leitz Microscope

The first thing about the microscope is to understand that the actual equipment that you need to do this kind of photography is easier to get, and less expensive, than you might think it would be. That’s important because one of the things I would hope that this discussion does is to encourage you to try this kind of micro photography or microscopy if you want to be more formal.

Leitz Microscope set-up

Before I write about the individual components of the camera/microscope combination, I’d like to give an overview of the set-up, from top to bottom. At the top is a digital SLR, the currently available cameras would be good for this. Next is a T-mount (more below) which connects the camera lens mount to a microscope adapter. This adapter is basically a hollow tube that fits between the camera and the eyepiece tube. The eyepiece is in the eyepiece tube, and it’s the first part for the optical system. The eyepiece tube is connected to the microscope head, where the lens or lenses are mounted. That lens is called the objective lens and it is the second part of the optical system. Below the objective lens is the stage, which is where you’ll place your subject. Under the stage there will often be an iris/condenser device, which can be used to change the quality of the light coming through the subject. Probably most scopes have a mirror below the condenser, but a few will have a light source. I think a mirror is more useful. At the bottom is the base, which is usually heavy to keep the whole thing stable.C14 The condenser, it helps to focus the light onto the subject

The large wheel is course focus and the small one is fine focus. They are often set up this way on modern scopes

The condenser, it helps to focus the light onto the subject.

A decent student grade microscope can be had for around a hundred and fifty dollars. This will do the job. Of course, you can spend much more on a microscope, but since you are not trying to accurately reproduce pictures of cell division or tiny crystalline structures (at least I’m hoping you’re not) a student grade microscope is a good choice. A student grade scope has course focusing and fine focusing, two separate knobs. It takes standard interchangeable eyepieces and interchangeable objective lenses with a standard thread. I’ll put a link to a student scope, and the rest of the stuff, at the end of the post.

Objective lenses on Lens turret

Eyepiece

In order to understand the reproduction ratio of a microscope for viewing it’s pretty simple. The eyepiece and the objective lens have numbers for their power, say 10x or 4x. Multiply the two numbers and you have the power of the system. So, if you have a 4X objective and 10X eyepiece, you would be viewing at 40 times life size, which is a nice range to work in. I’m not actually sure that this is exactly the power on your camera sensor, but whatever it is you’re damn close. When you make a print of the capture or reproduce it on your computer screen it gets larger still. So, you are frequently looking at things that may be a hundred, two hundred maybe even three hundred times life size on your computer screen, which is pretty impressive.

Microscope Adapter and T-mount

The adapters that you need to do this, in addition to the scope, are first a microscope adapter. This fits around the eyepiece tube on a standard microscope. Is available for less than $40. Surplus shed would be a good place to start looking for them. In addition, you will need a T-mount adapter. T-mount was an early interchangeable lens mount that is still used today. A T-mount lens could fit onto cameras with several different lens mounts, if you used the right adapter. And it remained unchanged and in use pretty much to this day. There are mounts for most current cameras, even mirrorless. T-mount is also used for telescopes and some other optical systems. You can also get old mirror lenses that use t-mount adapters. They can be a lot of fun. T-mounts are available from Surplus Shed and B&H Photo and any of a variety of suppliers.

The camera on top of the scope

Microscope and T-mount attached. They are screwed together

The microscope adapter is two pieces. It’s easier to mount the small piece on the scope and mount the larger piece onto the camera and then put them together on top of the scope.

You should start with the microscope arranged vertically. Most of the student grade microscopes, in fact, I think all of them, will tilt backwards to make it easier to sit and view your subject. Unfortunately, if you mount your camera on the microscope in this way, it will probably fall off the microscope and that would be a bad thing. So, you’ll set up the microscope vertically. Important safety tip. It is also very important to set the camera to use the self-timer. If you trigger the camera directly with the shutter release you will shake the camera and get fuzzy pictures. You could also use a remote release, but the self-timer works very well for microscope work.

Microscope lenses- Shown are a 4X Plan, a 25mm Zeiss Luminar and a Spencer 10X. This is the group I’ll usually put onto the scope.

I would always start with a 4X objective lens. I say this because one of the problems that you’ll get into, as I mentioned earlier, is the closer you get to your subject the more difficult it is to manage taking a picture of the subject. With a 4X objective lens, the lens will end up being between a quarter and three-quarters of an inch from your subject. That gives you just enough room to light the subject from above. It also gives you room to put a filter on the lens; it gives you room to do a whole lot of things. A 10X lens will be less than 3 millimeters from your subject, which makes it impossible, or close to impossible, to light your subject from above. You’ll only be able to work with transparent subjects with the 10X or more powerful lens. It’s more difficult to manage the focusing or positioning with the 10X lens. When a professional microscopist uses a 100X lens she/he will usually add oil to the top of the subject and then put the lens into the oil. There’s less reflectivity if you do this. You would only be able to photograph transparent subjects with light transmitted from below the stage. I have not tried to do this, and, unless I find some transparent subject that seems absolutely compelling to me, I am unlikely to try it in the future.

Eyepieces, Shown are a Leitz 6x and 10X and a Wollensak 15X and 20X

One of the things that may not come with a student-grade microscope is multiple eyepieces. And this is one of the things that you might very much want for photo microscopy such as I do. Since it’s so difficult to use more powerful objective lenses, you may find yourself wanting to change the eyepiece to change the power of the scope. Eye pieces come in a variety of strengths. I own a 4X eyepiece, a 10x eyepiece, a 15x eyepiece and a 20x eyepiece, which gives me some variety of reproduction powers. Surplus shed carries a number of different eyepieces and they would be a good place to start looking for eyepieces. A student grade microscope usually comes with a 10X eyepiece and that is a good place to start. Neither standard eyepieces or objective lenses are terribly expensive, compared to camera lenses. There are some special purpose objective lenses if you’d like an upgrade. If you find a PLAN objective lens it will be sharper than the lenses that come with most scopes. The biggest difference might be that an inexpensive objective lens will be more likely to be fuzzy at the sides of your image.

Geared stage

Most student microscopes have clips which will hold down a regular microscope slide. Then you position the slide, or other subject by moving it with your fingers under the scope. This is the biggest problem with inexpensive microscopes. Better scopes have a geared stage to move the subject around under the scope. If you really enjoy photo microscopy you might want to get a scope which has gears to control the position of the subject.

Lowell Pro light with Barn Doors

Lowel Pro light

The next thing you will need is a light source. Most student-grade microscopes and in fact most fancy microscopes only have a mirror below the lens. Most scopes also have a condenser between the mirror and the stage which changes the spread of the light that you’re using. I find that the condenser is not terribly useful to the way I approach microscopy, but you may find it helpful. Some student grade microscopes will not have a condenser. The actual light source that you use can be something as simple as a desk lamp or even the room light. And that will work very acceptably for an awful lot of work that you might do with the microscope. Look for a lamp that has a continuous spectrum or perhaps an LED light source. Stay away from fluorescent light sources because the spectrum can make it very difficult to get a true color reproduction or can change the color reproductions in unexpected ways. I find that I rarely look for accurate color in micro photography, especially because the images aren’t things we can usually see with the unaided eye. Often, I will use the 3200º Kelvin quartz light and either not compensate for the warm color shift of compensate in Adobe RAW when I open the image. A small light source gives you more control than a broad light source. At this point I am using a Lowel PRO quartz light, which provides much more light than any desk lamp. I like this a lot, but it’s not available new, there are generally several of them on eBay pretty inexpensively. Lowel still makes several more powerful quartz lights, like the Lowel Omni or Tota quartz light but these might be too hot for microscope work (they do get extremely hot).  A bright light source is especially important when I start to filter or modify the light because I will still have enough light to actually see the subject. Even without a filter it’s dark through a microscope; more so when the light has to go through the camera and into the viewfinder, after it leaves the microscope eyepiece. The next problem is to position the light source. The Lowel PRO quartz light can be attached to a regular light stand mount or it can be attached to a tripod mount. This enables you to use a ball head or another tripod head to position your lamp in relationship to your subject. This light also has barn doors which give you more control over the light. You can also move the microscope mirror which will help position the light; that is if you are lighting your subject from bellow. If you’re using a 4x objective lens you can also light a subject from above, which makes positioning the Lowel PRO light with a tripod head even more helpful. You can also use a strobe to light, even a dedicated camera flash. This can increase sharpness, because camera shake can be a problem, BUT, it’s very difficult to be sure what your subject will look like when you take the picture. Also, you’ll still need a bright light to focus.

The 4X lens focused on a feather. You have a good amount of room between the lens and the subject.

If you are using the 4X objective lens you will find that most of the focusing can be achieved with the course focus wheel on your scope. The fine focus wheel is useful when you try to use that 10X lens. You will also find that the objective lens will stay at about the same distance from you subjects, so if you get a sense of that distance you can set the scope at about the right distance before you look through the camera. Your actual focus is achieved by looking through the camera viewfinder. Since your microscope is set up vertically, it may help to place the scope on a low table or get something to help you stand above the scope. As you might imagine depth of field, holding things at different distances form the lens in acceptable focus, doesn’t really exist with microscopes. With few exceptions, notably Zeiss Luminar lenses, microscope lenses do not have diaphragms, so there is no way to adjust depth of field, that is if you had any… What you can do is use Photoshop to do focus stacking. In order to do this, you need to take a several pictures at different focus points. Photoshop will enable you to combine these images into a single image with better focus. This can be a very helpful technique. While it is outside the scope of this particular post you will find that there are plenty of tutorials on line. Or, you could wait for me to do a post about modifying micro images in Photoshop. If you do take images for photo stacking, you’ll want to take them at the same exposure.

Image without focus stacking

Image with focus stacking DSC2130

When I first worked with high magnification optical systems exposure was very difficult to calculate. I had to compensate for long bellows extension on the view camera as well as reciprocity failure form the long exposure times. It is still astonishing to me how much easier it is to get a great exposure with a digital camera. If you set your camera on aperture preferred, you’ll get a good exposure. You may want to add exposure compensation correction, if you want a darker or lighter exposure. You might want to see what an image looks like at different settings, just to get a better feel for how you can interpret your subject. Of course, you can also do a lot of interpretation after you capture the image in photoshop. These changes in exposure calculation are perhaps the biggest improvement in micro photography that I’ve seen in 40 years. The massive improvement in the amount of information that a sensor records, compared to 35mm film, is also very significant. I used to do micro photography with large format cameras and transparency film, which was really quite difficult.

Sodium Thiosulfate

As you look at the pictures of the set-up and the various tools I use, you might want to begin thinking about subjects. I’ve recently done some nice work with old watches and some shiny goo meant for hair. Jerome Russel used to be a client and they made some very shiny hair care products with glitter and other reflective materials. I’ve included shots of both here.

Watch Parts

Old Watch Parts DSC2210

Old Watch Parts DSC2207

Jerome Russel Hair stuff:

Hair goo-focus stacking DSC2069

Hair goo-focus stacking DSC2061

Hair goo-file heavily modified in Photoshop DSC2058

Of course, a lot of things have interesting colors. Below are a couple of shots of dried Selenium toner, which is used in the wet darkroom to add color to B&W prints.

Selenium Toner DSC1999

Selenium Toner-file heavily modified in Photoshop DSC2000

Let’s not forget living things. These are a couple of pictures of butterfly wings. Bet you didn’t visualize them looking like this.

Butterfly wing DSC2050

Butterfly wing DSC2046

I mentioned filters above. There’s a lot of science behind this trick, but I’m going to cut direct to the chase. Put certain transparent materials, things like plastics and sodium thiosulfate (B&W fixer from the wet darkroom) between two polarizing filters. As you rotate one of the filters colors will start to appear. FUN! But, as I mentioned above, you need a lot of light. These shots are of a plastic prop ice cube. You can get interesting results, but you’ll need to experiment. Frankly all of photo microscopy requires an experimental attitude.

Plastic Prop Ice Cube-Dual Polarization

Sodium thiosulfate, fixer in the B&W darkroom-Dual Polarization DSC2025

As I mentioned at the top of this post, I am now offering prints of many of these images. If the caption has an index code like DSC1234 you can buy a print! Right now, all prints are set to fit on an 11×14 inch piece of paper. If the image is too thin it will have white paper on the sides. I am printing with an archival ink/paper combination. Prints are shipped by USPS priority mail to anywhere in the US that’s covered by Priority Mail service. The price is $75 for the first print and $60 for each additional print ordered at the same time. Please e-mail me at john@siskinphoto.com and include index code and your address. I will send you a PayPal request to arrange payment. I will be adding old and new images to this service. If you see an image on my site you would like to purchase please tell me where you found it and I’ll try to make it available to you. Thanks for your support!

A few links to the items mentioned in the post:

Student scope:

https://www.surplusshed.com/pages/item/T1480D.html

Microscope adapter:

https://www.surplusshed.com/pages/item/M1573D.html

Sony T-mount:

https://amzn.to/3s7xGOa

Nikon T-mount:

https://amzn.to/312M2DC

Canon T-mount

https://www.bhphotovideo.com/c/product/261256-REG/Celestron_93419_T_Mount_SLR_Camera_Adapter.html

And my books!
Understanding and Controlling Strobe Lighting: A Guide for Digital Photographers

https://amzn.to/3tH5Dp9

Photographing Architecture: Lighting, Composition, Postproduction and Marketing Techniques

https://amzn.to/3c8nLlU

December 3, 2020

Courting Chaos

Curt #5
Published in Black and White Magazine

This post is about my Courting Chaos images, a group of images I made over more than two years, while I was working and teaching in Indianapolis. Black & White Magazine is going to publish one of these images in a few weeks! The work evolved over more than a dozen shoots with an 11×14 camera. The first show of this work was on November 2nd 2018 at Indiana Landmarks (1201 Central Ave, Indianapolis, IN 46202). Before I get any further, I should thank David Kidwell for assisting all through this project and Julie Powers for make-up and models. This work wouldn’t have happened without them.

Andrea #5

These images are figure studies handled with a very unusual and chaotic photographic process described below. Many of them are nudes and several of them are disturbing. I’m writing about the process in this post and also some thoughts about the results. I’ve enjoyed the entire project as a voyage of constant discovery. I really had no idea how the project would evolve when it began. My response to the images continues to change. I hope the images invite the viewer to create a narrative from them. My narrative involves ideas about escape. I hope you’ll find them interesting. My perception of the project continues to evolve.

Cassie #14

There are a lot of places I could begin to explain this work, because this project integrates traditional photographic techniques that I learned in high school with digital image manipulation techniques I’ve learned as recently as a few months ago. The project integrates inspiration from my first trip to Europe in 1971 and my visual inspiration continues to evolve to today. The greatest challenge, for me, is coming to accept chaos to be a co-creator in my photography. As a commercial photographer, for more than four decades, I’ve been fighting chaos. A commercial photographer generally wants to control and direct images to produce effective visual communication. In this project I’ve used special processes to push the images into shapes I couldn’t predict or control. The results have been the most surprising images of my career.

Gordon #1

I saw a series of sculptures by Michelangelo called the Prisoners when I was in Europe in 1971. I was about fifteen at the time. At first these images appear unfinished, especially in comparison with the David sculpture which was in the same museum. When I continued to stare at the pieces they seemed to be struggling to escape from the marble. The effect was quite surprising to me at the time: the seemingly unfinished sculpture conveyed movement while David sculpture remained a single moment of time. It’s now almost fifty years later and I still remember the effect and the details of these sculptures.

Bree #11

I remember seeing an Edward Weston photograph of a pepper just a few years after I saw the Prisoners. This image also had a lasting effect on my development as a visual artist. The design of the image was beautiful, but the medium: a silver gelatin photograph was also gorgeous. Of course, I had seen photographs before, but this was a contact print from a large format negative. Weston’s excellent craft created particularly beautiful prints. Over the years, in my classes and in working with photography, I’ve often met people that assume photographs are somehow independent of the medium in which they’re presented. For example, a person might think that they’ve seen “Moonrise Over Hernandez” by Ansel Adams because they’ve seen it on-line or in a magazine or a book, but a fine photographic print, made by Ansel himself, has a different effect than an image from an offset press or a computer display. In order to appreciate any creative work, it helps to see the work as the artist intended. Of course, there are many posters of paintings by Van Gogh or Monet and so many others, but is seeing these posters equivalent to seeing the original painting? It was the effect of the actual Weston print that allowed me to see beauty of the medium. I hope to share the actual prints of Courting Chaos again soon.

Wayne #2
Framed silver gelatin print for the show

Of course, there are so many images that affected my way of seeing, and these images in particular, but the work of Man Ray is most important for this project. Man Ray worked in a variety of media: doing sculpture, painting and photography. My perception of his work changed when I saw original pieces at the Getty in Los Angeles. One aspect of his images was important to this project: he was solarizing his negatives in a way I had never seen before. The way that Man Ray integrated innovative technique with creative images is spell binding.

Pernicamera

On another level this project began when I purchased an 11X14 inch camera. While it’s not necessarily difficult to think about scaling up a camera “it’s just the same thing only bigger” the reality is pretty impressive. A full frame dSLR uses a sensor that is 1X1.5 inches, regardless of how high the sensor resolution; it’s a small area. The camera for this project has a capture area of 11X14 inches. In addition, while the sensor may have high resolution, film resolution is on the molecular level. The total amount of information you can capture is mind blowing. The costs of the thing are pretty impressive as well; a single sheet of 11X14 inch film costs eight dollars. Adams used 4X5 inch camera much of the time; Edward Weston used an 8X10; Brett Weston did use an 11X14 camera occasionally. The problems of using a camera this size are not just expense and weight, it also needs a lot of light. So, when I got the camera, I wasn’t sure that I would use it much, maybe just a couple of times to prove I could master the thing. Then, after a lot of thinking, I came up with a way of using the camera to make images that I couldn’t create with any other camera. I decided to explore solarizing (re-exposing) the negatives.

Bonnie Hunt, Hand
Print Solarization

This is similar to what Man Ray did, during the processing of his film he re-exposed the negative to light. This creates a reversal effect. This was a pretty common process when I was in high school, but we solarized prints rather than negatives. When you solarize a print the white area of the print black or gray, which can look pretty compelling. It’s impossible to entirely predict what will happen, and even if you do the same thing twice, the results will be different. The thing about Man Ray’s solarization process is that he turned the black areas of the image white AND he could make multiple prints that were the same. This was because he solarized the negative rather than the print. This creates another big problem: you have to process modern film in total darkness (yes, even black and white film) so you can’t see what you’re doing. When Man Ray did this people used orthochromatic films; films that couldn’t record red light, so he could see what he was doing. I realized that I could shoot 11×14 photographic paper, which can be used under safelight. Since I have an 11×14-inch scanner I could take these negatives, which were on paper, and scan them. This enables me to interpret the images in Adobe Photoshop. The large area of the negative is an advantage with this process because you can choose to re-expose and re-develop specific parts of the image. As I mentioned, what actually happens to the image when you re-expose and re-develop is chaotic, almost totally unpredictable. Thus, I am courting chaos in making these images.

Mindy K #7
Original Negative Scan

A great advantage of shooting the photographic paper, rather than film, is that the processing is quick and easy. You can develop the RC paper in about a minute. Even with re-exposure it was only about 5 minutes from exposing with the camera to seeing the negative in white light. Almost as quick as Polaroid! In addition, since the large scanner was in the studio I could scan and reverse the images in short order, so the subject was able to leave with digital prints! This project benefited immensely from the immediacy of this medium. For many of the models, this was their first experience in seeing photos develop.

Cassie #1

This project is also the result of the work of David Kidwell, assistant extraordinaire, and Julie Powers, makeup artist for angels and devils. Julie did a couple of really remarkable things for this project: first she designed the make-up for all the models. This is tougher than it might appear because the Multigrade paper doesn’t react to color in an even way: reds and yellows are very dark while blues are brighter that you would suppose. Julie also arranged for all the models, THANKS! David managed set up and kept me on my feet all through the shoots. Now that I’m in my sixties I couldn’t have done it without him! Each of the models was special. It can be difficult to come to terms with normal pictures of yourself, it’s more of a challenge when you’re teaming up when chaos. You know that all of the images will present you in unpredictable ways. My thanks and gratitude to all!

Rachel #10

In another way this project began at University High School in Los Angeles, specifically in bungalow L79. At sort of the end of the campus was the photography classroom. I first learned about photography in that classroom. The instructor was Arnold Rubinoff. Arnold was teaching things that really weren’t common in high school photography, back then. I remember learning to make color prints from him. One of the things we learned was how to do solarization. He also introduced us to Cyanotype prints. Half of the show was printed as cyanotype images. You can see those prints at this link: https://siskinphoto.com/blog/?p=3630.

Cassie 1 #5
Framed cyanotype print for the show

There are a number of important technical insights that led to this project. One of the first problems that had to be solved was the cost of film; if film is too expensive it keeps the photographer from taking risks. One other advantage of the paper is that it has good light sensitivity: Ilford Multigrade is about ISO 100. Another important moment was when I realized that I had an oversized scanner. My original thought was to remove the emulsion from the paper and put it onto a clear base, which would have been very difficult. Scanning the images was easy and quick. I was then able to make new negatives on clear film using a digital printer. These prints, both silver and cyanotype, are much more beautiful than the digital prints. For this show I used multiple coats of cyanotype chemistry on blotter paper. The images have a very dark maximum tone as a result. Because the prints are hand coated each cyanotype print is different, even if made form the same negative. Cyanotype prints do change over time, which is part of the charm. For the silver gelatin prints (check here to see: https://siskinphoto.com/blog/?p=3571) I used Ilford Multigrade Warm Tone Fiber base paper. Fiber base papers use a barium clay coating called baryta that produces the white tones. In addition, when you air dry a glossy fiber-based paper the surface looks fabulous. I also toned all the silver gelatin prints with selenium, which makes a more agreeable print color as well as adding to the stability of the final print.

Tyler #12
Framed silver gelatin print for the show

Actually shooting with the camera is pretty tricky. Some things are like working with any large format camera, for instance the image is upside down and backwards on the ground glass. Over the years I’ve become used to that. One problem that particularly affects the 11X14 is bellows extension. The closer your lens is to the subject the further it is from the film. I know this seems exactly backwards, but trust me it’s the way it works. What might not be obvious is that as the lens gets further from the film, there is less light on the film. If you are shooting a head and shoulders portrait with a 35mm camera you don’t have any bellows extension; if you’re shooting with 4X5 film you might lose half stop to bellows extension; with the 11X14 camera you’ve lost about 2 stops of light to bellows extension. This means it’s dark on the ground glass when you’re focusing and composing AND you need a lot of light to make the exposure. Most of the time I was using between 5000 and 7000 watt-seconds of strobe power to make the exposure. My lens was generally set between f11 and f16. While this seems like it would give you plenty of depth of field on a digital camera, on the 11X14 it gives you only a matter of millimeters of focus depth. So, focus is critical, which makes it very important for the model to stay in place! Another aspect of bellows extension is the way it affects your lens choice. The normal lens, if there is one, for an 11X14 camera is about 450mm, or 18 inches. If you were shooting like you do with a full frame digital camera, you’d need about 1000mm (39 inches) of bellows to bring the lens into focus. That makes the camera really difficult to keep stable and to adjust. The answer is to shoot with shorter lenses, which bring the camera closer to the subject. My favorite lenses for this project were a 12 inch red dot Artar from Goerz (f9) and a 14 inch gold dot Dagor (f8) made by Kern for Schneider. I use the 12 inch Artar for head and shoulders and the 14 inch Dagor for full body shots. I used a few other lenses on occasion including a 48cm Goerz Dogmar (f5.5) and a 270mm Wide Angle G-Claron from Schneider (f6.3), but they just didn’t keep the subject/camera distance in a good range.

Mindy #7
The negative for this image is above

The camera itself has some basic challenges. The fact that it’s a working 11X14 camera must be in its favor but it’s built out of parts from other cameras. It’s built on top of a drawer, like something out of a card catalog. This allows it considerable expansion, but it also means the camera isn’t portable. It weighs a lot, so the tripod needs to be a beast. The focus skips out of alignment, which is annoying. The bellows sag. There is a plaque on the camera proclaiming it as the Pernicamera Model Number 0001, built in 1995 to 1997. I’d like to meet the person who built it. I don’t use a shutter with the camera at all. I keep the lens open, but all the illumination, once the paper is loaded, is from safelights. I trigger the strobes with a radio slave to make the exposure. This makes it easier to do multiple exposures and to move the subject between the exposures.

Leslie #6

I hope you’ll enjoy looking at more of the images from the first show.

Part 1, Silver Gelatin Show Prints:

Courting Chaos-The show, Part 1-Silver Gelatin Prints

Part 2, Cyanotype Show Prints:

Courting Chaos-The show, Part 2-Cyanotype Prints

Part 3, Color Glossy Show Prints:

Courting Chaos-The show, Part 3-Kodak Color Glossy prints

If you examine more of this blog you’ll see information about many other aspects of photography. If you’d like to look at some of my articles about photography, from View Camera, Photo Techniques and shutterbug, please look at this link: http://www.siskinphoto.com/magazinearticles.php

You can see my main site at: http://www.siskinphoto.com/

If you have any questions regarding these images or my photography please contact me at john@siskinphoto.com.

I generally post current work on Facebook. Perhaps you’d like to look me up there at https://www.facebook.com/john.siskin

I’ve written a couple of books. They’re available at Amazon. Here’s my author page there: https://www.amazon.com/John-Siskin/e/B004N73O36/ref=dp_byline_cont_pop_book_1

Wayne #13

Wayne #13

November 8, 2020

Digital Shooting is Different!

Filed under: Basic Photo Technique,Digital Photography,Looking at Photographs — John Siskin @ 3:12 pm

There are over 600 images attached to this blog post, probably excessive… Please take a look. Due to the number of images I’ve decided to place them after the text. If you only want to look at the images please scroll right through the text. Please note, all of these images were shot by me in 2020. They are covered by any and all applicable copyright law. Thanks!

I’ve had several discussions, over the years about the difference between digital and analog photography. When I first started to do a blog I did some posts about the things that hadn’t changed, the things that carried over from film to digital. Some of that stuff is in this article: file:///Users/siskin/Downloads/basic-1.pdf. This made the point that many of the basics of photographic capture, things like aperture and shutter speed and design, don’t really change when you’re shooting digital. Over the years, I’ve met a lot of people, including photo instructors, who want to work with a digital camera as if it is a film camera. You can certainly do this, but it ignores some of the great advantages of digital shooting.

Since I got out to New Mexico most of my time, photographically, has been spent with film cameras. I don’t want to try to justify that choice, except by saying I’m having a lot of fun playing with film cameras. Since most of my time as a commercial photographer and teacher, for many years, has been largely spent with digital cameras, I’m very aware of differences in the way I shoot digital and film. This blog post is about a very basic and EXTREMELY IMPORTANT, differences between shooting film and digital: MONEY and TIME. Every time you press the shutter button on a film camera you have committed to a financial expenditure. Maybe you think, but it’s not a lot, it shouldn’t be important to your shooting decisions. Here’s the thing, it’s not a lot, if you shoot a digital camera like a film camera, BUT, if you shoot it like a digital camera, it should be a lot. Later in this blog I’m going to present the shots I took at Leonora Curtin Wetlands, a couple of weeks ago. The first time I went with a film camera, and shot about 8 images. I went back a few days later with my digital camera and shot 700 images. The film cost about $8 dollars. I took be about an hour to process the roll and another hour to scan the images. If I’d shot film, I’d have spent about $85 dollars and say a couple of days to process and scan all those shots…

My Mamiya Press camera is a little tricky to use and it has questionable ergonomics; the Nikon D800 is easy to use and a dream to handle. Why do I insist on working with film cameras, and while we’re at it why do people climb mountains… Ansel Adams often spent a lot of time on making each image, at best his 4×5 camera and tripod took minutes to set up, so he put a lot of effort into each negative. Jay Maisel was also, originally, a film photographer. Instead of a 4×5 camera he was using 35mm cameras. The thing about Jay is that he shot a ton of film! I’ve heard him speak and have some of his books. One of my articles even appeared in a magazine that featured his work. He is a terrific photographer and you should look at his work. Every story I’ve heard about him stresses how many photographs he takes, how much film he used. It was EXPENSIVE to shoot like Jay. Of course, he had a big budget for his shoots…

The thing is that digital capture separates pushing the shutter button from emptying your wallet. SO, SHOOT LIKE JAY MAISEL!!

But then I have to edit all those images…

Of course, did you think that buying an expensive camera made you a better photographer? Editing makes you a better photographer.

Over the years I’ve talked to a lot of stock photographers, magazine photographers and photo teachers. The stock photographers and the magazine photographers will always tell you to “frame loosely”, leave a little extra space in your composition. And, they’ll remind you to shoot both vertical and horizontal versions of your subject. The reason is that when you sell that image you don’t know what the buyer will want to do with it: maybe they’ll need a little extra room for a title or for a label. I’ve heard a lot of photo teachers harangue students to make their compositions in the camera; to do their final framing in the view finder. This is a good exercise, and it was sort of important if you were shooting slides for projection, but it’s not good advice for digital shooting. Those ideas were important when folks were shooting 35mm film. Today, people have forgotten how little resolution 35mm film had. You could make a good 8×10 inch print, if you didn’t crop much. If you had a really graphic composition a bigger print would work, but a double page spread in Life Magazine wasn’t going to look great. So, people were using bigger film, much of the time. Like my Mamiya Press camera, which uses 6x9cm film. As you may know, I often shoot much bigger film, 8×10 inch and 11×14 inch negatives! Modern digital cameras have huge files, which can translate into either huge prints, or cropping without a loss in image resolution. The files from my Nikon will print at 24×16 inches at 300 dpi, fantastic resolution! Even the files from my phone camera have more resolution than the 35mm film I used when I started out. So shoot loosely!
In the old days, most of us spent a good deal of time in the darkroom. It was part of basic training. First, if a photographer didn’t understand the whole process, he/she was often handicapped in dealing with a professional lab: you didn’t know what they could and couldn’t do. Of course, there were lazy photographers, people who dropped the film off and assumed that the lab would do right by them. If you were a wedding shooter, and went to a pro lab that was good at weddings, this generally worked out. If you dropped your film off at the drug store your work often looked lousy. Today, with digital, a good photographer needs to have a real familiarity with digital image processing. You can get services like www.deepetch to do the work for you, but just like with an old school professional lab, you need to communicate with them. You can also work with Photoshop or Lightroom and get great results on your own, and your hands won’t smell like fixer. The bottom line is that you’re going to have to have some involvement in the interpretation of the image after the shot. Shooting loosely doesn’t mean that your finished images should be loose!
I’ve already done a blog post about editing: https://siskinphoto.com/blog/?p=3362. Editing is very difficult process; it can be heart breaking. In this post I’ve included a proof sheet of the 8 images I shot with my film camera at Leonora Curtin Wetlands. One shot was ruined by my mistake, and I took 3 shots through Photoshop. This was a quick shoot; I was only there for about a half hour because the place was closing. Because of the short time I kept the wide-angle lens on the camera the whole time. Three out of eight is pretty good odds…

I went back a couple of days later with the digital camera: Nikon D800. I had a few hours to shoot, which would have changed the original shoot as well. The big change was that I shot like a digital photographer. I shot 700 images. I’ve attached 608 of the images to this blog. I kept the others back because they had people in them and I didn’t bother to get model releases from those folks. If you plan on selling your shots you better plan on getting model release forms filled out. Regardless, it’s a hell of a lot of pictures. I edited these files several times. It took a while, and I put it off for a while. It’s often better to edit after you’ve spent a few days away from the shoot. You’re more likely to edit the images for effect, rather than the experience of making the shot. I used to ask students to trade raw images with each other so that they could get the feeling of editing, truly independent of shooting. This is great exercise. We often forget that the viewer won’t have the experience of making the shot, they only have what we choose to share. I finished 15 shots in Photoshop, not such good odds, but odds on, better images. I’ve included all these images so that you can get the idea of what it’s like to edit a big shoot.

For the digital shoot I had four lenses, all manual focus. It’s not that I don’t have, or use, autofocus lenses, but I felt I needed some practice with these lenses. As I’ve written before, it’s extremely important for photographers to PRACTICE. I had the Vivitar Series 1, 90-180 Flat Field zoom lens F4.5. This is a very unusual lens design. It was supposed to have been designed for medical photography. The one I have now is wicked sharp, but what really makes this lens different is that it CONTINUOUSLY focuses from infinity to macro. I know of only one other zoom lens that would do that: the Nikkor 70-180, discontinued now. Both these lenses are rare and rather expensive for older manual focus used lenses. The Vivitar is really great for shooting product because it has a tripod collar, which makes it really easy to charge the camera orientation without changing the centering. I also took the Lomography Daguerreotype Achromat. This is a modern lens built with a similar optical design to 19th century lenses. It’s a beautiful thing, actually gold plated. It makes very soft images. You’ll be able to pick them out of the attached images pretty easily. I was using it wide open, f2.9, which adds to the softness. Then I took the Nikkor 35mm PC. lens f2.8. This is a very manual lens with a manual diaphragm. What makes it interesting is that it is a shift lens. You can move the center of the lens in relation to the center of the film. Usually this is used for shooting architecture, but in this case, I just wanted to play with it. Finally I had the 14mm f2.8 Rokinon, which is just incredibly wide! There are no prizes for figuring out which images are made with which lens. In fact, since these lenses don’t leave a trace in the exif files, I don’t know myself. I really should keep better records.

I am sure you would choose different images to work with than I did. I am sure you would process the images differently than I did. That is an essential part of our individual expression. I would like to hear your thoughts about these images. Please e-mail me at john@siskinphoto.com with your thoughts! Unfortunately, I had to close the comments on this blog long ago, but I’ll add your comments at the end.

Shoot #1-Mamiya Press with 50mm lens-Processed images:

Shoot #1-Mamiya Press with 50mm lens-Proof sheet

contact sheet


Shoot #2-Nikon D800-Processed images

Shoot #2-Nikon D800-Original images

Wow, you’re still here? Thanks! If you have any comments e-mail me at john@siskinphoto.com!


October 3, 2020

Copying Artwork and Photographs

I wrote this a few years ago when I was teaching at BetterPhoto. Recently a friend asked about copy work, so I thought I’d re-post it here. The basic ideas are still valid, but today I would use different strobes to do the work. I hope you find it interesting…

Wow, look at how old that computer is… The cover for the Style Guide for Bagadasarian Productions.

When I started my photography business a few decades ago my commercial client was Bagdasarian Productions. They made the Chipmunk animated cartoons, with Alvin, Theodore and Simon. They were working on a full-length movie about the adventures of the Chipmunks. One of the keys to animation, back in the eighties was high quality painting for backgrounds. Those paintings were done here in Los Angeles and then shipped to Korea for the character animation. My job was to make high quality copies of the backgrounds so that the background painters would be able to refer to them in order to maintain accurate color and style. Since then I have done copy work for businesses, artists and galleries. Copy work is pretty simple but it must be done very carefully in order to get the best results. I often do copy work in the living room, since I keep my finished work at home.

The basic layout of a copy job is to have the camera back, whether film or sensor, parallel to the original. The lights need to be between 30º and 45º from the plane of the original. In this range they light the original but you don’t see reflections of your lights in the original. You can even shoot through glass! The lights need to be far enough from the original to even out the lighting. In the example with this article the lights are about five feet from the center of the original. You need the lights further away from a larger original. The reason for this is that if the distances from the light to the corner of the original and to the center of the original are significantly different you will not be able to even out the light. The amount of light that makes it to the subject goes down as the distance from the light source increases. So, if the distances to different parts of the original are very different you will not be able to even out the light. In the example the difference between the light on the center of the shot and the corner is 1/10th of a stop, pretty small.

This is the one area of digital photography where I still use a light meter. When I set-up a copy job I put the lights an equal distance from the center of the original. I also point the lights at the original. Then I use the light meter to move the lights into the most advantageous position.

As I mentioned above, in this case I was able to get the lights to almost perfectly even. It is very difficult for the eye to see differences of less than 1/3rd stop, so if you can get your lighting even to the 1/3rd stop level your light will be even on the copy. I also use diffusion domes over my lights to make them more even.

You might need these if your lights are close to the original, as you move the lights further back, they don’t matter as much. I generally use them, but then I already have them. I will usually use the lights directly, to reduce the chance of reflection. If I am photographing a piece of art with an irregular surface I will probably use umbrellas to reduce the shadows on the irregular artwork. If I am including the frame in the copy I will also use the umbrellas to reduce the harsh light on the frame.

The kinds of lights for copies are also important. The easiest lights to use are strobes. Strobes have a color balance that is the same as daylight; this is a big advantage if you are using film to make copy slides. You can use strobes in a room that has existing light; the room light will be so much less than the light from the strobes (if you have reasonably powerful strobes) that the room light won’t affect your shot. If you can remove existing light from your location (including daylight) you can shoot with quartz lights. These lights are designed for photography and they have the qualities to make good copies. I would avoid the tungsten photo bulbs that look like regular light bulbs; they change color too quickly. I would not use any fluorescent lights for copy work, although digital cameras can balance for them reasonably well, they do not have a continuous spectrum. Consequently you will probably have problems achieving accurate color everywhere in your image.

Whatever light source you decide to use you will need to do a color balance if you are using a digital camera and a color test if you are shooting transparency film. The key to doing a good balance with a digital camera is to use an accurate grey sample. I use a GretagMacbeth ColorChecker, to keep things accurate.

I use the grey samples on this card to set my balance on the digital camera and the whole card to test my film. Getting the color set accurately is a very important part of copying, so it will be important to check the best way to do this on your digital camera.

There are popular copy stands for doing small copies, say 11X14 inches at the largest. These are faster than using than my tripod set-up. If you are copying a large amount of originals from 4X6 inch to 11X14 inch you should check these out. However, if you are doing larger originals or doing copy work less often you should consider a Side Arm attachment for your tripod. I use a Bogen/Manfotto 3059 with my Gitzo tripod; you can mix and match in this area. The side arm mounts on the tripod legs and then the tripod head mounts on the side arm. I cover the side arm with black Duvateen fabric when I am shooting products under glass or very glossy originals.

There can be enough light spilling onto the side arm for it to reflect in the picture. The key to keeping your copy square is to be able to get the original parallel to the camera back. Before you do the leveling get the camera into about the right position, because if you have to move the camera you may have to level it again. I use two surface levels to make the camera parallel to the original. I place one on the original and one on the camera back. This is generally a part of the procedure that requires some patience. The object is to get the two bubbles in precisely the same place.

I have used several different types of levels over the years, these little round levels work pretty well. The key is to not be in a hurry, and to double check if you move the camera. Remember you can move the original as well as the camera. If you are copying an original mounted on a wall, then the levels won’t help you. The way to get your camera positioned is to make the original square in the frame by moving the camera. This also requires patience.

You can use any lens to do copy work, but if you want to have a high quality copy, some lenses are better. You should probably avoid zoom lenses, they do not copy flat objects as well as fixed focal length lenses, and they often do not focus close enough.  One inexpensive alternative is 50mm lens. The best lenses for this work are macro lenses; they are designed to shoot a flat field. I use an older Nikon 55mm f3.5 macro lens. It does not have any automatic features when I use it with my camera, but those features don’t do me a lot of good with copy work. I have exposure information since I used the meter to set my lights. Auto focus often doesn’t work well on artwork, since there may not be enough contrast to focus on, and I don’t want to reposition my camera to focus. I usually place a coin or other object on the original to help me focus by eye with the macro lens. I can check my focus on the computer. Of course, when I am using a film camera it is a little easier to focus, since the viewfinder is designed for manual focus. One of the other problems with focus is that I have to stand on a stepladder to focus. I wouldn’t have to do that if I shot the original mounted on a wall, but it is much harder to get the sensor parallel to the original!

I hope you’ll also check out my books, use the links below:


One more thing, there are more than14,000 people subscribed on this blog. Wow! Thanks everyone.
« Newer PostsOlder Posts »

Powered by WordPress