Photo Notes A place to talk about making images.

April 22, 2012

Bubbles in the glass.

Filed under: Photographic Education,Photographic Equipment — John Siskin @ 3:31 pm


Amazon is shipping copies of my second book: Photographing Architecture. This is really exciting! Of course you can also get my first book Understanding and Controlling Strobe Lighting. You can download copies of most of my articles and some do it yourself projects. I teach three classes at BetterPhoto: Portrait Lighting on Location and in the Studio, An Introduction to Photographic Lighting and Getting Started in Commercial Photography. I hope you’ll check them out.

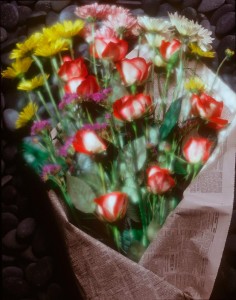
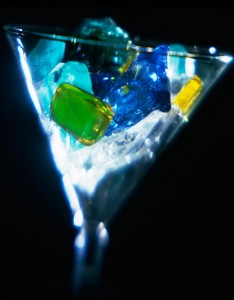
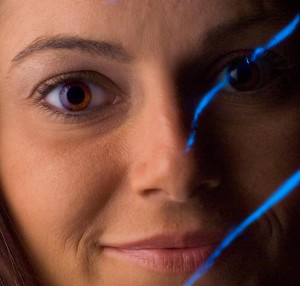
I used a double exposure to capture both a soft and sharp image with different lens settings.

When I started doing photography bubbles in a lens was considered a good sign. They meant that the glass had been at the perfect temperature when the lens was made. There were really only two types of optical glass: crown and flint. Glass has always been critical for photography. The first lenses were very slow, which meant that exposures were many minutes long. Josef Petzval designed a much faster lens in 1840 that made portraiture possible. The first photographs were made on silver coated copper plates, for Daguerreotypes and on paper for Talbot’s photos. Soon photographs were made on glass plates, because this made it much easier to make additional copies of an image and keep good detail. The famous photographs of the Civil War were made on wet plates, which required very fast work by the photographer. The glass plate had to be coated, exposed and processed before the sensitive coating dried. Those photographers worked hard to make an image.

This image was originally made for an article in View Camera Magazine

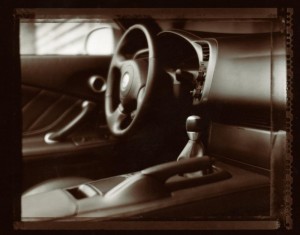
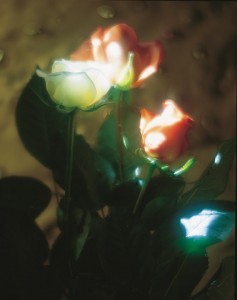
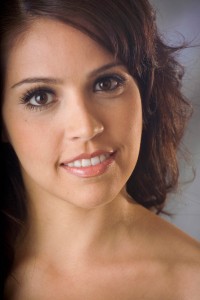
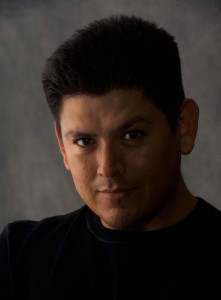
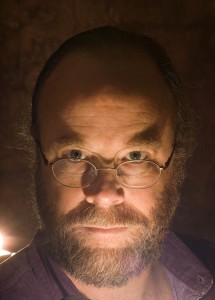
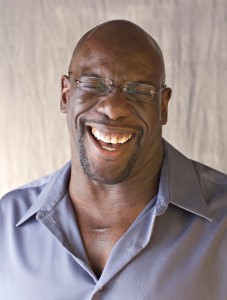
A few years ago, before Photoshop, I used to rely on the glass to make an image special. I had about twenty lenses for my view cameras that would do things like close focusing or capturing a wider angle of view. I had several soft focus lenses, including a set I assembled myself. The biggest challenge was in making an image that was both soft and sharp. This usually required lighting the image twice and making a double exposure. It was really a great feeling when everything worked. Now you can make a second layer in Photoshop and apply Gaussian Blur. Then you can do whatever blending you want between the two versions. The tools we have today allow us much more control over our images, and more options. However, there was a wonderful sense of accomplishment in making an image with special glass and light. I’ve attached images from soft focus lenses this week. The ones that used soft and sharp exposures in one image are marked.

I mounted a 180 soft Fuginon on a SLR Graflex B, quite a combination!

If you want to shoot classic lenses with a digital camera you should check out this article. It will tell you how to adapt a dSLR to a view camera.

I’m going to be judging a contest for the Indianapolis Camera Club on Tuesday. I really hope to be impressed. I expect to be putting up a schedule for classes with Indy photo Coach here and on the website soon. Of course you can sign up for one of my classes at BetterPhoto:An Introduction to Photographic Lighting

Portrait Lighting on Location and in the Studio

Getting Started in Commercial Photography
I hope you’ll check them out. I have been told that prices are going up this year at BetterPhoto, so you might want to sign up soon.

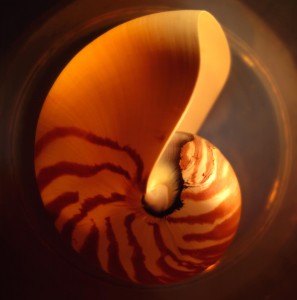
Another double exposure with both a sharp and a soft exposure.

Nautilus Shell

February 21, 2012

Location Work

Filed under: Architectural Lighting,Photographic Equipment — John Siskin @ 7:04 pm


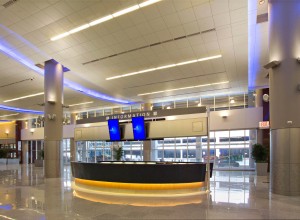
I’m doing a workshop here in Indianapolis on March 4. This one will be about shooting interiors, so it will go over some of the same information as my new book: Photographing Architecture . Here’s a link to more information about the workshop. The workshop is free, but tickets are limited.  Of course you can also get my first book Understanding and Controlling Strobe Lighting.   I had a great experience shooting the airport. The images in this blog entry are all from that shoot. I did this shoot for Chusid Associates one of my Los Angeles clients. Chusid Associates is a marketing consultant specializing in architectural and building products. Their blog offers good tips on the value of photos as sales and marketing tools. The project is an expansion of Hartsfield–Jackson Atlanta International Airport and, as you can see, it is still under construction. The photos are for Ceilings Plus a leading producer of architectural ceiling and wall panels. My instructions were to capture how the ceiling panels help to express the architecture of the facility. I am glad to have the chance to work with Chusid Associates again after my move. I have always had good experiences working with them, and the chance to work with very interesting clients. Much of the micro work on my site is work I’ve done for Chusid Associates.
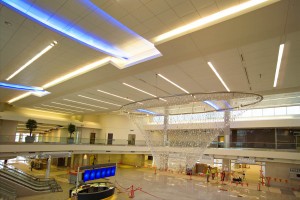
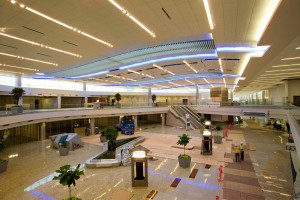
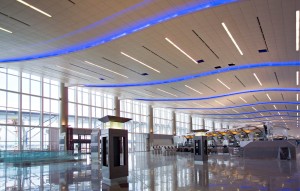
The shoot reminded me of a couple of things I want to add to this blog; this week I’ll be writing about location shooting. There are two kinds of locations: the first is the one you can drive to. I’ve done thousands of this kind of location shoot. In fact every time I get a new car I drag out the equipment to figure out an efficient way to load the new vehicle. I have a lot of lighting gear, eighteen strobes and the quartz lights, so it takes up a lot of space. Space is the first thing I think about with a vehicle, the second is how beat up the car looks. I like a car to have a certain level of urban camouflage. If the thing looks too good it will draw thieves, better to avoid attention. As you can imagine I mostly end up with used pick-up trucks and vans. I prefer the vans because they are easier to load.
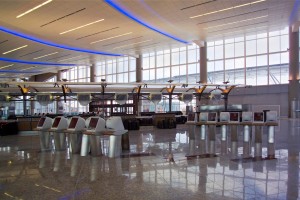
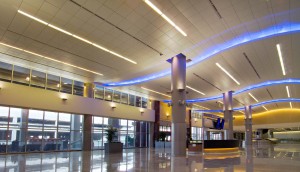
Of course for the airport shoot I had to fly in. This brings a whole different challenge to location work. When I drive to a shoot I can bring everything and the kitchen sink. If I did that on this shoot my luggage charge would have been staggering. When I got off the plane I wouldn’t have been able to get the gear to a rental car. So the key here is to bring just what you need and some back up. This shoot was largely ambient light, but a few shots would require strobes. I knew that I would be using several captures to make my final image (see this earlier blog for details https://siskinphoto.com/blog/?p=621) so a good tripod would be absolutely essential. I took my Gitzo legs and a Manfrotto 3025 head. I’ve had the Gitzo legs for at least fifteen years, so I know I can rely on them. The 3025 is not my favorite head, but it’s sturdy, light weight and small, a terrific combination for travel. I also took a five-gallon portable shower. This is basically a heavy-duty plastic bladder I can fill with water. I use this to make my tripod heavier. Weight makes the tripod more stable, which is essential if you want to make several captures from exactly the same place. Too often people buy lightweight tripods that don’t provide enough stability. I have several tripods and heads for different cameras and situations. As I have mentioned in other places tripods are very inexpensive because they will last for decades. So it makes sense to get good ones. One other thing I liked about the Gitzo legs for this job: they fit inside my Pelican case. The Pelican is one of the few cases I’ll check into airline luggage. Of course I also took a chain-pod to stabilize the camera.
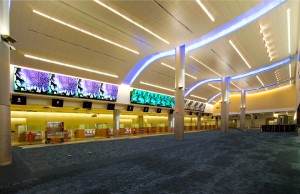
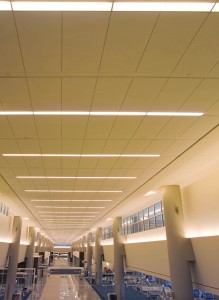
I took some of my Norman 200B units to handle whatever lighting needs I would have. It turned out that I needed the Normans to shoot a picture of the ducts behind the ceiling, a bathroom and one of the ceiling shots. While these weren’t the most important shots of the day, they were critical for the client. The 200B units are very sturdy. They produce a lot of light and they recycle incredibility quickly. I used to recommend them all the time, but, as they haven’t been made in about 20 years, I’ve stopped suggesting them. Norman has a new unit called a 200C, which is nice but awfully expensive. They also brought out a 400B that is twice as powerful as the 200B. If you really need a very fast portable unit I would look at this. However I now recommend the LumoPro 160 when I recommend a battery unit. They produce a useful amount of light, and are small and inexpensive. One of the reasons I like the Normans is that they work like the studio strobes I started with, the LumoPros work like dedicated strobes, which is very helpful to people who started with digital equipment.

In addition to the 200B units, which need power packs to run the heads, I needed reflectors, umbrellas, shoe covers as well as light stands. The light stands are always the biggest problem on a job like this. I think that light stands are the most difficult problem. They take up a lot of space and they weigh a lot. I haven’t seen a light stand I really like. What I want is a stand that extends to ten feet, collapses to two feet and weighs about two pounds. I’m not going to get that. I do have one small stand that was meant to be a light stand, but it only goes to about 6 feet. I have a couple of stands that were collapsible music stands. I cut the tops off of them. They are small, but they don’t get that tall and are kind of flimsy. The other thing I carry is a 1/4X20 stud adapter. This allows a tripod to be used as a stand. I also have a vice grip that has 1/4X20 threads welded to it, and the adapter fits on that. This isn’t the same thing, but I might buy one of these. I take some other stuff when I go on location. The last things I pack are clothes, which I use to pad everything else.

I teach three classes at BetterPhoto:

Portrait Lighting on Location and in the Studio

An Introduction to Photographic Lighting

Getting Started in Commercial Photography

I hope you’ll check them out. I have been told that prices are going up this year at BetterPhoto, so you might want to sign up soon.

January 31, 2012

Reflectors 2

Filed under: Basic Photo Technique,Lighting Technique,Photographic Equipment — John Siskin @ 5:19 pm

Amazon is shipping copies of my second book: Photographing Architecture. This is really exciting! Of course you can also get my first book Understanding and Controlling Strobe Lighting. You can download copies of most of my articles and some do it yourself projects. I teach three classes at BetterPhoto: Portrait Lighting on Location and in the Studio, An Introduction to Photographic Lighting and Getting Started in Commercial Photography. I hope you’ll check them out. I have been told that prices are going up this year at BetterPhoto, so you might want to sign up soon.

So it’s taken me a while to get back to this blog. No real surprise there. As mentioned I have some samples of what reflectors do for you. Before I get to that I want to mention a few things I have coming up. I will be in Atlanta this weekend. I am going down a few days early for a shoot at the Hartsfield-Jackson airport on Monday. I’d make a joke about shooting in an airport, but the security people have no sense of humor. It’s pretty exciting to be shooting a large public space for a client. I’ll post the results when I have them.

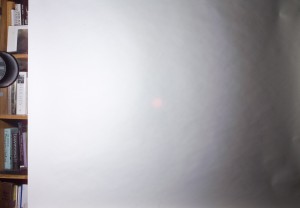
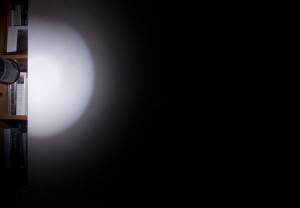
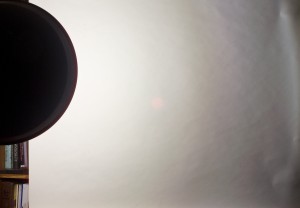
I also want to say something about testing. I took a while to get back to this blog because I needed to test a bunch of reflectors. I still don’t have a studio here in Indianapolis, so this is a pain in the neck. I couldn’t get the reflectors as far from the seamless as I would like. I only shot half of the pattern of the light. None of this matters. Since I hadn’t done this in a while, and I have some new reflectors, I learned things. It is vitally important to test your gear. Not only do you learn about how well it works, you learn about how it works. The strobe manufacturer can tell you about the spread of a reflector, soft box or umbrella, but you won’t know how it actually looks until you do the test. I notice that very few of my students have ever tested their strobes. I encourage them to do a test, and so should you.

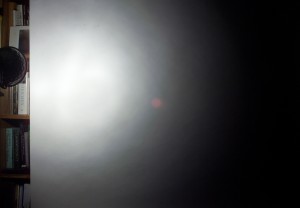
Norman LH 2400 strobe 6 in reflector. This is the light I choose to base other power settings on. So neutral power, large coverage


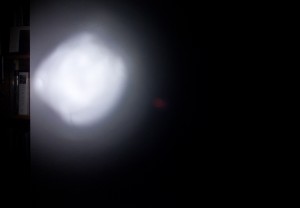
Norman LH 2400 Stove pipe snoot small coverage neutral power


Norman LH 2400 22 in Beauty Dish. Very wide coverage, smooth gradation. -2/3 power


Norman LH 2400 6 in grid spot. Very very small coverage. -1 & 1/3 power


Norman LH2 5 inch reflector. Actually the coverage is surprisingly small. A +5 the power is quite high


Norman Lh2 Glass Dome reflector. long coverage, with soft gradation. -1/3 power


Norman LH 2 Parabolic reflector, small coverage from a very shiny focused reflector. +6 power


Norman LH2 Parabolic w/shoe cover. The cover diffused the light a lot, so long coverage. Neutral power


Norman LH2 6 in/2Q reflector, an alternative basic reflector. Larger coverage w/fast gradation. +3 power

Norman LH2 Homemade black snoot. Small coverage. with -1 power (negative)

BetterPhoto.com, The better way to learn photography


January 7, 2012

Reflector or Reflector?

Filed under: Lighting Technique,Photographic Equipment — John Siskin @ 11:51 am


Amazon is shipping copies of my second book: Photographing Architecture. This is really exciting! Of course you can also get my first book Understanding and Controlling Strobe Lighting. You can download copies of most of my articles and some do it yourself projects. I teach three classes at BetterPhoto: Portrait Lighting on Location and in the Studio, An Introduction to Photographic Lighting and Getting Started in Commercial Photography. I hope you’ll check them out. I have been told that prices are going up this year at BetterPhoto, so you might want to sign up soon.

I’ve often said that I believe that strobes are the best lights available for still photography. The reason I like strobes is that you can make the light work in a large number of different ways. You can make a small spot or a broad light; you can make hard light or soft light; you can even project images (www.siskinphoto.com/magazine/zpdf/strobeprojector.pdf). There are a number of different sorts of tools that give you this control; many of them are called reflectors, which is a problem. Entirely different sorts of tools are called reflectors. Tools which probably should be called reflectors aren’t. I hope to add a little clarity to this situation in the next couple of postings of this blog. I have students that this information will help. I hope it will be more broadly useful.

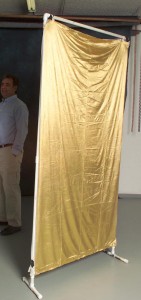
This is a large bounce reflector. The gold color creates warm light.

So let’s begin with the most basic problem: a large flat device to bounce light is called a reflector and the bowl shaped device that fits onto a mono-light or studio strobe is called a reflector. The large panel reflectors are very useful. They can be used in the studio, indoors and outside. They can reflect continuous light like the sun and strobe with equal ease. I really like using them in the studio and indoors, but not so much outdoors. I find that they are difficult to keep properly oriented outdoors. Often the effect of a panel reflector is so subtle that you can’t tell if one was used.

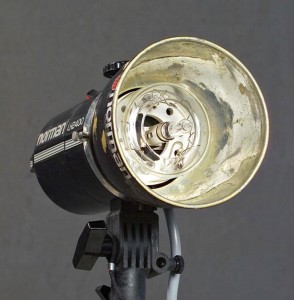
Bowl shaped reflector that fits onto a Norman LH2400

The bowl shaped reflector makes the strobe more efficient by putting more of the light in one direction. It also makes the strobe much more useful by keeping light from going where you don’t want it. Different reflectors give you different patterns of light. For instance the five-inch reflector I often use on my Norman LH2400 spreads light over 130º, a very broad spread. A larger ten-inch reflector spreads light over only 60º. When you use most dedicated strobes, like the Nikon SB900 or the Canon 580II EX there is actually a reflector built into the strobe. The spread of the built-in reflector can be changed by changing the setting from wide to telephoto. In addition to changing the spread of the light reflectors can also change the amount of light that reaches the subject. The standard reflector 2D for my Norman 200B spreads light over 60º, The telephoto reflector spreads light over a much smaller area, but is about 2.5 stops brighter. In the next blog I’ll be providing more examples of the styles and light patterns of reflectors. Most studio strobes and mono-lights only use bowl shaped reflectors made by the manufacturer. So when you buy strobes one thing you want to check on the reflectors and other accessories available from the manufacturer.

I just want to add a quick update about my marketing here in Indianapolis. Some of the connections I made through the clubs are starting to bear fruit: I have a catalog shoot that will start in a few weeks. Also I am supposed to meet with someone from the local community college about a teaching position. I went to the Indiana Home and Garden show yesterday. I met dozens of new people and handed out a lot of cards. It was a great place to show off the new book!

Click on the image to download an article about this shoot.

I’m trying to schedule a new lighting workshop. Please let me know if you would like to attend!
Thanks, John

BetterPhoto.com, The better way to learn photography

November 11, 2011

Shadow!

Filed under: Lighting Technique,Photographic Education,Photographic Equipment — John Siskin @ 9:52 am

The strong shadows in this image make the portrait more effective.

I teach lighting courses at BetterPhoto.com. Some days I think I should teach a course in shadowing. Somewhere photographers acquired the idea that shadows are bad. I’m not sure when that happened. The classic Hollywood portraits used dramatic shadows very effectively. Look at the work of George Hurrell . Shadow is an important part of his palette. Shadow creates shape in an image. Part of what makes a good photograph is the sense of three-dimensionality that shadowing creates in an image. You can make shadows strong and hard. These shadows add drama to an image. You can also make soft subtle shadows that bring out the shape of an object. Whether a shadow is soft or hard is really a function of how close your light source is and how big it is. A bigger closer light source is always softer.

The hard shadows and unusual angle of the light give this image an interesting feel.

I’m not sure how the shadows are bad thing got started. I would guess that it has something to do with the fact that it is more difficult to work with small hard lights than large soft lights. Since a misplaced hard shadow can be really annoying, many people would rather work with soft lights. Not only is it easier, because light position is less critical, but also because a large light is more pleasant for the subject. I think that using just soft light for a portrait is often very dull: soft light doesn’t create much drama. This article is about the differences between hard and soft light and using them together.

I think that the way the manufacturers sell lighting gear has a lot to do with the popularity of large light sources. When I checked at B&H they had hundreds more soft boxes for sale than snoots. There are more types of umbrellas than grid spots. Also umbrellas and soft boxes fit most lights

This shot wouldn't work as well without highlight and shadow. Flat light creates flat images.

while snoots, barn doors and grid spots are designed for specific lights. This means that a manufacturer can sell soft light devices to more users than hard light modifiers. So, naturally, the people who build these things will spend more money on advertising soft boxes. This makes people think that they have to have them. Here’s a link to an article about lighting tools, in case some of these terms are unfamiliar.

Don’t get me wrong: I like soft light. I just like to use it with hard light when I can. My favorite tool for making soft light is a light panel . The light panel can be used in many different ways, while the soft box is less flexible.

You can learn a lot more about lighting in my BetterPhoto.com classes: An Introduction to Photographic LightingPortrait Lighting on Location and in the Studio and Getting Started in Commercial Photography You might also want to check out my book: Understanding and Controlling Strobe Lighting: A Guide for Digital Photographers. Here’s a sample chapter that discusses portraiture.

BetterPhoto.com, The better way to learn photography

October 2, 2011

Seeing and Lights

What you do affects the way you see. I don’t suppose this comes as any particular surprise. And yet I often find that I forget that I see through a filter of commercial photography. This means that my images are designed to read quickly. As I have been learning more about Indianapolis I have been seeing photographs that are very different from my way of seeing. There are a couple of reasons for this: first I am going to several camera clubs. This means I see other peoples’ photographs more often, which is good. Of course I look at a lot of student photos at BetterPhoto, but a lot of those are wig head shots. Another thing that is changing my way of seeing is that I am still lost a lot of the time. So I have to watch where I am going. I expect that my images might begin to change in the next few months.

The tools you use change the way you see. I can remember using a tripod for every shot as an exercise. Shooting this way slows you down and makes you pay attention to composition. Using a view camera changed the way photographers see, because you were always viewing the image upside down and backwards. Instead of paying attention to the overall composition I paid attention to the relationships between parts of the composition. I miss view cameras. One of the best sorts of tools to change the way you see is light. With lights, even just a dedicated strobe, you can change the relationships between sunlight and shadow. With a couple of mono lights you can create light that defines a subject in a new way. You can simulate room light by using soft light from above. You can make something completely different by lighting from below or by using a snoot. Of course I hope you are interested in learning how to use light, that’s the subject that I teach. You can take my class at BetterPhoto, or, if you’re near Indianapolis you can take the workshop I’m giving in a couple of weeks. One of the questions I often get, in my classes, is what should I buy? First, start with just one light. If you get several lights, at one time, you’ll have a tougher time learning to make it work. This is the list I give people in my classes:
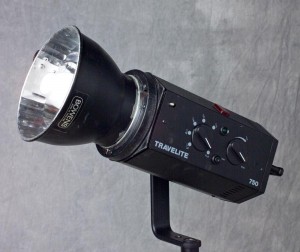
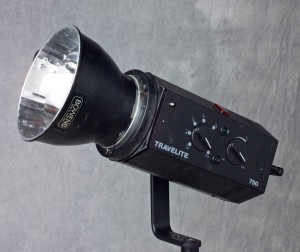
Alien Bee B1600 or Calumet Travelite 750. There are other good brands as well. The important thing is getting enough power to enable you to use lights in a variety of ways. You can always reduce light output, but you can’t get more than you bought.
50º or 60º metal bowl reflector. This is the standard reflector, usually 6 to 8 inches. It spreads light over the angle covered by a normal lens.
1-45 inch umbrella, white satin with a removable black back. An umbrella with covered ribs would be better. The size and style of umbrellas is important.
2- light panels with 2-white cotton or white nylon covers. Also get or make a black cover and a sliver cover. Instructions for making light panels  are at the Camera Design page on my website.
Light stand. At least 8 feet tall, 10 is better.
Perhaps a background stand and a neutral muslin background.
Get a chinese Radio Slave. You can get these from eBay, search digital radio slave. Look for one that has a plug headphones or a guitar. For more on connections check out this article. The radio slaves from China are very attractively priced.

When you get a second light, you may get something with less power depending on what you shoot.
I would also get: A second metal bowl reflector, the same as above.
Barn doors and/or snoot Light stand, as above
2- umbrellas, one matching the one you already have, and the other a 60 inch umbrella.
Very short light stand.

If you add a third light I would get Metal bowl reflector, as above.
1 more light panel with a gold cover.
Light stand, maybe with a boom arm.
Barn doors or snoot if you didn’t get it before.
45 inch umbrella.

I’m still doing experimenting with marketing here in Indianapolis. Yesterday I went out and shot a charity event. While this isn’t the kind of thing I do often, it can be a good way to meet some new folks, and hand out a few business cards. I’ll be going to a couple of camera clubs this week. I need to check out the chamber of commerce here in Indianapolis. Of course I am still sending out e-mail, over a thousand sent out so far! I really hope you can take my workshop but if you’re not around Indianapolis you can take my class at BetterPhoto. I also work with a few people privately using the phone and e-mail. Please contact me if you’re interested. And let’s not forget the book: Understanding and Controlling Strobe Lighting: A Guide for Digital Photographers! I hope you take good photos. Thanks, John

June 26, 2011

Investing In Photo Gear

Filed under: Lighting Technique,Photographic Equipment — John Siskin @ 5:29 pm

I went through some older blog entries I did for an earlier blog at BetterPhoto. I think this is useful information about understanding the cost of photographic tools. I did make a few updates. All the pictures are from my new book: Lighting for Architectural Photography. The book will be out in the fall, but you can pre-order now at Amazon. That’s where the link goes. Here are some more plugs for my other books and classes: If you would rather order something you’ll get right away try my first book Understanding and Controlling Strobe Lighting: A Guide for Digital Photographers which is at Amazon.com and other places. You can get a Kindle version or a Nook version also. I have no idea what they look like. Here is a sample chapter from the book. There has been nothing but good feedback on the first book, so I would guess that you’ll like it. Of course I still hope that you will please consider purchasing my fine art book B Four: pictures of beach, beauty, beings and buildings. Purchases of this book mean a lot to me, and it is also a fine gift for any occasion. I lowered the price a couple of weeks ago, and that has helped. As you know I teach for BetterPhoto.com. I really hope you’ll sign up my class: An Introduction to Photographic Lighting. Remember that the books and the class keep me updating this blog.

I was thinking about how photo gear endures. I used to think about wearing out equipment, and I still do. But I don’t think about wearing out my camera. Technology will force me to replace it long before it wears out. I am on my fourth digital camera system and, as with the others, it will be retired before it stops working. That wasn’t the case with film cameras. I have a Speed Graphic, still my favorite film camera, that isn’t worn out after fifty years, but it has needed some parts.
I still use it when I want to do personal work with a large negative. It was a pleasure to use. My first digital camera was a Leaf back, a DCB 2 that fit on a Mamiya RZ67. I really disliked that camera. It made 3 separate exposures in order to make a color shot. It was very slow and awkward to work with. I was glad to see it go. But, when it did go it was a working camera, a technological dinosaur. I wanted to write about this topic not to whine about digital cameras, but to discuss the expected life times of photoproducts; and how that should affect the way we buy them. For instance, I think that we should buy cameras that have been on the market for a while; my business can’t stand a recall, or other problem with a new product. I also think that I might need a camera with a large file. I nope to do some business with display prints. As a consequence I believe that a camera has a lifetime between 3 and 5 years. It needs to pay for itself quickly!
When I think about lenses, I have different considerations. Current lenses will wear out: the motors that make the lens auto focus will not work forever. Also the focus tracks are very lightweight, they will have wear problems. The tracks are built this way in order to allow auto focus to function quickly. I would guess that the lenses I use frequently are going to last between five and ten years, not too bad. I can make an investment in a lens that will pay off more slowly, even buying specialty lenses that I might not use more that once a month. So I can easily make a case for buying quality lenses.

Tripods last for decades. I would not be surprised to see my current tripods, I have five, last for more another fifty years. So the cost of a tripod is very inexpensive because the cost is amortized over such a long time. By the way I have five tripods because I have small medium and large cameras. My 8X10 camera requires a tripod that is much larger tan I would need for my digital camera. If you buy a good tripod it may outlast ten cameras, a poor tripod may be lousy from the first day.

One of my goals for these blog entries is to talk about lights. In my discussions about strobes I often hear how expensive they are. An investment in strobes is like buying a tripod, since strobes last such a long time. I have some Norman equipment that I bought new in 1983, that’s almost 25 years. The tubes haven’t broken and the strobes still work. Not bad. More to the point, of the photos I’ve made for money since 1983, most required strobes. More than any other piece of equipment, lights separate the assignment photographer from people who are more hobbyist than professional. So, although it may not seem that way when you right the check, strobes are cheap; they will be with you for a long ling time. Good strobes help make professional photographers!

When I teach a class I ask people to practice. I suggest that they work with a Styrofoam wig head and cheap flood lights. The wig head is all white that makes it easy to see the shadows. The flood lights are easy to see and to manipulate. This gives you a sort of a lighting lab where you can practice and experiment. I still use the wig head when I get a new piece of lighting gear. I know I’ve said this before: musicians practice so they can play, why shouldn’t we? If you can only practice with a live model you won’t be able to take the same risks you can with a hunk of Styrofoam. Most models don’t have the patience of the wig head. So, if you’re thinking about a lighting class why not mine?
BetterPhoto.com, The better way to learn photography

February 10, 2010

Buying Camera Gear

Filed under: Photographic Equipment — John Siskin @ 1:36 am


Branded 2 468x60

Shot For Aids Walk, Los Angeles

One of my first big opportunities in photography was selling cameras at a store in Santa Barbara: Russ’ Camera. Russ Eckerstrom took a risk on me and I hope I gave him good service. I learned a lot there, not just about photography. I leaned about buying and selling and serving customers: the kinds of things that have been important in my business as a photographer. The store is still in business up in Santa Barbara.

When I came back to Los Angeles and started my business I needed suppliers that were local and would carry the products I had to have. I was in a camera store every couple of days looking for film, Polaroid or chemicals. I dealt with a lot of stores that provided these products, but often the service was bad. Too often the sales people felt they needed to tell me they could do my job. I don’t like spending my money and having some guy behind the counter feel he needs to compete with me. Of course there were a few great sales people over the years, but they mostly left camera sales.

What I learned at Russ’ and saw in many stores is that camera sales is a tough business. I’ve seen a lot of stores die in the last few years, so I know this is especially true after digital. The mark-up on gear is low, the market competitive. It used to be that a lot of money was earned on photofinishing, but this too has taken a big hit. I particularly miss the stores that have a lot of junk; I do a lot with junk. You might check out my article on building cameras.

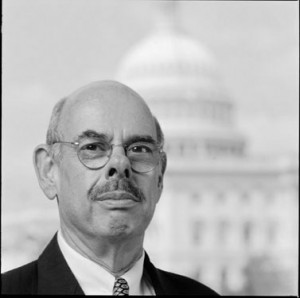
Congressman Waxmand shot for Aids Walk, Los Angeles

I want to recommend that you do business with Calumet Photographic. I have been buying stuff from them since about 1984. I used to pour over their catalog, and I learned a lot from that book. For me, a great supplier has the little things that make everything else work. I remember needing several 40.5mm to 52 mm step up rings: Calumet had them, in stock. When I need a camera battery or a gel for my lights I can get it at Calumet. When they opened a store in Hollywood, there was only one problem for me; it wasn’t in the San Fernando Valley. I can go in their store and actually see the products. The sales people treat me like I might know something. I have dealt with many big stores including a couple of the stores in New York. I don’t look forward to buying from them again. But I do hope to do more business with Calumet. I should also say that every employee I have dealt with at Calumet has been knowledgeable, which is good, and a nice person, which is better

Calumet is now associated with this site. I am very happy about this. If you would like to support this blog please visit Calumet through the link on this page. If you think I am being unreasonably nice I suggest you visit some large camera stores in Los Angeles and New York.

As always, I hope you will check out my classes at BetterPhoto.com:
An Introduction to Photographic Lighting
Portrait Lighting on Location and in the Studio
Business to Business: Commercial Photography

The pictures this time are just a few I like. They are linked to my site
Thanks, John

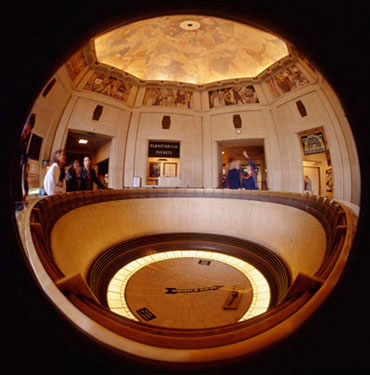
Shot with my 4X5 fisheye camera.


Branded 2 468x60

May 9, 2009

Speaking About Photography

smart-dodie3One way to understand photography is as a way of communicating. So I could tell you about a spark plug, but if I show you the spark plug you know more. The plug could be from an engine, and then someone who knows cars could tell you the car is running rich. From just a picture of the plug. I could tell you a story with a picture, or I could give you an image that communicates like a poem. We can use photographs to communicate about facts, things actions, ideas and emotions. What a wonderful medium.

Photography is a universal language, although I can’t communicate equally well with everybody. Certainly it is at least very difficult to communicate with the visually impaired. However, since I teach on line, I have had the opportunity to work with students from Finland to Bangladesh. This experience has helped me to believe that almost everyone can read a photograph. I have even had my dog react to photographs; photographs can communicate across species. I can remember seeing a cover of National Geographic that was shot by a Gorilla.

One of the strange things about photography is how much easier it is to read than to write. Most people take pictures. These images are intensely personal, and often only communicate well to the photographer. So a picture from your vacation, or of your child, may be very evocative to you and meaningless to me. These images are really a personal diary, and like a diary, mean little to anyone else. Modern cameras are very good at creating these personal documents.

Photographers will want to do more, to make images that can communicate easily with other persons. We photographers will want to make documents that do more than just document. We will want to create those images that are more than just beautiful; we will want to tell stories, and to make poems. The key for us is to do more than take photographs; we will want to MAKE photographs

« Newer Posts

Powered by WordPress