Photo Notes A place to talk about making images.

April 22, 2012

Bubbles in the glass.

Filed under: Photographic Education,Photographic Equipment — John Siskin @ 3:31 pm


Amazon is shipping copies of my second book: Photographing Architecture. This is really exciting! Of course you can also get my first book Understanding and Controlling Strobe Lighting. You can download copies of most of my articles and some do it yourself projects. I teach three classes at BetterPhoto: Portrait Lighting on Location and in the Studio, An Introduction to Photographic Lighting and Getting Started in Commercial Photography. I hope you’ll check them out.

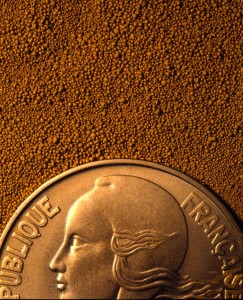
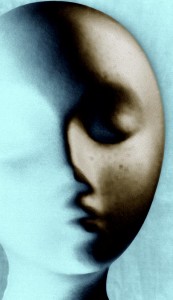
I used a double exposure to capture both a soft and sharp image with different lens settings.

When I started doing photography bubbles in a lens was considered a good sign. They meant that the glass had been at the perfect temperature when the lens was made. There were really only two types of optical glass: crown and flint. Glass has always been critical for photography. The first lenses were very slow, which meant that exposures were many minutes long. Josef Petzval designed a much faster lens in 1840 that made portraiture possible. The first photographs were made on silver coated copper plates, for Daguerreotypes and on paper for Talbot’s photos. Soon photographs were made on glass plates, because this made it much easier to make additional copies of an image and keep good detail. The famous photographs of the Civil War were made on wet plates, which required very fast work by the photographer. The glass plate had to be coated, exposed and processed before the sensitive coating dried. Those photographers worked hard to make an image.

This image was originally made for an article in View Camera Magazine

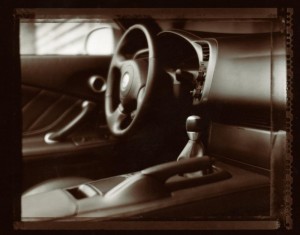
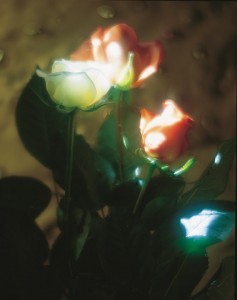
A few years ago, before Photoshop, I used to rely on the glass to make an image special. I had about twenty lenses for my view cameras that would do things like close focusing or capturing a wider angle of view. I had several soft focus lenses, including a set I assembled myself. The biggest challenge was in making an image that was both soft and sharp. This usually required lighting the image twice and making a double exposure. It was really a great feeling when everything worked. Now you can make a second layer in Photoshop and apply Gaussian Blur. Then you can do whatever blending you want between the two versions. The tools we have today allow us much more control over our images, and more options. However, there was a wonderful sense of accomplishment in making an image with special glass and light. I’ve attached images from soft focus lenses this week. The ones that used soft and sharp exposures in one image are marked.

I mounted a 180 soft Fuginon on a SLR Graflex B, quite a combination!

If you want to shoot classic lenses with a digital camera you should check out this article. It will tell you how to adapt a dSLR to a view camera.

I’m going to be judging a contest for the Indianapolis Camera Club on Tuesday. I really hope to be impressed. I expect to be putting up a schedule for classes with Indy photo Coach here and on the website soon. Of course you can sign up for one of my classes at BetterPhoto:An Introduction to Photographic Lighting

Portrait Lighting on Location and in the Studio

Getting Started in Commercial Photography
I hope you’ll check them out. I have been told that prices are going up this year at BetterPhoto, so you might want to sign up soon.

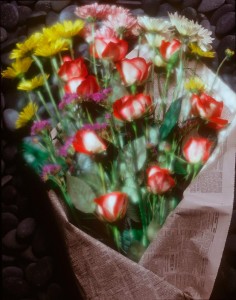
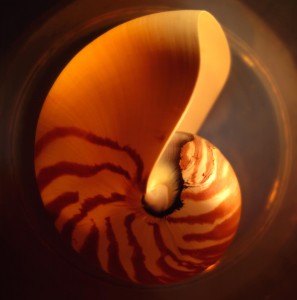
Another double exposure with both a sharp and a soft exposure.

Nautilus Shell

March 8, 2012

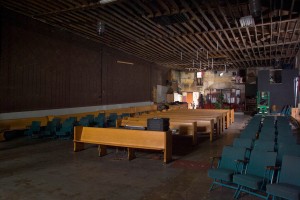
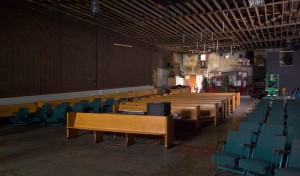
Retouching the Irving Theater

Filed under: Indianapolis,Photographic Education,Post-Processing — John Siskin @ 4:52 pm

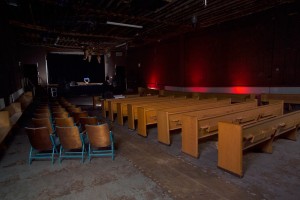
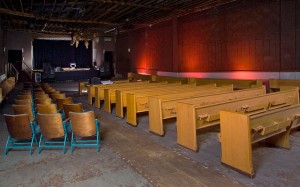
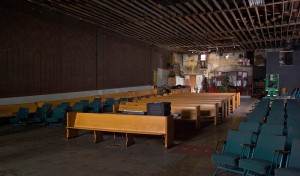
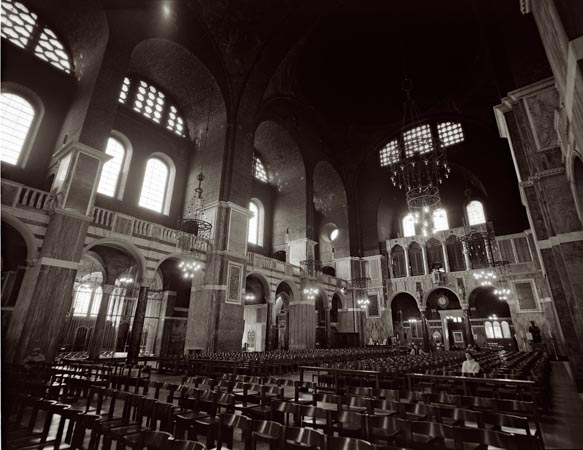
I did a workshop at the Irving Theater in Indianapolis on March 4.  I offered 25 tickets and had a sell out. I shot the Irving with the participant and the owner and a couple of assistants. This was the actual shoot for the Irving so the participants got to see the actual process rather than a staged version of the shoot. I’ve been teaching for a couple of decades and I’ve discovered that many students like to see the way shoots actually work, and the actual problem solving that goes into a shoot. Of course not every moment in this kind of a production is good entertainment. Personally, I sometimes feel as though I’m making a bad landing in front of an audience. Especially if I’m shooting in a theater.

The next step in this process is to discuss post-production. What you do after the shot can be as important as what you do in front of the camera. I should point out that the images here will enlarge if you click on them. The next shots are the before and after Photoshop for the first shot:

Original Capture


Final Version

I used eight lights to make this shot. The theater lights were turned off.

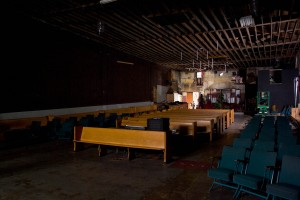
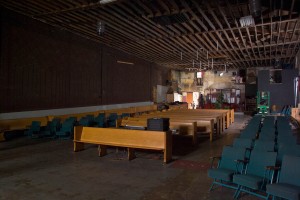
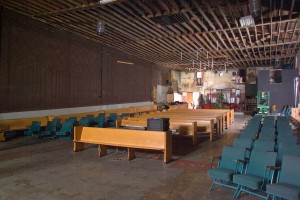
In this next shot I used only 4 lights, plus a little daylight co ming through the windows. I’m going to walk through the steps of post-production with this shot.


Version 1: The raw file is converted to jpg without adjustments. There are four lights: 2 behind the camera each at 800 watt-seconds with a 45-inch umbrella. One mono-light on the right side of the frame, which you can see. It has about 600 watt-seconds with a 45 inch umbrella. Finally a 500 watt second light hidden at the back of the shot. This had a shoe cover over the strobe.


Version 2: Raw file converted with Fill Light adjustment at 9, blacks at 1, Vibrance at 15 and Saturation at 10.


Version 3: Same as above with 1 stop higher exposure and blacks set at 0. This version might be used to create lighter areas in the finalversion. Under other circumstances I might make a dark file as well as a light file. This was the last work done with the RAW files.


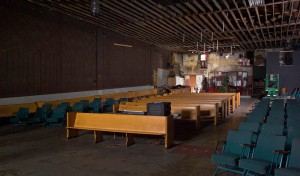
Version 4: I took the dark version and put it over the light version in Layers. I used the eraser tool set at opacity 15%. This gave me a way to lighten the image selectively. I can vary the size and softness of the eraser tool for good control. This works better than dodging for me. I wanted the ceiling dark. The walls are just a little lighter and I kept the floor dark. I lightened the pews just a bit. When things looked good I flattened the file. You need to do any work in layers before you work with cropping.


Version 5: This is all the cropping. First I use lens correction because my light has slight barrel distortion. I usually have this set around 3. Then I do the cropping and change the perspective with the cropping tool. I do the cropping incrementally that works better for me than one big correction. You‘ll notice I cropped out the light on the right side of the frame.


Version 6: Next I used the burn tool. In some circumstances I would build another layer from raw (not after cropping) but the details of this shot don’t require it. I had the tool set between 8% and 20% for this and I changed the size of the tool as needed.


Version 7: I usually do unsharp mask twice, once to increase contrast in the image. This time my settings were Amount 10 and Radius 40 for that. My second sharpening was Amount 35 and Radius 2.5, this actually sharpens the image. Of course how you do this is going to depend on your camera and lens.


Version 8: This image is a little grainy, especially on the wall. I made a duplicate layer and removed the noise on that version. The settings were Strength 9, Preserve Details 10, Reduce color noise 90 and no sharpening. This is a lot, but this isn’t the layer we’ll look at. Then I used the eraser tool, as did I above, to custom blend the two versions. The eraser tool was very big, 900 pixels, so that I could fix areas of the shot.


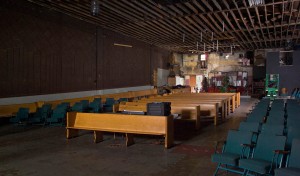
Version 9 (Final): I’m going to look at the image at 100%. I’ll fix dust and problems in the image like the hanging fluorescent lights. This will take a while. I kept the reduced noise layer for this, so I can also spot fix noise. This is the image I’ll hand to Dale at the Irving Theater. He may want additional cropping or other changes, but I’ll do these after I consult with him.

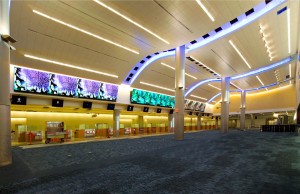
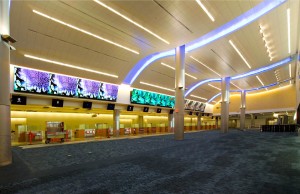
Now maybe you don’t want to do this. or perhaps there are jobs you don’t have the skills to retouch. That happens to me frequently. I use a company called Deepetch.com when I need extra help. You can see that there were a lot of ceiling tiles missing in the first version of this shot. This is from my recent airport shoot.

Version 1

Version 2: fixed ceiling tiles


In Version 2 all the tiles suddenly appeared. Deepetch did the job in just a day and for an extremely reasonable price. As photographers it is our responsibility to get the job done right, but that doesn’t mean we have to do everything ourselves.
I teach three classes at BetterPhoto:

Portrait Lighting on Location and in the Studio

An Introduction to Photographic Lighting

Getting Started in Commercial Photography

I hope you’ll check them out. I have been told that prices are going up this year at BetterPhoto, so you might want to sign up soon.
November 11, 2011

Shadow!

Filed under: Lighting Technique,Photographic Education,Photographic Equipment — John Siskin @ 9:52 am

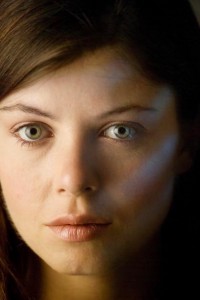
The strong shadows in this image make the portrait more effective.

I teach lighting courses at BetterPhoto.com. Some days I think I should teach a course in shadowing. Somewhere photographers acquired the idea that shadows are bad. I’m not sure when that happened. The classic Hollywood portraits used dramatic shadows very effectively. Look at the work of George Hurrell . Shadow is an important part of his palette. Shadow creates shape in an image. Part of what makes a good photograph is the sense of three-dimensionality that shadowing creates in an image. You can make shadows strong and hard. These shadows add drama to an image. You can also make soft subtle shadows that bring out the shape of an object. Whether a shadow is soft or hard is really a function of how close your light source is and how big it is. A bigger closer light source is always softer.

The hard shadows and unusual angle of the light give this image an interesting feel.

I’m not sure how the shadows are bad thing got started. I would guess that it has something to do with the fact that it is more difficult to work with small hard lights than large soft lights. Since a misplaced hard shadow can be really annoying, many people would rather work with soft lights. Not only is it easier, because light position is less critical, but also because a large light is more pleasant for the subject. I think that using just soft light for a portrait is often very dull: soft light doesn’t create much drama. This article is about the differences between hard and soft light and using them together.

I think that the way the manufacturers sell lighting gear has a lot to do with the popularity of large light sources. When I checked at B&H they had hundreds more soft boxes for sale than snoots. There are more types of umbrellas than grid spots. Also umbrellas and soft boxes fit most lights

This shot wouldn't work as well without highlight and shadow. Flat light creates flat images.

while snoots, barn doors and grid spots are designed for specific lights. This means that a manufacturer can sell soft light devices to more users than hard light modifiers. So, naturally, the people who build these things will spend more money on advertising soft boxes. This makes people think that they have to have them. Here’s a link to an article about lighting tools, in case some of these terms are unfamiliar.

Don’t get me wrong: I like soft light. I just like to use it with hard light when I can. My favorite tool for making soft light is a light panel . The light panel can be used in many different ways, while the soft box is less flexible.

You can learn a lot more about lighting in my BetterPhoto.com classes: An Introduction to Photographic LightingPortrait Lighting on Location and in the Studio and Getting Started in Commercial Photography You might also want to check out my book: Understanding and Controlling Strobe Lighting: A Guide for Digital Photographers. Here’s a sample chapter that discusses portraiture.

BetterPhoto.com, The better way to learn photography

October 31, 2011

New Classes At BetterPhoto!

Filed under: Lighting Technique,Photographic Education,Uncategorized — John Siskin @ 6:27 pm

Some important updates: first BetterPhoto has brought back two of my classes. So I hope you’ll sign up for either Portrait Lighting on Location and in the Studio or Getting Started in Commercial Photography. These classes, particularly the portrait class, were popular before. I hope they will be again. If you want any information on the classes, that isn’t on the links, please e-mail me: john@siskinphoto.com. Of course you can take my other class at BetterPhoto: An Introduction to Photographic Lighting. I’m pleased to say that my first book continues to sell well. Please pick up a copy of Understanding and Controlling Strobe Lighting: A Guide for Digital Photographers. Another update: my second book will be out in February. You can visit the sale page for Lighting for Architectural Photography. Finally I have a fine art book that I made at blurb, please check out B Four.

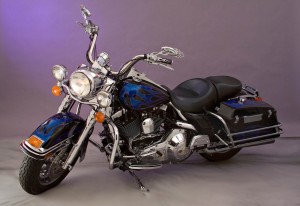
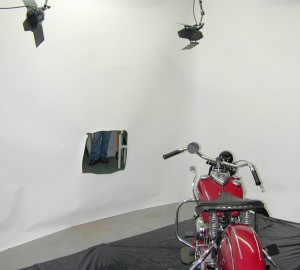
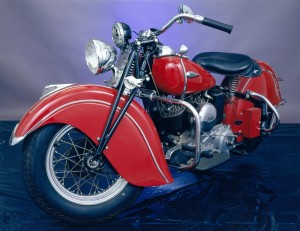
I was evaluating the photo equipment in an old photograph for the Indiana Historical Society. There’s an old 8X10 stand camera and a 4X5 and so on, but I found the lighting set up kind of interesting. Now, if you looked at the shot, you’ll know that it’s impossible to be sure of everything that is going on in the set up. But it looks like there is an opening cut for a vignette in a white wall half way down the studio. The wall has to be lit from the camera side in order to keep the vignette white. It looks like some clamp lights were added at some time to help with this. The subject would be lit from behind the wall. This got me thinking; because it is similar to the way I light motorcycles. I want to try lighting the back side of a wall, as I would with a motorcycle, and then bounce the light into a human subject. As with the motorcycle shot I would use white seamless paper for the wall.

Click on the shot for an article about lighting motorcycles

It’s cheap and much easier to work with than drywall. I would probably use two strobes pointed at the wall. It would be good to keep any direct light from these strobes from falling onto the subject. This should create a very soft even light, virtually shadowless. You could vary the lighting somewhat, by changing the brightness of the strobes behind the wall, and by changing the placement. This should do a lot of what people expect from a large ring light. As a lot of my students know a ring light doesn’t really create shadowless light, except when you are extremely close to the subject. In general a lighting set up like this won’t give you much sparkle, or a catch light in the eye, but it could give shape and make most fabrics look great. So maybe a bare bulb, or a light behind the subject would work well as a third light. I haven’t had a chance to work on this, so I’ll be interested to see if anybody, who reads this blog, does an experiment. I would keep the hole in the wall close enough to the camera, and big enough, so that there won’t actually be a vignette. I would guess that the close wall would be 3-6 feet from the camera, and there would be at least 8 feet between the walls. I don’t think I would try to add much hard light to the shot. It would be much easier to design a shot with hard light using the light panels, because they are much easier to move around. Any really large light source, which will create shadowless light, is pretty flattering to persons with skin issues.

I’m thinking about some workshops for next year. Please let me know what would interest you. Thanks, John
BetterPhoto.com, The better way to learn photography

September 26, 2011

Workshop In Indianapolis!

Filed under: Indianapolis,Photographic Education — John Siskin @ 3:49 pm

I think that I have some important news in this issue of the blog. I’m offering a live workshop here in Indiana. This is the first time I have done a live class in a couple of years, so I hope you will appreciate that this is a special opportunity. One of my students from BetterPhoto is here in Indianapolis, and she is opening up a new rental studio in the Stutz Building. This is great for me because it offers me an opportunity to teach here in Indianapolis. It also means that my students will have an opportunity to check out the new studio. Even better: each person, who signs up for the workshop, will get two hours to work in the studio on their own. Of course you can get more hours or work with another student. This time will give you a chance to get hands on experience with lights.

The workshop is set up over two days. The first day, October 15, will be lecture and demonstration. Because there are only ten students in the class, you’ll have the opportunity to learn the material in a way that suits you. We’ll have a model so that you can really see how light affects a person. I hope that everyone in the class will ask questions and get a chance to examine everything we do. Over the next two weeks each student will visit the studio individually, or with another student, and work with the studio and lights themselves. If you do team up with another student I’ll try to come by during your studio time. Finally, we’ll meet again on October 29. During this session we’ll review the work each student did and discuss any issues that came up during the shoot.

We are going to cover several topics in depth. How lights work. How to manipulate and control light. How to control color. The differences between hard light, soft light and projected light. How to achieve a sense of three-dimensionality with light. We’ll discuss how to light the face, products and spaces. You should gain an understanding of how the basic tools of light can be applied in a variety of situations to create the image you want to make. Most people take pictures, they point the camera at a subject and press the button. Photographers MAKE pictures: they control light and image to make a photograph that is more than just a record. This workshop will give you the tools that you need to take control!

One more thing that you’ll get from the class a copy of my book: Understanding and Controlling Strobe Lighting: A Guide for Digital Photographers. The book will help you integrate the ideas from the class in the pictures that you make.

Please visit here to sign up using PayPal, at the bottom of the page. Or you can call me to ask questions or to reserve a space: (317) 473-0406. I really hope you’ll join me for this great opportunity to learn how make the photographs you want by controlling light! The class is just $295, so I hope you’ll reserve a space now.

April 21, 2011

Light and Style?

Filed under: Lighting Technique,Photographic Education — John Siskin @ 3:09 pm

Here are the shameless plugs: my book Understanding and Controlling Strobe Lighting: A Guide for Digital Photographers is on Amazon.com. Here is a sample chapter from the book. There has been nothing but good feedback on this book, so I would guess that you’ll like it. Of course I still hope that you will consider purchasing my fine art book B Four: pictures of beach, beauty, beings and buildings. Frankly purchases of this book mean a lot to me, and it is also a fine gift for any occasion. I lowered the price a couple of weeks ago, and that has helped. As you know I teach for BetterPhoto.com. I really hope you’ll sign up my class: An Introduction to Photographic Lighting.

Shot with an 8X10 Toyo field. Scanned from a contact print. Original print on Kodak Azo paper

The idea for this week’s entry came to me as I was reading another photographer’s blog. He used language that I hear a lot: “My light,” and “My style.” The idea that because you create the same light again and again doesn’t seem to me to be a thing that you would want to brag about. One of my goals as a commercial photographer is to be able to work with a variety of tools and create any look that might benefit a client. I know that many photographers want to brand themselves with a signature style, but I prefer to be known as a guy who can deliver, almost anything. In addition, doing the same thing bores me. I want new challenges. I know many people who want to build a business doing portraits, or babies or even weddings. I wonder what kind of enthusiasm I would bring to shooting the six hundred and first school child in a month? I can tell you that if you shoot a thousand piece catalog you aren’t doing much creative thinking after item number seven hundred fifty. You have to do work to be good, but if you constantly do the same work you may lose your edge. If there is such a thing as a photographer’s eye, part of it must surely be the ability to pay attention to your subject, even after hours with that subject. I really like shooting architecture since the subjects are very different it presents constant challenges.

Shot with a 4X5 Speed Graphic and a 65mm Super Angulon lens.

A few years ago another photographer came to me and asked me how a particular shot was done. I looked at the print and told him the original photographer used hard and soft light and had filtered the hard light with at least a 1/2 CTO. I’ve written about this lighting a couple of time here in Photo Technique, here in Shutterbug and also in my book: Understanding and Controlling Strobe Lighting: A Guide for Digital Photographers. This is a very useful technique, but it does require close attention to detail. I was explaining this when he said “Why don’t you set it up for my shot?” Now I was willing, for free, to explain something about how light works. He could have applied this idea to any shot he wanted, but he didn’t want that. Too often the idea of learning to control light is too much trouble. He wanted me to do it for him. He didn’t want to experiment and learn, too much trouble, he wanted results. Eventually he convinced a friend of mine to come in and rig the lights for him whenever he shot. My friend tells me this photographer refers to himself as an artist.

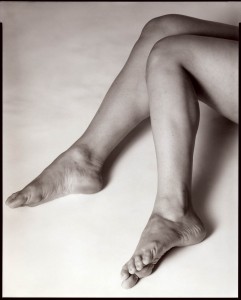
Shot with my 4X5 Speed Graphic and a 135mm Xenar. Same model as Legs above.

One of the great advantages of digital photography is that testing is free or close to it. I should be precise about what I mean by testing: which is testing tools to see how they work. Testing can also mean shooting for your portfolio. “I need a model for testing” means I want to work on some new images for my book, and that can be expensive. But if I get a new umbrella it won’t cost me anything to shoot a shot of the way the umbrella spreads light or a shot to figure out where it should be placed in relation to the strobe. When I shot with film testing was quite expensive, and frustrating. The frustration was a product of not seeing the results of a test until the film was processed. So I didn’t test much. I tried to figure out what my tools were doing by analyzing my commercial shoots. This didn’t really serve my clients all that well. These days I do a lot of testing so that I can better understand my lights. I hope you’ll do a lot of testing also. And I hope you’ll practice with new techniques so that you can add them to your tool kit. You might get some new ideas by taking my class at BetterPhoto.com  or reading my book.

Digital photography is MUCH easier than film photography was. Just the weight of the equipment is so much less. I used to go out on location to do an architectural job with close to 200 pounds of lights. That would be 5 lights, 2 power packs and accessories in 4 cases. I now have half that in weight and only 3 cases, but with 8 lights. So half the weight and almost twice as many lights, and this is because I don’t need as much power with a digital camera. The work I do is better, because I have instant feedback: the camera is tethered to the computer. Professionals, if they want to keep working, need to bring a really effective skill set, rather than just a good eye, to the table if they want to keep getting work. I think of myself as a craftsman as often as I think of myself as an artist.

You don’t need to log in to post on this blog anymore, but I would appreciate it if people didn’t post links to unrelated and inappropriate sites. I’ve included a few favorite large format photographs with this blog. There are times when I do miss the heavy lifting.
BetterPhoto.com, The better way to learn photography

April 9, 2011

What is Real Photography?

Here are the shameless plugs: my book Understanding and Controlling Strobe Lighting: A Guide for Digital Photographers is on Amazon.com. Here is a sample chapter from the book. There has been nothing buut good feedback on this book, so I would guess that you’ll like it. Of course I still hope that you will consider purchasing my fine art book B Four: pictures of beach, beauty, beings and buildings. Frankly purchases of this book mean a lot to me, and it is also a fine gift for any occasion. I lowered the price a couple of weeks ago, and that has helped.  As you know I teach for BetterPhoto.com. I really hope you’ll sign up my class: An Introduction to Photographic Lighting. Sign ups continue for the current session, please sigh up now.

This shot was meant to show the size and shape of the concrete dye.

I don’t know when the Kodak company first used the phrase “You push the button; we do the rest” but it must have been in the early 1900s. The Kodak company made possible a new kind of amateur photography: where the camera operator didn’t need to know anything about the technical aspects of photography. This, I think, is the beginning of the idea that what you need to be a photographer is a “good eye,” not any level of technical excellence. In the last few weeks I’ve seen several posts in which real photographers are complaining about those amateur photographers who are ruining everything. I think we ought to take a look at this sentiment.

First who are the real photographers? Photography is the most popular hobby in the world. How many people

I needed to use some of the light from the window, as well as strobe to balance this shot.

don’t try to take a picture sometime? I now have a camera in my phone, and I expect to have one in my next blender. Really I wouldn’t be surprised to see an oven camera that would e-mail you a picture of your food, so you could turn off the oven before it overcooks. Real photography is photography that communicates with pictures; that captures the memories of your days; and that sends pictures to Grandma. I would guess that without amateurs buying cameras we would still be using Speed Graphics, Rollieflexs and Nikon F cameras. These were cameras that were designed for professionals. Are there enough professionals in the world to pay for the design of a Canon 7D? Or consider it this way: a new Hasselblad H4D-60 costs $42,000, as much as new luxury automobile. A Canon Rebel XS costs just $550. I bet Canon is making more money. The thing professional photographers need to come to terms with is that Aunt Tilly, with her Nikon Coolpix, is the real photographer.

Since I’ve been doing photography the goal of the camera manufactures is to make better images for more people, people like Aunt Tilly. These people are amateurs: they take photographs for themselves and to share with friends. They want to remember the moments of their lives in vivid ways. I am a professional photographer that is I make money with my camera. Not just $5 or 10 from the occasional stock photo, but a living. If I am going to continue to do that I need to do more that tell potential clients that I have a good eye. As the manufacturers make better cameras I need to have skills that Aunt Tilly doesn’t have.

Back when I used film I had equipment that amateurs didn’t have: a 4X5 and 8X10 camera and lights. Business was better then, people with Instamatic cameras didn’t shoot product. But now the graphic designer I used to work for frequently has a new Canon. Because not only has Aunt Tilly got a Coolpix, Bob the graphic designer has a 5D. If Bob can shoot the image he needs for that ad he won’t hire me. The cameras are easier to use, and the images are better, and often they don’t need a professional photographer.

If we want to keep working, and I don’t know about you but I want to keep working, we have to bring more to the table than a good eye. I say this a lot, but what we have to do is be able to make pictures, not just take pictures. Aunt Tilly takes pictures. She finds something interesting and points and shoots. She’s like a walking scanner. Photographers need to be able to build a photo from concept to final image. This means you need to know how to create and control light, how to edit, how to work in Photoshop and how to work with a client. There are other things like framing and writing that can be helpful. If you’re doing these things on automatic, or if you’re sending them out, better look behind you to see if Aunt Tilly is catching up.

I added photographs that I used lights for this week. As I’ve mentioned lighting requires a considerable amount of craft, so Aunt Tilly won’t be catching up in this race any time soon.
I really hope you’ll consider taking my class at BetterPhoto.com. Sign-up are almost over, but if you sign up now you won’t miss a thing. I also hope you’ll suggest my BetterPhoto class An Introduction to Photographic Lighting to other photographers you know, or perhaps you’d like to give it as a gift? Amherst media sent me the cover for my second book, you can see it here, of course you can still look at my first book at Amazon .
BetterPhoto.com, The better way to learn photography

April 5, 2011

Teaching Light

Filed under: Lighting Technique,Photographic Education — John Siskin @ 3:04 pm

I haven’t been able to get back to the blog for a few weeks. I’m sorry about that, but I have been busy shooting and arranging other crises. Anyway, here are the shameless plugs. My book Understanding and Controlling Strobe Lighting: A Guide for Digital Photographers is on Amazon.com. Here is a sample chapter from the book. Of course I still hope that you will consider purchasing my fine art book B Four: pictures of beach, beauty, beings and buildings. Frankly purchases of this book mean a lot to me, and it is also a fine gift for any occasion. I lowered the price a couple of weeks ago, and that has helped.  As you know I teach for BetterPhoto.com. I really hope you’ll sign up my class: An Introduction to Photographic Lighting. Sign ups could be better this month, so please join the class!

Now that that is over with I wanted to say something about teaching. I teach on line for BetterPhoto.com, so it might be assumed that I teach photography. That is not entirely true. What I really teach is lighting, as it applies to photography. There is a significant difference:  a big part of teaching photography is explaining to students how to record an image. That might be a mountain or a flower or a child, but the idea is to capture what you see. When you actually control light you create the image for the camera to record. You are painting the image with your lights. Photography involves understanding and controlling certain aspects of your picture, for instance how distance is recorded (depth of field) and how time is recorded (how much blur you might allow with the shutter). Lighting provides another tool kit entirely: where light goes, the transition between light and dark, and the color of the light. Often people come to my class with the idea that they can set up lights in ways that will work for most subjects, but this would mean giving up the ability to customize the picture for the subject. That is to create the light for the image.

Since I teach an introductory class what I try to do is give people an opportunity to experiment with the tools. I tell them how to create a very simple, and inexpensive, play ground where they can learn how light works. Play is a critical part of learning. Digital cameras make it much easier and cheaper to learn this way, because they give you almost instant access to your images. Consequently people should be learning all aspects of photography, not just lighting, faster and better than with film. At least I hope so.

One of the questions that I get is: “Will this class teach me to light…” And you can fill in the blank, whether it is people, architecture, product, fine art and so on. My goal is to teach you to light, period. If you understand how light really works you can apply light to anything from a flower to a mountain, but you may need more light for the mountain.

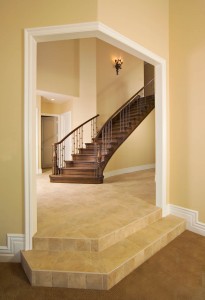
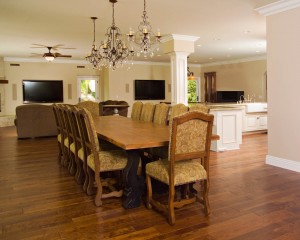
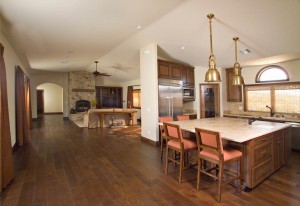
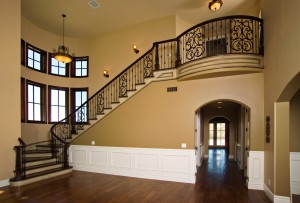
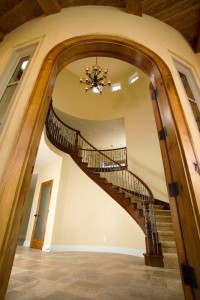
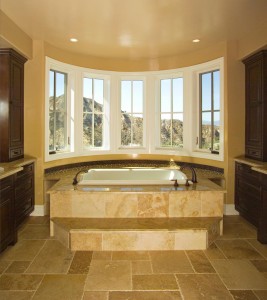
I’ve attached several shots of interiors to this week’s blog. These shots required a lot of control over lighting. I have to say that I do love a challenge. I used these shots, and quite a few more in a Blurb book for a contractor I work for.

I am asking some of my students, and anyone else who would like to participate (you?) to post their thoughts about the differences between learning photography and learning how to control light. Please post something.

I really hope you’ll consider taking my class at BetterPhoto.com. Sign-up are almost over, but if you sign up now you won’t miss a thing. I also hope you’ll suggest my BetterPhoto class An Introduction to Photographic Lighting to other photographers you know, or perhaps you’d like to give it as a gift? Amherst media sent me the cover for my second book, you can see it here, of course you can still look at my first book at Amazon .
BetterPhoto.com, The better way to learn photography

November 6, 2010

Gaining Perspective

Filed under: Basic Photo Technique,Photographic Education — John Siskin @ 6:14 pm

Usually I put the shameless plugs at the bottom end of this blog, but not this week. My book Understanding and Controlling Strobe Lighting: A Guide for Digital Photographers is on Amazon.com at number 16 in photographic lighting books! And there was much rejoicing! Here is a sample chapter.   Of course I still hope that you will consider purchasing my fine art book B Four: pictures of beach, beauty, beings and buildings. Frankly purchases of this book mean a lot to me. I really hope that people will consider this work.  And you know that I teach for BetterPhoto.com. I’ll leave those links to the end of the blog.
There are a few ways to change the shape of the face. The one I talk about most is with lighting. You can use light to  shape the face in a two dimensional medium. The more you use large light sources, particularly the light panel/umbrella combination the less strong shadowing you will have, and the less definition you will get.
The second consideration is perspective. This really means where you stand. If you are 2 feet from a persons face the contours of the face are exaggerated. If you shoot at 10 feet from a subject the face is flat. Consider it this way, the distance from your lens to the nose is say 24 inches, then the distance to the ear will be close to 29 inches. The difference between these two numbers is a significant percentage of the total. If you are 72 inches (6 feet) from the nose than you will be about 77 inches from the ear, the difference is insignificant. So if you want to make a shot with a flatter perspective you need to move further away from the subject. This will require a longer lens, to keep the subject the same size in the image.  On my full frame camera I generally don’t use anything less than a 100mm lens for a headshot of an average face. For a face with extreme contours I’ll use a 200mm lens. Since most people use smaller chips they will need to convert these numbers, but for instance a 50mm lens is pretty short (about 80mm converted) to use for an average face. Perhaps an 85mm lens might be better, for an average face and you might want 135, for an extreme face. In these two shots I used a 50mm lens on my full frame camera and a 200mm lens. The lighting is the same. You can see a difference in the way the face looks. I think he 200mm shot is ok, but the 50 is certainly too exaggerated.

Shot with a 50mm lenms on a full frame camera.

Shot with a 200mm lens. I think the face looks much better.

This is why it is important to move your camera rather than rely on a zoom lens when you do portraits. If you’re to close or too far away the zoom won’t fix that it will just change the perspective.
Of course changing the angle of the face can also change the shape. If you shoot a profile a strong nose or chin will be very visible.
Please consider taking one of my classes, or even recommending them. I have three classes at BetterPhoto:
An Introduction to Photographic Lighting
Portrait Lighting on Location and in the Studio
Getting Started in Commercial Photography

BetterPhoto.com, The better way to learn photography

Just a couple more from B Four;

August 28, 2010

Art and Craft

Filed under: Looking at Photographs,Photographic Education,Uncategorized — John Siskin @ 5:40 pm

When I was in college I used to have arguments with my roommate about whether or not photography is an art. Neither of us were armed with the history of this argument, so no direct hits were scored. If you find this argument interesting you might want to study Alfred Stieglitz, who argued the topic with the Museum of Modern Art in New York.
Today, as I have in the past, I want to discuss the craft of photography. Craft is something you can discuss in a more objective way than art. I don’t think I would want an artist to frame my house, but I would want good craftspeople framing my house if I was building one. One of the key aspects of good craft is that it can perform to a plan; art often doesn’t do that.
One of my favorite artists is Man Ray. When I first saw reproductions of his work I thought he had great ideas and poor craft. Over the years I bought better quality books and saw original work. I realized that I had been wrong. He was a consummate craftsman. What I didn’t see at first was quality because of poor reproductions, and the experimental nature of his images. Experimentation allows an artist to walk into the unknown. Continued experimentation allows the artist to map the area. The map really allows the artist to add craft to the experiments. For instance Man Ray’s work with solarization is the best I have ever seen. There are many images that I can’t explain, because I don’t have that craft.
I teach classes at BetterPhoto.com, as many who read this blog regularly know. I am not trying to teach art. I try to teach craft, and frankly I am often frustrated. In order for a person to learn craft they must practice, build their own map. In one of my classes: An Introduction to Photographic Lighting, I tell people how to build a kind of a lighting laboratory. They can run their own experiments in this environment. I can tell when a student has really experimented and when they just did a shot. I wish that I could find a way to get more students to do more experiments; there is so much to learn. I know that many people present lighting as do this and this and you’ll get great results. I call this cookie-cutter lighting. If you are going to be good you need your own map. You need to know how to build a custom environment for each subject. This is the attitude of a good craftsperson and an artist.
The greatest advantages of digital photography are in this area of practice and mapping. A digital camera will allow you to practice for free; you couldn’t do that with film. Your results from digital are available instantly, and film wouldn’t do that either. So we should be seeing more good craftspeople ant ever before.
I wanted to add something from the book on interior photography I’m working on. I think it also has bearing on this discussion.
“When I started doing photography I thought there was a rule book. Of course I didn’t have a copy of the rules, and I didn’t know where to get a copy. Frankly I had the same idea about things other than photography. I went to school for a long time, they taught me a lot of rules, mostly about things that didn’t matter. There are supposed to be a lot of right ways to do things in photography, and there are. But they are the right way to do a particular thing for a particular reason. So in this chapter we’ll start with a picture that is taken from a wrong angle. The client is very happy with, I’m very happy with it, in fact I use it on some of my business cards.


This is a picture of the same doorway taken from a more usual angle. Both are good pictures, but one is much more dramatic.”


I teach a class in commercial photography , as well as classes in lighting and portraiture at BetterPhoto.com. I hope you will check out the classes soon. My first book: Understanding and Controlling Strobe Lighting: A Guide for Digital Photographers will be published in the fall you can pre-order it. I have a new magazine article coming out in September about strobe power. You can see it in Photo Technique Magazine.
Thanks, John

« Newer PostsOlder Posts »

Powered by WordPress