Photo Notes A place to talk about making images.

July 24, 2013

Comparing Lights

Filed under: Lighting Technique,Photographic Education,Photographic Equipment — John Siskin @ 4:47 pm

It’s been a few weeks since I caught up with the blog. There has just been a lot going on. I’ve been trying to get the studio open. I’ve got a new client, and, oh yeah, my wife and I bought a house. I’m cheating this time around because most of this entry is an answer to one of the students in my class: An Introduction to Photographic Lighting . I hope you’ll take this class or one of my others: Portrait Lighting on Location and in the Studio and Getting Started in Commercial Photography. I have to remind you about the books as well.
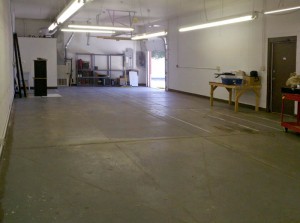
 

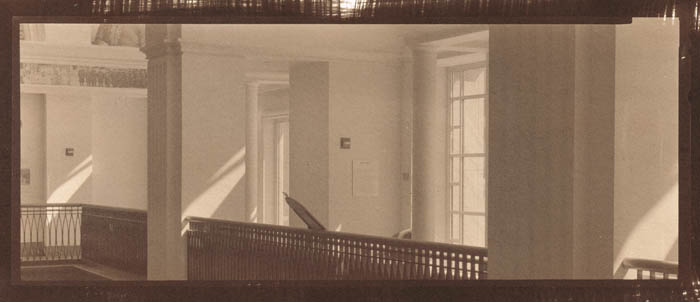
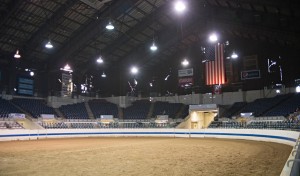
Anyway, this is a picture of the studio today. My goal is a big empty space, and well it’s big and empty right now. I’ve got utilities, which is important. I also have business insurance. I got insurance from a local broker because it was quick. I’ll be reevaluating my insurance in the next few months. I still need to do an equipment list. The most important thing is to have liability, and that’s covered. The rest of the pictures in this entry are taken with at least one projected light source, which I’ll mention again below.
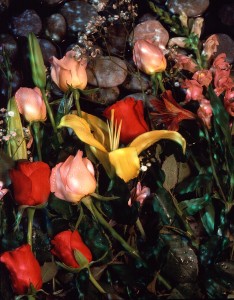
The problem with the built in strobe on your camera (you can call it a flash if you must) is that it’s right on top of the lens. There are few situations in which your world is lit by a light right over your eyes: miners’ helmets do this and a few flashlights. Still nobody ever said it was good light, just convenient. And because it’s easy to do the camera manufactures put it into your camera. I think the only thing it is good for is flash fill, and there are a lot better ways to do flash fill.

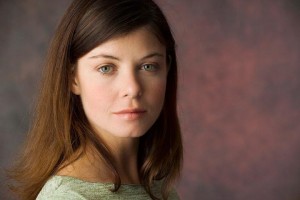
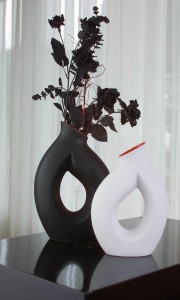
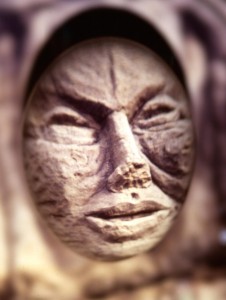
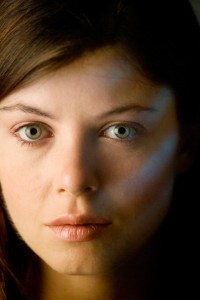
It’s extremely difficult to understand how lighting gear compares across brands and types. I’m going to try to explain why. First I’ll mention how light is used, and what you might want to compare. There are three types of light: hard light, soft light and projected light. The first two are covered extensively in my Introduction to Photographic Lighting class, but I need to mention a couple of things. Projected light isn’t in the class for good reasons. But I will say a few things about it here. Also I’m going to try and attach some projected light shots. Hard light is light from a small source. It acts like direct sunlight: hard shadows and a lot of sparkle. You create this by using direct flash with out diffusers. Because you aren’t using anything to make the light into a larger softer source you can often get by with a strobe that doesn’t have much power, like the built in strobe. You can make very interesting and dramatic light with hard light, but the position of the light is critical. Position is the big problem with the built in strobe. When you make the light source bigger, with a light panel, soft box or umbrella, you’ve lit the subject from more angles, which makes soft light. This softens shadows and makes a smoother transition from light to shadow. An overcast day is soft light: light comes from the entire sky and there are few shadows. Large light modifiers inevitably absorb a lot of your light. In addition they leak light into places you don’t need lit. As a consequence you’ll need more powerful strobes to make very soft light. You should remember that it is the size of the light source that is important, not the type of light modifier. So a 60-inch umbrella will always be softer than a 30-inch umbrella at the same distance from the same subject. A large umbrella and a large soft box give similar light if they have similar surface area. Of course you can have a light is softer or harder depending on the size and the distance from the subject.

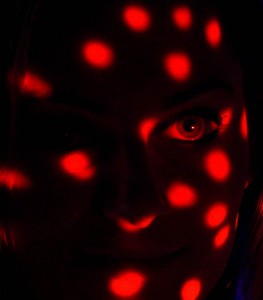
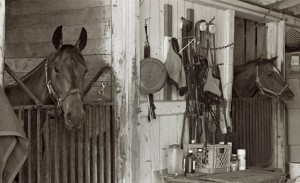
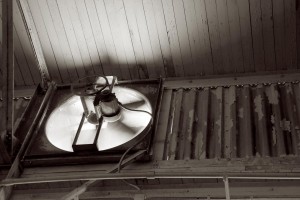
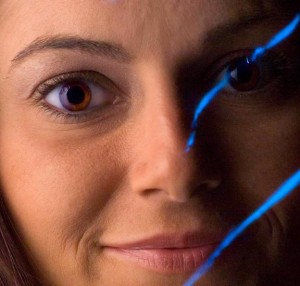
Projected light uses a lens to focus the light, or an image, onto the subject. A simple source for projected light is a slide projector. This article shows how projected light can be used in a shot. There have been very few strobes made that created projected light; one of the few was the Tri-Lite by Norman. I have done some experiments with using strobe for projected light you can see them at my blog: here and here.  Projected light can light very small details, but it does require considerable attention to detail.

You should understand from this that creating good soft light requires considerable power, and the more tools (light modifiers) you can work with the better. Large modifiers, like umbrellas and soft boxes, will fit many different units. Small modifiers, like barn doors and snoots, are usually designed for a specific strobe.
So the next thing to consider is where does the electricity that makes the light come from? If you are using mono-lights then you’ll be using AC power: wall current. The full-power recycling time on your strobes will stay the same all day and all night. If you go where you can’t plug in there are batteries, or you can use a generator. While generators are heavy, you can refill them quickly, which is important for big shoots. Battery strobes are obviously necessary for events, like weddings. They can also be very helpful for architectural lighting because you can hide them and you don’t need power cords. Recycling times depends on how fresh the batteries are, and what kind you use. Manufacturers often lie about recycling times; which makes it tough to compare this critical feature. The basic problem is that batteries put a low limit on the number of shots you can make without more batteries, usually around 200 full power shots. Also extra batteries add weight. There are mono-lights available that have much more power than battery powered units. If you have special needs for battery powered units you might check Lumedyne strobes. They make gear that can be customized in interesting ways.
There are basically three methods for controlling exposure with a strobe. The first is manual, and if you have time to set-up the lights, this is undoubtedly your best choice. You need to use your eyes to design the light, to perfect it for each subject. If you depend on formulas or auto systems you can easily get a perfect exposure, the right amount of light, but the light may have the wrong placement and balance. The human eye/brain is much better at designing light to fit a subject than any meter. An important goal of my classes is to help you to visualize good light for different subjects. Mono-lights are manual lights. The problem with manual lighting is that it takes time to get it right. The second system is a strobe with a built in meter. These do not use the camera meter; they just specify the aperture the camera should use. They are quicker to use than a manual strobe. Actually these are pretty good and cheap. I use this sort of equipment when I need to shoot an event. The classic Vivitar 283 has this sort of automation, so do a lot of Metz units. I’m using Sunpak 120J units that controls light this way. I’m not sure who makes these strobes currently. Finally there are dedicated strobes that meter through the camera. These are very accurate at creating the right amount of light, although, as noted above, that doesn’t mean the light will be designed well. These units are expensive, considering the amount of power they provide: $550 for a Canon 600EX. Several units can be used together, and still metered by the camera. All of this makes these units very good for weddings and other events. You can use them for other types of lighting, but I don’t think they are the best choice.
I want to talk about the problem with discussing power. You can check out this article, although it isn’t my favorite. Basically a strobe with a built in reflector like a Canon 600EX or a LumoPro can be compared with another strobe with a built in reflector pretty accurately. However mono-lights and studio strobes take a large number of different accessories, even different heads, so you can’t do an accurate comparison between them or between mono-lights or studio strobes and strobes with built in reflectors. Some of the manufacturers of various strobes will inflate their numbers. The article describes how to determine a guide number and what watt-seconds are.

I just now mentioned studio strobes. Basically these do what a mono-light unit does, but you have to plug the head into a separate pack and then plug the pack into the wall. These are not battery packs: the unit still needs to be plugged into the wall. The packs create the high power spark for the strobe heads. Usually several heads will plug into one pack. These can be very economical to buy used. I have Norman 900 series strobe units, some of which, I’ve used for more than thirty years. Keep in mind that strobes can last quite a long time, so if can make sense to invest in good equipment. We’ll probably still need lights to design better pictures in another thirty years.

I hope people are interested in these posts, but I really don’t know. If you want to leave a comment you have to log in. I’m sorry about that, but I was getting a huge amount of spam posts, so I had to change to registration. If you’d like you can send me an e-mail with your comments, john@siskinphoto.com. Also please remember the classes and the books!
An Introduction to Photographic Lighting

Portrait Lighting on Location and in the Studio
Getting Started in Commercial Photography.

May 30, 2013

Print Types

I hope you’ll check out my books: Photographing Architecture and Understanding and Controlling Strobe Lighting. Please get copies, if you haven’t already. Of course you know that one reason for this blog is introduce the books and get you to consider one of my classes at BetterPhoto.com: An Introduction to Photographic Lighting, Portrait Lighting on Location and in the Studio, Getting Started in Commercial Photography

The second portfolio class was great. Please let me know if you want to be on the mailing list. Here’s some more information the next meeting is Tuesday June 18, 2013, 6:30 pm. We may be meeting at my new studio. Stay tuned for more about that! The class is a great opportunity to make a greater commitment to your work and learn more about how others see your work. Still only $20. I look forward to seeing you if you’re near Indianapolis.

I’m going to discuss the kinds of prints I’ll be using in my show at Indiana Landmarks. The opening is on June 7 at 6pm. I hope I’ll see you there! For more information check this link. Most of the images in this week’s blog are going to the show at Landmarks. Please keep in mind that images on your screen aren’t good representations of what real prints look like. The images are linked to the fine art part of my website, which you can use to buy a print. The prints available on my website are made on the Moab Entrada rag paper discussed below.

I’ll start with silver gelatin prints because in many ways they’re my favorites. These were the most common black and white prints for most of the twentieth century. The black part of the image is silver and the emulsion is made of gelatin, which is probably the reason for the name. One of the most beautiful aspects of these prints is the bright whites created by a layer of barium clay called baryta. This layer is on most prints made on a paper base, usually called fiber based paper. This layer was replaced by a titanium layer when resin coated papers were introduced. I think resin papers aren’t as beautiful because they don’t have the baryta layer.

Fiber based silver gelatin papers are still available ready to use. The prints are exposed in a darkroom with an enlarger. Processing time is over an hour; most of this is wash time. If the prints are properly handled, particularly given through washing, they will last for at more than a hundred years. There are many examples of prints that have lasted longer than a hundred years. The photographer has considerable control over the print; in addition to changing density the photographer can also change contrast tone and local density.

Cyanotypes have bright blue images on a base that is the color of the paper or other material you print on. Sir John Herschel invented the process in 1842. The light sensitive chemistry is iron based, and the final image is an iron compound. The final dye is called Prussian blue. The chemistry is mixed by hand and brush coated on the paper. Multiple coatings add to the saturation of the image, which is why I usually triple coat the paper I use for cyanotypes. Processing is just a long wash.


Cyanotype, Vandyke and other processes are usually referred to as alternate processes or alt process. The idea is that these are different from the more commercial photographic processed used for most photography. These processes are much more personal, for instance the paper is hand coated by the photographer. The processes are not very sensitive to light so enlargers can’t be used. Most often the original camera negative is pressed right against the hand coated paper. An alt process print is a handmade object and each print will be unique. Of course the photographer has to exercise considerable care when preparing and processing these prints in the darkroom.
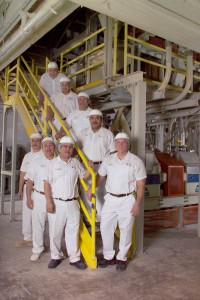
The Vandyke process produces a brown toned image. The image is made of silver, but the light sensitivity is based on iron chemistry, like cyanotypes rather than silver chemistry like a silver gelatin print. This process is often referred to as Kallitype. The sensitizer contains Ferric Ammonium Citrate, Tartaric Acid and Silver Nitrate. Processing includes considerable wash time as well as a bath in sodium thiosulfate. Properly processed Vandyke images have lasted for about a hundred years.


From the time that George Eastman introduced the Kodak camera with the slogan “You press the button, we do the rest” there have been places to get your processing work done for you. In some cases, for instance Kodachrome processing, there was literally no way to do it yourself. In addition much processing can’t be done economically unless you do a lot of printing everyday. Certainly many people have noticed that their ink jet printers don’t work well after sitting unused for several weeks. There are several things that are important to the photographer and the viewer with all of these processes; first is how much control does the photographer have over the images. The printer that I am using allows me to manipulate the image files in Photoshop. This gives me incredible control over the final print. Another consideration is how long will the prints last. While none of these processes have been around long enough to prove durability, prints can tested using light and heat.

Fuji Type R Paper was actually used when photo labs had enlargers. The R stood for reversal. It allowed the lab to maker a print directly from a slide or a larger film positive. So you could make prints from Kodachrome or Ektachrome without making an inter negative. Labs generally used enlargers to work with this paper, so you could do dodging and burning, but there was not much other control. I am not sure if anyone is still making Type R paper. These prints had good saturation and good durability.

Moab Entrada Rag 290 Bright paper is made to high standards and designed for specialized ink jet printers. It is a rag paper and has no acid or lignin. The Epson Ultrachrome inks are used. These are pigment inks so they will last for an exceptionally long time. I find that these prints have a very long tonal scale and very fine color. These prints are made from files that have been prepared with Photoshop. Both color and black and white prints can be made on this paper.

I am showing a 20X50 inch print of this image! It looks great.

Fuji Crystal Archive Matte paper is a color photographic paper designed to be used with digital enlargers. Prints are made from files that have been prepared with Photoshop. This kind of paper is usually used to make color prints. I often use it to make mono-chrome images with a warm tone. Prints made with this product are expected to last more than twenty years.

Please check out my classes at BetterPhoto.com:

An Introduction to Photographic Lighting,

Portrait Lighting on Location and in the Studio,

Getting Started in Commercial Photography

Thanks, John


April 28, 2013

New Images from Indianapolis Central Library

I hope you’ll check out my books: Photographing Architecture and Understanding and Controlling Strobe Lighting. I hope you’ll get copies, if you haven’t already. Of course you know that one reason for this blog is introduce the books and get you to consider one of my classes at BetterPhoto.com: An Introduction to Photographic Lighting, Portrait Lighting on Location and in the Studio, Getting Started in Commercial Photography

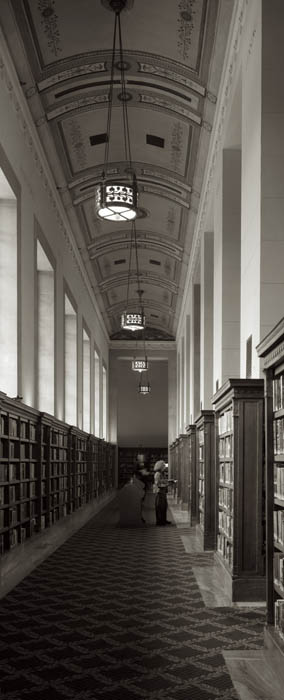
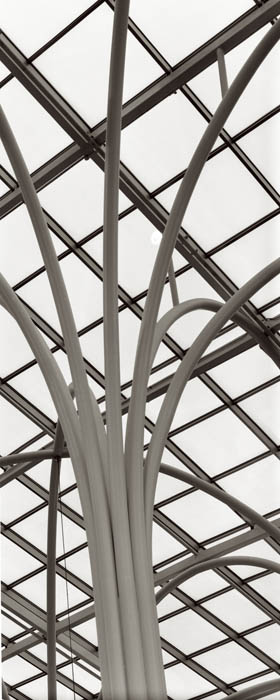
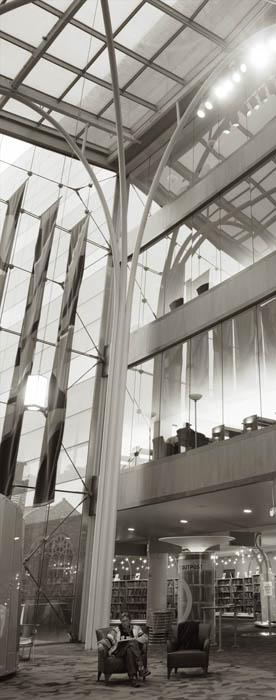
Pictures this week are from a shoot I did at the Indianapolis Central Library. The first portfolio class went really well. Please let me know if you want to be on the mailing list. Here’s some more information the next meeting is Tuesday May 21, 2013 at the Indianapolis Central Library. This is a great opportunity to make a greater commitment to your work and learn more about how others see your work. Still only $20. I look forward to seeing you if you’re near Indianapolis.

I’m still looking for a studio space here in Indianapolis. I’ve checked on a couple of spaces, but they have been too large, and therefore too expensive. I’d like to have the extra space and I could have a couple of offices for related businesses, but I don’t want to have to commit to a more expensive lease. I’m going to continue checking out spaces. My goals, right now, are to have about 1600 feet, with a large commercial or cargo door. The actual studio space must be at least 20X30 feet. I will need air conditioning and heat. You always here “location, location, location” applied to real estate. I think the key is to be sure you understand what you want in a location. I want to be in a good area of town, but I don’t need to be in a mall or on an expensive street. I can be a couple of blocks off the boulevard especially if the parking is good.


I’ve written about processing film and scanning it before, but as I did a lot of work with my 8X10 Toyo recently I thought I would discuss this again. I’ve made some changes in the way I’m processing film for printing Vandykes. I’ll be discussing how I’m scanning the film as well.


I started out working with a two-part developer based on Kodak D-23. The idea of a two-part developer: separating developer and activator, is that you can process almost any film at almost any temperature, which certainly makes things easier. The problem was that the Vandyke process, and most alternate printing processes, requires a very long density range with a very high maximum density. That is the film records the information in a way the makes the whites and blacks further apart, because the printing process tends to push the tones closer together. So I’ve switched to Ilford ID-11 developer. The biggest differences between the two developers is the addition of hydroquinone and the inclusion of the activator (borax) in the single solution developer. I’m using a dilute version of this developer with a very long development time because it makes a longer tonal range. Of course it’s kind of annoying that the processing time is now thirty minutes. If I were going to try and print these negatives on traditional silver gelatin photographic paper it would be difficult, and would require special paper or special handling.


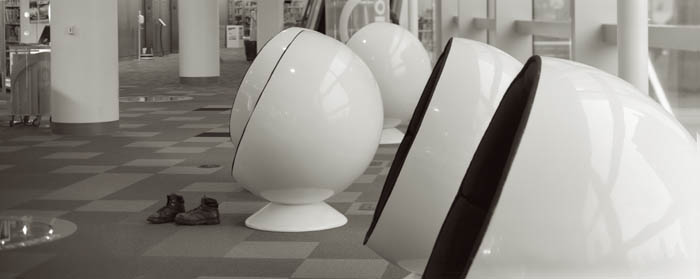
One of the great advantages of scanning a negative is that you make a good scan of a negative that wouldn’t print well without special handling. I set the scan to keep the detail in the whites and black while maintaining a lot of detail and light in the mid-tones. My actual scan looks pretty flat. Of course the scan is in black and white, and I scan in 8-bit depth. I’m making very large scans: 3200 dpi. The first thing I do with these scans is basically spotting. I remove dust and so on. Since the scans are the first thing I do after processing there isn’t much of this. The next step is to make a copy of the scan and convert it to RGB. As many of you know I like a warm color palette. I use curves for this. I will raise the red curve about 7 units at the very bottom of the curve. Then I’ll move the center of the blue curve down into the yellow about 8 to 10 units. This makes my black and white image a slightly warm black and white image. Then I’ll adjust the whole curve, usually by deepening the shadows and lightening the highlights. This is how I make the final image less flat. Of course sometimes the curves will get rather complex. Then I’ll do a little sharpening, usually with smart sharpening in Photoshop.

I used my own shoes


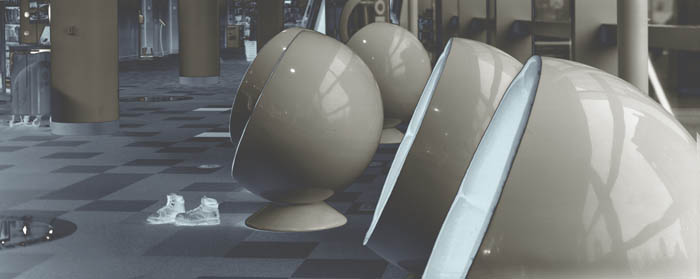
There is one more thing I do with curves: you can see it in the shot below. This is a u shaped curve. I raise the bottom left of the curve to the top of the box and lower the center of the curve, usually to about the 1/4 line. If you do this without adding the red and yellow first you get an image that looks a little like a solarization that you might make in a darkroom. If you change the curve after you change the color you get the two-tone effect you can see in this image. I think this is a really interesting effect; of course it doesn’t work with most images.

This image was processed with a U shaped curve

Please check out my classes at BetterPhoto.com:
An Introduction to Photographic Lighting,
Portrait Lighting on Location and in the Studio,

Getting Started in Commercial Photography
Thanks, John

March 13, 2013

Candlelight Home Tour #2

I hope you’ll check out my books: Photographing Architecture and Understanding and Controlling Strobe Lighting. I hope you’ll get copies, if you haven’t already. Of course you know that one reason for this blog is introduce the books and get you to consider one of my classes at BetterPhoto.com: An Introduction to Photographic Lighting, Portrait Lighting on Location and in the Studio, Getting Started in Commercial Photography


This week I shot another home for the Candle Light Tour of Indianapolis’ Old North Side. This is also a fabulous home, but why would anybody put a home on a tour that wasn’t fabulous? The interior of this home is very different from the last home, more of an Italian flare, and less of a period piece.

I knew that there would be less time to do this shoot, which reduces what can be done. It’s hard to set up to light a room, do the shot and clean up in two hours, which was all the time I had. In this case I did one very difficult shot that included several rooms and a simple shot of the kitchen. And I did leave the house in the required two hours.

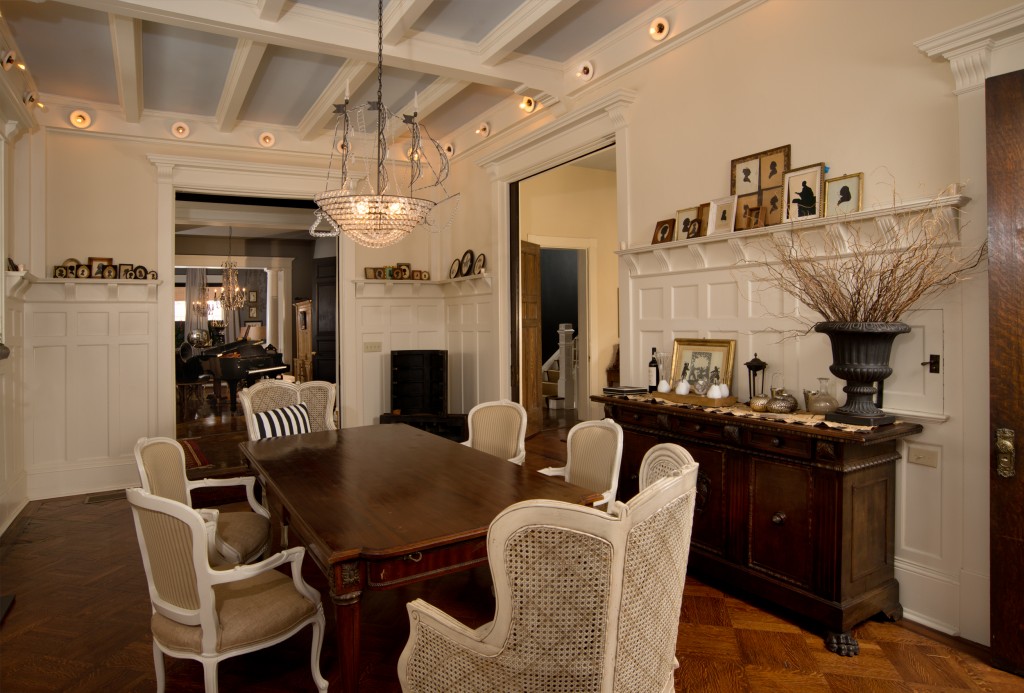
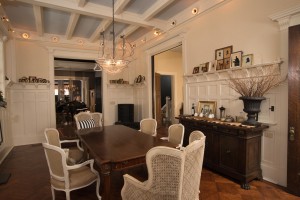
This is the final version of the dining room shot. The exposure was 1/30th of a second at f11
and an ISO of 400. Six strobes were used.

This is the first shot. As you can see the dining room opens onto two other rooms, one with a piano and another room on the right. To add difficulty both these rooms open onto other rooms. The room on the right opens onto a stairway and the music room open onto a front parlor, at least that’s what I think it is. Because I knew I had very little time I brought less lighting gear, just three Norman LH2 heads, three power packs (the 200B units) and a pair of Sunpak 120J strobes. Of course I also brought the camera, and a bag of assorted stands, tripod and umbrellas.

I set up the camera at the far end of the dining room, so that I could see into all the rooms I mentioned. The first light was a 200B placed at the opposite corner of the dining room. I used the 60-inch umbrella on this light to give a softer look to the light in the dining room. I also held a Sunpak 120J in my outstretched arm above the camera to help light the dining room. The Sunpak 120J strobes have about half the power of a Norman 200B, but they do have simple automation and can be set to much lower power settings then the 200B. One nice thing is that the two strobes use the same strobe tubes and can use the same accessories. I placed a shoe cover over this 120J; it was a quick way to modify the light.


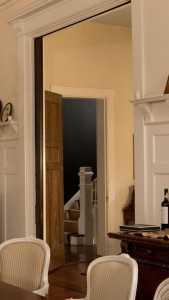
In the room on the right I set up another Norman 200B. I used a 30-inch shoot through umbrella because it threw light in every direction. Even so my original placement of the light, to the left of the door, didn’t work because the light was visible in the shot. So I placed the light to the right of the door. Perhaps it would be easier to say nearer the camera? Anyway this hid the strobe. This light also gave enough light to show the stairway. The strobe was set to full power. I used a 1/4 CTO filter to give warmth to this light and add separation from the dining room.


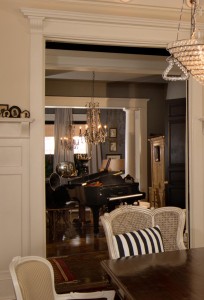
Now the biggest problem is the room with the piano. At first I thought the slave wasn’t working because the room stayed so dark. The problem was that room was really dark. The walls are medium gray and the piano is black, so you can see this might be a challenge. I started bouncing light off a white satin umbrella, but wasn’t happy with the shot until I took the umbrella off and used light directly from the strobe onto the room. Even after this I had to lighten this area a little in post-production. By the way this light had a 1/8-CTO filter for the same reasons as I mentioned above.

So that brings us to the front parlor. If you’ve been keeping track you’ll know that the only light I have left is a Sunpak 120J. So I put that on a stand. I used it bare bulb, no reflector at all. I though it would help the separation between the front parlor and the music room. I think it did help. No filter on this light.

If I had more lights I would have used a second more powerful light in the music room, maybe my Calumet 750 Travelite. I would have had lights on either side of the music room. At the time I would have used two lights with umbrellas for the front parlor, but now I’m not sure it would be better. The bare bulb was good, and it didn’t show in the mirror. Did I mention the large mirror in the front parlor? I’m sorry there’s no diagram for this shot, but the diagram was becoming as complex as the shot.

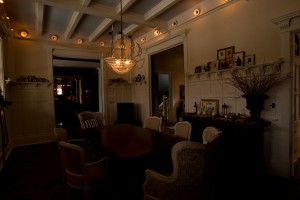
Here’s the shot with the lights turned off. I think lighting makes the picture. Most of the post-production was dodging and burning. I also adjusted the perspective a little and removed a few things at the edges. You can see the image without these fixes below.

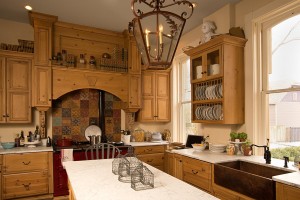
I had a few minutes left so I dragged the 60-inch umbrella into the kitchen. I liked this kitchen because it fit into the overall design of the house so well. As people who have taken my class: An Introduction to Photographic Lighting will certainly know kitchens can be a challenge to shoot.

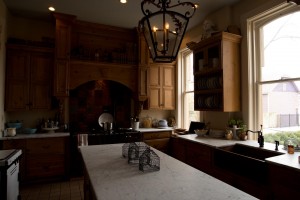
The strobe, with the large umbrella is on the left side of the camera if you’re looking into the shot. I used the full 200 watt-seconds with this light and a 1/4-CTO filter to warm up this side of the shot. I used a shutter speed of 1/30th of a second to keep the windows bright. The view out the windows wasn’t very interesting. I had to adjust the angle of the chandelier in the picture several times to remove reflections. As before I did a little dodging and burning, as well as fixing the perspective. I also warmed up the shot a bit; I like warm kitchen shots. I think the lighting really helped the shot; below is a version without my light.


March 4, 2013

Candlelight Home Tour #1

I hope you’ll check out my books: Photographing Architecture and Understanding and Controlling Strobe Lighting. I hope you’ll get copies if you haven’t already. Of course you know that one reason for this blog is to sell the book and get you to consider one of my classes at BetterPhoto.com: An Introduction to Photographic Lighting, Portrait Lighting on Location and in the Studio, Getting Started in Commercial Photography

I am involved with Candlelight Home Tour in the Old North Side of Indianapolis. The tour will happen on Halloween this year. I’ll add more information about the tour in later entries. I am also doing this with a few people from the Indy MU Photo Club. So I have a small audience for these shoots. The plan is that I’ll shoot one room, with my lights, and they’ll shoot the rest of the house. Yesterday was the first shoot, and it went very well, although more time would have been welcome, especially for the people from the club.

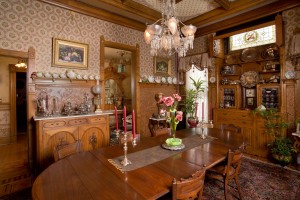
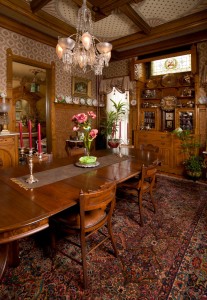
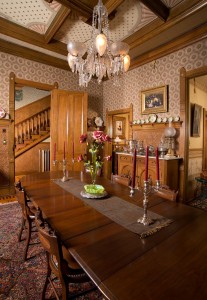
I started by looking around the house, and I settled on the dining room, because of the look of the room, and also because of the complexity. I was particularly interested in shooting into the two connecting rooms and the windows at the same time. The second camera angle was interesting because of the way the staircase was framed in the door. It was easier to shoot, first because the lights were set up and because there weren’t any windows.


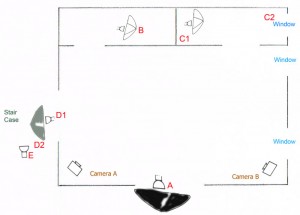
You can see the position of the lights in this diagram, of course everything isn’t exactly to scale. The A light is a Calumet 750 Travelite set at 1/4 power. It creates the overall light of the shot, and is positioned near the camera so that the shadows are less visible from the camera. I bounced the light off a 60-inch umbrella, with a black back, to create soft shadows. Of course there is a lot of information about placing lights in my book: Photographing Architecture: Lighting, Composition, Postproduction and Marketing Techniques The B light is a Norman 200B modified with a 30-inch shoot through umbrella. I normally don’t use umbrellas in this way, but here I’m trying to add light quickly to a small ancillary room, and this is a quick way to do it. I used a 1/4 CTO filter over the light because I wanted the two rooms on the side of the shot to have different colors of light. Rosco makes these filters that enable you to modify single lights in a shot. Of course you can modify all the lights in a shot in the camera and in post-production. Light C is also a Norman 200B with a 30-inch shoot through umbrella, but it doesn’t have the 1/4 CTO filter so the color is cooler. This fits because there is a window this room. The light moved from the first position, which is shown to the other side of the room to keep the reflection of the light out of the mirror. In the first shot I placed the D light to open up the left half of the room. I used another Norman 200 B and a silver umbrella. The silver umbrella is a little brighter than the white satin umbrellas I use most of the time, but the light is a little harder. In this case the extra brightness helped. I also used a 1/8 CTO filter to add just a little warmth to the edge of the room. When I made the second shot I pulled this light back just a little and changed its direction so it lit the hall rather than the room, position D2. This wasn’t quite enough to create separation on the staircase so I added a Sunpak 120J light at about 1/4 power. I used the standard bowl reflector on this light, so it was hard light, and pretty bright. I like the sparkle it added to the staircase. I just got a couple of the Sunpak 120J units, they are similar to an older Quantum strobe, but use high voltage batteries I already had. I use a lot of older equipment mostly because I started buying strobes a long time ago. I spend a lot of time helping the students in one of my BetterPhoto classes identify the type of equipment that will work best for them. The exposure was f11 at 1/15 and ISO 200. The exposure needed to be long for the windows and the lighting.


I looked at the shots in Adobe Bridge, and of course it was easy to choose the shots I wanted to work on. When I do architectural shooting the last shots are usually the ones I want to use. Next I opened the horizontal version of shot 1 in Adobe Raw. I reduced the blacks to 3, and I moved the fill light to 12. The exposure was a little dark, so I increased the exposure using the exposure slide. Then, since the right wall was too dark, I opened two separate versions of the file. The second version was much brighter than the first, almost a stop. I mixed the two versions of the shot using layers in Photoshop. I also did a little sharpening and use the dodging and burning tools here and there. The result is at the top of the shot, and I think it worked really well. Oh, I also adjusted the perspective just a little to get the verticals right.

This version was handled the same way, except that I used a little vibrance and saturation to make the carpet a little more colorful.

On this shot I increased the exposure a little and added just a little fill light. I only needed one version of this shot, so it was quick to process. I didn’t have as much time to do this shot, so I’m quite pleased at how well it turned out. About the only thing I had to do in Photoshop was use the burn tool to darken a couple of highlights.

November 27, 2012

Lighting Kits?

Filed under: Lighting Technique,Photographic Education,Photographic Equipment — John Siskin @ 11:49 am


Most people buy strobes twice. I’ve said this before. They buy a cheap kit first, and unfortunately most kits aren’t really cheap. They can learn a couple of things from this kit. The first thing they learn, and this is an important thing to learn, is whether or not they enjoy controlling the light in their pictures. What most people want to do with a camera is to capture a scene, to keep it as a memory, or to share with others. A few people want to make a photograph, control the light subject and background to make an image that wouldn’t exist without the photographer stepping in. For instance few families stand in order of height around the holiday decorations, unless someone is making a picture. Since I’ve been teaching lighting for more than twenty years, the people who want to control the light, make good light, in their pictures, are the people I’m working with. As people who read this blog know, I often write about light and I’ve written a couple of books about light Understanding and Controlling Strobe Lighting: A Guide for Digital Photographers and Photographing Architecture: Lighting, Composition, Postproduction and Marketing Techniques. These books might make good gifts for other photographers. You might consider giving a photographer one of my classes: An Introduction to Photographic Lighting, Portrait Lighting on Location and in the Studio and  Getting Started in Commercial Photography Or buying a class for yourself. By the way, all the images this week are strobe image, and most of them are from my books.

In addition to teaching you about whether or not you want to make good light, that first lighting kit often teaches you about what you want when you buy lights again. Of course you learn this by being frustrated by the problems with your first lights. Many inexpensive kits use fluorescent bulbs for light. These can only be used effectively in rooms without other light sources, and they have little or no control over the relative power of the lights. These and other continuous light sources might be good for cheap video lights, but they aren’t much use for still shooting, because you won’t have good depth of field and a short shutter speed. Strobes, or flash if you prefer, are much better lights for still cameras. They give you more light, better color balanced light, and they stop action. Unfortunately there are many strobe kits that have too little light power to do any of this. In my An Introduction to Photographic Lighting class at BetterPhoto.com I ask students to work with a couple of very cheap clamp lights. You can learn the important first lessons from $15 worth of lights as well as from a $300 kit. Plus you can use the clamp lights in the garage when you’re through doing photography with them.

Here’s the way I think about power on a strobe, or even on a continuous light: I might want to shoot in a room that had direct sunlight, and in that case I would want my lights to be much brighter than the sunlight or whatever other light there might be. If my light isn’t much brighter than the existing light than the existing light will define the kinds of pictures I can make. Of course the size and color of the room will have a lot to do with how much power I’ll need. The other big consideration is the way I modify light. If I was using hard light, direct from the strobe, I’d need much less strobe power than if I was using a large light modifier, like a soft box, umbrella or a light panel. Since I often use an umbrella and a light panel together, and the combination is inefficient, I need a lot of power. I find, based on extensive experience, that I need at least 600 watt-seconds to be able to overcome ambient light in most situations. I have and use many lights with less power, but in most situations I have at least one strobe with 600 watt-second to set the tone of my shot. Keep in mind that raising the ISO will raise the sensitivity of ambient light as quickly as the sensitivity to light from the strobes, so a higher ISO won’t always reduce your need for powerful strobes. In my classes I often recommend the Alien Bee B1600. I like this unit because of both the power and the quality.

If I were doing location work, where portability was critical, I would compromise on this. I might also accept longer recycling times, but in most location situations I would really want to have quick recycling. Keep in mind that one common location situation is shooting an event, and picture opportunities can happen very quickly. The first choice for a location strobe will probably be a powerful dedicated strobe from your camera manufacturer: perhaps a Canon 580 IIEX or a Nikon SB900. Many will get additional dedicated units from the manufacturer when they want to do more complex lighting. I can see that a second dedicated unit might be useful for shooting events, but only if you have an assistant to position the light, but for most situations a manual unit would do as well, and it would save a lot of money. I particularly like the Lumopro unit.

Of course the type and quality of the accessories is really important to evaluating a kit. Much of the advantage in a kit is the discount you get on accessories. Unfortunately many kits include poor accessories. For instance I like to see umbrellas in a kit, as I think they are good tools. If the umbrellas don’t have a removable black back they are pretty much useless as light modifiers, because you can’t control the direction of the light. Many people selling kits save a couple of bucks and include only translucent umbrellas, which is too bad. Here’s a list of the tools I would like to have with one light: light stand, barn doors, bowl reflector, 45 inch umbrella with a black back, a light panel and a sync wire or a radio slave. Here’s an article about shooting with one light, there’s a lot you can do! Additional useful accessories include: a snoot or a grid spot, a small light stand and a large umbrella, maybe 60 inches. I already put a list of the basic kit I often recommend on this blog here

Happy holidays. I hope that you receive light for the holidays!

October 15, 2012

Updates and Light Opinions

I hope you’ll check out my books: Photographing Architecture and Understanding and Controlling Strobe Lighting. I hope you’ll get copies if you haven’t already. Of course you know that one reason for this blog is to sell the book and get you to consider one of my classes at BetterPhoto.com: An Introduction to Photographic Lighting, Portrait Lighting on Location and in the Studio, Getting Started in Commercial Photography

Updates on my project with the 8X10 camera: I went back to the Indiana Historical Society and made another negative. This didn’t have the defects on some of the last set, so I think it is time to go forward. Here’s the latest shot from the conservation lab:


I also made a Vandyke print of one of the original negatives. I need to stress that seeing this scan on your monitor isn’t like seeing the actual print. It never is. If you want to see original images you need to go to galleries or buy prints. At least look at well printed books made with the photographer’s supervision. Anyway, here is a scan of my print from the first shoot.


I wrote most of what follows for one of my students at BetterPhoto. I’ve said these things before in this blog, but that’s no reason not to say them again. The heart of the matter is: if you can’t make light, if you have to find light to take a picture, or if you believe that light designed by a photographer is inferior to found light, you will limit the pictures you can take and limit there quality. It is better to learn more skills, and get more tools, in order to allow yourself to be a better photographer.


I am aware that many people use the terms artificial light and natural light, but I don’t think that when a great number of people use a term that actually makes the term accurate. A photon doesn’t act differently because it comes from the sun or a light bulb. A given light source may have a different color balance, but that doesn’t mean that it is natural. Sunlight and lightning (note the word is lightning with an n. Instantaneous light from storm clouds) have a similar color balance, but a cloudy day, or a volcano or natural phosphorescence have very different color than daylight. People most often refer to strobes as being artificial, but call a light bulb is a natural light source. In fact a strobe is really a kind of controlled lightning, which is natural, while light bulbs doesn’t occur naturally. The real problem that people have with strobes is that they can’t visualize what the light will look like, so they find that their pictures look very differently from what they hope. This is why you need to practice with light in order to understand and visualize light, which will make it easier to work with any light source.


I do think that natural is a value laden term. Natural foods are assumed to be better than artificial food; natural fabrics are assumed to be better than artificial. I often hear people describe themselves as “natural light photographers.” I am sure they wouldn’t like to describe themselves as photographers who are handicapped by an inability to create and control light in their photographs. The term photography is from the Greek and can be translated as “writing with light,” and I do think a photographer is a better photographer when she/he can actually create a photograph by controlling the light. Lighting is not the only way to make better photographs, but it is one of the most important tools for creating better photographs. This is why I teach lighting courses, and write books and articles about lighting. If I can help more shooters learn to use this tool I can help a lot of people make better photos.


Some years ago I did a job for the Huntington Library in Pasadena, actually San Marino, at the same time [a well known photographer who I shouldn’t disparage on this blog] was shooting for them. He is known for using “natural” light. I talked to my contact about my shots and his after the shoot was over. My contact was much happier with my work because of issues with focus and light control and color, all the problems in the other photographer’s images existed because he had little ability to control the light.


People that I know and respect use the term natural light, which is too bad. The term has even slipped out of my mouth once or twice, which is unfortunate because natural isn’t precise. There, I am glad I got that off my chest, again. You might want to say: “I use ambient light” rather than “natural light” in order to be accurate.


The important thing is to learn to pre-visualize what the light will do. You can walk around hunting for good light outdoors, or even inside. But if you don’t understand the way light defines a subject you will be hunting for good light randomly, which may be a fruitless search. This is why I think that practice, with lights, is so important: it gives you a real sense of how light works. So if you think you need soft light for a portrait you’ll start with a large light modifier, perhaps the light panel. Then you might want to define the face a little more so you may add a hard light. Regardless you won’t have to just keep moving the lights around. The goal is to be able to see the portrait you want to make, or still life or architectural shot, in your head. This will enable you to make choices about the light. It is important to know there isn’t one right light that will fit everyone, or even a few lighting set-ups that will work in any situation. Lighting is not something you can set your camera to do automatically. Lighting requires you to take control and create the right situation for your subject.


Strobes create light by passing a spark though a tube filled with xenon gas. Both a dedicated on camera flash (say a Nikon SB900 or a Canon 580II EX) and a mono-light like an Alien Bee (http://www.paulcbuff.com/b1600.php) create light in exactly the same way. A dedicated unit (SB900, 580II EX) is better for work where you travel or cover events, like weddings. It is much lighter and will mount on the camera. It will expose automatically, but of course automatic light often looks bad, even when it is properly exposed. Mono-lights, or studio strobes will work all day without running out of batteries or taking longer to recycle because they run off AC power. They often have more power and better light modifiers. They are much better for studio work, and can be better for many location jobs.


The images I put into the lighting discussion are all strobe images. I’m aware that I use some images repeatedly in this blog. I am building a new portrait portfolio so I should have more shots where I can find them for the blog.


Please consider one of my classes at BetterPhoto.com:

An Introduction to Photographic Lighting

Portrait Lighting on Location and in the Studio

Getting Started in Commercial Photography

If you’re in the Indianapolis area there are other opportunities as well. I’ll be teaching a class in commercial photography next spring at Ivy Tech.

August 14, 2012

New Camera!

I hope you’ll check out my books: Photographing Architecture and Understanding and Controlling Strobe Lighting. I hope you’ll get copies if you haven’t already. Of course you know that one reason for this blog is to sell the book and get you to consider one of my classes at BetterPhoto.com: An Introduction to Photographic Lighting Portrait Lighting on Location and in the Studio Getting Started in Commercial Photography If you’re in the Indianapolis area there are other opportunities as well. I’ll be giving a Photomicrography presentation on August 23 at Black Dog Books in Zionsville. Call 317.733.1747 to reserve a space. I’ll be teaching a class in commercial photography next spring at Ivy Tech.

I’ve been spending time learning to work with my new camera, a Nikon D800. Since I haven’t had a new digital camera in about 8 years there are a few things to catch up on. My previous camera was a full frame camera that used Nikon lenses, so I can use the same glass, but I needed to make several up grades to work with the 36 megapixel images. I’ve had to get larger CF cards and a faster card reader, as well as a portable hard drive for location work.

One of the upgrades I am most excited about is the Eye-Fi card. This is an SD card that transfers the image files wirelessly to the computer. I have long been a proponent of setting up your lighting while looking at the image on a laptop. On my last camera the only way to do this was with a cable that ran between the camera and the computer. Most wireless systems are very expensive: Nikon makes a Wireless File Transmitter, but it costs about $740. The Eye-Fi card is about $80, but there are a lot of considerations about using it. First it is only appropriate for small to medium sized files. This would mean that I really couldn’t use it, but the D800 has two card slots, one for a CF card and another for an SD card. So you can set up the camera to put the RAW file on the CF card and put a smaller jpg file on to the Eye-Fi SD card. There are some definite challenges to setting up the network, but I got everything to work. One thing I am still trying to find is a program that will display the most recent image.

One of the keys to getting comfortable with a new camera is to play with it. I spent several days in my office playing with micro lenses (check out the earlier blog entries for info on specialized micro lenses. Look at the Micro Photography Category). I made a lot of bad images, and few that are passable. The key is that I leaned a lot about how the camera sees. I also did tests on resolution, long exposure and high ISO settings. It is important to look at the files in detail.

It is also very important to be willing to make mistakes. So I need to play with the buttons and the settings. I don’t need to memorize every function of the camera, what I need is to make choices about every function of the camera. For instance I don’t think I’ll use the photo editing functions of the camera, but I will use the custom white balance settings.

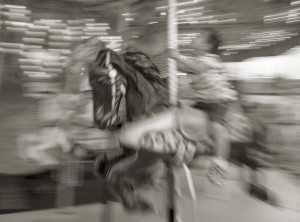
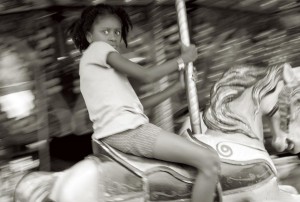
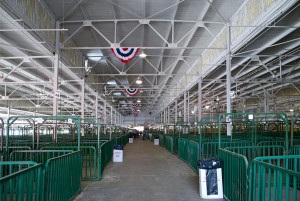
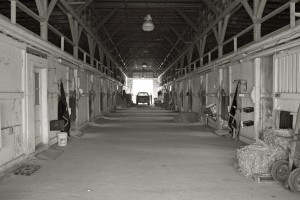
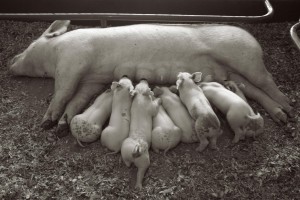
Yesterday I went to the Indiana State Fair, which was a great place to play with the camera. I made a lot of shots, which helps me to test my workflow. I got to play with long exposures, which didn’t work very well with the last camera. I also experimented with shots at high ISO. One of the biggest problems with the old camera was that the maximum usable ISO was 160. I can now shoot at ISO 6400, which is really remarkable. The shots I’m attaching are from the fair.

I have to say I am very impressed with the camera. The files are remarkably crisp and saturated. The camera is very quick, by my standards. I particularly like how quickly the camera turns on. I think the camera might be a little lighter than my last camera. Certainly the camera is a little smaller, but the LCD is a lot larger. I’ve done a few experiments with my strobe and everything works well there. I’m not done playing yet, but I am ready to use the camera on a commercial job.

July 14, 2012

I’m Showing in Indianapolis!


I had an opportunity to show a few images at a local coffer house, Lazy Daze, drop into my lap. If you’re in Indiana I hope you’ll check it out: the address is 10 S. Johnson Ave. Indianapolis, IN 46219.  The images on display are 16X20 inches, so these on line images aren’t really as effective, but at least you can see them. The text is the artist’s statement I included with the show. The images are on sale for $275. If you’d like to buy one I’ll get it to you for that price, plus shipping, after the show. All prints are silver gelatin, and are hand made by me.

Time and Shadow

Photography is an art form that is evolving. William Henry Fox Talbot realized that photography would become a means of communication when he created his first images back in the late 1830s. He used his camera to record household goods as buildings people and plants. When he published Pencil of Nature starting in 1844 he presented many of the ways the world would use photographs up to the present time. In the beginning photography was extraordinarily difficult to do. Exposures were long, so cameras had to be supported by a tripod. The chemical processes were almost as arcane as a witch’s brew, and sometimes more dangerous. It’s very important to remember that the photographs a person takes are always constrained by the limitations of the medium: the photographs a person could take.

The photographs I present here are from a certain time in photography. I used large cameras at this time to increase detail and reduce grain. I made prints by hand in a darkroom. I watched each of these images develop on a white sheet of paper under a safelight. It was a good time.
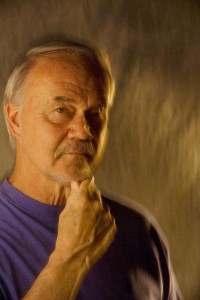
One of the most significant differences between working in this fashion and working with a digital camera is that each image you captured involved certain costs of time and material, so I would choose an image much more carefully. Now I more often shoot everything and edit, which is a very effective way to work with a digital camera. One more time the change in the technology of making pictures has changed the way we take pictures.
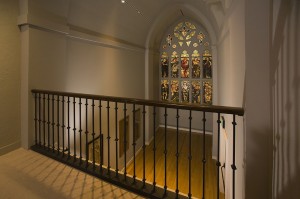
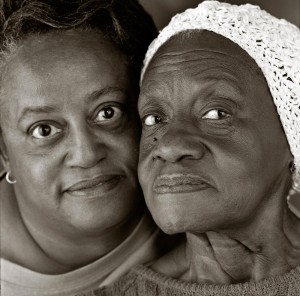
I hope these images will share not just how I see, but also some of the magic of making an image. These images were made with 4X5 film cameras. They were printed by hand with an enlarger in a darkroom. I enjoyed this way of fixing my vision onto paper. I hope you will find some joy in these images as well.

John Siskin

I hope you’ll check out my books: Photographing Architecture and Understanding and Controlling Strobe Lighting. I hope you’ll get copies if you haven’t already. Of course you know that one reason for this blog is to sell the book and get you to consider one of my classes at BetterPhoto.com:
An Introduction to Photographic Lighting

Portrait Lighting on Location and in the Studio
Getting Started in Commercial Photography
If you’re in the Indianapolis area there are other opportunities as well. I’ll be teaching a class in commercial photography next spring at Ivy Tech.

May 31, 2012

More Big Camera Notes

I wrote this for the person who just bought a 8X10 camera from me. I actually know a few people who are working in large format again, so I thought I would post a few notes. I’m going to be shooting people blowing hot glass tomorrow; I’m pretty excited about that. I’m including a few images I made with big cameras.

A photograph is a two dimensional illusion of a three dimensional reality. It has limitations primarily that movement of the viewer’s eye doesn’t change the scene and the amount of detail captured and displayed. The amount of detail can be changed of course, but it is not always as easy as just increasing the size of a capture. There are three primary considerations: depth of field, resolution and capture. Resolution is thought of as sharpness, but the human eye will interpret a contrasty image of lower resolution as sharper than a low contrast image with high resolution. Arthur Cox’s book Photographic Optics shows a good example of this. There are limitations to how much you can adjust sharpness in post-production, but depending on the image, you can increase contrast until there are just two tones: black and white with no intermediate grays.

Lens resolution: Lenses are optimized for different size capture. A lens optimized for a smaller capture has a greater potential resolution then a lens designed for large format work. Fixed focal length lenses have fewer air to glass surfaces, and fewer elements, and so are sharper than zoom lenses. So a 50mm lens designed for a 24mmX36mm (full frame 35mm film area) is sharper than a 150 mm lens designed to be used with 4X5 inch film. The number of air to glass surfaces is not the only indicator of sharpness, and perhaps not the best one. Many lenses with 6 elements are sharper than 4 element lenses, but a zoom with 10 elements that move in different groups is always lower in sharpness than the best fixed focal length lenses. Resolution refers to the ability to separate fine details. A lens that can delineate the details of a feather has high resolution.

Depth of field: Many people interpret this as synonymous with sharpness, but in fact that is wrong. A lens will resolve better somewhere between one and three stops from wide open, then it will at the minimum aperture. Once again resolution is the ability to separate detail. As the lens approaches minimum aperture the diaphragm begins to diffract light, which reduces resolution. So while f64 may keep a lot of stuff in focus it doesn’t produce maximum sharpness. There are computer programs that are able to take several captures and combine them to obtain maximum sharpness and extended depth of field. Also, a larger capture area requires a smaller aperture to obtain the same depth of field.  A 150mm lens on a 4X5 camera is in focus from 32 feet to infinity at f8, a 50mm lens on a 35mm camera is in focus from about 6 feet to infinity at the same aperture.

Capture resolution: This is where a large format camera can make up for it’s other challenges. Film’s actual resolution is a factor of how it is manufactured, so a bigger piece of film has more resolution than a smaller piece of film, just because there is more film. A 35mm frame is 1.5 square inches, while a 4X5 piece of film is 20 square inches, more than 13 times bigger. This relationship is different with digital, more total pixels generally means a higher resolution capture. However I have seen some information that suggests more pixels on a larger capture area can be sharper than the same number of pixels in a smaller area.

As I suggested above you can increase apparent sharpness by increasing contrast, but there are limits. Many times increased contrast just doesn’t look good.

Notes for focus and exposure with large format cameras: Many lenses need to be refocused after you stop them down to the shooting aperture. This can be difficult because the image is so dark on the ground glass. This is particularly true of wide-angle lenses. Also wide-angle lenses are much sharper if focused at the hyper focal distance when stopped down rather than infinity. This means extending the bellows just a little. Put another way: if you have a 65mm lens on a 4X5 camera and you want to focus at infinity with an aperture of f11, you can focus the lens at infinity, but the image will be sharper if you focus at 8 feet from the lens. This is the mid point for your depth of field at that aperture. Total depth of field would be 3 feet to infinity at f11.

Another problem with large format wide-angle lenses is cosign 4 failure. The focal length is approximately the distance from the diaphragm of the lens to the film, when the lens is focused at infinity. As you can figure out for yourself the distance from the diaphragm to the corner of the frame is considerably greater on a wide-angle lens. This means that the light isn’t even across the frame on a wide-angle lens. There are filters that can correct this for you, and I am sure you could also correct for it in Photoshop.

One advantage of a large format camera is that you can selectively focus. This is similar to what you can do with a Lens Baby: shift the plane of the lens so that the focus follows the image or so that focus goes against the image. With large format shooting, where depth of field can be a challenge, this feature is very important.
Thanks for paying attention the blog. I’ll be back soon. Here are the usual reminders.
Please check out my books and classes:

Understanding and Controlling Strobe Lighting: A Guide for Digital Photographers

Photographing Architecture: Lighting, Composition, Postproduction and Marketing Techniques

An Introduction to Photographic Lighting

Portrait Lighting on Location and in the Studio

Getting Started in Commercial Photography

Thanks, John


« Newer PostsOlder Posts »

Powered by WordPress