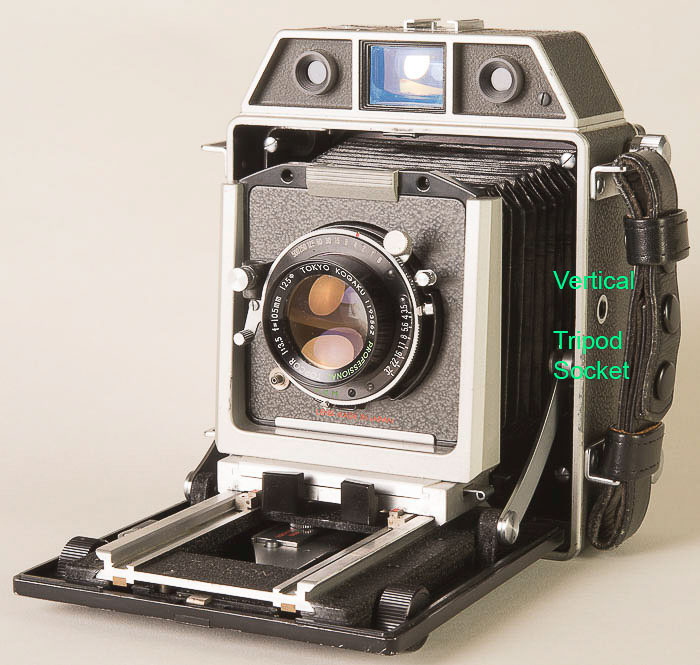
So this is a couple of things about wide-angle lenses for large format lenses.
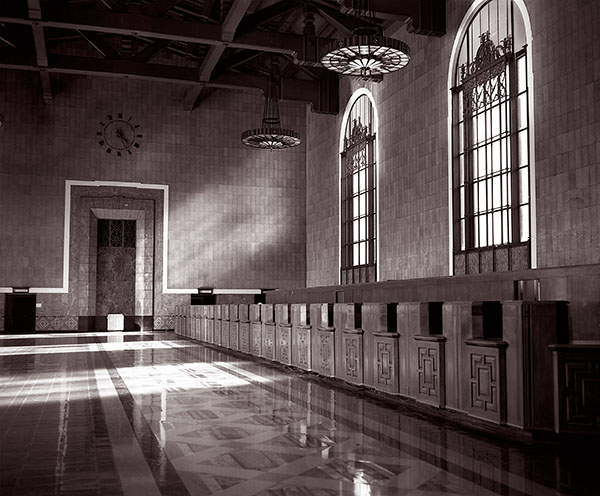
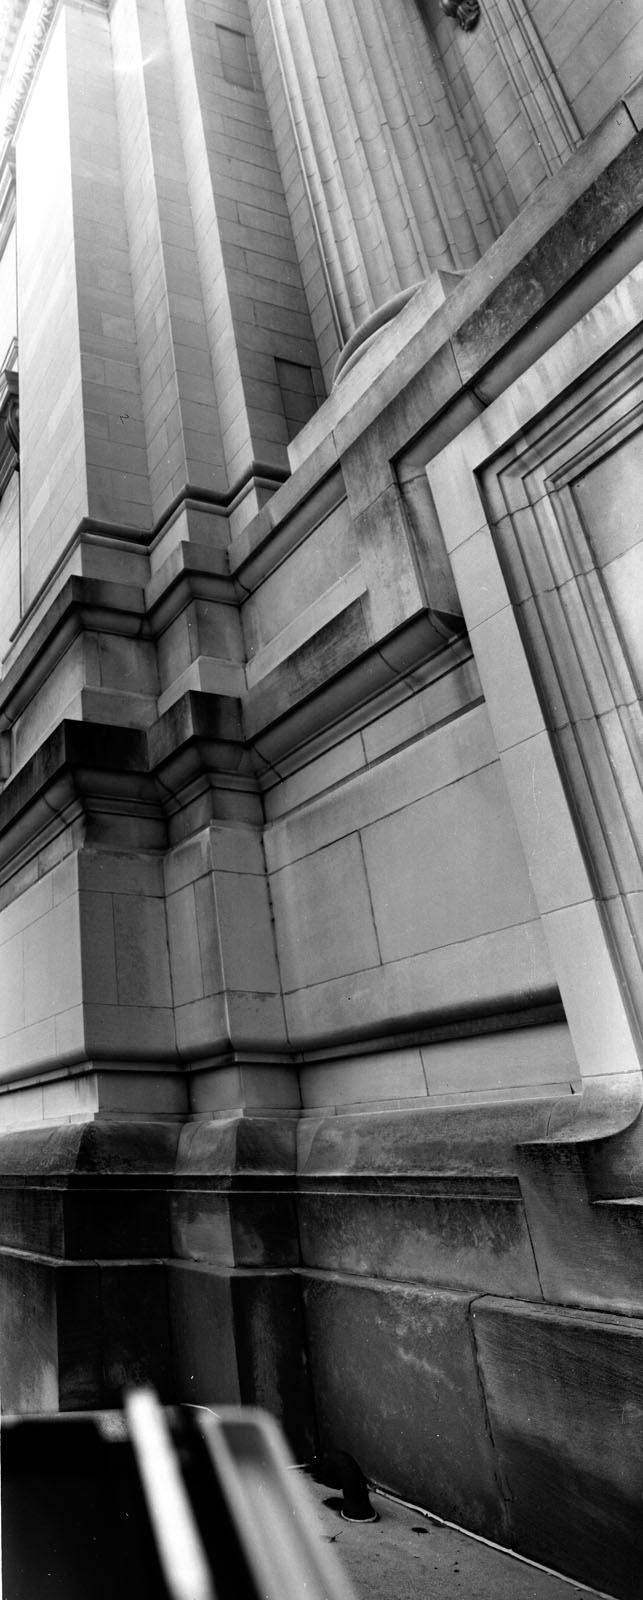
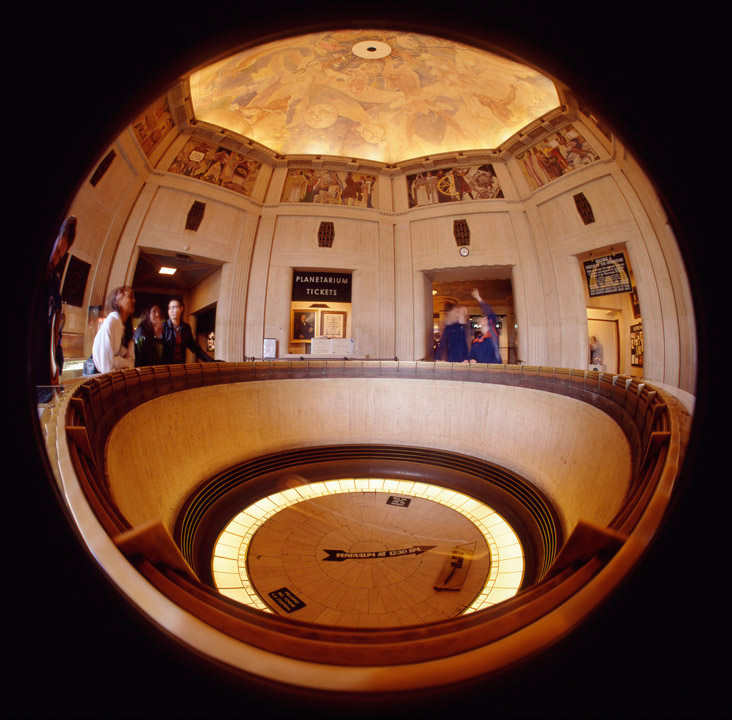
Union Station, Los Angeles #1 This shot was made with a 65mm f8 lens. Focus is tricky with this lens
Section 1
I love lenses. I think it is just amazing that a small piece of glass can actually bend light and form an image. My favorite lenses are wide-angle lenses. I’ve got a 14mm that fits my digital camera. It will produce a 115º angle of view on the full frame camera. It’s well corrected especially with the plug in available in Photoshop.
If I were a simple person this would be enough for me. Ah, that that was the case. You see I also love big cameras. No I mean BIG cameras. Once upon a time photographers used big cameras: 8X10 film and larger. Back in those days there was a lens that had a wider angle of view than my 14mm, possible wider than anything made since. The Goerz Hypergon had a 130º angle of view, and there are reports that it could resolve even a larger angle. In addition the lens had no rectilinear distortion, which means that a straight line on the edge of the frame stayed straight. Unless I use the plug-in with my 14mm lens edge lines don’t stay straight. This link goes to a picture of a Hypergon (http://inphoto.blog.hu/2015/12/03/goerz_hypergon)
Not that the Hypergon doesn’t have problems; it has lots of problems. Most Hypergons only had two aperture settings, often f22 and f32, but sometimes 48 and 96. The thing is those last two numbers really meant about the same thing as f22 and f32, they were a special Goerz numbering system. This is just one of the things that makes these lenses so difficult to work with. Consider trying to focus with a lens that is f22, and keep in mind you’re focusing on a ground glass under a black clot. Oh, and don’t forget the image will be upside down and backwards. Anything for a weird life.
My 14mm lens has 14 glass elements. The Hypergon has 2. The glass in the lens is about the size of a marble. Now you may be saying, at least if the lens is that simple it must be cheap. NO. The average Hypergon costs about $3000. Yes, that is three thousand United States Dollars, and a really nice one may go for double that. I think there are a couple of reasons for the high prices. First, I don’t think they made all that many of them. They were made between about 1900 and 1920, so not that many still exist or are for sale. No one, ever, made any lens that did what a Hypergon does: cover a large piece of film with a huge angle of view.
I would guess that the reason that no one else ever made a lens like the Hypergon was that they are an incredible pain to use. First, as mentioned, they can’t be easy to focus. Second there is the problem with the evenness of exposure. The exposure in the center of the frame is at least four times more than the exposure on the edges. The problem is that the distance from the center of the lens to the film, which is the actual focal length, is much shorter than the distance from the center of the lens to the corner of the film. This is called Cosine failure, just to make things more difficult by adding trigonometry to it. You can work out a rough approximation by comparing the distance from the middle of the lens to the center or to the corner and working the problem like a bellows extension correction. The effect is that the center of the image is MUCH brighter than the edges.
Goerz understood this issue, and designed a really weird solution for the problem. The built a sort of fan that moved in front of the lens. At least I think it moved; the various descriptions differ. Then you removed the fan entirely for part of the exposure. There was a squeeze bulb to manipulate the fan. This must have been an unbelievable pain in the ass. I’ll probably write more about modern wide angle lenses for large format later, but for now it’s enough to know that other companies solved the problem by using a variable density filter: darker in the center than on the sides.
This filter compensates for the fact that the edges are darker on the sides of a wide angle shot. It does this by removing light from the center of the shot. this one also controls contrast on black and white film, which is why it’s yellow
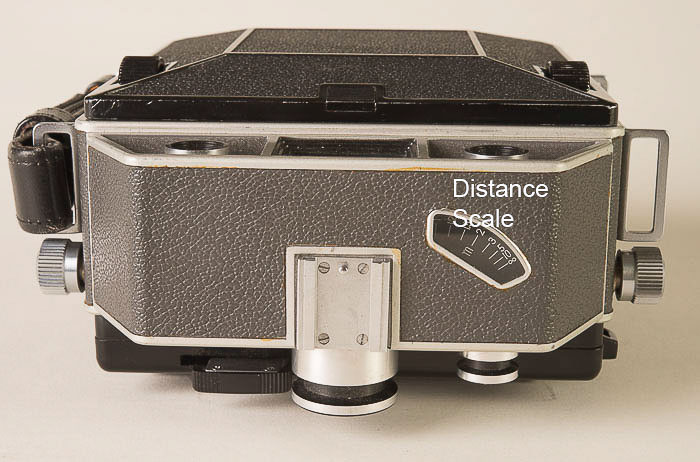
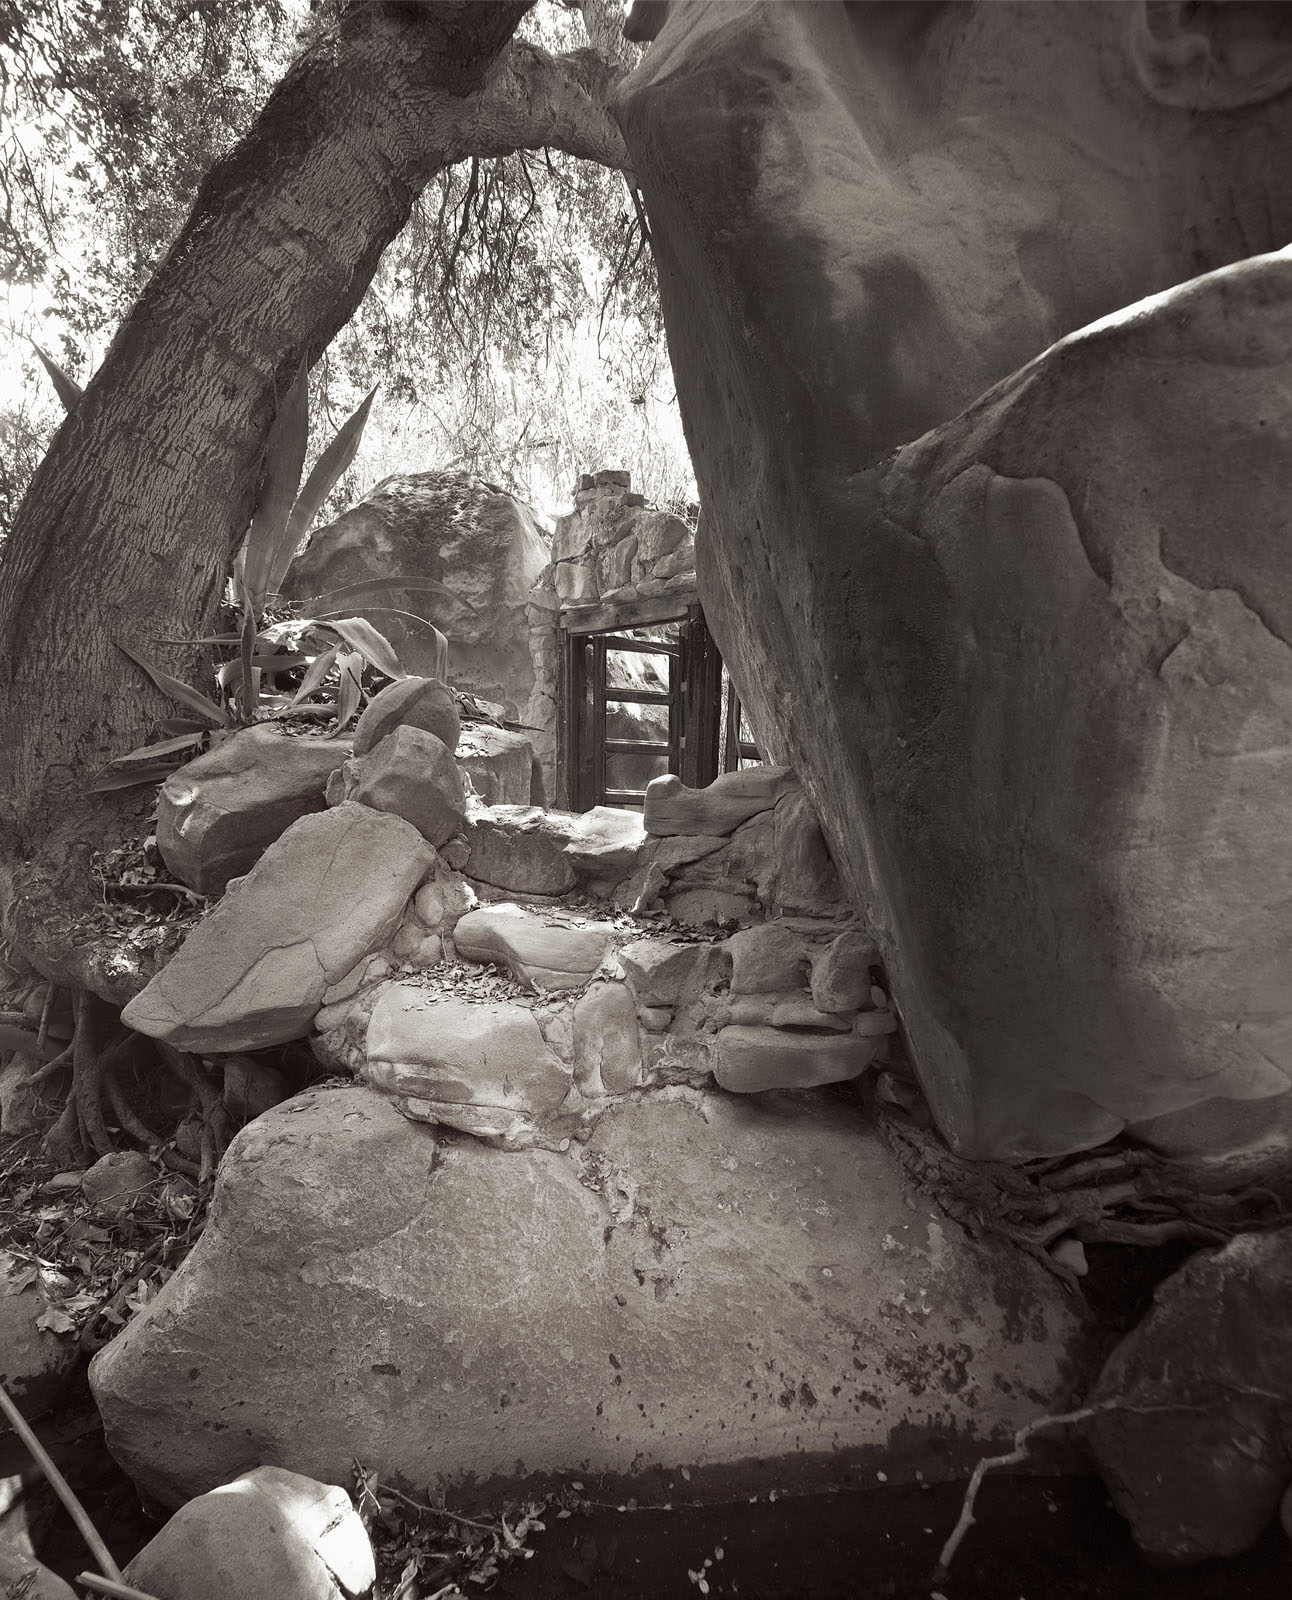
Another problem is that the lens is so wide that the parts of many cameras would show up in the shot when you used this lens. So, for instance when I use a 121mm Schneider Super Angulon lens with my 8X10 Toyo field camera the bed of the camera shows up in the shot. Very often photographers used a dedicated camera for theses lenses. This is a little easier than it sounds, since you wouldn’t need to focus the camera, and you might not be able to. The idea would be to build a camera that is set to the hyper focal distance of the lens. The hyper focal distance is the point where the depth of field, from front to back, is maximized with a lens. This actually gives you a better image than if you focus at infinity and stop down, particularly with a wide-angle lens. It’s just one more issue with this lens.

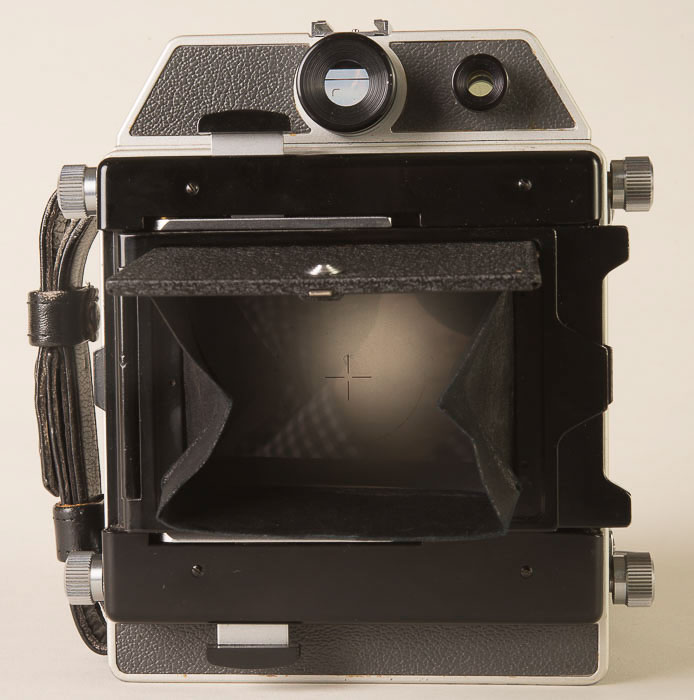
You can see the bed of my Toyo 8X10 camera in this shot.
One more annoyance: there is no shutter in the lens. Large format lenses usually have internal shutters, but there isn’t any way to build one into a Hypergon, or at least there wasn’t when the lenses were build I’ve never heard of anybody installing a shutter into a Hypergon. However, since you’re generally using the lens indoors at f22 of f32, your exposure is, likely to be very long anyway. So I guess you can use a lens cap. They made versions of the Hypergons without the fans. These lenses are reported to only cover 110º. Supposedly they have even coverage without needing the fan. I’m not at all sure that I believe this.
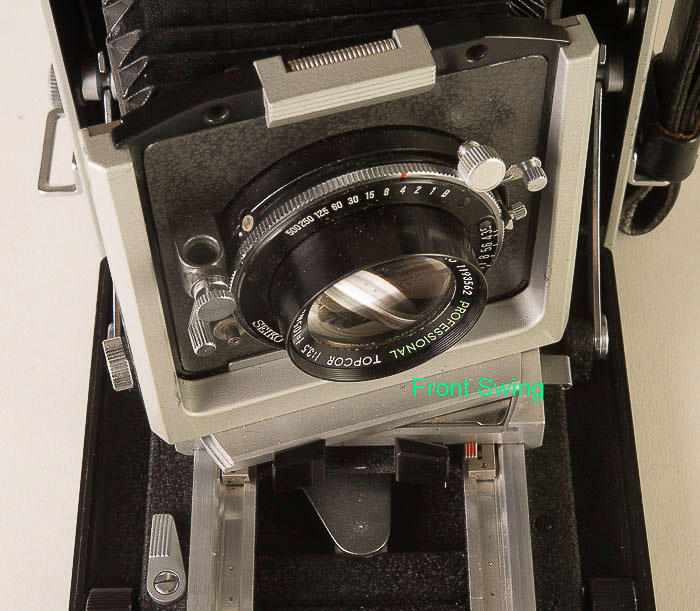
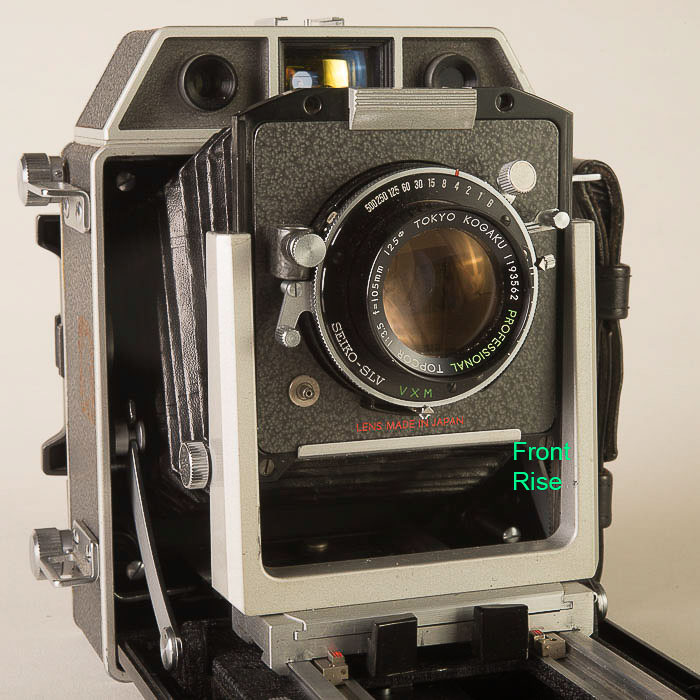
The basic design of the lens is called a globe lens, because of the marble like shape of the lens. There were people who built them before the Hypergon, for instance I have a Zentmayer lens that is a two-element globe lens, but it’s not designed to be an extreme wide-angle lens. It seems other early lens manufacturers adopted a four-element design, like the Zeiss f18 Protar or the six-element design of the Schneider f6.8 Angulons. Of course the later designs were generally 6 or 8 element lenses like the Schneider Super Angulons and the Zeiss Biogons. These lenses were faster. These lenses were better corrected for chromatic aberration, but they didn’t cover as much. The Schneider Angulon only covered 84º. A much later Schneider Super Angulon generally covers only 100º. What this means is that you could use a 90mm Hypergon with an 8X10 camera, but a 90mm Super Angulon would only cover the 5X7 format.
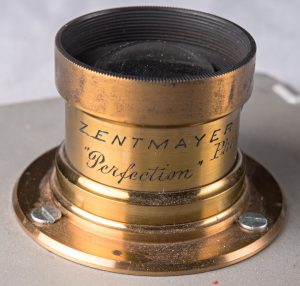
This is an early glob lens by Zentmayer
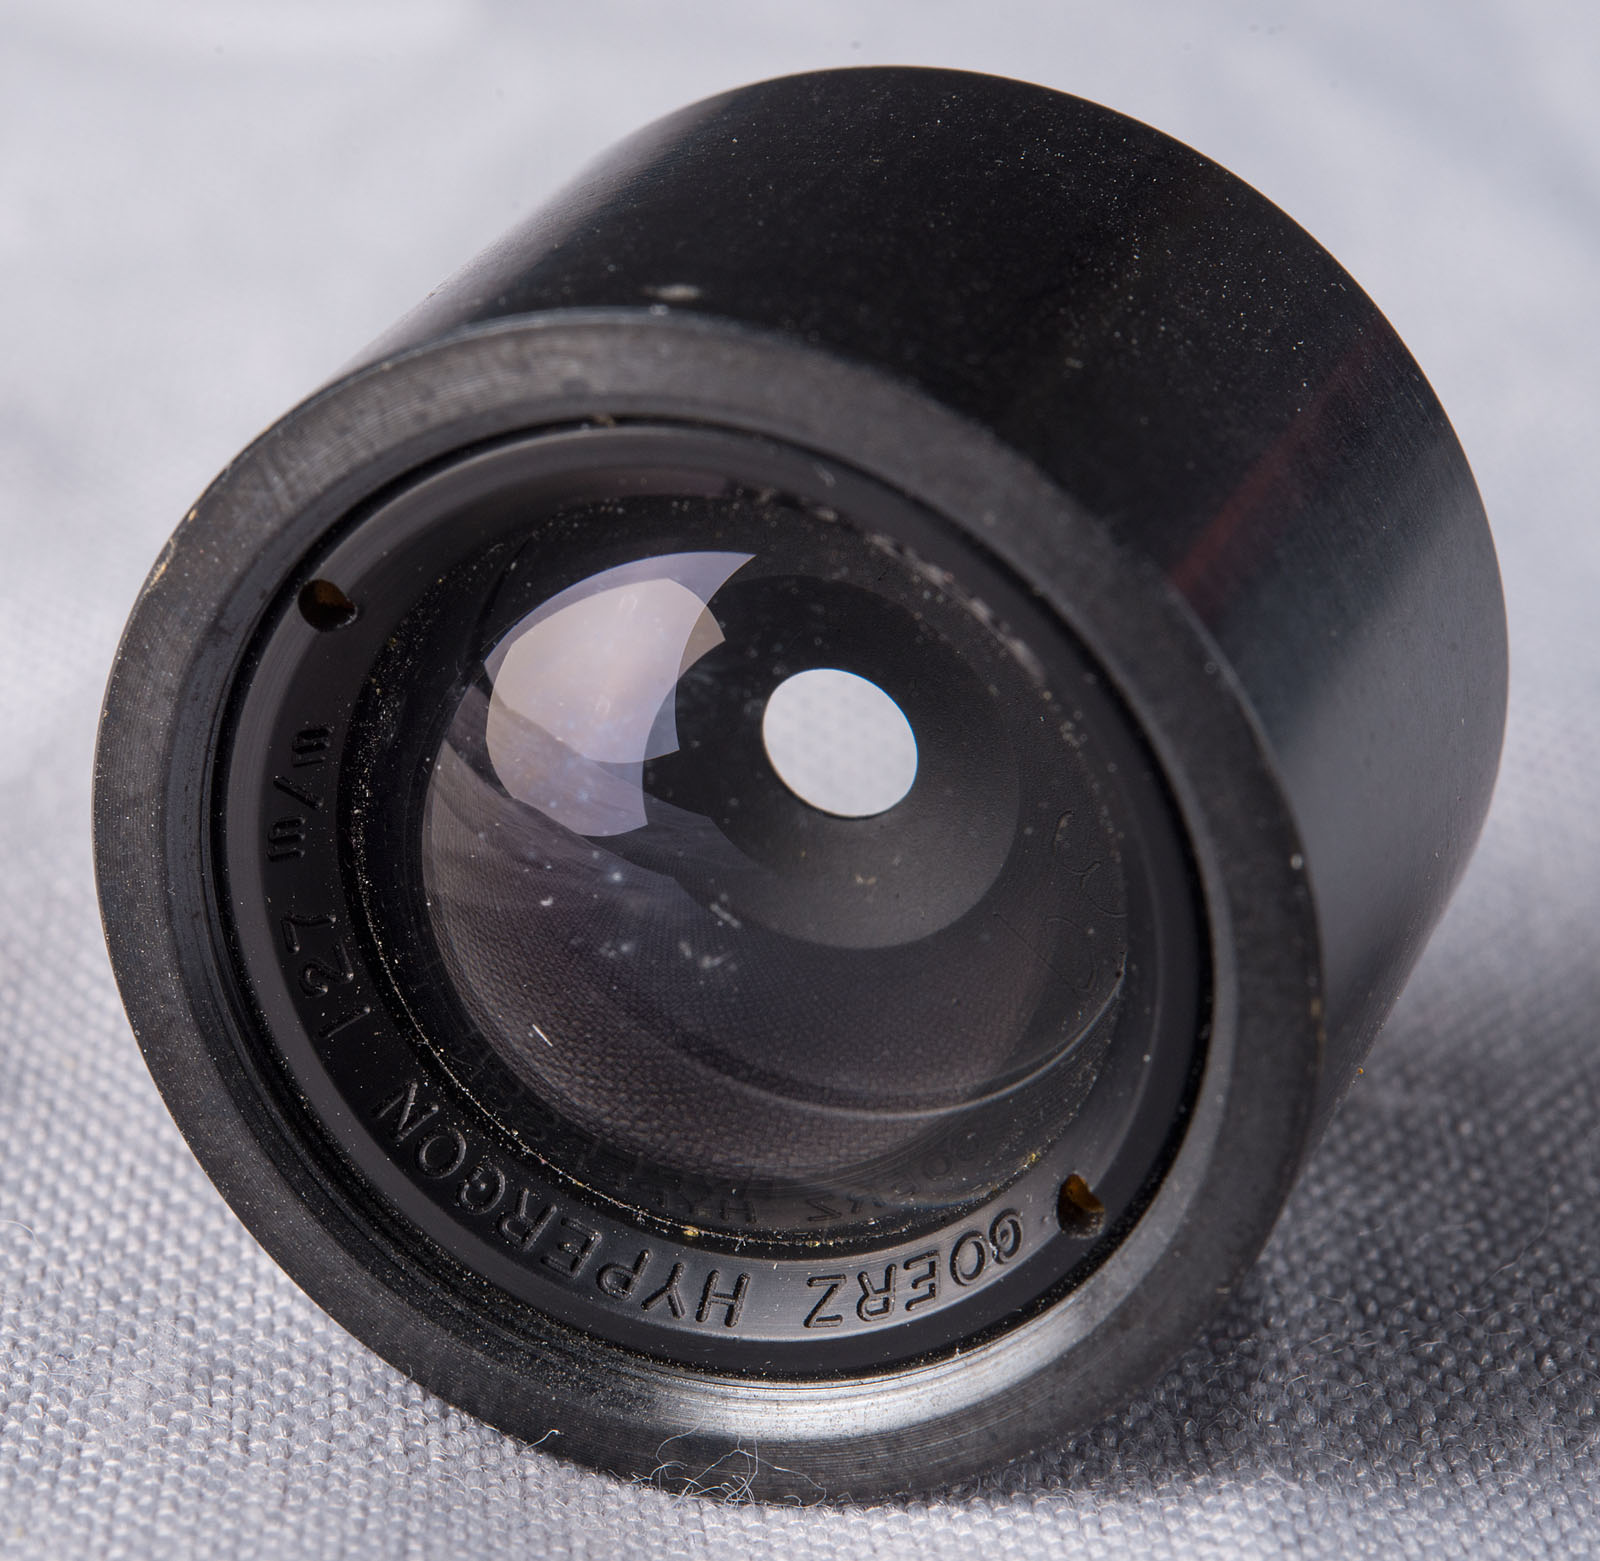
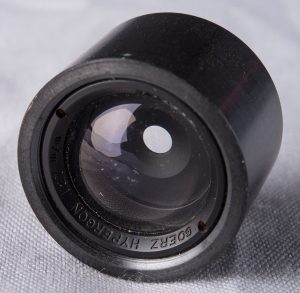
Now to the good part: my dog got me up at four in the morning the other day. Since I couldn’t get back to sleep I was trolling eBay. I found a Goerz Hypergon for just $200, buy it now! That’s two hundred United States Dollars. And there was much rejoicing! Of course I kept the noise down so as not to wake the wife. I am waiting to receive the lens as I write this. From the pictures I know that this lens is weird even for a Hypergon. The lens does not have the usual inverted cone shape mount. The focal length, 127mm is not mentioned on early Goerz literature. It has only a single diaphragm opening. I’ve been able to find very few references to this particular Hypergon on line. It might have been used for map copying. I did see an auction record of the same lens selling for 1800€ (is that the right sign for Euros?) so I still feel good about buying it.
If it is a usable lens for large format work then the lens should cover 11X14 inch film and maybe 16X20 inch film. That is one whole hell of a lot of film. Now, as you may know, I have an 11X14 inch camera. The thing is that there is no way I could get the standards close enough together to shoot with this lens. I could make a box that would fit the back from the 11X14 inch camera, so that is probably the best way forward. It’s good that I have a couple of 11X14 inch film holders, because the damn holders usually cot a couple of hundred bucks. If I mount the lens on a Speed Graphic lens board then I can at least start testing the lens with the 8X10 camera. It’s probably going to take a bout a year to start getting good images with this lens. More if I lose my mind and start trying to work out a way to shoot 16X20.
Section 2
I just received the Hypergon. This lens is extremely strange, even for a Hypergon. First Hypergons were built by Goerz Berlin in the very early part of the twentieth century, say between 1900 and 1920. The serial number on this lens matches lens made American Goerz after 1950. Hypergons weren’t coated. This lens seems to be coated. Apparently these were made for a map-making function, but it’s hard to tell. Very few Hypergons like this are shown on the web. So this lens is a very rare rarity. I don’t know how big an area the lens will cover, but by eye it does seem to have a LOT of coverage. So the next step is to mount the lens, but that’s not going to be easy. As you might be able to tell from the picture the lens has no mounting threads. I’ll probably need to work with a machinist to put the lens onto a Speed Graphic board. I have a special board to mount Speed Graphic boards on my Toyo cameras and onto my 11X14 camera. I’ll probably mount the lens off center so I can create some rise movement if I build a dedicated 11X14 camera for the lens.
My new Hypergon! It’s less than an inch across.
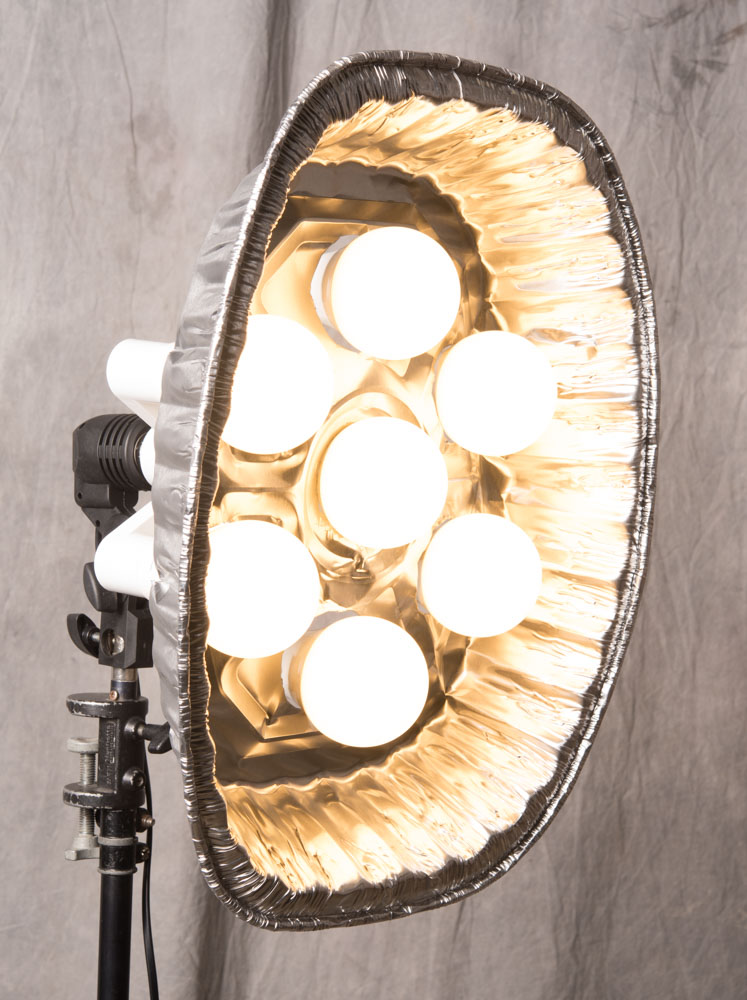
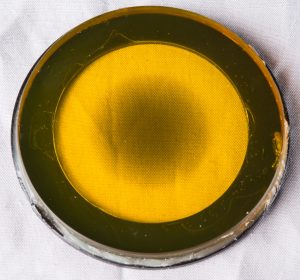
There is going to be a learning curve with this lens. I can’t be sure about the coverage until I can mount it on a camera. Then I’ll need to figure out how to manage the cosine failure. The more coverage the lens has, the bigger this problem will be. As I mentioned above most Hypergons were built with a fan. This lens didn’t have a fan. I don’t think that I can reverse engineer a fan for the lens. I could do something with a center filter. Maybe I could even build a mount for a center filter. Surplus Shed has center filters for Metrogon lenses for just $4, cheap. There is a picture of the Metrogon filter above. Center sharp filters for Schneider Super Angulons generally cost a couple of hundred dollars used, which makes the Metrogon filters look cheap. One detail about the Metrogon filters is that they are also yellow filters, but yellow filters are very useful with black and white film.
There’s another way to manage the cosine failure. I could just dodge the exposure in front of the camera, the way I would dodge a print in the darkroom. I’ll bet the learning curve on that sill will be pretty steep.
If the lens does cover 11X14 film I still can’t use it with my 11X14 camera. There is no way to get the lens anywhere close to five inches form the film on the camera. Also the camera isn’t really good for location work. So IF it covers I’ll need to build a camera, well really just a box. See the focus will need to be set at the hyper focal distance for the lens. Since the lens has a small stop and will be very difficult to view the plan is to build a camera with fixed focus. At 11X14 the lens probably won’t have any extra coverage, so I won’t need movements. If there is coverage, and that would be nice, I can build in a way to shift the lens board.
When I get everything built I’ll probably keep using Ilford Multigrade Paper instead of film. I’ve been using this so far with the 11X14 in the studio, and it’s worked quite well. I’ve done some blog posts about working with the current 11X14 cameras that discuss using the paper. The ISO is about 100. Of course the processing is fast and easy. I’ve got a large scanner so I can take the negatives into digital after they’re processed.
Frankly I won’t be surprised if it takes the better part of a year to make good images with my new lens.
Section 3
I thought I should add details about the evolution of wide angle lenses, just to give some context.
Pretty much all wide-angle lenses for full frame digital cameras are retro focus designs. This design allows the lens to be placed further from the film. This is essential for a SLR design camera because the camera requires space for the mirror. There were older designs for range finder cameras, but I don’t think they were better than current designs. For what it’s worth most, but not all, wide-angle lenses for medium format cameras were also retro focus designs. A notable exception would be the 38mm Zeiss Biogon that was permanently mounted to the Hasselblad SWC camera. Of course this camera didn’t have a mirror.
Zeiss made a wide-angle Protar for large format cameras, probably about the same time that Goerz was amking the Hypergon. These didn’t have as much coverage as the Hypergon, but they were a little faster. It takes a Hypergon to make f18 look fast. There are other Protars from Zeiss; the f18 ones were the only really wide angle versions. The Protars were four element lenses
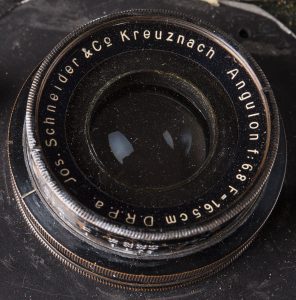
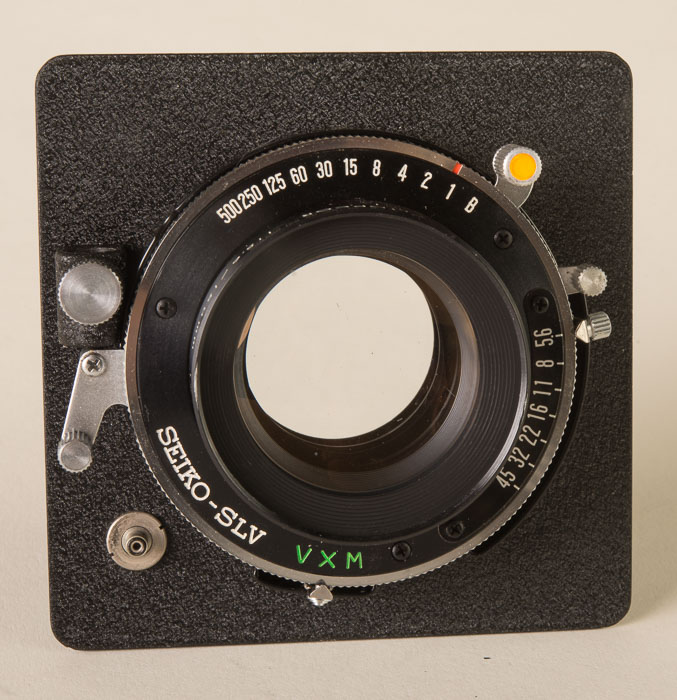
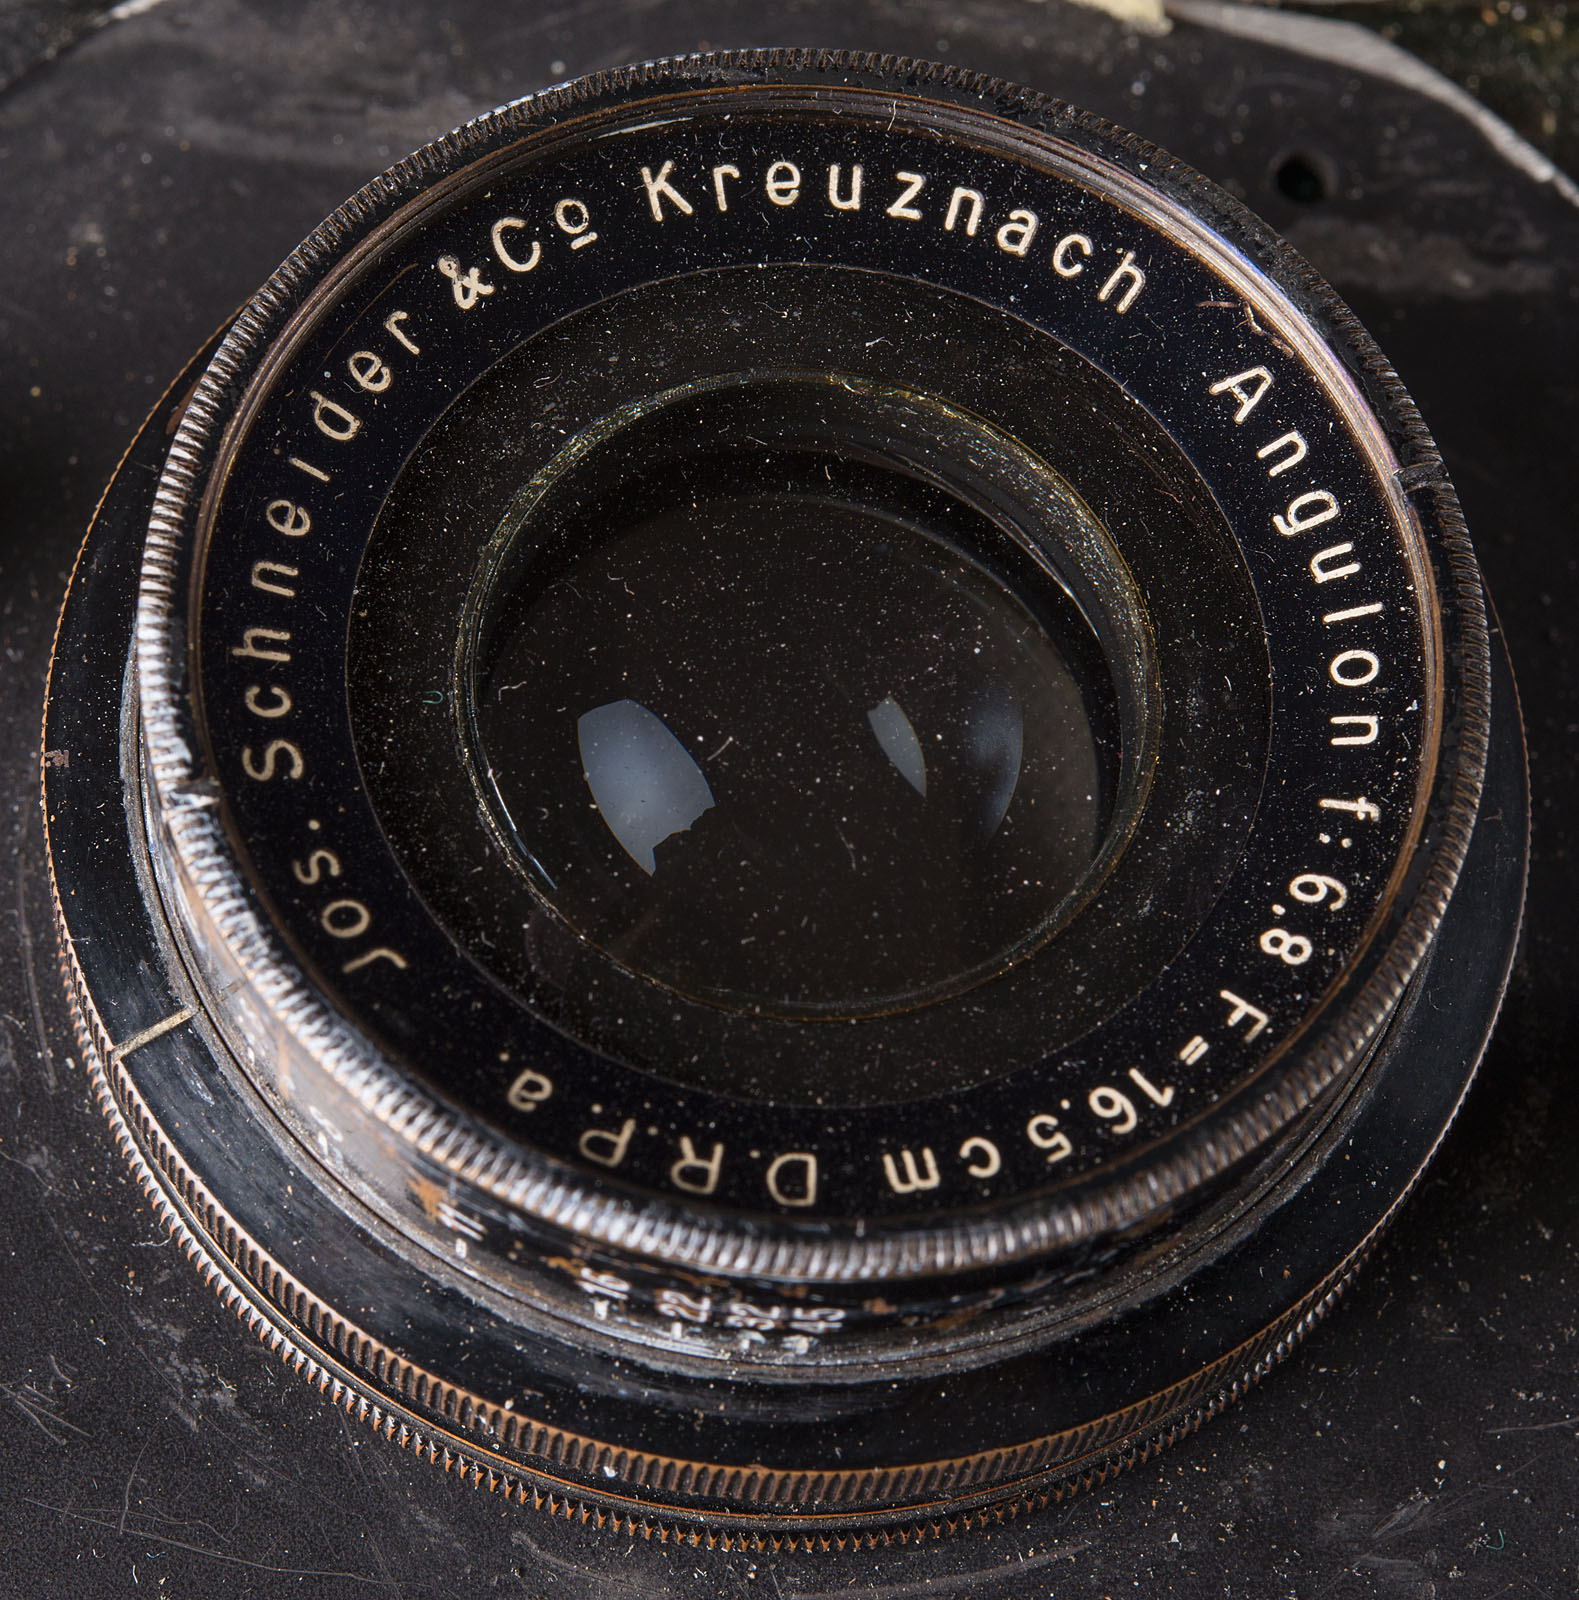
This is my 165mm Angulon. It wasn’t originally coated, but i got coating put on. It’s pretty good!
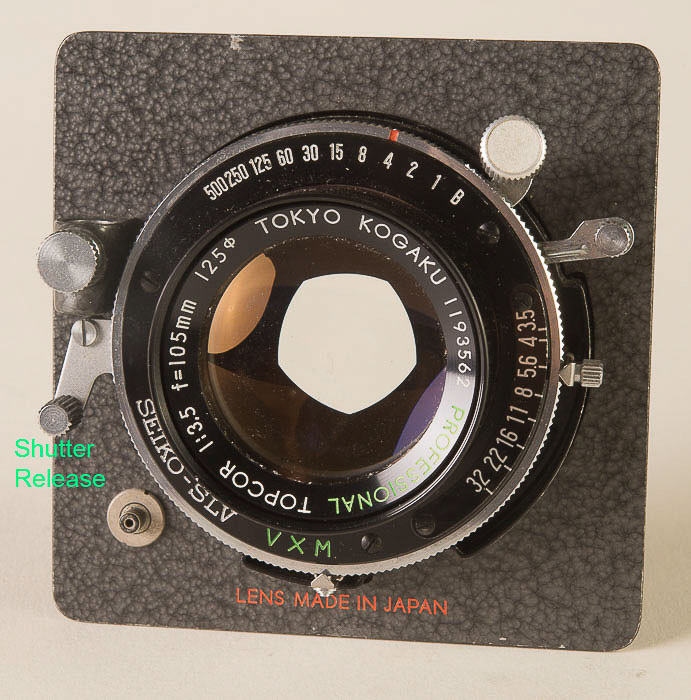
Schneider introduced the Angulon lenses around 1930. These were six element lenses, and quite well corrected. The aperture on these lenses is f6.8, which is so much faster than a Protar of a Hypergon! You can actually frame and focus an Angulon on the ground glass, hard to do with the other lenses. I have a 165 Angulon. The overall sharpness is adequate. It will just cover 8X10, in fact you have to be careful or you’ll lose the corners. As with most of the early Angulon lenses mine wasn’t coated or mounted in a shutter. I had the lens coated, which improved it’s performance. Mine is mounted in front of a Packard shutter. Frankly it isn’t pretty, but it does work pretty well.
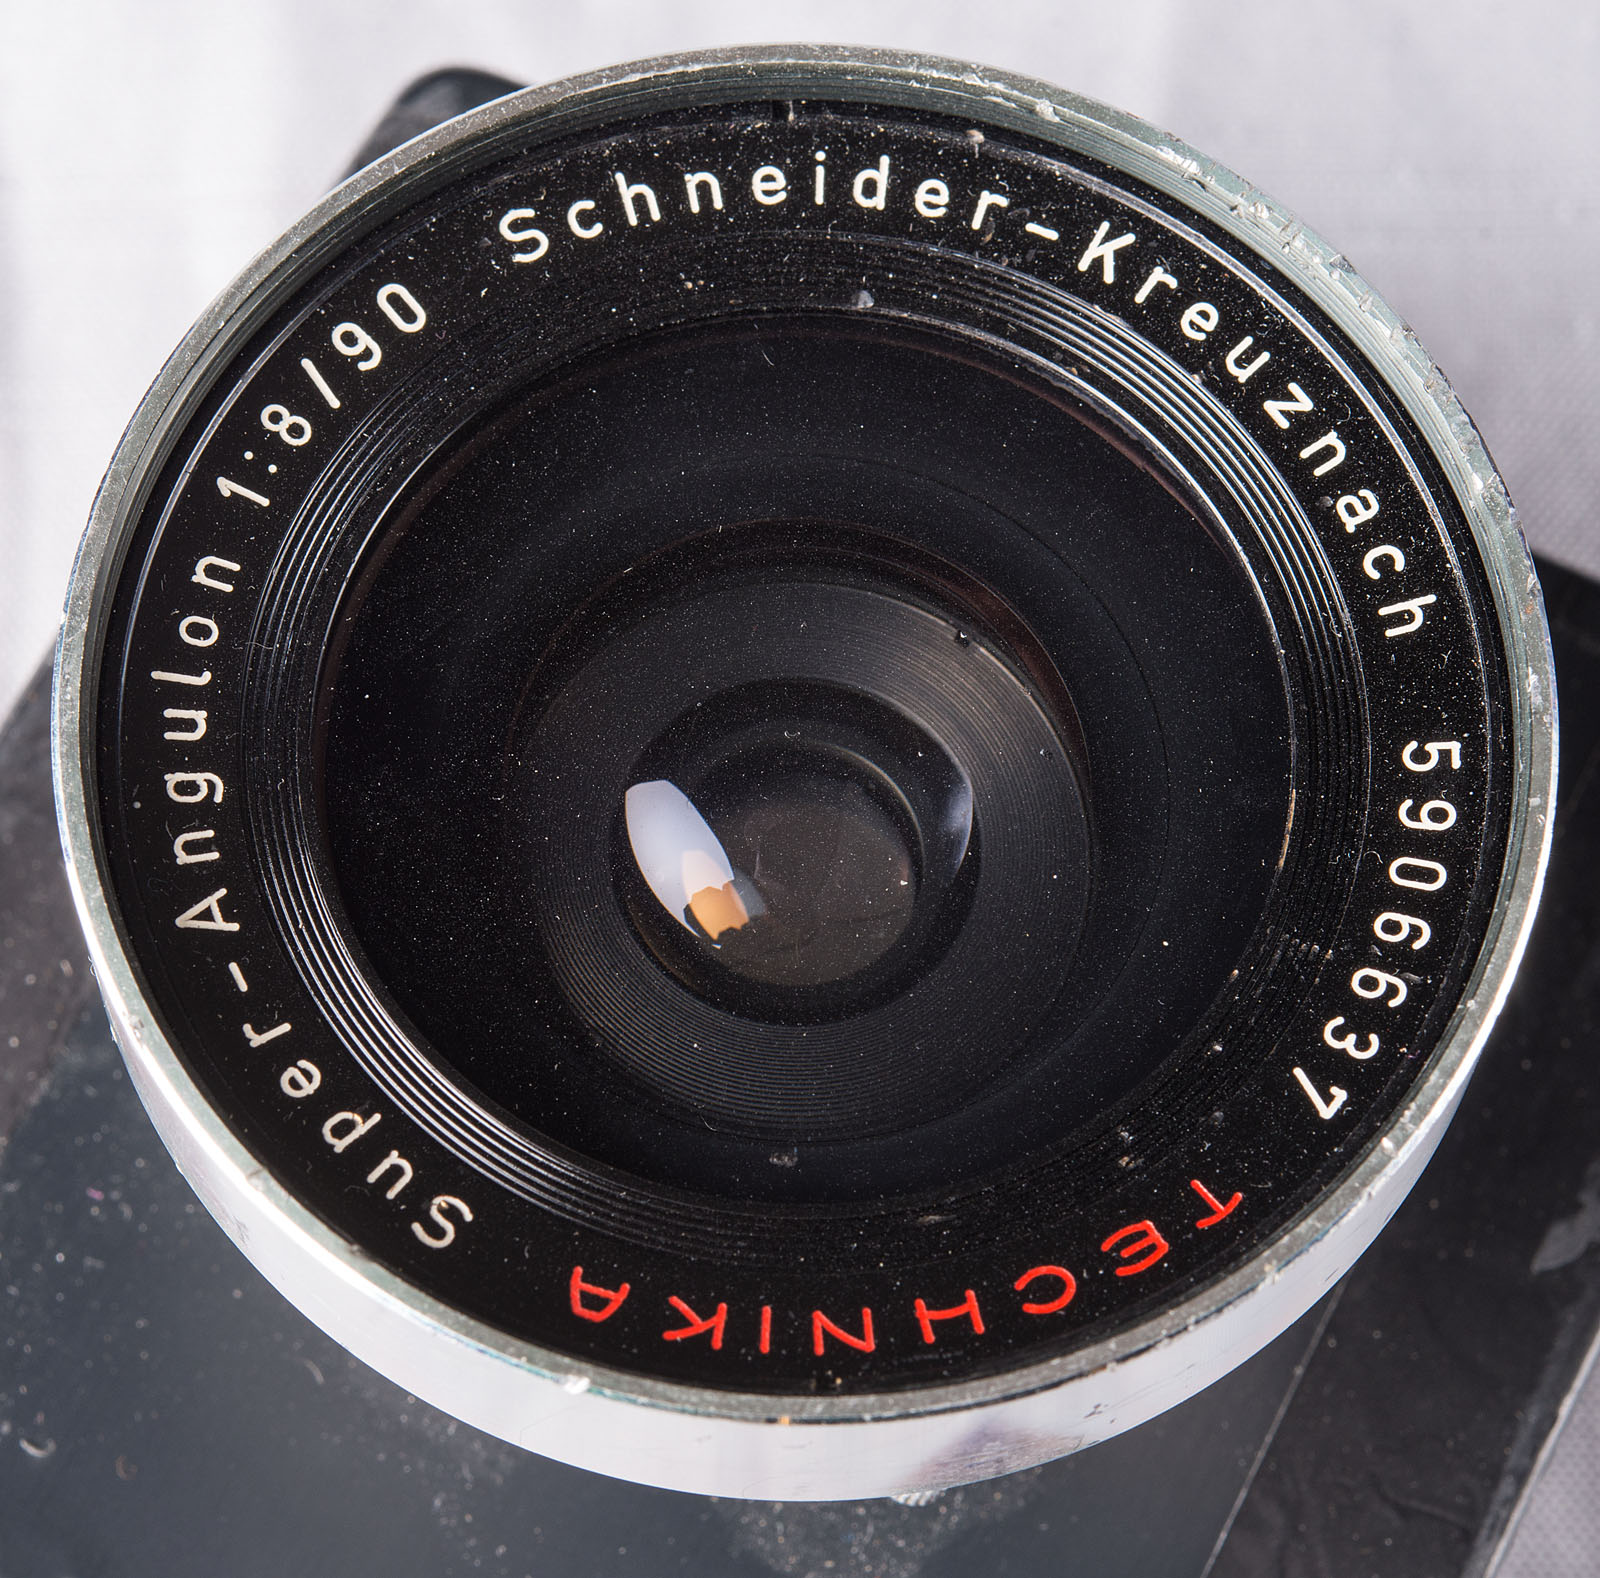
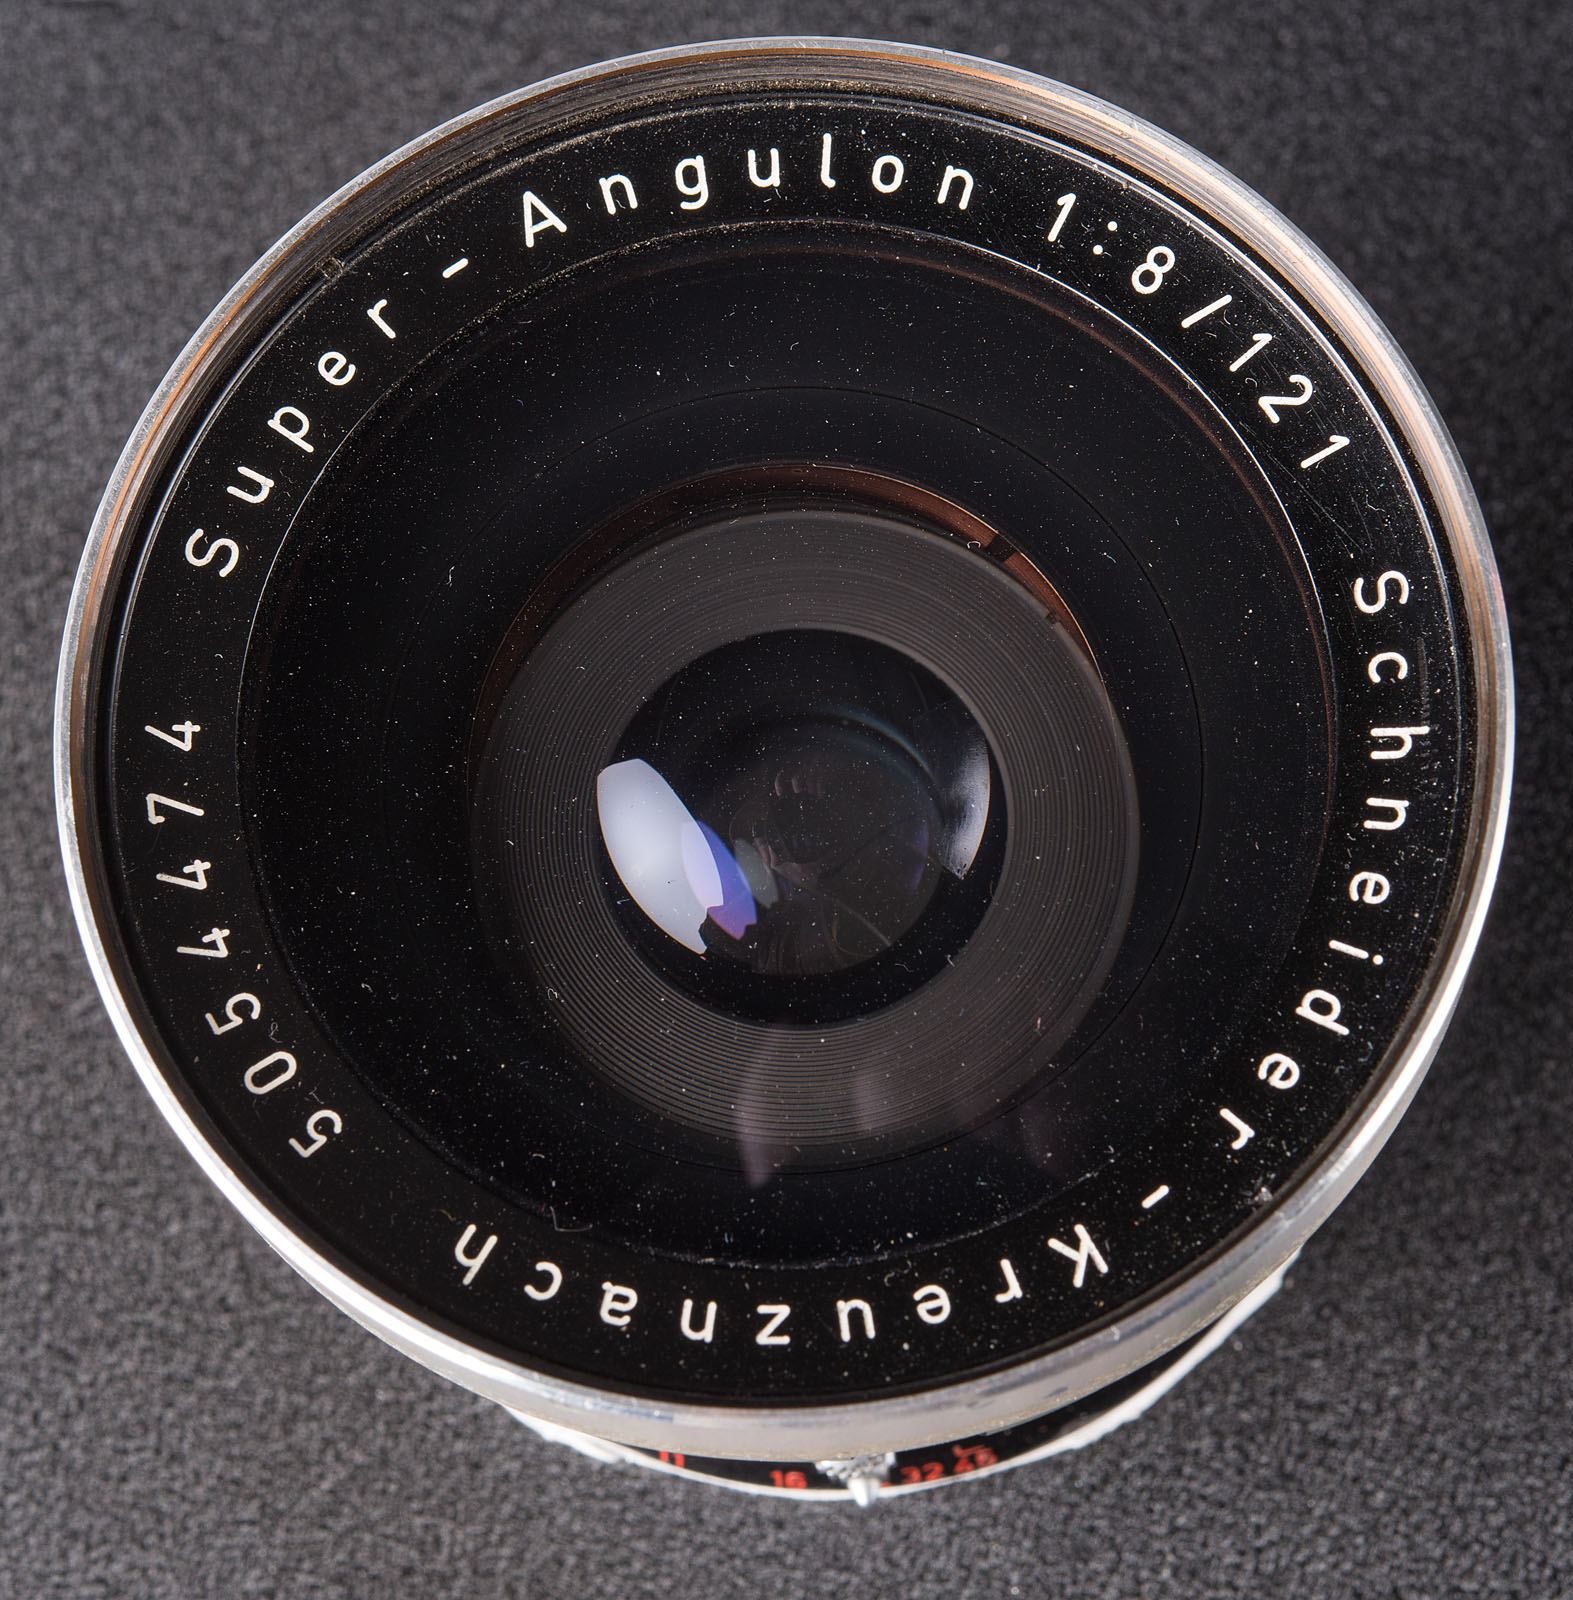
Schneider went on to develop the Super Angulon lenses, which were the standard wide-angle when I stated doing large format work. Frankly they are fabulous. Even my older f8 Super Angulon lenses are quite great. They generally came in an f8 version, which was a 6-element design and an f5.6 version, which was an 8-element design. I own several of the f8 lenses and I think they are great. Predictably, since I told you I really like wide angle lenses, my favorite is the 65mm for 4X5 and the 121 for the 8X10 format. If you shoot 8X10 you should really take a look at the 121mm or the later 120mm Super Angulon. Strangely enough they are very reasonably priced, often about 20% of what a 165mm Super Angulon costs. Of course you need to be careful with a lens that wide. If I shoot a vertical with my 8X10 Toyo field camera the baseboard shows up in the picture! You can see that earlier in this post.

65mm f8 Super Angulon for the 4X5
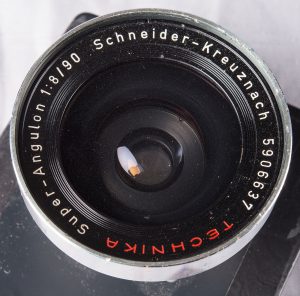
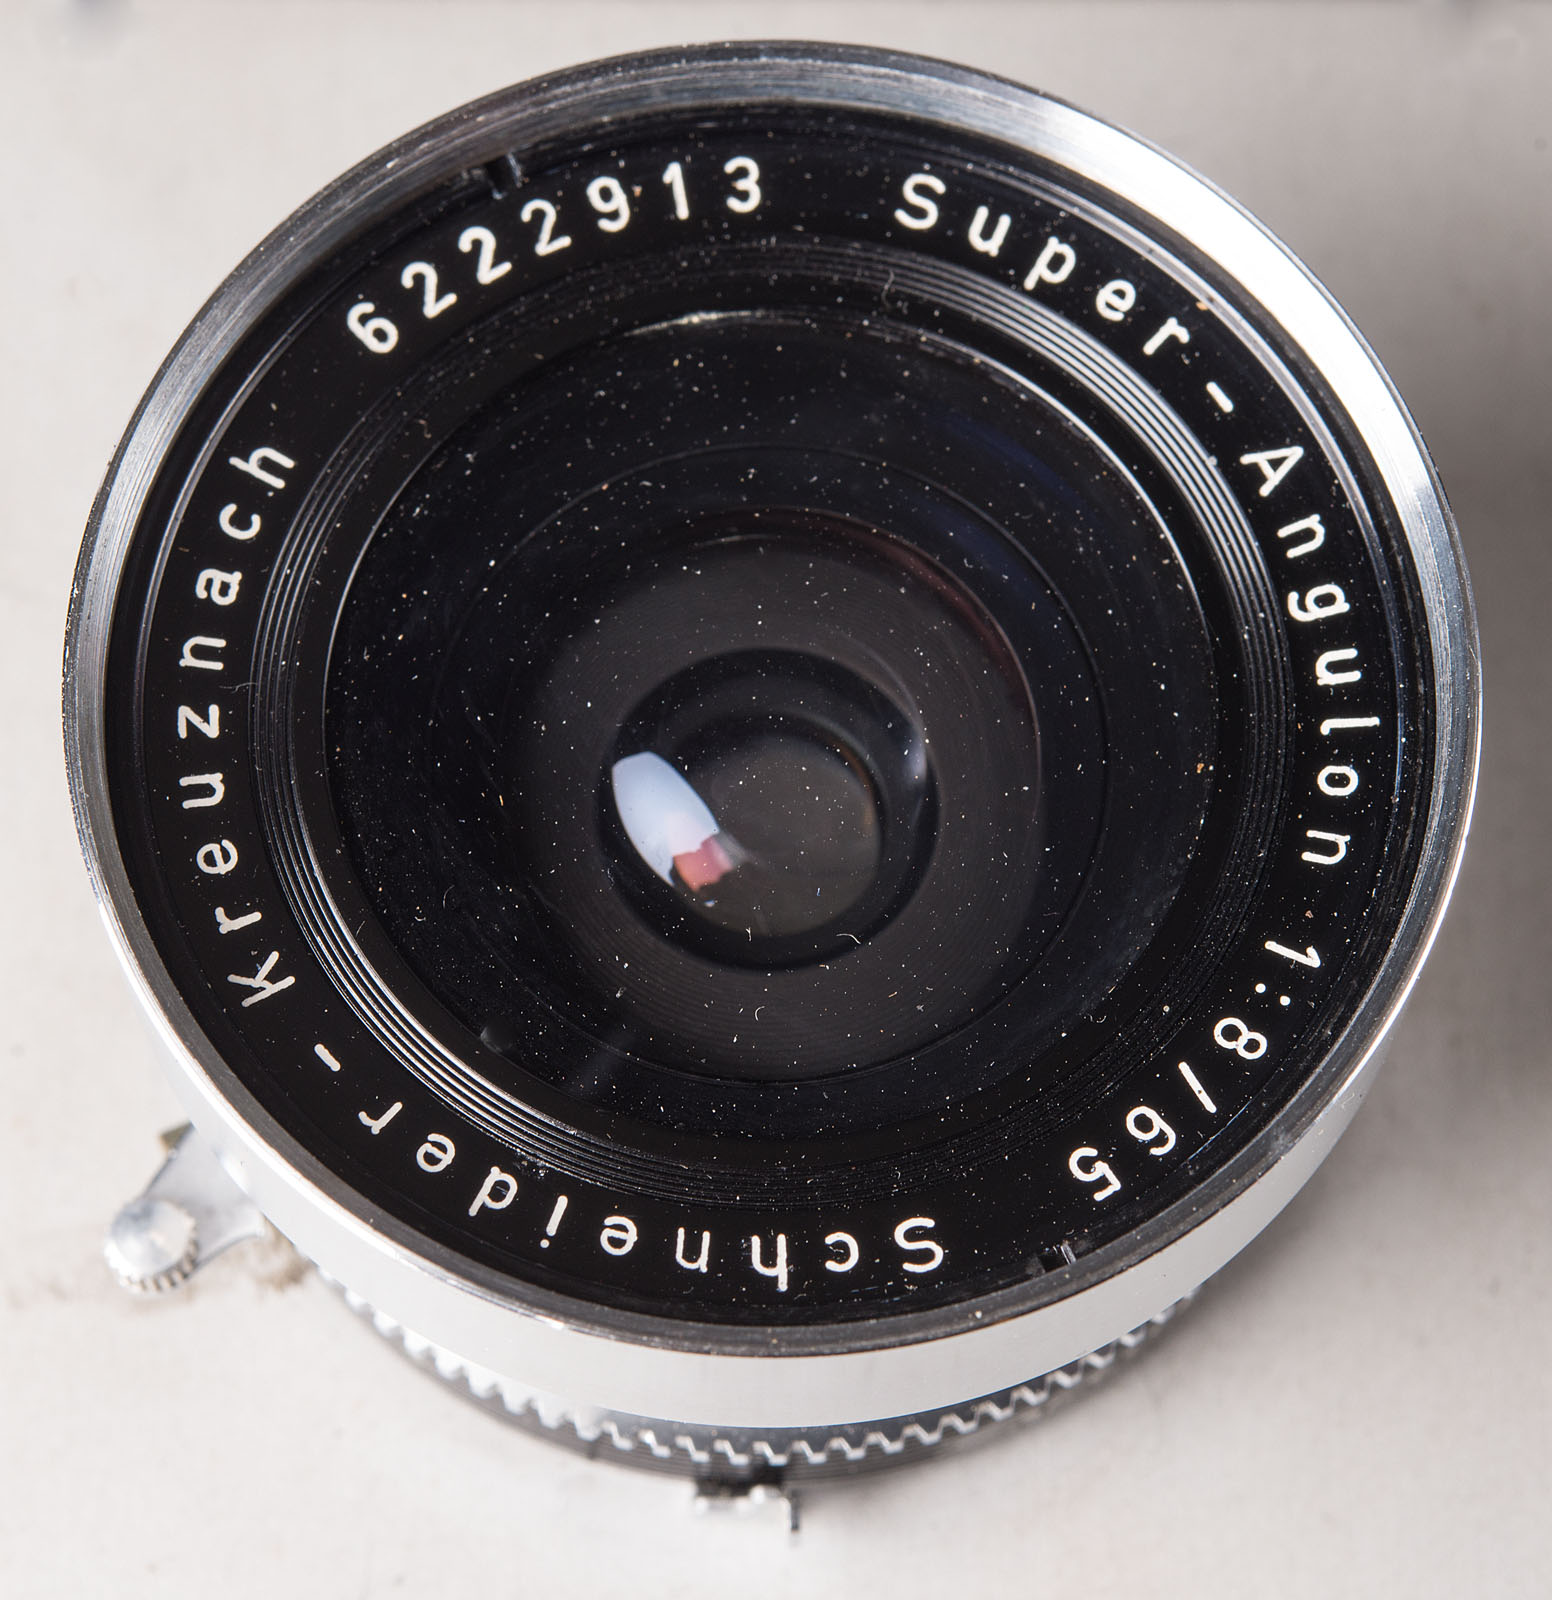
90mm f8 Super Angulon. I use this on a 4X5 but it will cover 5X7
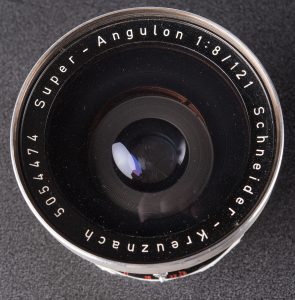
My 121mm f8 Super Angulon. This just barely covers 8X10!
Section 4
I’ve mentioned the hyper focal distance on a lens above. This is extremely important when working with large format wide-angle lenses. Here’s the thing, if you focus a wide lens, say a 65mm f8 Super Angulon, at infinity and then stop the lens down, you’ll get a lousy image. Since we often shoot large cameras at small stops this can be quite a problem. While this happens with a lot of large format lenses the problem is particularly bad with wide-angle lenses. In the old days photographers used to do a trick called back focus. They would set up the shot, focus the lens and then focus the lens back a couple of millimeters. Other photographers would check the focus after stopping down the lens, which is tricky, but it does work. If you focus on the Hyper Focal point for the lens, which is the point where you have maximum depth of field for the aperture and lens you’re using that will also work very well. For instance, if you’re shooting a 65mm lens on a 4X5 camera at f22 the Hyper Focal distance is just 4 feet! At that distance you’re in focus from 2 feet to infinity. If you focus at this distance and stop down a shot at infinity will be sharp. If you focus at infinity and stop down the shot won’t be sharp. It took me a while, and quite a few bad negatives, to figure this out. I thought the lens was defective, but it was the photographer that was defective. The Kodak Professional Photoguide gives calculator wheels that will enable you to find out the hyper focal length for your lenses. This is really important.
One more thing I wanted to mention: I offer several workshops at my studio in Indianapolis. I hope you’ll check out the workshops at http://www.siskinphoto.com/workshop.php.