Photo Notes A place to talk about making images.

October 2, 2011

Seeing and Lights

What you do affects the way you see. I don’t suppose this comes as any particular surprise. And yet I often find that I forget that I see through a filter of commercial photography. This means that my images are designed to read quickly. As I have been learning more about Indianapolis I have been seeing photographs that are very different from my way of seeing. There are a couple of reasons for this: first I am going to several camera clubs. This means I see other peoples’ photographs more often, which is good. Of course I look at a lot of student photos at BetterPhoto, but a lot of those are wig head shots. Another thing that is changing my way of seeing is that I am still lost a lot of the time. So I have to watch where I am going. I expect that my images might begin to change in the next few months.

The tools you use change the way you see. I can remember using a tripod for every shot as an exercise. Shooting this way slows you down and makes you pay attention to composition. Using a view camera changed the way photographers see, because you were always viewing the image upside down and backwards. Instead of paying attention to the overall composition I paid attention to the relationships between parts of the composition. I miss view cameras. One of the best sorts of tools to change the way you see is light. With lights, even just a dedicated strobe, you can change the relationships between sunlight and shadow. With a couple of mono lights you can create light that defines a subject in a new way. You can simulate room light by using soft light from above. You can make something completely different by lighting from below or by using a snoot. Of course I hope you are interested in learning how to use light, that’s the subject that I teach. You can take my class at BetterPhoto, or, if you’re near Indianapolis you can take the workshop I’m giving in a couple of weeks. One of the questions I often get, in my classes, is what should I buy? First, start with just one light. If you get several lights, at one time, you’ll have a tougher time learning to make it work. This is the list I give people in my classes:
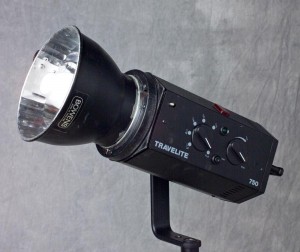
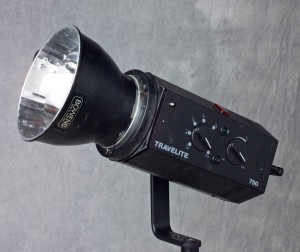
Alien Bee B1600 or Calumet Travelite 750. There are other good brands as well. The important thing is getting enough power to enable you to use lights in a variety of ways. You can always reduce light output, but you can’t get more than you bought.
50º or 60º metal bowl reflector. This is the standard reflector, usually 6 to 8 inches. It spreads light over the angle covered by a normal lens.
1-45 inch umbrella, white satin with a removable black back. An umbrella with covered ribs would be better. The size and style of umbrellas is important.
2- light panels with 2-white cotton or white nylon covers. Also get or make a black cover and a sliver cover. Instructions for making light panels  are at the Camera Design page on my website.
Light stand. At least 8 feet tall, 10 is better.
Perhaps a background stand and a neutral muslin background.
Get a chinese Radio Slave. You can get these from eBay, search digital radio slave. Look for one that has a plug headphones or a guitar. For more on connections check out this article. The radio slaves from China are very attractively priced.

When you get a second light, you may get something with less power depending on what you shoot.
I would also get: A second metal bowl reflector, the same as above.
Barn doors and/or snoot Light stand, as above
2- umbrellas, one matching the one you already have, and the other a 60 inch umbrella.
Very short light stand.

If you add a third light I would get Metal bowl reflector, as above.
1 more light panel with a gold cover.
Light stand, maybe with a boom arm.
Barn doors or snoot if you didn’t get it before.
45 inch umbrella.

I’m still doing experimenting with marketing here in Indianapolis. Yesterday I went out and shot a charity event. While this isn’t the kind of thing I do often, it can be a good way to meet some new folks, and hand out a few business cards. I’ll be going to a couple of camera clubs this week. I need to check out the chamber of commerce here in Indianapolis. Of course I am still sending out e-mail, over a thousand sent out so far! I really hope you can take my workshop but if you’re not around Indianapolis you can take my class at BetterPhoto. I also work with a few people privately using the phone and e-mail. Please contact me if you’re interested. And let’s not forget the book: Understanding and Controlling Strobe Lighting: A Guide for Digital Photographers! I hope you take good photos. Thanks, John

July 6, 2011

Portraiture

Filed under: Lighting Technique,Portraits — John Siskin @ 3:31 pm
Here are some plugs for my books and classes: you can get right away from Amazon: Understanding and Controlling Strobe Lighting: A Guide for Digital Photographers which is at Amazon.com and other places. You can get a Kindle version or a Nook version also. The Kindle version looks OK, but the pagination is a little weird on my reader. Here is a sample chapter from the book. There has been nothing but good feedback on this book, so I would guess that you’ll like it. Of course I still hope that you will please consider purchasing my fine art book B Four: pictures of beach, beauty, beings and buildings. Purchases of this book mean a lot to me, and it is also a fine gift for any occasion. I lowered the price a couple of weeks ago, and that has helped. As you know I teach for BetterPhoto.com. I really hope you’ll sign up my class: An Introduction to Photographic Lighting. Remember that the books and the class keep me updating this blog. My new book, Lighting For Architectural Photography will be out in the fall.
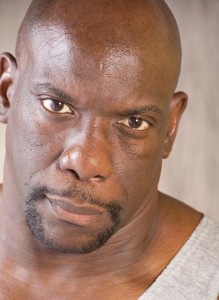
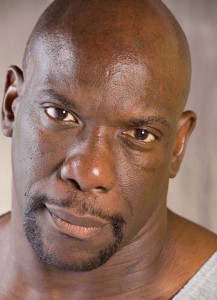
I have the idea that many of the people who take my classes, read the books or even just look at this blog are interested in taking portraits. I don’t get much actual feedback about most of the work I put out, so I could be wrong about this. But no matter, this issue of the blog will be about portraiture. I just did a shoot for Randy, a friend of mine. He is a good subject in that he has strong features and is patient. Actually there is a shot of him in my book on page 88. There are a couple of things about this shoot that might be instructive, at least I hope so.

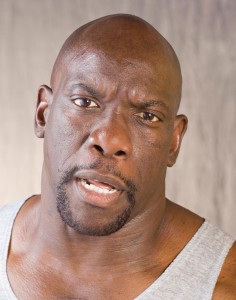
First, the light is harder than I might use for many portraits. This works well for this subject. You would not want to have this level of reflectivity in the skin if the person had a very light complexion. The density and shininess of the skin should effect the decisions you make about light. The light should be adjusted for each subject. I often use the same tools for portraits but I use them differently. In this case I used a light panel very close to the subject. The panel was about three feet from the subject. It was on the subject’s right side. Often I use a light with an umbrella behind the panel, but in this case I used a strobe with barn doors. The barn doors keep the light from spilling out the sides of the light panel. Using the light directly on the panel gives you a harder effect. The light was at the top of the panel pointed down the panel. This created a gradated light across the panel. I think this gives the face a little more shape.

I had a second light with a beauty dish behind and above the camera. It was on the right of the camera. I was using my old Norman strobes. The Norman beauty dish is about 2 feet across and painted white. I like the catch light it makes in the eye. Also, because of the size of the dish, it is a moderately hard light. Finally I placed a light panel with a gold cover on the subject’s left side. The large size of this reflector means that the position isn’t very critical. The harder, or smaller, a light source is the more critical the position of the light is.

If I was shooting a person with a much lighter complexion I could use shadow to add shape to the face. Randy is quite dark, perhaps a little darker than he actually appears in the first two shots, so if I used a lot of shadow I would actually lose shape. The mid tones of a photograph are much better at expressing information about the subject than the highlights or deep shadows. So, for this subject, I wanted to use highlights to impart shape more than shadow. There are also cultural aspects of this: for reasons I don’t actually understand reflections are not considered flattering to many European skin tones. I think the reflectivity in Randy’s skin is quite flattering and quite effective. I am pleased with the strong sense of three-dimensionality in these shots.

I used a light gray background illuminated with a 1/2 CTO filter to give a warm look in back of the subject. I like the warm color for Randy, which is why I used a gold reflector on his left side. I would avoid a dark background for this subject. First it would have made it tougher to delineate the shape of his head and it might have made him look much more menacing. I dislike portraits where a black background seems to swallow the subject. I included two versions of this image so that you can see the difference expression makes.

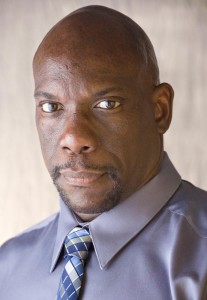
In the third shot I moved the gold reflector. It blocked most of the light from the beauty dish. This changes the light on the face, and, importantly, it changes the catch lights in the eyes. I think this creates a more powerful look for Randy, which works well with the more formal shirt and the tie. I think the having the right side of the photograph darker is very effective.

The lights were three Norman LH2400. The power pack was a Norman P1250D. The light behind the light panel had 375 Watt-second and the light on the background had the same. I used a snoot on the background light to control spill. The light with beauty dish was set to 250 watt-seconds. The light panel on the left of the camera had one layer of white cotton broad cloth.

When I teach a class I ask people to practice. I suggest that they work with a Styrofoam wig head and cheap flood lights. The wig head is all white that makes it easy to see the shadows. The flood lights are easy to see and to manipulate. This gives you a sort of a lighting lab where you can practice and experiment. I still use the wig head when I get a new piece of lighting gear. I know I’ve said this before: musicians practice so they can play, why shouldn’t we? If you can only practice with a live model you won’t be able to take the same risks you can with a hunk of Styrofoam. Most models don’t have the patience of the wig head. So, if you’re thinking about a lighting class why not mine?
BetterPhoto.com, The better way to learn photography

June 26, 2011

Investing In Photo Gear

Filed under: Lighting Technique,Photographic Equipment — John Siskin @ 5:29 pm
I went through some older blog entries I did for an earlier blog at BetterPhoto. I think this is useful information about understanding the cost of photographic tools. I did make a few updates. All the pictures are from my new book: Lighting for Architectural Photography. The book will be out in the fall, but you can pre-order now at Amazon. That’s where the link goes. Here are some more plugs for my other books and classes: If you would rather order something you’ll get right away try my first book Understanding and Controlling Strobe Lighting: A Guide for Digital Photographers which is at Amazon.com and other places. You can get a Kindle version or a Nook version also. I have no idea what they look like. Here is a sample chapter from the book. There has been nothing but good feedback on the first book, so I would guess that you’ll like it. Of course I still hope that you will please consider purchasing my fine art book B Four: pictures of beach, beauty, beings and buildings. Purchases of this book mean a lot to me, and it is also a fine gift for any occasion. I lowered the price a couple of weeks ago, and that has helped. As you know I teach for BetterPhoto.com. I really hope you’ll sign up my class: An Introduction to Photographic Lighting. Remember that the books and the class keep me updating this blog.

I was thinking about how photo gear endures. I used to think about wearing out equipment, and I still do. But I don’t think about wearing out my camera. Technology will force me to replace it long before it wears out. I am on my fourth digital camera system and, as with the others, it will be retired before it stops working. That wasn’t the case with film cameras. I have a Speed Graphic, still my favorite film camera, that isn’t worn out after fifty years, but it has needed some parts.

I still use it when I want to do personal work with a large negative. It was a pleasure to use. My first digital camera was a Leaf back, a DCB 2 that fit on a Mamiya RZ67. I really disliked that camera. It made 3 separate exposures in order to make a color shot. It was very slow and awkward to work with. I was glad to see it go. But, when it did go it was a working camera, a technological dinosaur. I wanted to write about this topic not to whine about digital cameras, but to discuss the expected life times of photoproducts; and how that should affect the way we buy them. For instance, I think that we should buy cameras that have been on the market for a while; my business can’t stand a recall, or other problem with a new product. I also think that I might need a camera with a large file. I nope to do some business with display prints. As a consequence I believe that a camera has a lifetime between 3 and 5 years. It needs to pay for itself quickly!

When I think about lenses, I have different considerations. Current lenses will wear out: the motors that make the lens auto focus will not work forever. Also the focus tracks are very lightweight, they will have wear problems. The tracks are built this way in order to allow auto focus to function quickly. I would guess that the lenses I use frequently are going to last between five and ten years, not too bad. I can make an investment in a lens that will pay off more slowly, even buying specialty lenses that I might not use more that once a month. So I can easily make a case for buying quality lenses.

Tripods last for decades. I would not be surprised to see my current tripods, I have five, last for more another fifty years. So the cost of a tripod is very inexpensive because the cost is amortized over such a long time. By the way I have five tripods because I have small medium and large cameras. My 8X10 camera requires a tripod that is much larger tan I would need for my digital camera. If you buy a good tripod it may outlast ten cameras, a poor tripod may be lousy from the first day.

One of my goals for these blog entries is to talk about lights. In my discussions about strobes I often hear how expensive they are. An investment in strobes is like buying a tripod, since strobes last such a long time. I have some Norman equipment that I bought new in 1983, that’s almost 25 years. The tubes haven’t broken and the strobes still work. Not bad. More to the point, of the photos I’ve made for money since 1983, most required strobes. More than any other piece of equipment, lights separate the assignment photographer from people who are more hobbyist than professional. So, although it may not seem that way when you right the check, strobes are cheap; they will be with you for a long ling time. Good strobes help make professional photographers!

When I teach a class I ask people to practice. I suggest that they work with a Styrofoam wig head and cheap flood lights. The wig head is all white that makes it easy to see the shadows. The flood lights are easy to see and to manipulate. This gives you a sort of a lighting lab where you can practice and experiment. I still use the wig head when I get a new piece of lighting gear. I know I’ve said this before: musicians practice so they can play, why shouldn’t we? If you can only practice with a live model you won’t be able to take the same risks you can with a hunk of Styrofoam. Most models don’t have the patience of the wig head. So, if you’re thinking about a lighting class why not mine?
BetterPhoto.com, The better way to learn photography

May 16, 2011

Natural Light Again?

Filed under: Lighting Technique,Photography Communication — John Siskin @ 12:30 pm
Before we get to the blog, here is the self promotion: my book Understanding and Controlling Strobe Lighting: A Guide for Digital Photographers is on Amazon.com. Here is a sample chapter from the book. There has been nothing but good feedback on this book, so I would guess that you’ll like it. Of course I still hope that you will please consider purchasing my fine art book B Four: pictures of beach, beauty, beings and buildings. Purchases of this book mean a lot to me, and it is also a fine gift for any occasion. I lowered the price a couple of weeks ago, and that has helped. As you know I teach for BetterPhoto.com. I really hope you’ll sign up my class: An Introduction to Photographic Lighting.Remember that the books and the class keep me updating this blog.

I would guess that I have written about the words natural and artificial as they apply to light in the past. Every so often somebody says or writes something that makes me want to revisit the topic. When I’ve written about this topic in the past I have included images lit by strobes, this time I’m including daylight images.

Click on the image for information about the super wide camera that made this shot. This camera usees the Nikkor 28mm shift lens.

There are many places where the terms natural and artificial make sense, say with food or even gem stones. We put a high value on natural food and an even higher value on natural rubies. Which is better: natural granola or sugar frosted flakes? Would you be happier if someone gave you a one carat natural ruby, or a ten carat ruby grown in a lab? So the terms natural and artificial have an emotional value associated with them. I know several photographers who say that they are natural light photographers. I do not know anyone who uses that phrase who is also an expert at creating fine light with strobes. There are plenty of people who are good at using ambient light and at using strobes, but they seem to avoid the term natural light photographer.

I think the mercury vapor lights are bad light sources for making photographs. I don’t think I have ever made a good photograph with mercury vapor lights. When I look at these lights with my spectrometer I see only a green, blue and orange line. I have a bad attitude towards these lights. However if I wanted to work in black and white I might be able to do good work with these lights. A big part of why I don’t use these lights is my attitude. It might also be that you typically find these lights used as streetlights. Mercury vapor light doesn’t occur in nature.

The natural light sources that I see used in photographs are the sun, fire and rarely lightning. Bio-luminescence is also natural light, but I have never seen a photograph made with a hundred thousand lightning bugs in a really big jar.

Shot with my digital camera. The hazy sunlight is one of mt favorite types of sunlight.

Lava also counts, but it is somewhat difficult to control. Glowing wires do not occur in nature nor do tubes filled with fluorescent chemicals. As I have mentioned before, for most photographers it would be easier to differentiate between found light and light that you controlled (found light and made light?) or perhaps more usefully continuous light and instantaneous light. Most photographers have a much easier time using continuous light because they can see how the light interacts with the subject. Instantaneous light, this means strobes, but it would apply to the old flash bulbs too, requires an understanding of how light works before it can be used effectively.

There is nothing inherently different about how the light from a strobe works than how light from the sun works. However the strobe is much more portable and much easier to use with accessories. It is very tough to put the sun over head at midnight, even if you go to Alaska. A photographer needs to learn how to control and manipulate light so that you can start with an idea and capture it with a camera. In order to do this we have to practice and improve our tool kits.

Sometimes sunlight is quite good!

If you choose a tool, based on the manufacturer’s recommendation, and then take it to a shoot, you have a good chance of having problems. You need to test it first. Remember the goal of people who make lighting and camera gear is to sell you more gear, NOT to make you a better photographer. Recently I’ve had people telling me that shift/tilt lenses and soft boxes will solve photographic problems they have. I have these things, and have used them, and don’t recommend them. I note that the people interested remained interested despite my comments. Personally, I do not trust equipment manufacturers. I guess others do.

When I teach a class I ask people to practice. I suggest that they work with a Styrofoam wig head and cheap flood lights. The wig head is all white that makes it easy to see the shadows. The flood lights are easy to see and to manipulate. This gives you a sort of a lighting lab where you can practice and experiment. I still use the wig head when I get a new piece of lighting gear. I know I’ve said this before: musicians practice so they can play, why shouldn’t we? If you can only practice with a live model you won’t be able to take the same risks you can with a hunk of Styrofoam. Most models don’t have the patience of the wig head. So, if you’re thinking about a lighting class why not mine?
BetterPhoto.com, The better way to learn photography

April 21, 2011

Light and Style?

Filed under: Lighting Technique,Photographic Education — John Siskin @ 3:09 pm

Here are the shameless plugs: my book Understanding and Controlling Strobe Lighting: A Guide for Digital Photographers is on Amazon.com. Here is a sample chapter from the book. There has been nothing but good feedback on this book, so I would guess that you’ll like it. Of course I still hope that you will consider purchasing my fine art book B Four: pictures of beach, beauty, beings and buildings. Frankly purchases of this book mean a lot to me, and it is also a fine gift for any occasion. I lowered the price a couple of weeks ago, and that has helped. As you know I teach for BetterPhoto.com. I really hope you’ll sign up my class: An Introduction to Photographic Lighting.

Shot with an 8X10 Toyo field. Scanned from a contact print. Original print on Kodak Azo paper

The idea for this week’s entry came to me as I was reading another photographer’s blog. He used language that I hear a lot: “My light,” and “My style.” The idea that because you create the same light again and again doesn’t seem to me to be a thing that you would want to brag about. One of my goals as a commercial photographer is to be able to work with a variety of tools and create any look that might benefit a client. I know that many photographers want to brand themselves with a signature style, but I prefer to be known as a guy who can deliver, almost anything. In addition, doing the same thing bores me. I want new challenges. I know many people who want to build a business doing portraits, or babies or even weddings. I wonder what kind of enthusiasm I would bring to shooting the six hundred and first school child in a month? I can tell you that if you shoot a thousand piece catalog you aren’t doing much creative thinking after item number seven hundred fifty. You have to do work to be good, but if you constantly do the same work you may lose your edge. If there is such a thing as a photographer’s eye, part of it must surely be the ability to pay attention to your subject, even after hours with that subject. I really like shooting architecture since the subjects are very different it presents constant challenges.

Shot with a 4X5 Speed Graphic and a 65mm Super Angulon lens.

A few years ago another photographer came to me and asked me how a particular shot was done. I looked at the print and told him the original photographer used hard and soft light and had filtered the hard light with at least a 1/2 CTO. I’ve written about this lighting a couple of time here in Photo Technique, here in Shutterbug and also in my book: Understanding and Controlling Strobe Lighting: A Guide for Digital Photographers. This is a very useful technique, but it does require close attention to detail. I was explaining this when he said “Why don’t you set it up for my shot?” Now I was willing, for free, to explain something about how light works. He could have applied this idea to any shot he wanted, but he didn’t want that. Too often the idea of learning to control light is too much trouble. He wanted me to do it for him. He didn’t want to experiment and learn, too much trouble, he wanted results. Eventually he convinced a friend of mine to come in and rig the lights for him whenever he shot. My friend tells me this photographer refers to himself as an artist.

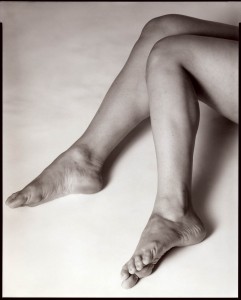
Shot with my 4X5 Speed Graphic and a 135mm Xenar. Same model as Legs above.

One of the great advantages of digital photography is that testing is free or close to it. I should be precise about what I mean by testing: which is testing tools to see how they work. Testing can also mean shooting for your portfolio. “I need a model for testing” means I want to work on some new images for my book, and that can be expensive. But if I get a new umbrella it won’t cost me anything to shoot a shot of the way the umbrella spreads light or a shot to figure out where it should be placed in relation to the strobe. When I shot with film testing was quite expensive, and frustrating. The frustration was a product of not seeing the results of a test until the film was processed. So I didn’t test much. I tried to figure out what my tools were doing by analyzing my commercial shoots. This didn’t really serve my clients all that well. These days I do a lot of testing so that I can better understand my lights. I hope you’ll do a lot of testing also. And I hope you’ll practice with new techniques so that you can add them to your tool kit. You might get some new ideas by taking my class at BetterPhoto.com  or reading my book.

Digital photography is MUCH easier than film photography was. Just the weight of the equipment is so much less. I used to go out on location to do an architectural job with close to 200 pounds of lights. That would be 5 lights, 2 power packs and accessories in 4 cases. I now have half that in weight and only 3 cases, but with 8 lights. So half the weight and almost twice as many lights, and this is because I don’t need as much power with a digital camera. The work I do is better, because I have instant feedback: the camera is tethered to the computer. Professionals, if they want to keep working, need to bring a really effective skill set, rather than just a good eye, to the table if they want to keep getting work. I think of myself as a craftsman as often as I think of myself as an artist.

You don’t need to log in to post on this blog anymore, but I would appreciate it if people didn’t post links to unrelated and inappropriate sites. I’ve included a few favorite large format photographs with this blog. There are times when I do miss the heavy lifting.
BetterPhoto.com, The better way to learn photography

April 5, 2011

Teaching Light

Filed under: Lighting Technique,Photographic Education — John Siskin @ 3:04 pm

I haven’t been able to get back to the blog for a few weeks. I’m sorry about that, but I have been busy shooting and arranging other crises. Anyway, here are the shameless plugs. My book Understanding and Controlling Strobe Lighting: A Guide for Digital Photographers is on Amazon.com. Here is a sample chapter from the book. Of course I still hope that you will consider purchasing my fine art book B Four: pictures of beach, beauty, beings and buildings. Frankly purchases of this book mean a lot to me, and it is also a fine gift for any occasion. I lowered the price a couple of weeks ago, and that has helped.  As you know I teach for BetterPhoto.com. I really hope you’ll sign up my class: An Introduction to Photographic Lighting. Sign ups could be better this month, so please join the class!

Now that that is over with I wanted to say something about teaching. I teach on line for BetterPhoto.com, so it might be assumed that I teach photography. That is not entirely true. What I really teach is lighting, as it applies to photography. There is a significant difference:  a big part of teaching photography is explaining to students how to record an image. That might be a mountain or a flower or a child, but the idea is to capture what you see. When you actually control light you create the image for the camera to record. You are painting the image with your lights. Photography involves understanding and controlling certain aspects of your picture, for instance how distance is recorded (depth of field) and how time is recorded (how much blur you might allow with the shutter). Lighting provides another tool kit entirely: where light goes, the transition between light and dark, and the color of the light. Often people come to my class with the idea that they can set up lights in ways that will work for most subjects, but this would mean giving up the ability to customize the picture for the subject. That is to create the light for the image.

Since I teach an introductory class what I try to do is give people an opportunity to experiment with the tools. I tell them how to create a very simple, and inexpensive, play ground where they can learn how light works. Play is a critical part of learning. Digital cameras make it much easier and cheaper to learn this way, because they give you almost instant access to your images. Consequently people should be learning all aspects of photography, not just lighting, faster and better than with film. At least I hope so.

One of the questions that I get is: “Will this class teach me to light…” And you can fill in the blank, whether it is people, architecture, product, fine art and so on. My goal is to teach you to light, period. If you understand how light really works you can apply light to anything from a flower to a mountain, but you may need more light for the mountain.

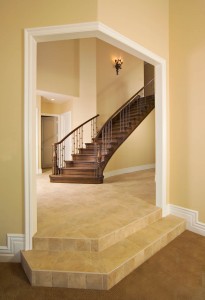
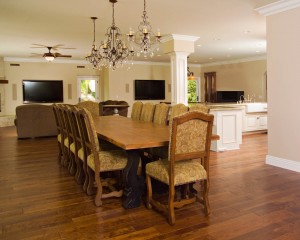
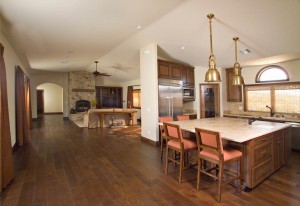
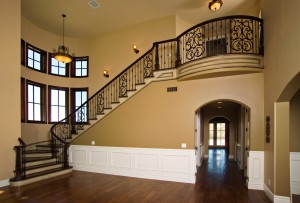
I’ve attached several shots of interiors to this week’s blog. These shots required a lot of control over lighting. I have to say that I do love a challenge. I used these shots, and quite a few more in a Blurb book for a contractor I work for.

I am asking some of my students, and anyone else who would like to participate (you?) to post their thoughts about the differences between learning photography and learning how to control light. Please post something.

I really hope you’ll consider taking my class at BetterPhoto.com. Sign-up are almost over, but if you sign up now you won’t miss a thing. I also hope you’ll suggest my BetterPhoto class An Introduction to Photographic Lighting to other photographers you know, or perhaps you’d like to give it as a gift? Amherst media sent me the cover for my second book, you can see it here, of course you can still look at my first book at Amazon .
BetterPhoto.com, The better way to learn photography

February 4, 2011

Lighting a Background

Filed under: Do It Yourself,Lighting Technique — John Siskin @ 6:30 pm

And I am continuing the shameless plugs at the beginning of the blog. My book Understanding and Controlling Strobe Lighting: A Guide for Digital Photographers is on Amazon.com. The wonderful folks at Shutterbug magazine are printing a 3 page excerpt in the next issue. Please pick up the magazine.  Here is a sample chapter from the book. Of course I still hope that you will consider purchasing my fine art book B Four: pictures of beach, beauty, beings and buildings. Frankly purchases of this book mean a lot to me, and it is also a fine gift for any occasion. As you know I teach for BetterPhoto.com. I really hope you’ll sign up my class: An Introduction to Photographic Lighting. Sign up are very good this month!

I used a Rosco CTO for the background. The light came from a snoot which was covered by a piece of cine foil with cuts in it.

I’ve continued to work on the projector powered by a strobe. The results have been very effective, as I demonstrated in the last blog entry. While the strobe projector is very effective for putting light or an image onto a face, it isn’t giving me as much ability to control background light as I would like. People used to project images behind a subject before Photoshop. Now, it’s easier to drop in a background, after the shot, using Photoshop. However it is really good to be able to add color and dimension to a muslin or canvas background. You can change the background color easily this way and make the background lighter or darker in different parts of the shot. The strobe projector I built isn’t really bright enough to do a change a background unless

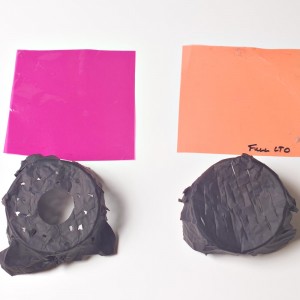
This time I used a magenta gel and a piece of foil with holes cut into it.

the light on the subject is very low power. You can do this, but it isn’t what I really want. I am hoping the strobe projector will show up in a magazine article soon. For the background on this week’s shots I have been putting cine foil over my snoot and cutting various openings. I am attaching a picture taken with a piece of cine foil with straight cuts, which has a warm filter. And there is another shot using cine foil with several holes in the foil. This second shot has a magenta gel, which makes a very saturated background. Of course both shots are made on a simple mottled gray muslin background. This is really a fun way to change the background. I should point out that it only takes seconds to change the cine foil and/or the

The foil and gels I used for these shots

colored gel.

For these shots I used a strobe set at 250 watt-seconds pointed into a 45 inch umbrella with a black back. This was the light for the subject. I used a gold reflector on a light panel frame on the opposite side of the face. I also used one more panel, with a black cover on it, behind the umbrella. This reduced white light spilled on the background.  If you get light from the umbrella on the background it will mix with the colored light and reduce the saturation. The strobe in the snoot had 1200 watt-seconds when I used the CTO gel and the foil with the cuts in it. For the other set-up, with the magenta gel, I used 800 watt-seconds. The camera was set at f8 and ISO 100. This really works much better than my tests with the projector light. In the tests with the projector the aperture was at f5.6 and the power was set at 2000 watt-seconds, and the background was still to dark.

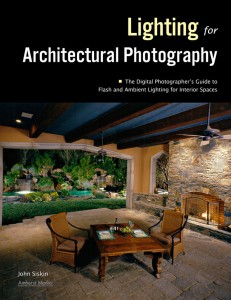
The cover of my next book. This book will be available in the fall of this year!


I hope you’ll suggest my BetterPhoto class An Introduction to Photographic Lighting to other photographers you know, or perhaps you’d like to give it as a gift? Amherst media sent me the cover for my second book, you can see it above, of course you can still look at my first book on Amazon . Also if you look at the March issue of Shutterbug you’ll find a three page excerpt form my book. I am so pleased that they did this.
BetterPhoto.com, The better way to learn photography

January 23, 2011

Strobe Projector 2

Filed under: Do It Yourself,Lighting Technique — John Siskin @ 12:30 am

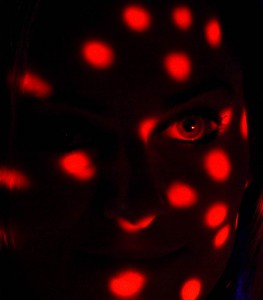
All the light is from the strobe projector using a cookie of little holes. I think the light in the eye makes this wonderfully effective.

And I am continuing the shameless plugs at the beginning of the blog. My book Understanding and Controlling Strobe Lighting: A Guide for Digital Photographers is on Amazon.com. It got as high as number 15 in photographic lighting books! And there was much rejoicing! But is is dropping now, so you need to buy a couple of copies, please! Here is a different sample chapter. Of course I still hope that you will consider purchasing my fine art book B Four: pictures of beach, beauty, beings and buildings. Frankly purchases of this book mean a lot to me, and it is also a fine gift for any occasion.  As you know I teach for BetterPhoto.com. I really hope you’ll sign up my class:  An Introduction to Photographic Lighting. Sign up are very good this month!

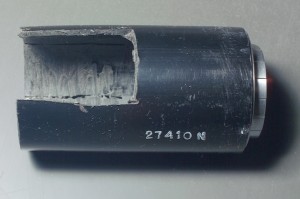
When we last saw this project, back in December, I showed some of the parts I used to make the projector. The most involved part is the tube that holds the lens and the series 7 filter holder. The

This tube is the key to making the projector work.

Series 7 filter holder is used to hold the cucoloris, or cookie, that creates a pattern, or a slide that is used to project an image. You can see where it fits on the image of the tube. The finished version of the tube is 4 inches long. There is a slot that is an inch and a half wide and 2 and a half inches long cut into the side. I cut the slot with a Dremel tool. This is quick, but you do need to be very careful. Dremel saw blades can break and fly at you. There are three other cuts made into the front of the tube that are the same light as the shot. These make the tube expand enough to hold the lens. On the other side I ground out the interior of the

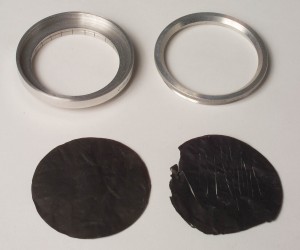
The Series 7 filter holder and a couple of cookies. One cookie is cut and the other is blank

tube enough to hold the filter holder. You could do the same thing with 52mm filters, but you would probably have to remove the glass filters. I used the Dremel tool to do the grinding. Dremel tools are very versatile.  There is nothing special about the Series 7 filter holders, except that I had a couple of them that weren’t doing anything. You would probably need two 52mm filters so you could put the cookie or the slide between them. I made the cookies from cine foil. You would also need to cut a mask of cine foil if you wanted to project slides, to keep light from spilling out the sides.  I cut the foil with and X-Acto blade and other tools. This tube is really the only significant part you’ll need to build and it isn’t terribly difficult. Although I did build four versions before I got it right.

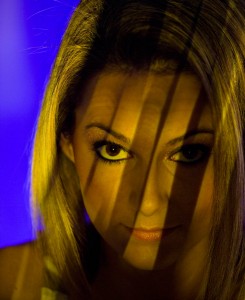
I used a cookie with slits cut into it.

The projector is not very bright, especially with a cookie or slide in place. At ISO 100 and 10 feet, without any cookie the meter reads f5.6, so the guide number would be 56. Most of the time you won’t be using the projector very far from the subject, so it is bright enough. By moving the lens in the tube it is possible to go from a hard edge, or if a slide a sharp image, to a soft edge, or if a slide a soft image. This gives you considerable control over the image. The difficulty is making changes to the projected image while shooting. If the projector is near the camera, as it was for the demonstration images, it can be reasonably convenient to shoot. If you are projecting a background or lighting the side of a subject than it is more difficult to arrange the image. A remote control release for the camera might be useful, or it might be helpful to work with an assistant. I am still working on ways to use the projector to create a background, which has been difficult. The problem with backgrounds seems to be the low power level of the

I really like the effect of the slits cut into the cookie. It is simple and effective. There is a filter over the projector and over the background light.

projector as well as the difficulty of getting it in place. Part of what makes this difficult is that when you are at the projector you can’t also be looking through the camera, so what looks right might not be right.

The samples this week were made with simple cookies. One is slits cut into the cine foil and the other is just holes. I used filters over the projector lens for color. On a couple of the shots I put a strobe behind the subject to add light to the background. I used colored gels on the background light as well.

I still offer a class at BetterPhoto, I hope you’ll consider taking it: An Introduction to Photographic Lighting And please consider my book: Understanding and Controlling Strobe Lighting: A Guide for Digital Photographers.
BetterPhoto.com, The better way to learn photography

January 6, 2011

Monolights vs. Dedicated Strobes

Filed under: Lighting Technique — John Siskin @ 2:24 pm

So here are the shameless plugs at the beginning of this blog. My book Understanding and Controlling Strobe Lighting: A Guide for Digital Photographers is on Amazon.com. It got as high as number 15 in photographic lighting books! And there was much rejoicing! But is is dropping now, so you need to buy a couple of copies, please! Here is a sample chapter. Of course I still hope that you will consider purchasing my fine art book B Four: pictures of beach, beauty, beings and buildings. Frankly purchases of this book mean a lot to me, and it is also a fine gift for the holidays.  As you know I teach for BetterPhoto.com. I really hope you’ll sign up my class:  An Introduction to Photographic Lighting. Sign up are very good this month!

I have probably already written something on this topic, but I think it is good to return to it. Also it has been a while, what with the holidays and all, since I posted to the blog. This came out of a discussion with one of my BetterPhoto.com students. I hope everyone has an abundant and peaceful New Year! I’ve added a few random shots to this blog. I hope you like them.

It is difficult to compare monolights, like an Alien Bee or a Calumet Travelite, with dedicated strobes like the Canon 580 EX II or the Nikon SB900. The fact is that they were designed to do very different jobs: the monolights are designed to create light for controlled circumstances and the dedicated strobes are designed for working fast. A monolight is a manual light source, with considerable power and adaptability that is designed to be controlled by the eye and skill of the photographer. Indeed it has to be controlled by the eye and skill of the photographer, as it has no auto-exposure capability. A dedicated strobe is designed for automatic control by the camera. While manual control is generally possible, the extensive menus on dedicated strobes make this difficult. I feel that reliance on manual control of light, for portraits, products and architectural interiors, makes a photograph better, because it requires the photographer to pay attention to the light. I have seen many images that had the right exposure, but the wrong light, because the photographer relied on a meter or auto-exposure rather than vision and skill. When I use a meter, which is rarely, I use it only to provide a starting place for exposure. I choose the actual light for an image after examining one or more test exposures.

If you are shooting an event, like a wedding or a party, or shooting flash fill with sunlight, a dedicated strobe is the best possible tool. In these situation composing and shooting fast is often the key to good results. It makes sense to use dedicated strobes if you travel and shoot stock or personal photos, both for speed and for portability.  However when I travel for a client I take monolights because my clients are looking for controlled results, but I might pack a dedicated strobe also.

One of the biggest differences between dedicated strobes and monolights is power. Of course this has to be very confusing: nothing regarding the amount of light created by a strobe is simple. Two brands of monolights, with the same power ratings, can create very different amounts of light. Dedicated strobes are a little more accurate about light output, but use a different rating system. Then too, different light modifiers affect dedicated strobes differently than monolights. For instance a Canon 580EX II gives you a reading of f11.2 if the meter is ten feet from the unit and set at ISO 100, with the same set up on the Alien Bee B1600 the meter reads f16.3. So the Canon is only one stop less than the B1600, which is very respectable. This shows how much direct light you can get from a dedicated strobe. For any situation in which you want hard direct light the dedicated strobes can do a fine job. However when you put the units into a soft box the situation is very different: the Canon reads f2.8.6 and the B1600 reads f5.6.7. This is a two stop difference, which means the dedicated strobe has just 1/4 the light of the B1600. To put it another way: you could set the ISO to 400 with the B1600 and you would have to set the ISO to 1600 to use the same aperture with the dedicated strobe. So when you increase the size of your light source you always lose a lot of the power of your lights, but you lose power faster with a dedicated strobe. I am sure there is a reason for this, but I don’t know what it is.

Recycling is the amount of time it takes for the strobe to be ready to fire again. This is a constant for a monolight, but varies depending on the conditions of the batteries in a dedicated strobe. On a B1600 the recycle time is 2 seconds, and it will stay that way. On Canon 580 EX II the recycle time is 6 second to full power with alkaline batteries. There are faster batteries, but all the batteries will get significantly slower as you use them. I find shooting a second shot quickly will often give a good expression, so I find a 6 second recycle time annoying. Since I often try to shoot anyway I get a lot of bad exposures with some battery powered units. Just to confuse this issue, my battery powered Norman 200B strobes, which are manual strobes, recycle to full power in about a second, fast!

There is  some difference in cost between a monolight, in this case an Alien Bee B1600, and a Canon 580EX II. The obvious difference is that the B1600 is $360 and the 580 is $420. The Bee comes with a reflector, and this is built into the 580. You can use the Bee all day and night if you plug it into the wall, or you can run it off a generator that costs $200 at Home Depot. I like generators better than portable battery packs because you can run them as long as you have gas. There is a battery pack for the Canon (CP-E4), which I think is a very important accessory. This unit will make your strobe recycle quicker, and give more pops before you need batteries. Still, CP-E4 only runs on 8-AA batteries, so it isn’t all day power. It costs $150. Any way you look at it you’re going to need a lot of batteries if you want to do studio shooting. Ni-MH (nickel metal hydride)is the fastest to recycle and they are rechargeable. Of course you will have to have a light stand for a monolight, but you can use a dedicated strobe on the camera.

I still offer a class at BetterPhoto, I hope you’ll consider taking it: An Introduction to Photographic Lighting And please consider my book: Understanding and Controlling Strobe Lighting: A Guide for Digital Photographers.
BetterPhoto.com, The better way to learn photography

December 5, 2010

Strobe Projector 1

Filed under: Do It Yourself,Lighting Technique,Uncategorized — John Siskin @ 1:37 pm

So here are the shameless plugs at the beginning of this blog. My book Understanding and Controlling Strobe Lighting: A Guide for Digital Photographers is on Amazon.com. It got as high as number 15 in photographic lighting books! And there was much rejoicing! But is is dropping now, so you need to buy a couple of copies for holiday presents. Here is a sample chapter. Of course I still hope that you will consider purchasing my fine art book B Four: pictures of beach, beauty, beings and buildings. Frankly purchases of this book mean a lot to me, and it is also a fine gift for the holidays.  As you know I teach for BetterPhoto.com. I really hope you’ll sign up my class:  An Introduction to Photographic Lighting. Sign up are very good this month!

A projector light source can create wonderful special effects!

Light comes off of a small light source, whether light bulb or a strobe tube, in all directions. People don’t generally like this effect, regardless of where it happens. So you don’t see many living rooms lit by a 60-watt bulb hanging from a wire. There are two basic ways photographers modify light to make it more useful. First, we make the light source bigger so it is softer. We might do this with an umbrella or a light panel or a soft box. These devices light the subject from more angles because the light source is bigger, so the light is softer with longer gradation. The other thing we do is to shoot light onto a smaller part of the subject. We might use a grid spot or a snoot to do this. Of course there are any number of small strobes, like the SB 900 or the 580 II EX that retain the effect of a small light source and spread the light over only the area you want to photograph. Often the results of this are grim, but perhaps we’ll get to that issue another day.

This projector fits onto a Norman LH2400 strobe head

There is another way to control light, which can offer very special effects. We can use a lens and project the light. This enables us to put light in a very small area of a shot, or put light with a very sharp edge into a shot. This means you could make a spot that was only a millimeter across or make a spot, or pattern, with a hard edge. You can also project images into a shot. There are a couple of ways to do this, but there are also significant challenges. A few years ago I wrote an article about doing this with slide projectors. This worked extremely well with film cameras. This was so because there were few

This glass dome evens the light from the strobe tube, very helpful!

issues with very long exposures and you could do double exposures easily. I still use the slide projectors, but they just aren’t as useful with my digital camera. If you have a slide projector you may want to do some experiments to see how suited they are to your camera.

I have often wanted to use a strobe as the light source for projecting an image. There have been devices made to do this, but most of them were designed to project backgrounds. This is not a useful as it once was, because it is easy to drop in a background with Photoshop, while it was very challenging to do this with film. I am not very interested in projecting backgrounds, but am interested in projecting light onto a

This pipe reduces the reflector diameter to the diameter of the projector tube.

person’s face. Norman makes a device called a Tri-lite, which is priced at almost $1400 on the last price list I have. The Tri-lite is a strobe-powered projector. They are often available used for less money. I should mention that you would also need a Norman 900 series power pack with the Tri Light, as it won’t plug into the wall. I used one occasionally when I shot film, and the light output was too dim for most purposes. However, I am sure a Tri-Lite would be powerful enough to be useful with many digital cameras.

There is another option, a projection box. Dean Collins introduced this design. Basically it uses a relative small aperture, or hole, between the strobe and what you’re projecting. It isn’t particularly

Projector tubes

I made several versions of the projector tube before I got one that worked. The one in the center works pretty well.

sharp. The thing you’re projecting should be large, at least 4X5 inches. And it doesn’t create a lot of light. So I never got around to building one of these, but you can probably find plans on the web. There was at least one commercially available device built on this plan. There are also some specialized snoots that can project, but again without much sharpness.

I thought about building a projector for some time, but I thought in terms of a slide projector with a strobe behind it.

The problem is that a slide projector

is really quite complex, so my ideas were

Projector tube

The projector tube. You can see the series 7 filter holder on the back fo the tube

impractical.

Recently I found myself thinking about an enlarger rather than a slide projector, and enlargers are basically simple. An enlarger is a light source, a diffuser, a negative carrier and a lens that focuses. No mirrors, no condensers and no auto-focus.

Before I discuss the device I built I have to mention a couple of things. First, never, and that means under no circumstances, use a Dremel tool without safety glasses. You shouldn’t use any power tool without safety glasses, but this is particularly true of Dremel and other power carving tools. Second, this

This is the holder I uses for cookies and for slides. Cookies are used to make patterns.

projector captures a lot of heat, so you it is best not to build it for any strobe that doesn’t have a fan, that means most or all mono lights, including Alien Bees and Calumet Travelites. It is possible you could use this device if you didn’t use a modeling light, but I don’t think so. If you do build something based on these ideas please let me know how it works for you. This week I am going to discuss the general details and show pictures of some of the construction. In the next blog I’ll discuss more details.

The strobe I used is a Norman LH2400 with a fan. This strobe only works with a Norman power pack. I have a lot of these strobes, so if something went wrong I could afford it. I used a

This is a Kodak projector lens. I attached a 52mm filter thread to make it easier to mount filters.

Norman 5 inch reflector and a Norman Diffusion Dome. The dome fits inside the reflector and makes the light even. Which is important. Basically these two items make up the light source of a diffusion enlarger. Then I went to the plumbing section of a home improvement store. I got some 2.25-inch external diameter PVC and a step-down pipe that steps a large pipe down to a small one. The large side has an external diameter of 5 inches so it fit into my Norman reflector and the other end held PVC pipe with an external diameter of 2.25 inches. I painted the inside of the step-down pipe white with high temperature paint. I used the high temperature paint because heat is a problem. I cut a nail down to about 1/2. I made a hole to insert the nail from the reflector into the step-down pipe. This keeps the adapter from

Fun with lights! Come back soon for more details.

falling out of the reflector. I then made some cuts in the 2.25-inch pipe to accommodate a 4-inch focal length lens from a Kodak projector. This is a good lens for this project, as it is inexpensive and pretty bright. The focus on this lens can be adjusted by moving it inside the 2.25-inch pipe. I ground out the back of the pipe so that a series 7 adapter would fit inside. This holds the material to be projected. More details on this next week.

You can’t leave the modeling light on, even with the fan on this strobe. But you can use it to position the light. Because the light is so detailed, this is important. I’ll have more details of construction and samples from the new light next week. I hope with different models.

I still offer a class at BetterPhoto, I hope you’ll consider taking it: An Introduction to Photographic Lighting And please consider my book: Understanding and Controlling Strobe Lighting: A Guide for Digital Photographers.Have a wonderful holiday season!
BetterPhoto.com, The better way to learn photography

« Newer PostsOlder Posts »

Powered by WordPress