Photo Notes A place to talk about making images.

January 8, 2010

The Right Exposure or the Right Light?

Filed under: Basic Photo Technique,Lighting Technique — John Siskin @ 10:33 pm

Getting a good exposure is important, but getting the right light is MUCH more important. Digital cameras make this much

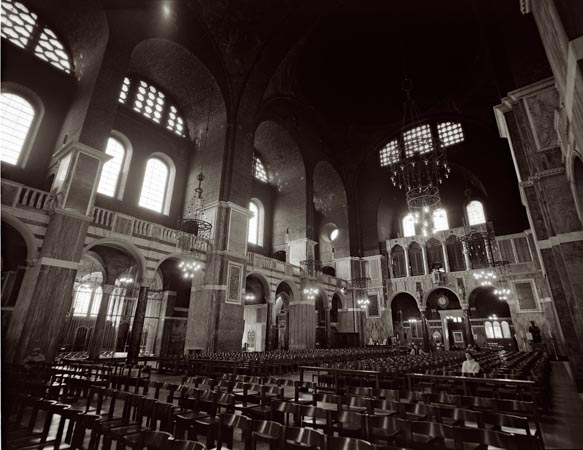
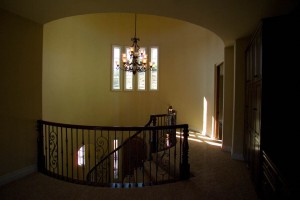
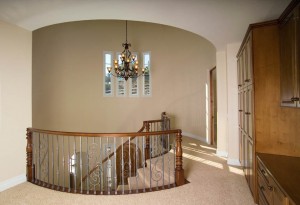
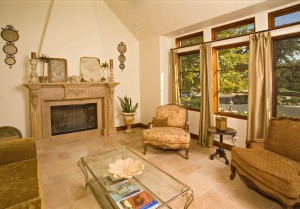
This is what the shot looked like without strobes. It is the right exposure, but the wrong light.

This is what the shot looked like without strobes. It is the right exposure, but the wrong light.

easier than ever before! People often rely on a meter when they should look at what they are doing. But even when I shot film for a living I didn’t rely on the meter, I relied on the Polaroid instant images I made with the camera. I suspect part of the difficulty is that it is frightening to turn the meter off and rely on your eye and proof image and histogram, but now that we have these tools we should not be so afraid to turn off the meter.

In teaching classes I keep trying to find ways to say that you have to move into the land BEYOND metering. When you use a strobe meter you get a response that tells you how to make a middle density, but the meter doesn’t tell you how to make it look right. There is no automatic way to make it look right, only the application of brains can do that. When I make a shot with strobes and a digital camera, the first thing I do is to put the camera on manual. The camera meter can’t read strobes, except for the proprietary strobe. So the camera meter is useless. I do not use a hand held strobe meter, as it doesn’t give me useful information. The only things I pay attention to are the histogram and the proof image on the camera back, or, even better, an image on a computer tethered to the camera. More than metering these two tools tell you about your image.

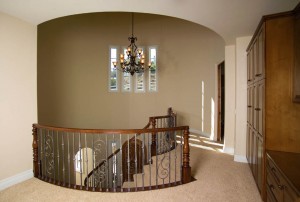
In this version I've put in a couple of lights and things look better. I know what to do becaues I am examining what I've done step by step.

In this version I've put in a couple of lights and things look better. I know what to do becaues I am examining what I've done step by step.

Let me suggest a plan for seeking the right exposure:

1)   Set the shutter speed to the sync speed.
2)   Set the aperture to your middle aperture, whatever that is on the lens you are using
3)   Take a picture, it will probably be wrong.
4)   Move the aperture dial to let in more or less light based on test exposure 1, you can look at the histogram to help determine how much to change the aperture, but the proof image should tell you if you need to change the exposure a lot or a little. If you are using more than one light consider the balance of the lights. Remember the aperture affects the strobes, the shutter speed doesn’t.
5)   More test exposures and changes of light placement and light power until the strobes are right.
6)   If you need to use ambient light increase the shutter speed until the balance looks right. This same technique will work if you are mixing strobes and daylight. This was why the Polaroid bill was so high with film cameras, but with digital these test exposures are free, so we should not be afraid to make them. If you practice this you will actually end up being able to find the right exposure quite quickly.

In this version I added a couple more lights to open up the far wall with more light. No meter could have done this. I need to look at what I'm doing.

In this version I added a couple more lights to open up the far wall with more light. No meter could have done this. I need to look at what I'm doing.

This is the essential trick with strobes, to evaluate and change our images in search of the right levels for our lights and our exposures. With the histogram and the proof image on camera or in the computer we have better tools for creating the right exposure than any meter could give us, but it does take repeated testing. If you use a hand-held meter you will get an answer, but very often it will be profoundly wrong.

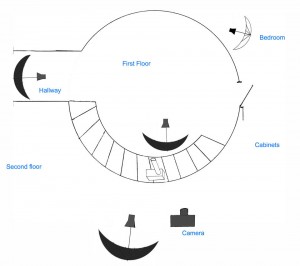
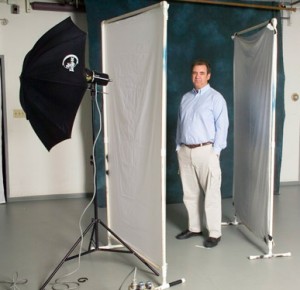
This shows the final placement of the lights.

This shows the final placement of the lights.

November 8, 2009

Fluorescent Lights?

Filed under: Basic Photo Technique,Lighting Technique — John Siskin @ 5:16 pm

I have written elsewhere about fluorescent lights for photography. I didn’t say anything complimentary there, and I don’t intend to say much that is nice in this blog. So if you really love the new compact fluorescent lights as studio lights, it might be best to stop now. Still, the results of my tests were somewhat less dire that I had anticipated.

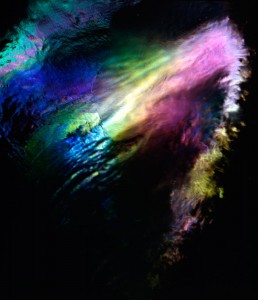
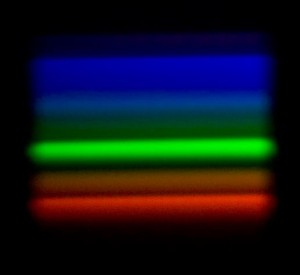
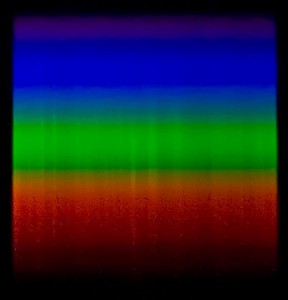
I was finally able to borrow one of these lights (a Top Lighting PB-85 120v 85 watt) so that I could run tests. I certainly didn’t want to buy one. I did several tests: first I used my spectrometer to look at the color distribution of the light, that is look at the light spread into a rainbow. My spectrometer is made from cardboard, a couple of razor blades and a small piece of diffraction grating. It is not a tremendously accurate device. It was not designed to be used with a camera. Still I am including pictures of daylight and of the fluorescent tube. You can see that daylight is continuous, smooth. The fluorescent has big bright lines and big dark lines, so no continuous spectrum. So the nature of this light is very, very different from daylight.

Fluorescent Spectrum, notice how the spectrum is banded rather than continuous

Fluorescent Spectrum, notice how the spectrum is banded rather than continuous

Sunlight Spectrum

Sunligth Spectrum, it is smoother in the spectrometer.

<p><P>

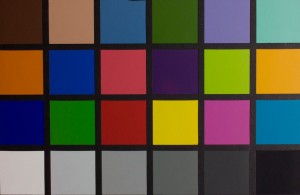
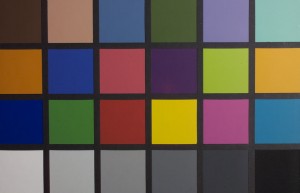
In my second test I made a picture of a Macbeth Color Chart with strobe light and the fluorescent light. The color of the two shots was very different, so I would not want to use the fluorescent light with my strobe. However when both shots were white balanced, in the computer, the shots were very similar. Really the fluorescent tube was a closer match than I would have expected, after the white balance. Please keep in mind that white balance will not enable to correct a shot for two different light sources.

Fluorescent version of the Color Checker, white balanced.

Fluorescent version of the Color Checker, white balanced.

Strobe version of the Color Checker, white balanced.

Strobe version of the Color Checker, white balanced.

<p>

In the third test I made 10 shots at a shutter speed of 1/180 to see if the light would be consistent on all the shots. I did not expect this to go well. Fluorescent tubes are supposed to vary with the cycling of alternating current electricity. In this country the power cycles 60 times a second. So 1/180 should be only part of a cycle. In this shot the color did not vary by as much as 1%, really quite impressive. Since the shots all looked the same, I am not including them.

Finally I compared the overall quantity of light to a 600 watt Smith Victor quartz light. The quartz light was 8 times more powerful than the fluorescent  light. Although I could use an array of these lights to increase power, I could not get the power and hard light effect that I can get from quartz lights.

On the whole the light performed better with color than I had anticipated. However the unusual spectrum leaves me suspicious that there will be problems in the real world, especially with fabrics. Certainly the low power disappoints me, but if your camera performs well at high ISO levels, this may be less of a problem for you.

Thanks, John

Please check out my classes

An Introduction to Photographic Lighting

Portrait Lighting on Location and in the Studio

Business to Business: Commercial Photography

October 26, 2009

FABULOUS NEW BOOTY LIGHT!!!!!

Filed under: Basic Photo Technique,Lighting Technique — John Siskin @ 5:36 pm

Sand Canyon HomeThere are a lot of lighting products on the market, and many of them are mostly hype. There are only so many ways you can manipulate light, and few of them are new. So you can make a light source larger with an umbrella, soft box or a light panel. If you want to put light in just one part of an image you will probably need a snoot, grid spot, or barn doors. There are other ways to do these things, but they do about the same things. Changing the name doesn’t change the product much.
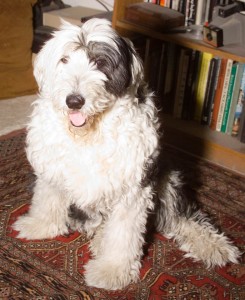
One of the things people have tried to do for a long time is to make the little light source on a camera mount strobe, like the Nikon SB 900 or the Canon 580, act like a bigger light source. When you have a large light source the light hits the subject from all points of the source, so you get less shadowing and softer transitions between highlight and shadow. Vivitar introduced a bounce card for the 283 strobe in about 1976, so the manufacturers have been at this for a while. The Vivitar bounced all the light off a card, simple but didn’t change things all that much. Later designers bounced light off the walls of the room, so that there was a lot of fill light. This was more effective. So you see products from Sto-fen, Lumiquest and Gary Fong. There are differences in the way they move the light around and where they move the light, but the idea is similar: some light goes directly to the subject and some is bounced. Now this idea works, and it is probably the best idea for event photography, and will work well in other situations.

Direct flash

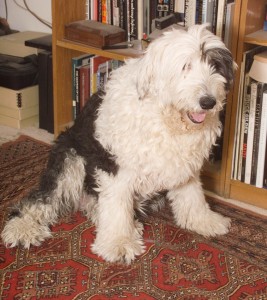
Taken with a direct flash. See the hard shadows and the high contast? What a difference the BOOTY LIGHT makes!!!

Booty light shot!!

Booty light shot!!

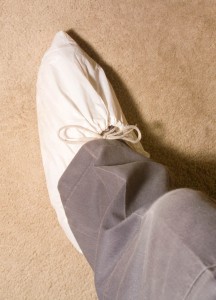
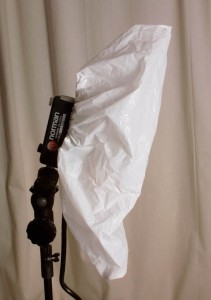
I have decided to introduce a NEW and FABULOUS way to spread light from a camera mount strobe, or many other kinds of strobes. Did I say it is NEW and WONDERFUL? I have to make sure I use enough hype here. It is the BOOTY light, yes this FABULOUS new light is actually a shoe covering. You can by TWO for only 79¢, YES less than a dollar. That makes these WONDEFUL, NEW units less than one half of one per cent as expensive as a Gary Fong Lightsphere II. Didn’t I say this is FABULOUS?

Seriously these are useful tools. I have used them on several occasions, because I needed to be quick of I needed a camera mount strobe to add to a monolight on a stand. In addition to the before and after shots, necessary to introduce something as WONDERFUL as this, I have a shot from a recent project where I used the booty light and just one other strobe with an umbrella. I had to work quick on this shoot. So think about it: Don’t you need a Booty light? Here’s a link: http://www.envirosafetyproducts.com/product/Tyvek-Shoe-Covers.html You can also buy them in quantities of over 100, even CHEAPER!!!

Thanks, John Siskin

Ps. One size fits mostly all! WONDEFUL!!!

Pps. Collapses for easy storage and WILL KEEP THE CARPETS CLEAN!!

My classes:

An Introduction to Photographic Lighting

Portrait Lighting on Location and in the Studio

Business to Business: Commercial Photography

Booty Light on a Norman 200B, one size fits almost all!!

Booty Light on a Norman 200B, one size fits almost all!!

Booty Light on shoe, It's dual purpose!!

Booty Light on shoe, It's dual purpose!!

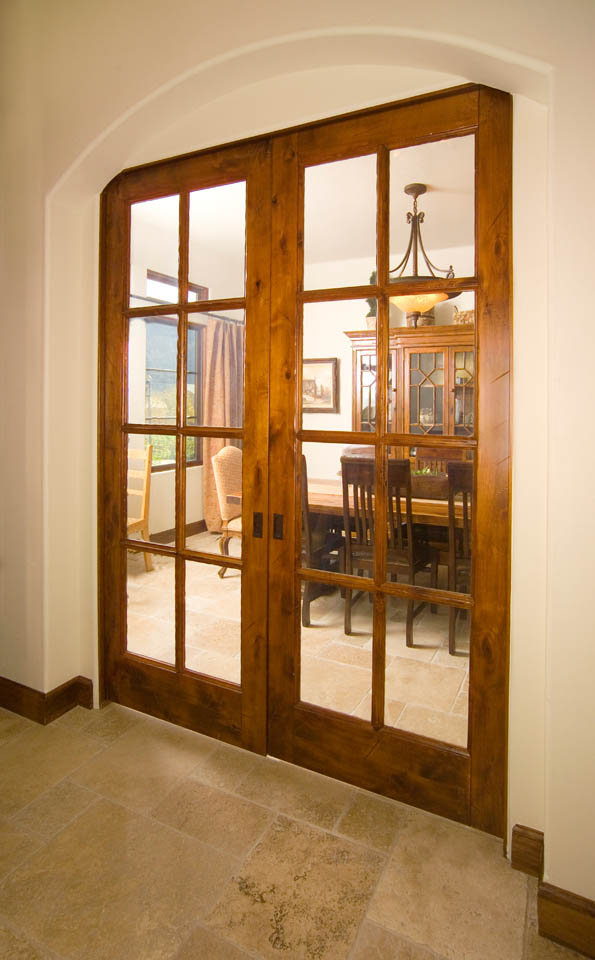
Another location shot with the BOOTY LIGHT the booty light is the only light on the outside of thedoor, the strobe with the umbrella is in the room past the door.

Another location shot with the BOOTY LIGHT the booty light is the only light on the outside of the door, the strobe with the umbrella is in the room past the door.

October 12, 2009

Natural?? Light

Taken with both continuousl light and strobes. Link to an article about the Tools of Light

Taken with both continuousl light and strobes. Link to an article about the Tools of Light

I’ve seen a lot of photographers, and some of talented armatures talk about natural light. So maybe I should too. I hate the term natural light, simply because in our culture natural is always good and artificial is always bad. When was the last time you saw a product advertised as NEW! Now with More Artificial Ingredients!! So my first problem is that when someone speaks of natural light they are making a value judgment about light sources. Second, people aren’t always consistent about the term; really natural light ought to be used to describe sunlight, moonlight, starlight, and less useful things like molten lava and the back end of lightning bugs. If you use only natural light you are not going to take any pictures more than a few minutes after sundown or, if indoors, never very far from a window. Of course this limits the pictures that you take. Many people seems to include, in their use of the term natural light, any light source that happened to be there, including such poor quality light sources as fluorescent light and sodium vapor light. I would prefer terms like existing light and ambient light or even found light. We could call the light we make for a shot created light or controlled light, or even perfected light.

I think that the real problem that people have with making light is between continuous light sources, like quartz lights, and instantaneous light sources like strobes. There is no question that it is more difficult to place and modify lights that you can’t see. So often photographers are confused because the shot they see has no relationship, or little resemblance, to the shot they took with the camera strobe. Of course the reason is that the strobe was in a place no light came from, and had a quality of light that wasn’t present the moment before you took the image. It’s as if you switched off all the lights and put a spotlight on your head. So if you are going to get strobe to work for you, you need to learn take control of the way the light works. It isn’t the fault of the light, and it isn’t because the light is instantaneous the problem exists because the photographer expects the strobe to work by magic. Instead the photographer must understand how light can be controlled and used. Then we will make better images because we can control the light.

I should also mention that while you can do things with continuous lights, there are problems that only strobes can solve. Strobes are much brighter than other sources, many strobes are brighter than daylight, so you can control a mixed light environment. Also strobes have a true daylight color balance, so they are easier to use with daylight. Strobes are smaller and lighter than continuous lights with equivalent power would be, and they consume less power.

Link to an article about one light portraits.

Link to an article about one light portraits.

August 24, 2009

Lenses and Perspective

Filed under: Basic Photo Technique — John Siskin @ 8:15 pm

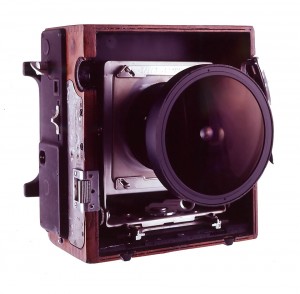
Custom Camera with a Fish-eye lensThe important thing to remember is that changing the focal length of your lens does not change where you stand it only changes the way your picture is cropped. So if you take a picture of a person’s face with your widest angle lens you will be inches from the subject if you fill the frame with just the face (unless you don’t own a wide angle lens). If you frame the shot the same way with your longest lens you may be more than 10 feet from the same subject, depending on how long a lens you own. You should really do this exercise and compare the results. In the image with the wide-angle lens your subject will probably look extended and strange. The telephoto image will look flat. The difference isn’t the lens it is where you stand. If you took a third image with the wide-angle lens, but standing where you stood with the telephoto lens and blew up the image to match the telephoto image, besides fewer pixels, you would notice the same flatness you saw with the telephoto lens. If you want to make images have a greater three-dimensionality stand closer to your subject and use a wider lens. If you want your images to be compressed stand further back and use a telephoto. No amount of new lens technology will change this. People often stand to far away from a person to make an intimate portrait, they find being close to the subject embarrassing. This causes a flatter look in the portrait. I use an 80-100mm lens on my full frame camera for portraits. I make more pictures with wide-angle lenses, 18mm to 40mm on my full frame camera, than often than telephoto lenses.

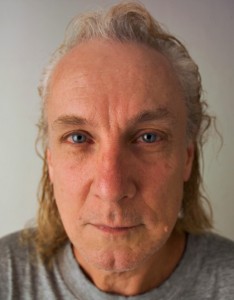
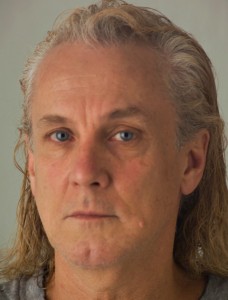
I’ve included a picture of a friend, Lance, made with a 28mm lens and with a  200mm lens. I tried to keep the size of the head the same. You can see the huge changes in the way the face appears, the charges are a result of the difference in camera position. With the 28mm lens I am just inches from the subject and with the 200mm lens I am almost 10 feet from the subject. You should try this for yourself.

Lance with a 28mm lens

Lance with a 28mm lens

Lance with a 200mm lens

Lance with a 200mm lens

August 13, 2009

Editing


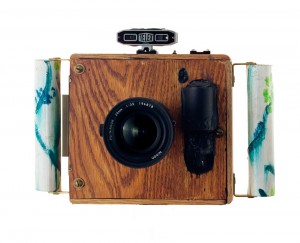
A hand built super wide camera

A hand built super wide camera

Editing photographs is not only difficult, sometimes it is heart wrenching. Often each image seems a special and unique expression of your creative vision, how can you bare to part with even one? Get over it; this feeling is personal. No one else will ever experience your photographs the way you do. You remember the day, what happened before and after, you remember the client and you remember whether you got paid. The viewer doesn’t experience any of this, and for the photograph to be effective for the viewer you have to give him/her an image they can perceive in their own terms. That is the purpose of editing. I am going to attach a photographs I made to this blogl. I designed and built the camera that made the image. Because of that intimacy no one else will ever perceive the shot in the way I do. I hope they will like it, but they will inevitably have a different feel for the image. You may think editing is time consuming, and it is, but it will make you a better photographer.

Made wirth the Super Wide camera

Made wirth the Super Wide camera

The first step in editing is shooting. You need to shoot a lot of images. The last head shot job I did was around 300 images, on a product job I might shoot only 20 images. Since we are now working in digital it is important to always shoot that extra image, or extra dozen images. It is always easier to shoot more than it is to go back. Although Eisenstaedt was famous for just taking a few shots, we will do better not to emulate him in this.

Made with the Super Wide camera

Made with the Super Wide camera

In order to edit effectively we need to be ruthless. The first step is to remove everything that is clearly a mistake. With a portrait type job this is generally pretty easy. A mistake is an image that has no real subject. A mistake is an image that is out of focus. A mistake is an image that is not focused on the subject. A mistake cuts into important parts of the subject, like the hands. If you shoot in raw a shot doesn’t have to be perfectly exposed, but if the shot is two stops from perfect exposure the shot is a mistake. If the strobes didn’t go off it is a mistake. Get rid of all this stuff, you should have plenty more images. I understand the Photoshop CS 15 will be able to fix everything, but that hasn’t happened yet. Photoshop 16 will be able to make your entire childhood perfect. Yes there are many mistakes you could fix, but you could spend days working in Photoshop. It is better to move through the process quickly. But you might as well save these images somewhere. This is why we have terabyte hard drives.

Made with the Super Wide Camera

Made with the Super Wide Camera

Step two is to get rid of everything that makes the subject look like a doofus. So that shot where the subject is checking out your shoes? Gone. At the same time you should part with all the shot where you awkwardly cut off body parts, hands cut in half and so on. Yes a lot of these shots could be saved. If you shot enough you shouldn’t need to save them.


Made with the Super Wide Camera

Made with the Super Wide Camera

If I am giving the client a proof disc, that is a disc with all the acceptable images, I will take the images at this point and convert them to jpg with the proprietary program. The proprietary program is often simple than Adobe Raw for this kind of large batch processing.

This should do it for negative editing; that is removing images because of problems. With any luck you have removed any where from 20 to 50 percent of your shots. Good. The other thing you have done is to look at all of the images that are left at least twice; well you went through the images twice didn’t you? That familiarity with your images is going to help a lot in the next go round. When you look through the images this time, look for images that are particularly fine, not just acceptable. They should have something special they may need cropping or other minor work, but the quality of your vision should be apparent. Also you want to look at the images as if you didn’t shoot them, as if you were seeing them not editing them. Look for an image that really connects. Certainly you can keep images you are unsure about, but you should end up with less than 10 percent of the images you started the third go around with.

I do this in Adobe Bridge, but there are certainly other good programs. As I go through each step I display the images larger, so that I get a better feel for the shots. The next step is to bring the images into Adobe Raw. Raw gives me a better look at each image, and I can begin the image processing. In raw I can do batch corrections on color, contrast, saturation and so on. I can also crop my images and do a variety of individual corrections. I will do my final choices on editing in raw. An image may get left behind at this point for a variety of reasons. Sometimes it is something I could fix, but don’t want to, or perhaps two images very similar.

Finally I will open up all of the images that made it through Raw in Photoshop. While I will rarely remove an image form the group in Photoshop I will perfect the images in Photoshop. This is where I will sharpen and do other detail work. Now finally, if the client asks for just there shots (not likely on a head shot) and I don’t have any personal reasons to make a choice, I can say enie minie moe….

July 25, 2009

Aperture III

Filed under: Basic Photo Technique — John Siskin @ 1:29 pm


This shot was focused mid-way through the image to hold focus back to front. Shot made with a Toyo 4X5 camera.

This shot was focused mid-way through the image to hold focus back to front. Shot made with a Toyo 4X5 camera.

Well I hope I haven’t lost too many readers by going on about aperture for three blogs, but it is really important to understand this in order to make good pictures. The idea is that the use of the right aperture allows the photographer to control what part of an image the viewer concentrates on.

The next part of understanding aperture I want to discuss is the hyper focal distance. This is the point at which you focus and stop down in order to create the most depth of field possible in a shot. Of course it is different with different focal length lenses, as we saw last week. Of course it is also different at different apertures. The thing to keep in mind, regardless of aperture and focal length is that in order to maximize depth of field you would not focus on infinity. Two thirds of the depth of field exists behind the focus point and one third in front. You would not be using the depth of field efficiently if you focused on the furthest point that the lens could focus on, something closer would make better use of depth of field. Also if everything in you shot is effectively at infinity then depth of field doesn’t matter.

There is a button on most cameras to help you figure that out, and sometimes it does help. The reason I say sometimes is that this button causes the lens to stop down, and that makes the picture darker, but you can see the depth of field. The darker image in the viewfinder can mean that the image is hard to see, which can make the preview pretty useless especially indoors. Modern cameras are set up to let you look through the lens at its widest opening, which makes focusing much easier. The lens stops down to the working aperture at the moment you activate the shutter, this system works very well. Under the right circumstances, usually bright, the depth of field button can give you an indication of how the depth of field will look.

I promised that memorizing the apertures would be helpful, the reason is that these numbers apply to any time that you are

Careful use of aperture and focus point keep the whole image in focus.

Careful use of aperture and focus point keep the whole image in focus.

working with the area of a circle. For instance when working with light. If you have a light at 5.6 feet from a subject and you bring it closer, to say 4 feet that the light on the subject will be one stop brighter. You went from f5.6 to f4, a one-stop increase in light. Similarly if you had a light at 8 feet from a subject and dragged it back to 11 feet from the subject you would lose one stop of light. Wedding photographers used to use manual strobes like the Norman 200B, they would use this principal to rapidly figure changes in exposure. The same principal made it possible to figure bellows extension, but I won’t trouble you with that now.


The depth of field keeps the whole shot in focus.

The depth of field keeps the whole shot in focus.

July 18, 2009

More on Aperture

Filed under: Basic Photo Technique — John Siskin @ 1:37 pm
This image uses short depth of field to give the image a sense of three-dimensionality.

This image uses short depth of field to give the image a sense of three-dimensionality.

When I left off last time I had just suggested the concept of depth of field, and we will start with that this in this blog. The real problem is that the language is confusing here: what does “depth of field” mean? Obviously we aren’t talking about how much acreage you might have planted in corn. What we are taking about is how much of your image, closer and further from the lens, is in sharp focus. So if I want an image that will concentrate the eye on just part of the face, of a subject, I would say that I need a very narrow depth of field. In order to get this I will use a wide aperture (small number, say 2) that will let in a lot of light through the lens. This will create an isolated zone of focus. How low will depend on the focal length of the lens. For instance f2.8 is extremely short depth of field on a 200mm lens while it provides significant depth of field on an 18mm lens.

The focal length of the lens is one of the factors that affects the depth of field. If you use a long lens you see more details in the subject than you would with a short lens at the same distance. The need to use a smaller aperture (bigger number like 16) to achieve sufficient depth of field is related to this increase in detail. If you shoot with a 28mm lens at a distance of 10 feet from the subject many of the details of the subject are no more than specs, so you wouldn’t expect to see detail in them. If you shoot the same subject, from the same distance with a 150mm lens many of the parts of the subject that were specs in the 28mm shot will have visible detail, and thus need to be sharp. For this reason you can expect to need more depth of field with a longer lens. I should point out that the 150mm lens will see much less of the subject.

Another factor with depth of field is visualizing what will be sharp and how the soft areas will appear. This is covered by a rule that is usually referred to as the one third, two thirds rule. It is also know as the Scheimpflug rule, but since this name is hard to pronounce it doesn’t get used much. Regardless of what you call it the idea is that as you stop down the lens 1/3rd of the extra depth of field exists in front of the point you focus on and 2/3rds of the additional sharp focus area is behind the focus point. Think about this, if you want a lot of stuff in focus, don’t focus on the front of the image, but midway through the image. You will use the depth of field you have, at any give aperture, more effectively. Of course if you don’t have enough depth of field, for an image that needs it, the point of focus won’t save you; you need to use a smaller aperture.

This shot uses long depth of field to keep the whole room in focus.

This shot uses long depth of field to keep the whole room in focus.

July 10, 2009

Understanding the Aperture

Filed under: Basic Photo Technique — John Siskin @ 1:14 pm
This shot uses short depth of field to bring the viewers' eye to the soup.

This shot uses short depth of field to bring the viewers' eye to the soup.

There is no other subject in teaching photography that is at the same time so basic and so important as understanding aperture and still so confusing and hard to explain. I want to start with a simple comparison to shutter speed: as the shutter speed number increases the amount of light let in by the shutter decreases. This is because the number is a fraction, and we are talking about the bottom number of the fraction, called the denominator. The number we use to discuss the aperture is also the bottom number of a fraction and as this number gets bigger the amount of light transmitted by the lens gets smaller. So for instance f16 lets less light reach the sensor than f8. Two stops less light, but we will get to that soon.

The aperture is a hole, which can be varied in size, in the middle of the lens. It blocks some of the light coming through the lens. The aperture number is actually the focal length of the lens divided by the width of the lens. So if you have a simple one-element lens that is one inch wide and has a focal length of 8 inches the lens aperture would be f8. If the lens had a one inch diameter and had a focal length of 4 inches that the aperture would be f4. Please don’t make me do this in metric, the relationships works but the math is more annoying. That wasn’t so bad was it? Here’s where it gets tricky, if you want the aperture to increase the light coming through the lens by one stop you have to double the area of hole in the middle of the lens. If you double the diameter (distance across the lens) you will increase the area of the circle to 4 times the originals size, or two stops. Instead of doubling the diameter of the lens you have to divide by the √2 (square root of two) which is approximately 1.4. This is similar to converting a focal length from your sensor size to what it would be in full frame 35mm. So 8÷1.4=5.714, which we refer to as f5.6. If you want to decrease the amount of light reaching the sensor by one stop you need to multiply by 1.4, remember the number must be smaller to let in more light. So 8 X 1.4=11.2, which we refer to as f11. It is important to remember that since we are working with fractions, things get turned around.

Please forgive me for all of this, but I didn’t make it up. As you may find it difficult to multiply by 1.4 in your head you may want some help on how to manipulate and use these numbers. There are a number of important applications that I will probably blog about later. In the mean time you might want to try to remember the full stops: 1, 1.4, 2, 2.8, 4, 5.6, 11, 16 and 22. You may notice that every other number is double; this helps to memorize the numbers.

This shot uses long depth of field to keep the control panel and the room in focus

This shot uses long depth of field to keep the control panel and the room in focus

I also want to mention that small numbers isolate focus and large numbers increase the area. This is called depth of field. I wanted to mention it so that I can put pictures into this blog.
I am going to write about using the aperture to control the depth of field very soon, but I thought this was enough confusion for one week. People often tell me that they don’t need to know these things, and that is certainly true. But I want to control what happens in my pictures; I want to make pictures rather than just take pictures. If I understand how my camera records light I will, inevitably, have more control over my pictures.

June 26, 2009

Controlling the Shutter

Filed under: Basic Photo Technique — John Siskin @ 10:54 pm
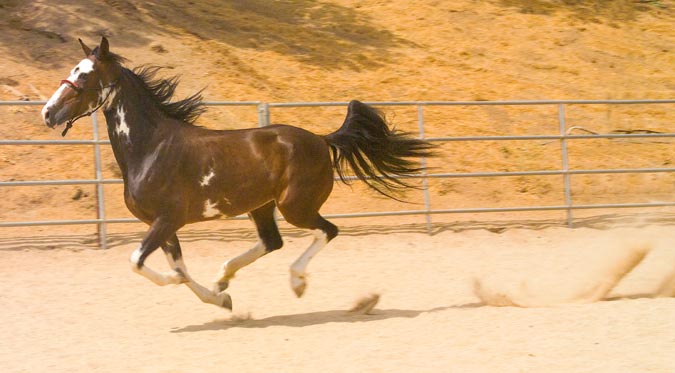
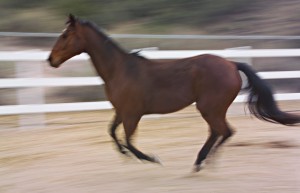
A 1/20th of a second, paned with the horse.

A 1/20th of a second, paned with the horse.

I talked about the shutter and what it does, a couple of weeks ago. This time I am going to discuss aspects of how to use it.

Since DSLR cameras are so small and light that we often hand hold them, they are designed to be used this way some of the time. Unfortunately too often we use them at longer shutter speeds than we can hold steady. This causes blurred pictures. Many years ago Kodak did a study on blurred photos and fond that this is the biggest reason for blurred images. I think that many people have more trouble with this now than when we used film cameras. There are a couple of reasons for this; first digital SLR cameras are heavier than film cameras were. Second since the sensors are smaller than film lenses bring subjects closer than they did with film cameras. For instance a 50mm lens has about a 45º angle of view on a full frame camera and about a 30º angle of view on a Canon D30. Not only does this mean that the subject appears to be closer to the camera, but it also means that camera shake is increased. You can see this for yourself if you want to do a simple experiment. Cut a small hole in a piece of paper, say a circle about an inch in diameter. Now if you hold the paper close to your face and look through it you will be able to keep it pretty steady. If you hold the paper a couple of feet from your face it will be a lot tougher to keep steady. A telephoto lens is like the piece of paper a few feet from your eye, tough to keep steady. There use to be a rule of thumb that you could hand hold 1/the focal length of a lens. So if you were using a 250mm lens you could hand hold a 1/250th of a second. If you were using a 60mm lens you could hand hold a 1/60th of a second. Basically this is now wrong. Unless you have a camera or lens with image stabilization you should not try to hand hold anything less than 1/twice the focal length of the lens. So if you have a 250mm lens don’t hand hold anything less than 1/500th.

There are a couple of ways around this short of image stabilization. Everyone knows about tripods, the only problem is that you have to carry them. By the way, if you are using a lightweight tripod you might want to use the self-timer to trigger the camera, this will reduce vibration. You can also get a monopod, which is like tripod that is missing two legs, this will reduce shake on shots that are not so long. Finally you can build a chain-pod. This costs almost nothing, weighs a couple of ounces and takes up less room than a 35mm film can. Chain-pods are he simplest and best piece of photo equipment you can build. It works like a monopod. To build it drill a small hole in 1/2 inch 1/4X20 (that is a thread size) thumbscrew. Attach about 6 feet of chain to the hole (more if you are really tall). Next put a nut onto the thumbscrew and position it so that the screw can’t go too deep into you tripod socket and glue the nut in place. To use attach the thumbscrew to the base of your camera drop the chain and step on it. Now pull up against the chain. Steady!

This shows how you build a chain pod.

This shows how you build a chain pod.

« Newer PostsOlder Posts »

Powered by WordPress