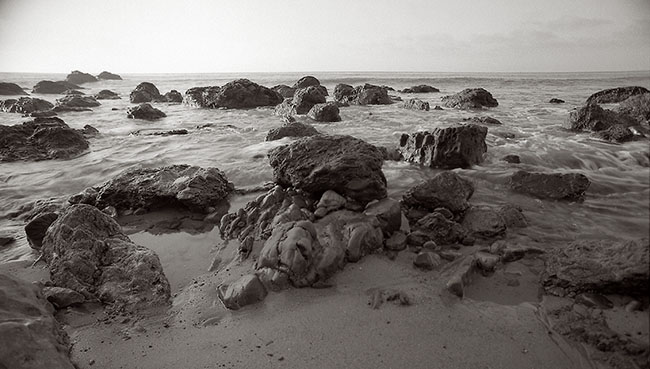
Planetarium
The last blog was about my Super-Wide Camera, which has 110º angle of view. Of course it’s possible to go even wider, and I built a camera to do that also. The thing is that when you go beyond super wide you get distortion. Just as it’s not really possible to make a flat map of the entire planet that makes all the continents and distances look right, it’s impossible to show everything in front of the lens without distortion. This camera/lens combination shows everything in front of the camera: 180º in all directions, but the images bows out in the center. This is called fisheye effect.
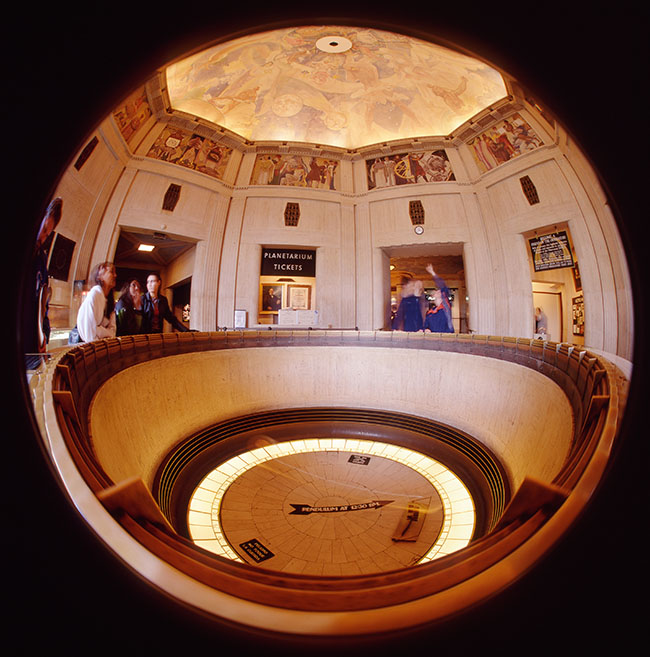
The shot was made at the Griffith Observatory in Los Angeles, maybe you’ve seen it in an old James Dean movie? There is a pendulum in the center of this shot, but it’s hard to see because it’s moving. The pendulum demonstrates that the earth is moving, but I’m not sure how that works. I made the shot on 4X5 Ektachrome film, and the exposure is long enough for the pendulum to have moved from side to side. Didn’t use a tripod, but I did have the camera steadied against the rail. The transparency looks a little like a Christmas tree ornament. The actual image is about 80mm across on the film, pretty impressive.
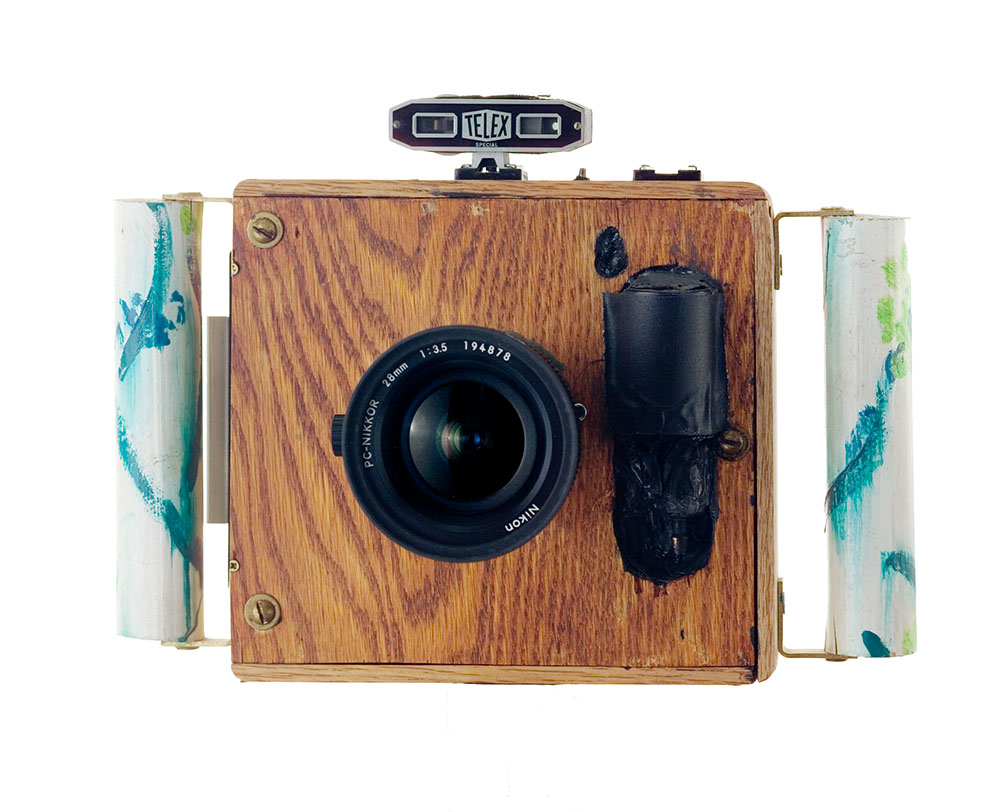
Fisheye Camera
I should say that I didn’t build these cameras because you couldn’t get super wide lenses or fisheye lenses for 35mm cameras. I did it because the resolution of film was so poor. If you made an 8X image of shot like this from 35mm film the image would already show grain and a loss of detail. Because this shot uses at least 10 times more film than there would be with a 35mm shot the grain and detail are much better! I’ve made prints 24 inches wide that looked fabulous. You can use the PayPal link below to get a print that’s about 13 inches wide, on a black background. I normally mount and mat on white board, if you’d like something else let me know when you order the print. I’ll be adding more links as this project goes forward.
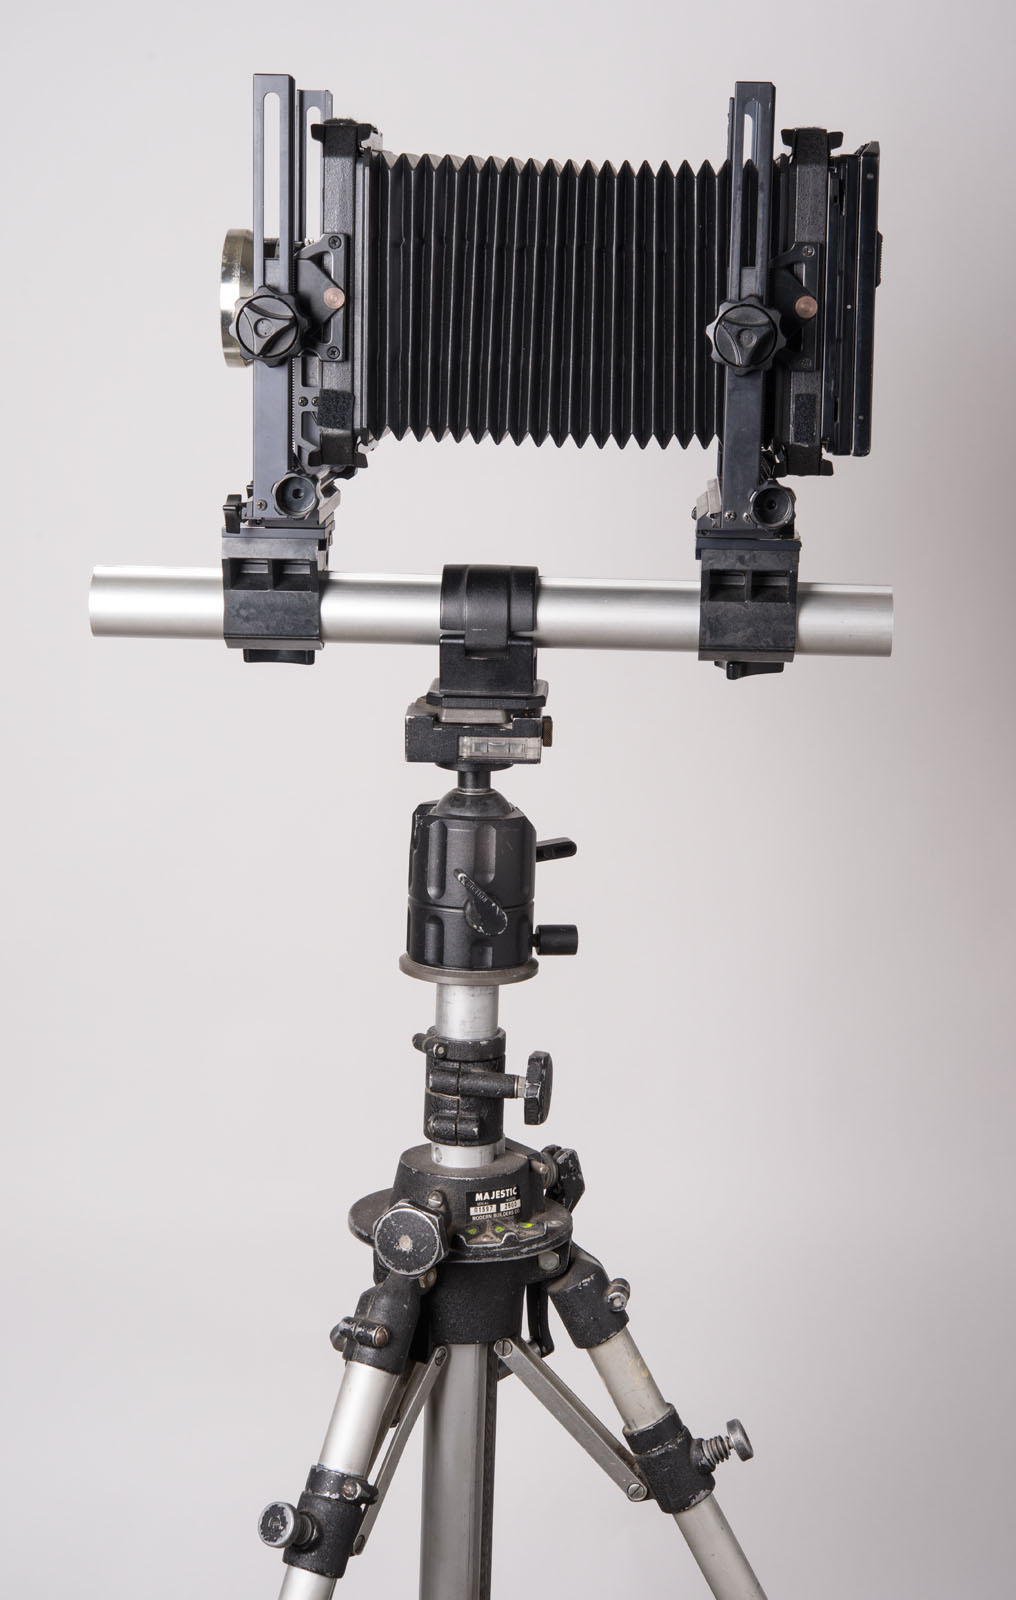
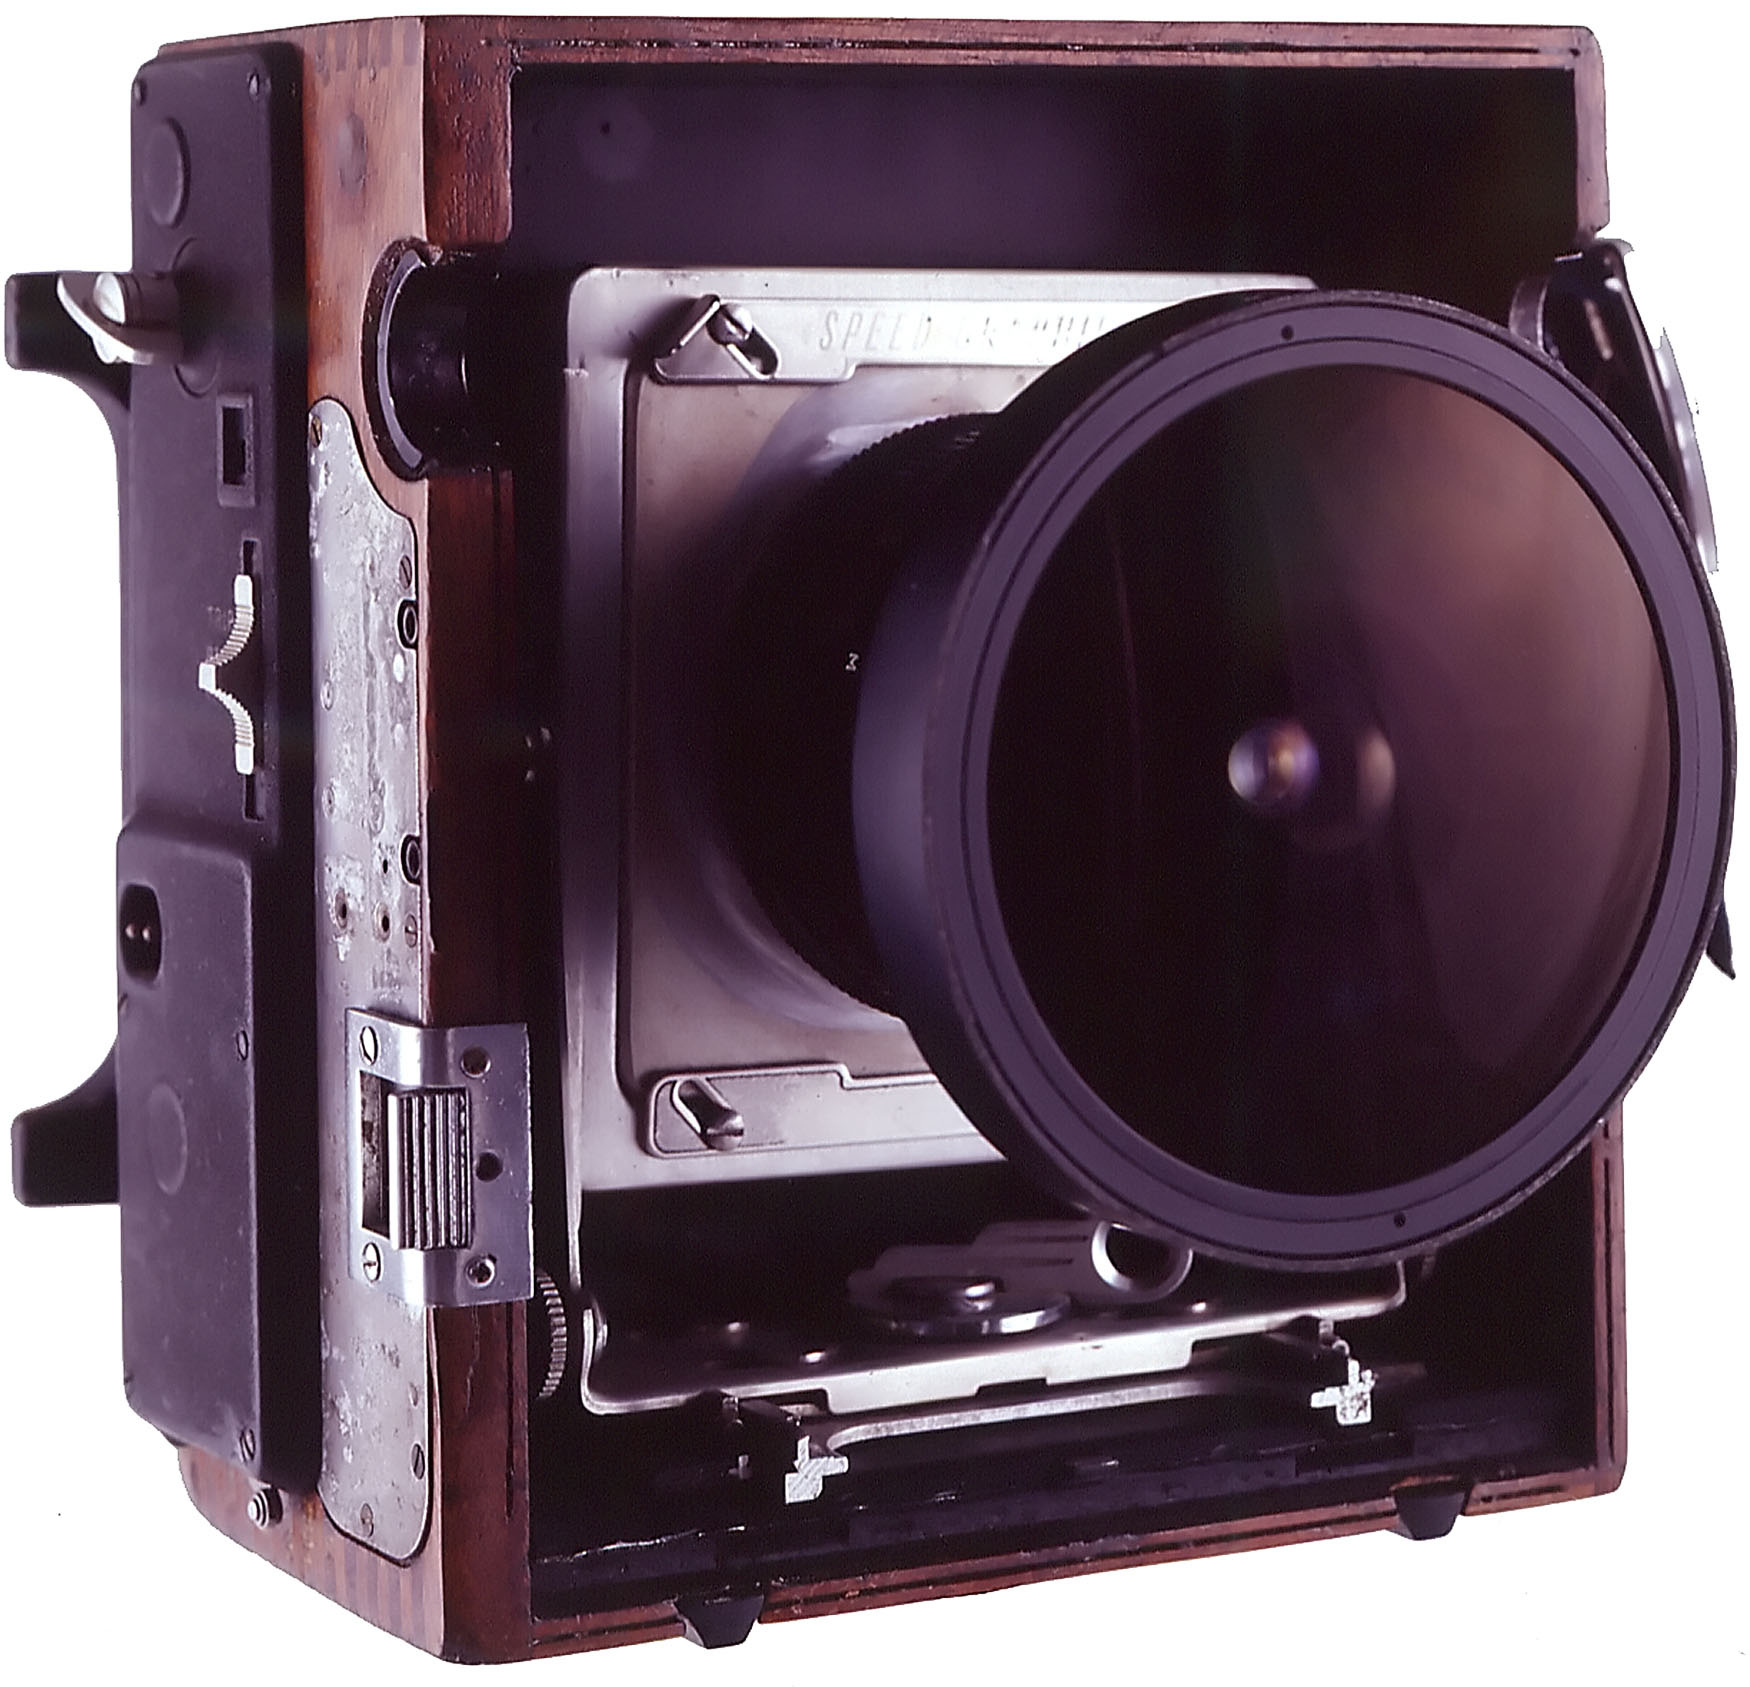
The camera started life as a Speed Graphic, a classic press camera. The lens is from a Russian Kiev 60 camera that shot 6X6 cm images. The lens made full frame (edge to edge) square fisheye images on the original camera. I modified the lens by removing the built in lens hood. Then I customized the Speed Graphic to take the Kiev lenses. I also had to remove the base board (front) of the camera so it wouldn’t show up in the shot. The camera was a junker when I began, with a very rough appearance. I took the leather off the outside of the camera and refinished the mahogany surface. On the whole, I think it is the best looking camera I ever built. The camera focuses using the ground glass or the focus scale on the lens. Speed Graphics have a built in focal plane shutter so that’s what the camera uses. You can see my article about camera building here.
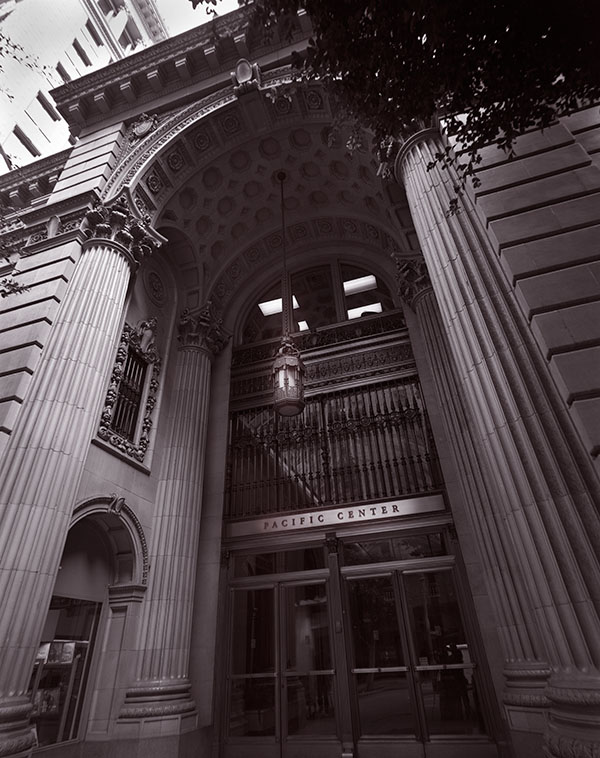
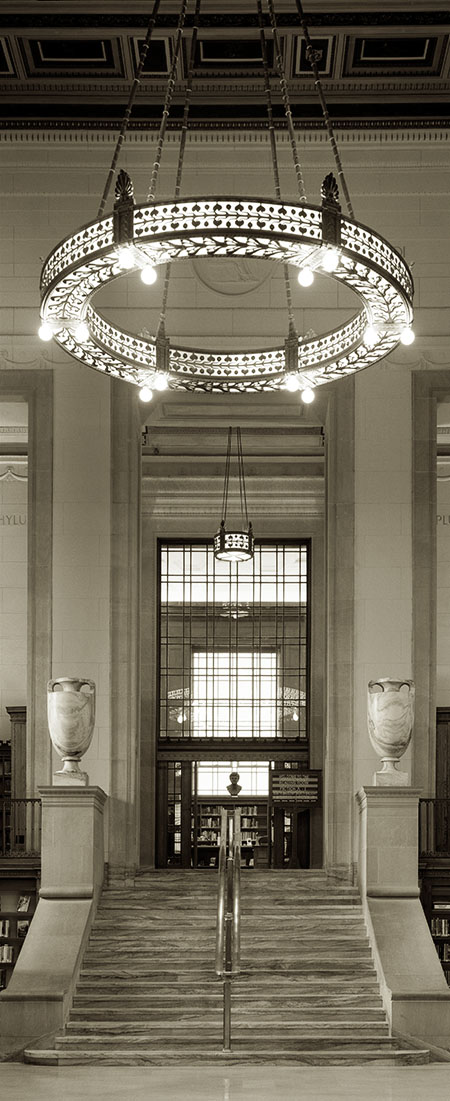
I’ve attached a couple of the other images I made with the camera below. I hope to add posts and PayPal links for these images soon.
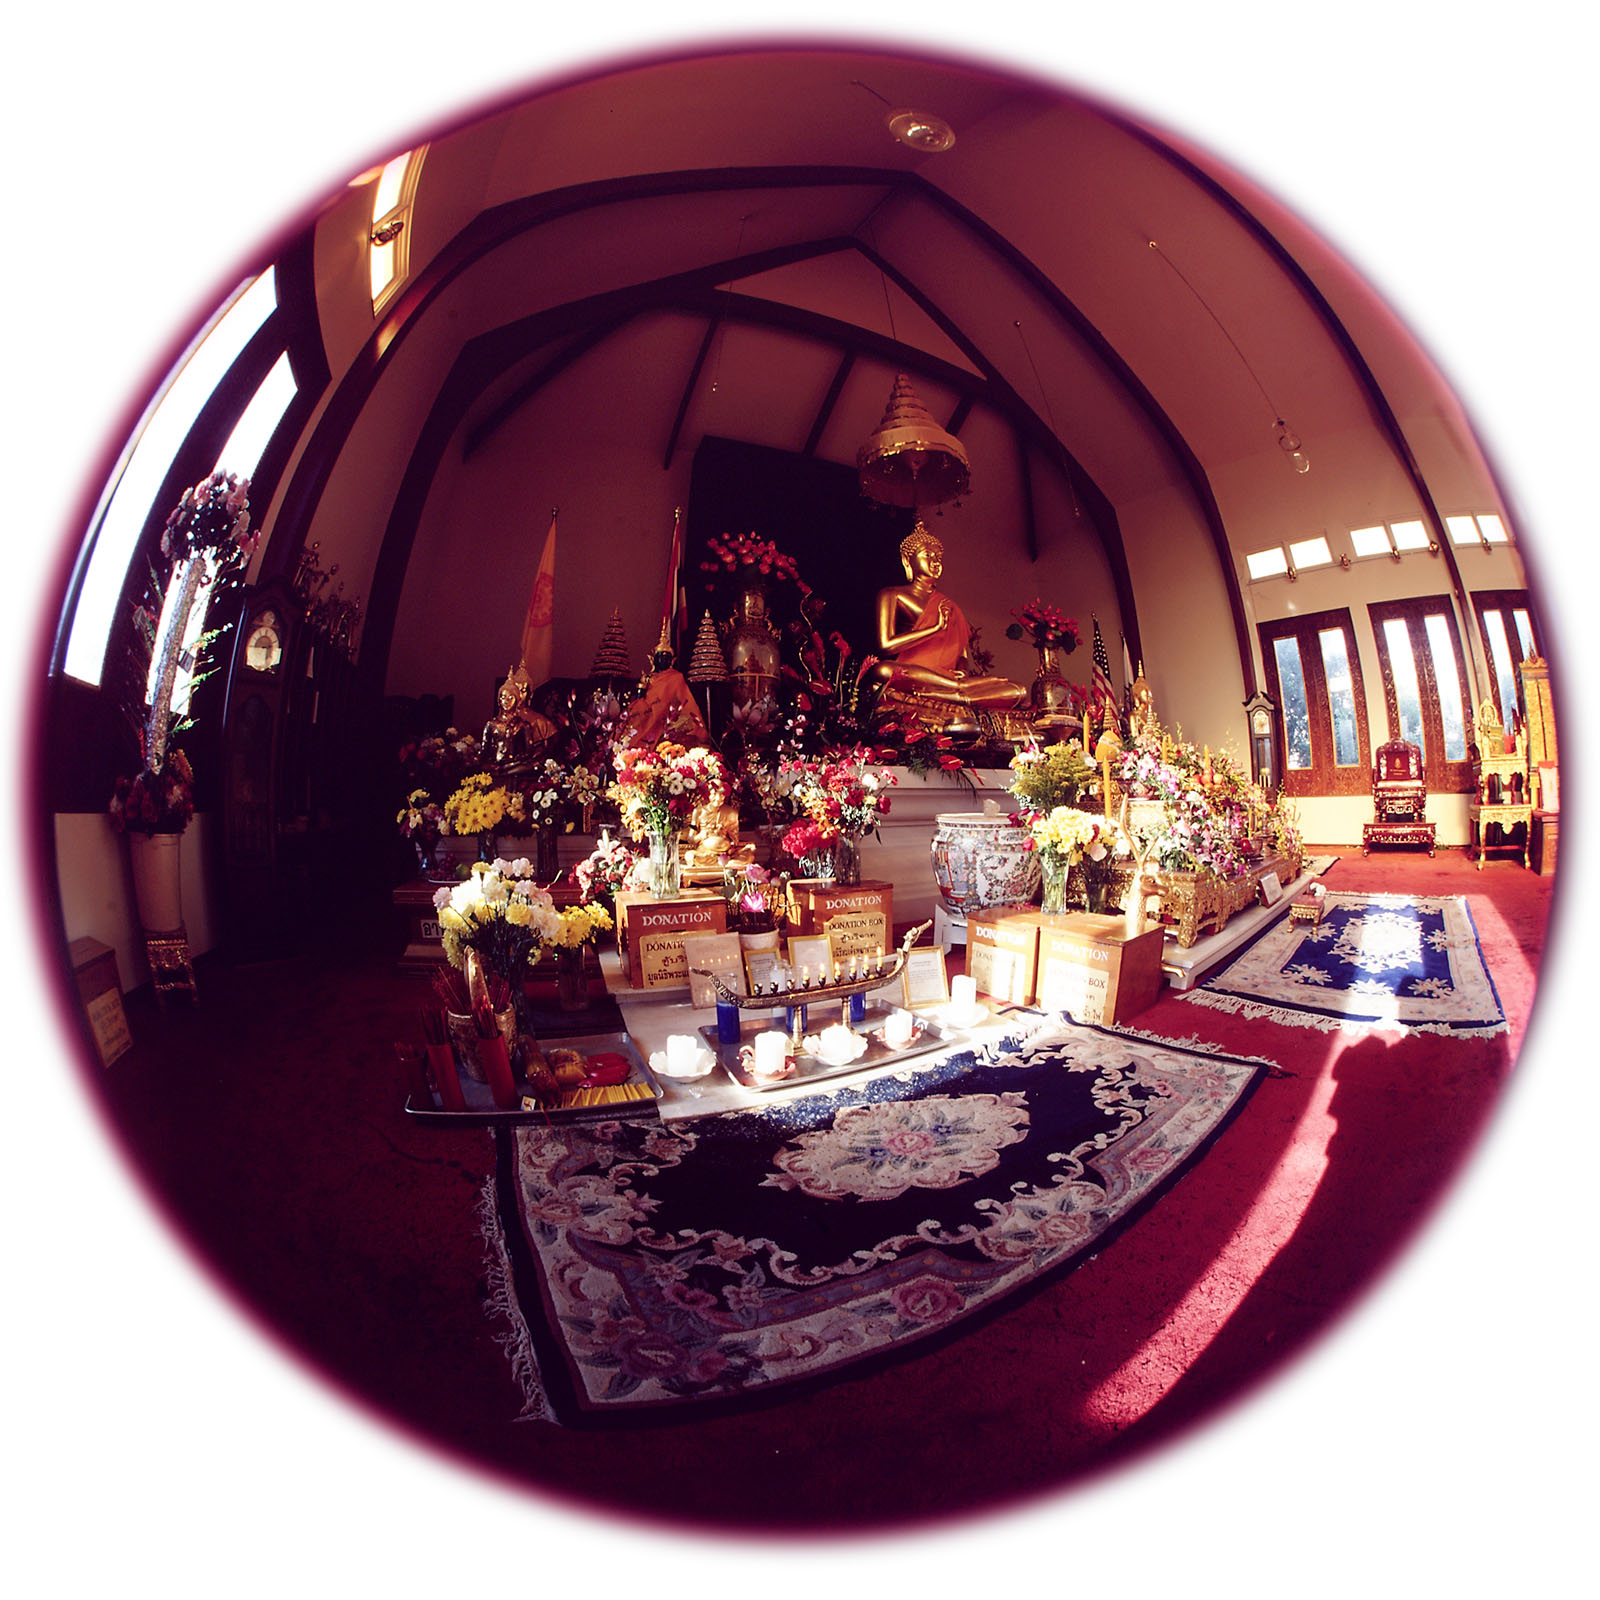
Wat Thai Temple, Los Angeles
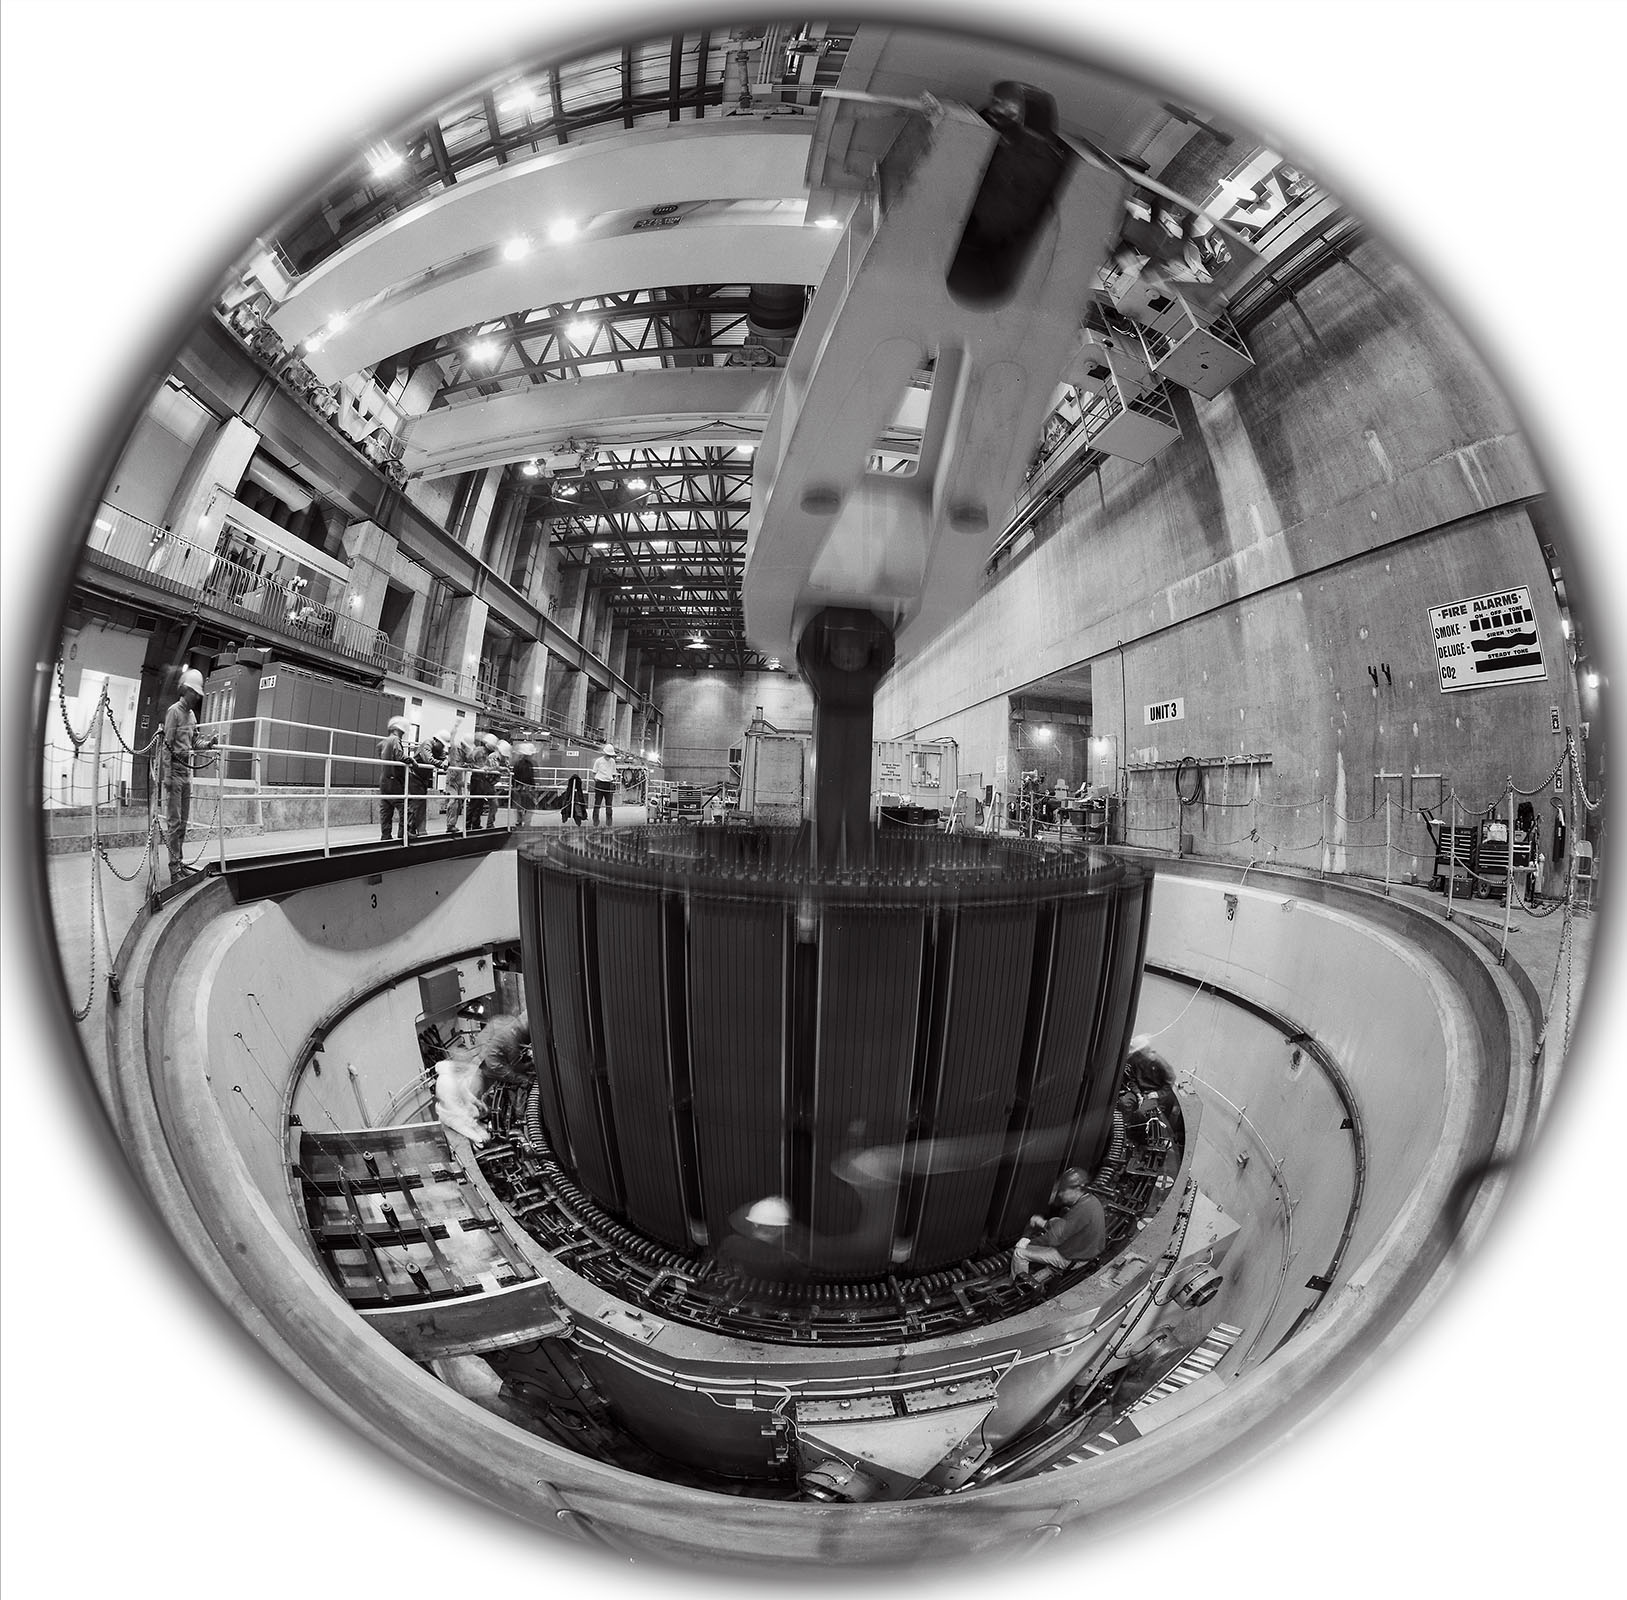
Castaic Power Plant-Pulling Rotor, California
I hope you’ll order a print of this image. As usual the price, $125, includes mounting and matting. The image will be about 1X13 inches. Please let me know about the mat at john@siskinphoto.com. Also contact me if you’d like the print shipped outside the United States. You can also get the image, and many others, in my book B-Four.

![]()