Photo Notes A place to talk about making images.

March 4, 2013

Candlelight Home Tour #1

I hope you’ll check out my books: Photographing Architecture and Understanding and Controlling Strobe Lighting. I hope you’ll get copies if you haven’t already. Of course you know that one reason for this blog is to sell the book and get you to consider one of my classes at BetterPhoto.com: An Introduction to Photographic Lighting, Portrait Lighting on Location and in the Studio, Getting Started in Commercial Photography

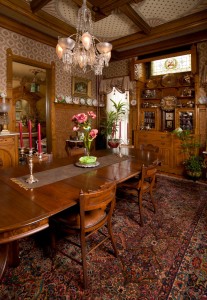
I am involved with Candlelight Home Tour in the Old North Side of Indianapolis. The tour will happen on Halloween this year. I’ll add more information about the tour in later entries. I am also doing this with a few people from the Indy MU Photo Club. So I have a small audience for these shoots. The plan is that I’ll shoot one room, with my lights, and they’ll shoot the rest of the house. Yesterday was the first shoot, and it went very well, although more time would have been welcome, especially for the people from the club.

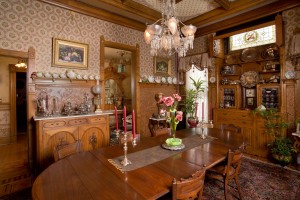
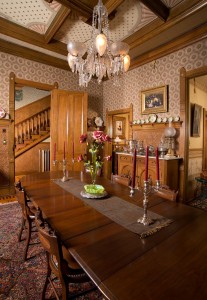
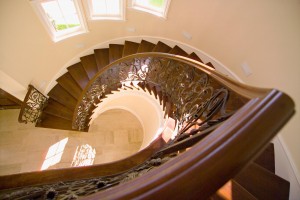
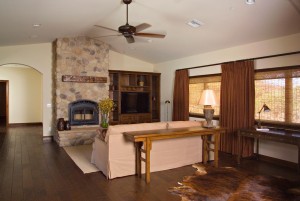
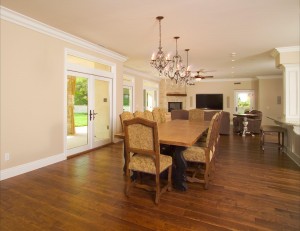
I started by looking around the house, and I settled on the dining room, because of the look of the room, and also because of the complexity. I was particularly interested in shooting into the two connecting rooms and the windows at the same time. The second camera angle was interesting because of the way the staircase was framed in the door. It was easier to shoot, first because the lights were set up and because there weren’t any windows.


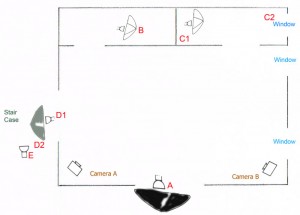
You can see the position of the lights in this diagram, of course everything isn’t exactly to scale. The A light is a Calumet 750 Travelite set at 1/4 power. It creates the overall light of the shot, and is positioned near the camera so that the shadows are less visible from the camera. I bounced the light off a 60-inch umbrella, with a black back, to create soft shadows. Of course there is a lot of information about placing lights in my book: Photographing Architecture: Lighting, Composition, Postproduction and Marketing Techniques The B light is a Norman 200B modified with a 30-inch shoot through umbrella. I normally don’t use umbrellas in this way, but here I’m trying to add light quickly to a small ancillary room, and this is a quick way to do it. I used a 1/4 CTO filter over the light because I wanted the two rooms on the side of the shot to have different colors of light. Rosco makes these filters that enable you to modify single lights in a shot. Of course you can modify all the lights in a shot in the camera and in post-production. Light C is also a Norman 200B with a 30-inch shoot through umbrella, but it doesn’t have the 1/4 CTO filter so the color is cooler. This fits because there is a window this room. The light moved from the first position, which is shown to the other side of the room to keep the reflection of the light out of the mirror. In the first shot I placed the D light to open up the left half of the room. I used another Norman 200 B and a silver umbrella. The silver umbrella is a little brighter than the white satin umbrellas I use most of the time, but the light is a little harder. In this case the extra brightness helped. I also used a 1/8 CTO filter to add just a little warmth to the edge of the room. When I made the second shot I pulled this light back just a little and changed its direction so it lit the hall rather than the room, position D2. This wasn’t quite enough to create separation on the staircase so I added a Sunpak 120J light at about 1/4 power. I used the standard bowl reflector on this light, so it was hard light, and pretty bright. I like the sparkle it added to the staircase. I just got a couple of the Sunpak 120J units, they are similar to an older Quantum strobe, but use high voltage batteries I already had. I use a lot of older equipment mostly because I started buying strobes a long time ago. I spend a lot of time helping the students in one of my BetterPhoto classes identify the type of equipment that will work best for them. The exposure was f11 at 1/15 and ISO 200. The exposure needed to be long for the windows and the lighting.


I looked at the shots in Adobe Bridge, and of course it was easy to choose the shots I wanted to work on. When I do architectural shooting the last shots are usually the ones I want to use. Next I opened the horizontal version of shot 1 in Adobe Raw. I reduced the blacks to 3, and I moved the fill light to 12. The exposure was a little dark, so I increased the exposure using the exposure slide. Then, since the right wall was too dark, I opened two separate versions of the file. The second version was much brighter than the first, almost a stop. I mixed the two versions of the shot using layers in Photoshop. I also did a little sharpening and use the dodging and burning tools here and there. The result is at the top of the shot, and I think it worked really well. Oh, I also adjusted the perspective just a little to get the verticals right.

This version was handled the same way, except that I used a little vibrance and saturation to make the carpet a little more colorful.

On this shot I increased the exposure a little and added just a little fill light. I only needed one version of this shot, so it was quick to process. I didn’t have as much time to do this shot, so I’m quite pleased at how well it turned out. About the only thing I had to do in Photoshop was use the burn tool to darken a couple of highlights.

January 17, 2013

More Tools and Tips!

I hope you’ll check out my books: Photographing Architecture and Understanding and Controlling Strobe Lighting. I hope you’ll get copies if you haven’t already. Of course you know that one reason for this blog is to sell the book and get you to consider one of my classes at BetterPhoto.com: An Introduction to Photographic Lighting, Portrait Lighting on Location and in the Studio, Getting Started in Commercial Photography

I wanted to continue with the equipment and tips I was talking about in the last entry. I always enjoy talking about these sorts of things. I feel that the equipment manufacturers often try to make us all create images in similar ways, and I prefer to be creative about making pictures. For instance there are a lot of lenses built with vibration reduction technology, and this is a great thing. But, as I mentioned in the last entry, you can use a chain pod, which will also reduce vibration. The chain pod will work with almost any camera and lens, including the stuff you already own.

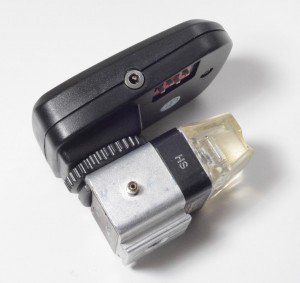
I've put a radio trigger on an optical slave so that I can use multiple sets of radio slaves.

The first thing I want to mention, because I just figured it out, allows me to use two different radio slave systems together. I try to buy a lot of receivers when I buy radio slaves because I have a lot of strobes. The problem is when I need even more receivers the signals of the two radio slave systems don’t always match up. I discovered I could put the sending unit from a second set of radio slaves onto an optical slave and trigger both sets of slaves together. One thing I’m looking for now is a very sensitive optical slave to extend the range of my radio slaves. Please note that I am still using inexpensive Chinese radio slaves with good results overall.

Cine foil is a flexible aluminum foil that can be used to block light and as lens hood.

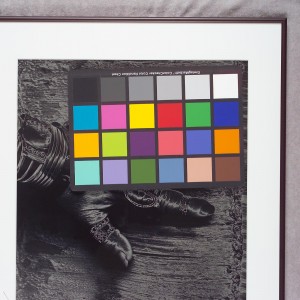
A couple more things that are in my camera case, that I didn’t mention last time, model release forms, cine foil and a GretagMacbeth ColorChecker. Of course it is always wise to have a release form whenever you shoot a person or private property, because there are severe limits on publication without a release. Because so much of my work is for clients there are times I can’t get a release, and so can’t use a shot in a book or article. Here’s a link to a good release form. I really like Cine foil, which is black aluminum foil. It can be used to control

GretagMacbeth ColorChecker, gives me good gray samples and pure colors.

the spill from a light or as a lens hood in a pinch. A couple of pieces take up no room, and can be a real lifesaver. I keep a roll in the studio. The GretagMacbeth ColorChecker is the most accurate gray and color sample I own. Since I always shoot in RAW I will shoot a sample image with the ColorChecker after I finish the set-up. I can use this sample to make the color accurate on all of the shots with the same set-up. You can also use it to help you make pleasing color, because you can see how a particular setting will affect the colors you’re using.

Perhaps I should mention that I have several camera cases, not only do I have cases for my lights but I also have hard soft and small camera cases. I store my main camera in a Pelican case. I really like this large hard case because I can store almost my entire system, everything I would take on location anyway. Also the Pelican case provides very good protection and it is pretty easy to ship. Another good thing: the Pelican cases are ugly. I avoid the fancy cases that draw peoples’ attention; you don’t want to have your camera gear stolen. The problem with a hard case is that it’s difficult to work out of, so I have a couple of soft cases for when I have to keep moving. I have different sized cases so that I can reduce the load when I need less equipment. I’d like to see a case that would allow you to add external sections, so you could create the right space to fit your gear. Of course I have a lot of gear so being able to customize a case would make it easier to work.

Almost all my cases are used. I buy inexpensive used cases from camera stores, thrift stores, surplus stores and even antique stores. I will get a case even when I don’t have anything specific to put in it, if it is cheap and in usable condition. I stuff cases inside cases to store them; otherwise I’d have run out of room long ago. It usually turns out that I need most of the cases I get. I even keep much of my studio gear in cases; you never know when you’ll have to do something unusual on location.

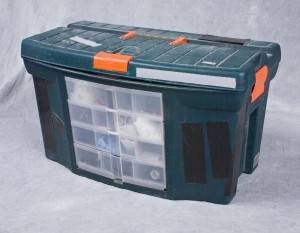
A useful case from Home Depot

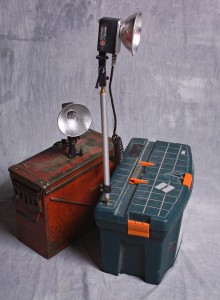
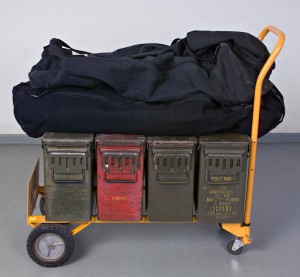
Most of my lighting cases have come from military surplus stores or hardware stores. I’ve used a lot of ammunition cases over the years because they are very strong and also waterproof. I often add a 1/4X20 threaded nut to the cases. This allows me to put a stud to mount a light onto the case. This means that I have a short light stand, or a stand I can put on a table, without having to carry another stand. I have a lot of lighting cases because I can’t use a case so heavy that I can’t actually lift it. I also have a wheeled cart, which can make it a lot easier to get lights and cameras to location. Light stands and tripods go into a large duffel bag.

These cases have 1/4X20 threads so I can attach studs for my lights.

Rolling cart, ammunition cases and duffel bag. Ready for a location shoot!


I saw this on YouTube: http://www.youtube.com/watch?v=g4aE2f07ON4&feature=player_embedded. As a long time fan of Edward Weston’s photos it was nice to see it again.

Please consider one of my classes at BetterPhoto.com:

An Introduction to Photographic Lighting

Portrait Lighting on Location and in the Studio

Getting Started in Commercial Photography

If you’re in the Indianapolis area there are other opportunities as well. I’ll be showing much of my personal architectural work in June at Indiana Landmarks. Please come look.

December 20, 2012

Handy Tools

Filed under: Basic Photo Technique,Do It Yourself,Photographic Equipment — John Siskin @ 3:43 pm

I hope you’ll check out my books: Photographing Architecture and Understanding and Controlling Strobe Lighting. I hope you’ll get copies if you haven’t already. Of course you know that one reason for this blog is to sell the book and get you to consider one of my classes at BetterPhoto.com: An Introduction to Photographic Lighting, Portrait Lighting on Location and in the Studio, Getting Started in Commercial Photography

There are things in my camera and lighting case that aren’t cameras or lights. Some of these are pretty obvious: if you have lights you must have light stands. If you have cameras you’ll have lenses. This post is about the other things, some of them are used constantly and others hardly used. But they are all critical once in a while. If you have some favorite gadgets please let me know. I’ll post the information. Because this site got spammed you’ll need to let me know by e-mail.

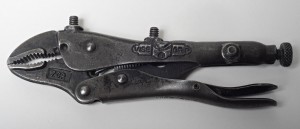
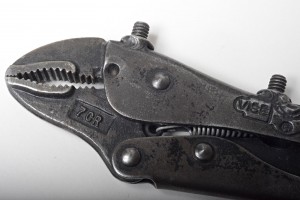
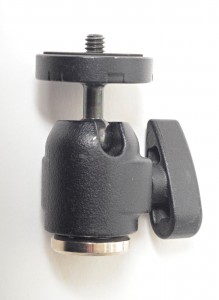
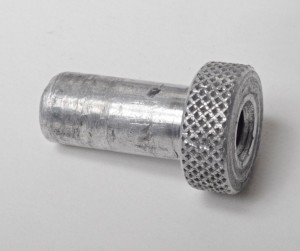
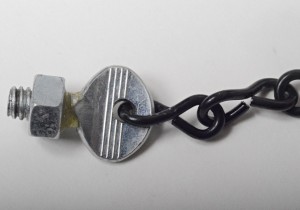
This is probably my favorite. It’s a vice grip that has tripod sized threads welded onto it. I can put on a small ball head and use it to hold the camera or a light stud and it’s a light stand. Vice grips can attach to almost anything. I don’t know of a commercial supplier for this, so, if you want one, you’ll need to visit a welding shop. Here’s the ball head and the lighting stud. This is the small lighting stud that fits all my lights.

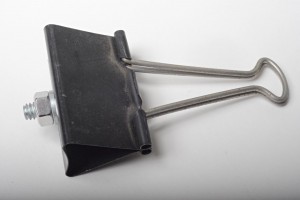
I also have this clip that I put a tripod thread on. It can hold a small light, or notes. By the way tripod thread is 1/4X20, unless you are European.

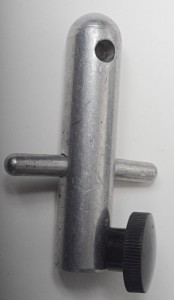
This is another sort of lighting stud, basically it allows you to mount two lights on a single light stand. This is useful when you need more power. It used to hold four lights, which is why there’s a hole. This is another thing I don’t have a supplier for. Any suggestions?

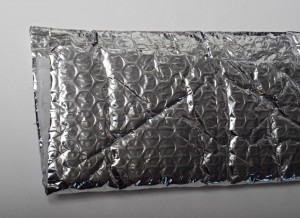
I know a lot of people have 5 in 1 reflectors but they don’t really appeal to me. I do have a piece of bubble wrap with a silver and a white side. Good as a reflector and extra padding. The piece I carry is about 18X24 inches. I also have a piece of duvatyne in the case. Duvatine is a very black cloth used for blocking light.

This is another old friend: the chain pod. Here’s more information. They’re easy to build. If you must spend the money you can get one from Calumet.

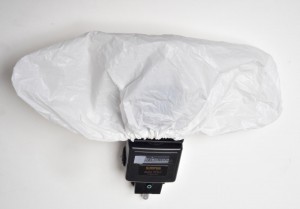
This is another one I wrote about before. It’s a shoe cover that helps modify light. For more check out this link.

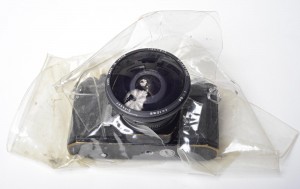
I don’t use this much, but it doesn’t take up much room. It has been important on come occasions. It’s basically a raincoat for the camera. Here’s a modern version.

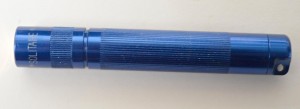
I also have a laser pointer. This helps me focus in low light by giving me a target. I have to remember to check the batteries once in a while. I don’t use it often, but when I need it I really need it.
pointer

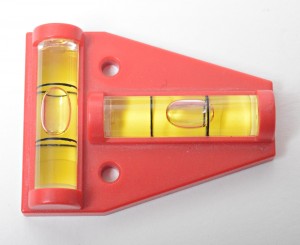
The next two items are still in my case, but I find I use my smart phone for both: a level and a flashlight. Especially with architectural photography leveling the camera is important, and I often need to see things in low light.

There are other things I should at least mention:
Model release, adult and child
Property release
Gray card
MacBeth Color checker
Cine Foil
Gaffer Tape. This is actually on the cases, which makes it easier to find

Clothes pins. I use these to hold filters on lights.
Please consider one of my classes at BetterPhoto.com:

An Introduction to Photographic Lighting

Portrait Lighting on Location and in the Studio

Getting Started in Commercial Photography

If you’re in the Indianapolis area there are other opportunities as well. I’ll be teaching a class in commercial photography next spring at Ivy Tech.


Happy Holidays!

November 27, 2012

Lighting Kits?

Filed under: Lighting Technique,Photographic Education,Photographic Equipment — John Siskin @ 11:49 am


Most people buy strobes twice. I’ve said this before. They buy a cheap kit first, and unfortunately most kits aren’t really cheap. They can learn a couple of things from this kit. The first thing they learn, and this is an important thing to learn, is whether or not they enjoy controlling the light in their pictures. What most people want to do with a camera is to capture a scene, to keep it as a memory, or to share with others. A few people want to make a photograph, control the light subject and background to make an image that wouldn’t exist without the photographer stepping in. For instance few families stand in order of height around the holiday decorations, unless someone is making a picture. Since I’ve been teaching lighting for more than twenty years, the people who want to control the light, make good light, in their pictures, are the people I’m working with. As people who read this blog know, I often write about light and I’ve written a couple of books about light Understanding and Controlling Strobe Lighting: A Guide for Digital Photographers and Photographing Architecture: Lighting, Composition, Postproduction and Marketing Techniques. These books might make good gifts for other photographers. You might consider giving a photographer one of my classes: An Introduction to Photographic Lighting, Portrait Lighting on Location and in the Studio and  Getting Started in Commercial Photography Or buying a class for yourself. By the way, all the images this week are strobe image, and most of them are from my books.

In addition to teaching you about whether or not you want to make good light, that first lighting kit often teaches you about what you want when you buy lights again. Of course you learn this by being frustrated by the problems with your first lights. Many inexpensive kits use fluorescent bulbs for light. These can only be used effectively in rooms without other light sources, and they have little or no control over the relative power of the lights. These and other continuous light sources might be good for cheap video lights, but they aren’t much use for still shooting, because you won’t have good depth of field and a short shutter speed. Strobes, or flash if you prefer, are much better lights for still cameras. They give you more light, better color balanced light, and they stop action. Unfortunately there are many strobe kits that have too little light power to do any of this. In my An Introduction to Photographic Lighting class at BetterPhoto.com I ask students to work with a couple of very cheap clamp lights. You can learn the important first lessons from $15 worth of lights as well as from a $300 kit. Plus you can use the clamp lights in the garage when you’re through doing photography with them.

Here’s the way I think about power on a strobe, or even on a continuous light: I might want to shoot in a room that had direct sunlight, and in that case I would want my lights to be much brighter than the sunlight or whatever other light there might be. If my light isn’t much brighter than the existing light than the existing light will define the kinds of pictures I can make. Of course the size and color of the room will have a lot to do with how much power I’ll need. The other big consideration is the way I modify light. If I was using hard light, direct from the strobe, I’d need much less strobe power than if I was using a large light modifier, like a soft box, umbrella or a light panel. Since I often use an umbrella and a light panel together, and the combination is inefficient, I need a lot of power. I find, based on extensive experience, that I need at least 600 watt-seconds to be able to overcome ambient light in most situations. I have and use many lights with less power, but in most situations I have at least one strobe with 600 watt-second to set the tone of my shot. Keep in mind that raising the ISO will raise the sensitivity of ambient light as quickly as the sensitivity to light from the strobes, so a higher ISO won’t always reduce your need for powerful strobes. In my classes I often recommend the Alien Bee B1600. I like this unit because of both the power and the quality.

If I were doing location work, where portability was critical, I would compromise on this. I might also accept longer recycling times, but in most location situations I would really want to have quick recycling. Keep in mind that one common location situation is shooting an event, and picture opportunities can happen very quickly. The first choice for a location strobe will probably be a powerful dedicated strobe from your camera manufacturer: perhaps a Canon 580 IIEX or a Nikon SB900. Many will get additional dedicated units from the manufacturer when they want to do more complex lighting. I can see that a second dedicated unit might be useful for shooting events, but only if you have an assistant to position the light, but for most situations a manual unit would do as well, and it would save a lot of money. I particularly like the Lumopro unit.

Of course the type and quality of the accessories is really important to evaluating a kit. Much of the advantage in a kit is the discount you get on accessories. Unfortunately many kits include poor accessories. For instance I like to see umbrellas in a kit, as I think they are good tools. If the umbrellas don’t have a removable black back they are pretty much useless as light modifiers, because you can’t control the direction of the light. Many people selling kits save a couple of bucks and include only translucent umbrellas, which is too bad. Here’s a list of the tools I would like to have with one light: light stand, barn doors, bowl reflector, 45 inch umbrella with a black back, a light panel and a sync wire or a radio slave. Here’s an article about shooting with one light, there’s a lot you can do! Additional useful accessories include: a snoot or a grid spot, a small light stand and a large umbrella, maybe 60 inches. I already put a list of the basic kit I often recommend on this blog here

Happy holidays. I hope that you receive light for the holidays!

November 12, 2012

Shooting Large Format at Indiana Landmarks


Since I’ve been writing about architectural shooting lately, I should start off by mentioning my book Photographing Architecture. Available at Amazon and other fine booksellers.

Of course my other book: is also available, why not get the set?

And my classes continue at BetterPhoto.com. I’d like to meet you in class.
An Introduction to Photographic Lighting,
Portrait Lighting on Location and in the Studio,

Getting Started in Commercial Photography

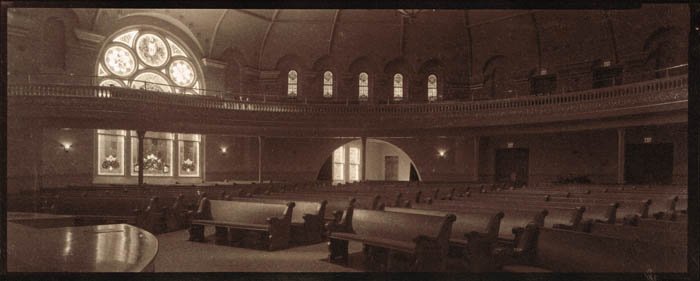
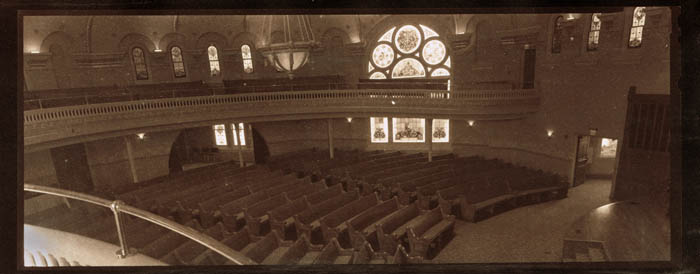
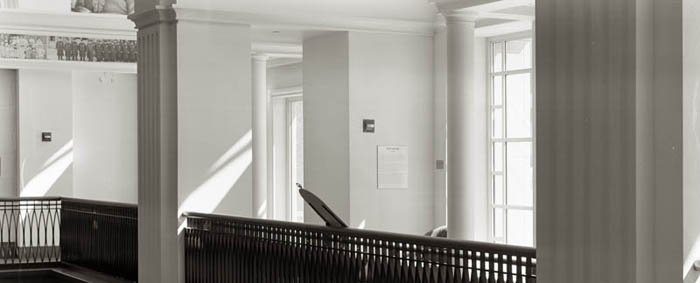
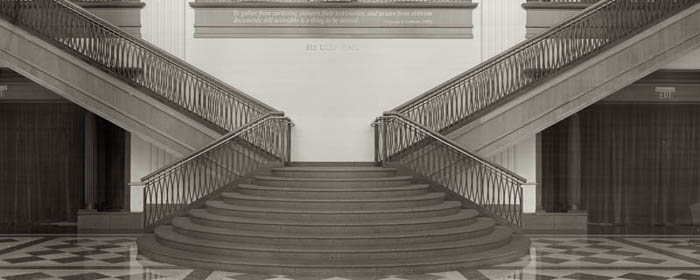
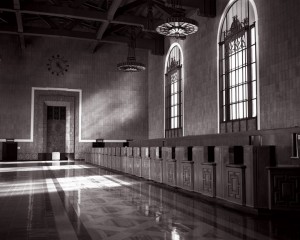
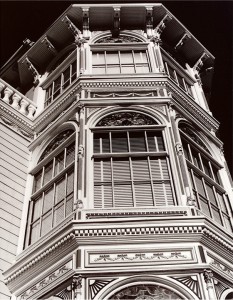
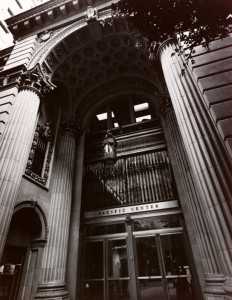
I’ve been continuing to shoot architecture with the 8X10 camera, and I must say I am having a fabulous time doing it. I did a shoot at a building called the Indiana Landmarks Center, which was formerly the Central Avenue Methodist Church. After restoration the facility is just stunning. I did several shots with the big camera. Two of my favorites are reproduced here. These are scans of the Vandyke prints. As I mentioned in previous blog entries the reproductions are very different from original prints. I will be selling originals soon, so you’ll be able to have an original for yourself. I am going back to the Indiana landmarks Center, probably tomorrow, to do some more shooting.

I should add a few technical details, in case anybody is keeping track. Both these images were made with my widest lens: a 165mm Angulon. This lens has about an 85º angle of view, which is very wide for large format, but not quite as wide as a 20mm lens on full frame 35mm film. I’m continuing to process in a two-bath version of D-23. The first bath is 5 minutes and the second just 3 minutes. I’m pretty happy with this, but I do need to increase the exposure a little. I’m using HP-5 film from Ilford currently, but I’m looking at other options. A box of 25 sheets of 8X10 film costs almost $90, so I want to be careful about what I choose. I’m actually shooting two 4X10-inch images on a single sheet of 8X10-inch film. I use a dark slide I’ve cut in half to protect the unexposed side of the film in the camera. This works really well, but I have to be careful not to double expose.

The image on a Vandyke print is made from silver, like modern black and white photo papers. However the light sensitive coating is mixed by hand and the chemical reactions are very different from modern photo papers. The coating is then brushed onto watercolor or other fine art paper. I’ve been having some difficulty coating the paper, but I think I have it figured out now. If you’re interested in more information about hand coated papers and the chemical/mechanical history of photography you should check out The Keepers of Light by William Crawford. Since it is out of print a new copy can be quite expensive, but Amazon offers used copies at reasonable prices.

After shooting digital for the last few years it is really interesting to travel back in time to large format cameras and older printing processes. As always shooting a big camera makes me a more careful shooter when I return to shooting digital.
Please consider one of my classes at BetterPhoto.com:

An Introduction to Photographic Lighting

Portrait Lighting on Location and in the Studio

Getting Started in Commercial Photography

If you’re in the Indianapolis area there are other opportunities as well. I’ll be teaching a class in commercial photography next spring at Ivy Tech.

September 25, 2012

Project Begins!

I hope you’ll check out my books: Photographing Architecture and Understanding and Controlling Strobe Lighting. I hope you’ll get copies if you haven’t already. Of course you know that one reason for this blog is to sell the book and get you to consider one of my classes at BetterPhoto.com: An Introduction to Photographic Lighting, Portrait Lighting on Location and in the Studio, Getting Started in Commercial Photography If you’re in the Indianapolis area there are other opportunities as well. I’ll be teaching a class in commercial photography next spring at Ivy Tech.


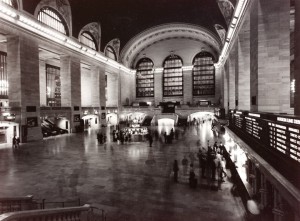
I did my first shoot for the project I discussed in the last blog entry. These are the images I used in this entry. Of course these don’t really look like prints, they look like the way you balanced your screen. My working title is Interiors. This shoot went well, there are, however, some defects in some negatives. I did the shoot at the Indiana Historical Society. They were very accommodating about my large camera and tripod. Many of the people in the building seemed to assume that I was one of the displays. There was more light inside the building than I had expected so the exposures were a little shorter than I expected; ranging from 1 to 12 seconds. I shot at f32 or f45 and used my two Dagors; the 8.25 inch and the 14 inch I discussed in the last blog. When you use a larger image area you need a longer lens to create the same field of view. So a 12 inch (300 mm) lens on an 8X10 camera sees like a 50 mm (2 inch) lens on my full frame Nikon D800. When you use longer lenses and a larger capture area you also need to stop the lens down further to get the same depth of field. A 12 inch lens will need to be stopped down to f64 to get the same depth of field as a 50mm lens at f16. Of course this means the shutter will be open eight times as long.

I have to work out shutter issues on some lenses before I can use them in the field. When you use long exposures you don’t need a very sophisticated shutter, in fact a lens cap will do! The problem with a lens cap is that you may shake the camera when you remove it. I have used Packard shutters, which are air driven, in the studio. These work especially well with strobes, but I’m not sure I can mount them on the camera in the field. My Dagors are both mounted in leaf shutters.

I have been using a recipe for developing the film I got from The Darkroom Cookbook, Third Edition. I used a recipe for a divided developer: D-23. The developing agents are separate from the accelerators. There are several reasons that this is advantageous for this project: one is that I can process several types of film in the same way. As I may change films, or use older film, this will help me get printable negatives. I had processing problem with the second sheet of film I shot at the Indiana Historical Society. I think I contaminated my developer. You can see streaking in one of the images I’ve attached to this blog.

As I suggested at the top of this entry, the images I’ve attached aren’t really my goal. I will be contact printing these negatives onto watercolor paper using the Van Dyke process. This is the next step in this project. I may consider other processes, like Cyanotype or Kallitype, but I hope that Van Dykes will work out. More as the project evolves.


August 27, 2012

Making the Camera Personal

Filed under: Indianapolis,Photographic Equipment — John Siskin @ 2:33 pm

I hope you’ll check out my books: Photographing Architecture and Understanding and Controlling Strobe Lighting. I hope you’ll get copies if you haven’t already. Of course you know that one reason for this blog is to sell the book and get you to consider one of my classes at BetterPhoto.com: An Introduction to Photographic Lighting, Portrait Lighting on Location and in the Studio, Getting Started in Commercial Photography If you’re in the Indianapolis area there are other opportunities as well. I’ll be teaching a class in commercial photography next spring at Ivy Tech.

According to the Word Press program I use to post this blog this is blog number 100! I don’t know if that proves anything other than I can write lengthy note to myself without knowing if anyone reads this thing. So if you look at this blog please send an e-mail or something.

I went to Camp Chesterfield here in Indiana yesterday. The camp is a Spiritualist center that began in the nineteenth century, and an interesting place to visit. All images were made with the new Nikon D800.

I’ve been writing about my Nikon D800 for the last couple of blogs, but today I want to discuss making a camera your camera. Anytime you get a new piece of equipment you’ll need to learn about how it works, but it is also important to customize the camera to your way of working. I think most of this is quite simple: really just choosing the options you’ll use. For instance when I’m shooting for clients, I usually have the camera set to manual exposure. I evaluate the exposures using the laptop and the LCD which is why I spent time setting up Eye-Fi option I already wrote about. I also set up a couple of custom white balance settings for my strobes. These are things that make the camera work better for me. I also put a thin strap on the camera. I like straps that are about half an inch wide because, while I almost never put the camera around my neck, I do wrap the strap around my hand. When I am hand holding the camera I keep the camera in my right hand. The strap is wrapped three times around my hand, so I can let go of the camera without dropping the camera. I learned this from Nikon School in 1978 and I still like it. I can get the camera to my eye and shoot very quickly. By the way my left hand cradles the lens and braces against my body. This makes it easier to shoot hand held. When I am shooting for my self I’ll generally shoot with aperture priority, so, of course I will be able to find the M and A setting pretty quickly.

There are things I generally don’t use on any camera. My last camera had a microphone for taking notes about your pictures. I never used this on purpose, but I did turn it on by mistake a couple of times. I couldn’t tell you how to actually make it work. I don’t expect I’ll use the in camera editing features of the Nikon D800, so I may never really know how they work. It’s important to remember it’s your camera; it should work as an extension of your vision. If you need to look at the instruction book before every shot you should probably practice with the settings you use most often. If you’re shooting with a DSLR and you keep all the settings on auto all the time you’ve limited your control over the camera and your ability to express your own vision.

I think I’ve made modifications on every camera I’ve ever had. Sometimes it’s just the settings, like turning on the lines in the viewfinder. On my Speed Graphic I added extra infinity stops, added a filter to the range finder and changed the lens. For my Mamiya C330 camera I got prism finders, brackets, and built a custom Polaroid camera. I really loved the speed finder on my Nikon F, but it was really built for a Nikon F2. I think that it is important to examine all of the accessories that are available for your camera. While many of them might not help you with your shooting, they may inspire you with new ideas of how to shoot.

August 14, 2012

New Camera!

I hope you’ll check out my books: Photographing Architecture and Understanding and Controlling Strobe Lighting. I hope you’ll get copies if you haven’t already. Of course you know that one reason for this blog is to sell the book and get you to consider one of my classes at BetterPhoto.com: An Introduction to Photographic Lighting Portrait Lighting on Location and in the Studio Getting Started in Commercial Photography If you’re in the Indianapolis area there are other opportunities as well. I’ll be giving a Photomicrography presentation on August 23 at Black Dog Books in Zionsville. Call 317.733.1747 to reserve a space. I’ll be teaching a class in commercial photography next spring at Ivy Tech.

I’ve been spending time learning to work with my new camera, a Nikon D800. Since I haven’t had a new digital camera in about 8 years there are a few things to catch up on. My previous camera was a full frame camera that used Nikon lenses, so I can use the same glass, but I needed to make several up grades to work with the 36 megapixel images. I’ve had to get larger CF cards and a faster card reader, as well as a portable hard drive for location work.

One of the upgrades I am most excited about is the Eye-Fi card. This is an SD card that transfers the image files wirelessly to the computer. I have long been a proponent of setting up your lighting while looking at the image on a laptop. On my last camera the only way to do this was with a cable that ran between the camera and the computer. Most wireless systems are very expensive: Nikon makes a Wireless File Transmitter, but it costs about $740. The Eye-Fi card is about $80, but there are a lot of considerations about using it. First it is only appropriate for small to medium sized files. This would mean that I really couldn’t use it, but the D800 has two card slots, one for a CF card and another for an SD card. So you can set up the camera to put the RAW file on the CF card and put a smaller jpg file on to the Eye-Fi SD card. There are some definite challenges to setting up the network, but I got everything to work. One thing I am still trying to find is a program that will display the most recent image.

One of the keys to getting comfortable with a new camera is to play with it. I spent several days in my office playing with micro lenses (check out the earlier blog entries for info on specialized micro lenses. Look at the Micro Photography Category). I made a lot of bad images, and few that are passable. The key is that I leaned a lot about how the camera sees. I also did tests on resolution, long exposure and high ISO settings. It is important to look at the files in detail.

It is also very important to be willing to make mistakes. So I need to play with the buttons and the settings. I don’t need to memorize every function of the camera, what I need is to make choices about every function of the camera. For instance I don’t think I’ll use the photo editing functions of the camera, but I will use the custom white balance settings.

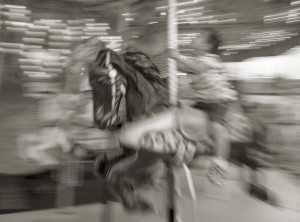
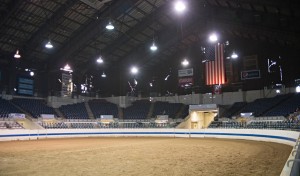
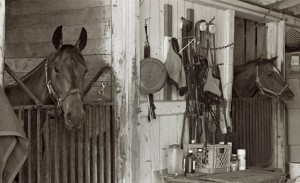
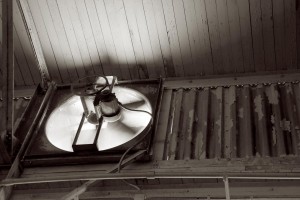
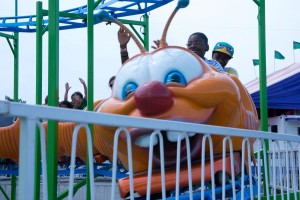
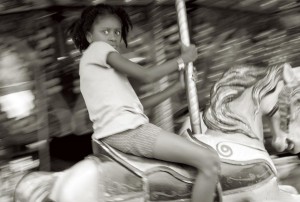
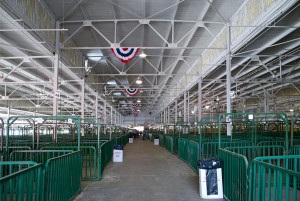
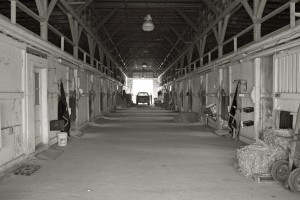
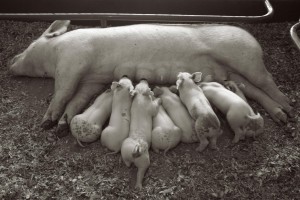
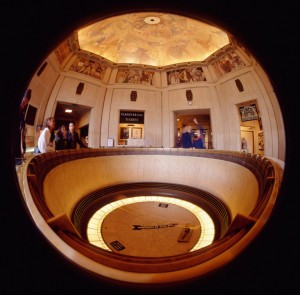
Yesterday I went to the Indiana State Fair, which was a great place to play with the camera. I made a lot of shots, which helps me to test my workflow. I got to play with long exposures, which didn’t work very well with the last camera. I also experimented with shots at high ISO. One of the biggest problems with the old camera was that the maximum usable ISO was 160. I can now shoot at ISO 6400, which is really remarkable. The shots I’m attaching are from the fair.

I have to say I am very impressed with the camera. The files are remarkably crisp and saturated. The camera is very quick, by my standards. I particularly like how quickly the camera turns on. I think the camera might be a little lighter than my last camera. Certainly the camera is a little smaller, but the LCD is a lot larger. I’ve done a few experiments with my strobe and everything works well there. I’m not done playing yet, but I am ready to use the camera on a commercial job.

May 31, 2012

More Big Camera Notes

I wrote this for the person who just bought a 8X10 camera from me. I actually know a few people who are working in large format again, so I thought I would post a few notes. I’m going to be shooting people blowing hot glass tomorrow; I’m pretty excited about that. I’m including a few images I made with big cameras.

A photograph is a two dimensional illusion of a three dimensional reality. It has limitations primarily that movement of the viewer’s eye doesn’t change the scene and the amount of detail captured and displayed. The amount of detail can be changed of course, but it is not always as easy as just increasing the size of a capture. There are three primary considerations: depth of field, resolution and capture. Resolution is thought of as sharpness, but the human eye will interpret a contrasty image of lower resolution as sharper than a low contrast image with high resolution. Arthur Cox’s book Photographic Optics shows a good example of this. There are limitations to how much you can adjust sharpness in post-production, but depending on the image, you can increase contrast until there are just two tones: black and white with no intermediate grays.

Lens resolution: Lenses are optimized for different size capture. A lens optimized for a smaller capture has a greater potential resolution then a lens designed for large format work. Fixed focal length lenses have fewer air to glass surfaces, and fewer elements, and so are sharper than zoom lenses. So a 50mm lens designed for a 24mmX36mm (full frame 35mm film area) is sharper than a 150 mm lens designed to be used with 4X5 inch film. The number of air to glass surfaces is not the only indicator of sharpness, and perhaps not the best one. Many lenses with 6 elements are sharper than 4 element lenses, but a zoom with 10 elements that move in different groups is always lower in sharpness than the best fixed focal length lenses. Resolution refers to the ability to separate fine details. A lens that can delineate the details of a feather has high resolution.

Depth of field: Many people interpret this as synonymous with sharpness, but in fact that is wrong. A lens will resolve better somewhere between one and three stops from wide open, then it will at the minimum aperture. Once again resolution is the ability to separate detail. As the lens approaches minimum aperture the diaphragm begins to diffract light, which reduces resolution. So while f64 may keep a lot of stuff in focus it doesn’t produce maximum sharpness. There are computer programs that are able to take several captures and combine them to obtain maximum sharpness and extended depth of field. Also, a larger capture area requires a smaller aperture to obtain the same depth of field.  A 150mm lens on a 4X5 camera is in focus from 32 feet to infinity at f8, a 50mm lens on a 35mm camera is in focus from about 6 feet to infinity at the same aperture.

Capture resolution: This is where a large format camera can make up for it’s other challenges. Film’s actual resolution is a factor of how it is manufactured, so a bigger piece of film has more resolution than a smaller piece of film, just because there is more film. A 35mm frame is 1.5 square inches, while a 4X5 piece of film is 20 square inches, more than 13 times bigger. This relationship is different with digital, more total pixels generally means a higher resolution capture. However I have seen some information that suggests more pixels on a larger capture area can be sharper than the same number of pixels in a smaller area.

As I suggested above you can increase apparent sharpness by increasing contrast, but there are limits. Many times increased contrast just doesn’t look good.

Notes for focus and exposure with large format cameras: Many lenses need to be refocused after you stop them down to the shooting aperture. This can be difficult because the image is so dark on the ground glass. This is particularly true of wide-angle lenses. Also wide-angle lenses are much sharper if focused at the hyper focal distance when stopped down rather than infinity. This means extending the bellows just a little. Put another way: if you have a 65mm lens on a 4X5 camera and you want to focus at infinity with an aperture of f11, you can focus the lens at infinity, but the image will be sharper if you focus at 8 feet from the lens. This is the mid point for your depth of field at that aperture. Total depth of field would be 3 feet to infinity at f11.

Another problem with large format wide-angle lenses is cosign 4 failure. The focal length is approximately the distance from the diaphragm of the lens to the film, when the lens is focused at infinity. As you can figure out for yourself the distance from the diaphragm to the corner of the frame is considerably greater on a wide-angle lens. This means that the light isn’t even across the frame on a wide-angle lens. There are filters that can correct this for you, and I am sure you could also correct for it in Photoshop.

One advantage of a large format camera is that you can selectively focus. This is similar to what you can do with a Lens Baby: shift the plane of the lens so that the focus follows the image or so that focus goes against the image. With large format shooting, where depth of field can be a challenge, this feature is very important.
Thanks for paying attention the blog. I’ll be back soon. Here are the usual reminders.
Please check out my books and classes:

Understanding and Controlling Strobe Lighting: A Guide for Digital Photographers

Photographing Architecture: Lighting, Composition, Postproduction and Marketing Techniques

An Introduction to Photographic Lighting

Portrait Lighting on Location and in the Studio

Getting Started in Commercial Photography

Thanks, John


April 22, 2012

Bubbles in the glass.

Filed under: Photographic Education,Photographic Equipment — John Siskin @ 3:31 pm


Amazon is shipping copies of my second book: Photographing Architecture. This is really exciting! Of course you can also get my first book Understanding and Controlling Strobe Lighting. You can download copies of most of my articles and some do it yourself projects. I teach three classes at BetterPhoto: Portrait Lighting on Location and in the Studio, An Introduction to Photographic Lighting and Getting Started in Commercial Photography. I hope you’ll check them out.

I used a double exposure to capture both a soft and sharp image with different lens settings.

When I started doing photography bubbles in a lens was considered a good sign. They meant that the glass had been at the perfect temperature when the lens was made. There were really only two types of optical glass: crown and flint. Glass has always been critical for photography. The first lenses were very slow, which meant that exposures were many minutes long. Josef Petzval designed a much faster lens in 1840 that made portraiture possible. The first photographs were made on silver coated copper plates, for Daguerreotypes and on paper for Talbot’s photos. Soon photographs were made on glass plates, because this made it much easier to make additional copies of an image and keep good detail. The famous photographs of the Civil War were made on wet plates, which required very fast work by the photographer. The glass plate had to be coated, exposed and processed before the sensitive coating dried. Those photographers worked hard to make an image.
This image was originally made for an article in View Camera Magazine

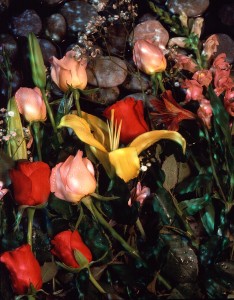
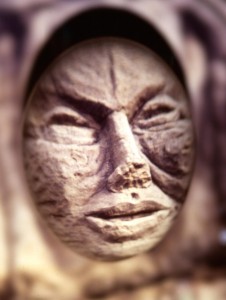
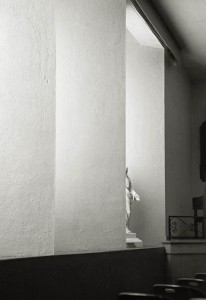
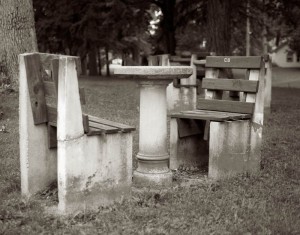
A few years ago, before Photoshop, I used to rely on the glass to make an image special. I had about twenty lenses for my view cameras that would do things like close focusing or capturing a wider angle of view. I had several soft focus lenses, including a set I assembled myself. The biggest challenge was in making an image that was both soft and sharp. This usually required lighting the image twice and making a double exposure. It was really a great feeling when everything worked. Now you can make a second layer in Photoshop and apply Gaussian Blur. Then you can do whatever blending you want between the two versions. The tools we have today allow us much more control over our images, and more options. However, there was a wonderful sense of accomplishment in making an image with special glass and light. I’ve attached images from soft focus lenses this week. The ones that used soft and sharp exposures in one image are marked.

I mounted a 180 soft Fuginon on a SLR Graflex B, quite a combination!

If you want to shoot classic lenses with a digital camera you should check out this article. It will tell you how to adapt a dSLR to a view camera.

I’m going to be judging a contest for the Indianapolis Camera Club on Tuesday. I really hope to be impressed. I expect to be putting up a schedule for classes with Indy photo Coach here and on the website soon. Of course you can sign up for one of my classes at BetterPhoto:An Introduction to Photographic Lighting
Portrait Lighting on Location and in the Studio

Getting Started in Commercial Photography
I hope you’ll check them out. I have been told that prices are going up this year at BetterPhoto, so you might want to sign up soon.

Another double exposure with both a sharp and a soft exposure.

Nautilus Shell

« Newer PostsOlder Posts »

Powered by WordPress