Photo Notes A place to talk about making images.

February 7, 2017

Wide-Angle Lenses for Large Format Cameras

Filed under: Film Technique,Large Format Photography,Photographic Equipment — John Siskin @ 6:03 pm

So this is a couple of things about wide-angle lenses for large format lenses.
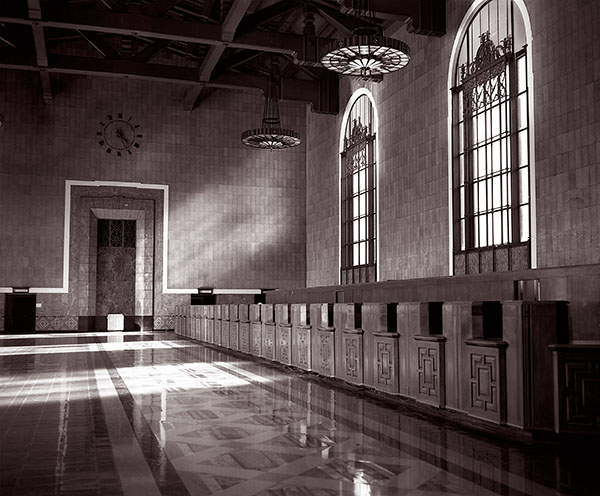
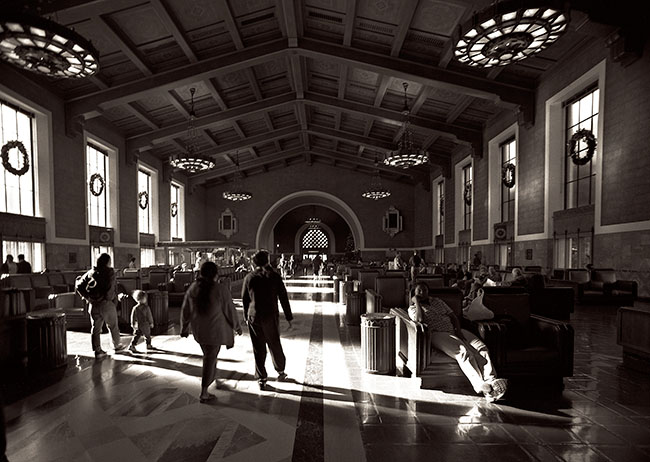
Union Station, Los Angeles #1

Union Station, Los Angeles #1 This shot was made with a 65mm f8 lens. Focus is tricky with this lens

Section 1

I love lenses. I think it is just amazing that a small piece of glass can actually bend light and form an image. My favorite lenses are wide-angle lenses. I’ve got a 14mm that fits my digital camera. It will produce a 115º angle of view on the full frame camera. It’s well corrected especially with the plug in available in Photoshop.

If I were a simple person this would be enough for me. Ah, that that was the case. You see I also love big cameras. No I mean BIG cameras. Once upon a time photographers used big cameras: 8X10 film and larger. Back in those days there was a lens that had a wider angle of view than my 14mm, possible wider than anything made since. The Goerz Hypergon had a 130º angle of view, and there are reports that it could resolve even a larger angle. In addition the lens had no rectilinear distortion, which means that a straight line on the edge of the frame stayed straight. Unless I use the plug-in with my 14mm lens edge lines don’t stay straight. This link goes to a picture of a Hypergon (http://inphoto.blog.hu/2015/12/03/goerz_hypergon)

Not that the Hypergon doesn’t have problems; it has lots of problems. Most Hypergons only had two aperture settings, often f22 and f32, but sometimes 48 and 96. The thing is those last two numbers really meant about the same thing as f22 and f32, they were a special Goerz numbering system. This is just one of the things that makes these lenses so difficult to work with. Consider trying to focus with a lens that is f22, and keep in mind you’re focusing on a ground glass under a black clot. Oh, and don’t forget the image will be upside down and backwards. Anything for a weird life.

My 14mm lens has 14 glass elements. The Hypergon has 2. The glass in the lens is about the size of a marble. Now you may be saying, at least if the lens is that simple it must be cheap. NO. The average Hypergon costs about $3000. Yes, that is three thousand United States Dollars, and a really nice one may go for double that. I think there are a couple of reasons for the high prices. First, I don’t think they made all that many of them. They were made between about 1900 and 1920, so not that many still exist or are for sale. No one, ever, made any lens that did what a Hypergon does: cover a large piece of film with a huge angle of view.

I would guess that the reason that no one else ever made a lens like the Hypergon was that they are an incredible pain to use. First, as mentioned, they can’t be easy to focus. Second there is the problem with the evenness of exposure. The exposure in the center of the frame is at least four times more than the exposure on the edges. The problem is that the distance from the center of the lens to the film, which is the actual focal length, is much shorter than the distance from the center of the lens to the corner of the film. This is called Cosine failure, just to make things more difficult by adding trigonometry to it. You can work out a rough approximation by comparing the distance from the middle of the lens to the center or to the corner and working the problem like a bellows extension correction. The effect is that the center of the image is MUCH brighter than the edges.

Goerz understood this issue, and designed a really weird solution for the problem. The built a sort of fan that moved in front of the lens. At least I think it moved; the various descriptions differ. Then you removed the fan entirely for part of the exposure. There was a squeeze bulb to manipulate the fan. This must have been an unbelievable pain in the ass. I’ll probably write more about modern wide angle lenses for large format later, but for now it’s enough to know that other companies solved the problem by using a variable density filter: darker in the center than on the sides.
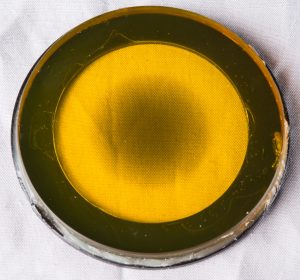
 

center filter

This filter compensates for the fact that the edges are darker on the sides of a wide angle shot. It does this by removing light from the center of the shot. this one also controls contrast on black and white film, which is why it’s yellow

Another problem is that the lens is so wide that the parts of many cameras would show up in the shot when you used this lens. So, for instance when I use a 121mm Schneider Super Angulon lens with my 8X10 Toyo field camera the bed of the camera shows up in the shot. Very often photographers used a dedicated camera for theses lenses. This is a little easier than it sounds, since you wouldn’t need to focus the camera, and you might not be able to. The idea would be to build a camera that is set to the hyper focal distance of the lens. The hyper focal distance is the point where the depth of field, from front to back, is maximized with a lens. This actually gives you a better image than if you focus at infinity and stop down, particularly with a wide-angle lens. It’s just one more issue with this lens.
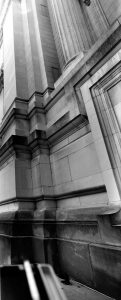
Post Office-Indianapois

You can see the bed of my Toyo 8X10 camera in this shot.

One more annoyance: there is no shutter in the lens. Large format lenses usually have internal shutters, but there isn’t any way to build one into a Hypergon, or at least there wasn’t when the lenses were build I’ve never heard of anybody installing a shutter into a Hypergon. However, since you’re generally using the lens indoors at f22 of f32, your exposure is, likely to be very long anyway. So I guess you can use a lens cap. They made versions of the Hypergons without the fans. These lenses are reported to only cover 110º. Supposedly they have even coverage without needing the fan. I’m not at all sure that I believe this.

The basic design of the lens is called a globe lens, because of the marble like shape of the lens. There were people who built them before the Hypergon, for instance I have a Zentmayer lens that is a two-element globe lens, but it’s not designed to be an extreme wide-angle lens. It seems other early lens manufacturers adopted a four-element design, like the Zeiss f18 Protar or the six-element design of the Schneider f6.8 Angulons. Of course the later designs were generally 6 or 8 element lenses like the Schneider Super Angulons and the Zeiss Biogons. These lenses were faster. These lenses were better corrected for chromatic aberration, but they didn’t cover as much. The Schneider Angulon only covered 84º. A much later Schneider Super Angulon generally covers only 100º. What this means is that you could use a 90mm Hypergon with an 8X10 camera, but a 90mm Super Angulon would only cover the 5X7 format.
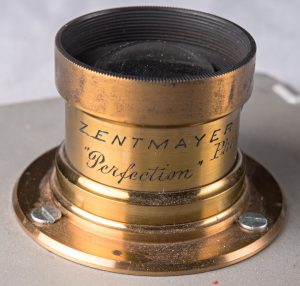
Zentmayer Lens

This is an early glob lens by Zentmayer

Now to the good part: my dog got me up at four in the morning the other day. Since I couldn’t get back to sleep I was trolling eBay. I found a Goerz Hypergon for just $200, buy it now! That’s two hundred United States Dollars. And there was much rejoicing! Of course I kept the noise down so as not to wake the wife. I am waiting to receive the lens as I write this. From the pictures I know that this lens is weird even for a Hypergon. The lens does not have the usual inverted cone shape mount. The focal length, 127mm is not mentioned on early Goerz literature. It has only a single diaphragm opening. I’ve been able to find very few references to this particular Hypergon on line. It might have been used for map copying. I did see an auction record of the same lens selling for 1800€ (is that the right sign for Euros?) so I still feel good about buying it.

If it is a usable lens for large format work then the lens should cover 11X14 inch film and maybe 16X20 inch film. That is one whole hell of a lot of film. Now, as you may know, I have an 11X14 inch camera. The thing is that there is no way I could get the standards close enough together to shoot with this lens. I could make a box that would fit the back from the 11X14 inch camera, so that is probably the best way forward. It’s good that I have a couple of 11X14 inch film holders, because the damn holders usually cot a couple of hundred bucks. If I mount the lens on a Speed Graphic lens board then I can at least start testing the lens with the 8X10 camera. It’s probably going to take a bout a year to start getting good images with this lens. More if I lose my mind and start trying to work out a way to shoot 16X20.

Section 2

I just received the Hypergon. This lens is extremely strange, even for a Hypergon. First Hypergons were built by Goerz Berlin in the very early part of the twentieth century, say between 1900 and 1920. The serial number on this lens matches lens made American Goerz after 1950. Hypergons weren’t coated. This lens seems to be coated. Apparently these were made for a map-making function, but it’s hard to tell. Very few Hypergons like this are shown on the web. So this lens is a very rare rarity. I don’t know how big an area the lens will cover, but by eye it does seem to have a LOT of coverage. So the next step is to mount the lens, but that’s not going to be easy. As you might be able to tell from the picture the lens has no mounting threads. I’ll probably need to work with a machinist to put the lens onto a Speed Graphic board. I have a special board to mount Speed Graphic boards on my Toyo cameras and onto my 11X14 camera. I’ll probably mount the lens off center so I can create some rise movement if I build a dedicated 11X14 camera for the lens.
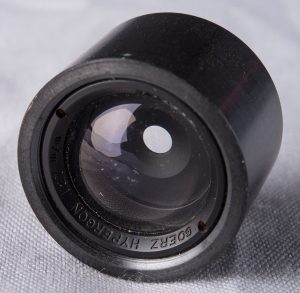
127mm Hypergon

My new Hypergon! It’s less than an inch across.

There is going to be a learning curve with this lens. I can’t be sure about the coverage until I can mount it on a camera. Then I’ll need to figure out how to manage the cosine failure. The more coverage the lens has, the bigger this problem will be. As I mentioned above most Hypergons were built with a fan. This lens didn’t have a fan. I don’t think that I can reverse engineer a fan for the lens. I could do something with a center filter. Maybe I could even build a mount for a center filter. Surplus Shed has center filters for Metrogon lenses for just $4, cheap. There is a picture of the Metrogon filter above. Center sharp filters for Schneider Super Angulons generally cost a couple of hundred dollars used, which makes the Metrogon filters look cheap. One detail about the Metrogon filters is that they are also yellow filters, but yellow filters are very useful with black and white film.

There’s another way to manage the cosine failure. I could just dodge the exposure in front of the camera, the way I would dodge a print in the darkroom. I’ll bet the learning curve on that sill will be pretty steep.

If the lens does cover 11X14 film I still can’t use it with my 11X14 camera. There is no way to get the lens anywhere close to five inches form the film on the camera. Also the camera isn’t really good for location work. So IF it covers I’ll need to build a camera, well really just a box. See the focus will need to be set at the hyper focal distance for the lens. Since the lens has a small stop and will be very difficult to view the plan is to build a camera with fixed focus. At 11X14 the lens probably won’t have any extra coverage, so I won’t need movements. If there is coverage, and that would be nice, I can build in a way to shift the lens board.

When I get everything built I’ll probably keep using Ilford Multigrade Paper instead of film. I’ve been using this so far with the 11X14 in the studio, and it’s worked quite well. I’ve done some blog posts about working with the current 11X14 cameras that discuss using the paper. The ISO is about 100. Of course the processing is fast and easy. I’ve got a large scanner so I can take the negatives into digital after they’re processed.

Frankly I won’t be surprised if it takes the better part of a year to make good images with my new lens.

Section 3

I thought I should add details about the evolution of wide angle lenses, just to give some context.

Pretty much all wide-angle lenses for full frame digital cameras are retro focus designs. This design allows the lens to be placed further from the film. This is essential for a SLR design camera because the camera requires space for the mirror. There were older designs for range finder cameras, but I don’t think they were better than current designs. For what it’s worth most, but not all, wide-angle lenses for medium format cameras were also retro focus designs. A notable exception would be the 38mm Zeiss Biogon that was permanently mounted to the Hasselblad SWC camera. Of course this camera didn’t have a mirror.

Zeiss made a wide-angle Protar for large format cameras, probably about the same time that Goerz was amking the Hypergon. These didn’t have as much coverage as the Hypergon, but they were a little faster. It takes a Hypergon to make f18 look fast. There are other Protars from Zeiss; the f18 ones were the only really wide angle versions. The Protars were four element lenses
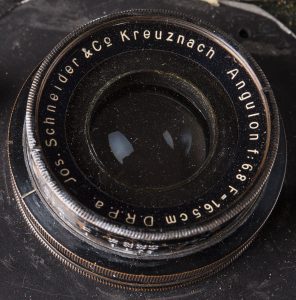
165mm Angulon

This is my 165mm Angulon. It wasn’t originally coated, but i got coating put on. It’s pretty good!

Schneider introduced the Angulon lenses around 1930. These were six element lenses, and quite well corrected. The aperture on these lenses is f6.8, which is so much faster than a Protar of a Hypergon! You can actually frame and focus an Angulon on the ground glass, hard to do with the other lenses. I have a 165 Angulon. The overall sharpness is adequate. It will just cover 8X10, in fact you have to be careful or you’ll lose the corners. As with most of the early Angulon lenses mine wasn’t coated or mounted in a shutter. I had the lens coated, which improved it’s performance. Mine is mounted in front of a Packard shutter. Frankly it isn’t pretty, but it does work pretty well.

Schneider went on to develop the Super Angulon lenses, which were the standard wide-angle when I stated doing large format work. Frankly they are fabulous. Even my older f8 Super Angulon lenses are quite great. They generally came in an f8 version, which was a 6-element design and an f5.6 version, which was an 8-element design. I own several of the f8 lenses and I think they are great. Predictably, since I told you I really like wide angle lenses, my favorite is the 65mm for 4X5 and the 121 for the 8X10 format. If you shoot 8X10 you should really take a look at the 121mm or the later 120mm Super Angulon. Strangely enough they are very reasonably priced, often about 20% of what a 165mm Super Angulon costs. Of course you need to be careful with a lens that wide. If I shoot a vertical with my 8X10 Toyo field camera the baseboard shows up in the picture! You can see that earlier in this post.
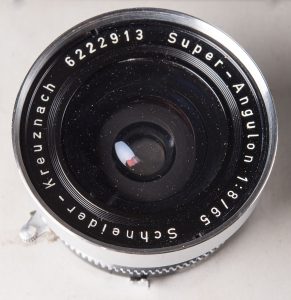
65mm f8 Super Angulon for the 4X5
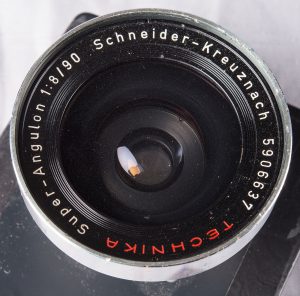
65mm f8 Super Angulon for the 4X5

90mm f8 Super Angulon

90mm f8 Super Angulon. I use this on a 4X5 but it will cover 5X7
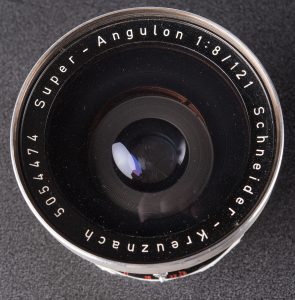
121mm f8 Super Angulon

My 121mm f8 Super Angulon. This just barely covers 8X10!

Section 4

I’ve mentioned the hyper focal distance on a lens above. This is extremely important when working with large format wide-angle lenses. Here’s the thing, if you focus a wide lens, say a 65mm f8 Super Angulon, at infinity and then stop the lens down, you’ll get a lousy image. Since we often shoot large cameras at small stops this can be quite a problem. While this happens with a lot of large format lenses the problem is particularly bad with wide-angle lenses. In the old days photographers used to do a trick called back focus. They would set up the shot, focus the lens and then focus the lens back a couple of millimeters. Other photographers would check the focus after stopping down the lens, which is tricky, but it does work. If you focus on the Hyper Focal point for the lens, which is the point where you have maximum depth of field for the aperture and lens you’re using that will also work very well. For instance, if you’re shooting a 65mm lens on a 4X5 camera at f22 the Hyper Focal distance is just 4 feet! At that distance you’re in focus from 2 feet to infinity. If you focus at this distance and stop down a shot at infinity will be sharp. If you focus at infinity and stop down the shot won’t be sharp. It took me a while, and quite a few bad negatives, to figure this out. I thought the lens was defective, but it was the photographer that was defective. The Kodak Professional Photoguide gives calculator wheels that will enable you to find out the hyper focal length for your lenses. This is really important.
One more thing I wanted to mention: I offer several workshops at my studio in Indianapolis. I hope you’ll check out the workshops at http://www.siskinphoto.com/workshop.php.
I hope you’ll also check out my books, use the links below:

April 5, 2016

Rock House #2

Rock House #2

Rock House #2

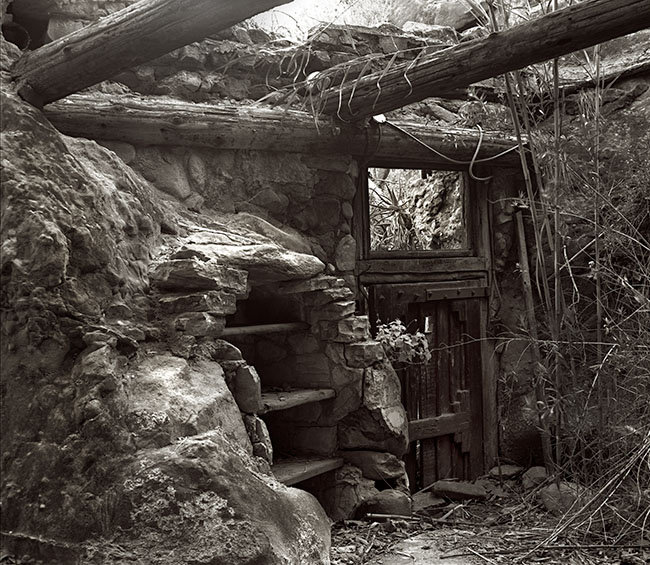
This is the second image I’m posting from this site. I think this image shows more about the house than the others I made. As I mentioned in the earlier post (Rock House #1). When I look at this picture I look for evidence about the house like the electrical conduit you can see in this shot. I really don’t know much about this site, so I try to extrapolate from the image. Look at the huge logs, I keep wondering where they came from, certainly they weren’t local. The house seems to have had two floors. The logs would have been the support for the second floor. I wonder what the house looked like before the fire.

I’ve recently posted a couple of shots of a waterfall in Box Canyon (Box Canyon #1 and Box Canyon #2). Literally on the other side of the left had rock is this house, or what remains of this house. I came upon the place hiking down the canyon. I had no idea it was there, and there is much less than a quarter mile from where I lived at that time.

Shot with my Speed Graphic of course. I think I used my 135 f4.7 Xenar lens. This probably, certainly, isn’t the best lens Schneider ever made, but it’s a lot better than the lens that’s usually found on a Speed Graphic. I started using a Speed Graphic when I was in High School, back in the early 1970s. I learned a lot about using big cameras through the problems I had. A big source of problems was the original lens I had, which was made by Wollensak. One of the things that makes large format shooting so rewarding are the great lenses, but not all large format lenses are good. Some of the early problems I had were caused by the shutter. I recently got a shutter speed app for my Andriod phone. I went ahead and got the optical sensor for the app; and I have to say it works great! I also really like the Color Temp Meter, Photo Tools, LightMeter & Lighting Studio. One more: Photog Companion, this has model releases that can be filled out on your phone or tablet.

I’ll add more shots from the Rock House soon.

As you know I’m adding these images to my blog as part of my re-do of my fine art portfolio pages. I’m also doing it to make these images available. If you’d like an archival print of this shot, please order with the PayPal link. The image will be about 11X14 inches and mounted on 16X20 cotton rag board. I’ll even throw in shipping, if you are in the U.S.

One more thing I wanted to mention: I offer several workshops at my studio in Indianapolis. I hope you’ll check out the workshops at http://www.siskinphoto.com/workshop.php.
I hope you’ll also check out my books, use the links below:

January 21, 2016

Union Station, Los Angeles #2

Union Station #2

Union Station #2

Another shot of Union Station in Los Angeles. This is a beautiful place fallen on hard times. It’s still busy, but people in L.A. don’t use transit service like they do in New York, and trains just aren’t part of the mix in California. Still I’ve take trains out of here a couple of times, and it’s always interesting. It’s also a fabulous place to shoot, but don’t take my word for it-look for Union Station on television. It’s used for a lot of shoots. Consequently the management is difficult about using a camera, and won’t let use a tripod at all. I really like the way the super wide effect changes this building, and I also like the way the people appear in the shot. I particularly like the child on the left side of the frame.

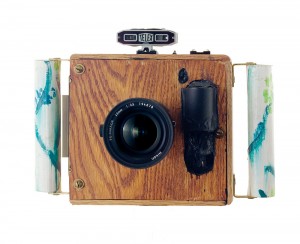
Super-wide Camera

Super-wide Camera

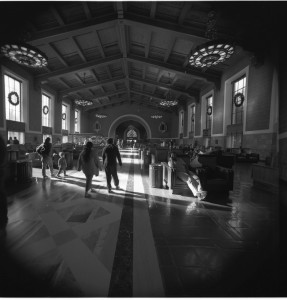
This shot was made with the super-wide camera I build. I used the same one for shots at El Matador and other places. I’ve included a scan of the original negative so you can see the way the lens cuts the corners off on a 6X6cm piece of film. This was always an interesting camera to use. It wasn’t possible to really predict hos the camera would see, or even if the negative would be sharp. So it was always exciting to see the film. You can check out an article I did on making cameras at this link. I hope you’ll check it out.


original scan

original scan


Just so I’ve mentioned it my family’s company Angelus Furniture built the benches and some of the other furnishings in this room.

If you want a print of Union Station, Los Angeles #2, use the link below. I’ll send you a print mounted and matted to 16X20 inches. No additional charge for shipping in the U.S.


I’m going to give a Micro-Photography Workshop soon (https://siskinphoto.com/blog/?p=3105) and another Lighting Workshop, probably in March. Please check them out. You can find out more about my workshops, and access some FREE Classes at my website.

I hope you’ll also check out my books, use the links below:

January 7, 2016

Planetarium

Planetarium

Planetarium

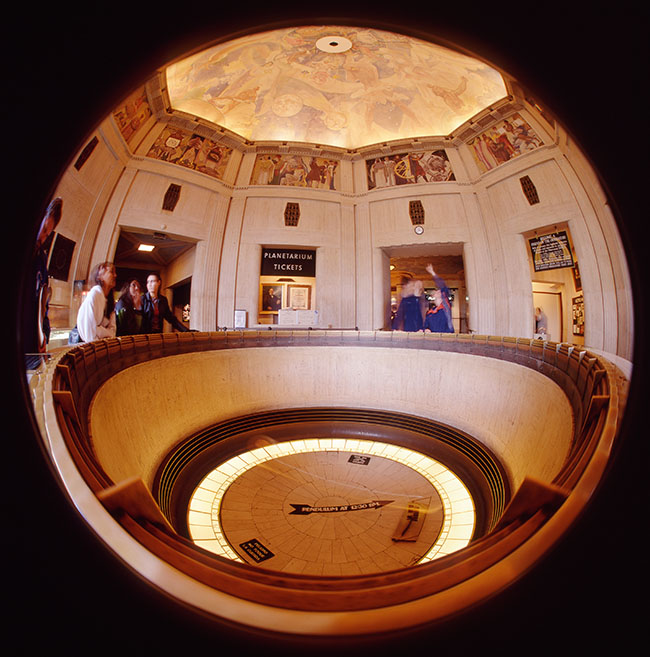
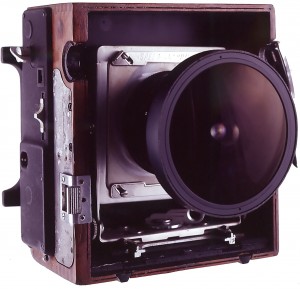
The last blog was about my Super-Wide Camera, which has 110º angle of view. Of course it’s possible to go even wider, and I built a camera to do that also. The thing is that when you go beyond super wide you get distortion. Just as it’s not really possible to make a flat map of the entire planet that makes all the continents and distances look right, it’s impossible to show everything in front of the lens without distortion. This camera/lens combination shows everything in front of the camera: 180º in all directions, but the images bows out in the center. This is called fisheye effect.

The shot was made at the Griffith Observatory in Los Angeles, maybe you’ve seen it in an old James Dean movie? There is a pendulum in the center of this shot, but it’s hard to see because it’s moving. The pendulum demonstrates that the earth is moving, but I’m not sure how that works. I made the shot on 4X5 Ektachrome film, and the exposure is long enough for the pendulum to have moved from side to side. Didn’t use a tripod, but I did have the camera steadied against the rail. The transparency looks a little like a Christmas tree ornament. The actual image is about 80mm across on the film, pretty impressive.

Fisheye Camera

Fisheye Camera

I should say that I didn’t build these cameras because you couldn’t get super wide lenses or fisheye lenses for 35mm cameras. I did it because the resolution of film was so poor. If you made an 8X image of shot like this from 35mm film the image would already show grain and a loss of detail. Because this shot uses at least 10 times more film than there would be with a 35mm shot the grain and detail are much better! I’ve made prints 24 inches wide that looked fabulous. You can use the PayPal link below to get a print that’s about 13 inches wide, on a black background. I normally mount and mat on white board, if you’d like something else let me know when you order the print. I’ll be adding more links as this project goes forward.

The camera started life as a Speed Graphic, a classic press camera. The lens is from a Russian Kiev 60 camera that shot 6X6 cm images. The lens made full frame (edge to edge) square fisheye images on the original camera. I modified the lens by removing the built in lens hood. Then I customized the Speed Graphic to take the Kiev lenses. I also had to remove the base board (front) of the camera so it wouldn’t show up in the shot. The camera was a junker when I began, with a very rough appearance. I took the leather off the outside of the camera and refinished the mahogany surface. On the whole, I think it is the best looking camera I ever built. The camera focuses using the ground glass or the focus scale on the lens. Speed Graphics have a built in focal plane shutter so that’s what the camera uses. You can see my article about camera building here.

I’ve attached a couple of the other images I made with the camera below. I hope to add posts and PayPal links for these images soon.

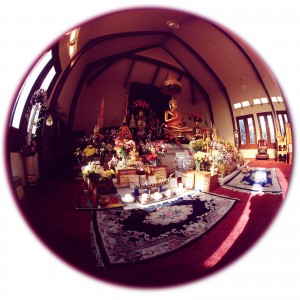
Wat Thai Temple, Los Angeles

Wat Thai Temple, Los Angeles


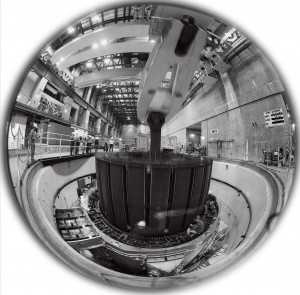
Castaic Power Plant-Pulling Rotor, California

Castaic Power Plant-Pulling Rotor, California

I hope you’ll order a print of this image. As usual the price, $125, includes mounting and matting. The image will be about 1X13 inches. Please let me know about the mat at john@siskinphoto.com. Also contact me if you’d like the print shipped outside the United States. You can also get the image, and many others, in my book B-Four.


You can buy one of my other books by clicking on the titles below:


December 30, 2015

Los Angeles Downtown #1

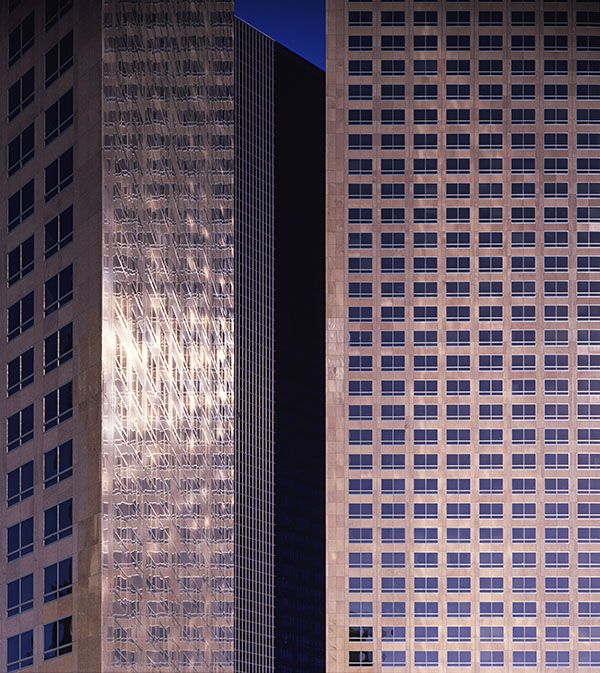
Los Angeles, Downtown #1

Los Angeles, Downtown #1

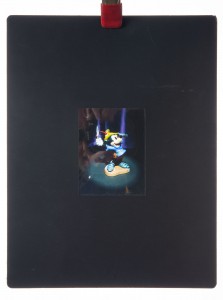
I’ve been stumbling through my archives as I prepare these posts and begin to put together the fine art pages for my website. Some of the images create an effect I like to call involuntary time travel; the pictures really take me back. I was surprised when I saw this image in my files. I though the original transparency was encapsulated in my portfolio. I used to get presentation pages made from my best shots that permanently held the transparencies. I thought the original was in one of these pages. The things looked great, if you happened to have a light box. It was a very effective way to present my portfolio, at the time anyway. For more information about portfolios you might want to check out my Portfolio Workshop. Anyway I found the original in my files, so this is a new scan. I really should consider more creative titles.

Encapsulated Portfolio Image, Mickey for Disney. Dick Duerrstein Art Director

Encapsulated Portfolio Image, Mickey for Disney. Richard Duerrstein Art Director

I remember taking this image. I think I was with Richard Risemberg, in fact I think he pointed out this composition. I learned a lot from Richard: he helped develop my fascination with lenses. The shot was taken on my Omega View Camera, really a cheap Toyo. I know that because the image is cut off on the top because of the considerable camera movement used to keep the subject straight. I guess this image was made with my Fujinon 210, f5.6 lens. This was one of the first really modern view camera lenses I had. It’s also possible I shot it with a 210 Komura, f6.3 I got from Bernie Sayers. This was a four element lens and really the first good view camera lens I had. I think I gave that lens to Jeri Grover when I got the Fujinon. I told you this shot triggered a trip down memory lane. I guess the shot was made in the mid-eighties. I can’t tell you much about the technical details, but I do know it was made on Fuji Film.

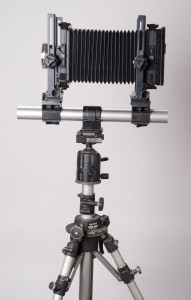
My Toyo 4X5 Camera-about the same size as my original Omega. 121mm Super Angulon Lens.

My Toyo 4X5 Camera-about the same size as my original Omega. 121mm Super Angulon Lens.

On one level this shot is sort of a basic straight view of a building detail, but what makes it special is the play of light and reflection in the buildings. Sometimes you get to make a special image just because you’re present and awake to the moment. Richard helped me learn that lesson here. I often talk about making images rather than just taking them, but sometimes you have the tools and subject at the same time, that’s good. In this case the camera was a 4X5 Toyo monorail camera, really a big camera. I haven’t used this camera for field work in many years; it was just too bulky. I’m glad I had it on this day because I couldn’t have made the same image with a Speed Graphic, they don’t have enough camera movements.

If you’d like to get a fine art print of Los Angeles, Downtown #1 you can click on the PayPal link below.  The image will be   almost 13 inches wide. It’s mounted and matted to 16X20 inches. The price, just $125, includes shipping in the United States. If you’d like to have me ship somewhere else, or order another size please contact me at john@siskinphoto.com.


You can buy one of my books at these links

December 10, 2015

Union Station, Los Angeles #1

Union Station, Los Angeles #1

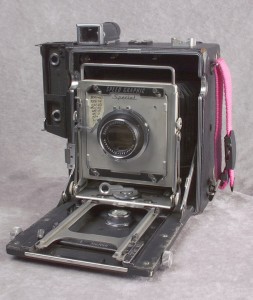
This is one of my favorite images. I love the look of the print. I have it above the desk in my office. Sometimes the experience of making an image is transformative: making this image changed the way I make pictures. I learned to take risks, even if the shot might not work. While this might seem natural with digital photography, it’s different with film. I shot this image on 4X5 film. Each sheet of film is individually loaded into a film holder. Five film holders, ten sheets of film, weighs more than a pound, and takes up a lot of room as well. Each exposure costs more than two dollars after processing. So on location each shot is precious. I made this shot with my speed graphic, which weighs almost seven pounds (I got out the scale to do this blog). This isn’t usually important, but Union Station, Los Angeles, won’t let anyone shoot with a tripod unless they have a permit. I made the shot with a Schneider 65mm f8 Super Angulon lens. I’d never made a really sharp image with this lens. So I hand held the camera at an exposure of 1/15 sec at almost f16. The light was beautiful, but I didn’t know if I could hold the camera still for the exposure.

There’s something that I didn’t know about using the Super Angulon lens, or any wide-angle lens on a large format camera. If you focus the camera on infinity and stop down the lens only the center of your shot will be sharp. In order to get a sharp image with this class of lenses you have to focus closer if you stop down the lens. So if you want to have the whole shot sharp, and you’re going to shoot at f16, you should focus at about eight feet from the camera. When I took this shot I was very careful, because I knew I needed to get as much depth of field as I could. So I focused closer, using the rule of thumb that depth of field extend a third in front of your focus point and two-thirds behind that point. To my surprise and delight the whole image is sharp edge to edge. I’ve posted a lot more about aperture and depth of field in these posts: https://siskinphoto.com/blog/?p=50, https://siskinphoto.com/blog/?p=56 and https://siskinphoto.com/blog/?p=68. Of course the fact that the image is sharp also means I held the camera steady at 1/15th of a second. Pretty good for a large format camera!

My Speed Graphic camera with the 135mm lens, not the 65mm Super Angulon.

My Speed Graphic camera with the 135mm lens, not the 65mm Super Angulon.

It’s always exciting to see your film images after processing, because, unlike digital, you don’t know you’ve got the shot until it’s processed. When I saw this negative, before I even made a print, I knew it was great. I still remember that moment. Regardless of how you make a photograph it’s exciting when you realize you’ve made something special. By the way, since this image is titled Union Station, Los Angeles #1, you can assume that there are more images of this fabulous site to come.

I hope that when I get the website updated I’ll be offering silver gelatin prints of this image in various sizes. Right now I’m offering archival digital prints of this image at a special price just $95, mounted and matted on cotton rag board, and shipped in the United States. The image will be about 11X13 inches and matted to 16X20.


This image, and many others, is also available in my book B-Four. You can look at the book at this link, and order it as well. I hope you’ll take a look at the book.

You can buy one of my other books by clicking on the titles below:

I’m going to be using my blog to add information about images to the fine art pages of my site. This part of the site isn’t functioning yet, but it will be. These posts will enable me to put up information about the shot and to add details about buying prints. I think it’s very useful to talk about the details of creating specific images. I hope to hear from you about this-use my e-mail to let me know: john@siskinphoto.com. Of course I hope you’ll also want to buy some prints. I’ll be offering more types of prints in the future.

October 10, 2015

Tool Kit

Of course I’m thinking about the workshop next weekend. There are only two spaces left, so you should SIGN UP NOW!

Samantha will be one of the models for Sunday October 18th.

Samantha will be one of the models for Sunday October 18th.

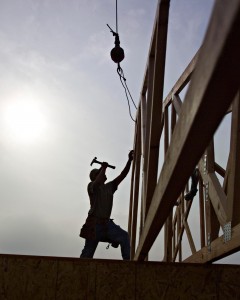
One of the things I want to examine at the workshop is the lighting tool kit for a photographer. The equipment manufacturers want us to buy everything; they’re not exactly on our side. Many of the available tools are of little use, or totally redundant. So I hope that this workshop will actually help you to save money by experimenting with the tools. I’ve seen a lot of people who work with hammers: carpenters, roofers and neurologists. The all use different kinds of hammers; purpose built for their applications. When we choose our tools we need to exercise the same care a carpenter does when he buys a hammer.

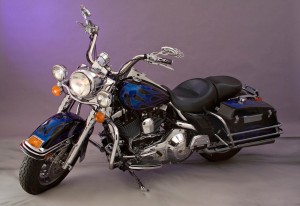
harley

The main tools we use as photographers are designed to work for a large variety of applications. So my Nikon D800 is a terrific camera to fit onto a microscope or use for architectural photography or even an auto race. While the camera will work well in all those applications, I’ll need to use different lenses for each situation. This is one of the great strengths of camera design: a good camera can be adapted to different situations. Can you imagine buying a whole new camera everything you needed a lens or even a filter? Strobe lights are the same way: a basic strobe can be used for a lot of applications, if you have the light modifiers for the job. This is one of the good aspects of strobe lights over movie lights, which are purpose built. Over the years I’ve worked with many light modifiers for strobes, everything from large soft boxes to fiber optics. These modifiers are designed to make the lights useful in all kinds of applications. Some of modifiers have been good, some bad; some work in a lot of situations and some are only good for one kind of job. I hope one of the things you’ll receive from the workshop is a better way to choose your tools.

The first step in adding a tool to your kit is identifying the reason you need or want that tool. So I may choose a new light because I didn’t have the lights I felt I could use at my last job, but I may also choose a tool because it inspires me. I think this second reason is really important. I often get tools because they make me want to work, or because they open up new ideas for shots. I also get tools because they replace or upgrade or back up the tools that I have. Of course one problem is that I now have too many tools to take on location.

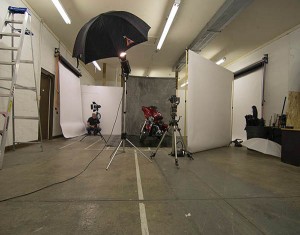
When i shoot a motorcycle i need to use large light modifiers to build good light.

When I shoot a motorcycle I need to use large light modifiers to build good light.

I’ve got a large studio so I have some tools that are only useful in a full time studio. One of the best is my Broncolor Hazylight. I picked up the frame in a studio sale, and adapted a Norman head to fit the frame. Then I put the whole thing on a camera stand, so it’s easy to position in my studio. Most photographers don’t have a space for a light modifier this big. If you’re going to use a smaller studio you might want to use light panels. The panels are cheap to make and incredibly adaptable.

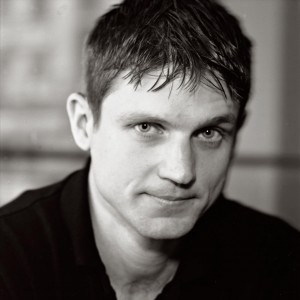
Here's a shot that mixes hard light, soft light and continuous light effectively.

Here’s a shot that mixes hard light, soft light and continuous light effectively. Effective catch lights as well.

One of the important aspects of a portrait is the catch light in the eyes. The catch light, which is really just a small reflection of you’re the light, can change the whole quality of a portrait. If you don’t see a catch light, or if you see an umbrella, or just a tiny pin prick of light, it can damage an image. There are all kinds of light sources for portraits shooting that address this problem. I’ve used quite a few: portrait dish, soft box, octabox, umbrella and so on. One of the things that makes better catch lights is a large circular light source, which will make a round catch light in the subject’s eyes. For this reason I’ve got a cover with a circular cut out for my Hazylight. I would build a similar cover for a soft box, if I were using one. I also use a light panel and a snoot to make a circular light source. I can use the snoot to put a circle of light onto the panel. I can use these tools to make other shapes and control the direction of the light. This gives me a round catch light, or I can change the angle of the snoot and get many different shapes on the light panel. So both the snoot and the light panels are at the top of my list for light modifiers. I also use the snoot as a hard light source in my shots. I’ve found that the snoot is an incredibly fun tool to have in my lighting kit.

Just a guy using thee right tool for the job!

Just a guy using thee right tool for the job!

I also like using a set of barn doors with my light for illuminating the light panels. The barn doors can even crate a strip with the light panel. I also like the barn doors for shooting architecture. I can control a bounce off a ceiling or other surface, to keep the light out of my image. Of course the barn doors can help to place a highlight in a subject, say a hair light or a rim light. Both the snoot and the barn doors are small light sources, so the position of the light is important, but if you use the snoot or the barn doors with a modifier like the light panel you can make a large light source.

It really doesn’t matter whether you make light with a mono-light or a dedicated strobe. What matters is controlling just a few things: the color of the light, the power of the light, the size and shape of the light source and the position of the light. The color and power of the light really only matter relative to other light sources in your shot. So if you were using just one light you could change the ISO or the aperture to control the amount of light, but if you have two lights they have to be balanced. Not necessarily the same power, but a balance that suits your vision for the shot. Similarly you might want all the lights in a shot to have the same color balance, but you might also want one light to be warmer. A warmer light might give the effect of sunlight coming into your shot. You can control the color of one light in your camera, but the camera won’t make one light warm and another cool. Controlling power and color are tools that you use to build your shot. The size of the light source, relative to your subject, affects the quality of the light: hard or soft. The larger your light source is the less that the position of the light matters; consider how the light comes from the whole sky on an overcast day, no shadows and no direction.

F2359911

The image should start in your mind. If you have an idea of how to position a model, or how to light a face, or a room, or a product, then you can start to build that shot. If you start with the same light each time, or only use existing light, then you have much less control over your shot. So it’s important to understand how each tool works, how you can use the tools together, to build the images you want to make. One of my heroes is Felix the Cat, because whenever he gets in a fix, he reaches into his bag of tricks. As photographers we need a big bag of tricks. Here are a couple of things I have in my bag of tricks whenever I go on location: umbrellas (white, silver, gold all with black covers) gaffers tape, magic arm and super clamp, small tripod, large tripod, lighting filters (Rosco gels) light stands, maybe even a reflector or two. Of course I’ve also got some interesting strobes on location, mine work with both ac and dc power. The heads are small enough to fit almost anywhere. I’ve been doing this for more than forty years, which means a couple of things: I’ve got multiple kits for different location work. I can grab just one box if I’m shooting an executive portrait, but I’ll add a couple of boxes to this, if I’m making room shots. The time I’ve spent shooting also means that the way I use the tools, and the tricks I use, have evolved over the years. Part of being a creative photographer is learning to see what could be, not just what is. I want to help you to build the images that could be.

This is shot made with just a snoot.

This is shot made with just a snoot.

Of course I want to see you at the lighting workshop on October 17 & 18. You can sign up here. You can also see another post about the workshop here. There are only two spaces left for the shoot on Sunday. You can also sign up for just Saturday, which will be demonstrations and explanations. Of course if you just can’t make it to the workshop, you can still get my books.

September 21, 2015

Lighting Workshop-New date posting soon!

Next Micro Workshop -New date posting soon

Samantha 1

Samantha was a model in the last workshop

I’ve made some arrangements for models for the Lighting Workshop. There is a new date; I’ll post it soon. So I have pricing and sign-up information for this workshop below. This workshop is about lighting for still photography with strobe lights. We’re going to work on building the images that you see in your mind: pre-visualizing and creating shots. You can sign up for just the first day of the workshop, where I’ll introduce the tools and explain how to manipulate them, or you can sign up for both days. On the second day, Sunday the 18th, we’ll work in the studio with models and still life shots. You’ll be doing the shooting on Sunday! This workshop is about building images in the camera, but of course we’ll also discuss post-production.

Cassie is also going to model for the workshop

Here are some of the details, on Saturday we’ll start at 10am. The day will be about understanding how light works and how to control light. We’re going to concentrate first on how to achieve the quality of light you want. For this part of the day we’ll see how to modify the light to create hard or softer gradations in the light. Then we’ll work on how to pre-visualize your light: how to build an image in your mind and translate it to your camera. In order to build images for the camera we’ll examine how to balance the light between multiple light sources. We’ll also work with color filtration on the light so that we can change the color as well as the amount of light. We’re also going to discuss how to direct a model so that you can realize your visualization. You’ll get to see professional equipment and how it’s used to create an image in the studio. Of course we’ll also discuss how to build better lighting on location.

F2382346 (1)

On Sunday we’ll be shooting all day in the studio. There will be several sets. You’ll get the opportunity to work with live models, and different lighting tools. This will be an opportunity for you to shoot, so bring your cameras! This part of the workshop is limited to just 6 students, and 3 are already signed up! You can bring your own lights on Sunday, if you’d like to work with them, of you can use my lights. Trust me, I have plenty of lights!

F23D2301 (1)

 You can sign up for just the Saturday demonstration part of the workshop, which will give you new ways to work with light, for just $95. If you’d like to come both days (New date posting soon!) it’s just $395, for both days. Pretty great for a two-day workshop with live models! You can sign-up on my site at http://www.siskinphoto.com/workshop.php.
p37

Please visit my site to see my other workshops and to check out the Free On Line Classes!

Of course, if you can’t come to this workshop, you can still buy my books at Amazon:

September 10, 2015

Shooting the 11X14 inch Camera!!

Just a couple of details to mention, before we get to the good stuff. I’ve taken down my site at BetterPhoto: www.john-siskin.com. I think BetterPhoto and Jim Miotke are absolutely wonderful, but since I’m not teaching for them anymore I wanted to have the fine art part of my site hosted along with the rest of the site. It’s going to take a few days to complete the new pages I hope you’ll be patient. I hope you’ll check out the books, click on the cover pictures below, and don’t forget my workshop page (www.siskinphoto.com/workshop.php). I’m going to offer a lighting workshop in OCTOBER. More information soon.

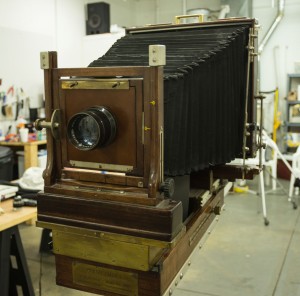
I wrote about my 11X14 film camera some time ago, and included a couple of pics of the camera. You can see that earlier post here. There is something quite magical for me about working with a very large camera. I suppose it’s not that different from people who want longer lenses to shoot surfing or birds. I should say that an image made with a large camera is different from an enlargement. In an enlargement there is another optical system, that changes the information in the image in some way and there is less information in the image. If you do an enlargement that is just eight time the size of the negative you’ll usually see grain: the shadows of the silver crystals that record the image. A print that’s made by putting the image right on the printing paper has a sense of infinite detail. I hope you’ll find a way to see an original contact print of a big negative, preferably made by a great photographer.

The big camera in the studio. It took 2 people to put it on the tripod.

The big camera in the studio. It took 2 people to put it on the tripod.

I can do contact prints from my 8X10 camera, and it’s quite satisfying. Now that I have a darkroom I can process and print from this camera again. I can even take the camera out to shoot on locations. However, the 11X14 is a beast; and it creates challenges that are different from 8X10. It’s taken me a while, but I’ve worked out ways to work with the camera. I’m going to detail some of the things I’m doing, some of the compromises I’ve made to get successful tests.

11X14 test image

Successful test image of Wiggy, made with 11X14 camera.

The biggest problem with the 11X14 camera is film. There are still quite a few sources for 8X10 film: a search at Freestyle Photo reveals fifteen separate results for actual camera film. You can get a sheet of film for less than $3. If you’ve been shooting digital the cost of shooting large film will come as a shock. If you search for 11X14 film you find one result: Ilford HP-5. This is a good film, but at about $9 for a single sheet, and that’s one picture, it’s expensive. One of the ways photographers afford to work with large cameras is to work with films that aren’t designed for cameras. One of the most popular is litho film. This is a graphic arts film. The good news is that it’s inexpensive. There is a lot of bad news: first it’s designed to make black and white images: no gray tones at all! I did some tests with litho films and I was unhappy with the results. You can process the film to get some gray tones, but it’s a real challenge to get a complete gray scale. The second problem is that the film is quite slow, insensitive to light, the ISO speed is about 3. I swear my skin sunburns with less light than it take to expose this film. An additional problem is that the film is designed to work under darkroom safelights, so it doesn’t respond to all colors of light. This is a good news bad news sort of problem: you can process the film by safelight so you adjust the development by inspection, but many colors of light just don’t show up on the film. I used a Macbeth color checker in my test shot and there were a lot of color patches with no density. Another inexpensive film choice is x-ray film. I haven’t tested this yet, but I’ve read about the challenges it presents.

This is an image made with litho film. I used my 4X5 camera to test. Not really successful.

This is an image made with litho film. I used my 4X5 camera to test. Not really successful.

At some point in this process it occurred to me that I own a flat bed scanner that will scan 12X17 inch images, much large than most scanners. I also realized that I had a great deal of 11X14 Ilford Multigrade glossy resin coated paper. I decided to try loading this paper into the film holder and shooting it in camera. In the beginning of photography Fox Talbot used paper negatives, so this was not a unique inspiration. The thing was that I realized that I could use the scanner to turn the images I made in the camera, which would be negatives, into positive images. The big advantage here is that I have all the tools of digital photography to interpret my images, but I’m not going to be making contact prints. Right now this seems a good trade. If I want to I can make a digital negative with my printer and make a sort of a contact print, and I can use a digital negative to make cyanotype or Vandyke prints. Of course I can also output a digital print, so I have a lot of printing options. I suppose some would say that I might just as well capture the image with my Nikon D800, but that would take away the pleasures and challenges of the big camera.

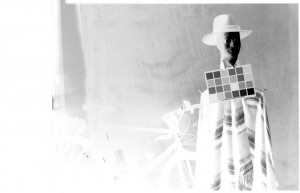
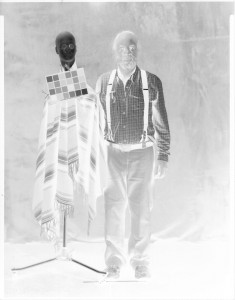
Negative image made on Ilford Multigrade paper

Negative image made on Ilford Multigrade paper

My tests revealed that the Multigrade had an ISO of about 100, which is so much nicer to work with than 3. In addition my tests revealed that Multigrade reacts to a much wider range of color than the litho film I tried. While the paper isn’t panchromatic it does react to most colors other than red. I think that’s because it’s a variable contrast paper. Of course the paper is designed to give a complete gray scale with normal processing. The Ilford paper can be processed under regular darkroom safelights, for instance the Kodak OC filters. I am lucky to have a Thomas sodium vapor safelight, which is a very bright safelight. I set it up in my studio, and it provided a good working environment for loading and processing the paper, even posing the subject. I should also mention that it is MUCH easier and quicker to process and dry this resin coated paper than to work with any film.

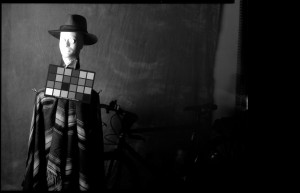
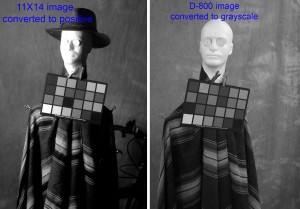
The image with the hat was made with Ilford Multigrade paper and the hatless image was made with my digital camera and converted to black and white. Note that most of the color samples show in the Multigrade image.

The image with the hat was made with Ilford Multigrade paper and the hatless image was made with my digital camera and converted to black and white. Note that most of the color samples show in the Multigrade image.

The paper is designed to change its contrast range depending on the color of light you use with your enlarger. There are filters for this purpose. Right now I’m working without a filter. This seems to provide a long contrast range. One advantage of scanning the negatives (ok, I know that these things are not transparent film negatives, but still they reverse black for white) is that I can control contrast in the computer. I can also flip the images left for right because, like any film image, the picture on the emulsion side of the base is reversed left for right.

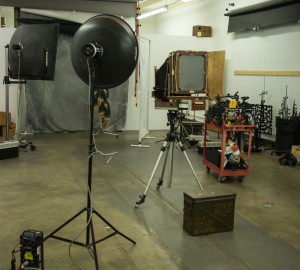
Studio set-up

The set up in the studio, for the shot of Wiggy and myself. I used 4 power packs to make over 5500 watt-seconds of light.

My scanner (actually it’s a very large all-in-one) is a Brother MFC-J6910DW. I did my first tests with the software that come with the scanner. This provides little control over the scan. I also have VueScan for my film scanner and, happily enough, this will also control the Brother scanner. I can scan at 2400 dpi, which would enable me to make a print that is 110 inches on the long side at 300 dpi. The resin coated paper lays flat and the glossy surface scans very well, no surface detail.

Wigg & Me, selfie

The negative of Wiggy & me. Actually it’s quite amazing to be able to make a portrait with a camera this big and strobes.

There are other details. One of my favorite areas to explore is the lenses for this large camera. The camera is too heavy and unwieldy to take out of the studio and this affects the choice of lens. The normal lens for this camera would be about 16 inches (400mm) long. It’s unlikely that I would use a wide-angle lens for a distance shot in the studio, but I would use a wide angle to shoot closer to a subject. My tests were done with a 24 inch (600mm) f11 Artar that I got for the camera. This lens is rather long for the studio. Because the distance between this lens and the back of the camera is quite long it’s a little difficult to control the camera. Since I did the tests I’ve mounted my 270mm (10 inch) G-Claron W.A. f6.3 on a lens board for the camera. I think this will be a useful lens for the camera, especially for small subjects. I’ve also ordered a board for my 14 inch Dagor. I have very high hopes for this lens. I’ll also set up my 48cm (480 mm, 19 inch) f5.5 Dogmar for this camera. I should note that I love Goerz lens design, but because the lenses were made at different times and places they are sometimes described in inches and sometimes in centimeters or millimeters, which is why I’ve used different both English and metric measures. The only one of these lenses that has a shutter is the Dagor, but that’s not a big deal. Since you can keep the safelight on in the studio you don’t have to fumble in the dark.

Right now I only have one holder and this holder only works on one side. Since I can shoot load and process immediately, under safelight, this isn’t as big a problem as it might be out of the studio. Additional 11X14 holders are amazingly expensive: used ones are usually more than $200 each! I am working on a design using framing parts to build a holder for the studio. This design wouldn’t have a dark slide, so it would only be practical in the studio. Updates on this as they become available.

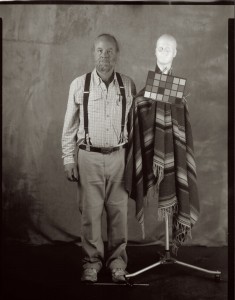
As you can see I’ve done tests with Wiggy and a color checker. Wiggy’s wearing a serape in the 11X14 tests. The serape is mostly green. I also did a selfie with me and wiggy. An 11X14 selfie is a heck of a thing. If I used a selfie stick it would have to be a telephone pole. As it is, my Majestic tripod is a little overloaded by this camera.

Positive of Wiggy & me

The last test with Wiggy and me. Would you like to come in for some shots?

Now that I’ve done the tests it’s time to shoot some actual pictures. I’m going to do still life shots of course, but I’d also like to do some work with people. Since the paper has an ISO of 100 I can actually shoot portraits and figure studies. Any volunteers?

Thanks, John

July 23, 2015

Finally the Darkroom!

I’ll start with a mention that you can find some of my courses from BetterPhoto on the workshop page of my website: www.siskinphoto.com/workshop.php. You can also arrange a One on One Workshop or sign up for the Portfolio Workshop. Check out the whole site: www.siskinphoto.com! You can get my books by clicking on the pictures below, and why not do that now?
Sometimes a circumstance or a thing sets off an idea in my brain. I see something that I like and I need to make a photograph, or I get to work with someone and that brings up new ideas, or a desire to work on an old idea. For instance I just did some testing with an Indianapolis model, Khristian Hildrith, and it was a great chance to work with my Norman Tri-Lite. I’m adding one of these shots here, and I’ll probably add more later.

Khristian with the Norman Tri-Lite

Khristian with the Norman Tri-Lite

The thing about being a professional creative, and I suppose this applies to all visual artists, writers and other creatives, is that there is a responsibility to work even when you’re not inspired. Not only do you need to work, but also you need to do good work. Sometimes this means doing the craft more than working with inspiration. For instance, a client may come to me to do a product shot that doesn’t require a new vision, just a good solid interpretation of a three-dimensional object into two-dimensions. Sometimes doing the craft of photography will lead me to new ideas. Often, when I haven’t done any real shooting for a while I’ll get out the microscope equipment and search for new worlds in a plastic ice cube. Creativity is something I need to exercise.

Plastic Ice Cube

Plastic Ice Cube

There are always stumbling blocks and obstacles to creative work. The desire to make an image doesn’t always begin with a road map to the image, or even with a visual inspiration. I’ve written about my delight with big film cameras and large format lenses in the past. Just using these things makes me feel better about photography and my way of working. A view camera slows me down; it makes me more deliberate about everything that goes on into the frame. My problem has been that, if I want to make an image with a large camera, I also need to be able to process and print it. When I did commercial or personal work ten years ago I could send the film to the lab, but now I need to do the lab work. I am so pleased to announce that I now have a darkroom!

Darkroom

Darkroom

This is a black and white darkroom; frankly I just can’t find any reason to do color work in a wet darkroom. For color work, digital is not only easier; it just seems better. You can see a couple of images here, but I want to tell you a little about the tool kit in the darkroom. It starts with the sink, in a chemical darkroom the sink is where stuff happens. This sink will hold three 20X24 inch trays, so I can make very large prints. It’s a wooden sink, and it’s coated with marine grade varnish. It’s a real sink, with hot and cold running water, not just a catch basin. My Jobo processor fits easily into the sink, which means I can process most any kind of black and white film or paper.

The large sink, with the Jobo Processor

The large sink, with the Jobo Processor

I guess that when most people think about film photography they’re remembering 35mm cameras, so they think the enlarger might be the main tool in the darkroom. While my goal is to work with larger negatives than 35mm, I still want an enlarger. Mine is an old Omega D-2 that will handle film up to 4X5 inches. The strange thing about this D-2 is the head (light source). Many years ago I converted an omega color head, and this head was old even then, to work with filters for printing black and white paper. This head used to be referred to as the Mickey Mouse head, maybe because of the shape: a black sphere with cylinders on the side, or maybe it’s just the technology. Regardless it gives even light and control over contrast. I’ve also got an ultraviolet light source for contact printing large negatives and alternative processes. The UV light source means that I can do Cyanotype and Vandyke prints maybe even platinum prints someday.

Omega D-2 Enlarger

Omega D-2 Enlarger

The dry table is a little smaller than I might like, but it’s big enough to load large film holders. Of course, with all the black plastic, the darkroom has the ambiance of a homeless encampment, but it’s going to be a good place to work. The important thing is I was able to build a workspace that will enable me to unlock all of my large format photography tool kit, even the 11X14 camera!

Dry Table

Dry Table

I hope you have inspiration and the tools you want. Thanks for your attention!

« Newer PostsOlder Posts »

Powered by WordPress