 I just got the advance copies of my second book: Photographing Architecture
. It appears that Amazon will actually be able to ship the book before Christmas, so order now. Pretty darned exciting!! All of the pictures in the blog this week are from Photographing Architecture
. Of course you can also get my first book Understanding and Controlling Strobe Lighting
.
Also as sort of a continuing gift you can download copies of most of my articles and some do it yourself projects. I wrote most of what follows for my Portrait Lighting on Location and in the Studio class at BetterPhoto.com. I teach two other classes at BetterPhoto: An Introduction to Photographic Lighting and Getting Started in Commercial Photography. I hope you’ll check them out. I have been told that prices are going up next year at BetterPhoto, so you might want
 to sign up soon. I have opinions about the value of proprietary strobes versus various kinds of manual strobes. They are based on my experience. Reasonable people can hold other opinions. I can only hope that these opinions are based on actual experience. Lighting is more of a language than an art. At it’s most basic level manipulating light can be discussed with numbers. We might call this a machine language. I began to learn this language decades ago. It
 was relatively difficult to learn because it was not described in a logical manner. I try to describe the language in a relatively coherent manner in my class An Introduction to Photographic Lighting. I think that the manufacturers of cameras would rather you didn’t learn this language. First they think you don’t want to learn and second it would reduce their profits. You can purchase a manual strobe that does what the Canon or Nikon proprietary strobe does for less
 than half the cost of the proprietary unit. While clearly the extra electronics do add to the cost of the thing, I wouldn’t guess that the extra cost would be very high. In addition these proprietary systems keep you from buying alternative products. I should say that dedicated strobes are great for flash fill and events: areas where auto exposure is particularly useful. When you shoot a wedding your goal is good and fast; when you shoot almost anything else your goal should be
 great photos. Also when proprietary strobes are used with larger light modifiers they could make a good quality of light. Since one of the best features of these lights is portability people often won’t carry large light modifiers. You can use manual lights with dSLR camera, from Nikon Canon and other companies. When you want to set up a shot with either dedicated strobes
 or manual strobes you need to be able to see what you’re doing. The idea that you can use the same settings on your lights and positions for the lights all the time, will greatly limit the kind of images you can make. This means that you need to pay attention when you design the light for a shot. It also means that, whenever humanly possible, you will want to do your set-ups tethered to a laptop computer or a tablet.
 Remember we want to take great photos, and so we need to see what we are doing. I shot a lot of film, and people often ask how I did that with just a meter. The answer is I didn’t. I used Polaroid for every shot I made: thousands of dollars worth of Polaroid in a year. I usually disconnect the camera from the laptop after I have perfected the set-up, it makes it easier and quicker to shoot. When you’re looking at an image, on your laptop, that you made with dedicated strobes you’ll want to examine the how much light you get from each light, the direction of each light, the quality of the light and the way the strobe light interacts with the ambient light. If you need to change the power of one or more of the off
 camera lights you’ll be able to do that from the camera. You can also adjust the balance between strobe and ambient light. The other things will probably require you to walk to the strobe units. If you need to change the power of a manual strobe you’ll probably need to walk to the strobe and adjust the power or the position. The biggest problem with automation is that people assume that the right amount of light is also the right light. Quantity of light is easy, but the quality of light: how hard or soft and color, require some practice to get right. One more thing, I use a lot of lights. I regularly go out on a shoot with eight lights. Not only do the manual lights I use cost less they use cheaper slaves. It isn’t that I didn’t spend as much on lights as other people, it is that I got more lights. I’m happy with the tools I have. I hope everyone has a great season of celebration! And a wonderful picturesque New Year for us all! Thanks, John
December 16, 2011
New Book: Photographing Architecture!
October 18, 2010
Photographing an Entry
This is another section of my second book. This book will be out in a bout a year. You can get my first book in stores any day, or order it here: Understanding and Controlling Strobe Lighting: A Guide for Digital Photographers. Thanks for your interest!
This shot really helped to create an important relationship with a client. The house had just been completed and was empty. Most of the other shots I took of this house were just empty rooms, for that matter so is this shot. But the way the angle defines the staircase and the door frame really gives the shot a feeling of drama and completion. I have gone on to do literally thousands of images for this client.

This is the image at the beginning of the shot.
I started with the camera a little too close and just ambient light. All the important aspect of this shot don’t have enough light. You can see that the windows will contribute a little light, and there is light on the entry.
So I started to add light. In this version I have a light outside, but it is too hard. You can see the small hard reflection on the door frame. I tried to use a small shoot through umbrella outside, because of the wind. Umbrellas are bad in the wind. I changed to a larger umbrella outside later in the evolution of the shot and added a sandbag. I also added a light in the hallway on the left of the shot, and a light on the second floor landing.

The lighting is better, but not even enough. Also I don’t like the highlight on the right side of the doorway.
The light on the stairway and the floor isn’t really bright enough. So I added a light inside the doorway on the left side. When I took the shot I though it was this light inside that was reflection onto the doorway. Reflections can be hard to figure out. The tethering program on this camera doesn’t allow you to back up quickly. This means it is really important to do a complete examination of the shot at each stage. I could have saved time if I had realized that the next light wasn’t causing the reflection.

I added a light inside the doorway that helped a lot.
The light on the second floor landing is not lighting the ceiling as evenly as I would like, so I moved the light back. The light in the hallway is a little bright in this shot also. There isn’t as much shape in the entry room because the light is even and the shadow of the banister is a little too intense. One of the problems with making a shot is deciding when it is done. When do you say “Oh this is just what the client needs” and when do you decide to work a little longer? That is an important consideration in every job. In this case I know that I could make the door frame better. I suppose that there are jobs where you could keep making minor changes forever. In most cases I think it is important to take a few moments to really look at all of the shot. This is one of thee reasons that tethering your camera to a laptop is so important. Without the larger image on the laptop it is really hard to evaluate the image effectively.

Here the light is working pretty well, except for the highlight on the door frame.
In this version the light on the second floor landing is nice and smooth. It is really defining the shapes up there. I like the light in the hallway now. One of the things it does is define the curve at the top of the hallway. This shot is all about curves, so keeping the lines strong is really important. You can see that I am still struggling with the highlight on the door frame. This is the problem that stood out for me in this shot. Often there is a simple answer, but sometimes we all miss it. In this case the answer was to move to a larger softer light for the exterior. I had been using a small shoot through, as I mentioned earlier, but I finally changed to a 45-inch umbrella.
As you can see I also pulled the camera back a bit. For me this was the change than made the shot. I really like the wood and the curve at the top of the shot. It creates a frame around the image. The shapes are good. There is a nice sense of openness and light that certainly wasn’t there at the beginning. And the door frame looks fine! I also added a light at the top left side of the shot, on the second floor. You can see a little bit of the light in the upper left window. I also put in a light in a hallway on the bottom right of the shot. This hallway light really didn’t affect the shot very much, but it did seem to bring a little light to the banister.

Here is the final capture. The light is smooth and the door frame looks great!
This diagram shows where the lights ended up.

This diagram shows where the lights ended up.
The umbrellas, except where noted are 45-inch umbrellas. Except for the shoot through on the second floor all the umbrellas have black backs.
Most of the lights had 45-inch umbrella, but the umbrella inside the doorway was a 60-inch and the one on the top left of the landing was a 30-inch shoot through. Except for the shoot through umbrella all the lights had black backs, so they only lit the shot by reflection.
There was a little left to do in Photoshop. When I opened the image in Adobe RAW, I made the shot about 250ºK warmer with the color temperature slider. I also brighten the exposure by about one third of a stop. There really wasn’t anything else to do. However there were a few things to do in Photoshop. First I used the cropping tool with the perspective box clicked on. I put the top corners of the cropping box closer together. This made the door frame stand up a little straighter. While I didn’t feel it needed to be straightened completely, opening it up made the shot work better. I also cropped a little bit of the floor, because the change in perspective made the shot a little too thin. I removed the power outlet and few odds and ends from the second floor ceiling. I didn’t think they brought anything to the shot. I also put some density back into the window on the upper left.

This is the final shot after a color change in Adobe RAW and some minor work in Photoshop.
My first book: Understanding and Controlling Strobe Lighting: A Guide for Digital Photographers will be in stores any day! Or get it from Amazon with the link. I am really pleased with the way the book turned out.
Please consider taking one of my classes, or even recommending them. I have three classes at BetterPhoto:
An Introduction to Photographic Lighting
Portrait Lighting on Location and in the Studio
Getting Started in Commercial Photography
October 6, 2010
Strobes and Layers
This blog entry is a chapter from the book I’m working on now. This book will be about lighting interiors. Of course I hope you’ll look for it in about a year. In the mean time my first book will be out any day: Understanding and Controlling Strobe Lighting: A Guide for Digital Photographers
Shots in the bath are always difficult. The room is generally small and there are a huge number of reflecting surfaces. So it is always a special pleasure to be able to shoot in a bath that is really large. You still have reflective surfaces, but you also have more options for dealing with the problems. This was a really fun bath to shoot.
One of the things that made it particularly great was the assistant. I am often lucky enough to often have assistants who are great photographers in their own right. Mike had a different approach for shooting this room. In the end we did it both ways. He was really interested in a version with ambient light and I preferred a shot made with strobes. I always think in terms of how to light a subject, even when I end up using ambient light as the primary light.
In this case a 60-inch umbrella, near the camera, was all the light I needed. Of course this is usually the way I start, and sometimes finish. Although the light was ok, I didn’t like the camera position. Not only was the camera tilted, but the doorway was also cutting into the cabinets.

The first capture with the strobe. 1 mono light at half power with a 60-inch umbrella.
I’m not really happy with the balance between my light and the ambient light. I thought that more ambient light would be more attractive. There are artifacts from my sensor on the lights, which is often the case. But there are no large reflection problems and the color in the shot is pretty good. So change the camera position and use a longer shutter speed, for a better shot. In the next image the shutter speed was half a stop longer.

Here I’ve moved the camera and made the shutter speed a little longer.
When I opened the shot in Adobe RAW I changed the color temperature slider to a warmer setting. I used the recovery slider to brighten the shadows and cabinets a little. As I generally do I raised the Vibrance and Saturation levels slightly, but really I didn’t change much. Here is the shot after these changes:

I warmed up the color in Adobe RAW, and adjusted the recovery slider.
I didn’t have much to do in Photoshop. Cleaned up sensor dirt and the artifacts from the lights first. I also did a little sharpening.

The final shot. 1 strobe with 375 watt-seconds, and a 60 inch umbrella. Shutter at 1/10 and aperture at F9.5, ISO 100.
I really like the way the ambient light and the strobes work together in this shot. The final shot was made at F9.5 and 1/10 of a second, so you can see, because of the long exposure, how much of the ambient light I used. The light was a 750 watt-second mono light set to 1/2 power. The brightness of the open windows on the sides of the shot and the window with the covering in the back creates a nice feel for the light.
I shot quite a few versions of the shot with out any lights on. I wanted to see what I could do with an HDR version of this shot first. I ended up using 4 files for the HDR:


I used all four of these versions to create an HDR of the image.
I used the Equalize Histogram to convert from 32 bit depth to 8 bit depth. When I used HDR with the raw files the corrections to the color disappeared. The result looks like this:

I'm not happy with this version, but I wasn't really shooting for HDR.
I don’t like this version all that much. I could certainly fix the color, but the shot doesn’t have much sparkle. I really don’t like the way the windows work and there is some movement in the chandelier.
However Mike wasn’t thinking about using HDR. He had in mind using layers to manually bring the different versions of the shot together.
This is the bright version of the shot again. Most of the final image comes from this version.
This dark image will give me the detail I need in the windows.

This version will give me the lights in the chandelier. You can see how much overall color the lights created in the ambient light version of the shot.
This version will give me the lights in the chandelier. You can see how much overall color the lights created in the ambient light version of the shot.
The brightest layer will be the main layer of the shot. I used the dark layer to recover the windows and the layer with the chandelier lit to put the lights back into the shot. I also used the recovery slider (in Adobe RAW) on the bright layer to open the dark areas of the cabinets a little. I also used Vibrance and Saturation. I didn’t feel that I needed to change the overall exposure. Oh, as I mentioned above, I had already warmed up the color on the light and dark files. I made the color on the file with the chandelier lights on a little cooler. You can see, in that version, how much the lights change the overall color of the shot.
I started mixing the windows with a large soft eraser and pulled detail back into the window. I worked on the center of the shot and the mirrors on the sides. I used a 500 pixel brush with 12% opacity for the overall work. I also added just a little bit of density to the chandelier so there would be more contrast when I added the lights.

I added a lot more detail to the back window and the mirrors in this shot.
First I did the bulbs on the chandelier. I used a much small brush for the bulbs. I also used more opacity: 20%. Then I switched to a broad soft brush over the whole chandelier, at 5% opacity. The chandelier looks reasonable, but I prefer the version in the shot with the strobes. Of course all of this retouching is a mater of creating results that work for you and for your client. There are no actual rules. I could have pulled up the lights over the mirrors, but I didn’t like the effect of these lights.

Of course I needed to clean up sensor dirt and do some straightening with the crop tool. I also did a little sharpening in this last version.

I like the version made with the strobes better. For one thing the room seems brand new in that shot. I feel that the greater opacity in the back window, of the strobe shot, also makes the room seem more private, which is good for a bath. If I had a subject, such as a person in the shot, the cooler version made with ambient light might have worked better. One more thing, the cabinets look better in the shot I made with strobes.
Please consider taking one of my classes, or even recommending them. I have three classes at BetterPhoto:
An Introduction to Photographic Lighting
Portrait Lighting on Location and in the Studio
Getting Started in Commercial Photography
August 16, 2010
Understanding New Equipment
 Last week I was testing some new equipment. If you don’t know what it does I’m going to be able to use it effectively. Being able to predict and control your results is critical to being a good photographer. You need to know what your actual results are in order to do that. A pro may not take the best picture of a subject, but a pro had better always take a really excellent picture of the subject. For instance I have been at friends’ weddings, not as a shooter but as a friend. There are times when I took a picture the bride liked best, but I didn’t take a picture of the bride and groom and the bride’s mother, nor of the bride and groom and the ring bearer and so on and on and on. Shooting the event, if that is your job, means not one great shot but dozens of good shots. Shooting a home means, not a great shot of the living room, you should get that, but shots of every room. Anyway, I spent time on Saturday shooting with my new reflector, with a live subject. I included a couple of shots here. The device gives a very bright hard light, which mixes in an interesting way with softer light.
I’ve also been working on my next book, about lighting interiors. I really like the challenges of this kind of lighting. I’m going to attach a couple of paragraphs and a picture or two:
When you first look at a room, what forms your first impression? For some it will be color, and others will see the space, still others will be impressed by the contents. When you photograph a room you effectively miniaturize the room, so you need to pay attention to the original feel of a space, or you’ll lose the effect in the photograph. Architectural photography requires a great sensitivity to the feel of a place, in addition to an appreciation for detail.
 Architectural photography is most often client driven photography, that is you find yourself working for a client. So in addition to your perception of the space you need to be concerned with the way the client sees the space, and what particularly interests the client. If your client is an interior designer he/she may see a room differently from a painting contractor. Consequently communication is one of the most important skills an architectural photographer will need. You will have to get your client to understand what can be done and what choices will need to be made.
I teach a class in commercial photography , as well as classes in lighting and portraiture at BetterPhoto.com. I hope you will check out the classes soon. My first book: Understanding and Controlling Strobe Lighting: A Guide for Digital Photographers will be published in the fall you can pre-order it. I have a new magazine article coming out in September about strobe power. You can see it in Photo Technique Magazine.
Thanks, John

July 22, 2010
Balancing Light
This just came up for discussion in my Commercial Photography Class. I think this is a basic concept, but I’ve been lighting things for a few decades now, so my point of view isn’t average. When you light a subject each light source should bring the right amount of illumination to the party, too much or too little and the shot doesn’t look right. In addition the color of the light source must be right, for the circumstances, or the shot won’t look good. Of course you can do some of this in Photoshop, and I do, but I think that I get a more natural feel when the light is actually in the shot.
 In this shot I used five lights. The idea is to keep the light the room even and to make the light from the widows feel like a natural part of the shot. Of course the actual available light in the room didn’t match the window light, so I had to bring in all those strobes. You can see an article that discusses the lighting here, as well as an alternative version with HDR. In order to make the lighting work in this shot I had the camera tethered to a laptop. I can not stress enough that you just won’t be able to do really creative controlled lighting without feedback. While the camera back is good a larger device, like a laptop is MUCH better. I set up my lights for a portrait with the camera connected to the computer. When the set up is done. I disconnect and shoot the portraits. For architectural shot and for product shots I keep the camera tethered. Before digital, I used a lot of Polaroid material, usually in the same camera that I was shooting, to make sure the light was right. I need positive visual feed back even when I shoot with continuous light, just have to see how the camera sees.
 In this shot there is only one strobe, but as before it has to be balanced with the light from outside. Strobes make that easier than it would be with a continuous light source. You can change your shutter speed and change the amount of light from all the continuous sources in a shot, but the shutter won’t affect the amount of light from the strobe. The strobe only stays on for 1/1000th of a second, so the shutter doesn’t affect it. If you’d like more information about this check this article. One more thing to mention about this shot, the color of the interior and exterior light in the shot are a good match. Strobes match to daylight, but you can filter them to match other sources. The soft quality of the light also fits in well with the shot, if I’d used harder light the shot wouldn’t have worked as well.
So to balance light you have to be aware of all the qualities of light: quantity, color and how hard the light is. Each light in a shot should be fit to the others, including any ambient light.
I hope you’ll consider taking one of my classes:
An Introduction to Photographic Lighting
Portrait Lighting on Location and in the Studio
Getting Started In Commercial Photography
Or buy my book: Understanding and Controlling Strobe Lighting: A Guide for Digital Photographers(ok it won’t be out until November, but you can order it now).
Thanks John
February 1, 2010
A New Tool For Lighting Space

Modified Umbrella
If your goal is to light a human face you are talking about controlling light on about one square foot of surface area, if you are lighting head to toe, or even a small group, you are not talking about that much area. When you are trying to light a room you may be talking about thousands of cubic feet of space. The problems are not unrelated, but the solutions are going to be very different.
One of the most important tools in lighting people or product is the large light source. If you have a light source that is very large, and close to the subject, you can create soft shadowless light. The light seems to come from many directions, like the light on an overcast day. Of course this is because the light does come from every point on the surface of the light source, whether the light source is an umbrella, soft box or light panel. So lighting with a large light source can be relatively simple, since the position of the light is not as critical as with a small light source. As the subject gets bigger you need an increasingly large light source to accomplish the same thing. If you light a motorcycle (http://www.youtube.com/watch?v=pqEfShhW5pA) a large light source might be about 20X9 feet. But if you are lighting a room a large light source would need to be approximately as big as the room.
Since I haven’t seen a lot of soft boxes you could live in, or an umbrella that could keep the entire Mormon Tabernacle Choir dry in a rainstorm, I think that the only way to achieve a large light source in an architectural setting is to bounce the light off a wall or ceiling. This will work quite well if the surface you bounce off is white or close to white. The other concern, with the ceiling, is to keep light off, or nearly off, any part of the ceiling that is in your shot. I suppose you could bounce light off a large piece of seamless paper if your walls or ceilings weren’t white, but that sounds like it might be difficult to set-up. You could also repaint the room, but I don’t think that this solution is very practical. A bounce light will also cause reflections, but reflections from large light sources are not as bright as those from small light sources.
Recently I saw the way one of my students used an umbrella on a room shot. She pointed a shoot through umbrella at the ceiling. There was light all over the room and the ceiling from just one light. Of course there was not as much light as one would like bouncing off the ceiling, because the light had to go through the umbrella. I wondered what it would look like if you could bounce light off the ceiling and get light from the side of an umbrella. So I modified a white umbrella, by putting a hole in the center. I had to sew around the edges of the hole. The hard light went through the center of the umbrella and the umbrella diffused the light on all sides. This is a 360º light, so you get bounce fill from all over the room. The light worked wonderfully well. I have attached a before and after photo.

Without the new light

With the modified umbrella!
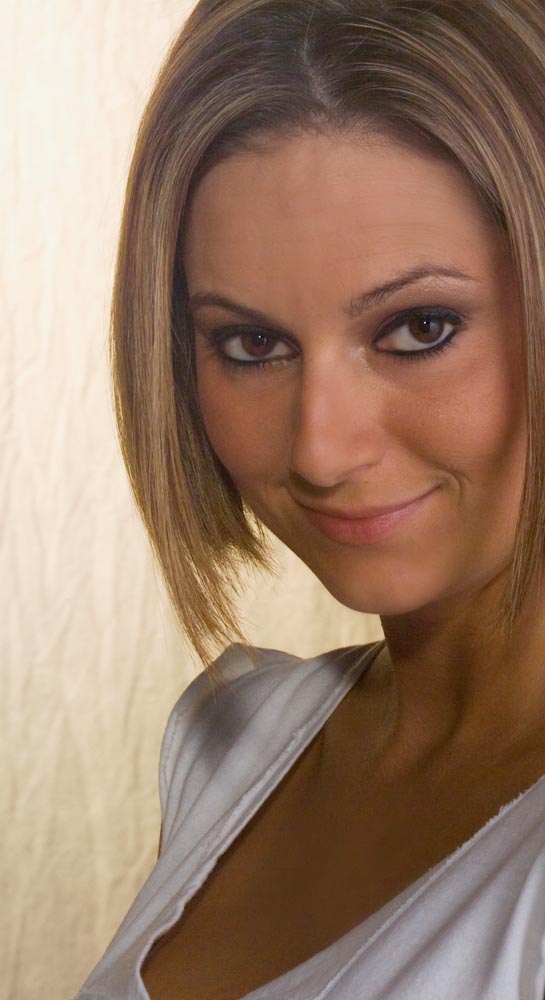
Of course I had to see what would happen with a portrait. The results on this test were less wonderful. The light needs to be place precisely, because it works as a hard light. In addition, since there is more hard light than soft light, the result is not really flattering to all subjects. Still the catch lights looked very fine.

Catchlights from the modified umbrella
I have a picture on page 58 of the New Yorker this week, I hope you’ll check it out. I also hope you will also check out my classes at BetterPhoto.com:
An Introduction to Photographic Lighting