Photo Notes A place to talk about making images.

July 6, 2014

Changing Your Way of Seeing

My books and my classes give me a reason to keep doing this blog. If you’re in Indiana I hope you’ll consider taking my Portfolio Workshop. You can see a little more information about this workshop if you check out this blog post . I’ve listed my BetterPhoto classes at the end of this post. Thanks so much for your attention.

Frame 16

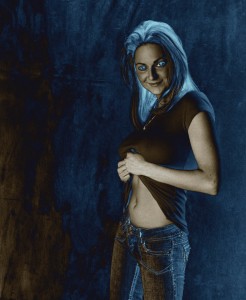
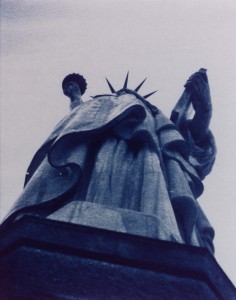
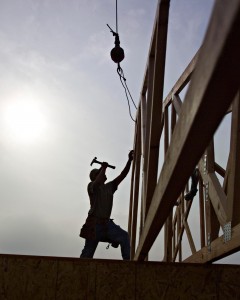
I see as a photographer, constantly breaking the world into still images. I think that most people who spend a big chunk of life doing photography see a little differently from people who aren’t involved in static art forms. I’ll look at something and think: “I’d shoot that, maybe a little warmer and with more contrast” or maybe: “That was a really great instant” and: “Look at that design.” I think this is part of being a good photographer. I once heard a guy say that he always adjusted a TV to look like Kodachrome, since that was the way he saw the world. Of course this illustrates one of the problems with this way of seeing: you start to see everything the same way. I’ve been known to walk by an interesting subject while thinking that’s not the kind of shot I do. I often make my shots warmer, even my black and white shots, but I can’t remember the last time I made a shot cooler.

Frame 22

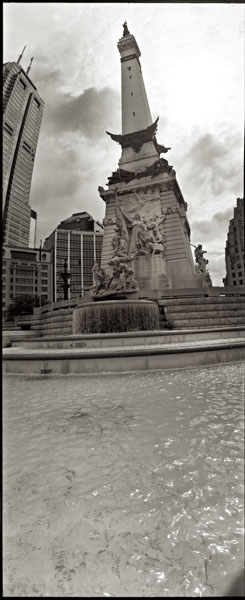
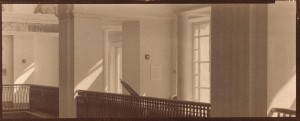
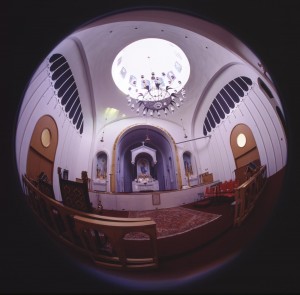
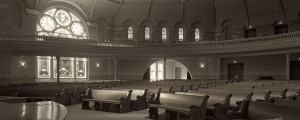
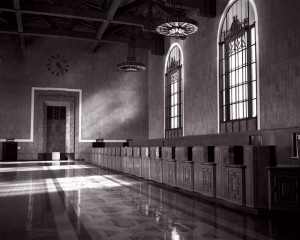
So I’m always looking for ways to break out of my way of seeing. I know that many people want to have a style, but not me. I’m a photographer, not a painter, so I can be prolific and do work that’s new. I want to push myself to see in different ways. One of the ways I do this is to work with different tools: cameras, lenses and software. I just got a Horizon Perfekt, which is really helping me to see differently. This camera shoots a 120º image, horizontally anyway. It’s really different from other wide-angle images because the lens actually moves during the shot.Frame 12


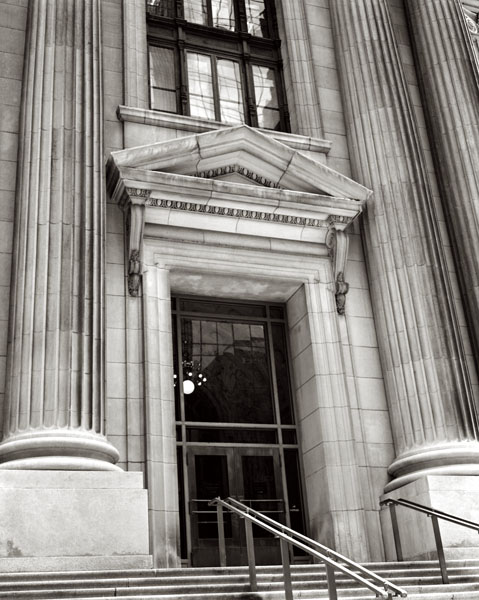
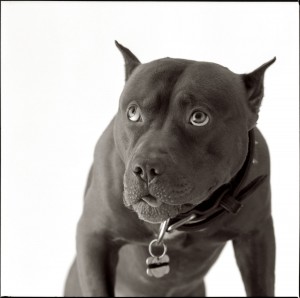
I shot with a Koni-Omega camera last week. It’s a medium format film camera. This is a manual camera with range finder. Shooting it reminded me of the acronym FAST: Focus, Aperture, Shutter and Think. I think that my digital camera has allowed me to get a little sloppy with technique. Of course shooting with a new camera is not the only way to open yourself to new ways of seeing, but it can be fun as well as enlightening.

Frame 15

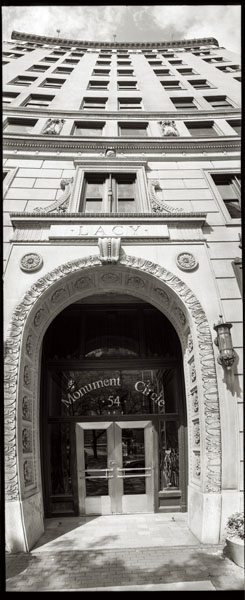
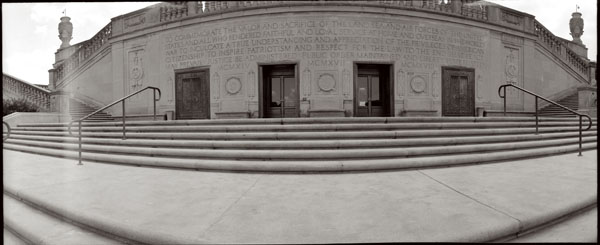
I got an 11X14 camera recently, but I haven’t shot with it yet. I still have to build a lens board and order some film, but it should be a quite an experience. Whenever you work with a very large camera the difficulties increase and so does the expense. But if 11X14 is anything like 8X10 getting a good result will be really fun. Sometimes just getting a good exposure can make you feel great. There’s another practice tool I want to work with. I have an old Spiratone 400 mm f6.3 lens. I’ve really only used it a couple of times because I’m more interested in wide-angle lenses. But in an effort to expand my vision I’m going to put in on the digital camera and start shooting. Who knows how that will affect my seeing? By the way I’ve included a couple of panoramas from the Horizon camera and one more from the Koni-Omega. Also I recently updated my website so you can get an idea of how I’m seeing now. Please check it out at www.siskinphoto.com

Of course there are other ways of expanding your seeing, like taking a BetterPhoto course. Here are the three I teach, perhaps you’d like to take another one or share them with a friend.
An Introduction to Photographic Lighting
Portrait Lighting on Location and in the Studio
Getting Started in Commercial Photography
One other note about BetterPhoto: I’ve been in the habit of sending out a private note to all my former students at BetterPhoto (Almost a thousand people!) each month. There’s some sort of hang up in the e-mail system for thst so, for a while anyway, I won’t be sending that note. I hope no one is too disappointed.
Thanks,  John


June 16, 2014

Portfolio Workshop January 28th, 2019!

The last Portfolio Workshop went really well. Why not join us  for the next one? We’ve been doing this for a couple of years now, and we’re getting quite good at it! We’ll meet on January 28th at 6:30pm at my studio in Downtown Indianapolis. Read on for more details.
Making photographs might be a solitary experience, but as soon as you’ve made a photograph you’ll want to share it. As you gain experience as a photographer you’ll want to share your photographs more broadly, beyond friends and acquaintance. Of course you’ll be concerned about how other people perceive your work, or at least I hope you will. If you want to present your images to galleries or contests or businesses it’s important to learn how other people see your work. Frankly it’s quite difficult to learn this on your own. I’ve learned this for myself. When I look at my shots I remember the circumstances of the shoot, and this always colors my perception of the shot.

Mosaic

The above shot is a good example I made this shot for a hotel in Beverly Hills. The owners of the hotel and the designer weren’t ready for the shoot and there were other problems. So, while the shot is good, I didn’t put it on my website for quite a while because I remembered the problems when I looked at the shot. So choosing photographs to show is very difficult. When I do a shoot I have certain reasons for the shots, the reasons may be commercial, personal or something else. Because the first time I edit the shots the choices are based on the reasons I did the shoot. I sometimes miss a shot that has other possibilities. This is why I go back to older shots and review them again. That even happened with this shot:

What?


The purpose of the Portfolio Workshop is to help you develop skills for editing and presenting your shots. There are different ways to present your portfolio, and presentation is important. I’ve seen a lot of people who only have digital versions of their portfolios. While a digital portfolio is good, I think you might also want a print portfolio; for one thing it helps you sell prints. More important you want to show various ways of presenting images to your client: digital, website print and more. These tools may be important to a commercial client. For instance I had a high end landscaping client that showed very large prints to potential buyers. He told me that he was going to be landscaping a couple of acres of land and you just couldn’t present that with a 4X6 inch print. Of course he knew he needed really good photographs if he was going to show prints that big. I have a 16X20 inch portfolio that I present to architecture clients; it’s been quite successful. I have a couple of portfolios on my tablet and even a few pdf portfolios my clients can see on line: www.siskinphoto.com/aportrait.pdf and www.siskinphoto.com/aarch.pdf. In the workshop we’ll be talking about the most effective ways of sharing our work. We’ll also talk about how to get people to look at our work. The shot below is in my16X20 portfolio.

Mark David

There’s a lot more to this workshop than listening to me pontificate about someone else’s photographs. This is a small group and everyone is encouraged to participate. The idea is to see how several different people react to your images. One object of this workshop is to develop a supportive environment where you can get detailed feedback about your images. Another object is to develop everybody’s skill communicating about images. This is always challenging to photographers because few photographers have a background in design. When you can better describe why an image works you’ll also create better skills designing and building images. Of course we’ll also share technical information about making images, but, in this sort of workshop, technology is secondary to developing our design skills.

I’m asking participants to bring two images to each meeting. This way everyone will get a chance to have an image reviewed and to comment on other people’s images. I’m sure there are people who would like to have just their portfolio reviewed rather than be part of this workshop. I certainly do portfolio reviews, but they cost more than $20. A portfolio review is static, this workshop will help you develop your skills as a photographer over time and build great portfolios. The Portfolio Workshop is a live experience. It meets once a month in my Indianapolis Studio.

You can start attending this workshop with just a few images. We meet once a month so you’ll have the opportunity to create more images for your portfolio and bring them to the workshop. You can use the workshop experience to help you decide what kind of a portfolio to develop, or you can develop several portfolios at one time. I’m always working on several sorts of images at the same time. I encourage everyone to participate, by bringing images and by giving feedback to the other participants. Sign up at the Workshop Page on my site. Please join in!

You can get my books through amazon or other booksellers.

Please visit my site to see my other workshops and to check out the Free On Line Classes!

January 10, 2014

Critiques

Filed under: Looking at Photographs,Photographic Education — John Siskin @ 3:55 pm

To start I just want to quickly remind you about the classes: An Introduction to Photographic Lighting, Portrait Lighting on Location and in the Studio and Getting Started in Commercial Photography and the books:

I went to the blog archive to find an entry about doing critiques, and I realized I hadn’t posted anything about this topic. Considering how may critiques I’ve written for my BetterPhoto classes, it surprised me that I haven’t done a blog entry about this topic. I’m continuing to build a portfolio class here in Indianapolis, and so this is an important topic. The pictures this week are from a shoot I did for the Indianapolis Hilton. I love shooting hotels!

A critique is different from a review. A review is done for an audience that hasn’t experienced the subject of the review. So it can be useful to give a negative review, perhaps even something scathing, because it will keep the reader from experiencing something bad. A critique is designed to give the creator of the work, a photographer in this case, information about how you respond to the image and helpful information about the image. So a review might say these are wonderful luminous images, a critique would say more. Perhaps: “I respond to the feeling of light in this image. I think you choose your subject matter well. I like the choice of paper, and the muted color palette of the image. You might have cropped tighter.” Well you get the idea.

I think the first thing you say about an image should be positive, but, frankly, that isn’t always the first part of a critique I write. One of the advantages of writing critiques is that you can organize your thoughts while you construct the critique. When you are doing a spoken critique, or participating in a class critique, you want to organize your thoughts before you begin. Certainly you don’t want to discourage anybody when you mean to help her/him. I try to start by talking about my emotional response to the image, if I have one. I want to say that I have a good feeling about the image, or a strong feeling, and to say why. So I might say that a shot of a frozen lake gives me a strong feeling of cold and distance, which might not sound good on its own, but matches the goal the photographer had for the image. One thing to keep in mind is that the emotion impact of a photograph is a big part of what a photographer wants to create in an image. Also you can create a bleak image, or a positive image, from pleasant elements by manipulating light and exposure. One of the important things is to discuss the impact of an image: are the feelings from an image mild or wild?

The next thing to discuss is what you might be able to do to strengthen the image. I like to start by discussing things that can be done with the existing image, that is things you can change in post-processing. The first, and most important, thing is cropping. I have seen so many images that are weakened simply because the photographer hasn’t cropped the image. I try to shoot with a little extra room around my image, so I expect to crop every shot that I work with. I am surprised that so many people show images that they haven’t cropped. When I do a critique on-line I’ll also be talking about the color, contrast and sharpening as well as anything else you can do in post. If I am doing an in-person critique I will talk about presentation as well. If you show me a 4X6” print of a shot I won’t thing you are as committed to your work as when you show me an 11X14 with a mat. If you aren’t committed to your work why would you expect people to take it seriously? Some images have to be big in order to work well. I have friend in Los Angeles who makes very complex images that are really quite wonderful. His prints are 20X30”, and work quite well because you can examine all the details in the big print. However if you look at these images on his website the images suffer a lot because of the small size. In addition to size I will discuss the matting and framing, as well as other presentation details.

The last section of my critiques is devoted to items that can only apply to making new shots. So I might say if you work with a back lit subject outdoors you might want to use flash fill. I may even suggest that flash fill is usually a good idea outdoors. I also find myself discussing the way you load the frame. Perhaps I’ll say something about keeping empty space on the right side of the frame or keeping the subject’s hands in a shot. This is a good time to add information about any technique.

If you’d like me to critique your shot then you might want to come to my portfolio class on Monday January 13. Or if you can’t get to Indianapolis you can take one of my BetterPhoto classes:
An Introduction to Photographic Lighting
Portrait Lighting on Location and in the Studio
Getting Started in Commercial Photography.


December 9, 2013

More Than Pressing the Button


To start I just want to quickly remind you about the classes: An Introduction to Photographic Lighting, Portrait Lighting on Location and in the Studio and Getting Started in Commercial Photography and the books:


People make pictures as a form of communication. People have been making pictures for tens of thousands of years, maybe for as long as there have been people. The oldest pictures that are still visible are made with pigments and painted in caves. These may not be the first pictures, but they seem to have lasted the longest. I suppose that pictures like the ones in caves might have been common, but time has washed them away. The reason I start with this idea is that the ability of a picture to convey information about the nature of things, or about feelings, is basic to humanity.  Of course this isn’t the only way we communicate, you’re reading this after all, but it is possibly the most basic way we communicate. Perhaps, because it is so basic people don’t receive much instruction in images. I’ve taken more English classes than I can remember, as well as other language classes. I’ve even taken classes in computer languages, learning to communicate with an inanimate object. Now, of course, I’ve also taken photography and art classes, I make photographs for a living after all, but every class I took about making images was an elective, not one was required. As a photo teacher I’m constantly amazed at how little insight my students have about how to communicate with images. Perhaps we should have more basic instruction in communicating with images.

As an example consider what is called the “rule of thirds.” The basic idea is that a line in your frame, particularly the horizon line, should run across the frame at one third of the way from the top or bottom of the frame. There are a few more considerations with this rule, like the idea that the places where the lines a third into the frame intersect are the most effective places to place the subject. If a photographer has any information about composition, this will often be the first thing he/she knows. Some of my students have followed this rule slavishly, even when it made an obviously bad image. Other basic ideas, like leading lines or placing the subject in a place where the eye will find it quickly are rarely known. Too bad, really. So many photographers have the idea that composition is an innate skill, something you do with your gut, rather than your brain. People often refer to this skill as the eye: “he has a really good eye.” We spend so much of our time discussing equipment and technique, but ignore the most critical skill, building better images. I think there is more to it than choosing what to make a picture of; how we present a subject is at least as important as the subject.

Another consideration is how a photograph itself is presented. If somebody shows me photos of a model mixed in with photos of their last vacation and a couple of pictures she/he took at an antique show, it’s going to make all the images more confusing and less effective. Choosing images that support each other builds a portfolio that is stronger than the individual images. Presenting the images in a consistent manner can also help strengthen the individual images. Most people I know are presenting their images in an electronic format, either on line or in a tablet. I do present this way this too, but I think it is a weaker way to show images. In general this presentation means that the images are small, and there is a sameness to reviewing images on a screen that you don’t have in a print portfolio. If you go to a museum or gallery you’ll notice that the size and frame of an image are part of the artwork. A Sunday Afternoon on the Island of La Grande Jatte and Guernica look depressingly similar on my computer screen, but Seurat’s painting is 10 feet long and Guernica is something like 25 feet long. So what you see on your computer screen is not what these paintings look like, unless you have a 25-foot screen. Maybe you think that these images don’t look very similar; perhaps you should go see them in person.

I’ve been tying to start a group here in Indianapolis that would work on building portfolios and better images. Frankly it’s not going very well. I’m hoping to find a group of around ten people who will commit to building a group of images that work together, or on portfolio groups. I’ll be working on a couple of things myself. I hope the participants will have new images most months. I expect them to discuss their reactions to the other participants’ images. Getting feedback from several people is probably the best way to learn how others react to your images. Also, it’s easier to listen to a critique from someone who is also building a portfolio and presenting images. If there are enough people then we could have separate groups for commercial work and fine art. So this is a group effort, not presentation where you sit back and watch.
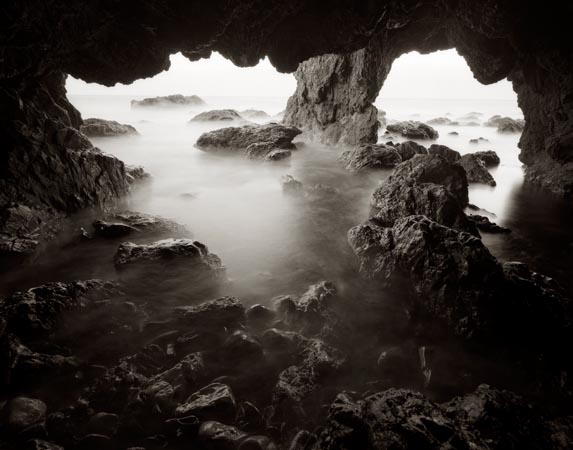
I’ve attached images from one of my tablet portfolios. I’m going to present these images at facebook as well. Tablets are clearly a wonderful tool for an informal portfolio presentation. You can have an extensive portfolio with you wherever you go. You can choose different groups of images to show different audiences. Also you have some control over the way your images appear, at least because you can choose which tablet to buy. However if the tablet is the only way you present yourself you’ll limit your print sales, if nothing else.

If you’re interested in the portfolio class please contact me at john@siskinphoto.com or 317.473.0406. Also check out the workshop (http://www.siskinphoto.com/Workshop.html) page of my blog for more information. I’m not doing a portfolio project on line, at this time, but I am still teaching at BetterPhoto.com. I have three classes there, all of which involve critiques of images as well as technical information. I hope you will check them out:
An Introduction to Photographic Lighting

Portrait Lighting on Location and in the Studio
Getting Started in Commercial Photography.


Please keep in mind that the classes and the books help to keep this blog going, so do your holiday shopping here! Happy New Year!


May 30, 2013

Print Types

I hope you’ll check out my books: Photographing Architecture and Understanding and Controlling Strobe Lighting. Please get copies, if you haven’t already. Of course you know that one reason for this blog is introduce the books and get you to consider one of my classes at BetterPhoto.com: An Introduction to Photographic Lighting, Portrait Lighting on Location and in the Studio, Getting Started in Commercial Photography

The second portfolio class was great. Please let me know if you want to be on the mailing list. Here’s some more information the next meeting is Tuesday June 18, 2013, 6:30 pm. We may be meeting at my new studio. Stay tuned for more about that! The class is a great opportunity to make a greater commitment to your work and learn more about how others see your work. Still only $20. I look forward to seeing you if you’re near Indianapolis.

I’m going to discuss the kinds of prints I’ll be using in my show at Indiana Landmarks. The opening is on June 7 at 6pm. I hope I’ll see you there! For more information check this link. Most of the images in this week’s blog are going to the show at Landmarks. Please keep in mind that images on your screen aren’t good representations of what real prints look like. The images are linked to the fine art part of my website, which you can use to buy a print. The prints available on my website are made on the Moab Entrada rag paper discussed below.

I’ll start with silver gelatin prints because in many ways they’re my favorites. These were the most common black and white prints for most of the twentieth century. The black part of the image is silver and the emulsion is made of gelatin, which is probably the reason for the name. One of the most beautiful aspects of these prints is the bright whites created by a layer of barium clay called baryta. This layer is on most prints made on a paper base, usually called fiber based paper. This layer was replaced by a titanium layer when resin coated papers were introduced. I think resin papers aren’t as beautiful because they don’t have the baryta layer.

Fiber based silver gelatin papers are still available ready to use. The prints are exposed in a darkroom with an enlarger. Processing time is over an hour; most of this is wash time. If the prints are properly handled, particularly given through washing, they will last for at more than a hundred years. There are many examples of prints that have lasted longer than a hundred years. The photographer has considerable control over the print; in addition to changing density the photographer can also change contrast tone and local density.

Cyanotypes have bright blue images on a base that is the color of the paper or other material you print on. Sir John Herschel invented the process in 1842. The light sensitive chemistry is iron based, and the final image is an iron compound. The final dye is called Prussian blue. The chemistry is mixed by hand and brush coated on the paper. Multiple coatings add to the saturation of the image, which is why I usually triple coat the paper I use for cyanotypes. Processing is just a long wash.
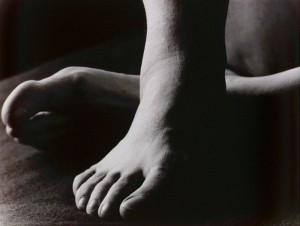
 

Cyanotype, Vandyke and other processes are usually referred to as alternate processes or alt process. The idea is that these are different from the more commercial photographic processed used for most photography. These processes are much more personal, for instance the paper is hand coated by the photographer. The processes are not very sensitive to light so enlargers can’t be used. Most often the original camera negative is pressed right against the hand coated paper. An alt process print is a handmade object and each print will be unique. Of course the photographer has to exercise considerable care when preparing and processing these prints in the darkroom.
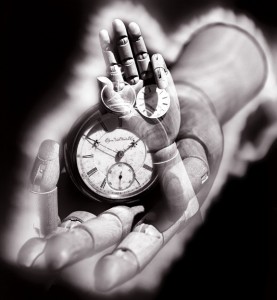
The Vandyke process produces a brown toned image. The image is made of silver, but the light sensitivity is based on iron chemistry, like cyanotypes rather than silver chemistry like a silver gelatin print. This process is often referred to as Kallitype. The sensitizer contains Ferric Ammonium Citrate, Tartaric Acid and Silver Nitrate. Processing includes considerable wash time as well as a bath in sodium thiosulfate. Properly processed Vandyke images have lasted for about a hundred years.


From the time that George Eastman introduced the Kodak camera with the slogan “You press the button, we do the rest” there have been places to get your processing work done for you. In some cases, for instance Kodachrome processing, there was literally no way to do it yourself. In addition much processing can’t be done economically unless you do a lot of printing everyday. Certainly many people have noticed that their ink jet printers don’t work well after sitting unused for several weeks. There are several things that are important to the photographer and the viewer with all of these processes; first is how much control does the photographer have over the images. The printer that I am using allows me to manipulate the image files in Photoshop. This gives me incredible control over the final print. Another consideration is how long will the prints last. While none of these processes have been around long enough to prove durability, prints can tested using light and heat.

Fuji Type R Paper was actually used when photo labs had enlargers. The R stood for reversal. It allowed the lab to maker a print directly from a slide or a larger film positive. So you could make prints from Kodachrome or Ektachrome without making an inter negative. Labs generally used enlargers to work with this paper, so you could do dodging and burning, but there was not much other control. I am not sure if anyone is still making Type R paper. These prints had good saturation and good durability.

Moab Entrada Rag 290 Bright paper is made to high standards and designed for specialized ink jet printers. It is a rag paper and has no acid or lignin. The Epson Ultrachrome inks are used. These are pigment inks so they will last for an exceptionally long time. I find that these prints have a very long tonal scale and very fine color. These prints are made from files that have been prepared with Photoshop. Both color and black and white prints can be made on this paper.

I am showing a 20X50 inch print of this image! It looks great.

Fuji Crystal Archive Matte paper is a color photographic paper designed to be used with digital enlargers. Prints are made from files that have been prepared with Photoshop. This kind of paper is usually used to make color prints. I often use it to make mono-chrome images with a warm tone. Prints made with this product are expected to last more than twenty years.

Please check out my classes at BetterPhoto.com:

An Introduction to Photographic Lighting,

Portrait Lighting on Location and in the Studio,

Getting Started in Commercial Photography

Thanks, John


July 14, 2012

I’m Showing in Indianapolis!


I had an opportunity to show a few images at a local coffer house, Lazy Daze, drop into my lap. If you’re in Indiana I hope you’ll check it out: the address is 10 S. Johnson Ave. Indianapolis, IN 46219.  The images on display are 16X20 inches, so these on line images aren’t really as effective, but at least you can see them. The text is the artist’s statement I included with the show. The images are on sale for $275. If you’d like to buy one I’ll get it to you for that price, plus shipping, after the show. All prints are silver gelatin, and are hand made by me.

Time and Shadow

Photography is an art form that is evolving. William Henry Fox Talbot realized that photography would become a means of communication when he created his first images back in the late 1830s. He used his camera to record household goods as buildings people and plants. When he published Pencil of Nature starting in 1844 he presented many of the ways the world would use photographs up to the present time. In the beginning photography was extraordinarily difficult to do. Exposures were long, so cameras had to be supported by a tripod. The chemical processes were almost as arcane as a witch’s brew, and sometimes more dangerous. It’s very important to remember that the photographs a person takes are always constrained by the limitations of the medium: the photographs a person could take.

The photographs I present here are from a certain time in photography. I used large cameras at this time to increase detail and reduce grain. I made prints by hand in a darkroom. I watched each of these images develop on a white sheet of paper under a safelight. It was a good time.

One of the most significant differences between working in this fashion and working with a digital camera is that each image you captured involved certain costs of time and material, so I would choose an image much more carefully. Now I more often shoot everything and edit, which is a very effective way to work with a digital camera. One more time the change in the technology of making pictures has changed the way we take pictures.

I hope these images will share not just how I see, but also some of the magic of making an image. These images were made with 4X5 film cameras. They were printed by hand with an enlarger in a darkroom. I enjoyed this way of fixing my vision onto paper. I hope you will find some joy in these images as well.

John Siskin

I hope you’ll check out my books: Photographing Architecture and Understanding and Controlling Strobe Lighting. I hope you’ll get copies if you haven’t already. Of course you know that one reason for this blog is to sell the book and get you to consider one of my classes at BetterPhoto.com:
An Introduction to Photographic Lighting

Portrait Lighting on Location and in the Studio
Getting Started in Commercial Photography
If you’re in the Indianapolis area there are other opportunities as well. I’ll be teaching a class in commercial photography next spring at Ivy Tech.

November 29, 2011

Kodachrome at Eastman House

Filed under: Film Technique,Lighting Technique,Looking at Photographs — John Siskin @ 8:15 pm

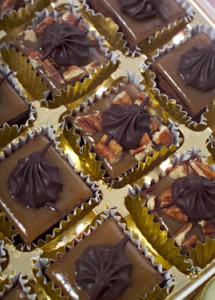
I wanted to post some information about my experience at The George Eastman House in Rochester. It’s been over a week since I got back, so I have had a chance to think about things a bit. I really wasn’t very interested in taking pictures of the house, so if you want to see the place, visit the site. The collection is huge and only a small amount is on display. You can see much more of the collection by making a request. I wanted to see large format Kodachrome, and the staff were kind enough to let me see dozens of example of 8X10 Kodachrome. Most of this blog will be devoted to what I learned. I wish I had some Kodachrome images to attach to this blog, but the scanner is still missing from the move. Besides you should look at original Kodachrome transparencies, the image on a computer is not the same. The computer makes everything the same size and removes other individual characteristic of images. So I’m just attaching a couple of food images.

Kodachrome was developed in the Kodak labs by a couple of musicians named Leopold: Mannes and Godowsky. The Kodak labs were run for most of the twentieth century by C. E. K. Mees. The Kodak lab was arguably the first industrial research lab. Kodachrome was a huge step forward in capturing color. The previous methods used a filter over a single emulsion, which is very similar to how digital cameras capture color. Kodachrome used three separate emulsions that captured individual colors. This captures much more detail. In addition, with a Kodachorme image, the color went where the silver molecules were. As a consequence Kodachrome images last much longer than other color processes. This was something I wanted to see.

Most of my first color shots were made on Ektachrome color film in the middle seventies. These images are beginning to fade. The Kodachrome shots I saw at Eastman House were from the fifties. The color was as vivid and as crisp as if they were made yesterday. As with other Kodachromes that I’ve seen, the images had no visible grain. Certainly, in large format sizes, Kodachrome was capable of capturing more information than most current digital cameras. of course you wouldn’t see this on print sizes less than 11X14, and probably not on print sizes  less then 20X30 inches. Unfortunately all sizes of Kodachrome, and processing for Kodachrome film, are discontinued.

I also learned a lot about shooting food. The images I saw were made by Nickolas Muray. Almost all of them were images of food. I was interested to see how much hard light he used to make his shot. The food had shape and sparkle as a result of this. I was also interested to see the design of the shots. Many of his images included items that a current stylist would never use. These shots were probably made in the fifties and early sixties and our ideas of how food should look have changed. It must have been difficult to shoot the food for several reasons. 8X10 cameras heed to shoot at a small stop, perhaps f64 or smaller, which means you need a lot of light. He used quartz lights, so heat would have been a consideration especially with food. He had no Polaroid proofing, so I don’t know how he tested his lighting and exposure. Perhaps he set up the day before and ran a test sheet of film overnight. It was really a pleasure to look at the very fine work that Nickolas Murray shot.
You can learn a lot more about lighting in my BetterPhoto.com classes: An Introduction to Photographic Lighting, Portrait Lighting on Location and in the Studio and Getting Started in Commercial Photography You might also want to check out my book: Understanding and Controlling Strobe Lighting: A Guide for Digital Photographers. Here’s a sample chapter that discusses portraiture.

BetterPhoto.com, The better way to learn photography

April 9, 2011

What is Real Photography?

Here are the shameless plugs: my book Understanding and Controlling Strobe Lighting: A Guide for Digital Photographers is on Amazon.com. Here is a sample chapter from the book. There has been nothing buut good feedback on this book, so I would guess that you’ll like it. Of course I still hope that you will consider purchasing my fine art book B Four: pictures of beach, beauty, beings and buildings. Frankly purchases of this book mean a lot to me, and it is also a fine gift for any occasion. I lowered the price a couple of weeks ago, and that has helped.  As you know I teach for BetterPhoto.com. I really hope you’ll sign up my class: An Introduction to Photographic Lighting. Sign ups continue for the current session, please sigh up now.

This shot was meant to show the size and shape of the concrete dye.

I don’t know when the Kodak company first used the phrase “You push the button; we do the rest” but it must have been in the early 1900s. The Kodak company made possible a new kind of amateur photography: where the camera operator didn’t need to know anything about the technical aspects of photography. This, I think, is the beginning of the idea that what you need to be a photographer is a “good eye,” not any level of technical excellence. In the last few weeks I’ve seen several posts in which real photographers are complaining about those amateur photographers who are ruining everything. I think we ought to take a look at this sentiment.

First who are the real photographers? Photography is the most popular hobby in the world. How many people

I needed to use some of the light from the window, as well as strobe to balance this shot.

don’t try to take a picture sometime? I now have a camera in my phone, and I expect to have one in my next blender. Really I wouldn’t be surprised to see an oven camera that would e-mail you a picture of your food, so you could turn off the oven before it overcooks. Real photography is photography that communicates with pictures; that captures the memories of your days; and that sends pictures to Grandma. I would guess that without amateurs buying cameras we would still be using Speed Graphics, Rollieflexs and Nikon F cameras. These were cameras that were designed for professionals. Are there enough professionals in the world to pay for the design of a Canon 7D? Or consider it this way: a new Hasselblad H4D-60 costs $42,000, as much as new luxury automobile. A Canon Rebel XS costs just $550. I bet Canon is making more money. The thing professional photographers need to come to terms with is that Aunt Tilly, with her Nikon Coolpix, is the real photographer.

Since I’ve been doing photography the goal of the camera manufactures is to make better images for more people, people like Aunt Tilly. These people are amateurs: they take photographs for themselves and to share with friends. They want to remember the moments of their lives in vivid ways. I am a professional photographer that is I make money with my camera. Not just $5 or 10 from the occasional stock photo, but a living. If I am going to continue to do that I need to do more that tell potential clients that I have a good eye. As the manufacturers make better cameras I need to have skills that Aunt Tilly doesn’t have.

Back when I used film I had equipment that amateurs didn’t have: a 4X5 and 8X10 camera and lights. Business was better then, people with Instamatic cameras didn’t shoot product. But now the graphic designer I used to work for frequently has a new Canon. Because not only has Aunt Tilly got a Coolpix, Bob the graphic designer has a 5D. If Bob can shoot the image he needs for that ad he won’t hire me. The cameras are easier to use, and the images are better, and often they don’t need a professional photographer.

If we want to keep working, and I don’t know about you but I want to keep working, we have to bring more to the table than a good eye. I say this a lot, but what we have to do is be able to make pictures, not just take pictures. Aunt Tilly takes pictures. She finds something interesting and points and shoots. She’s like a walking scanner. Photographers need to be able to build a photo from concept to final image. This means you need to know how to create and control light, how to edit, how to work in Photoshop and how to work with a client. There are other things like framing and writing that can be helpful. If you’re doing these things on automatic, or if you’re sending them out, better look behind you to see if Aunt Tilly is catching up.

I added photographs that I used lights for this week. As I’ve mentioned lighting requires a considerable amount of craft, so Aunt Tilly won’t be catching up in this race any time soon.

I really hope you’ll consider taking my class at BetterPhoto.com. Sign-up are almost over, but if you sign up now you won’t miss a thing. I also hope you’ll suggest my BetterPhoto class An Introduction to Photographic Lighting to other photographers you know, or perhaps you’d like to give it as a gift? Amherst media sent me the cover for my second book, you can see it here, of course you can still look at my first book at Amazon .
BetterPhoto.com, The better way to learn photography

February 20, 2011

Looking For Work?

Filed under: Looking at Photographs,Marketing — John Siskin @ 7:36 pm

For Aids Walk, Los Angeles

Here are the shameless plugs at the beginning of the blog. My book Understanding and Controlling Strobe Lighting: A Guide for Digital Photographers is on Amazon.com. The wonderful folks at Shutterbug magazine are printing a 3 page excerpt in the current issue. Please pick up the magazine.  Here is a sample chapter from the book. Of course I still hope that you will consider purchasing my fine art book B Four: pictures of beach, beauty, beings and buildings. Frankly purchases of this book mean a lot to me, and it is also a fine gift for any occasion. As you know I teach for BetterPhoto.com. I really hope you’ll sign up my class: An Introduction to Photographic Lighting.

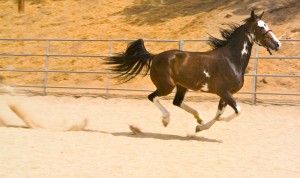
Shot for a breeder.

Sign up are very good this month!

Recently I’ve been having a conversation with a couple of people on the discussion board at BetterPhoto.com. We’ve been discussing selling photographs. One of the problems that a person has as he/she becomes a more committed photographer is that she/he needs some sort of validation. Many people will participate in contests, but often the judging of

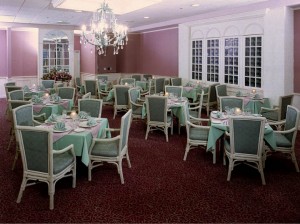
Shot for Ramada South Bay.

a contest is capricious or even insane. Selling photography can seem like a much better way of getting validation, and it might even buy you some new gear. Heck, it can even turn a hobby into a tax write off.   If you want to sell photographs you need to look at the photographs that get bought, rather than the photographs you want to take. I have been selling photographs for almost thirty years. I started out photographing backgrounds for the Chipmunks: Alvin, Theodore and Simon. The last job I did was photographing a concrete

For Aids Walk, Los Angeles

pour for the footings of a new building. In the middle I’ve done work for General Motors and Aids Walk. Almost every photograph I’ve ever sold I sold to a business or a magazine. These are markets that need a lot of photographs. I’ve already done 6 jobs this year for one client. You can see some of the work I’ve done for this client at www.beelerbuildsembetter.com. Families don’t need a lot of photographs, would you do a family portrait more often then every other year?  People don’t have weddings frequently, at least most people don’t. I’ve seen a lot of bad photography that got paid for, because the clients needed the images. If you want to sell photographs look at the businesses

For Rhythm Child

that buy photographs. Also get the Photographer’s Market. The Photographers market lists ad agencies, magazines and publishers. It even lists art fairs. It also tells you how to approach various kinds of businesses.

I have the 2010 version of Photographers Market right now. If I were going to do a major push for new accounts I would go get 2011 version. While there may be new markets, and that is important, the key thing is that you have up to date information on who the buyer is in a particular company or publisher. I found the publisher for my current book, and my next book, in Photographer’s Market. I sold to the New Yorker because of Photographer’s Market. What is not to love?

It is difficult for emerging photographers to understand that

For West Wind Studios.

they need to develop a broader definition of what a photographer does. You might want to look at my website: www.siskinphoto.com, to see the many kinds of photography I do to make a living. Oh, and I also teach at BetterPhoto.com. The pictures this week are images I’ve made for clients.

On a related note, I am really interested in what people are sending out as digital portfolios. If you have a digital portfolio, and you don’t mind, could you send me a copy? If you want I could add a link to the portfolio here in the blog, or not. Of course if you could tell me how the portfolio is targeted, and how you send it, that would be great.
Thanks, John Siskin

I hope you’ll suggest my BetterPhoto class An Introduction to Photographic Lighting to other photographers you know, or perhaps you’d like to give it as a gift? Amherst media sent me the cover for my second book, you can see it here, of course you can still look at my first book at Amazon . Also if you look at the current issue of Shutterbug you’ll find a three page excerpt form my book. I am so pleased that they did this.
BetterPhoto.com, The better way to learn photography

February 13, 2011

Editing Images

Filed under: Looking at Photographs,Photography Communication — John Siskin @ 7:22 pm

Before I get to the shameless plugs for my book and stuff, I’d like to mention something I think is important. Over the last few days I’ve traded a couple of e-mails with one of my students who is an Egyptian. It is a remarkable experience to have such a connection to world events. This would not have happened to me without BetterPhoto. I truly have a world full of connections because I shared what I know and the photographs I’ve made with the world through BetterPhoto. I urge you to get connected, either with BetterPhoto or in some other way. I wish the Egyptian people good fortune in their new adventure.

And here are the shameless plugs. My book Understanding and Controlling Strobe Lighting: A Guide for Digital Photographers is on Amazon.com. The wonderful folks at Shutterbug magazine are printing a 3 page excerpt in the current issue. Please pick up the magazine.  Here is a sample chapter from the book. Of course I still hope that you will consider purchasing my fine art book B Four: pictures of beach, beauty, beings and buildings. Frankly purchases of this book mean a lot to me, and it is also a fine gift for any occasion. As you know I teach for BetterPhoto.com. I really hope you’ll sign up my class: An Introduction to Photographic Lighting. Sign up are very good this month!

This shot was done with 4X5 film so there were significant expenses.

Back in the misty depths of time I was a large format photographer. I shot mostly on 4X5 and 8X10 film, which was expensive. A single piece of processed 4X5 film was about $4 and a sheet of Polaroid was $3. An average shot took 2 Polaroids and 2 pieces of film, so $14 per shot. Expenses were marked up for the client so film and Polaroid were a very significant part of the client’s bill. The reason I mention this is that I didn’t shoot many extra images, so I didn’t need to edit. You edited with the Polaroids, and the set-ups, getting the shot perfected before you took it. When I began using digital it became obvious that since an additional image had no additional cost more images would get made. Of course this means that editing is very important.

I made about 250 exposures on this shoot.

The number of images I shoot has continued to go up as digital equipment has improved and the cost of memory has come down. I did a typical construction shoot last week. I shot about 250 images of earth moving equipment. I love it when the earth moves. The problem is that the client needs only about 20 images. So I need to edit.

I know photographers who claim that they just can’t edit their own work. I think that anytime you tell me what you can’t do you are probably

A musician's head shot

right. But I also ask myself what kind of a photographer will limit himself or herself by saying that he/she can’t something? There are things I can’t do now, but if I wanted to do them I would learn. Some skills are hard to learn, but a professional will find a way to learn them. An amateur might not feel that they want to learn a skill, and that makes sense, because they are doing photography for personal expression.

When I take a photograph there is always a personal element to it. I am affected by the day, the people, the nature of the job and so on. The thing is that this won’t be part of my picture; my picture is only what I put in the frame. So when I look at a group of images the first thing is to concentrate only on what other people will see. I need to analyze the shot as someone else would see it. This isn’t all that difficult to learn, but it is really important. Most people use photography to diarize their

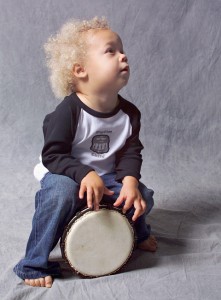
The musician doing a stock shot.

lives, to remember the moments of their own life. This is exactly what you need to avoid if you are making pictures for someone else. The first thing I look for is will the shot interest the intended audience.

The next step is to understand my shot in terms of the purpose of the shot. So I wouldn’t expect a shot of a musician to look like a shot of a realtor. If I’m shooting construction the look is going to be grittier and more graphic than the shot I would do of a finished home. I may have shots that would be excellent for family, but not for commercial usage. The client gets a group of the images for their stated purpose, but I may include additional images in a separate folder.

For analysis and for understanding my shots, I’ll probably

I did quite a number of similar images, but this had a little more emotional impact. I had to compare several images to make the decision.

use a fairly small version of the shot in an editing program. I use Adobe Bridge most of the time. I may edit with 4 or 5 images on a row. But for the next step I’m going to look at the images much larger. In the early editing process I’m looking for things that keep the image from working. In the final edit I’m looking for what makes the image work.

I want to think in terms of the graphic nature of the image, is it strong or subtle? I want to think about the nuances of expression, how intimate is an image? I want to think about color and technical aspects of an image.

One more thing: you want to go back to your images, in a few months or a year, to see if you’ve missed anything. As much as I try to see my shots from outside the experience of the shoot, putting some distance in time between editing and shooting will still change the way I see my work.


I hope you’ll suggest my BetterPhoto class An Introduction to Photographic Lighting to other photographers you know, or perhaps you’d like to give it as a gift? Amherst media sent me the cover for my second book, you can see it here, of course you can still buy my first book on Amazon . Also if you look at the March issue of Shutterbug you’ll find a three page excerpt from my book. I am so pleased that they did this.
BetterPhoto.com, The better way to learn photography

« Newer PostsOlder Posts »

Powered by WordPress