Photo Notes A place to talk about making images.

February 4, 2013

Large Format Lenses

Filed under: Basic Photo Technique,Film Technique,Large Format Photography — John Siskin @ 11:06 am

I hope you’ll check out my books: Photographing Architecture and Understanding and Controlling Strobe Lighting. I hope you’ll get copies if you haven’t already. Of course you know that one reason for this blog is to sell the book and get you to consider one of my classes at BetterPhoto.com: An Introduction to Photographic Lighting, Portrait Lighting on Location and in the Studio, Getting Started in Commercial Photography


I was going to write about some more handy equipment in this issue, but I decided to put that off. I think I’ll be back to talking about stuff, particularly DIY stuff soon. I had breakfast with another experienced photographer, I don’t want to say old, a couple of days ago. We talked about some of the things we miss from the old days and both of us missed watching a print come up in a tray of developer. Whenever I talk about this with someone we end up using the word magic. When you put an exposed piece of silver gelatin paper into a tray of developer there is no picture, it’s just white paper. As you agitate the print in the developer the image slowly appears on the paper. If you’ve ever seen a Polaroid SX-70 print develop, it’s like that, only better. I know I’ve written about this stuff before, but I find it interesting and, well, magical.

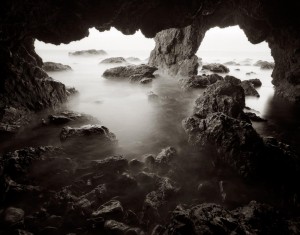
8.25 inch Gold Barrel Dagor on 8X10 film

Photography, before digital was mostly about magic goo. Like baking a cake you followed a recipe, and if everything was done properly, you got a picture. If everything was done well the picture would last. It’s been that way since William Henry Fox Talbot first made a paper negative. Fox Talbot used sodium chloride, table salt to make his images safe in daylight, so salt was the first magic goo. The thing is that few people really understood how the chemicals interacted, but a lot of us understood how to control what they did. Perhaps the person who understood the interaction best was C.E. K. Mees who ran Kodak Labs.

63mm Zeiss Luminar on 6X7cm film


I bring this up because, as I’ve mentioned before, I’m doing some personal work with my 8X10 Toyo camera. This brings me back into the land of magic goo. I’m testing different developers in an attempt to make a more perfect negative. I used Kodak chemicals, both HC-110 and, more recently, Xtol, to develop film for decades. Now, however, Kodak is imperiled, so I need to look for another supplier. It’s amazing how many things that I relied on Kodak for. At breakfast I discussed the Kodak Camel Hair brush with my friend. Kodak made things that couldn’t possibly have made a difference to their bottom line, but made a difference to photographers everywhere, like a good brush for cleaning film holders. I’ve been mixing a version of a Kodak developer, D-23. I got the recipe from The Darkroom Cookbook. Those of us working in the old ways are going to have to make a lot of things from scratch.

48cm Goerz Berlin Dogmar 8X10in. film


The problem is to know if everything is working well. Today I processed test negatives in D-23 and in Xtol. I’ve ordered some ID-11, an Ilford developer, and I’ll process a negative in that next week. I find that I do a lot of testing. I’ve mentioned before that a photographer needs to test equipment. If you don’t test you’ll never really know what you’re doing. Then you’ll not only believe in magic, you’re relying on magic that you don’t understand. I’ve attached copies of the negatives I processed in Kodak Xtol, they have a longer contrast range than the negs I did in D-23.

65mm Schneider Super Angulon 4X5in. film


Another magical area of large format photography is lenses. Although I’ve studied the physics and worked with the thin lens equations, I still find the way in which lenses bend light quite magical. At least as far back as 1840, when Joseph Petzval developed the first portrait lenses, people understood how much the lens affected the image. The goals of lens design, at least until the 1960s, were to make a lens that was sharp, had large coverage, even illumination, strong contrast and was fully corrected for spherical aberration and chromatic aberration and eliminated coma, unless you were trying to make a soft focus lens, in which case none of these might apply. It’s important to understand that you couldn’t, and still can’t, make a perfect lens: all lenses designs are compromises. But older lenses made different compromises so some are considered classic and others crap. I’ve always been very interested in lenses from Goerz and Schneider. I am pleased that I currently own two Goerz lenses, an 8 1/4 inch Dagor from the American version of Goerz and a 48cm Dogmar that is from Berlin Goerz. I’ve already mentioned that I recently acquired a 14 inch Dagor that is a Schneider Dagor. The Schneider Dagors are the last of this noble design. I am also getting a lot of use from my older Schneider Angulon (actually it is old enough to be a Jos. Schneider & Co.) and I also use a wide angle G-Claron from the modern version of Schneider. Of course I also carry a bunch of diopters to create soft focus lenses, for more about these check out this article.

135mm Schenider Xenar 4X5in. film


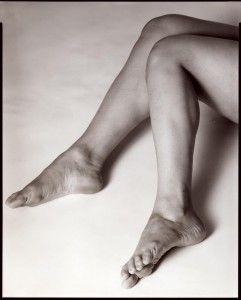
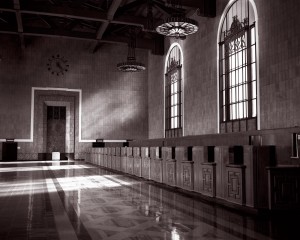
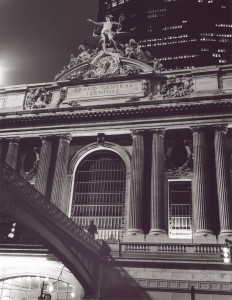
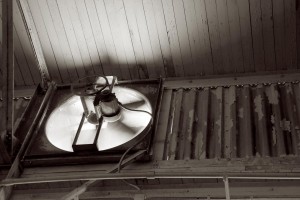
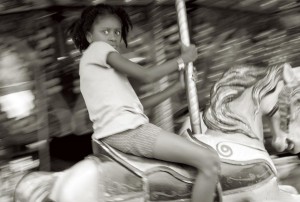
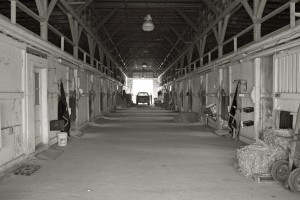
The pictures this week are all large format images. I put the format and the lens name in the caption.

65mm Super Angulon 4X5in. film


I’m looking at apps for my phone that will help with metering and other aspects of large format photography. So far I’ve found that beeCam Lightmeter is interesting. If you have any suggestions let me know at john@siskinphoto. I’ll put up people suggestions in a future blog. By the way I’m using an android phone, but if you have a suggestion for an iPhone I’ll be happy to pass it along.

Please consider one of my classes at BetterPhoto.com:

An Introduction to Photographic Lighting

Portrait Lighting on Location and in the Studio

Getting Started in Commercial Photography

If you’re in the Indianapolis area there are other opportunities as well. I’ll be showing much of my personal architectural work in June at Indiana Landmarks. Please come look.

January 17, 2013

More Tools and Tips!

I hope you’ll check out my books: Photographing Architecture and Understanding and Controlling Strobe Lighting. I hope you’ll get copies if you haven’t already. Of course you know that one reason for this blog is to sell the book and get you to consider one of my classes at BetterPhoto.com: An Introduction to Photographic Lighting, Portrait Lighting on Location and in the Studio, Getting Started in Commercial Photography

I wanted to continue with the equipment and tips I was talking about in the last entry. I always enjoy talking about these sorts of things. I feel that the equipment manufacturers often try to make us all create images in similar ways, and I prefer to be creative about making pictures. For instance there are a lot of lenses built with vibration reduction technology, and this is a great thing. But, as I mentioned in the last entry, you can use a chain pod, which will also reduce vibration. The chain pod will work with almost any camera and lens, including the stuff you already own.

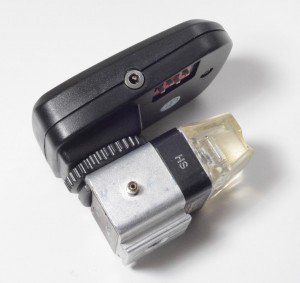
I've put a radio trigger on an optical slave so that I can use multiple sets of radio slaves.

The first thing I want to mention, because I just figured it out, allows me to use two different radio slave systems together. I try to buy a lot of receivers when I buy radio slaves because I have a lot of strobes. The problem is when I need even more receivers the signals of the two radio slave systems don’t always match up. I discovered I could put the sending unit from a second set of radio slaves onto an optical slave and trigger both sets of slaves together. One thing I’m looking for now is a very sensitive optical slave to extend the range of my radio slaves. Please note that I am still using inexpensive Chinese radio slaves with good results overall.

Cine foil is a flexible aluminum foil that can be used to block light and as lens hood.

A couple more things that are in my camera case, that I didn’t mention last time, model release forms, cine foil and a GretagMacbeth ColorChecker. Of course it is always wise to have a release form whenever you shoot a person or private property, because there are severe limits on publication without a release. Because so much of my work is for clients there are times I can’t get a release, and so can’t use a shot in a book or article. Here’s a link to a good release form. I really like Cine foil, which is black aluminum foil. It can be used to control

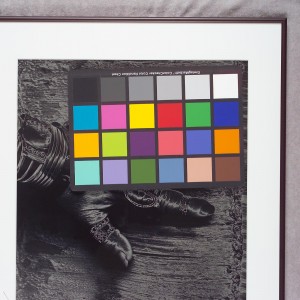
GretagMacbeth ColorChecker, gives me good gray samples and pure colors.

the spill from a light or as a lens hood in a pinch. A couple of pieces take up no room, and can be a real lifesaver. I keep a roll in the studio. The GretagMacbeth ColorChecker is the most accurate gray and color sample I own. Since I always shoot in RAW I will shoot a sample image with the ColorChecker after I finish the set-up. I can use this sample to make the color accurate on all of the shots with the same set-up. You can also use it to help you make pleasing color, because you can see how a particular setting will affect the colors you’re using.

Perhaps I should mention that I have several camera cases, not only do I have cases for my lights but I also have hard soft and small camera cases. I store my main camera in a Pelican case. I really like this large hard case because I can store almost my entire system, everything I would take on location anyway. Also the Pelican case provides very good protection and it is pretty easy to ship. Another good thing: the Pelican cases are ugly. I avoid the fancy cases that draw peoples’ attention; you don’t want to have your camera gear stolen. The problem with a hard case is that it’s difficult to work out of, so I have a couple of soft cases for when I have to keep moving. I have different sized cases so that I can reduce the load when I need less equipment. I’d like to see a case that would allow you to add external sections, so you could create the right space to fit your gear. Of course I have a lot of gear so being able to customize a case would make it easier to work.

Almost all my cases are used. I buy inexpensive used cases from camera stores, thrift stores, surplus stores and even antique stores. I will get a case even when I don’t have anything specific to put in it, if it is cheap and in usable condition. I stuff cases inside cases to store them; otherwise I’d have run out of room long ago. It usually turns out that I need most of the cases I get. I even keep much of my studio gear in cases; you never know when you’ll have to do something unusual on location.

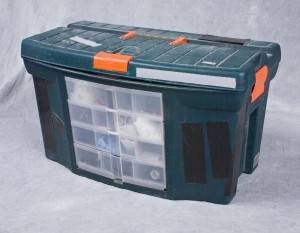
A useful case from Home Depot

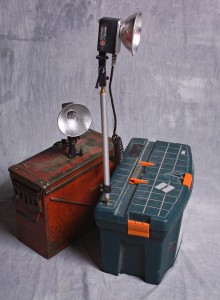
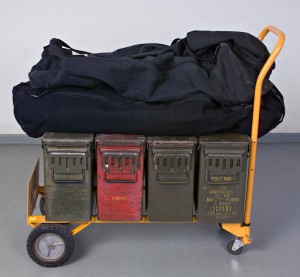
Most of my lighting cases have come from military surplus stores or hardware stores. I’ve used a lot of ammunition cases over the years because they are very strong and also waterproof. I often add a 1/4X20 threaded nut to the cases. This allows me to put a stud to mount a light onto the case. This means that I have a short light stand, or a stand I can put on a table, without having to carry another stand. I have a lot of lighting cases because I can’t use a case so heavy that I can’t actually lift it. I also have a wheeled cart, which can make it a lot easier to get lights and cameras to location. Light stands and tripods go into a large duffel bag.

These cases have 1/4X20 threads so I can attach studs for my lights.

Rolling cart, ammunition cases and duffel bag. Ready for a location shoot!


I saw this on YouTube: http://www.youtube.com/watch?v=g4aE2f07ON4&feature=player_embedded. As a long time fan of Edward Weston’s photos it was nice to see it again.

Please consider one of my classes at BetterPhoto.com:

An Introduction to Photographic Lighting

Portrait Lighting on Location and in the Studio

Getting Started in Commercial Photography

If you’re in the Indianapolis area there are other opportunities as well. I’ll be showing much of my personal architectural work in June at Indiana Landmarks. Please come look.

December 20, 2012

Handy Tools

Filed under: Basic Photo Technique,Do It Yourself,Photographic Equipment — John Siskin @ 3:43 pm

I hope you’ll check out my books: Photographing Architecture and Understanding and Controlling Strobe Lighting. I hope you’ll get copies if you haven’t already. Of course you know that one reason for this blog is to sell the book and get you to consider one of my classes at BetterPhoto.com: An Introduction to Photographic Lighting, Portrait Lighting on Location and in the Studio, Getting Started in Commercial Photography

There are things in my camera and lighting case that aren’t cameras or lights. Some of these are pretty obvious: if you have lights you must have light stands. If you have cameras you’ll have lenses. This post is about the other things, some of them are used constantly and others hardly used. But they are all critical once in a while. If you have some favorite gadgets please let me know. I’ll post the information. Because this site got spammed you’ll need to let me know by e-mail.

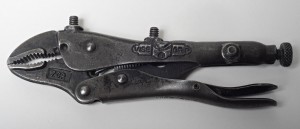
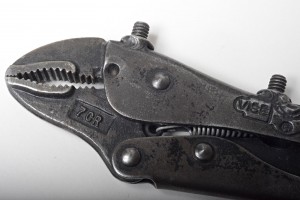
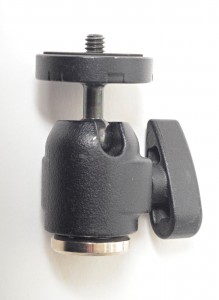
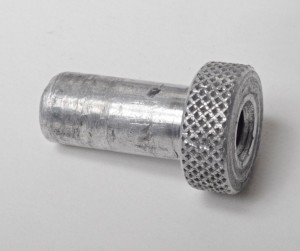
This is probably my favorite. It’s a vice grip that has tripod sized threads welded onto it. I can put on a small ball head and use it to hold the camera or a light stud and it’s a light stand. Vice grips can attach to almost anything. I don’t know of a commercial supplier for this, so, if you want one, you’ll need to visit a welding shop. Here’s the ball head and the lighting stud. This is the small lighting stud that fits all my lights.

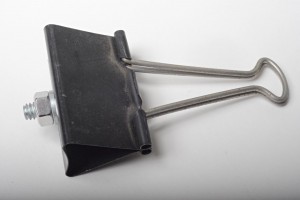
I also have this clip that I put a tripod thread on. It can hold a small light, or notes. By the way tripod thread is 1/4X20, unless you are European.

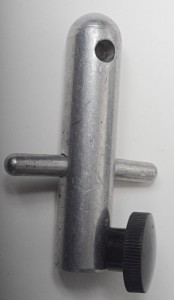
This is another sort of lighting stud, basically it allows you to mount two lights on a single light stand. This is useful when you need more power. It used to hold four lights, which is why there’s a hole. This is another thing I don’t have a supplier for. Any suggestions?

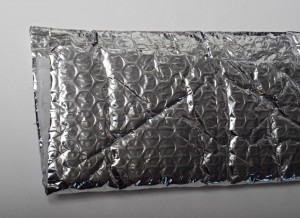
I know a lot of people have 5 in 1 reflectors but they don’t really appeal to me. I do have a piece of bubble wrap with a silver and a white side. Good as a reflector and extra padding. The piece I carry is about 18X24 inches. I also have a piece of duvatyne in the case. Duvatine is a very black cloth used for blocking light.

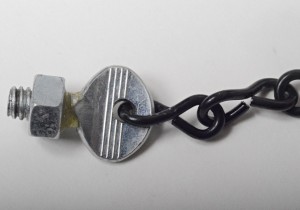
This is another old friend: the chain pod. Here’s more information. They’re easy to build. If you must spend the money you can get one from Calumet.

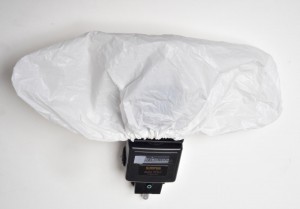
This is another one I wrote about before. It’s a shoe cover that helps modify light. For more check out this link.
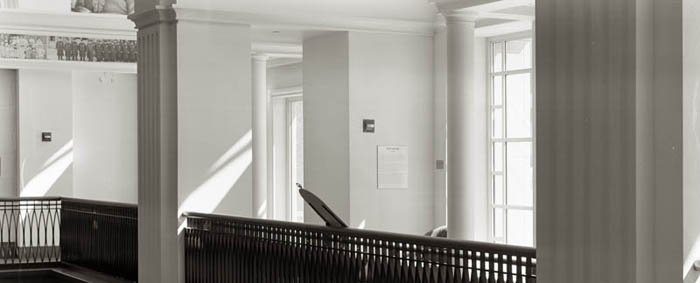
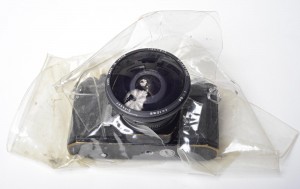
I don’t use this much, but it doesn’t take up much room. It has been important on come occasions. It’s basically a raincoat for the camera. Here’s a modern version.
I also have a laser pointer. This helps me focus in low light by giving me a target. I have to remember to check the batteries once in a while. I don’t use it often, but when I need it I really need it.
pointer

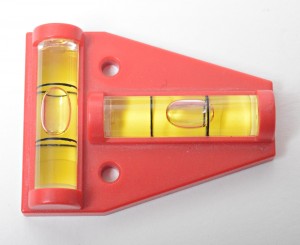
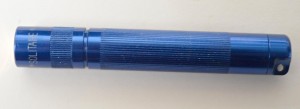
The next two items are still in my case, but I find I use my smart phone for both: a level and a flashlight. Especially with architectural photography leveling the camera is important, and I often need to see things in low light.

There are other things I should at least mention:
Model release, adult and child
Property release
Gray card
MacBeth Color checker
Cine Foil
Gaffer Tape. This is actually on the cases, which makes it easier to find

Clothes pins. I use these to hold filters on lights.
Please consider one of my classes at BetterPhoto.com:

An Introduction to Photographic Lighting

Portrait Lighting on Location and in the Studio

Getting Started in Commercial Photography

If you’re in the Indianapolis area there are other opportunities as well. I’ll be teaching a class in commercial photography next spring at Ivy Tech.


Happy Holidays!

October 15, 2012

Updates and Light Opinions

I hope you’ll check out my books: Photographing Architecture and Understanding and Controlling Strobe Lighting. I hope you’ll get copies if you haven’t already. Of course you know that one reason for this blog is to sell the book and get you to consider one of my classes at BetterPhoto.com: An Introduction to Photographic Lighting, Portrait Lighting on Location and in the Studio, Getting Started in Commercial Photography

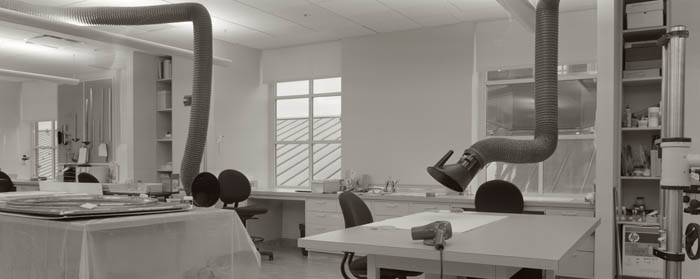
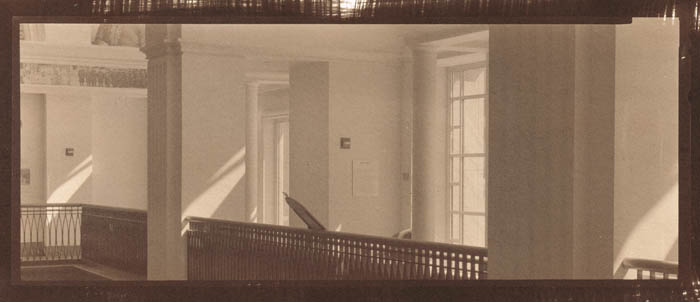
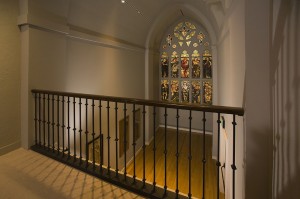
Updates on my project with the 8X10 camera: I went back to the Indiana Historical Society and made another negative. This didn’t have the defects on some of the last set, so I think it is time to go forward. Here’s the latest shot from the conservation lab:


I also made a Vandyke print of one of the original negatives. I need to stress that seeing this scan on your monitor isn’t like seeing the actual print. It never is. If you want to see original images you need to go to galleries or buy prints. At least look at well printed books made with the photographer’s supervision. Anyway, here is a scan of my print from the first shoot.


I wrote most of what follows for one of my students at BetterPhoto. I’ve said these things before in this blog, but that’s no reason not to say them again. The heart of the matter is: if you can’t make light, if you have to find light to take a picture, or if you believe that light designed by a photographer is inferior to found light, you will limit the pictures you can take and limit there quality. It is better to learn more skills, and get more tools, in order to allow yourself to be a better photographer.


I am aware that many people use the terms artificial light and natural light, but I don’t think that when a great number of people use a term that actually makes the term accurate. A photon doesn’t act differently because it comes from the sun or a light bulb. A given light source may have a different color balance, but that doesn’t mean that it is natural. Sunlight and lightning (note the word is lightning with an n. Instantaneous light from storm clouds) have a similar color balance, but a cloudy day, or a volcano or natural phosphorescence have very different color than daylight. People most often refer to strobes as being artificial, but call a light bulb is a natural light source. In fact a strobe is really a kind of controlled lightning, which is natural, while light bulbs doesn’t occur naturally. The real problem that people have with strobes is that they can’t visualize what the light will look like, so they find that their pictures look very differently from what they hope. This is why you need to practice with light in order to understand and visualize light, which will make it easier to work with any light source.


I do think that natural is a value laden term. Natural foods are assumed to be better than artificial food; natural fabrics are assumed to be better than artificial. I often hear people describe themselves as “natural light photographers.” I am sure they wouldn’t like to describe themselves as photographers who are handicapped by an inability to create and control light in their photographs. The term photography is from the Greek and can be translated as “writing with light,” and I do think a photographer is a better photographer when she/he can actually create a photograph by controlling the light. Lighting is not the only way to make better photographs, but it is one of the most important tools for creating better photographs. This is why I teach lighting courses, and write books and articles about lighting. If I can help more shooters learn to use this tool I can help a lot of people make better photos.


Some years ago I did a job for the Huntington Library in Pasadena, actually San Marino, at the same time [a well known photographer who I shouldn’t disparage on this blog] was shooting for them. He is known for using “natural” light. I talked to my contact about my shots and his after the shoot was over. My contact was much happier with my work because of issues with focus and light control and color, all the problems in the other photographer’s images existed because he had little ability to control the light.


People that I know and respect use the term natural light, which is too bad. The term has even slipped out of my mouth once or twice, which is unfortunate because natural isn’t precise. There, I am glad I got that off my chest, again. You might want to say: “I use ambient light” rather than “natural light” in order to be accurate.


The important thing is to learn to pre-visualize what the light will do. You can walk around hunting for good light outdoors, or even inside. But if you don’t understand the way light defines a subject you will be hunting for good light randomly, which may be a fruitless search. This is why I think that practice, with lights, is so important: it gives you a real sense of how light works. So if you think you need soft light for a portrait you’ll start with a large light modifier, perhaps the light panel. Then you might want to define the face a little more so you may add a hard light. Regardless you won’t have to just keep moving the lights around. The goal is to be able to see the portrait you want to make, or still life or architectural shot, in your head. This will enable you to make choices about the light. It is important to know there isn’t one right light that will fit everyone, or even a few lighting set-ups that will work in any situation. Lighting is not something you can set your camera to do automatically. Lighting requires you to take control and create the right situation for your subject.


Strobes create light by passing a spark though a tube filled with xenon gas. Both a dedicated on camera flash (say a Nikon SB900 or a Canon 580II EX) and a mono-light like an Alien Bee (http://www.paulcbuff.com/b1600.php) create light in exactly the same way. A dedicated unit (SB900, 580II EX) is better for work where you travel or cover events, like weddings. It is much lighter and will mount on the camera. It will expose automatically, but of course automatic light often looks bad, even when it is properly exposed. Mono-lights, or studio strobes will work all day without running out of batteries or taking longer to recycle because they run off AC power. They often have more power and better light modifiers. They are much better for studio work, and can be better for many location jobs.


The images I put into the lighting discussion are all strobe images. I’m aware that I use some images repeatedly in this blog. I am building a new portrait portfolio so I should have more shots where I can find them for the blog.


Please consider one of my classes at BetterPhoto.com:

An Introduction to Photographic Lighting

Portrait Lighting on Location and in the Studio

Getting Started in Commercial Photography

If you’re in the Indianapolis area there are other opportunities as well. I’ll be teaching a class in commercial photography next spring at Ivy Tech.

September 25, 2012

Project Begins!

I hope you’ll check out my books: Photographing Architecture and Understanding and Controlling Strobe Lighting. I hope you’ll get copies if you haven’t already. Of course you know that one reason for this blog is to sell the book and get you to consider one of my classes at BetterPhoto.com: An Introduction to Photographic Lighting, Portrait Lighting on Location and in the Studio, Getting Started in Commercial Photography If you’re in the Indianapolis area there are other opportunities as well. I’ll be teaching a class in commercial photography next spring at Ivy Tech.


I did my first shoot for the project I discussed in the last blog entry. These are the images I used in this entry. Of course these don’t really look like prints, they look like the way you balanced your screen. My working title is Interiors. This shoot went well, there are, however, some defects in some negatives. I did the shoot at the Indiana Historical Society. They were very accommodating about my large camera and tripod. Many of the people in the building seemed to assume that I was one of the displays. There was more light inside the building than I had expected so the exposures were a little shorter than I expected; ranging from 1 to 12 seconds. I shot at f32 or f45 and used my two Dagors; the 8.25 inch and the 14 inch I discussed in the last blog. When you use a larger image area you need a longer lens to create the same field of view. So a 12 inch (300 mm) lens on an 8X10 camera sees like a 50 mm (2 inch) lens on my full frame Nikon D800. When you use longer lenses and a larger capture area you also need to stop the lens down further to get the same depth of field. A 12 inch lens will need to be stopped down to f64 to get the same depth of field as a 50mm lens at f16. Of course this means the shutter will be open eight times as long.

I have to work out shutter issues on some lenses before I can use them in the field. When you use long exposures you don’t need a very sophisticated shutter, in fact a lens cap will do! The problem with a lens cap is that you may shake the camera when you remove it. I have used Packard shutters, which are air driven, in the studio. These work especially well with strobes, but I’m not sure I can mount them on the camera in the field. My Dagors are both mounted in leaf shutters.

I have been using a recipe for developing the film I got from The Darkroom Cookbook, Third Edition. I used a recipe for a divided developer: D-23. The developing agents are separate from the accelerators. There are several reasons that this is advantageous for this project: one is that I can process several types of film in the same way. As I may change films, or use older film, this will help me get printable negatives. I had processing problem with the second sheet of film I shot at the Indiana Historical Society. I think I contaminated my developer. You can see streaking in one of the images I’ve attached to this blog.

As I suggested at the top of this entry, the images I’ve attached aren’t really my goal. I will be contact printing these negatives onto watercolor paper using the Van Dyke process. This is the next step in this project. I may consider other processes, like Cyanotype or Kallitype, but I hope that Van Dykes will work out. More as the project evolves.


August 20, 2012

Low Light Shooting With the Nikon D800

Filed under: Basic Photo Technique,Indianapolis — John Siskin @ 9:10 am

I hope you’ll check out my books: Photographing Architecture and Understanding and Controlling Strobe Lighting. I hope you’ll get copies if you haven’t already. Of course you know that one reason for this blog is to sell the book and get you to consider one of my classes at BetterPhoto.com: An Introduction to Photographic Lighting, Portrait Lighting on Location and in the Studio, Getting Started in Commercial Photography If you’re in the Indianapolis area there are other opportunities as well. I’ll be giving a Photomicrography presentation on August 23 at Black Dog Books in Zionsville. Call 317.733.1747 to reserve a space. I’ll be teaching a class in commercial photography next spring at Ivy Tech.

One of the biggest changes, for me, in working with the Nikon D800 is that the camera works in low light. My previous camera couldn’t make a good file above ISO 160 (yes 160, not 1600) and had trouble with exposures longer than about 1 second. The D800 will make a very usable file at ISO 6400, which is 6 stops brighter than my other camera. It will also make a good shot at an exposure of 30 seconds.

I always tell my students to test and practice, which is exactly what I’ve done with the D800. I made a test of film speed by shooting a five-dollar bill with different ISO settings. Money has a lot of finely printed detail, so I like to use it to look at resolution and noise. My evaluation of the test was that the camera worked exceptionally well to ISO 800, and had little noise at even higher ISO settings. I also discovered that long exposures were excellent, but take the camera considerably longer to process. Please note, these are my evaluations for the way I shoot, you should make your own tests and evaluations rather than accept my results. Besides testing is good practice.

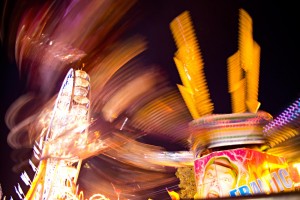
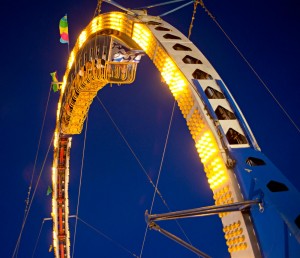
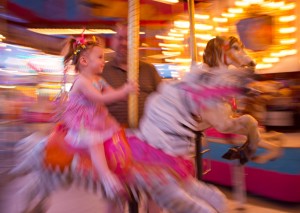
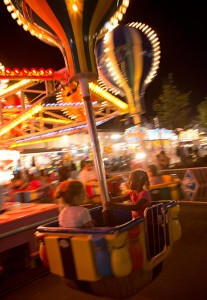
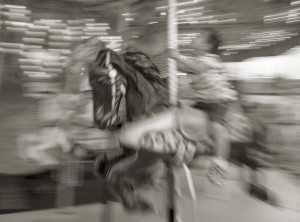
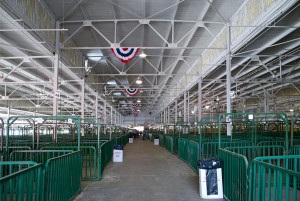
I went back to the Indiana State Fair at night for some testing and practice in low light. I really haven’t done this kind of shooting in a long time, and I had forgotten how much fun it can be. As you may have figured out all the shots in this blog entry are from the night shoot at the fair. I did all my shooting at ISO 1600. I was very interested in allowing some motion blur into my shots. I shot everything in RAW. I was generally pleased by the auto-exposure and auto-color choices the camera made, but there were exceptions. The camera occasionally wanted to make things brighter, and often a little greener, than they felt at the site. It was easy to correct this when I converted from RAW to JPG, but I wouldn’t want to do this kind of shooting without making RAW files.

I should probably do some more night shooting soon. First because it’s fun, but also because I could use a little more practice.

August 14, 2012

New Camera!

I hope you’ll check out my books: Photographing Architecture and Understanding and Controlling Strobe Lighting. I hope you’ll get copies if you haven’t already. Of course you know that one reason for this blog is to sell the book and get you to consider one of my classes at BetterPhoto.com: An Introduction to Photographic Lighting Portrait Lighting on Location and in the Studio Getting Started in Commercial Photography If you’re in the Indianapolis area there are other opportunities as well. I’ll be giving a Photomicrography presentation on August 23 at Black Dog Books in Zionsville. Call 317.733.1747 to reserve a space. I’ll be teaching a class in commercial photography next spring at Ivy Tech.

I’ve been spending time learning to work with my new camera, a Nikon D800. Since I haven’t had a new digital camera in about 8 years there are a few things to catch up on. My previous camera was a full frame camera that used Nikon lenses, so I can use the same glass, but I needed to make several up grades to work with the 36 megapixel images. I’ve had to get larger CF cards and a faster card reader, as well as a portable hard drive for location work.

One of the upgrades I am most excited about is the Eye-Fi card. This is an SD card that transfers the image files wirelessly to the computer. I have long been a proponent of setting up your lighting while looking at the image on a laptop. On my last camera the only way to do this was with a cable that ran between the camera and the computer. Most wireless systems are very expensive: Nikon makes a Wireless File Transmitter, but it costs about $740. The Eye-Fi card is about $80, but there are a lot of considerations about using it. First it is only appropriate for small to medium sized files. This would mean that I really couldn’t use it, but the D800 has two card slots, one for a CF card and another for an SD card. So you can set up the camera to put the RAW file on the CF card and put a smaller jpg file on to the Eye-Fi SD card. There are some definite challenges to setting up the network, but I got everything to work. One thing I am still trying to find is a program that will display the most recent image.

One of the keys to getting comfortable with a new camera is to play with it. I spent several days in my office playing with micro lenses (check out the earlier blog entries for info on specialized micro lenses. Look at the Micro Photography Category). I made a lot of bad images, and few that are passable. The key is that I leaned a lot about how the camera sees. I also did tests on resolution, long exposure and high ISO settings. It is important to look at the files in detail.

It is also very important to be willing to make mistakes. So I need to play with the buttons and the settings. I don’t need to memorize every function of the camera, what I need is to make choices about every function of the camera. For instance I don’t think I’ll use the photo editing functions of the camera, but I will use the custom white balance settings.

Yesterday I went to the Indiana State Fair, which was a great place to play with the camera. I made a lot of shots, which helps me to test my workflow. I got to play with long exposures, which didn’t work very well with the last camera. I also experimented with shots at high ISO. One of the biggest problems with the old camera was that the maximum usable ISO was 160. I can now shoot at ISO 6400, which is really remarkable. The shots I’m attaching are from the fair.

I have to say I am very impressed with the camera. The files are remarkably crisp and saturated. The camera is very quick, by my standards. I particularly like how quickly the camera turns on. I think the camera might be a little lighter than my last camera. Certainly the camera is a little smaller, but the LCD is a lot larger. I’ve done a few experiments with my strobe and everything works well there. I’m not done playing yet, but I am ready to use the camera on a commercial job.

July 9, 2012

About Perspective


I hope you’ll check out my books: Photographing Architecture and Understanding and Controlling Strobe Lighting. I hope you’ll get copies if you haven’t already. Of course you know that one reason for this blog is to sell the book and get you to consider one of my classes at BetterPhoto.com:
An Introduction to Photographic Lighting

Portrait Lighting on Location and in the Studio
Getting Started in Commercial Photography
If you’re in the Indianapolis area there are other opportunities as well. I’ll be giving a lighting presentation at the Indy MU Photo Club on July 12.  I’ll be teaching a class in commercial photography next spring at Ivy Tech.

A short lens for portraits

A longer lens for portraits

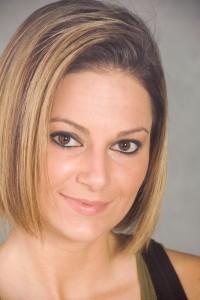
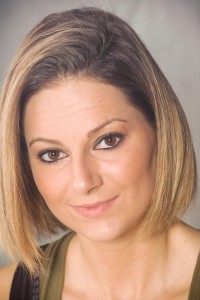
I mentioned in my entry that a photograph is a two dimensional representation of a three dimensional reality. Since it is a representation you can change the way people perceive the subject. If you step away from the subject and use a telephoto lens then the subject will appear flatter, and if you get closer and use a wide-angle lens the subject will seem exaggerated. So the photographer’s position is critical to the way the subject looks. I see too many images where the photographer got lazy and just used a zoom lens, rather than considering the way the subject will be seen. Can you see the difference in the two shots of Jennifer? One is taken with a short lens and the other with a telephoto lens. I think the shot with the telephoto lens looks better. I would normally use a long lens for a portrait. These shots are from my book Photographing Architecture.


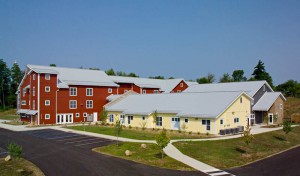
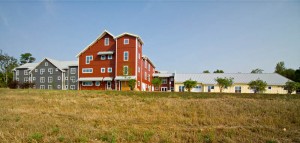
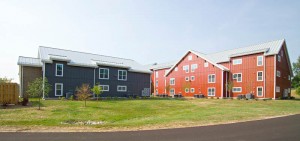
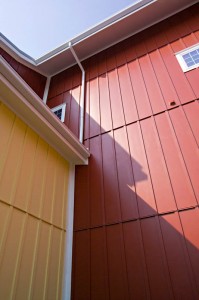
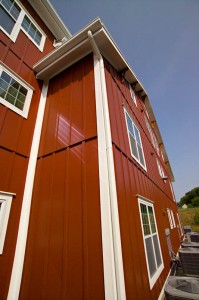
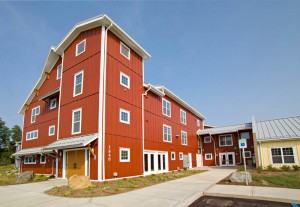
When I shoot a building my goal is to make the subject look more impressive. I start by using a wide-angle lens. I also look for a position that adds shape to the subject. One way to do this is to get close to the subject, and shoot just part of the subject. Another way to do this is to get above the subject. I did these images for a new client CRG Residential here in Indianapolis. You can see that I climbed the hill behind the building for one shot. I was also on a scissor light for a front shot. Lifts are incredibly helpful when shooting building. In this case I got stuck with one of the people from the company at the top of the lift for about twenty minutes. Photography can be so exciting

From the lift.

A straight look at the building

From behind on the hill

Close shot

Close Shot

Close shot


April 12, 2012

Back To Basics

Filed under: Basic Photo Technique — John Siskin @ 2:07 pm
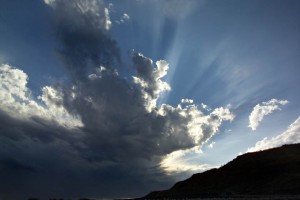
Sky & Sun

Sky & Sun

I was talking with a few old friends who are also photographers. Both of them were complaining about younger photographers who don’t know anything, as they would have it. Now neither of the guys teaches or interacts with new photographers in any regular way. One of them explained to me that you couldn’t really learn Photoshop without experience working in a chemical darkroom. I am older than either of these guys and I don’t believe any of this. The reason is that I actually interact with new photographers all the time. Teaching here at BetterPhoto will do that.


Inspired by my old friends, I want to go over the basics. Cameras, regardless of whether they are digital or film share some characteristics, these are like the language of the machine. For instance whenever you use a variable size aperture in a lens, what we refer to as an f-stop, you introduce changes in the distances that are in sharp focus. We call this depth of field, not really a very good name.

Speaking of bad terminology, I will start with the word STOP. Now we all know what that means, but not moving has nothing to do with the term in photography. In photography it means a relative change in exposure: if you have twice as much light in your shot as you did previously you have one stop more light. It doesn’t matter if the change is caused by changing your aperture or shutter speed or because the sun cleared the horizon, if you have twice as much light that is one stop more light. If you have four times as much light that is two stops, well you only doubled the amount of light twice. If you have 1/8th as much light you have three stops less light, maybe the sun just went under the horizon.

I know that a lot of people don’t want to talk about math, but it is the key to controlling the pictures you take. You can take all the pictures you want on automatic, but if you want to MAKE pictures you need to understand the controls on the camera.

January 31, 2012

Reflectors 2

Filed under: Basic Photo Technique,Lighting Technique,Photographic Equipment — John Siskin @ 5:19 pm

Amazon is shipping copies of my second book: Photographing Architecture. This is really exciting! Of course you can also get my first book Understanding and Controlling Strobe Lighting. You can download copies of most of my articles and some do it yourself projects. I teach three classes at BetterPhoto: Portrait Lighting on Location and in the Studio, An Introduction to Photographic Lighting and Getting Started in Commercial Photography. I hope you’ll check them out. I have been told that prices are going up this year at BetterPhoto, so you might want to sign up soon.

So it’s taken me a while to get back to this blog. No real surprise there. As mentioned I have some samples of what reflectors do for you. Before I get to that I want to mention a few things I have coming up. I will be in Atlanta this weekend. I am going down a few days early for a shoot at the Hartsfield-Jackson airport on Monday. I’d make a joke about shooting in an airport, but the security people have no sense of humor. It’s pretty exciting to be shooting a large public space for a client. I’ll post the results when I have them.

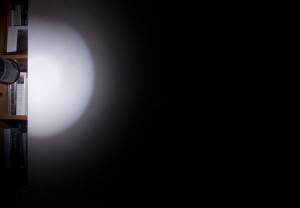
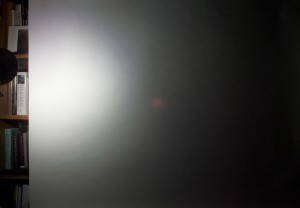
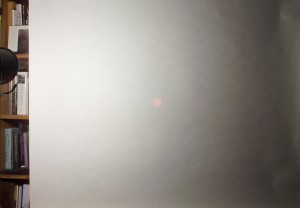
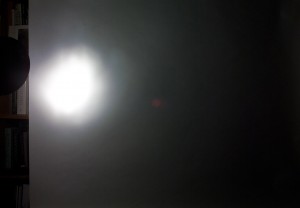
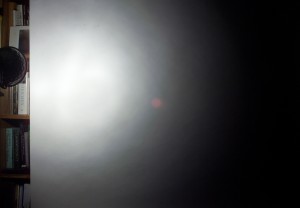
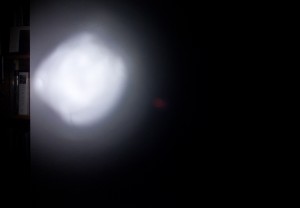
I also want to say something about testing. I took a while to get back to this blog because I needed to test a bunch of reflectors. I still don’t have a studio here in Indianapolis, so this is a pain in the neck. I couldn’t get the reflectors as far from the seamless as I would like. I only shot half of the pattern of the light. None of this matters. Since I hadn’t done this in a while, and I have some new reflectors, I learned things. It is vitally important to test your gear. Not only do you learn about how well it works, you learn about how it works. The strobe manufacturer can tell you about the spread of a reflector, soft box or umbrella, but you won’t know how it actually looks until you do the test. I notice that very few of my students have ever tested their strobes. I encourage them to do a test, and so should you.

Norman LH 2400 strobe 6 in reflector. This is the light I choose to base other power settings on. So neutral power, large coverage


Norman LH 2400 Stove pipe snoot small coverage neutral power


Norman LH 2400 22 in Beauty Dish. Very wide coverage, smooth gradation. -2/3 power


Norman LH 2400 6 in grid spot. Very very small coverage. -1 & 1/3 power


Norman LH2 5 inch reflector. Actually the coverage is surprisingly small. A +5 the power is quite high


Norman Lh2 Glass Dome reflector. long coverage, with soft gradation. -1/3 power


Norman LH 2 Parabolic reflector, small coverage from a very shiny focused reflector. +6 power


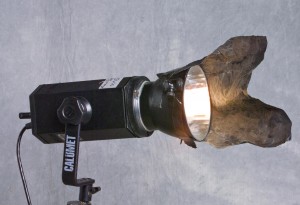
Norman LH2 Parabolic w/shoe cover. The cover diffused the light a lot, so long coverage. Neutral power


Norman LH2 6 in/2Q reflector, an alternative basic reflector. Larger coverage w/fast gradation. +3 power

Norman LH2 Homemade black snoot. Small coverage. with -1 power (negative)

BetterPhoto.com, The better way to learn photography


« Newer PostsOlder Posts »

Powered by WordPress