Photo Notes A place to talk about making images.

December 21, 2015

El Matador State Beach #2

Filed under: Do It Yourself,Film Technique,Fine Art,Landscape Photography — John Siskin @ 5:45 pm
El Matador State Beach, California #2

El Matador State Beach, California #2

I like the texture and presence of the rocks in this shot as well as the action of the water. The shutter speed, about 1/30th of a second showed the water coming over the rock in an interesting way. The rest of the water shows a feeling of movement, which is good for surf. The camera is positioned quite close the rocks in the foreground which gives the image a more exaggerated point of view. I can do this because of the very wide coverage of this lens. I’m still playing with ways of presenting this image on line since horizontal panoramic formats seem to suffer on this blog format. I really liked shooting at El Matador State Beach because of the rocks and caves. I’ve added another image from El Matador here.

Part of being a creative professional is staying creative. I suppose that’s obvious when you say it, but it’s a challenge to do. I see through the eyes I’ve always used, and I need to continue to see fresh and new. Of course craft will make a beautiful image, and craft is essential for my professional work, but there is more to being creative than achieving great craft. One way I change my seeing is to change my tools. If I choose to shoot with my usual kit I go down roads I’ve seen before, but new tools create new paths. Often this is because of what a tool CAN’T do. So if I have a huge camera I’m forced to look for static subjects. You can’t shoot children playing with an 8X10 camera. Over the years I’ve built cameras that allow me to walk down different paths. I’ve been especially interested in shooting extreme wide angle views. Of course I could always do this with 35mm film cameras, but the combination of wide angle vies with the lower resolution of 35mm film was not satisfying. I’ve found that using extreme wide angle lenses with my digital camera is much better. I’ve also used other tools to achieve this point of view; one of the most successful is my super wide camera. This camera uses a special Nikon lens, with very wide coverage, and medium format film (6cm wide). I’ve written about this camera before: www.siskinphoto.com/camera3a.html. I’ve included a picture of the camera below.

Superwide Camera

Superwide Camera

As I’ve mentioned this blog is part of a series of entries about my fine art images. I’m doing this series as part of an update for the fine art pages on my website. I hope this series will make my images more accessible, both on line and as prints. If you’d like to buy a digital print of this image, mounted and matted on archival cotton rag board, please use the PayPal link below. The image will be about 16 inches wide mounted on 16X20 board. The price includes shipping in the United States, for other countries please ask first.


This image, and many others, is also available in my book B-Four. You can look at the book at this link, and order it as well. I hope you’ll take a look at the book.

You can buy one of my other books by clicking on the titles below:


July 23, 2015

Finally the Darkroom!

I’ll start with a mention that you can find some of my courses from BetterPhoto on the workshop page of my website: www.siskinphoto.com/workshop.php. You can also arrange a One on One Workshop or sign up for the Portfolio Workshop. Check out the whole site: www.siskinphoto.com! You can get my books by clicking on the pictures below, and why not do that now?

Sometimes a circumstance or a thing sets off an idea in my brain. I see something that I like and I need to make a photograph, or I get to work with someone and that brings up new ideas, or a desire to work on an old idea. For instance I just did some testing with an Indianapolis model, Khristian Hildrith, and it was a great chance to work with my Norman Tri-Lite. I’m adding one of these shots here, and I’ll probably add more later.

Khristian with the Norman Tri-Lite

Khristian with the Norman Tri-Lite

The thing about being a professional creative, and I suppose this applies to all visual artists, writers and other creatives, is that there is a responsibility to work even when you’re not inspired. Not only do you need to work, but also you need to do good work. Sometimes this means doing the craft more than working with inspiration. For instance, a client may come to me to do a product shot that doesn’t require a new vision, just a good solid interpretation of a three-dimensional object into two-dimensions. Sometimes doing the craft of photography will lead me to new ideas. Often, when I haven’t done any real shooting for a while I’ll get out the microscope equipment and search for new worlds in a plastic ice cube. Creativity is something I need to exercise.

Plastic Ice Cube

Plastic Ice Cube

There are always stumbling blocks and obstacles to creative work. The desire to make an image doesn’t always begin with a road map to the image, or even with a visual inspiration. I’ve written about my delight with big film cameras and large format lenses in the past. Just using these things makes me feel better about photography and my way of working. A view camera slows me down; it makes me more deliberate about everything that goes on into the frame. My problem has been that, if I want to make an image with a large camera, I also need to be able to process and print it. When I did commercial or personal work ten years ago I could send the film to the lab, but now I need to do the lab work. I am so pleased to announce that I now have a darkroom!

Darkroom

Darkroom

This is a black and white darkroom; frankly I just can’t find any reason to do color work in a wet darkroom. For color work, digital is not only easier; it just seems better. You can see a couple of images here, but I want to tell you a little about the tool kit in the darkroom. It starts with the sink, in a chemical darkroom the sink is where stuff happens. This sink will hold three 20X24 inch trays, so I can make very large prints. It’s a wooden sink, and it’s coated with marine grade varnish. It’s a real sink, with hot and cold running water, not just a catch basin. My Jobo processor fits easily into the sink, which means I can process most any kind of black and white film or paper.

The large sink, with the Jobo Processor

The large sink, with the Jobo Processor

I guess that when most people think about film photography they’re remembering 35mm cameras, so they think the enlarger might be the main tool in the darkroom. While my goal is to work with larger negatives than 35mm, I still want an enlarger. Mine is an old Omega D-2 that will handle film up to 4X5 inches. The strange thing about this D-2 is the head (light source). Many years ago I converted an omega color head, and this head was old even then, to work with filters for printing black and white paper. This head used to be referred to as the Mickey Mouse head, maybe because of the shape: a black sphere with cylinders on the side, or maybe it’s just the technology. Regardless it gives even light and control over contrast. I’ve also got an ultraviolet light source for contact printing large negatives and alternative processes. The UV light source means that I can do Cyanotype and Vandyke prints maybe even platinum prints someday.

Omega D-2 Enlarger

Omega D-2 Enlarger

The dry table is a little smaller than I might like, but it’s big enough to load large film holders. Of course, with all the black plastic, the darkroom has the ambiance of a homeless encampment, but it’s going to be a good place to work. The important thing is I was able to build a workspace that will enable me to unlock all of my large format photography tool kit, even the 11X14 camera!

Dry Table

Dry Table

I hope you have inspiration and the tools you want. Thanks for your attention!

February 10, 2015

Working With A Cucoloris

Filed under: Basic Photo Technique,Do It Yourself,Lighting Technique — John Siskin @ 4:18 pm

My books and my classes give me a reason to keep doing this blog. If you’re in Indiana I hope you’ll consider taking my Portfolio Workshop. You can see a little more information about this workshop if you check out this blog post. Thanks so much for your attention.

Matthews Cucoloris

Matthews Cucoloris

I just bought a used Matthews Cucoloris. Now this is certainly a piece of equipment you could build, but I didn’t. Basically it’s a piece of plywood, about 18X24 inches, with a bunch of irregularly shaped holes in it. It fits on a C-stand or even a standard light stand with a grip head. The idea is to use the cucoloris to make shadows. You can put it in front of a light with a bowl reflector or perhaps a snoot. By moving the cucoloris around you can change the position and shape of the shadows. You can also change the size and edge sharpness of the shadows by moving the cucoloris closer or further from the light source. On the whole a really useful tool as you can use it on a subject or on the background. I’ve attached some examples.


With CTO filter

With CTO filter

There’s a kind of a calculation in deciding whether to buy or build a piece of equipment. Money is a part of it: if I only wanted one light panel I might buy it; but I’ve got five light panels, so I saved a few hundred dollars by making my panels. There are things like a chain-pod or my fish-eye camera  that aren’t available commercially. I’ve also built things, like my mono-pod, when I didn’t know if I would really like working with them. One problem, when you build your own gear, is that it doesn’t always perform well. Of course building gear is also time consuming, for instance I still haven’t completed my darkroom.

Bastard Amber Filter

Bastard Amber Filter


Pale Lavender Filter

Pale Lavender Filter


If you’re going to save time by buying gear instead of building it you should use some of that time practicing with your new gear. I’m sure I’ve written before that photographers don’t practice enough. Most good musicians practice everyday and many photographers don’t practice at all. We may learn about techniques or tools but most of the time we don’t do the kind of repetitive practice that a musician does when playing scales. So as soon as I got the cucoloris I grabbed a strobe and the wig head and started to experiment.


Background with even light

Background with even light

I have a mottled gray muslin background on each side of my studio. Neither of them is particularly lovely, but they get better if you light them creatively. So I used the cucoloris and various Rosco gels to see how I could change the background. I am very pleased with the results. I usually work with CTO filters when I want to warm up the light, but this time I also tried bastard amber, which was quite nice. I also tried a pale lavender, which looked more neutral than I expected. I was really pleased with how easy it is to make changes in the appearance of the background, both color and pattern, with the cucoloris. I’m sure I’ll be using the cucoloris to create better backgrounds in the future.

_dsc6802

Of course you can also use the cucoloris on a subject rather than the background. In order to practice I brought out a wig head as a test subject. If you’ve looked at my Intro to Lighting class you’ll know that I think the wig head is a great test subject. By keeping the strobe close to the cucoloris I was able to create some interesting shadows on the subject. I’m sure that there will be opportunities to use this.

_dsc6787

When I look at any test I learn how the image actually looks, rather than how I think it will look. I also get ideas for more testing. In this case I want to see how the cucoloris will perform if I put a snoot on the strobe. Also I have diffusion domes that fit over my strobes. These are designed to make the light from modeling light look more like the light from the strobe tube. I want to try working with the dome because the visual presentation with the modeling light didn’t really look like the image the camera captured with the strobe light. This isn’t surprising because the difference in the shape of the tube and the modeling light can be important when the strobe is used close to the cucoloris.

_dsc6759

December 7, 2014

Do It Yourself!

Filed under: Basic Photo Technique,Do It Yourself,Uncategorized — John Siskin @ 4:07 pm

My books and my classes give me a reason to keep doing this blog. If you’re in Indiana I hope you’ll consider taking my Portfolio Workshop. You can see a little more information about this workshop if you check out this blog post. Thanks so much for your attention.

As the faithful readers of this blog will know I updated my website a while back. I wanted the site to appeal to commercial photography buyers. So, for instance the site is designed to work on a desktop computer rather than a phone. It’s been working out for me, perhaps because of the changes, or maybe because I’m using Adwords from Google. Regardless I’ve been getting a few jobs from new clients, which is great. I’ve added a couple of recent pics to this blog entry.

_DSC5850

One of the things I didn’t put back on the website is the Do It Yourself page. Frankly I really don’t want to encourage my clients to do it themselves. So I thought I would put links to some of the stuff that was on the page here. Don’t hurt your hands clapping. These aren’t all my designs, but they are things I use. My favorite project is the Chain-Pod. It’s easy to build and really useful. It helps to steady your camera when you don’t have a tripod or a monopod. And it fits in a pocket. Check it out!

_DSC6269 copy

You don’t have to actually build anything to use the Booty Light. It’s just a cover for your flash, but it really works!

fdc1S

If you came to my studio you’d see a lot of Light Panels. I use them a lot in the studio, more than softboxes. They are really great tools for modifying light. You can change the size and character of a light much more than you can with a softbox or an umbrella. There are a lot of plans for light panels. I like this plan because they have feet.

_DSC4070

Here’s a plan for a Monopod. It’s probably not as good as one you can buy, but I think it cost less than $5, so it’s not a big investment.

_DSC4189

I like using this Computer Table on location. It’s simple to build and it’s very helpful if you’re tethering your camera to a computer.

_DSC6205v-2 copy

I like this Modified Umbrella for quickly lighting a room. It’s designed after a table lamp and it works very well.

_DSC6236

There are a few other projects at this link, including several cameras I’ve built. I’m not sure these really come under the heading of Do It yourself, as you might not even need these cameras, but I really like them. This article has a lot of information about the cameras & lenses I’ve built.

I’ve been mentioning my classes at BetterPhoto since I began doing this blog. I’m sorry to say that BetterPhoto has discontinued their interactive classes. I’ve really enjoyed working with BetterPhoto, so I’m sorry to see this happen. I may have a version of my classes at my website soon. Please look for it.


October 20, 2014

Junk Man

My books and my classes give me a reason to keep doing this blog. If you’re in Indiana I hope you’ll consider taking my Portfolio Workshop. You can see a little more information about this workshop if you check out this blog post . I’ve listed my BetterPhoto classes at the end of this post. Thanks so much for your attention.


I’m a junk man. I think that it’s better to have more gear than newer gear. So I have a lot of Norman 200B strobes. Norman 200Bs haven’t been made in about 20 years, long time. Norman still makes a 200C, which costs about $1200, while a used, well used, 200B can be had for around $100 on eBay. So, if I can find them I can get a used unit for less than 10% of a new one. The used one weighs more, which is too bad, but it has some actual advantages. The 200B recycles quicker than almost any other strobe; the best 200Bs recycle to full power in a second. Norman 200Bs use 12-volt power, so you can run one off a cigarette lighter socket in your car, you can use a cheap lead acid 12V battery, you can even use a car battery. I don’t know of any other strobe that has so many inexpensive power options. A Norman 200B is pretty powerful, with a guide number around 114 with a standard reflector. The thing is that a Norman reflector spreads light a lot wider field than a Canon or Nikon strobe. The reflector isn’t built in so there are a lot more ways to modify the light, you can even use the bare tube (bare bulb) alone. I’ve also checked and with a big soft box, say 3X3 foot the 200B is about the same brightness as the much more expensive Canon or Nikon units. Now a 200b, even a 200C is a manual strobe: you can control the output, but the strobe won’t automatically change the output. If you’re designing the light for your shot this won’t be a problem, but if you want to have the flash make your choices a Norman 200B, any manual strobe, is not the way to go.


A Norman 200B Head (called an LH2) bare bulb and with some accessories

A Norman 200B Head (called an LH2) bare bulb and with some accessories

If I’m shooting interiors, for an architect or a designer I’ll take 7 of the 200B strobes with me. There are so many places that you might need to put light when shooting interiors, so sometimes even 7 strobes isn’t enough. It’s better to have a lot of strobes, even if they’re junk, than not enough lights. With architectural lighting power isn’t as important as having light where you need it. If I was shooting people or product I might not take as many lights, but I would still grab the 200Bs first.

Norman 200B power pack

Norman 200B power pack


If I’m shooting an event, and frankly I’d rather not, I grab a different strobe: the Sunpak 120J. Another piece of old junk. A 120J has a little more than half as much power as a Norman 200B, but it has automatic exposure! This is an earlier version of strobe automation, not the current ttl system. Still it’s accurate most of the time. Here’s a couple of things I like about the 120J: it uses the same strobe tubes as a 200b and the same reflectors. It can hold its own batteries or use a high voltage battery pack. Also it mounts on a hot shoe or a 1/4X20 thread. Oh yeah, they’re cheap, well reasonably priced. Quantum made some similar units that are worth checking out. The current Quantum strobes are probably worth having if you shoot a lot of events.

A 200B rig for flash fill

A 200B rig for flash fill


There are a couple more classic (old) strobes I should mention, first the Vivitar 283. They made millions of these and you can consistently find them for less than $30. I owned a couple of these modified with an extra capacitor to have a stop more power and there were a lot more modifications and accessories. The high voltage battery packs were really quite helpful because they reduced the recycle time a lot. Another strobe from the same time period is the Sunpak 411. I still use these because the head was so well designed it moved up and down as well as side to side. Unfortunately you don’t often see a 411 in good shape.

Norman kit for location

Norman kit for location


Of course there are a lot of other good used strobes available, and I should mention Lumedyne in particular. These are manual strobes, similar to the 200B, but can produce much more light. With the right accessories you can get up to 2400watt-seconds from these battery powered units. Lumedyne strobes are available new and used, and a little pricier than the Norman 200B. Still if you need battery powered strobes with as much light as a studio strobe this might be the way to go.

Vivitar 283-with manual power control and 2nd capacitor modification

Vivitar 283-with manual power control and 2nd capacitor modification


If you need a lot of light on location there are a couple of ways to go. First there are battery packs that you can plug a mono-light or a studio strobe into. Many companies offer these now, and they can be quite helpful. I prefer to use a gas generator. While it is much heavier you can shoot all night and day with just a few gallons of gas! Of course you may need an assistant to lug the thing around. Gas generators start at less than $150.00, batteries for mono-lights are generally more expensive.

Gas generator for location work

Gas generator for location work

d/I could discuss the new stuff on the market, but not in this entry. There’s a lot more information about strobes in my book: Understanding and Controlling Strobe Lighting: A Guide for Digital Photographers
If you’re interested in how to light interiors and other architectural shooting you might want this book: Photographing Architecture
Or you can check out my classes at BetterPhoto:
An Introduction to Photographic Lighting
Portrait Lighting on Location and in the Studio
Getting Started in Commercial Photography


September 3, 2013

The Studio is Open!

I’m going to keep thins simple in this entry: just a bunch of pictures of the new studio. It’s possible to shoot here, but not everything is put in the right place yet. The shooting space is about 42X24 feet, pretty damn large. The background holders are up. I’m going to put some more holders on the sides so that I can pull down white or black to add or subtract bounce fill. I need a little help to finish, some things are to big to lift. If you’re local maybe you could help me out, or help with a shoot. I’m trying to set up a shot of a Mini-Cooper, maybe for this weekend. You can also arrange to drop by and have a look. Thanks for your attention! I’ll just remind you about the BetterPhoto classes: An Introduction to Photographic Lighting, Portrait Lighting on Location and in the Studio and Getting Started in Commercial Photography and the books:


The shooting wall. You can see the background holders above the wall.

Another view of the shooting wall.

The back of the studio. You can see the cargo door.

This is the outside. It's a separate building. There is parking, particularly on evenings and weekends.

My office. I'm very happy about the way it turned out.

January 17, 2013

More Tools and Tips!

I hope you’ll check out my books: Photographing Architecture and Understanding and Controlling Strobe Lighting. I hope you’ll get copies if you haven’t already. Of course you know that one reason for this blog is to sell the book and get you to consider one of my classes at BetterPhoto.com: An Introduction to Photographic Lighting, Portrait Lighting on Location and in the Studio, Getting Started in Commercial Photography

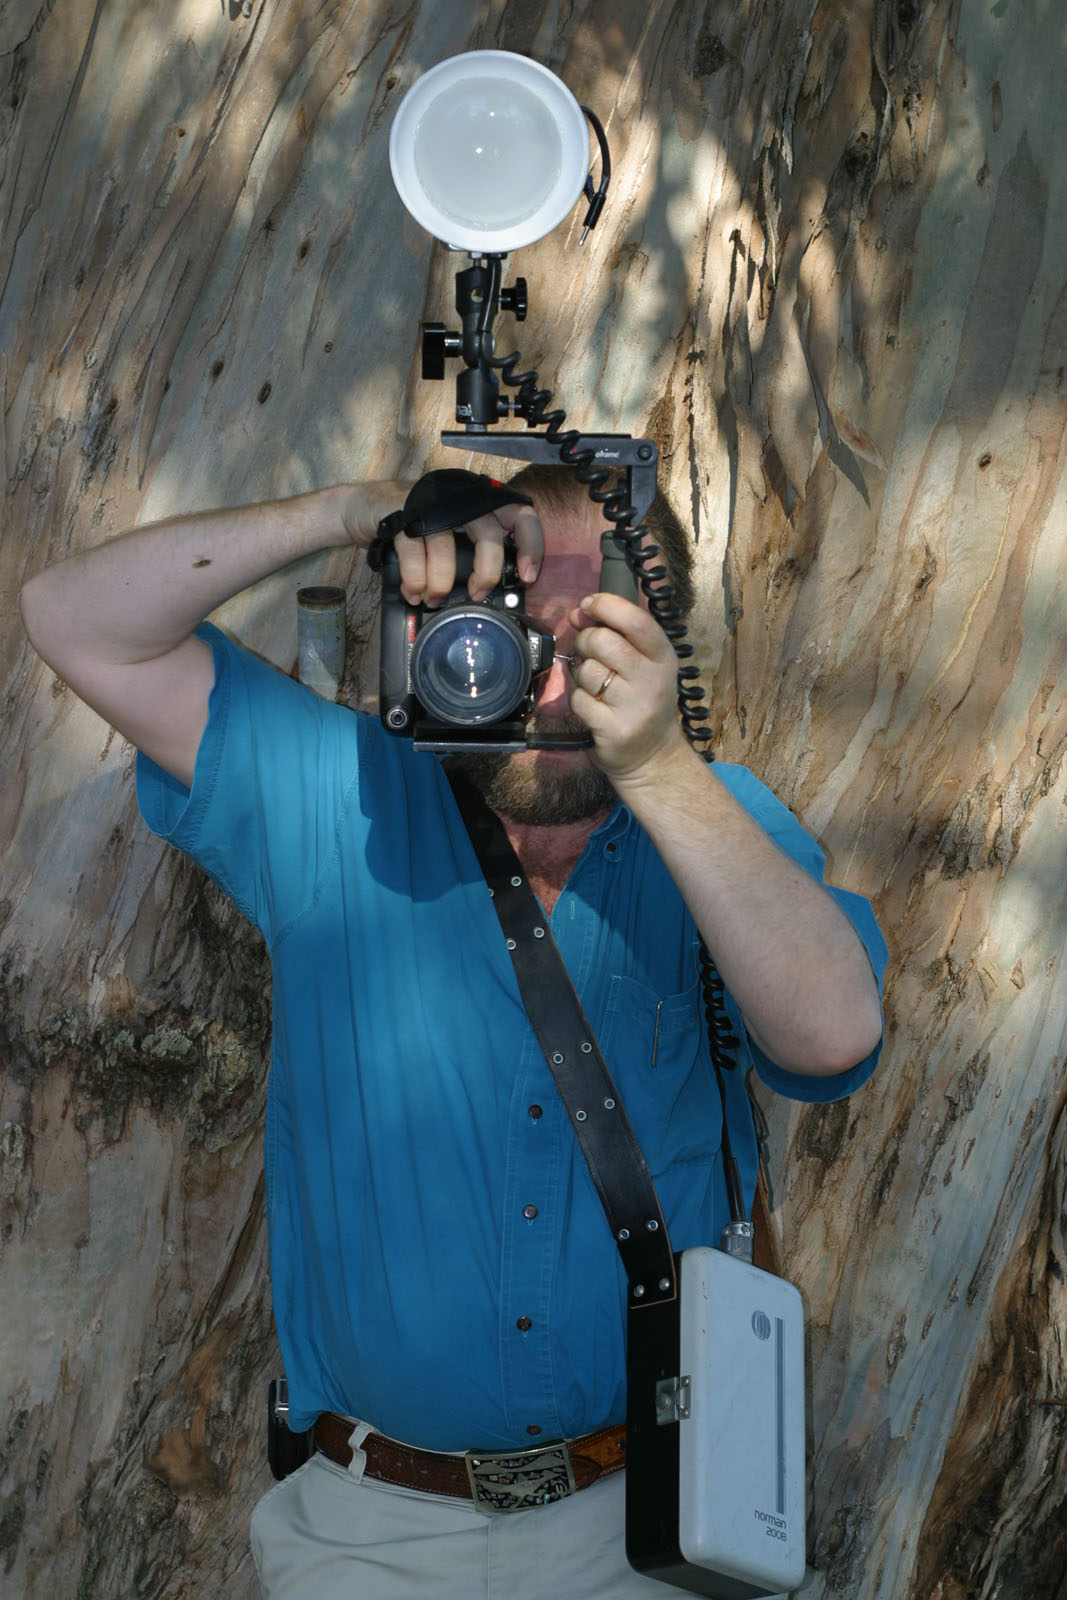
I wanted to continue with the equipment and tips I was talking about in the last entry. I always enjoy talking about these sorts of things. I feel that the equipment manufacturers often try to make us all create images in similar ways, and I prefer to be creative about making pictures. For instance there are a lot of lenses built with vibration reduction technology, and this is a great thing. But, as I mentioned in the last entry, you can use a chain pod, which will also reduce vibration. The chain pod will work with almost any camera and lens, including the stuff you already own.

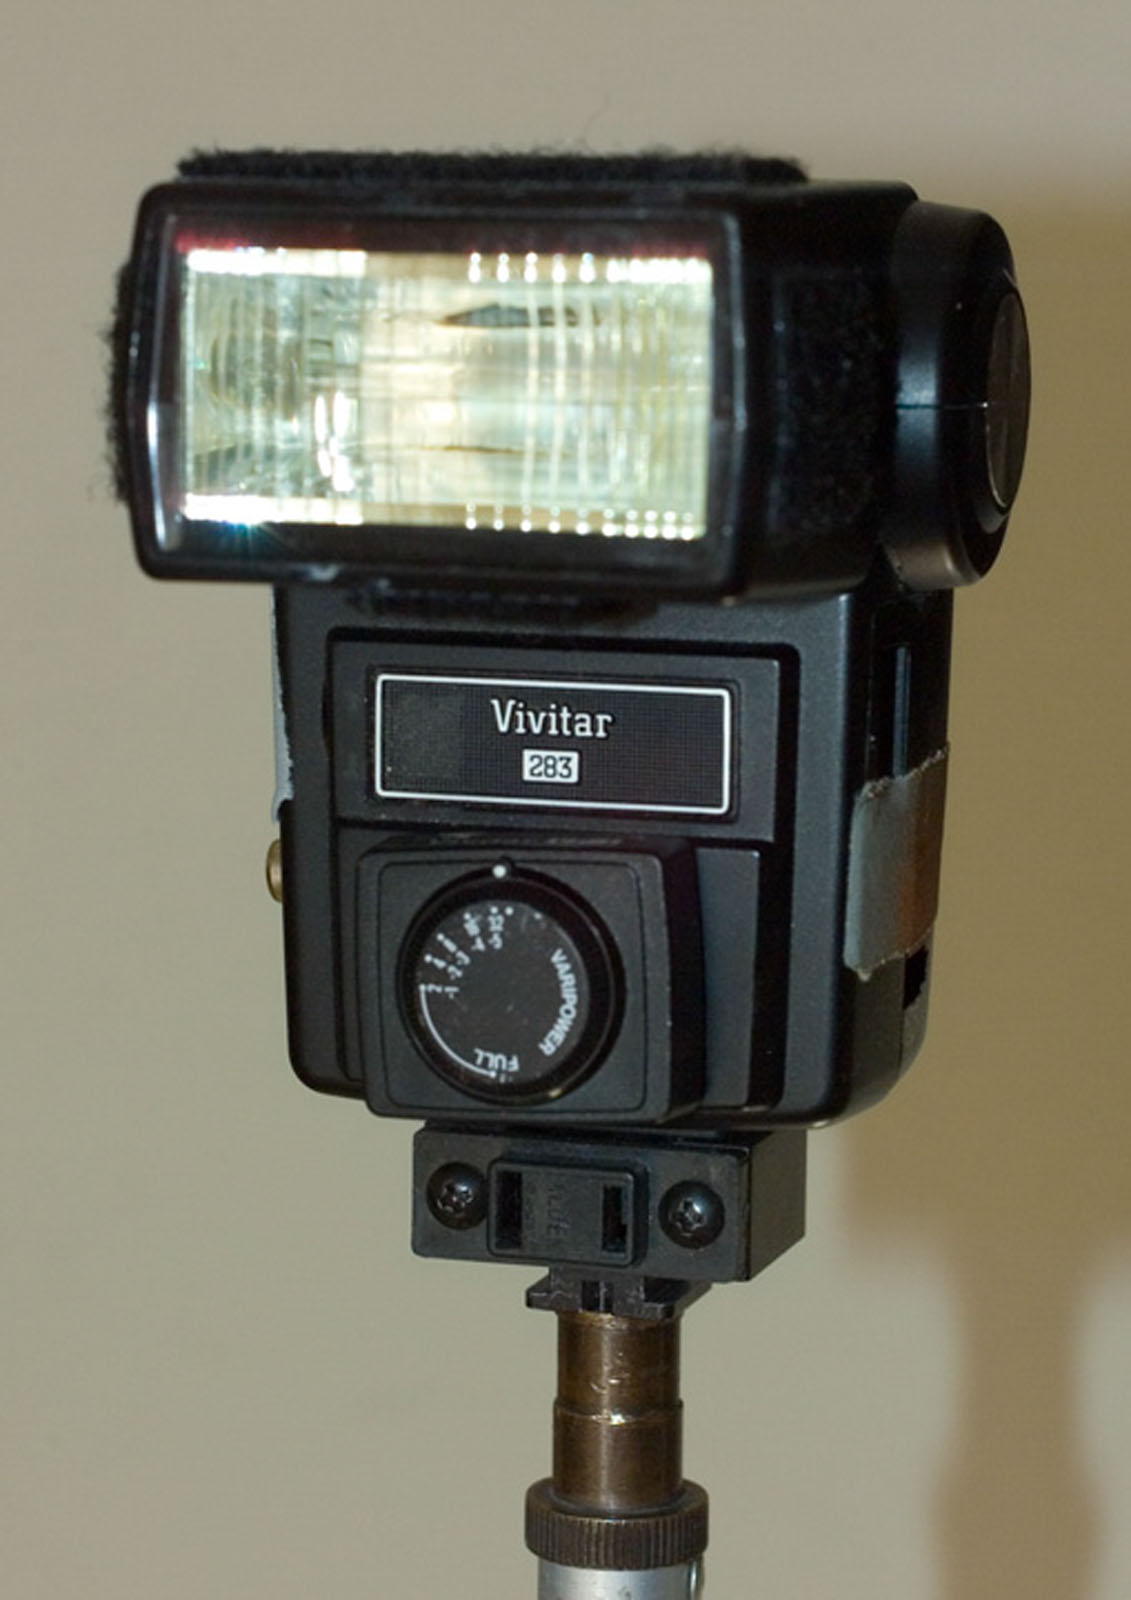
I've put a radio trigger on an optical slave so that I can use multiple sets of radio slaves.

The first thing I want to mention, because I just figured it out, allows me to use two different radio slave systems together. I try to buy a lot of receivers when I buy radio slaves because I have a lot of strobes. The problem is when I need even more receivers the signals of the two radio slave systems don’t always match up. I discovered I could put the sending unit from a second set of radio slaves onto an optical slave and trigger both sets of slaves together. One thing I’m looking for now is a very sensitive optical slave to extend the range of my radio slaves. Please note that I am still using inexpensive Chinese radio slaves with good results overall.

Cine foil is a flexible aluminum foil that can be used to block light and as lens hood.

A couple more things that are in my camera case, that I didn’t mention last time, model release forms, cine foil and a GretagMacbeth ColorChecker. Of course it is always wise to have a release form whenever you shoot a person or private property, because there are severe limits on publication without a release. Because so much of my work is for clients there are times I can’t get a release, and so can’t use a shot in a book or article. Here’s a link to a good release form. I really like Cine foil, which is black aluminum foil. It can be used to control

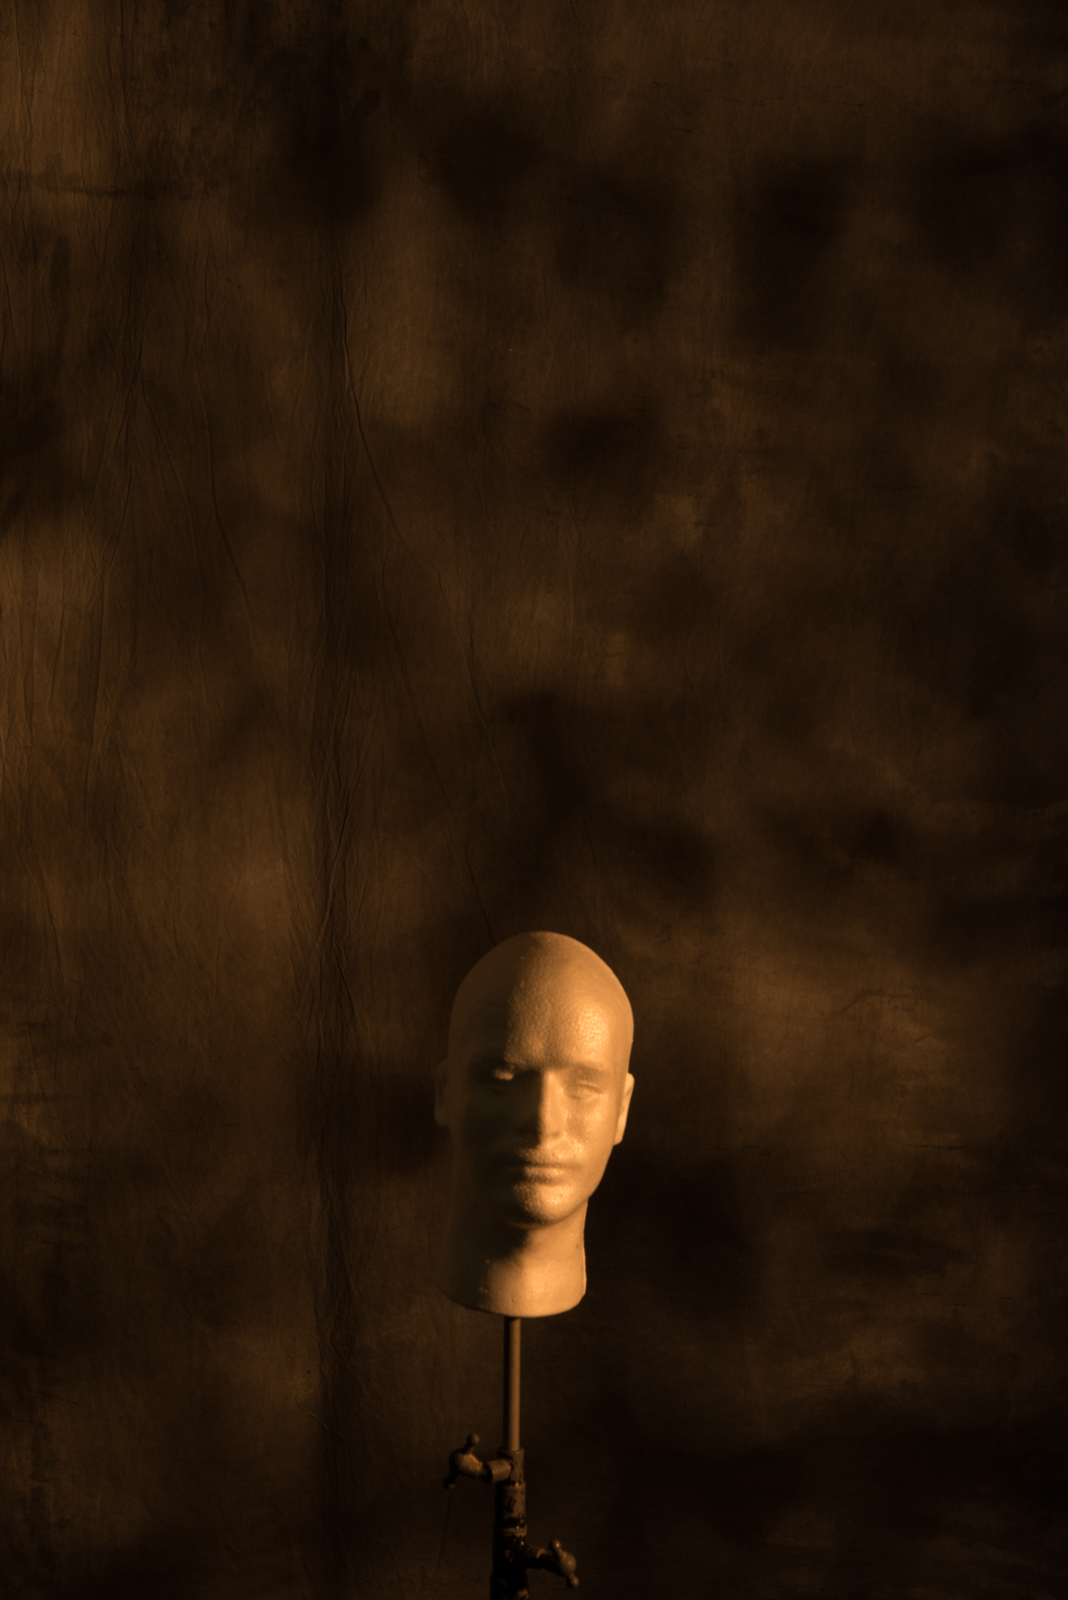
GretagMacbeth ColorChecker, gives me good gray samples and pure colors.

the spill from a light or as a lens hood in a pinch. A couple of pieces take up no room, and can be a real lifesaver. I keep a roll in the studio. The GretagMacbeth ColorChecker is the most accurate gray and color sample I own. Since I always shoot in RAW I will shoot a sample image with the ColorChecker after I finish the set-up. I can use this sample to make the color accurate on all of the shots with the same set-up. You can also use it to help you make pleasing color, because you can see how a particular setting will affect the colors you’re using.

Perhaps I should mention that I have several camera cases, not only do I have cases for my lights but I also have hard soft and small camera cases. I store my main camera in a Pelican case. I really like this large hard case because I can store almost my entire system, everything I would take on location anyway. Also the Pelican case provides very good protection and it is pretty easy to ship. Another good thing: the Pelican cases are ugly. I avoid the fancy cases that draw peoples’ attention; you don’t want to have your camera gear stolen. The problem with a hard case is that it’s difficult to work out of, so I have a couple of soft cases for when I have to keep moving. I have different sized cases so that I can reduce the load when I need less equipment. I’d like to see a case that would allow you to add external sections, so you could create the right space to fit your gear. Of course I have a lot of gear so being able to customize a case would make it easier to work.

Almost all my cases are used. I buy inexpensive used cases from camera stores, thrift stores, surplus stores and even antique stores. I will get a case even when I don’t have anything specific to put in it, if it is cheap and in usable condition. I stuff cases inside cases to store them; otherwise I’d have run out of room long ago. It usually turns out that I need most of the cases I get. I even keep much of my studio gear in cases; you never know when you’ll have to do something unusual on location.

A useful case from Home Depot

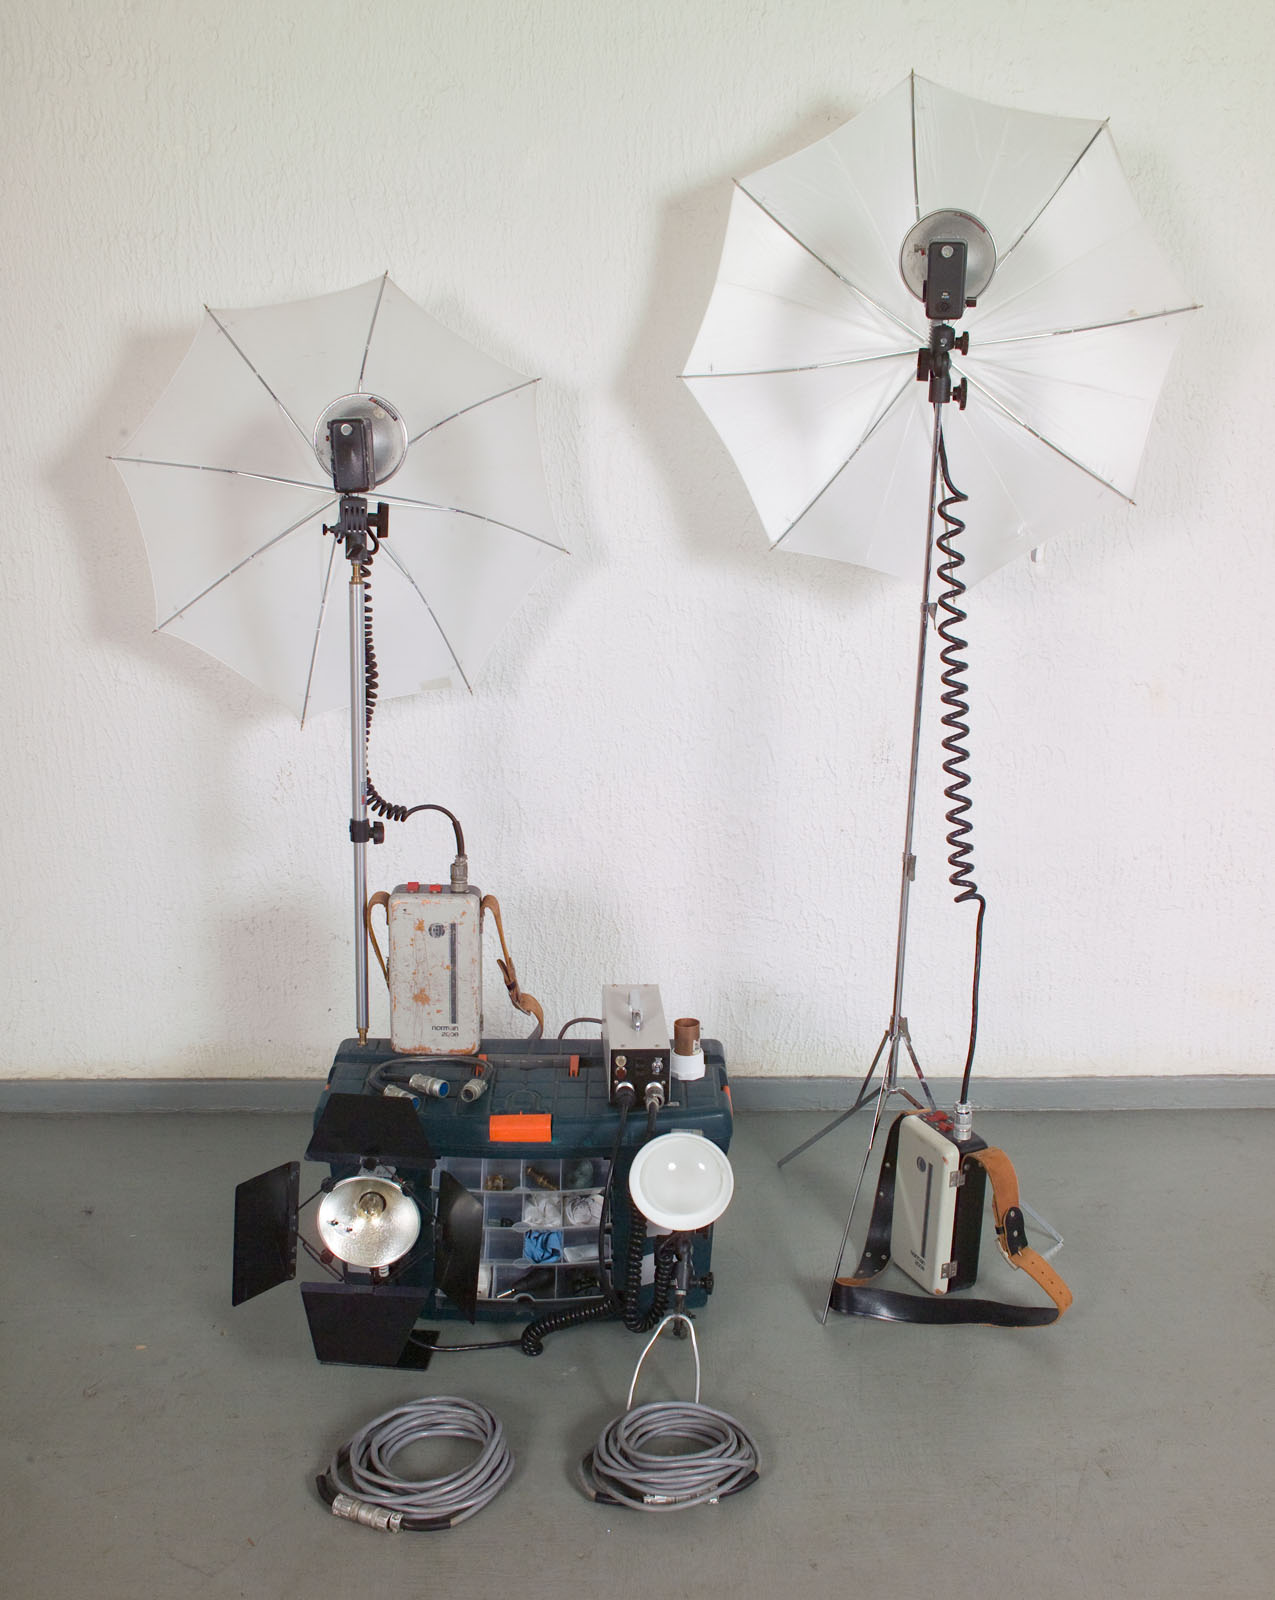
Most of my lighting cases have come from military surplus stores or hardware stores. I’ve used a lot of ammunition cases over the years because they are very strong and also waterproof. I often add a 1/4X20 threaded nut to the cases. This allows me to put a stud to mount a light onto the case. This means that I have a short light stand, or a stand I can put on a table, without having to carry another stand. I have a lot of lighting cases because I can’t use a case so heavy that I can’t actually lift it. I also have a wheeled cart, which can make it a lot easier to get lights and cameras to location. Light stands and tripods go into a large duffel bag.

These cases have 1/4X20 threads so I can attach studs for my lights.

Rolling cart, ammunition cases and duffel bag. Ready for a location shoot!


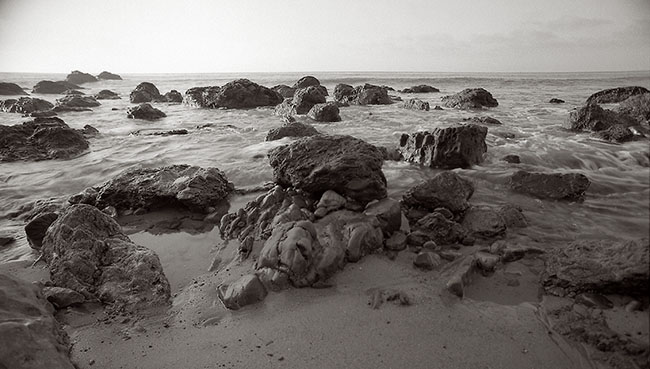
I saw this on YouTube: http://www.youtube.com/watch?v=g4aE2f07ON4&feature=player_embedded. As a long time fan of Edward Weston’s photos it was nice to see it again.

Please consider one of my classes at BetterPhoto.com:

An Introduction to Photographic Lighting

Portrait Lighting on Location and in the Studio

Getting Started in Commercial Photography

If you’re in the Indianapolis area there are other opportunities as well. I’ll be showing much of my personal architectural work in June at Indiana Landmarks. Please come look.

December 20, 2012

Handy Tools

Filed under: Basic Photo Technique,Do It Yourself,Photographic Equipment — John Siskin @ 3:43 pm

I hope you’ll check out my books: Photographing Architecture and Understanding and Controlling Strobe Lighting. I hope you’ll get copies if you haven’t already. Of course you know that one reason for this blog is to sell the book and get you to consider one of my classes at BetterPhoto.com: An Introduction to Photographic Lighting, Portrait Lighting on Location and in the Studio, Getting Started in Commercial Photography

There are things in my camera and lighting case that aren’t cameras or lights. Some of these are pretty obvious: if you have lights you must have light stands. If you have cameras you’ll have lenses. This post is about the other things, some of them are used constantly and others hardly used. But they are all critical once in a while. If you have some favorite gadgets please let me know. I’ll post the information. Because this site got spammed you’ll need to let me know by e-mail.

This is probably my favorite. It’s a vice grip that has tripod sized threads welded onto it. I can put on a small ball head and use it to hold the camera or a light stud and it’s a light stand. Vice grips can attach to almost anything. I don’t know of a commercial supplier for this, so, if you want one, you’ll need to visit a welding shop. Here’s the ball head and the lighting stud. This is the small lighting stud that fits all my lights.

I also have this clip that I put a tripod thread on. It can hold a small light, or notes. By the way tripod thread is 1/4X20, unless you are European.

This is another sort of lighting stud, basically it allows you to mount two lights on a single light stand. This is useful when you need more power. It used to hold four lights, which is why there’s a hole. This is another thing I don’t have a supplier for. Any suggestions?

I know a lot of people have 5 in 1 reflectors but they don’t really appeal to me. I do have a piece of bubble wrap with a silver and a white side. Good as a reflector and extra padding. The piece I carry is about 18X24 inches. I also have a piece of duvatyne in the case. Duvatine is a very black cloth used for blocking light.

This is another old friend: the chain pod. Here’s more information. They’re easy to build. If you must spend the money you can get one from Calumet.

This is another one I wrote about before. It’s a shoe cover that helps modify light. For more check out this link.

I don’t use this much, but it doesn’t take up much room. It has been important on come occasions. It’s basically a raincoat for the camera. Here’s a modern version.

I also have a laser pointer. This helps me focus in low light by giving me a target. I have to remember to check the batteries once in a while. I don’t use it often, but when I need it I really need it.
pointer

The next two items are still in my case, but I find I use my smart phone for both: a level and a flashlight. Especially with architectural photography leveling the camera is important, and I often need to see things in low light.

There are other things I should at least mention:
Model release, adult and child
Property release
Gray card
MacBeth Color checker
Cine Foil
Gaffer Tape. This is actually on the cases, which makes it easier to find

Clothes pins. I use these to hold filters on lights.
Please consider one of my classes at BetterPhoto.com:

An Introduction to Photographic Lighting

Portrait Lighting on Location and in the Studio

Getting Started in Commercial Photography

If you’re in the Indianapolis area there are other opportunities as well. I’ll be teaching a class in commercial photography next spring at Ivy Tech.


Happy Holidays!

February 4, 2011

Lighting a Background

Filed under: Do It Yourself,Lighting Technique — John Siskin @ 6:30 pm

And I am continuing the shameless plugs at the beginning of the blog. My book Understanding and Controlling Strobe Lighting: A Guide for Digital Photographers is on Amazon.com. The wonderful folks at Shutterbug magazine are printing a 3 page excerpt in the next issue. Please pick up the magazine.  Here is a sample chapter from the book. Of course I still hope that you will consider purchasing my fine art book B Four: pictures of beach, beauty, beings and buildings. Frankly purchases of this book mean a lot to me, and it is also a fine gift for any occasion. As you know I teach for BetterPhoto.com. I really hope you’ll sign up my class: An Introduction to Photographic Lighting. Sign up are very good this month!

I used a Rosco CTO for the background. The light came from a snoot which was covered by a piece of cine foil with cuts in it.

I’ve continued to work on the projector powered by a strobe. The results have been very effective, as I demonstrated in the last blog entry. While the strobe projector is very effective for putting light or an image onto a face, it isn’t giving me as much ability to control background light as I would like. People used to project images behind a subject before Photoshop. Now, it’s easier to drop in a background, after the shot, using Photoshop. However it is really good to be able to add color and dimension to a muslin or canvas background. You can change the background color easily this way and make the background lighter or darker in different parts of the shot. The strobe projector I built isn’t really bright enough to do a change a background unless

This time I used a magenta gel and a piece of foil with holes cut into it.

the light on the subject is very low power. You can do this, but it isn’t what I really want. I am hoping the strobe projector will show up in a magazine article soon. For the background on this week’s shots I have been putting cine foil over my snoot and cutting various openings. I am attaching a picture taken with a piece of cine foil with straight cuts, which has a warm filter. And there is another shot using cine foil with several holes in the foil. This second shot has a magenta gel, which makes a very saturated background. Of course both shots are made on a simple mottled gray muslin background. This is really a fun way to change the background. I should point out that it only takes seconds to change the cine foil and/or the

The foil and gels I used for these shots

colored gel.

For these shots I used a strobe set at 250 watt-seconds pointed into a 45 inch umbrella with a black back. This was the light for the subject. I used a gold reflector on a light panel frame on the opposite side of the face. I also used one more panel, with a black cover on it, behind the umbrella. This reduced white light spilled on the background.  If you get light from the umbrella on the background it will mix with the colored light and reduce the saturation. The strobe in the snoot had 1200 watt-seconds when I used the CTO gel and the foil with the cuts in it. For the other set-up, with the magenta gel, I used 800 watt-seconds. The camera was set at f8 and ISO 100. This really works much better than my tests with the projector light. In the tests with the projector the aperture was at f5.6 and the power was set at 2000 watt-seconds, and the background was still to dark.

The cover of my next book. This book will be available in the fall of this year!


I hope you’ll suggest my BetterPhoto class An Introduction to Photographic Lighting to other photographers you know, or perhaps you’d like to give it as a gift? Amherst media sent me the cover for my second book, you can see it above, of course you can still look at my first book on Amazon . Also if you look at the March issue of Shutterbug you’ll find a three page excerpt form my book. I am so pleased that they did this.
BetterPhoto.com, The better way to learn photography

January 23, 2011

Strobe Projector 2

Filed under: Do It Yourself,Lighting Technique — John Siskin @ 12:30 am

All the light is from the strobe projector using a cookie of little holes. I think the light in the eye makes this wonderfully effective.

And I am continuing the shameless plugs at the beginning of the blog. My book Understanding and Controlling Strobe Lighting: A Guide for Digital Photographers is on Amazon.com. It got as high as number 15 in photographic lighting books! And there was much rejoicing! But is is dropping now, so you need to buy a couple of copies, please! Here is a different sample chapter. Of course I still hope that you will consider purchasing my fine art book B Four: pictures of beach, beauty, beings and buildings. Frankly purchases of this book mean a lot to me, and it is also a fine gift for any occasion.  As you know I teach for BetterPhoto.com. I really hope you’ll sign up my class:  An Introduction to Photographic Lighting. Sign up are very good this month!

When we last saw this project, back in December, I showed some of the parts I used to make the projector. The most involved part is the tube that holds the lens and the series 7 filter holder. The

This tube is the key to making the projector work.

Series 7 filter holder is used to hold the cucoloris, or cookie, that creates a pattern, or a slide that is used to project an image. You can see where it fits on the image of the tube. The finished version of the tube is 4 inches long. There is a slot that is an inch and a half wide and 2 and a half inches long cut into the side. I cut the slot with a Dremel tool. This is quick, but you do need to be very careful. Dremel saw blades can break and fly at you. There are three other cuts made into the front of the tube that are the same light as the shot. These make the tube expand enough to hold the lens. On the other side I ground out the interior of the

The Series 7 filter holder and a couple of cookies. One cookie is cut and the other is blank

tube enough to hold the filter holder. You could do the same thing with 52mm filters, but you would probably have to remove the glass filters. I used the Dremel tool to do the grinding. Dremel tools are very versatile.  There is nothing special about the Series 7 filter holders, except that I had a couple of them that weren’t doing anything. You would probably need two 52mm filters so you could put the cookie or the slide between them. I made the cookies from cine foil. You would also need to cut a mask of cine foil if you wanted to project slides, to keep light from spilling out the sides.  I cut the foil with and X-Acto blade and other tools. This tube is really the only significant part you’ll need to build and it isn’t terribly difficult. Although I did build four versions before I got it right.

I used a cookie with slits cut into it.

The projector is not very bright, especially with a cookie or slide in place. At ISO 100 and 10 feet, without any cookie the meter reads f5.6, so the guide number would be 56. Most of the time you won’t be using the projector very far from the subject, so it is bright enough. By moving the lens in the tube it is possible to go from a hard edge, or if a slide a sharp image, to a soft edge, or if a slide a soft image. This gives you considerable control over the image. The difficulty is making changes to the projected image while shooting. If the projector is near the camera, as it was for the demonstration images, it can be reasonably convenient to shoot. If you are projecting a background or lighting the side of a subject than it is more difficult to arrange the image. A remote control release for the camera might be useful, or it might be helpful to work with an assistant. I am still working on ways to use the projector to create a background, which has been difficult. The problem with backgrounds seems to be the low power level of the

I really like the effect of the slits cut into the cookie. It is simple and effective. There is a filter over the projector and over the background light.

projector as well as the difficulty of getting it in place. Part of what makes this difficult is that when you are at the projector you can’t also be looking through the camera, so what looks right might not be right.

The samples this week were made with simple cookies. One is slits cut into the cine foil and the other is just holes. I used filters over the projector lens for color. On a couple of the shots I put a strobe behind the subject to add light to the background. I used colored gels on the background light as well.

I still offer a class at BetterPhoto, I hope you’ll consider taking it: An Introduction to Photographic Lighting And please consider my book: Understanding and Controlling Strobe Lighting: A Guide for Digital Photographers.
BetterPhoto.com, The better way to learn photography

« Newer PostsOlder Posts »

Powered by WordPress