Photo Notes A place to talk about making images.

April 14, 2013

Filed under: Uncategorized — John Siskin @ 2:54 pm

I hope you’ll check out my books: Photographing Architecture and Understanding and Controlling Strobe Lighting. I hope you’ll get copies, if you haven’t already. Of course you know that one reason for this blog is introduce the books and get you to consider one of my classes at BetterPhoto.com: An Introduction to Photographic Lighting, Portrait Lighting on Location and in the Studio, Getting Started in Commercial Photography

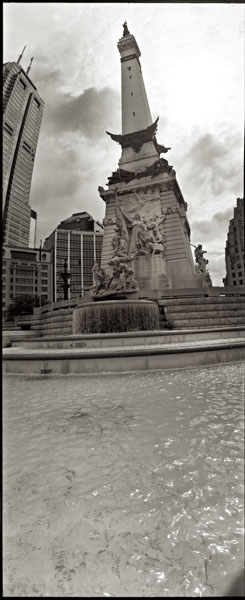
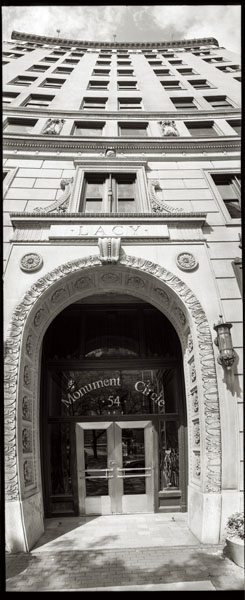
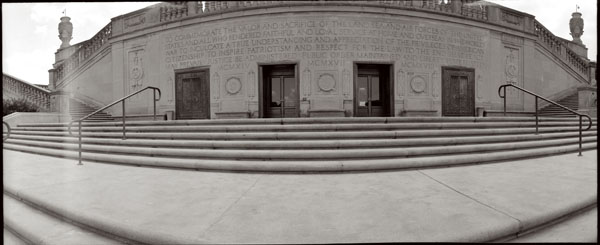
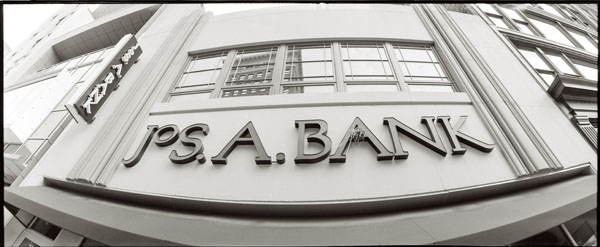
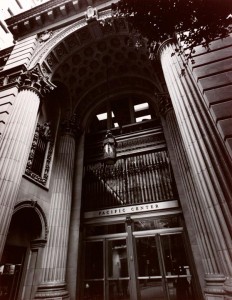
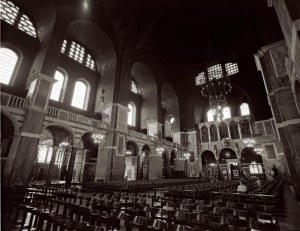
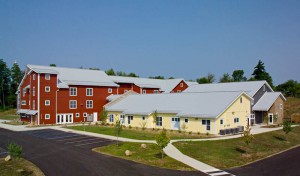
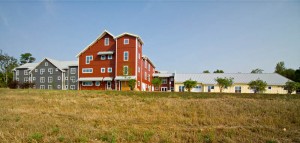
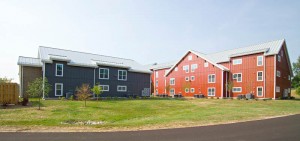
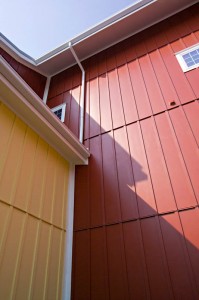
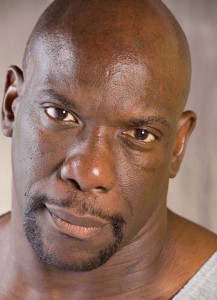
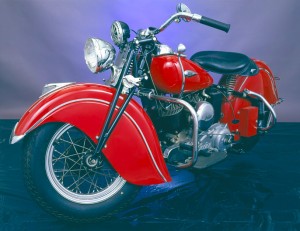
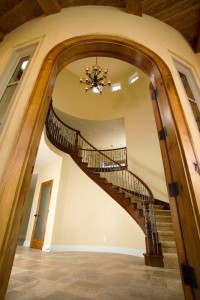
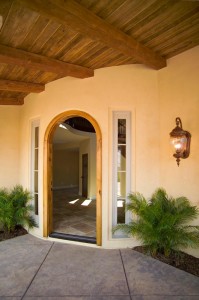
I’m stating a portfolio building class this Tuesday, here in Indianapolis. It will meet at the Central Library at 6:30 pm April 16. As this class goes on it will meet in the studio I’m going to open. I really hope you’ll be interested in this class. I think it is a very good thing to get feedback on your images and to build a group of images that work together. This is going to be a small class, about 10 people, so you’ll want to sign up now. You can contact me by e-mail: john@siskinphoto.com or you can sign-up with PayPal. I’ll be bringing a few shots that will be part of my show at Indiana Landmarks in June. I’ve attached a few of those shots to this blog post. I really think it’s important to hear what others have to say about your images and to learn to talk about photographs.


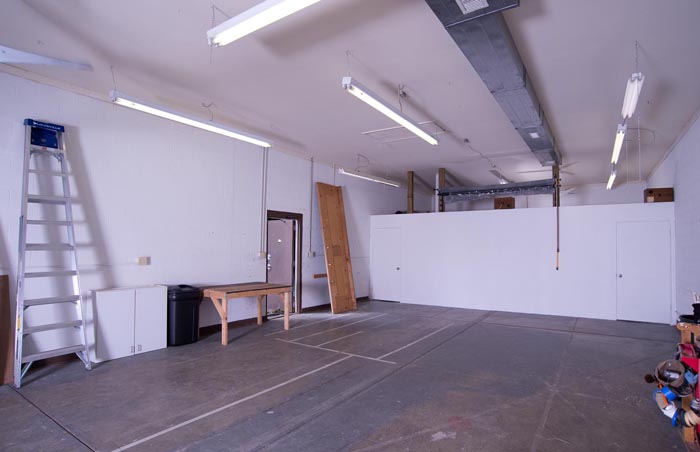
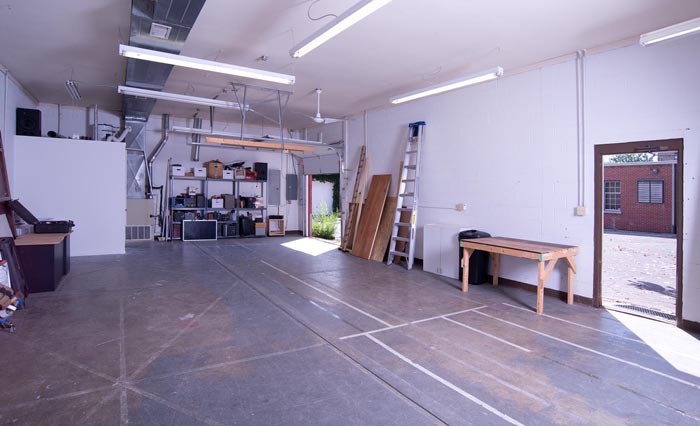
It looks like I’m going to open a studio here in Indianapolis. I hope to actually write a book about the experience, and you’ll be able to see what’s going on here in the blog. Right now I’m looking for the right location. I have a couple of appointments to go searching next week.


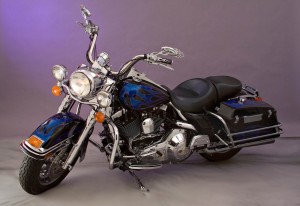
When you want to start a studio the first thing to decide is what you’re going to do in the space. If you’re going to shoot portraits and book weddings you’ll need a studio on the boulevard, whatever the local boulevard is, and you’ll need a window full of portraits on canvas. Of course I have more commercial goals than that, so I want a studio with a cargo door in an industrial park. I expect to need at least 600 sq. ft. of shooting space, and maybe an office and a lock-up area. I don’t expect to ever get a walk-in customer. I would like to be near printers and machinists, as well as graphic artists. I may work with a partner, so I might need another office. A partner drops your costs by 50% which means a great deal. I don’t think I’ll shoot cars, but I want to be able to shoot a motorcycle. I want to keep a low profile. I want to be able to load items into the studio easily. I want people to feel secure when they came to the studio for classes or for jobs.


When I started my studio in Los Angeles, I was in my early twenties, and didn’t have any money. So the choices I made were more about cost than anything else. This was the only choice, but it was a choice that created trouble for the quarter century I had that studio. The location had some problems, but it did have fabulous parking. I can’t really explain how important parking is for an LA studio. Many of the things I built into that studio could have been better. Things like the seamless holders and the rail system I built to hold lights near the ceiling, but the bottom line is that they worked. I wrote this article (www.siskinphoto.com/magazine/zpdf/buildastudio.pdf) a few years ago about building a studio. I expect to do things a little differently now. I will do more articles, and maybe a book, about this new studio.


And don’t forget the books!

Understanding and Controlling Strobe Lighting: A Guide for Digital Photographers
Photographing Architecture

B  Four


Thanks, John


July 9, 2012

About Perspective


I hope you’ll check out my books: Photographing Architecture and Understanding and Controlling Strobe Lighting. I hope you’ll get copies if you haven’t already. Of course you know that one reason for this blog is to sell the book and get you to consider one of my classes at BetterPhoto.com:
An Introduction to Photographic Lighting

Portrait Lighting on Location and in the Studio
Getting Started in Commercial Photography
If you’re in the Indianapolis area there are other opportunities as well. I’ll be giving a lighting presentation at the Indy MU Photo Club on July 12.  I’ll be teaching a class in commercial photography next spring at Ivy Tech.

A short lens for portraits

A longer lens for portraits

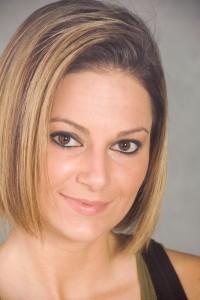
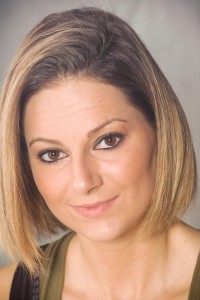
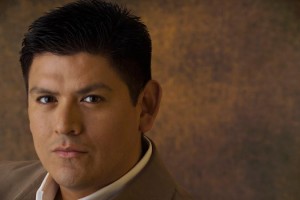
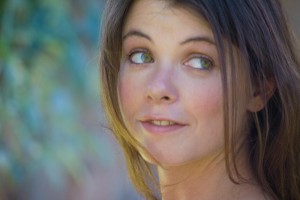
I mentioned in my entry that a photograph is a two dimensional representation of a three dimensional reality. Since it is a representation you can change the way people perceive the subject. If you step away from the subject and use a telephoto lens then the subject will appear flatter, and if you get closer and use a wide-angle lens the subject will seem exaggerated. So the photographer’s position is critical to the way the subject looks. I see too many images where the photographer got lazy and just used a zoom lens, rather than considering the way the subject will be seen. Can you see the difference in the two shots of Jennifer? One is taken with a short lens and the other with a telephoto lens. I think the shot with the telephoto lens looks better. I would normally use a long lens for a portrait. These shots are from my book Photographing Architecture.


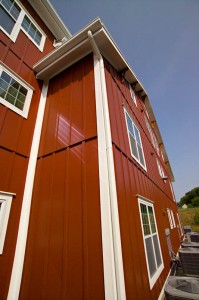
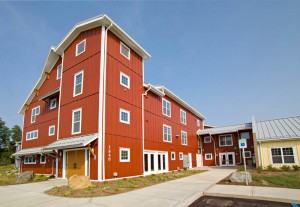
When I shoot a building my goal is to make the subject look more impressive. I start by using a wide-angle lens. I also look for a position that adds shape to the subject. One way to do this is to get close to the subject, and shoot just part of the subject. Another way to do this is to get above the subject. I did these images for a new client CRG Residential here in Indianapolis. You can see that I climbed the hill behind the building for one shot. I was also on a scissor light for a front shot. Lifts are incredibly helpful when shooting building. In this case I got stuck with one of the people from the company at the top of the lift for about twenty minutes. Photography can be so exciting

From the lift.

A straight look at the building

From behind on the hill

Close shot

Close Shot

Close shot


October 31, 2011

New Classes At BetterPhoto!

Filed under: Lighting Technique,Photographic Education,Uncategorized — John Siskin @ 6:27 pm

Some important updates: first BetterPhoto has brought back two of my classes. So I hope you’ll sign up for either Portrait Lighting on Location and in the Studio or Getting Started in Commercial Photography. These classes, particularly the portrait class, were popular before. I hope they will be again. If you want any information on the classes, that isn’t on the links, please e-mail me: john@siskinphoto.com. Of course you can take my other class at BetterPhoto: An Introduction to Photographic Lighting. I’m pleased to say that my first book continues to sell well. Please pick up a copy of Understanding and Controlling Strobe Lighting: A Guide for Digital Photographers. Another update: my second book will be out in February. You can visit the sale page for Lighting for Architectural Photography. Finally I have a fine art book that I made at blurb, please check out B Four.

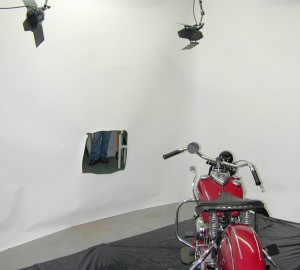
I was evaluating the photo equipment in an old photograph for the Indiana Historical Society. There’s an old 8X10 stand camera and a 4X5 and so on, but I found the lighting set up kind of interesting. Now, if you looked at the shot, you’ll know that it’s impossible to be sure of everything that is going on in the set up. But it looks like there is an opening cut for a vignette in a white wall half way down the studio. The wall has to be lit from the camera side in order to keep the vignette white. It looks like some clamp lights were added at some time to help with this. The subject would be lit from behind the wall. This got me thinking; because it is similar to the way I light motorcycles. I want to try lighting the back side of a wall, as I would with a motorcycle, and then bounce the light into a human subject. As with the motorcycle shot I would use white seamless paper for the wall.

Click on the shot for an article about lighting motorcycles

It’s cheap and much easier to work with than drywall. I would probably use two strobes pointed at the wall. It would be good to keep any direct light from these strobes from falling onto the subject. This should create a very soft even light, virtually shadowless. You could vary the lighting somewhat, by changing the brightness of the strobes behind the wall, and by changing the placement. This should do a lot of what people expect from a large ring light. As a lot of my students know a ring light doesn’t really create shadowless light, except when you are extremely close to the subject. In general a lighting set up like this won’t give you much sparkle, or a catch light in the eye, but it could give shape and make most fabrics look great. So maybe a bare bulb, or a light behind the subject would work well as a third light. I haven’t had a chance to work on this, so I’ll be interested to see if anybody, who reads this blog, does an experiment. I would keep the hole in the wall close enough to the camera, and big enough, so that there won’t actually be a vignette. I would guess that the close wall would be 3-6 feet from the camera, and there would be at least 8 feet between the walls. I don’t think I would try to add much hard light to the shot. It would be much easier to design a shot with hard light using the light panels, because they are much easier to move around. Any really large light source, which will create shadowless light, is pretty flattering to persons with skin issues.

I’m thinking about some workshops for next year. Please let me know what would interest you. Thanks, John
BetterPhoto.com, The better way to learn photography

December 5, 2010

Strobe Projector 1

Filed under: Do It Yourself,Lighting Technique,Uncategorized — John Siskin @ 1:37 pm

So here are the shameless plugs at the beginning of this blog. My book Understanding and Controlling Strobe Lighting: A Guide for Digital Photographers is on Amazon.com. It got as high as number 15 in photographic lighting books! And there was much rejoicing! But is is dropping now, so you need to buy a couple of copies for holiday presents. Here is a sample chapter. Of course I still hope that you will consider purchasing my fine art book B Four: pictures of beach, beauty, beings and buildings. Frankly purchases of this book mean a lot to me, and it is also a fine gift for the holidays.  As you know I teach for BetterPhoto.com. I really hope you’ll sign up my class:  An Introduction to Photographic Lighting. Sign up are very good this month!
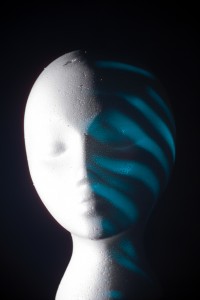
A projector light source can create wonderful special effects!

Light comes off of a small light source, whether light bulb or a strobe tube, in all directions. People don’t generally like this effect, regardless of where it happens. So you don’t see many living rooms lit by a 60-watt bulb hanging from a wire. There are two basic ways photographers modify light to make it more useful. First, we make the light source bigger so it is softer. We might do this with an umbrella or a light panel or a soft box. These devices light the subject from more angles because the light source is bigger, so the light is softer with longer gradation. The other thing we do is to shoot light onto a smaller part of the subject. We might use a grid spot or a snoot to do this. Of course there are any number of small strobes, like the SB 900 or the 580 II EX that retain the effect of a small light source and spread the light over only the area you want to photograph. Often the results of this are grim, but perhaps we’ll get to that issue another day.
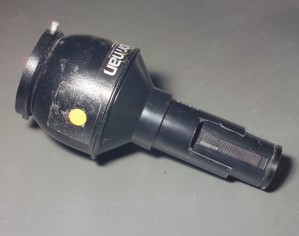
This projector fits onto a Norman LH2400 strobe head

There is another way to control light, which can offer very special effects. We can use a lens and project the light. This enables us to put light in a very small area of a shot, or put light with a very sharp edge into a shot. This means you could make a spot that was only a millimeter across or make a spot, or pattern, with a hard edge. You can also project images into a shot. There are a couple of ways to do this, but there are also significant challenges. A few years ago I wrote an article about doing this with slide projectors. This worked extremely well with film cameras. This was so because there were few
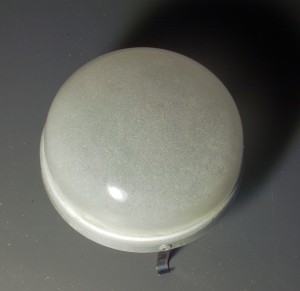
This glass dome evens the light from the strobe tube, very helpful!

issues with very long exposures and you could do double exposures easily. I still use the slide projectors, but they just aren’t as useful with my digital camera. If you have a slide projector you may want to do some experiments to see how suited they are to your camera.

I have often wanted to use a strobe as the light source for projecting an image. There have been devices made to do this, but most of them were designed to project backgrounds. This is not a useful as it once was, because it is easy to drop in a background with Photoshop, while it was very challenging to do this with film. I am not very interested in projecting backgrounds, but am interested in projecting light onto a
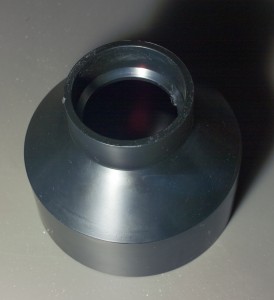
This pipe reduces the reflector diameter to the diameter of the projector tube.

person’s face. Norman makes a device called a Tri-lite, which is priced at almost $1400 on the last price list I have. The Tri-lite is a strobe-powered projector. They are often available used for less money. I should mention that you would also need a Norman 900 series power pack with the Tri Light, as it won’t plug into the wall. I used one occasionally when I shot film, and the light output was too dim for most purposes. However, I am sure a Tri-Lite would be powerful enough to be useful with many digital cameras.

There is another option, a projection box. Dean Collins introduced this design. Basically it uses a relative small aperture, or hole, between the strobe and what you’re projecting. It isn’t particularly
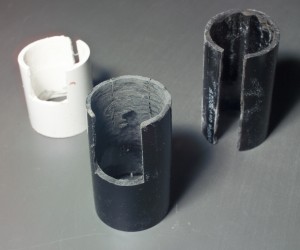
Projector tubes

I made several versions of the projector tube before I got one that worked. The one in the center works pretty well.

sharp. The thing you’re projecting should be large, at least 4X5 inches. And it doesn’t create a lot of light. So I never got around to building one of these, but you can probably find plans on the web. There was at least one commercially available device built on this plan. There are also some specialized snoots that can project, but again without much sharpness.

I thought about building a projector for some time, but I thought in terms of a slide projector with a strobe behind it.

The problem is that a slide projector

is really quite complex, so my ideas were
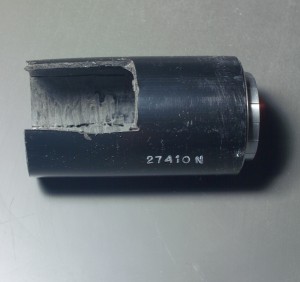
Projector tube

The projector tube. You can see the series 7 filter holder on the back fo the tube

impractical.

Recently I found myself thinking about an enlarger rather than a slide projector, and enlargers are basically simple. An enlarger is a light source, a diffuser, a negative carrier and a lens that focuses. No mirrors, no condensers and no auto-focus.

Before I discuss the device I built I have to mention a couple of things. First, never, and that means under no circumstances, use a Dremel tool without safety glasses. You shouldn’t use any power tool without safety glasses, but this is particularly true of Dremel and other power carving tools. Second, this
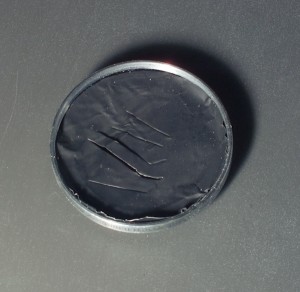
This is the holder I uses for cookies and for slides. Cookies are used to make patterns.

projector captures a lot of heat, so you it is best not to build it for any strobe that doesn’t have a fan, that means most or all mono lights, including Alien Bees and Calumet Travelites. It is possible you could use this device if you didn’t use a modeling light, but I don’t think so. If you do build something based on these ideas please let me know how it works for you. This week I am going to discuss the general details and show pictures of some of the construction. In the next blog I’ll discuss more details.

The strobe I used is a Norman LH2400 with a fan. This strobe only works with a Norman power pack. I have a lot of these strobes, so if something went wrong I could afford it. I used a
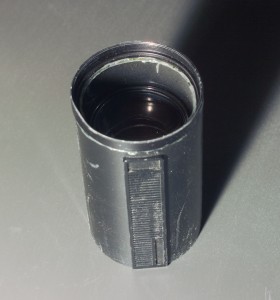
This is a Kodak projector lens. I attached a 52mm filter thread to make it easier to mount filters.

Norman 5 inch reflector and a Norman Diffusion Dome. The dome fits inside the reflector and makes the light even. Which is important. Basically these two items make up the light source of a diffusion enlarger. Then I went to the plumbing section of a home improvement store. I got some 2.25-inch external diameter PVC and a step-down pipe that steps a large pipe down to a small one. The large side has an external diameter of 5 inches so it fit into my Norman reflector and the other end held PVC pipe with an external diameter of 2.25 inches. I painted the inside of the step-down pipe white with high temperature paint. I used the high temperature paint because heat is a problem. I cut a nail down to about 1/2. I made a hole to insert the nail from the reflector into the step-down pipe. This keeps the adapter from
Fun with lights! Come back soon for more details.

falling out of the reflector. I then made some cuts in the 2.25-inch pipe to accommodate a 4-inch focal length lens from a Kodak projector. This is a good lens for this project, as it is inexpensive and pretty bright. The focus on this lens can be adjusted by moving it inside the 2.25-inch pipe. I ground out the back of the pipe so that a series 7 adapter would fit inside. This holds the material to be projected. More details on this next week.

You can’t leave the modeling light on, even with the fan on this strobe. But you can use it to position the light. Because the light is so detailed, this is important. I’ll have more details of construction and samples from the new light next week. I hope with different models.

I still offer a class at BetterPhoto, I hope you’ll consider taking it: An Introduction to Photographic Lighting And please consider my book: Understanding and Controlling Strobe Lighting: A Guide for Digital Photographers.Have a wonderful holiday season!
BetterPhoto.com, The better way to learn photography

September 5, 2010

Controlling the Viewers’ Eyes

I’ve written several times about making and taking photographs. My main goal in making a photograph is to keep the viewer engaged with the photograph. If a person looks at an image and says “picture of a motorcycle” and moves on, you haven’t really got any attention. If they look at the shot, and spend time staring at the motorcycle, that’s much better.

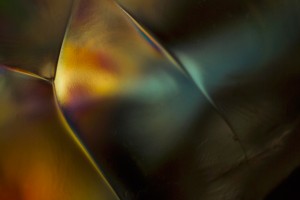
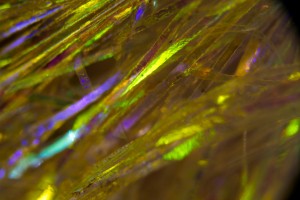
One of the ways to keep a viewer engaged in a shot is to give them color and line and shape, but not give them a recognizable object. I enjoy making images of this sort. As you may know, from this blog and my magazine articles, I make a lot of abstract images with the microscope.  I was asked to participate in a show last week, and I will probably bring these abstract images.

There are other ways to keep the viewer engaged. One is to place the subject on the left side of the frame, since the viewer’s eye often enters the frame from the upper left it is a good idea to have the subject near that corner of the shot. The eye starts in this corner because this is how people are taught to read English, I have had students who learned to read in the opposite direction, and they seemed to frame in the opposite direction way. Still, people often shoot the subject on the right side of the frame. They scan from the left finally find something on the right and hit the shutter. People could make better pictures if they took more time to re-frame the image.

Another way to influence the viewers’ eye is the use of sharp focus and soft focus in the image. Since the eye is looking for a subject it will naturally look for the sharpest areas of the image. The eye will also look at lighter areas of the image, so you can use these ideas to make better portraits, product shots and even action shots. You can manipulate the focus in an image after you shoot it, with Photoshop or another image manipulation tool. I also like doing this in camera. I use depth of field, dragging the shutter or panning the camera to give different effects. Depth of field is the area that is in focus in front of and behind the actual point where the lens is focused. The amount of distance, that is in focus, is changed by the aperture: a smaller aperture gives more depth of field and a larger aperture gives less. So a wide aperture would allow you to use depth of field to isolate the subject of your shot. There is more information about the aperture in an earlier blog entry.

Shutter drag, or dragging the shutter, is a way to mix the instantaneous light from a strobe with a long exposure of the ambient light. This gives me a chance to mix the image from instant and continuous light. The process of dragging the shutter is less controllable than some of the effects I use so it is good to shoot a lot of frames if you do this. Basically the idea is to use a strobe, which is only on for about 1/1000th of a second, and a long exposure for the ambient light, say a 1/4 second. I have often found this technique effective for shooting people working.

You also use a long exposure for panning. The idea is to move the camera along with the subject. That way the subject is sharp but the background is blurred. As with the shutter drag this doesn’t always work, so you need to take a lot of shots. This is also easier with a range finder camera, since you can see through the viewfinder when the shutter is open.  With a dSLR the viewfinder is black when the shutter is open.

Of course there are other ways to accomplish soft and sharp focus, maybe we’ll get to some of them next week. One thing I’m doing different this week: I the links are connected to copies of the images at BetterPhoto. I really don’t know how well this will work for non-members, so if you can’t use the links please let me know.
My article on strobe power is in the current Photo Technique Magazine. I hope you’ll get a copy.
Please consider taking one of my classes, or even recommending them. I have three classes at BetterPhoto:
An Introduction to Photographic Lighting
Portrait Lighting on Location and in the Studio
Getting Started in Commercial Photography

BetterPhoto.com, The better way to learn photography

August 28, 2010

Art and Craft

Filed under: Looking at Photographs,Photographic Education,Uncategorized — John Siskin @ 5:40 pm

When I was in college I used to have arguments with my roommate about whether or not photography is an art. Neither of us were armed with the history of this argument, so no direct hits were scored. If you find this argument interesting you might want to study Alfred Stieglitz, who argued the topic with the Museum of Modern Art in New York.
Today, as I have in the past, I want to discuss the craft of photography. Craft is something you can discuss in a more objective way than art. I don’t think I would want an artist to frame my house, but I would want good craftspeople framing my house if I was building one. One of the key aspects of good craft is that it can perform to a plan; art often doesn’t do that.
One of my favorite artists is Man Ray. When I first saw reproductions of his work I thought he had great ideas and poor craft. Over the years I bought better quality books and saw original work. I realized that I had been wrong. He was a consummate craftsman. What I didn’t see at first was quality because of poor reproductions, and the experimental nature of his images. Experimentation allows an artist to walk into the unknown. Continued experimentation allows the artist to map the area. The map really allows the artist to add craft to the experiments. For instance Man Ray’s work with solarization is the best I have ever seen. There are many images that I can’t explain, because I don’t have that craft.
I teach classes at BetterPhoto.com, as many who read this blog regularly know. I am not trying to teach art. I try to teach craft, and frankly I am often frustrated. In order for a person to learn craft they must practice, build their own map. In one of my classes: An Introduction to Photographic Lighting, I tell people how to build a kind of a lighting laboratory. They can run their own experiments in this environment. I can tell when a student has really experimented and when they just did a shot. I wish that I could find a way to get more students to do more experiments; there is so much to learn. I know that many people present lighting as do this and this and you’ll get great results. I call this cookie-cutter lighting. If you are going to be good you need your own map. You need to know how to build a custom environment for each subject. This is the attitude of a good craftsperson and an artist.
The greatest advantages of digital photography are in this area of practice and mapping. A digital camera will allow you to practice for free; you couldn’t do that with film. Your results from digital are available instantly, and film wouldn’t do that either. So we should be seeing more good craftspeople ant ever before.
I wanted to add something from the book on interior photography I’m working on. I think it also has bearing on this discussion.
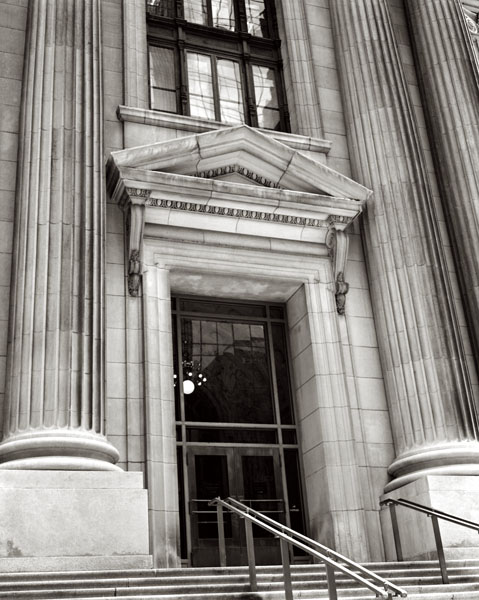
“When I started doing photography I thought there was a rule book. Of course I didn’t have a copy of the rules, and I didn’t know where to get a copy. Frankly I had the same idea about things other than photography. I went to school for a long time, they taught me a lot of rules, mostly about things that didn’t matter. There are supposed to be a lot of right ways to do things in photography, and there are. But they are the right way to do a particular thing for a particular reason. So in this chapter we’ll start with a picture that is taken from a wrong angle. The client is very happy with, I’m very happy with it, in fact I use it on some of my business cards.


This is a picture of the same doorway taken from a more usual angle. Both are good pictures, but one is much more dramatic.”


I teach a class in commercial photography , as well as classes in lighting and portraiture at BetterPhoto.com. I hope you will check out the classes soon. My first book: Understanding and Controlling Strobe Lighting: A Guide for Digital Photographers will be published in the fall you can pre-order it. I have a new magazine article coming out in September about strobe power. You can see it in Photo Technique Magazine.
Thanks, John

« Newer Posts

Powered by WordPress