And I am continuing the shameless plugs at the beginning of the blog. My book Understanding and Controlling Strobe Lighting: A Guide for Digital Photographers is on Amazon.com. The wonderful folks at Shutterbug magazine are printing a 3 page excerpt in the next issue. Please pick up the magazine. Here is a sample chapter from the book. Of course I still hope that you will consider purchasing my fine art book B Four: pictures of beach, beauty, beings and buildings. Frankly purchases of this book mean a lot to me, and it is also a fine gift for any occasion. As you know I teach for BetterPhoto.com. I really hope you’ll sign up my class: An Introduction to Photographic Lighting. Sign up are very good this month!

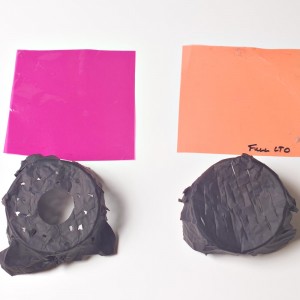
I used a Rosco CTO for the background. The light came from a snoot which was covered by a piece of cine foil with cuts in it.
I’ve continued to work on the projector powered by a strobe. The results have been very effective, as I demonstrated in the last blog entry. While the strobe projector is very effective for putting light or an image onto a face, it isn’t giving me as much ability to control background light as I would like. People used to project images behind a subject before Photoshop. Now, it’s easier to drop in a background, after the shot, using Photoshop. However it is really good to be able to add color and dimension to a muslin or canvas background. You can change the background color easily this way and make the background lighter or darker in different parts of the shot. The strobe projector I built isn’t really bright enough to do a change a background unless
the light on the subject is very low power. You can do this, but it isn’t what I really want. I am hoping the strobe projector will show up in a magazine article soon. For the background on this week’s shots I have been putting cine foil over my snoot and cutting various openings. I am attaching a picture taken with a piece of cine foil with straight cuts, which has a warm filter. And there is another shot using cine foil with several holes in the foil. This second shot has a magenta gel, which makes a very saturated background. Of course both shots are made on a simple mottled gray muslin background. This is really a fun way to change the background. I should point out that it only takes seconds to change the cine foil and/or the
colored gel.
For these shots I used a strobe set at 250 watt-seconds pointed into a 45 inch umbrella with a black back. This was the light for the subject. I used a gold reflector on a light panel frame on the opposite side of the face. I also used one more panel, with a black cover on it, behind the umbrella. This reduced white light spilled on the background. If you get light from the umbrella on the background it will mix with the colored light and reduce the saturation. The strobe in the snoot had 1200 watt-seconds when I used the CTO gel and the foil with the cuts in it. For the other set-up, with the magenta gel, I used 800 watt-seconds. The camera was set at f8 and ISO 100. This really works much better than my tests with the projector light. In the tests with the projector the aperture was at f5.6 and the power was set at 2000 watt-seconds, and the background was still to dark.
I hope you’ll suggest my BetterPhoto class An Introduction to Photographic Lighting to other photographers you know, or perhaps you’d like to give it as a gift? Amherst media sent me the cover for my second book, you can see it above, of course you can still look at my first book on Amazon . Also if you look at the March issue of Shutterbug you’ll find a three page excerpt form my book. I am so pleased that they did this.


