Photo Notes A place to talk about making images.

December 7, 2014

Do It Yourself!

Filed under: Basic Photo Technique,Do It Yourself,Uncategorized — John Siskin @ 4:07 pm

My books and my classes give me a reason to keep doing this blog. If you’re in Indiana I hope you’ll consider taking my Portfolio Workshop. You can see a little more information about this workshop if you check out this blog post. Thanks so much for your attention.

As the faithful readers of this blog will know I updated my website a while back. I wanted the site to appeal to commercial photography buyers. So, for instance the site is designed to work on a desktop computer rather than a phone. It’s been working out for me, perhaps because of the changes, or maybe because I’m using Adwords from Google. Regardless I’ve been getting a few jobs from new clients, which is great. I’ve added a couple of recent pics to this blog entry.

_DSC5850

One of the things I didn’t put back on the website is the Do It Yourself page. Frankly I really don’t want to encourage my clients to do it themselves. So I thought I would put links to some of the stuff that was on the page here. Don’t hurt your hands clapping. These aren’t all my designs, but they are things I use. My favorite project is the Chain-Pod. It’s easy to build and really useful. It helps to steady your camera when you don’t have a tripod or a monopod. And it fits in a pocket. Check it out!

_DSC6269 copy

You don’t have to actually build anything to use the Booty Light. It’s just a cover for your flash, but it really works!

fdc1S

If you came to my studio you’d see a lot of Light Panels. I use them a lot in the studio, more than softboxes. They are really great tools for modifying light. You can change the size and character of a light much more than you can with a softbox or an umbrella. There are a lot of plans for light panels. I like this plan because they have feet.

_DSC4070

Here’s a plan for a Monopod. It’s probably not as good as one you can buy, but I think it cost less than $5, so it’s not a big investment.

_DSC4189

I like using this Computer Table on location. It’s simple to build and it’s very helpful if you’re tethering your camera to a computer.

_DSC6205v-2 copy

I like this Modified Umbrella for quickly lighting a room. It’s designed after a table lamp and it works very well.

_DSC6236

There are a few other projects at this link, including several cameras I’ve built. I’m not sure these really come under the heading of Do It yourself, as you might not even need these cameras, but I really like them. This article has a lot of information about the cameras & lenses I’ve built.

I’ve been mentioning my classes at BetterPhoto since I began doing this blog. I’m sorry to say that BetterPhoto has discontinued their interactive classes. I’ve really enjoyed working with BetterPhoto, so I’m sorry to see this happen. I may have a version of my classes at my website soon. Please look for it.


September 23, 2014

One On One Photography Workshops!

A lot of class promotions start with the term: learn at your own pace. I’m offering you an opportunity to learn at your own pace, one on one, with the instructor. You choose the material we’ll go over. I provide the studio, the equipment, heck I might even buy lunch! Here’s the deal: A day in the studio with me. One on one. Pick a day. Pick the material. You set the pace. While we could discuss anything I think we should stick to photography, since that’s the subject I usually teach. This is a fabulous deal, and it will only last a short time. Just $425 for the studio, the equipment and me! Keep in mind the studio generally rents for $200 a day, so the studio, the equipment and me is a fabulous deal.

Some people have had schedule problems people with past courses, but now You Pick the Date! I hope we’ll have at least six hours together, but the class will fit your schedule. We could even do a second day for just a little more money. Let me know what you want to learn and when you want to come by. Also if you’d like to bring another person we can arrange that for a little more. Of course there’s no extra charge if you want to bring a model.

For my portrait class at BetterPhoto.com

For my portrait class at BetterPhoto.com

Now I know that you wouldn’t want to spend a day in the studio with just anyone. So I have to tell you about my accomplishments. Anyway I do this it’s going to sound like I’m blowing my own horn, but here goes: I was 15 when I had my first photography job, as an assistant to a commercial photographer in Los Angeles. His name is Steve Berman and he also taught at one of the best photography schools in LA: Art Center. I learned a lot! In the more than 40 years since then I’ve worked as a photographer and taught photography. In Los Angeles I’ve shot for Disney, Munchkin and General motors as repeatedly. Since I’ve moved to Indianapolis I’ve shot for the Hilton, BMW Construction, Mid West Studio and more. I’m currently teaching three classes at BetterPhoto.com: An Introduction to Photographic Lighting, Portrait Lighting on Location and in the Studio, and Getting Started in Commercial Photography. BetterPhoto has sent me students from all over the world. I’ve done two books for Amherst Media: Understanding and Controlling Strobe Lighting: A Guide for Digital Photographers and Photographing Architecture. Both are available from Amazon and also local camera stores. I’ve done a couple of dozen articles for photography magazines including Shutterbug, Photo Techniques, Studio Photography and View Camera. You can learn a lot more about me by visiting my website: www.siskinphoto.com. You’ll find most of my articles on the magazine page at my site. Of course I’ll answer any questions about my experience, just call 317.473.0406 or e-mail to john@siskinphoto.com

I also want to introduce you to my studio, because it is a terrific place to experiment and learn. I have more than twenty strobes, including a strobe powered projector! There are another half dozen quartz lights, various types. In addition there are umbrellas, light panels and soft boxes, even a ring light and a beauty dish. So you’ll have the opportunity for hands on learning with any equipment you might want. The shooting space is 24X45 feet with a 12 foot ceiling. Of course we could also arrange to do a location shoot, even an architectural shoot.

Shot of the Irving Theater for a workshop in Indianapolis.

Shot of the Irving Theater for a workshop in Indianapolis.

This is a custom learning opportunity. You can choose the material we cover. Here are some ideas, these can be a class or a starting point: How Light Works, Portraiture Lighting, Product Lighting, Shooting Jewelry, Commercial Photography, One Light Shooting, Location Shooting and whatever else I can help you with. For many subjects we can begin with a structured program or we can experiment and discover together.

Shot with a group of Ivy Tech students in my studio.

Shot with a group of Ivy Tech students in my studio.

The price for your day in the studio is just $425.


Remember you can choose a date that fits your schedule.
Shot with a class from The Learning Tree University in Los Angeles

Shot with a class from The Learning Tree University in Los Angeles

The pictures are from workshops and classes I’ve presented over the last few years.

If you’re in Indiana I hope you’ll also consider taking my Portfolio Workshop. You can see a little more information about the Portfolio Workshop if you check out this blog post .
 

Please visit my site to see my other workshops and to check out the Free On Line Classes!

July 6, 2014

Changing Your Way of Seeing

My books and my classes give me a reason to keep doing this blog. If you’re in Indiana I hope you’ll consider taking my Portfolio Workshop. You can see a little more information about this workshop if you check out this blog post . I’ve listed my BetterPhoto classes at the end of this post. Thanks so much for your attention.

Frame 16

I see as a photographer, constantly breaking the world into still images. I think that most people who spend a big chunk of life doing photography see a little differently from people who aren’t involved in static art forms. I’ll look at something and think: “I’d shoot that, maybe a little warmer and with more contrast” or maybe: “That was a really great instant” and: “Look at that design.” I think this is part of being a good photographer. I once heard a guy say that he always adjusted a TV to look like Kodachrome, since that was the way he saw the world. Of course this illustrates one of the problems with this way of seeing: you start to see everything the same way. I’ve been known to walk by an interesting subject while thinking that’s not the kind of shot I do. I often make my shots warmer, even my black and white shots, but I can’t remember the last time I made a shot cooler.

Frame 22

So I’m always looking for ways to break out of my way of seeing. I know that many people want to have a style, but not me. I’m a photographer, not a painter, so I can be prolific and do work that’s new. I want to push myself to see in different ways. One of the ways I do this is to work with different tools: cameras, lenses and software. I just got a Horizon Perfekt, which is really helping me to see differently. This camera shoots a 120º image, horizontally anyway. It’s really different from other wide-angle images because the lens actually moves during the shot.Frame 12


I shot with a Koni-Omega camera last week. It’s a medium format film camera. This is a manual camera with range finder. Shooting it reminded me of the acronym FAST: Focus, Aperture, Shutter and Think. I think that my digital camera has allowed me to get a little sloppy with technique. Of course shooting with a new camera is not the only way to open yourself to new ways of seeing, but it can be fun as well as enlightening.

Frame 15

I got an 11X14 camera recently, but I haven’t shot with it yet. I still have to build a lens board and order some film, but it should be a quite an experience. Whenever you work with a very large camera the difficulties increase and so does the expense. But if 11X14 is anything like 8X10 getting a good result will be really fun. Sometimes just getting a good exposure can make you feel great. There’s another practice tool I want to work with. I have an old Spiratone 400 mm f6.3 lens. I’ve really only used it a couple of times because I’m more interested in wide-angle lenses. But in an effort to expand my vision I’m going to put in on the digital camera and start shooting. Who knows how that will affect my seeing? By the way I’ve included a couple of panoramas from the Horizon camera and one more from the Koni-Omega. Also I recently updated my website so you can get an idea of how I’m seeing now. Please check it out at www.siskinphoto.com

Of course there are other ways of expanding your seeing, like taking a BetterPhoto course. Here are the three I teach, perhaps you’d like to take another one or share them with a friend.
An Introduction to Photographic Lighting
Portrait Lighting on Location and in the Studio
Getting Started in Commercial Photography
One other note about BetterPhoto: I’ve been in the habit of sending out a private note to all my former students at BetterPhoto (Almost a thousand people!) each month. There’s some sort of hang up in the e-mail system for thst so, for a while anyway, I won’t be sending that note. I hope no one is too disappointed.
Thanks,  John


June 16, 2014

Portfolio Workshop January 28th, 2019!

The last Portfolio Workshop went really well. Why not join us  for the next one? We’ve been doing this for a couple of years now, and we’re getting quite good at it! We’ll meet on January 28th at 6:30pm at my studio in Downtown Indianapolis. Read on for more details.
Making photographs might be a solitary experience, but as soon as you’ve made a photograph you’ll want to share it. As you gain experience as a photographer you’ll want to share your photographs more broadly, beyond friends and acquaintance. Of course you’ll be concerned about how other people perceive your work, or at least I hope you will. If you want to present your images to galleries or contests or businesses it’s important to learn how other people see your work. Frankly it’s quite difficult to learn this on your own. I’ve learned this for myself. When I look at my shots I remember the circumstances of the shoot, and this always colors my perception of the shot.

Mosaic

The above shot is a good example I made this shot for a hotel in Beverly Hills. The owners of the hotel and the designer weren’t ready for the shoot and there were other problems. So, while the shot is good, I didn’t put it on my website for quite a while because I remembered the problems when I looked at the shot. So choosing photographs to show is very difficult. When I do a shoot I have certain reasons for the shots, the reasons may be commercial, personal or something else. Because the first time I edit the shots the choices are based on the reasons I did the shoot. I sometimes miss a shot that has other possibilities. This is why I go back to older shots and review them again. That even happened with this shot:

What?


The purpose of the Portfolio Workshop is to help you develop skills for editing and presenting your shots. There are different ways to present your portfolio, and presentation is important. I’ve seen a lot of people who only have digital versions of their portfolios. While a digital portfolio is good, I think you might also want a print portfolio; for one thing it helps you sell prints. More important you want to show various ways of presenting images to your client: digital, website print and more. These tools may be important to a commercial client. For instance I had a high end landscaping client that showed very large prints to potential buyers. He told me that he was going to be landscaping a couple of acres of land and you just couldn’t present that with a 4X6 inch print. Of course he knew he needed really good photographs if he was going to show prints that big. I have a 16X20 inch portfolio that I present to architecture clients; it’s been quite successful. I have a couple of portfolios on my tablet and even a few pdf portfolios my clients can see on line: www.siskinphoto.com/aportrait.pdf and www.siskinphoto.com/aarch.pdf. In the workshop we’ll be talking about the most effective ways of sharing our work. We’ll also talk about how to get people to look at our work. The shot below is in my16X20 portfolio.

Mark David

There’s a lot more to this workshop than listening to me pontificate about someone else’s photographs. This is a small group and everyone is encouraged to participate. The idea is to see how several different people react to your images. One object of this workshop is to develop a supportive environment where you can get detailed feedback about your images. Another object is to develop everybody’s skill communicating about images. This is always challenging to photographers because few photographers have a background in design. When you can better describe why an image works you’ll also create better skills designing and building images. Of course we’ll also share technical information about making images, but, in this sort of workshop, technology is secondary to developing our design skills.

I’m asking participants to bring two images to each meeting. This way everyone will get a chance to have an image reviewed and to comment on other people’s images. I’m sure there are people who would like to have just their portfolio reviewed rather than be part of this workshop. I certainly do portfolio reviews, but they cost more than $20. A portfolio review is static, this workshop will help you develop your skills as a photographer over time and build great portfolios. The Portfolio Workshop is a live experience. It meets once a month in my Indianapolis Studio.

You can start attending this workshop with just a few images. We meet once a month so you’ll have the opportunity to create more images for your portfolio and bring them to the workshop. You can use the workshop experience to help you decide what kind of a portfolio to develop, or you can develop several portfolios at one time. I’m always working on several sorts of images at the same time. I encourage everyone to participate, by bringing images and by giving feedback to the other participants. Sign up at the Workshop Page on my site. Please join in!

You can get my books through amazon or other booksellers.

Please visit my site to see my other workshops and to check out the Free On Line Classes!

October 30, 2013

Studio Open House!


To start I just want to remind you about the classes: An Introduction to Photographic Lighting, Portrait Lighting on Location and in the Studio and Getting Started in Commercial Photography and the books:


I’m going to be having an opening for my studio on Friday November 1. The address is 971 North Delaware Street, Suite B, here in Indianapolis. Please come by if you can. I’ll be showing photographs of buildings in my studio and at the building in front: Re/Max Metro. The text for this blog entry is from recent correspondence and the photos are from a job for BMW Contractors. Thanks for your attention!


A couple of things about rim light, first most of your shots won’t work. Positioning the light is very critical, and even when you have an assistant, most of the time the light or the model won’t be in the right place. I much prefer the snoot as a tool for rim light. Norman has a wider “stovepipe” snoot that I prefer to the smaller ones like the Alien Bee. What I do most of the time to get rim light is put a bare bulb strobe, no reflector at all behind directly behind the subject. This works more often. This will put light on the background so sometimes I put a gel on the back of the light to change the color of the background. The position and power of the light both affect the outcome, so you have to experiment. I like to avoid discussing things in terms or ratios for several reasons: the most important is that ratios stop people from paying attention to the results. I set up my shots with a tethered computer so that I can evaluate the shot better. The bare bulb allows for more movement in the subject, but you have to keep the subject between you and the light. You can also use a large reflector on the side to bring some of the light to the front.


I really like to use at least one very large light modifier, usually a light panel, for a portrait. It creates a very soft gradation.

I don’t like the term “natural light.” It is a value term, and it often gives the idea that ambient or found light is generally or always better than light you design and create. This isn’t true. Many people have no idea how to make good light, but that is no reason to think that found light must be better. Photography comes from the Greek and means “write with light” if you can’t design good light are you writing with light or copying light?


You need to look at several things when you examine light. The first is the color. Often people don’t notice how warm or cool a light source is. The color of a subject will shift with the light, but because our eyes compensate for color, we don’t always notice.


The transition from light to shadow is a function of the size of a light source. So if you have light from the sky coming into a room you get a large light source, very long transition from light to dark. You need a big light source, at least as big as a window, to reproduce this light. Hard light makes very short transitions, which look like sunlight especially if you add warm filtration to the light.


Watch a person’s eyes in prints or when you are shooting. You can often see the reflection of the light source there. A small reflection come from a hard light, a bigger reflection is a large light source. The large reflection won’t be as bright. The eyes can also tell you about the placement and direction of light sources.


Balancing light is the essential trick with strobes, to evaluate and change our images by searching for the right levels on our lights and our exposures. With the histogram and the proof image on camera or in the computer we have better tools for creating the right exposure than any meter could give us, but it does take repeated testing. If you use a hand-held meter you will get an answer, but very often it will be profoundly wrong.


In addition to the new image stabilization equipment, there are some standard suggestions about holding the camera more effectively. Cradle the lens in your left hand, thumb pointing away from your body. The left hand supports the lens and the camera. The right hand guides the camera and controls the camera. Relax your body and breath out half way when you shoot. Lean against a tree or a wall. You might also consider a mono-pod or a chainpod to help stabilize your camera.

I hope people are interested in these posts, but I really don’t know. If you want to leave a comment you have to log in. I’m sorry about that, but I was getting a huge amount of spam posts, so I had to change to registration. If you’d like you can send me an e-mail with your comments, john@siskinphoto.com. Also please remember the classes and the books!

An Introduction to Photographic Lighting
Portrait Lighting on Location and in the Studio
Getting Started in Commercial Photography.


May 30, 2013

Print Types

I hope you’ll check out my books: Photographing Architecture and Understanding and Controlling Strobe Lighting. Please get copies, if you haven’t already. Of course you know that one reason for this blog is introduce the books and get you to consider one of my classes at BetterPhoto.com: An Introduction to Photographic Lighting, Portrait Lighting on Location and in the Studio, Getting Started in Commercial Photography

The second portfolio class was great. Please let me know if you want to be on the mailing list. Here’s some more information the next meeting is Tuesday June 18, 2013, 6:30 pm. We may be meeting at my new studio. Stay tuned for more about that! The class is a great opportunity to make a greater commitment to your work and learn more about how others see your work. Still only $20. I look forward to seeing you if you’re near Indianapolis.

I’m going to discuss the kinds of prints I’ll be using in my show at Indiana Landmarks. The opening is on June 7 at 6pm. I hope I’ll see you there! For more information check this link. Most of the images in this week’s blog are going to the show at Landmarks. Please keep in mind that images on your screen aren’t good representations of what real prints look like. The images are linked to the fine art part of my website, which you can use to buy a print. The prints available on my website are made on the Moab Entrada rag paper discussed below.

I’ll start with silver gelatin prints because in many ways they’re my favorites. These were the most common black and white prints for most of the twentieth century. The black part of the image is silver and the emulsion is made of gelatin, which is probably the reason for the name. One of the most beautiful aspects of these prints is the bright whites created by a layer of barium clay called baryta. This layer is on most prints made on a paper base, usually called fiber based paper. This layer was replaced by a titanium layer when resin coated papers were introduced. I think resin papers aren’t as beautiful because they don’t have the baryta layer.

Fiber based silver gelatin papers are still available ready to use. The prints are exposed in a darkroom with an enlarger. Processing time is over an hour; most of this is wash time. If the prints are properly handled, particularly given through washing, they will last for at more than a hundred years. There are many examples of prints that have lasted longer than a hundred years. The photographer has considerable control over the print; in addition to changing density the photographer can also change contrast tone and local density.

Cyanotypes have bright blue images on a base that is the color of the paper or other material you print on. Sir John Herschel invented the process in 1842. The light sensitive chemistry is iron based, and the final image is an iron compound. The final dye is called Prussian blue. The chemistry is mixed by hand and brush coated on the paper. Multiple coatings add to the saturation of the image, which is why I usually triple coat the paper I use for cyanotypes. Processing is just a long wash.


Cyanotype, Vandyke and other processes are usually referred to as alternate processes or alt process. The idea is that these are different from the more commercial photographic processed used for most photography. These processes are much more personal, for instance the paper is hand coated by the photographer. The processes are not very sensitive to light so enlargers can’t be used. Most often the original camera negative is pressed right against the hand coated paper. An alt process print is a handmade object and each print will be unique. Of course the photographer has to exercise considerable care when preparing and processing these prints in the darkroom.

The Vandyke process produces a brown toned image. The image is made of silver, but the light sensitivity is based on iron chemistry, like cyanotypes rather than silver chemistry like a silver gelatin print. This process is often referred to as Kallitype. The sensitizer contains Ferric Ammonium Citrate, Tartaric Acid and Silver Nitrate. Processing includes considerable wash time as well as a bath in sodium thiosulfate. Properly processed Vandyke images have lasted for about a hundred years.


From the time that George Eastman introduced the Kodak camera with the slogan “You press the button, we do the rest” there have been places to get your processing work done for you. In some cases, for instance Kodachrome processing, there was literally no way to do it yourself. In addition much processing can’t be done economically unless you do a lot of printing everyday. Certainly many people have noticed that their ink jet printers don’t work well after sitting unused for several weeks. There are several things that are important to the photographer and the viewer with all of these processes; first is how much control does the photographer have over the images. The printer that I am using allows me to manipulate the image files in Photoshop. This gives me incredible control over the final print. Another consideration is how long will the prints last. While none of these processes have been around long enough to prove durability, prints can tested using light and heat.

Fuji Type R Paper was actually used when photo labs had enlargers. The R stood for reversal. It allowed the lab to maker a print directly from a slide or a larger film positive. So you could make prints from Kodachrome or Ektachrome without making an inter negative. Labs generally used enlargers to work with this paper, so you could do dodging and burning, but there was not much other control. I am not sure if anyone is still making Type R paper. These prints had good saturation and good durability.

Moab Entrada Rag 290 Bright paper is made to high standards and designed for specialized ink jet printers. It is a rag paper and has no acid or lignin. The Epson Ultrachrome inks are used. These are pigment inks so they will last for an exceptionally long time. I find that these prints have a very long tonal scale and very fine color. These prints are made from files that have been prepared with Photoshop. Both color and black and white prints can be made on this paper.

I am showing a 20X50 inch print of this image! It looks great.

Fuji Crystal Archive Matte paper is a color photographic paper designed to be used with digital enlargers. Prints are made from files that have been prepared with Photoshop. This kind of paper is usually used to make color prints. I often use it to make mono-chrome images with a warm tone. Prints made with this product are expected to last more than twenty years.

Please check out my classes at BetterPhoto.com:

An Introduction to Photographic Lighting,

Portrait Lighting on Location and in the Studio,

Getting Started in Commercial Photography

Thanks, John


May 6, 2013

Working in Black and White

I hope you’ll check out my books: Photographing Architecture and Understanding and Controlling Strobe Lighting. Please get copies, if you haven’t already. Of course you know that one reason for this blog is introduce the books and get you to consider one of my classes at BetterPhoto.com: An Introduction to Photographic Lighting, Portrait Lighting on Location and in the Studio, Getting Started in Commercial Photography

The first portfolio class went really well. Please let me know if you want to be on the mailing list. Here’s some more information the next meeting is Tuesday May 21, 2013, 6:30 pm room 407 at the Indianapolis Central Library. This is a great opportunity to make a greater commitment to your work and learn more about how others see your work. Still only $20. I look forward to seeing you if you’re near Indianapolis.

I started out with a Kodak Retina and a roll of Plus-X. The first film developer I used was D-76 and I printed with Dektol. I guess you could say that I have my roots in black and white. If you’ve looked at my work you can see that I still see a lot of shots in black and white. I’ve mentioned, in these notes, that I’m doing some work with my 8X10 film camera. I wanted to talk about how I’m working with those images in digital. It doesn’t really matter whether you start with a digital image or a film image; these techniques make better final images. I start with a low contrast scan of my negative. If I were shooting film, for traditional silver gelatin printing, I would want a negative that I could interpret in the darkroom and that is a low contrast negative. Of course my new negatives aren’t really low contrast, because they need high density so I can print them using the Vandyke technique. Even though these techniques aren’t  really new I think it’s important to work with them from time to time.

If I’m starting with a color image, usually from my digital camera, I’ll look at the red, green and blue channels. The differences can be really huge. When I shoot with black and white film I use color filters to get the kind of control. The important thing to keep in mind is that you can make choices about what parts of the picture you want to make black & white. In addition to the red, green and blue channels you can mix the channels together.

I know there are a lot of programs for working with your images, but I use Photoshop for just about everything. It’s big, it’s complex and it offers wonderful control over your image. I mention this because I’m going to show the changes I make to an image in Photoshop.

Scans always have some dust and perhaps the negative has some defects, so I’ll fix those right away. I like to do this at the beginning because I’m working on a gray-scale image rather than a color image so the fixes are quicker, especially with a big file. In this case the file is over 100 megs, because the original negative is 4X10 inches. I want to get the biggest scan I can. Negatives are delicate so it’s best to make a digital copy as soon as possible. I make a flat, long scale, scan to capture as much information as possible. I shoot digital images in RAW for the same reason: to have a copy that can be interpreted as many ways as possible. I’ll save this image, so I can return to it.

I’ll create a new copy of the image, and the first thing I’ll do is open up Levels. I’ll position the sliders at the edges of the histogram. I may move the center slider to adjust the middle of the curve. This isn’t as controlled as using curves, but it makes the image look better quickly. Next I convert the file to RGB using mode. When I printed with an enlarger on silver gelatin black & white paper I used warm toned paper much of the time. Even when I used a neutral toned paper I usually developed in Selectol to warm the paper up a little. I can change the pallet, warmer, cooler or whatever once I have an RGB file. Now I open up curves. I like to depress the bottom left of the curve and raise up the upper right, usually I don’t make big changes here.  This makes the middle tones of the shot a little more contrasty and makes the highlight ands shadows look a little more like a silver gelatin print. Next I’ll add color, while still in curves, by choosing the red curve. For most images I’ll raise the bottom of the curve about 7 units. Then I’ll go to the blue curve and remove about 8 units from the middle of the curve. You can add as much color as you would like this way.

I wanted to lighten the boots, so I used the dodging tool. On the original I also did some sharpening, but that doesn’t really show up on this small file.

I wanted to discuss another thing I like to do in curves. If you take the bottom left of the curve up to the top of the graph you file will be all white. If you pull the center of the curve back down, usually around 1/4 from the bottom of the graph, interesting things will happen.  If you didn’t add any color to your shot it will look a little like a solarisation (also referred to as the Sabatier Effect) an old darkroom technique. However if you did the toning you’ll get a sort of dual tone solarisation, which is really fun. You can see how well it worked here. I usually refer to this as a u-shaped curve.


Please check out my classes at BetterPhoto.com:
An Introduction to Photographic Lighting,
Portrait Lighting on Location and in the Studio,

Getting Started in Commercial Photography
Thanks, John


February 4, 2013

Large Format Lenses

Filed under: Basic Photo Technique,Film Technique,Large Format Photography — John Siskin @ 11:06 am

I hope you’ll check out my books: Photographing Architecture and Understanding and Controlling Strobe Lighting. I hope you’ll get copies if you haven’t already. Of course you know that one reason for this blog is to sell the book and get you to consider one of my classes at BetterPhoto.com: An Introduction to Photographic Lighting, Portrait Lighting on Location and in the Studio, Getting Started in Commercial Photography


I was going to write about some more handy equipment in this issue, but I decided to put that off. I think I’ll be back to talking about stuff, particularly DIY stuff soon. I had breakfast with another experienced photographer, I don’t want to say old, a couple of days ago. We talked about some of the things we miss from the old days and both of us missed watching a print come up in a tray of developer. Whenever I talk about this with someone we end up using the word magic. When you put an exposed piece of silver gelatin paper into a tray of developer there is no picture, it’s just white paper. As you agitate the print in the developer the image slowly appears on the paper. If you’ve ever seen a Polaroid SX-70 print develop, it’s like that, only better. I know I’ve written about this stuff before, but I find it interesting and, well, magical.

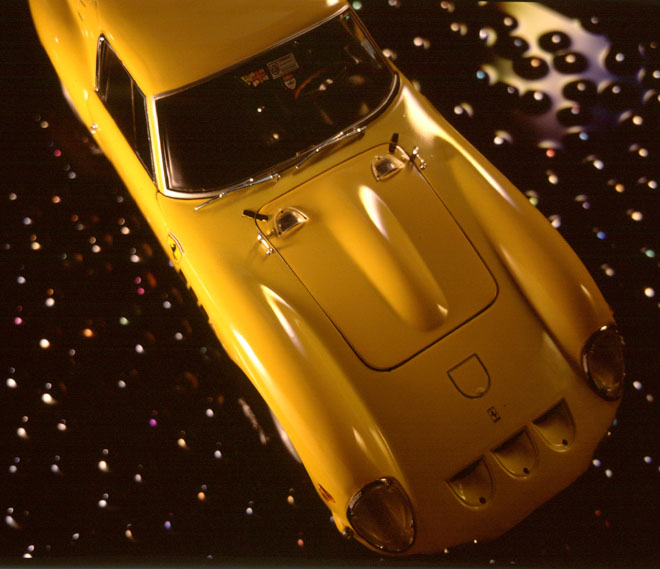
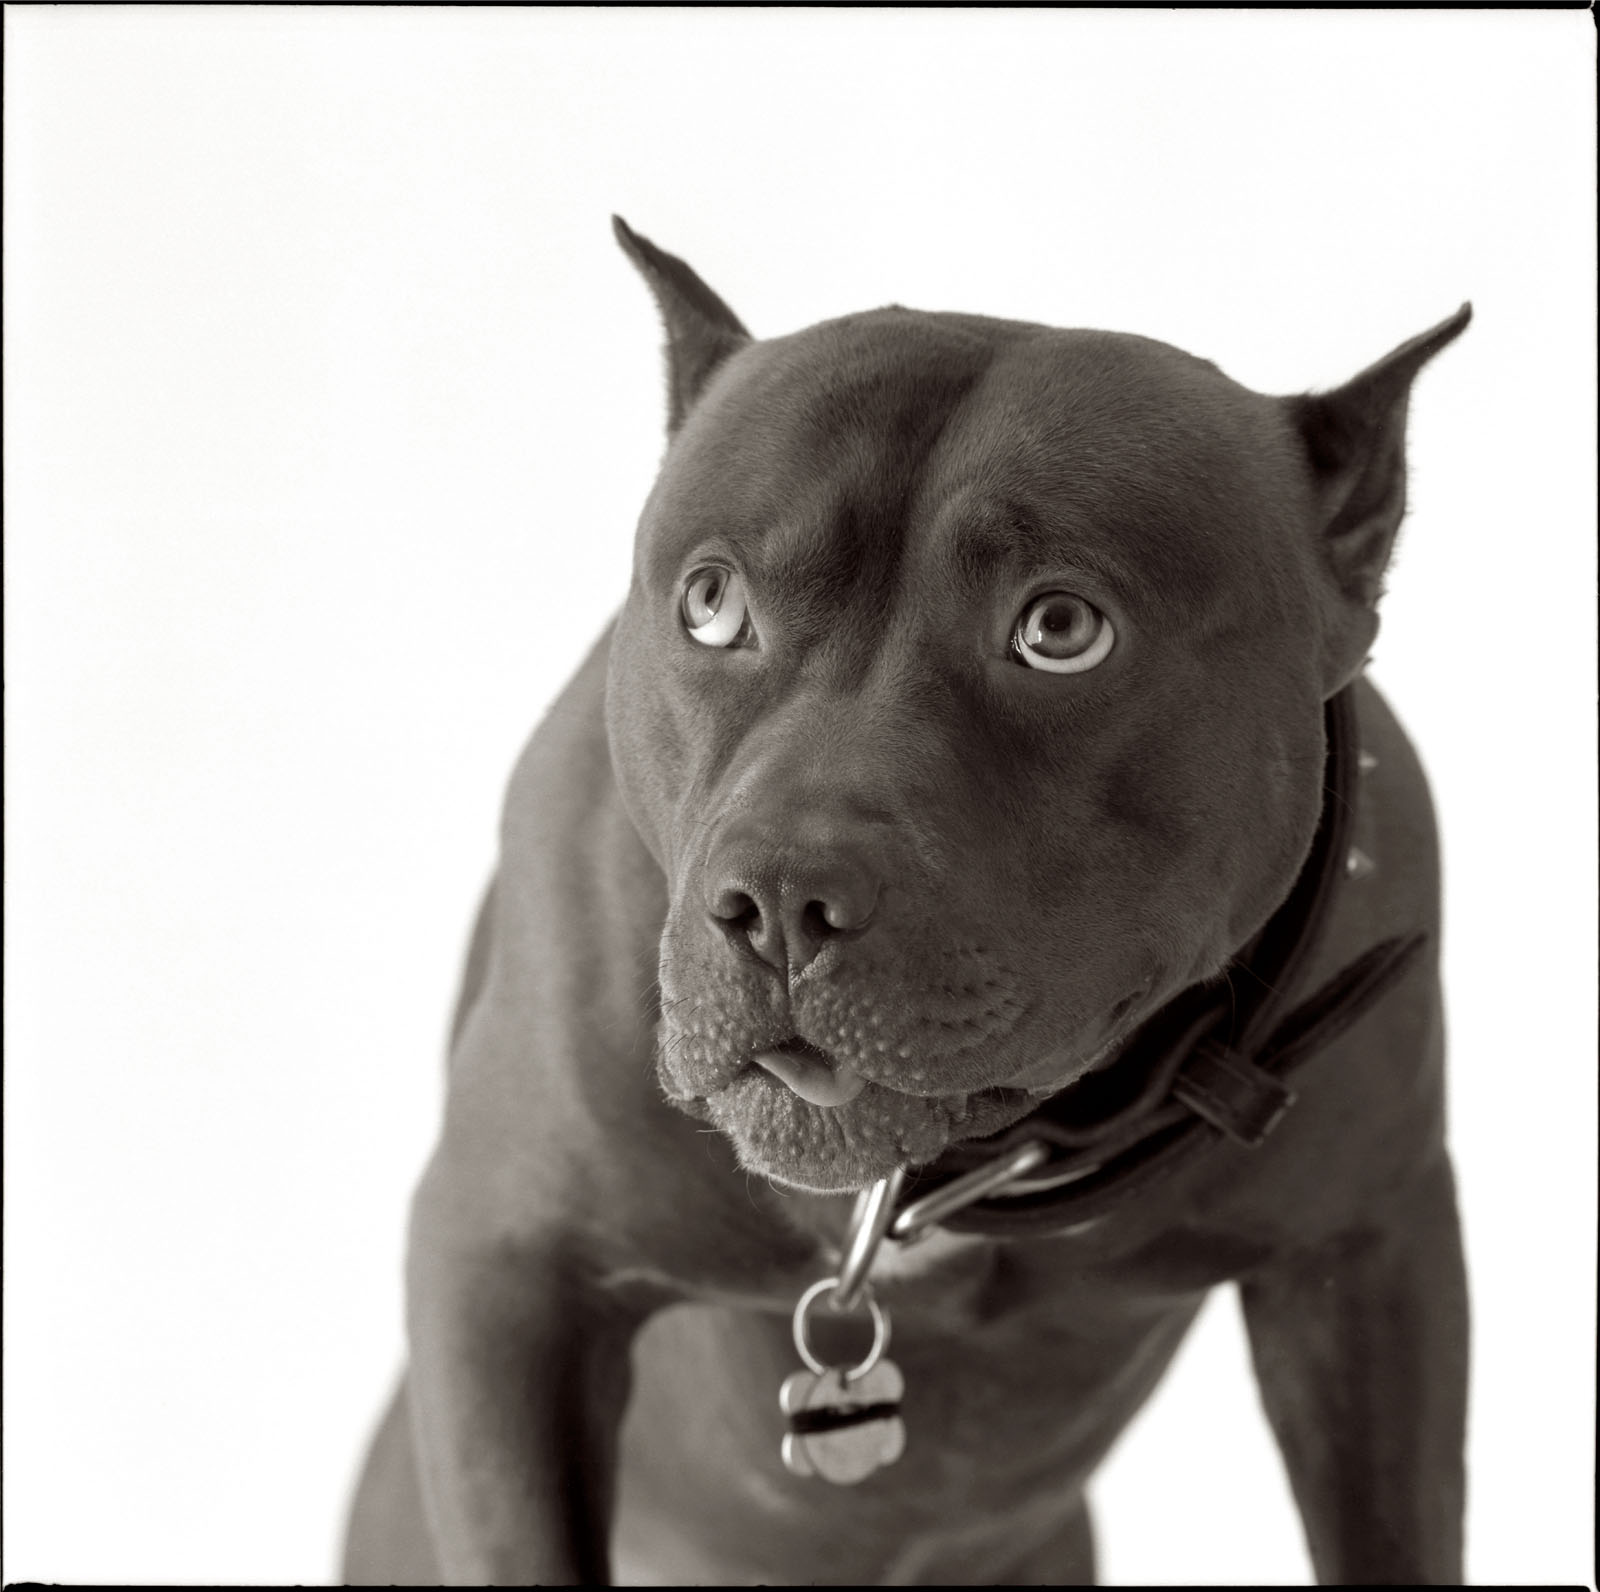
8.25 inch Gold Barrel Dagor on 8X10 film

Photography, before digital was mostly about magic goo. Like baking a cake you followed a recipe, and if everything was done properly, you got a picture. If everything was done well the picture would last. It’s been that way since William Henry Fox Talbot first made a paper negative. Fox Talbot used sodium chloride, table salt to make his images safe in daylight, so salt was the first magic goo. The thing is that few people really understood how the chemicals interacted, but a lot of us understood how to control what they did. Perhaps the person who understood the interaction best was C.E. K. Mees who ran Kodak Labs.

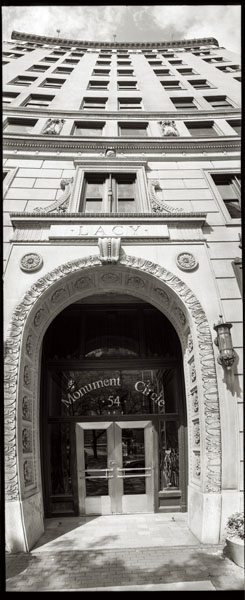
63mm Zeiss Luminar on 6X7cm film


I bring this up because, as I’ve mentioned before, I’m doing some personal work with my 8X10 Toyo camera. This brings me back into the land of magic goo. I’m testing different developers in an attempt to make a more perfect negative. I used Kodak chemicals, both HC-110 and, more recently, Xtol, to develop film for decades. Now, however, Kodak is imperiled, so I need to look for another supplier. It’s amazing how many things that I relied on Kodak for. At breakfast I discussed the Kodak Camel Hair brush with my friend. Kodak made things that couldn’t possibly have made a difference to their bottom line, but made a difference to photographers everywhere, like a good brush for cleaning film holders. I’ve been mixing a version of a Kodak developer, D-23. I got the recipe from The Darkroom Cookbook. Those of us working in the old ways are going to have to make a lot of things from scratch.

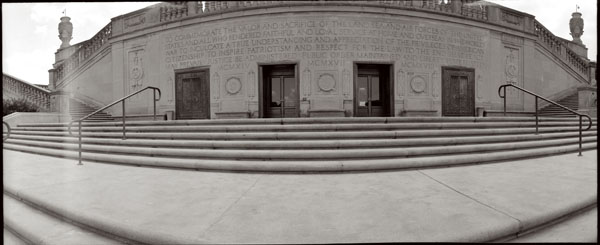
48cm Goerz Berlin Dogmar 8X10in. film


The problem is to know if everything is working well. Today I processed test negatives in D-23 and in Xtol. I’ve ordered some ID-11, an Ilford developer, and I’ll process a negative in that next week. I find that I do a lot of testing. I’ve mentioned before that a photographer needs to test equipment. If you don’t test you’ll never really know what you’re doing. Then you’ll not only believe in magic, you’re relying on magic that you don’t understand. I’ve attached copies of the negatives I processed in Kodak Xtol, they have a longer contrast range than the negs I did in D-23.

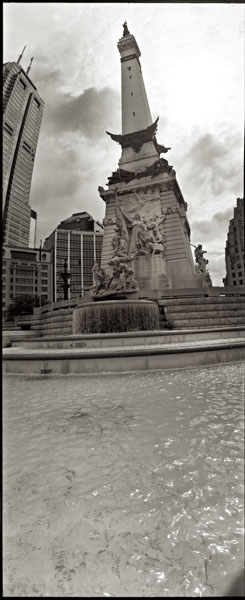
65mm Schneider Super Angulon 4X5in. film


Another magical area of large format photography is lenses. Although I’ve studied the physics and worked with the thin lens equations, I still find the way in which lenses bend light quite magical. At least as far back as 1840, when Joseph Petzval developed the first portrait lenses, people understood how much the lens affected the image. The goals of lens design, at least until the 1960s, were to make a lens that was sharp, had large coverage, even illumination, strong contrast and was fully corrected for spherical aberration and chromatic aberration and eliminated coma, unless you were trying to make a soft focus lens, in which case none of these might apply. It’s important to understand that you couldn’t, and still can’t, make a perfect lens: all lenses designs are compromises. But older lenses made different compromises so some are considered classic and others crap. I’ve always been very interested in lenses from Goerz and Schneider. I am pleased that I currently own two Goerz lenses, an 8 1/4 inch Dagor from the American version of Goerz and a 48cm Dogmar that is from Berlin Goerz. I’ve already mentioned that I recently acquired a 14 inch Dagor that is a Schneider Dagor. The Schneider Dagors are the last of this noble design. I am also getting a lot of use from my older Schneider Angulon (actually it is old enough to be a Jos. Schneider & Co.) and I also use a wide angle G-Claron from the modern version of Schneider. Of course I also carry a bunch of diopters to create soft focus lenses, for more about these check out this article.

135mm Schenider Xenar 4X5in. film


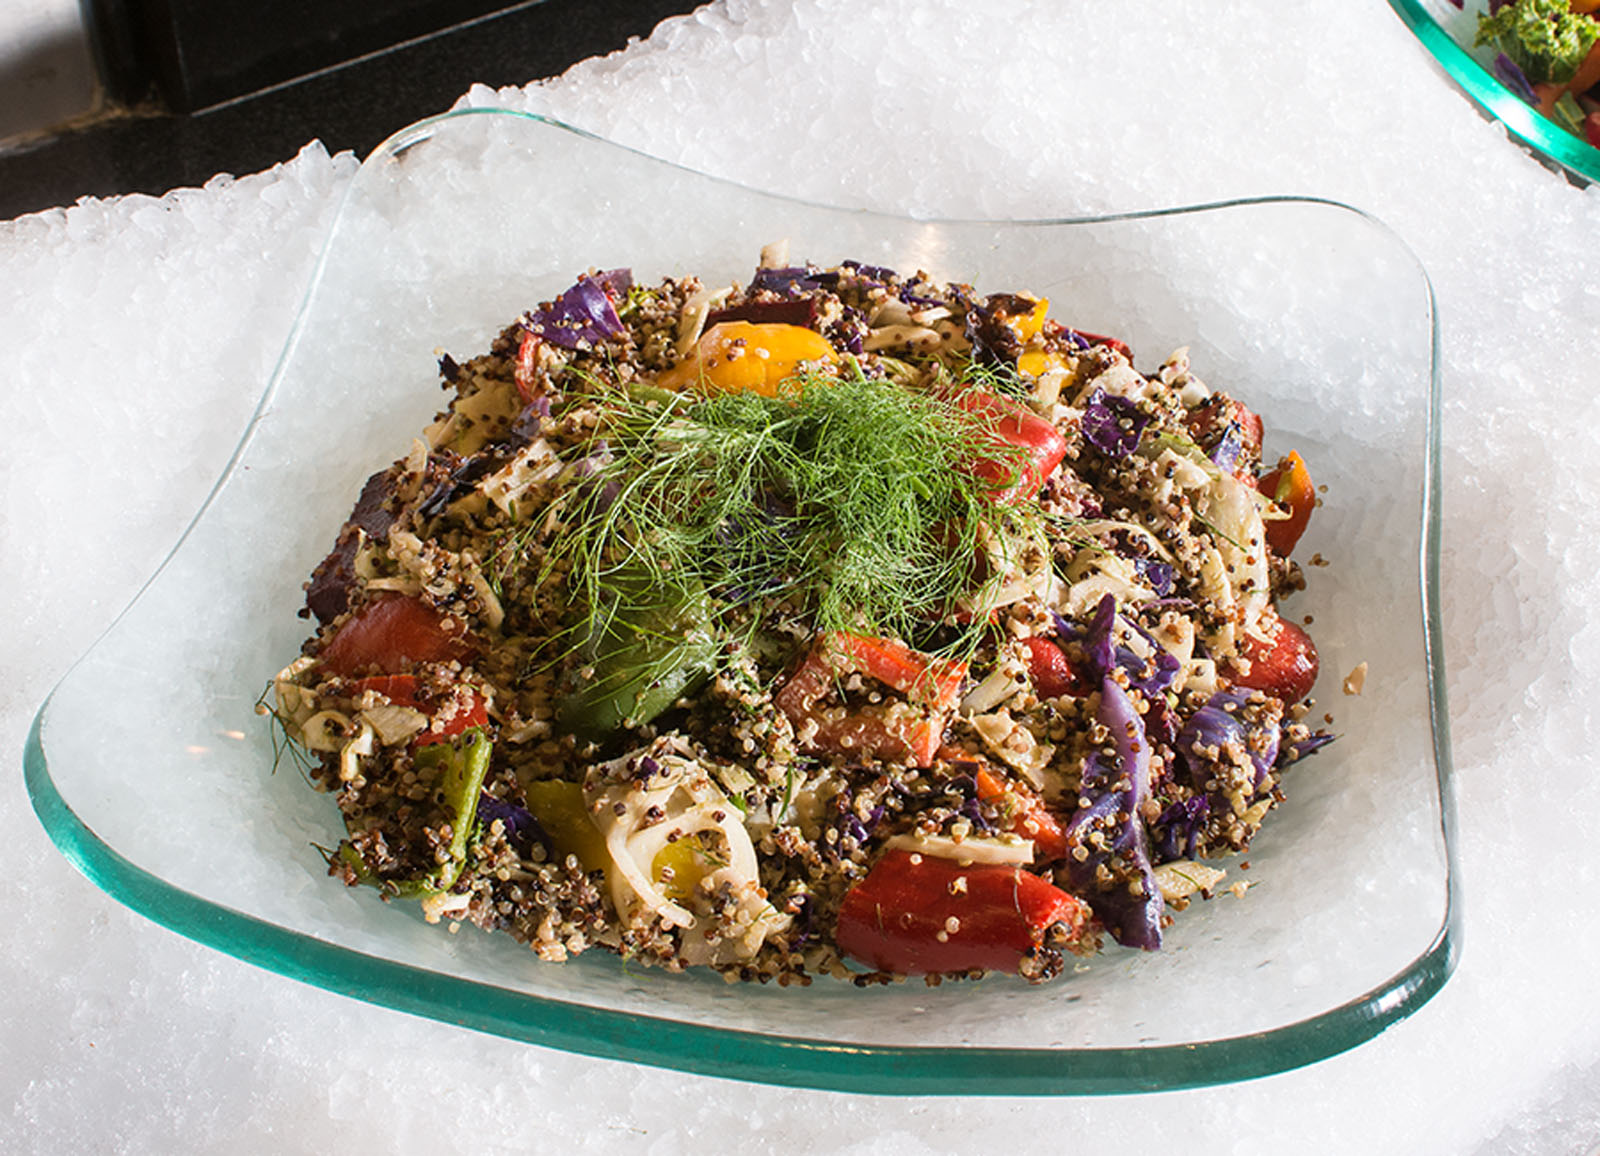
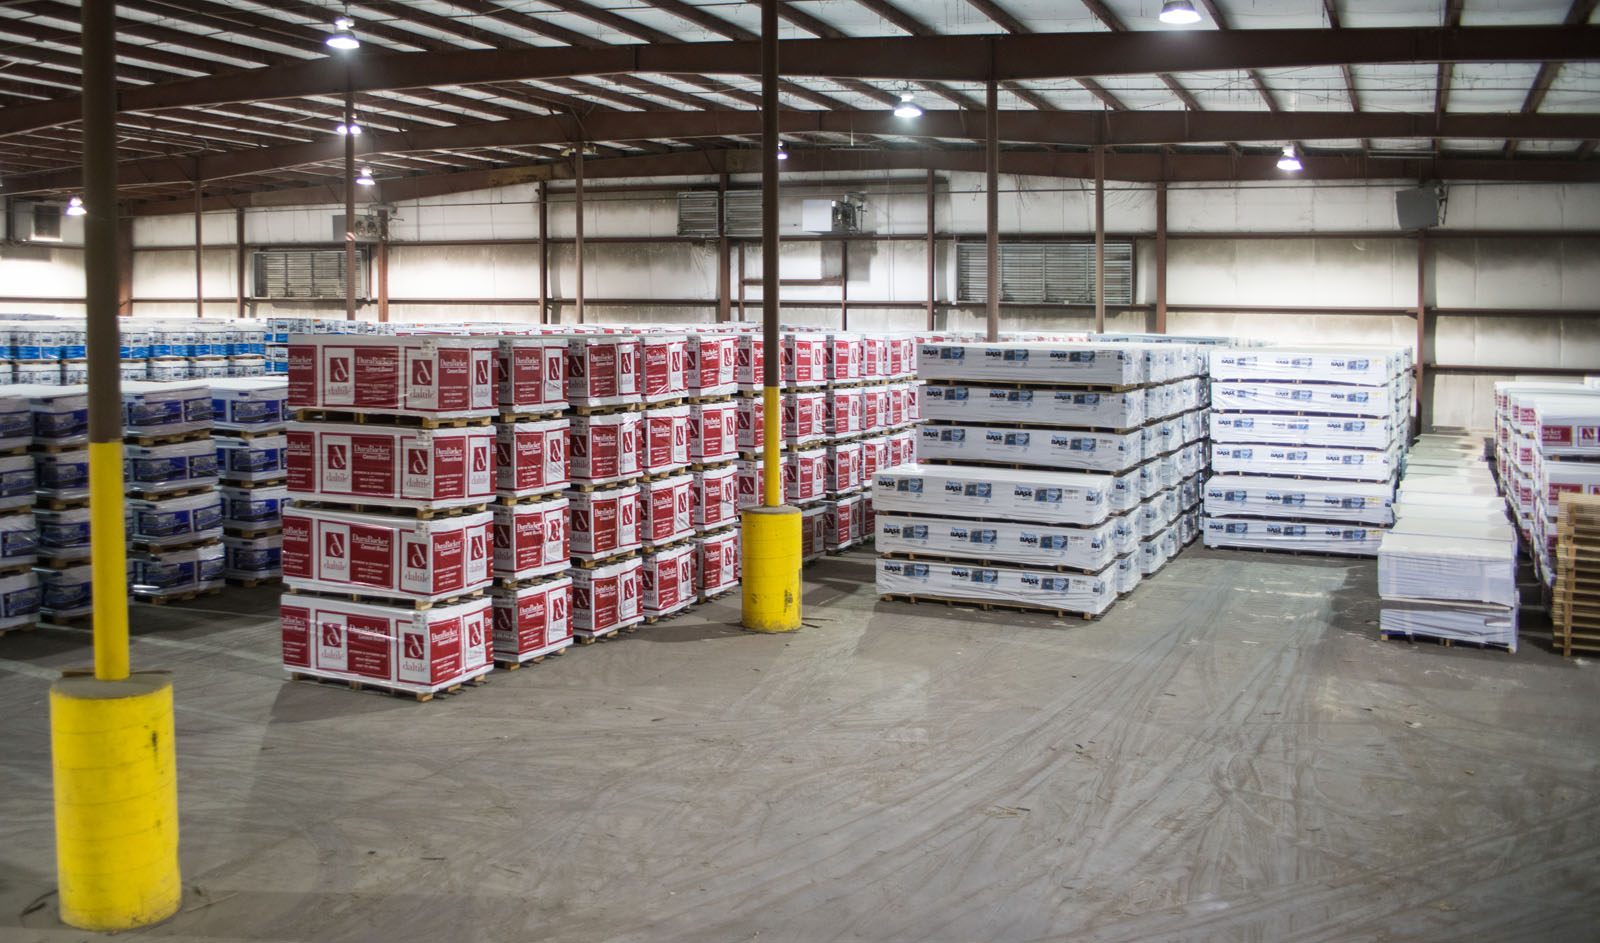
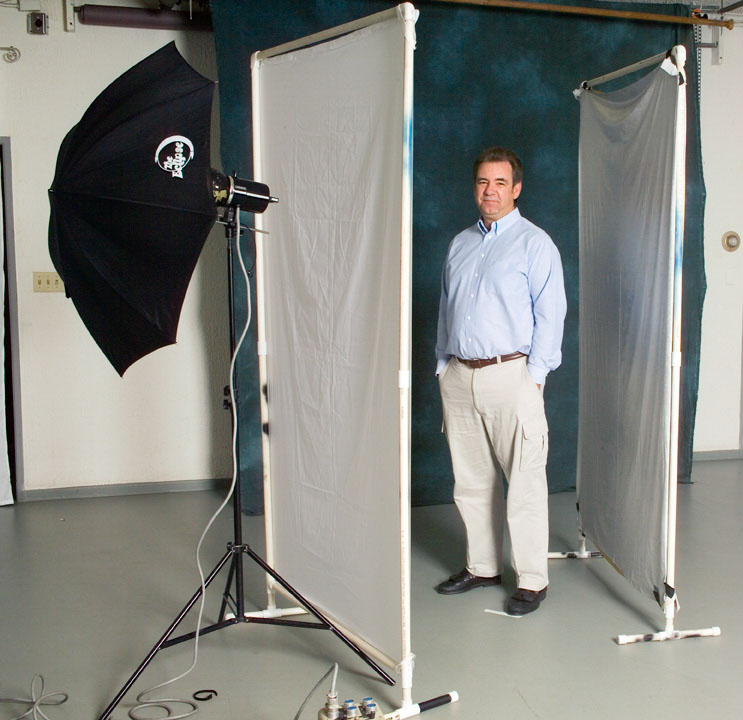
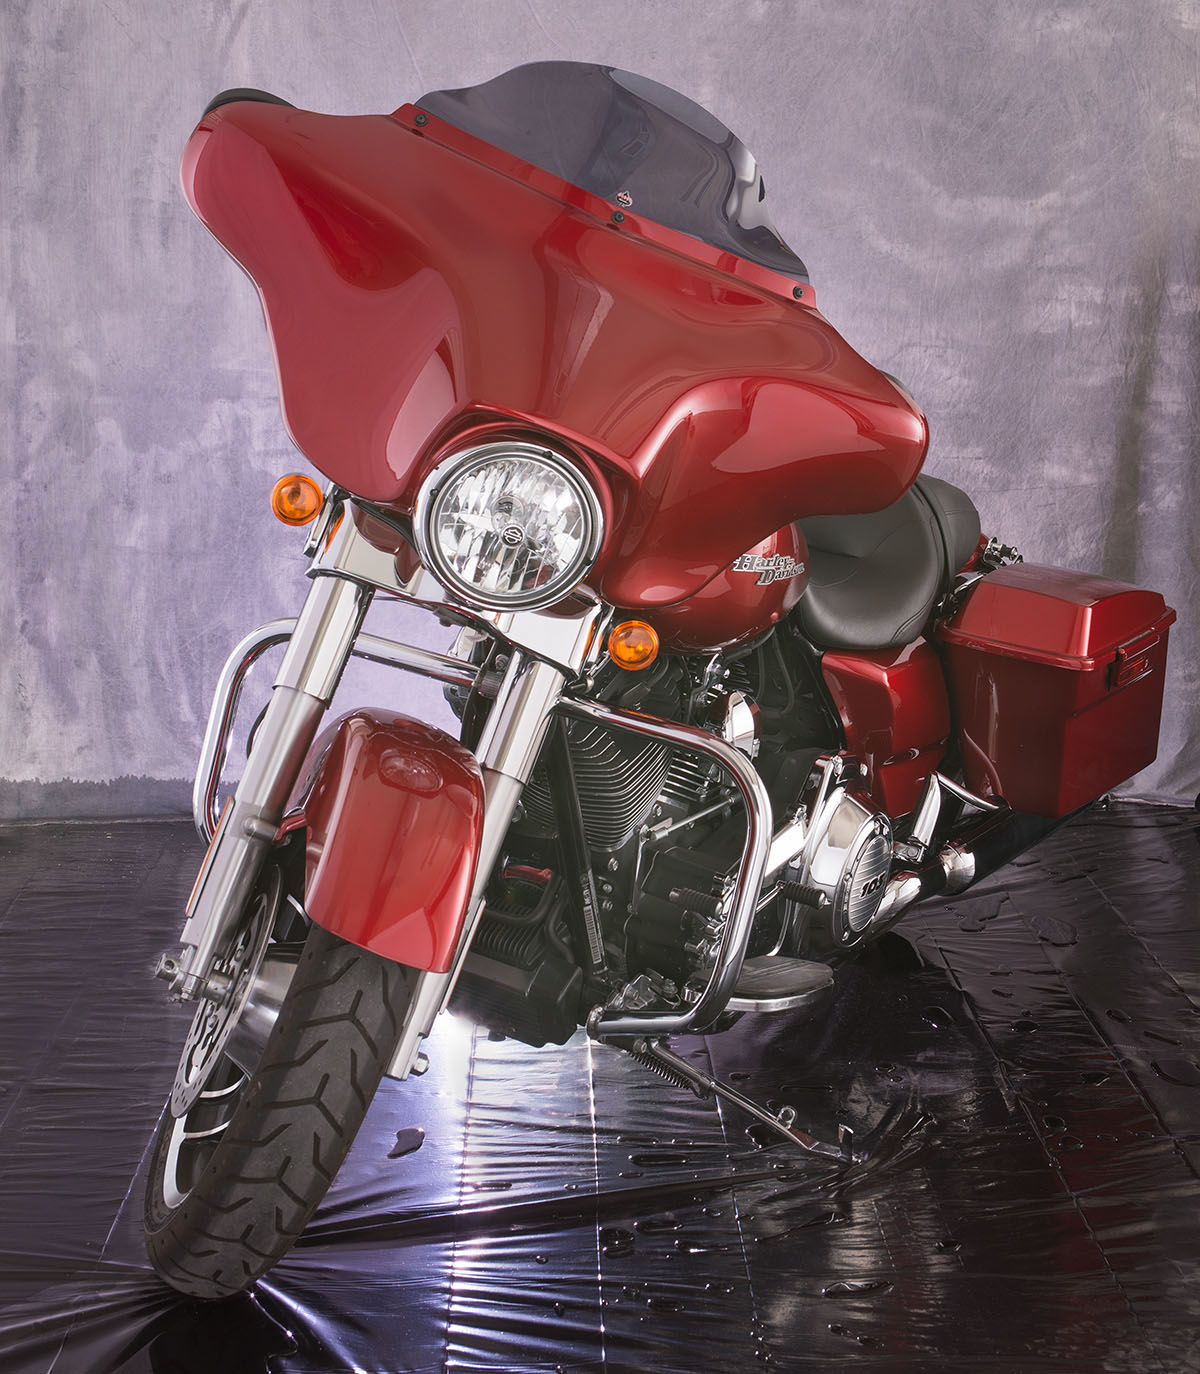
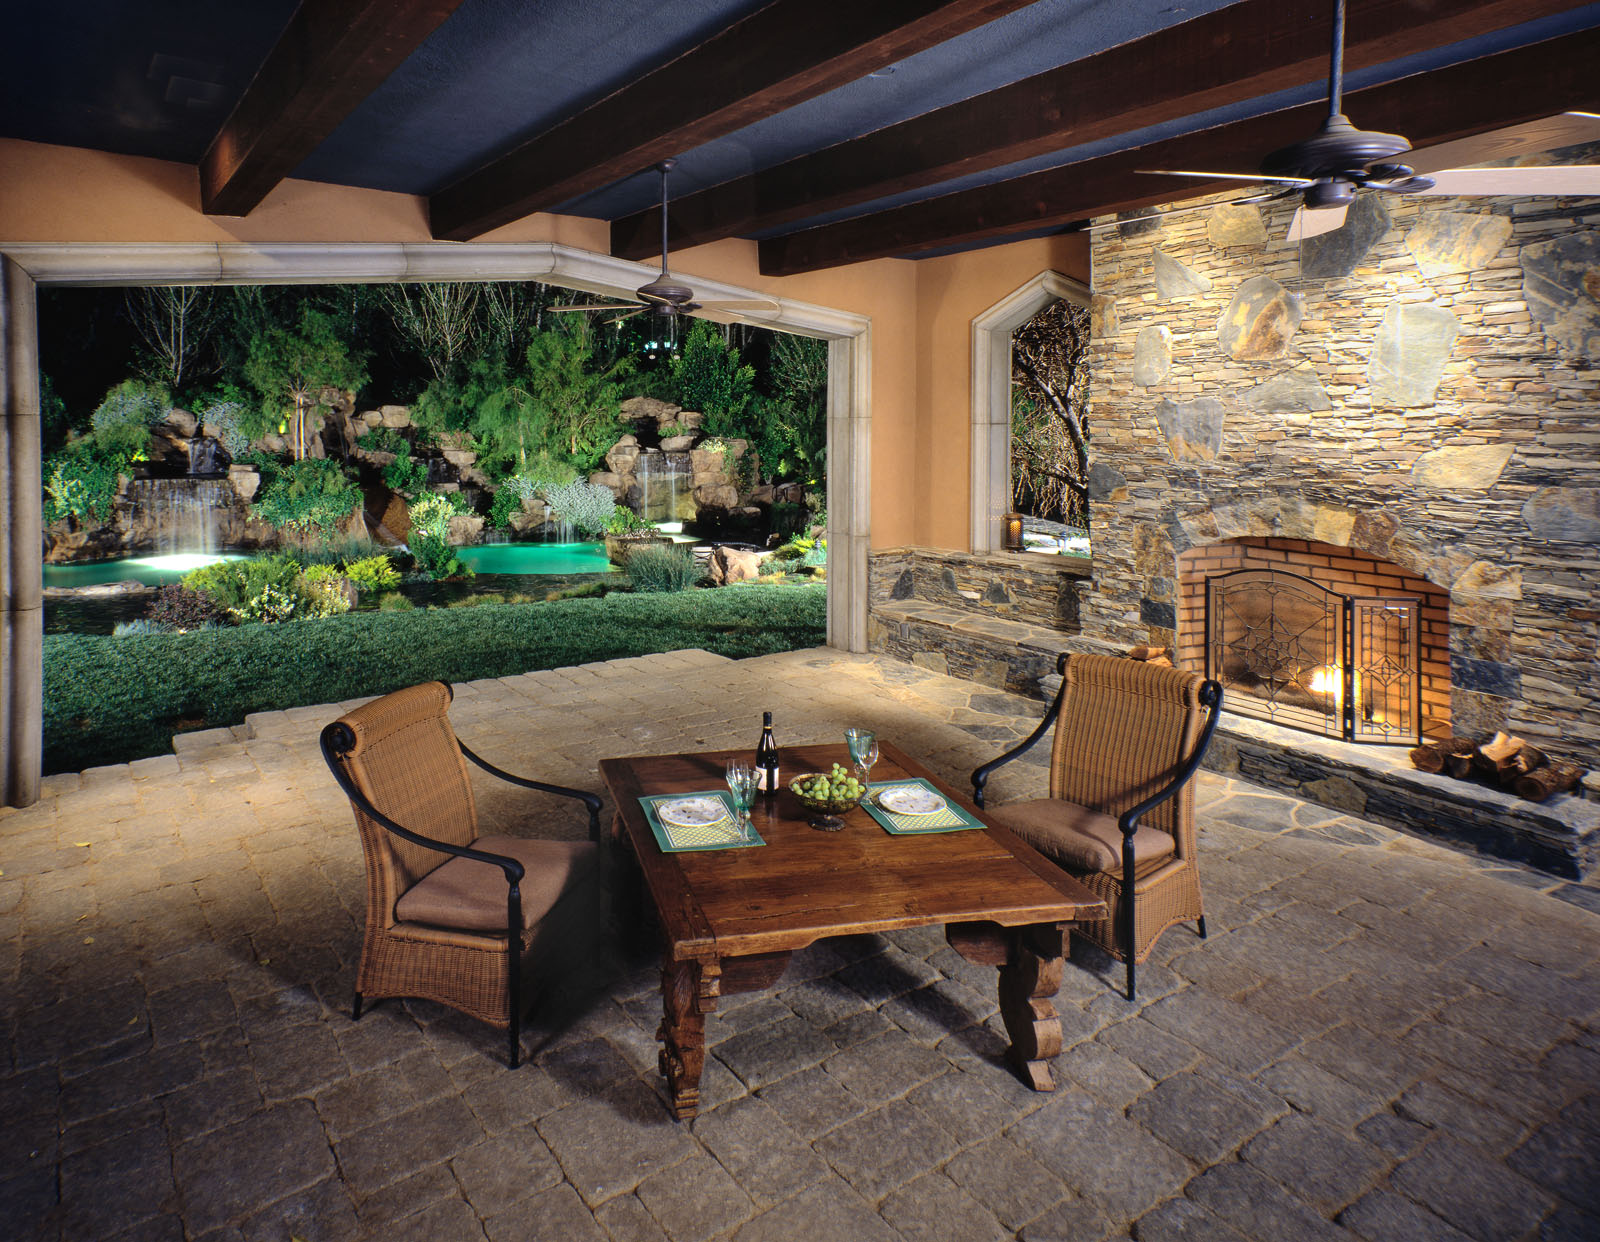
The pictures this week are all large format images. I put the format and the lens name in the caption.

65mm Super Angulon 4X5in. film


I’m looking at apps for my phone that will help with metering and other aspects of large format photography. So far I’ve found that beeCam Lightmeter is interesting. If you have any suggestions let me know at john@siskinphoto. I’ll put up people suggestions in a future blog. By the way I’m using an android phone, but if you have a suggestion for an iPhone I’ll be happy to pass it along.

Please consider one of my classes at BetterPhoto.com:

An Introduction to Photographic Lighting

Portrait Lighting on Location and in the Studio

Getting Started in Commercial Photography

If you’re in the Indianapolis area there are other opportunities as well. I’ll be showing much of my personal architectural work in June at Indiana Landmarks. Please come look.

January 17, 2013

More Tools and Tips!

I hope you’ll check out my books: Photographing Architecture and Understanding and Controlling Strobe Lighting. I hope you’ll get copies if you haven’t already. Of course you know that one reason for this blog is to sell the book and get you to consider one of my classes at BetterPhoto.com: An Introduction to Photographic Lighting, Portrait Lighting on Location and in the Studio, Getting Started in Commercial Photography

I wanted to continue with the equipment and tips I was talking about in the last entry. I always enjoy talking about these sorts of things. I feel that the equipment manufacturers often try to make us all create images in similar ways, and I prefer to be creative about making pictures. For instance there are a lot of lenses built with vibration reduction technology, and this is a great thing. But, as I mentioned in the last entry, you can use a chain pod, which will also reduce vibration. The chain pod will work with almost any camera and lens, including the stuff you already own.

I've put a radio trigger on an optical slave so that I can use multiple sets of radio slaves.

The first thing I want to mention, because I just figured it out, allows me to use two different radio slave systems together. I try to buy a lot of receivers when I buy radio slaves because I have a lot of strobes. The problem is when I need even more receivers the signals of the two radio slave systems don’t always match up. I discovered I could put the sending unit from a second set of radio slaves onto an optical slave and trigger both sets of slaves together. One thing I’m looking for now is a very sensitive optical slave to extend the range of my radio slaves. Please note that I am still using inexpensive Chinese radio slaves with good results overall.

Cine foil is a flexible aluminum foil that can be used to block light and as lens hood.

A couple more things that are in my camera case, that I didn’t mention last time, model release forms, cine foil and a GretagMacbeth ColorChecker. Of course it is always wise to have a release form whenever you shoot a person or private property, because there are severe limits on publication without a release. Because so much of my work is for clients there are times I can’t get a release, and so can’t use a shot in a book or article. Here’s a link to a good release form. I really like Cine foil, which is black aluminum foil. It can be used to control

GretagMacbeth ColorChecker, gives me good gray samples and pure colors.

the spill from a light or as a lens hood in a pinch. A couple of pieces take up no room, and can be a real lifesaver. I keep a roll in the studio. The GretagMacbeth ColorChecker is the most accurate gray and color sample I own. Since I always shoot in RAW I will shoot a sample image with the ColorChecker after I finish the set-up. I can use this sample to make the color accurate on all of the shots with the same set-up. You can also use it to help you make pleasing color, because you can see how a particular setting will affect the colors you’re using.

Perhaps I should mention that I have several camera cases, not only do I have cases for my lights but I also have hard soft and small camera cases. I store my main camera in a Pelican case. I really like this large hard case because I can store almost my entire system, everything I would take on location anyway. Also the Pelican case provides very good protection and it is pretty easy to ship. Another good thing: the Pelican cases are ugly. I avoid the fancy cases that draw peoples’ attention; you don’t want to have your camera gear stolen. The problem with a hard case is that it’s difficult to work out of, so I have a couple of soft cases for when I have to keep moving. I have different sized cases so that I can reduce the load when I need less equipment. I’d like to see a case that would allow you to add external sections, so you could create the right space to fit your gear. Of course I have a lot of gear so being able to customize a case would make it easier to work.

Almost all my cases are used. I buy inexpensive used cases from camera stores, thrift stores, surplus stores and even antique stores. I will get a case even when I don’t have anything specific to put in it, if it is cheap and in usable condition. I stuff cases inside cases to store them; otherwise I’d have run out of room long ago. It usually turns out that I need most of the cases I get. I even keep much of my studio gear in cases; you never know when you’ll have to do something unusual on location.

A useful case from Home Depot

Most of my lighting cases have come from military surplus stores or hardware stores. I’ve used a lot of ammunition cases over the years because they are very strong and also waterproof. I often add a 1/4X20 threaded nut to the cases. This allows me to put a stud to mount a light onto the case. This means that I have a short light stand, or a stand I can put on a table, without having to carry another stand. I have a lot of lighting cases because I can’t use a case so heavy that I can’t actually lift it. I also have a wheeled cart, which can make it a lot easier to get lights and cameras to location. Light stands and tripods go into a large duffel bag.

These cases have 1/4X20 threads so I can attach studs for my lights.

Rolling cart, ammunition cases and duffel bag. Ready for a location shoot!


I saw this on YouTube: http://www.youtube.com/watch?v=g4aE2f07ON4&feature=player_embedded. As a long time fan of Edward Weston’s photos it was nice to see it again.

Please consider one of my classes at BetterPhoto.com:

An Introduction to Photographic Lighting

Portrait Lighting on Location and in the Studio

Getting Started in Commercial Photography

If you’re in the Indianapolis area there are other opportunities as well. I’ll be showing much of my personal architectural work in June at Indiana Landmarks. Please come look.

December 20, 2012

Handy Tools

Filed under: Basic Photo Technique,Do It Yourself,Photographic Equipment — John Siskin @ 3:43 pm

I hope you’ll check out my books: Photographing Architecture and Understanding and Controlling Strobe Lighting. I hope you’ll get copies if you haven’t already. Of course you know that one reason for this blog is to sell the book and get you to consider one of my classes at BetterPhoto.com: An Introduction to Photographic Lighting, Portrait Lighting on Location and in the Studio, Getting Started in Commercial Photography

There are things in my camera and lighting case that aren’t cameras or lights. Some of these are pretty obvious: if you have lights you must have light stands. If you have cameras you’ll have lenses. This post is about the other things, some of them are used constantly and others hardly used. But they are all critical once in a while. If you have some favorite gadgets please let me know. I’ll post the information. Because this site got spammed you’ll need to let me know by e-mail.

This is probably my favorite. It’s a vice grip that has tripod sized threads welded onto it. I can put on a small ball head and use it to hold the camera or a light stud and it’s a light stand. Vice grips can attach to almost anything. I don’t know of a commercial supplier for this, so, if you want one, you’ll need to visit a welding shop. Here’s the ball head and the lighting stud. This is the small lighting stud that fits all my lights.

I also have this clip that I put a tripod thread on. It can hold a small light, or notes. By the way tripod thread is 1/4X20, unless you are European.

This is another sort of lighting stud, basically it allows you to mount two lights on a single light stand. This is useful when you need more power. It used to hold four lights, which is why there’s a hole. This is another thing I don’t have a supplier for. Any suggestions?

I know a lot of people have 5 in 1 reflectors but they don’t really appeal to me. I do have a piece of bubble wrap with a silver and a white side. Good as a reflector and extra padding. The piece I carry is about 18X24 inches. I also have a piece of duvatyne in the case. Duvatine is a very black cloth used for blocking light.

This is another old friend: the chain pod. Here’s more information. They’re easy to build. If you must spend the money you can get one from Calumet.

This is another one I wrote about before. It’s a shoe cover that helps modify light. For more check out this link.

I don’t use this much, but it doesn’t take up much room. It has been important on come occasions. It’s basically a raincoat for the camera. Here’s a modern version.

I also have a laser pointer. This helps me focus in low light by giving me a target. I have to remember to check the batteries once in a while. I don’t use it often, but when I need it I really need it.
pointer

The next two items are still in my case, but I find I use my smart phone for both: a level and a flashlight. Especially with architectural photography leveling the camera is important, and I often need to see things in low light.

There are other things I should at least mention:
Model release, adult and child
Property release
Gray card
MacBeth Color checker
Cine Foil
Gaffer Tape. This is actually on the cases, which makes it easier to find

Clothes pins. I use these to hold filters on lights.
Please consider one of my classes at BetterPhoto.com:

An Introduction to Photographic Lighting

Portrait Lighting on Location and in the Studio

Getting Started in Commercial Photography

If you’re in the Indianapolis area there are other opportunities as well. I’ll be teaching a class in commercial photography next spring at Ivy Tech.


Happy Holidays!

« Newer PostsOlder Posts »

Powered by WordPress