Photo Notes A place to talk about making images.

December 7, 2015

What?

Filed under: Looking at Photographs,Photographic Education,Portraits — John Siskin @ 3:48 pm
What?

What?

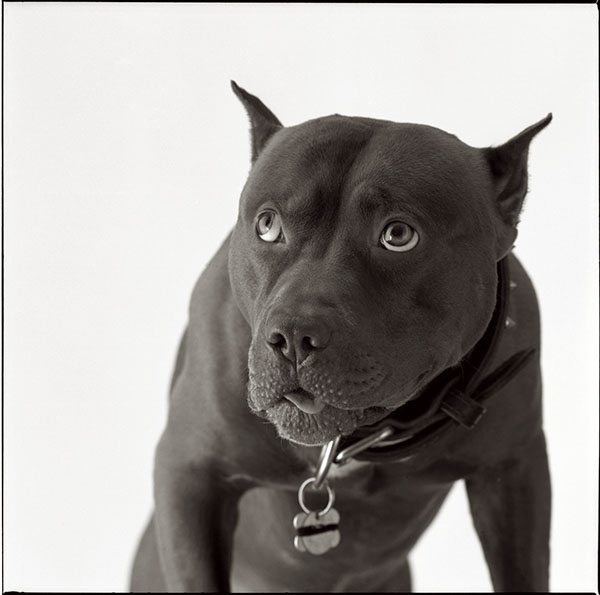
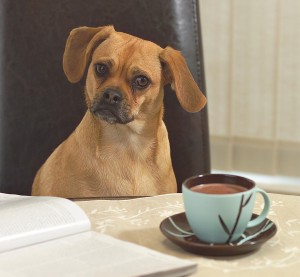
This is the most successful image I’ve ever made. It’s been published several times, including in the New Yorker Magazine. I’ve sold more prints of this shot than any other. And I almost missed it. Of course we often miss shots because we recognize a moment too late, or because something goes wrong, but this shot had a different problem. I made this shot, and made a proof sheet, and put it in a file without noticing how effective this single frame was. I don’t know why I missed it, maybe I just didn’t have time to print, but it ended up in the files. Fortunately I like to go through the old files, because I sometimes find good things. Sometimes you just need fresh eyes to see how effective an image is. Anyway I did notice the image, and it’s been an important part of my portfolio ever since.

Photographing animals in the studio is similar to making studio photographs of children: you need to be ready before the subject steps onto the set. You’ll probably only get the right look one time, so you don’t want to waste that on a set-up shot. In this case the dog came into the shoot after I finished shooting his owner, so everything was ready. I shot the image on Kodak TMAX film with a Mamiya C-330. I used the 250mm lens for the shot. It’s just about the only time I ever used this lens. I liked the Mamiya C-330 cameras because I could afford to have just about everything in the system. I did a lot of good commercial and personal work with these cameras. I still have one C-330 body and the 180 Super lens, a great combination.

If you’d like to buy a digital print of this image, mounted and matted on archival cotton rag board, please use the PayPal link below. The image will be about 13 inches wide mounted on 16X20 board. The price includes shipping in the United States, for other countries please ask first.

This image, and many others, is also available in my book B-Four. You can look at the book at this link, and order it as well. I hope you’ll take a look at the book.

You can buy one of my other books by clicking on the titles below:

I’m going to be using my blog to add information about images to the fine art pages of my site. This part of the site isn’t functioning yet, but it will be. These posts will enable me to put up information about the shot and to add details about buying prints. I think it’s very useful to talk about the details of creating specific images. I hope to hear from you about this-use my e-mail to let me know: john@siskinphoto.com. Of course I hope you’ll also want to buy some prints. I’ll be offering more types of prints in the future.

October 10, 2015

Tool Kit

Of course I’m thinking about the workshop next weekend. There are only two spaces left, so you should SIGN UP NOW!
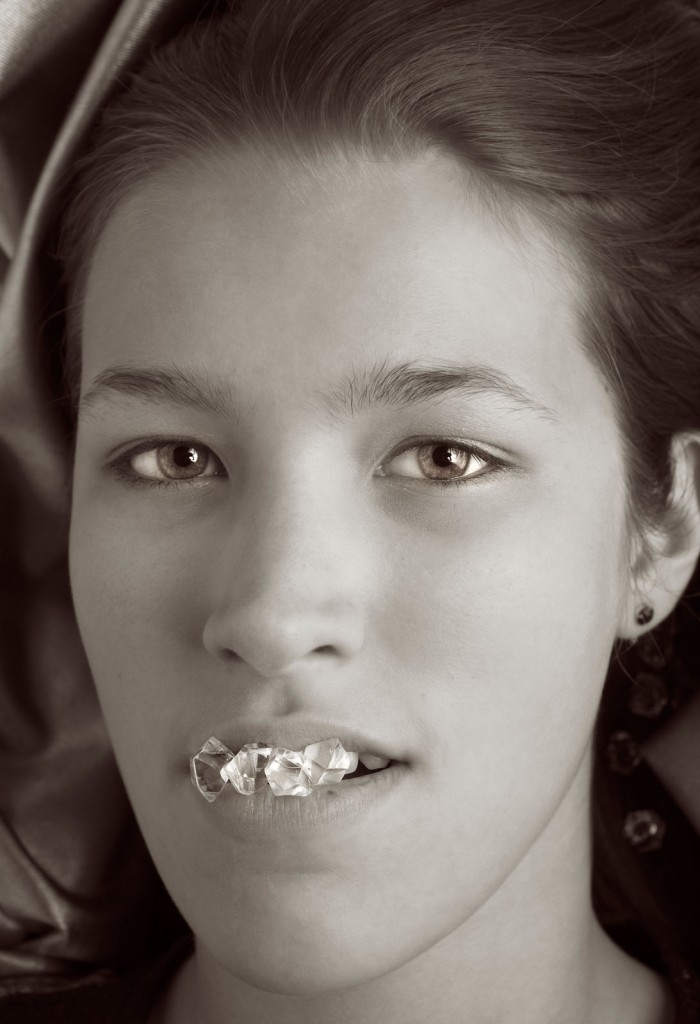
Samantha will be one of the models for Sunday October 18th.

Samantha will be one of the models for Sunday October 18th.

One of the things I want to examine at the workshop is the lighting tool kit for a photographer. The equipment manufacturers want us to buy everything; they’re not exactly on our side. Many of the available tools are of little use, or totally redundant. So I hope that this workshop will actually help you to save money by experimenting with the tools. I’ve seen a lot of people who work with hammers: carpenters, roofers and neurologists. The all use different kinds of hammers; purpose built for their applications. When we choose our tools we need to exercise the same care a carpenter does when he buys a hammer.
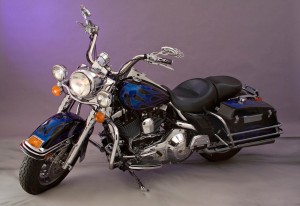
harley

The main tools we use as photographers are designed to work for a large variety of applications. So my Nikon D800 is a terrific camera to fit onto a microscope or use for architectural photography or even an auto race. While the camera will work well in all those applications, I’ll need to use different lenses for each situation. This is one of the great strengths of camera design: a good camera can be adapted to different situations. Can you imagine buying a whole new camera everything you needed a lens or even a filter? Strobe lights are the same way: a basic strobe can be used for a lot of applications, if you have the light modifiers for the job. This is one of the good aspects of strobe lights over movie lights, which are purpose built. Over the years I’ve worked with many light modifiers for strobes, everything from large soft boxes to fiber optics. These modifiers are designed to make the lights useful in all kinds of applications. Some of modifiers have been good, some bad; some work in a lot of situations and some are only good for one kind of job. I hope one of the things you’ll receive from the workshop is a better way to choose your tools.

The first step in adding a tool to your kit is identifying the reason you need or want that tool. So I may choose a new light because I didn’t have the lights I felt I could use at my last job, but I may also choose a tool because it inspires me. I think this second reason is really important. I often get tools because they make me want to work, or because they open up new ideas for shots. I also get tools because they replace or upgrade or back up the tools that I have. Of course one problem is that I now have too many tools to take on location.
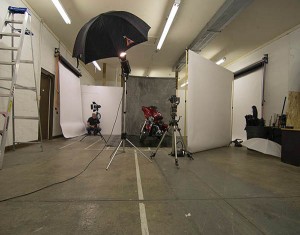
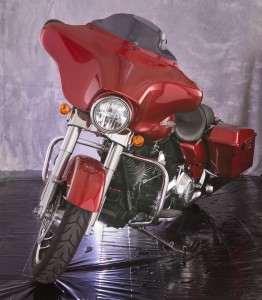
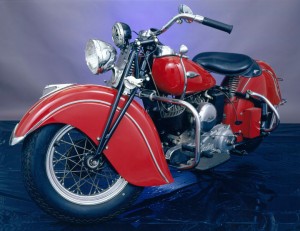
When i shoot a motorcycle i need to use large light modifiers to build good light.

When I shoot a motorcycle I need to use large light modifiers to build good light.

I’ve got a large studio so I have some tools that are only useful in a full time studio. One of the best is my Broncolor Hazylight. I picked up the frame in a studio sale, and adapted a Norman head to fit the frame. Then I put the whole thing on a camera stand, so it’s easy to position in my studio. Most photographers don’t have a space for a light modifier this big. If you’re going to use a smaller studio you might want to use light panels. The panels are cheap to make and incredibly adaptable.
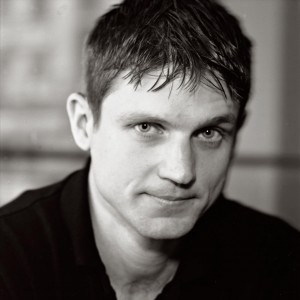
Here's a shot that mixes hard light, soft light and continuous light effectively.

Here’s a shot that mixes hard light, soft light and continuous light effectively. Effective catch lights as well.

One of the important aspects of a portrait is the catch light in the eyes. The catch light, which is really just a small reflection of you’re the light, can change the whole quality of a portrait. If you don’t see a catch light, or if you see an umbrella, or just a tiny pin prick of light, it can damage an image. There are all kinds of light sources for portraits shooting that address this problem. I’ve used quite a few: portrait dish, soft box, octabox, umbrella and so on. One of the things that makes better catch lights is a large circular light source, which will make a round catch light in the subject’s eyes. For this reason I’ve got a cover with a circular cut out for my Hazylight. I would build a similar cover for a soft box, if I were using one. I also use a light panel and a snoot to make a circular light source. I can use the snoot to put a circle of light onto the panel. I can use these tools to make other shapes and control the direction of the light. This gives me a round catch light, or I can change the angle of the snoot and get many different shapes on the light panel. So both the snoot and the light panels are at the top of my list for light modifiers. I also use the snoot as a hard light source in my shots. I’ve found that the snoot is an incredibly fun tool to have in my lighting kit.
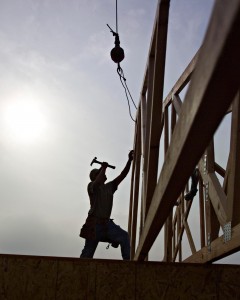
Just a guy using thee right tool for the job!

Just a guy using thee right tool for the job!

I also like using a set of barn doors with my light for illuminating the light panels. The barn doors can even crate a strip with the light panel. I also like the barn doors for shooting architecture. I can control a bounce off a ceiling or other surface, to keep the light out of my image. Of course the barn doors can help to place a highlight in a subject, say a hair light or a rim light. Both the snoot and the barn doors are small light sources, so the position of the light is important, but if you use the snoot or the barn doors with a modifier like the light panel you can make a large light source.

It really doesn’t matter whether you make light with a mono-light or a dedicated strobe. What matters is controlling just a few things: the color of the light, the power of the light, the size and shape of the light source and the position of the light. The color and power of the light really only matter relative to other light sources in your shot. So if you were using just one light you could change the ISO or the aperture to control the amount of light, but if you have two lights they have to be balanced. Not necessarily the same power, but a balance that suits your vision for the shot. Similarly you might want all the lights in a shot to have the same color balance, but you might also want one light to be warmer. A warmer light might give the effect of sunlight coming into your shot. You can control the color of one light in your camera, but the camera won’t make one light warm and another cool. Controlling power and color are tools that you use to build your shot. The size of the light source, relative to your subject, affects the quality of the light: hard or soft. The larger your light source is the less that the position of the light matters; consider how the light comes from the whole sky on an overcast day, no shadows and no direction.
F2359911

The image should start in your mind. If you have an idea of how to position a model, or how to light a face, or a room, or a product, then you can start to build that shot. If you start with the same light each time, or only use existing light, then you have much less control over your shot. So it’s important to understand how each tool works, how you can use the tools together, to build the images you want to make. One of my heroes is Felix the Cat, because whenever he gets in a fix, he reaches into his bag of tricks. As photographers we need a big bag of tricks. Here are a couple of things I have in my bag of tricks whenever I go on location: umbrellas (white, silver, gold all with black covers) gaffers tape, magic arm and super clamp, small tripod, large tripod, lighting filters (Rosco gels) light stands, maybe even a reflector or two. Of course I’ve also got some interesting strobes on location, mine work with both ac and dc power. The heads are small enough to fit almost anywhere. I’ve been doing this for more than forty years, which means a couple of things: I’ve got multiple kits for different location work. I can grab just one box if I’m shooting an executive portrait, but I’ll add a couple of boxes to this, if I’m making room shots. The time I’ve spent shooting also means that the way I use the tools, and the tricks I use, have evolved over the years. Part of being a creative photographer is learning to see what could be, not just what is. I want to help you to build the images that could be.
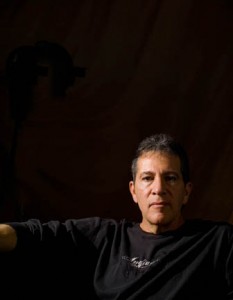
This is shot made with just a snoot.

This is shot made with just a snoot.

Of course I want to see you at the lighting workshop on October 17 & 18. You can sign up here. You can also see another post about the workshop here. There are only two spaces left for the shoot on Sunday. You can also sign up for just Saturday, which will be demonstrations and explanations. Of course if you just can’t make it to the workshop, you can still get my books.

September 21, 2015

Lighting Workshop-New date posting soon!

Next Micro Workshop -New date posting soon

Samantha 1

Samantha was a model in the last workshop

I’ve made some arrangements for models for the Lighting Workshop. There is a new date; I’ll post it soon. So I have pricing and sign-up information for this workshop below. This workshop is about lighting for still photography with strobe lights. We’re going to work on building the images that you see in your mind: pre-visualizing and creating shots. You can sign up for just the first day of the workshop, where I’ll introduce the tools and explain how to manipulate them, or you can sign up for both days. On the second day, Sunday the 18th, we’ll work in the studio with models and still life shots. You’ll be doing the shooting on Sunday! This workshop is about building images in the camera, but of course we’ll also discuss post-production.

Cassie is also going to model for the workshop

Here are some of the details, on Saturday we’ll start at 10am. The day will be about understanding how light works and how to control light. We’re going to concentrate first on how to achieve the quality of light you want. For this part of the day we’ll see how to modify the light to create hard or softer gradations in the light. Then we’ll work on how to pre-visualize your light: how to build an image in your mind and translate it to your camera. In order to build images for the camera we’ll examine how to balance the light between multiple light sources. We’ll also work with color filtration on the light so that we can change the color as well as the amount of light. We’re also going to discuss how to direct a model so that you can realize your visualization. You’ll get to see professional equipment and how it’s used to create an image in the studio. Of course we’ll also discuss how to build better lighting on location.

F2382346 (1)

On Sunday we’ll be shooting all day in the studio. There will be several sets. You’ll get the opportunity to work with live models, and different lighting tools. This will be an opportunity for you to shoot, so bring your cameras! This part of the workshop is limited to just 6 students, and 3 are already signed up! You can bring your own lights on Sunday, if you’d like to work with them, of you can use my lights. Trust me, I have plenty of lights!

F23D2301 (1)

 You can sign up for just the Saturday demonstration part of the workshop, which will give you new ways to work with light, for just $95. If you’d like to come both days (New date posting soon!) it’s just $395, for both days. Pretty great for a two-day workshop with live models! You can sign-up on my site at http://www.siskinphoto.com/workshop.php.

p37

Please visit my site to see my other workshops and to check out the Free On Line Classes!

Of course, if you can’t come to this workshop, you can still buy my books at Amazon:

September 23, 2014

One On One Photography Workshops!

A lot of class promotions start with the term: learn at your own pace. I’m offering you an opportunity to learn at your own pace, one on one, with the instructor. You choose the material we’ll go over. I provide the studio, the equipment, heck I might even buy lunch! Here’s the deal: A day in the studio with me. One on one. Pick a day. Pick the material. You set the pace. While we could discuss anything I think we should stick to photography, since that’s the subject I usually teach. This is a fabulous deal, and it will only last a short time. Just $425 for the studio, the equipment and me! Keep in mind the studio generally rents for $200 a day, so the studio, the equipment and me is a fabulous deal.

Some people have had schedule problems people with past courses, but now You Pick the Date! I hope we’ll have at least six hours together, but the class will fit your schedule. We could even do a second day for just a little more money. Let me know what you want to learn and when you want to come by. Also if you’d like to bring another person we can arrange that for a little more. Of course there’s no extra charge if you want to bring a model.

For my portrait class at BetterPhoto.com

For my portrait class at BetterPhoto.com

Now I know that you wouldn’t want to spend a day in the studio with just anyone. So I have to tell you about my accomplishments. Anyway I do this it’s going to sound like I’m blowing my own horn, but here goes: I was 15 when I had my first photography job, as an assistant to a commercial photographer in Los Angeles. His name is Steve Berman and he also taught at one of the best photography schools in LA: Art Center. I learned a lot! In the more than 40 years since then I’ve worked as a photographer and taught photography. In Los Angeles I’ve shot for Disney, Munchkin and General motors as repeatedly. Since I’ve moved to Indianapolis I’ve shot for the Hilton, BMW Construction, Mid West Studio and more. I’m currently teaching three classes at BetterPhoto.com: An Introduction to Photographic Lighting, Portrait Lighting on Location and in the Studio, and Getting Started in Commercial Photography. BetterPhoto has sent me students from all over the world. I’ve done two books for Amherst Media: Understanding and Controlling Strobe Lighting: A Guide for Digital Photographers and Photographing Architecture. Both are available from Amazon and also local camera stores. I’ve done a couple of dozen articles for photography magazines including Shutterbug, Photo Techniques, Studio Photography and View Camera. You can learn a lot more about me by visiting my website: www.siskinphoto.com. You’ll find most of my articles on the magazine page at my site. Of course I’ll answer any questions about my experience, just call 317.473.0406 or e-mail to john@siskinphoto.com

I also want to introduce you to my studio, because it is a terrific place to experiment and learn. I have more than twenty strobes, including a strobe powered projector! There are another half dozen quartz lights, various types. In addition there are umbrellas, light panels and soft boxes, even a ring light and a beauty dish. So you’ll have the opportunity for hands on learning with any equipment you might want. The shooting space is 24X45 feet with a 12 foot ceiling. Of course we could also arrange to do a location shoot, even an architectural shoot.

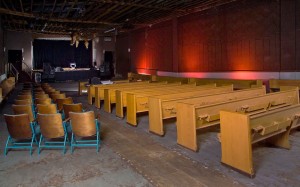
Shot of the Irving Theater for a workshop in Indianapolis.

Shot of the Irving Theater for a workshop in Indianapolis.

This is a custom learning opportunity. You can choose the material we cover. Here are some ideas, these can be a class or a starting point: How Light Works, Portraiture Lighting, Product Lighting, Shooting Jewelry, Commercial Photography, One Light Shooting, Location Shooting and whatever else I can help you with. For many subjects we can begin with a structured program or we can experiment and discover together.

Shot with a group of Ivy Tech students in my studio.

Shot with a group of Ivy Tech students in my studio.

The price for your day in the studio is just $425.


Remember you can choose a date that fits your schedule.
Shot with a class from The Learning Tree University in Los Angeles

Shot with a class from The Learning Tree University in Los Angeles

The pictures are from workshops and classes I’ve presented over the last few years.

If you’re in Indiana I hope you’ll also consider taking my Portfolio Workshop. You can see a little more information about the Portfolio Workshop if you check out this blog post .
 

Please visit my site to see my other workshops and to check out the Free On Line Classes!

April 30, 2014

Notes From the Lighting Workshop

Filed under: Indianapolis,Lighting Technique,Photographic Education,Portraits — John Siskin @ 12:22 pm

Please check out my on-line classes at BetterPhoto: An Introduction to Photographic Lighting, Portrait Lighting on Location and in the Studio and Getting Started in Commercial Photography, take a look at my site for workshops in Indianapolis and check out my books:

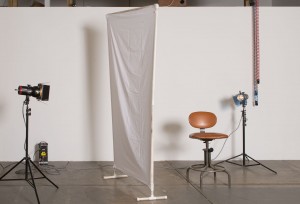
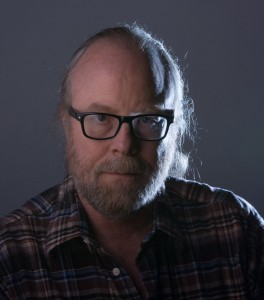
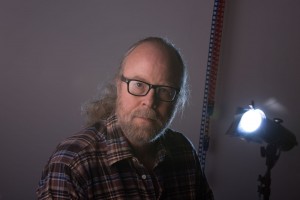
The Lighting Workshop happened last weekend and it went very well. We spent all day discussing and working with strobes. Since the class size was small I was able to be very responsive to the specific interests of each participant. We set up the strobes to see how the tools work in specific situations as well as discussing the basics of how light works. If you understand the basics of a light: size, color, position and power, you can understand what a light will do. We did a lot of shots so that we could see the effect. Of course the shots were for demonstration so we concentrated on the lighting. In this shot I’m the model, which is not my best talent. I used a light panel with a white cotton broad cloth cover. These are great light modifiers. I wanted to use a hard light in the shot so I set up a strobe with a snoot to the right of the camera. I like snoots more than grid spots because the light spreads more than with grids as you pull the snoots back from the subject. This shot shows the set-up.
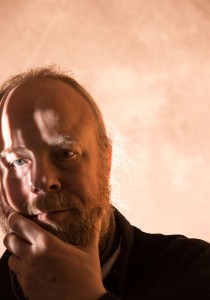
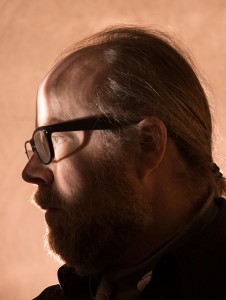
The light panel gives a smooth gradation across most of the face. The snoot defines the other side of the face. One of the first things I wanted to demonstrate was how to use a colored gel to change the color of the light. I usually use warm gels, but I wanted to make a change here so I added a CTB gel, which is a blue. The CTB gel is from Rosco and is designed to make a tungsten light act like daylight. The shot below shows how the shot looked at first: not great. The light on my face is a little dark while there is probably too much light from the snoot. It burns out the left side of my face.

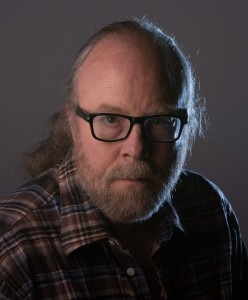
In the next shot I made some adjustments. The light on my face is a little brighter, which helps. Also I’ve positioned the light panel just a little more in front of my face; this make the light cover more of my face. The snoot is positioned to keep the light on just the side of my face. This is accomplished by moving the snoot a little more toward the center of the shot. The light from the snoot is still too bright. You’ll notice that since the light panel is still situated pretty far to the side of my face as  there is little or know reflection in my glasses. The further the light panels comes toward the camera position the more reflection there will be in my glasses.

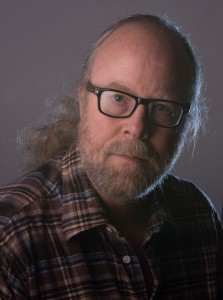
In the last shot I added a 1-stop neutral density filter to the blue gel. This reduced the light on the left side of my face nicely. The light panel is a little closer to the camera position so there is a little more reflection in my glasses. When you use a large light modifier, which makes soft light, the reflection (specular highlight) is larger and less bright, relative to the rest of the light. So the reflection is as strong as a reflection from a small hard light. This works well in this shot. The same thing applies to the catch lights in the eyes, which have a nice size and brightness in this shot.

You can see the two gels on the version of the shot below. They’re held onto the snoot by a very small spring clamp.

I hope you’ll consider taking one of my workshops. The next one is the continuing Portfolio Workshop on June 2. You can find more information on the workshop page of my site. You can also find the books on my site, and I hope you’ll check them out. I’ll be speaking about micro (not macro but micro) photography on June 5 at the Photo Venture Camera Club here in Indianapolis. Finally please don’t forget my classes at BetterPhoto, you can take them anywhere!
An Introduction to Photographic Lighting
Portrait Lighting on Location and in the Studio

Getting Started in Commercial Photography

Here are a couple more shots from the workshop. Thanks Bill!


February 20, 2014

The Norman Tri-Lite and Me

Filed under: Lighting Technique,Photographic Equipment,Portraits — John Siskin @ 2:23 pm

Please check out my on-line classes at BetterPhoto: An Introduction to Photographic Lighting, Portrait Lighting on Location and in the Studio and Getting Started in Commercial Photography and my books:

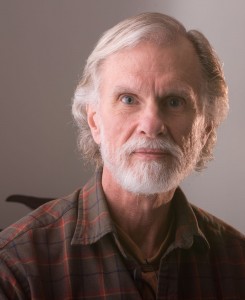
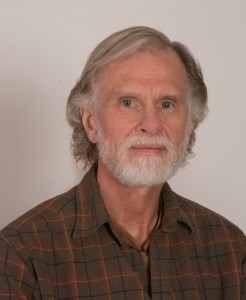
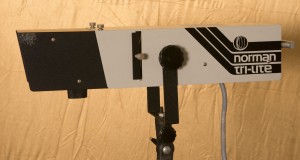
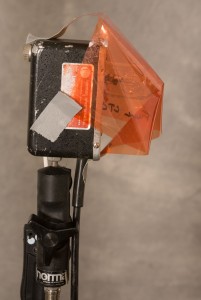
So I wanted to post a few samples made with the Norman Tri-Lite I just got. Unfortunately the only person I’ve had around the studio to inflict portraits on is myself. So I’m posting selfies. As you may remember the Tri-Lite is a sort of slide projector that uses a strobe for a light source. I’ve experimented with this before with a home built projector (https://siskinphoto.com/blog/?p=742 and https://siskinphoto.com/blog/?p=804) but the Tri-Lite is a brighter and more reliable tool. Norman doesn’t make the Tri-Lite anymore but you can find them at eBay. You need a Norman power Pack to power the Tri-Lite, it won’t plug into the wall. All the Tri-Lites I’ve seen work with the Norman 900 series power packs, but I understand some were built that use other Norman packs. If you want more information download the instructions for the Tri-Lite here. I used a simple cucoloris made out of cine foil for the shot. I put a picture of the Tri-Lite and the cucoloris below.


I used a bare bulb Norman 200B behind my head to make a rim light and to bounce off the light panel on my right side. You can see the set-up below. I covered the 200B with a Rosco CTO to give warmth to the background and the rim lite. On some of the shots I used a second 200B behind the light panel to give me a large light source. You can see the set-up and the bare bulb 200B with the CTO filter below.

So here’s the selfies with the Tri-Lite

Here’s a couple where I missed my head with the Tri Lite. It’s really tricky to do selfies with a light source that really needs to be aimed carefully.


I wanted to update you on a few things happening here at my studio: first I’m continuing to offer the Portfolio Workshop. For more information on this and my other workshops please take a look at the workshop page on my site. You can also find information about the Matting & Framing Workshop for Photographers at the site. This is going to be a very small class, so if you’re in Indianapolis sign up now. You can also rent my studio, and get the chance to work with Normans! Call 317.473.0406 or e-mail to reserve time for a shoot or a private workshop. If you can’t get to Indianapolis you can take one of my BetterPhoto classes:
An Introduction to Photographic Lighting
Portrait Lighting on Location and in the Studio
Getting Started in Commercial Photography.

October 30, 2013

Studio Open House!


To start I just want to remind you about the classes: An Introduction to Photographic Lighting, Portrait Lighting on Location and in the Studio and Getting Started in Commercial Photography and the books:


I’m going to be having an opening for my studio on Friday November 1. The address is 971 North Delaware Street, Suite B, here in Indianapolis. Please come by if you can. I’ll be showing photographs of buildings in my studio and at the building in front: Re/Max Metro. The text for this blog entry is from recent correspondence and the photos are from a job for BMW Contractors. Thanks for your attention!


A couple of things about rim light, first most of your shots won’t work. Positioning the light is very critical, and even when you have an assistant, most of the time the light or the model won’t be in the right place. I much prefer the snoot as a tool for rim light. Norman has a wider “stovepipe” snoot that I prefer to the smaller ones like the Alien Bee. What I do most of the time to get rim light is put a bare bulb strobe, no reflector at all behind directly behind the subject. This works more often. This will put light on the background so sometimes I put a gel on the back of the light to change the color of the background. The position and power of the light both affect the outcome, so you have to experiment. I like to avoid discussing things in terms or ratios for several reasons: the most important is that ratios stop people from paying attention to the results. I set up my shots with a tethered computer so that I can evaluate the shot better. The bare bulb allows for more movement in the subject, but you have to keep the subject between you and the light. You can also use a large reflector on the side to bring some of the light to the front.


I really like to use at least one very large light modifier, usually a light panel, for a portrait. It creates a very soft gradation.

I don’t like the term “natural light.” It is a value term, and it often gives the idea that ambient or found light is generally or always better than light you design and create. This isn’t true. Many people have no idea how to make good light, but that is no reason to think that found light must be better. Photography comes from the Greek and means “write with light” if you can’t design good light are you writing with light or copying light?


You need to look at several things when you examine light. The first is the color. Often people don’t notice how warm or cool a light source is. The color of a subject will shift with the light, but because our eyes compensate for color, we don’t always notice.


The transition from light to shadow is a function of the size of a light source. So if you have light from the sky coming into a room you get a large light source, very long transition from light to dark. You need a big light source, at least as big as a window, to reproduce this light. Hard light makes very short transitions, which look like sunlight especially if you add warm filtration to the light.


Watch a person’s eyes in prints or when you are shooting. You can often see the reflection of the light source there. A small reflection come from a hard light, a bigger reflection is a large light source. The large reflection won’t be as bright. The eyes can also tell you about the placement and direction of light sources.


Balancing light is the essential trick with strobes, to evaluate and change our images by searching for the right levels on our lights and our exposures. With the histogram and the proof image on camera or in the computer we have better tools for creating the right exposure than any meter could give us, but it does take repeated testing. If you use a hand-held meter you will get an answer, but very often it will be profoundly wrong.


In addition to the new image stabilization equipment, there are some standard suggestions about holding the camera more effectively. Cradle the lens in your left hand, thumb pointing away from your body. The left hand supports the lens and the camera. The right hand guides the camera and controls the camera. Relax your body and breath out half way when you shoot. Lean against a tree or a wall. You might also consider a mono-pod or a chainpod to help stabilize your camera.

I hope people are interested in these posts, but I really don’t know. If you want to leave a comment you have to log in. I’m sorry about that, but I was getting a huge amount of spam posts, so I had to change to registration. If you’d like you can send me an e-mail with your comments, john@siskinphoto.com. Also please remember the classes and the books!

An Introduction to Photographic Lighting
Portrait Lighting on Location and in the Studio
Getting Started in Commercial Photography.


July 6, 2011

Portraiture

Filed under: Lighting Technique,Portraits — John Siskin @ 3:31 pm

Here are some plugs for my books and classes: you can get right away from Amazon: Understanding and Controlling Strobe Lighting: A Guide for Digital Photographers which is at Amazon.com and other places. You can get a Kindle version or a Nook version also. The Kindle version looks OK, but the pagination is a little weird on my reader. Here is a sample chapter from the book. There has been nothing but good feedback on this book, so I would guess that you’ll like it. Of course I still hope that you will please consider purchasing my fine art book B Four: pictures of beach, beauty, beings and buildings. Purchases of this book mean a lot to me, and it is also a fine gift for any occasion. I lowered the price a couple of weeks ago, and that has helped. As you know I teach for BetterPhoto.com. I really hope you’ll sign up my class: An Introduction to Photographic Lighting. Remember that the books and the class keep me updating this blog. My new book, Lighting For Architectural Photography will be out in the fall.
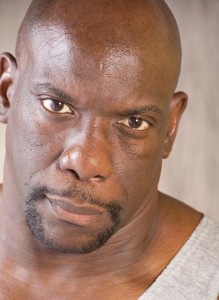
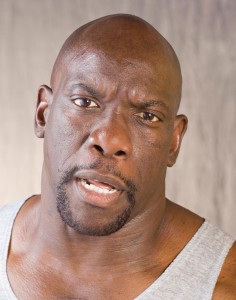
I have the idea that many of the people who take my classes, read the books or even just look at this blog are interested in taking portraits. I don’t get much actual feedback about most of the work I put out, so I could be wrong about this. But no matter, this issue of the blog will be about portraiture. I just did a shoot for Randy, a friend of mine. He is a good subject in that he has strong features and is patient. Actually there is a shot of him in my book on page 88. There are a couple of things about this shoot that might be instructive, at least I hope so.

First, the light is harder than I might use for many portraits. This works well for this subject. You would not want to have this level of reflectivity in the skin if the person had a very light complexion. The density and shininess of the skin should effect the decisions you make about light. The light should be adjusted for each subject. I often use the same tools for portraits but I use them differently. In this case I used a light panel very close to the subject. The panel was about three feet from the subject. It was on the subject’s right side. Often I use a light with an umbrella behind the panel, but in this case I used a strobe with barn doors. The barn doors keep the light from spilling out the sides of the light panel. Using the light directly on the panel gives you a harder effect. The light was at the top of the panel pointed down the panel. This created a gradated light across the panel. I think this gives the face a little more shape.

I had a second light with a beauty dish behind and above the camera. It was on the right of the camera. I was using my old Norman strobes. The Norman beauty dish is about 2 feet across and painted white. I like the catch light it makes in the eye. Also, because of the size of the dish, it is a moderately hard light. Finally I placed a light panel with a gold cover on the subject’s left side. The large size of this reflector means that the position isn’t very critical. The harder, or smaller, a light source is the more critical the position of the light is.

If I was shooting a person with a much lighter complexion I could use shadow to add shape to the face. Randy is quite dark, perhaps a little darker than he actually appears in the first two shots, so if I used a lot of shadow I would actually lose shape. The mid tones of a photograph are much better at expressing information about the subject than the highlights or deep shadows. So, for this subject, I wanted to use highlights to impart shape more than shadow. There are also cultural aspects of this: for reasons I don’t actually understand reflections are not considered flattering to many European skin tones. I think the reflectivity in Randy’s skin is quite flattering and quite effective. I am pleased with the strong sense of three-dimensionality in these shots.

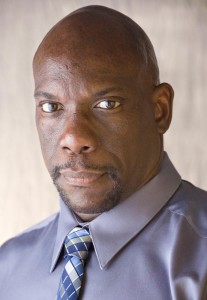
I used a light gray background illuminated with a 1/2 CTO filter to give a warm look in back of the subject. I like the warm color for Randy, which is why I used a gold reflector on his left side. I would avoid a dark background for this subject. First it would have made it tougher to delineate the shape of his head and it might have made him look much more menacing. I dislike portraits where a black background seems to swallow the subject. I included two versions of this image so that you can see the difference expression makes.

In the third shot I moved the gold reflector. It blocked most of the light from the beauty dish. This changes the light on the face, and, importantly, it changes the catch lights in the eyes. I think this creates a more powerful look for Randy, which works well with the more formal shirt and the tie. I think the having the right side of the photograph darker is very effective.

The lights were three Norman LH2400. The power pack was a Norman P1250D. The light behind the light panel had 375 Watt-second and the light on the background had the same. I used a snoot on the background light to control spill. The light with beauty dish was set to 250 watt-seconds. The light panel on the left of the camera had one layer of white cotton broad cloth.

When I teach a class I ask people to practice. I suggest that they work with a Styrofoam wig head and cheap flood lights. The wig head is all white that makes it easy to see the shadows. The flood lights are easy to see and to manipulate. This gives you a sort of a lighting lab where you can practice and experiment. I still use the wig head when I get a new piece of lighting gear. I know I’ve said this before: musicians practice so they can play, why shouldn’t we? If you can only practice with a live model you won’t be able to take the same risks you can with a hunk of Styrofoam. Most models don’t have the patience of the wig head. So, if you’re thinking about a lighting class why not mine?
BetterPhoto.com, The better way to learn photography

« Newer Posts

Powered by WordPress