Photo Notes A place to talk about making images.

January 17, 2015

On Contests

My books and my classes give me a reason to keep doing this blog. If you’re in Indiana I hope you’ll consider taking my Portfolio Workshop. You can see a little more information about this workshop if you check out this blog post. Thanks so much for your attention.

I seem to be judging photo contests more often. I would guess this is because I’m getting a more extensive network here in Indiana. Judging is always interesting, and occasionally inspiring. I’m usually asked to make some remarks about judging, as well as talking about the images. What follows are some of the things I think about photo contests.

pr07

First judging is capricious. Any individual judge has his/her particular experience as well as taste. So any contest that has multiple judges is likely to have more even standards than a contest judged by one person. I know that some organizations have standards for judging, but I think that the personality of the judge will still affect her/his choices.

11

Photography is not inherently a competitive endeavor; like ice dancing the results are much more open to interpretation than a 100 meter run. A photograph can be extremely personal and deeply evocative with out being a contest winner. I have images that look good to me, for personal reasons, that I don’t want to share. Photographs are a form of communication. Some photographs are able to communicate with almost anyone, while some images are only for a personal journal.

pr15

When I choose to enter a contest there is usually some reward besides winning. For instance the images might be published in a magazine or part of a show. I’ve also entered some contests to get my work in front of a particular judge. Usually I’m looking for an opportunity to promote my images or meet people. In addition I often enter contests that have an entry fee. When there is a fee people only enter their best images. I can understand that people only want the opportunity to share images with friends, but I’m not sure that a contest is the best way to do this. The whole business of winning and losing is not as important as communicating ideas, vision and feelings.

pr02

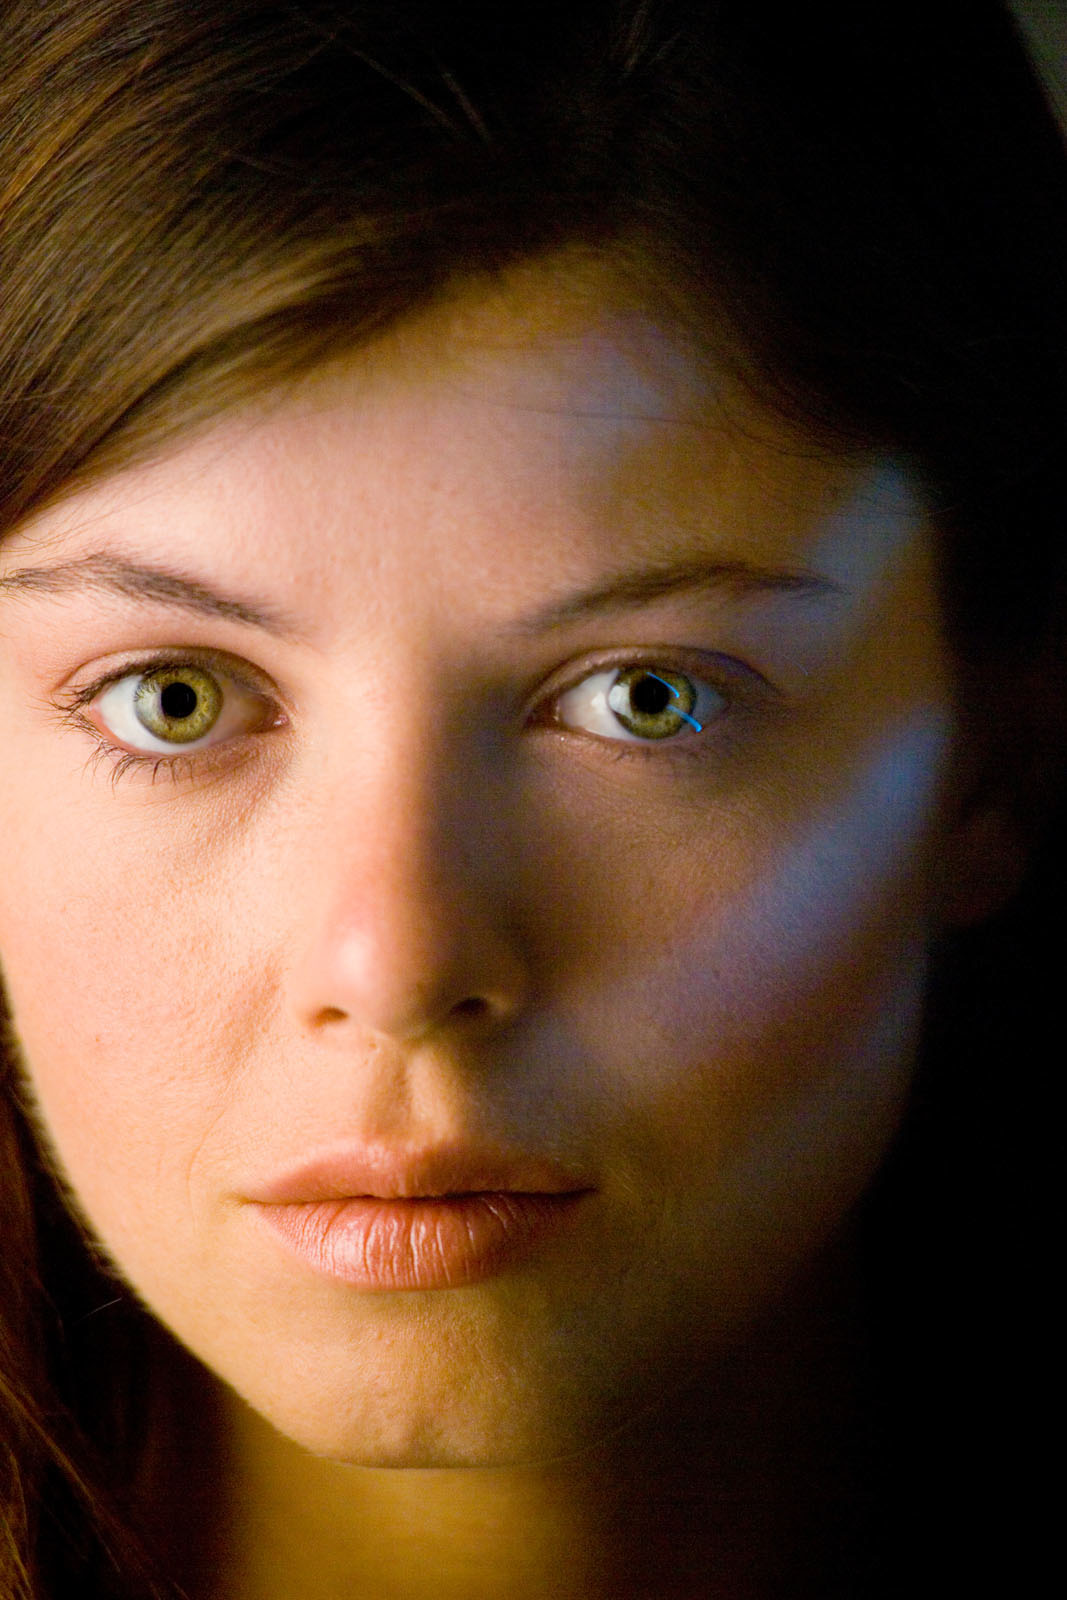
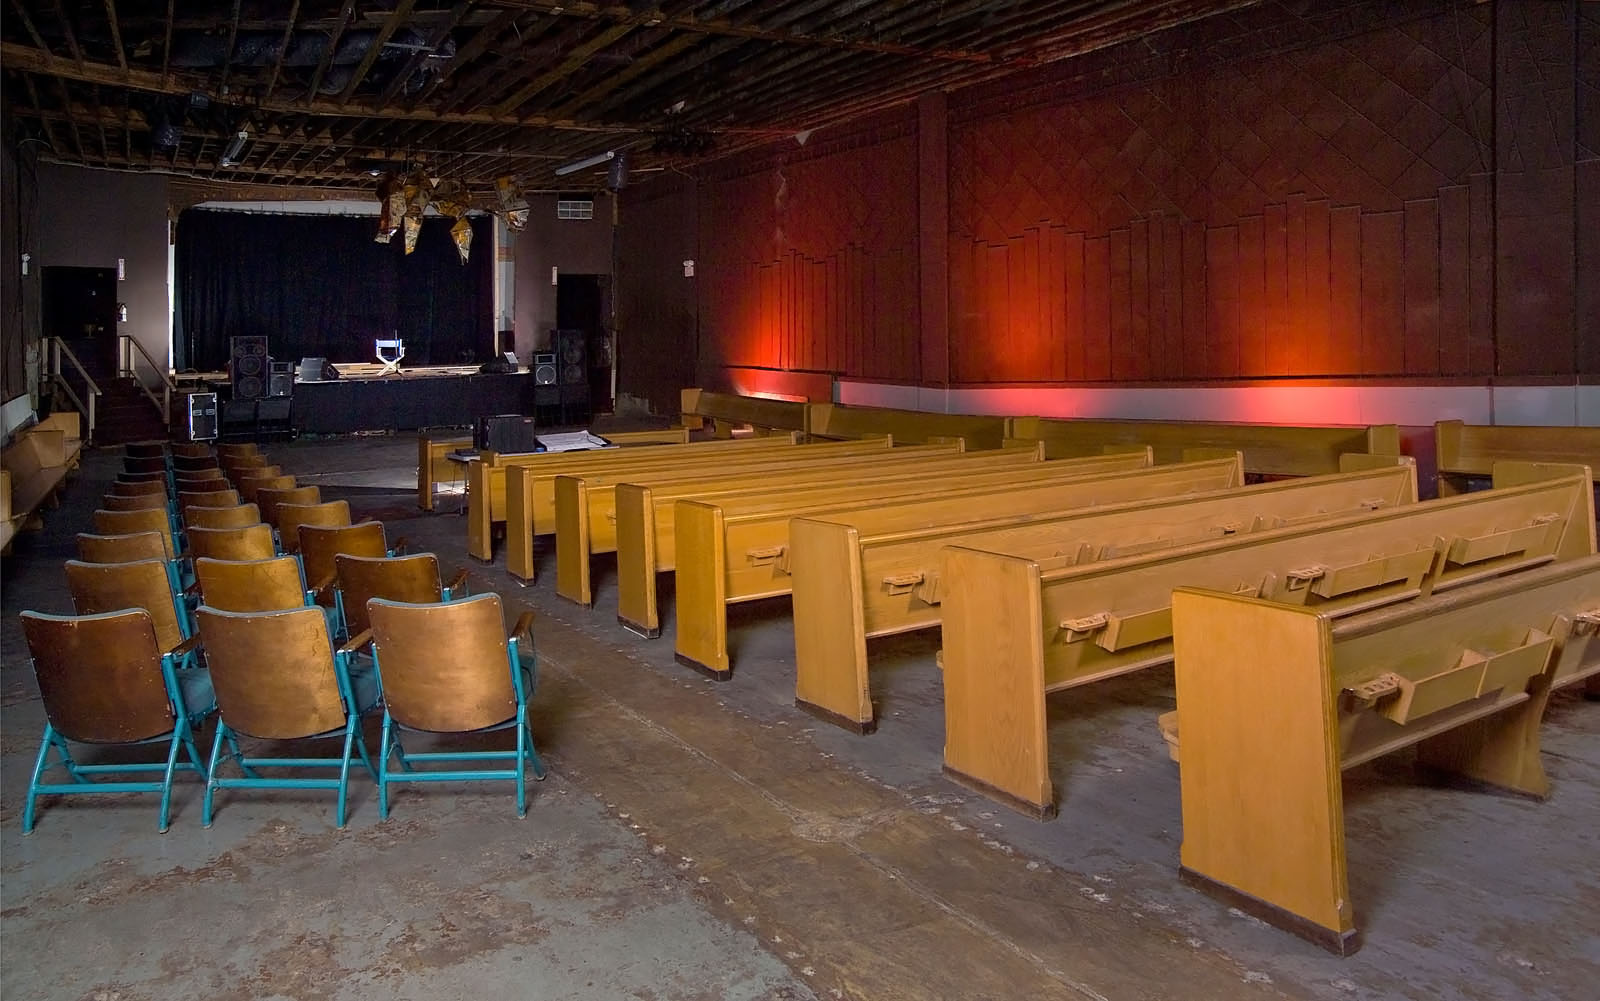
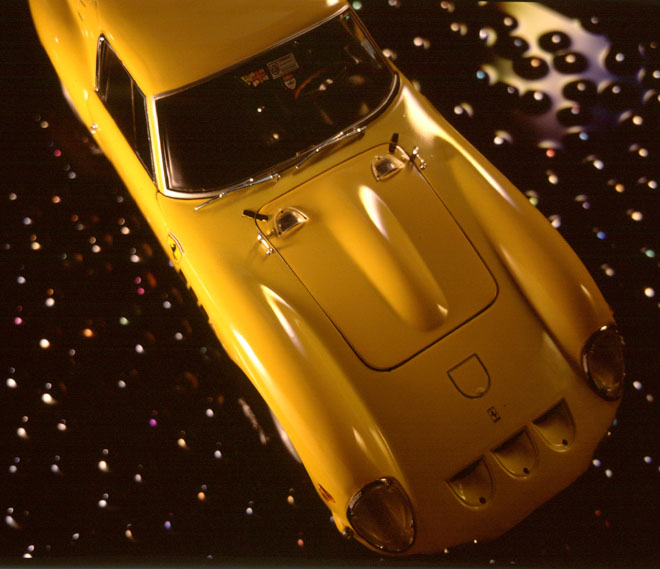
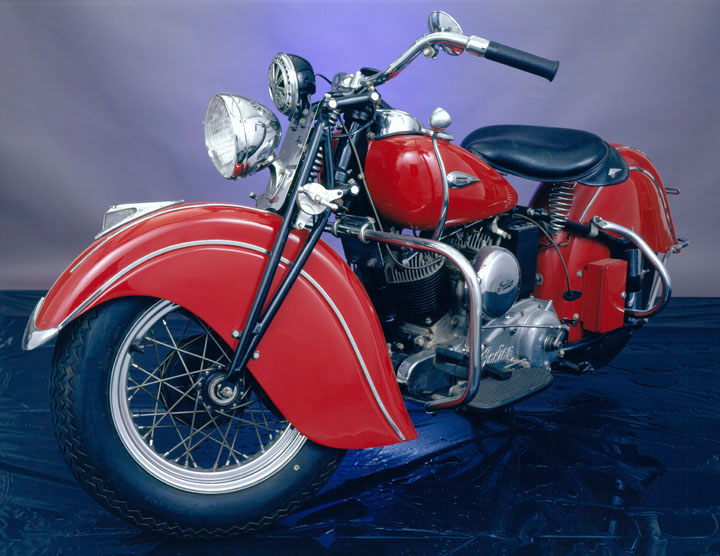
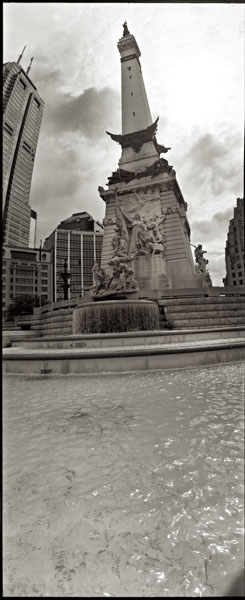
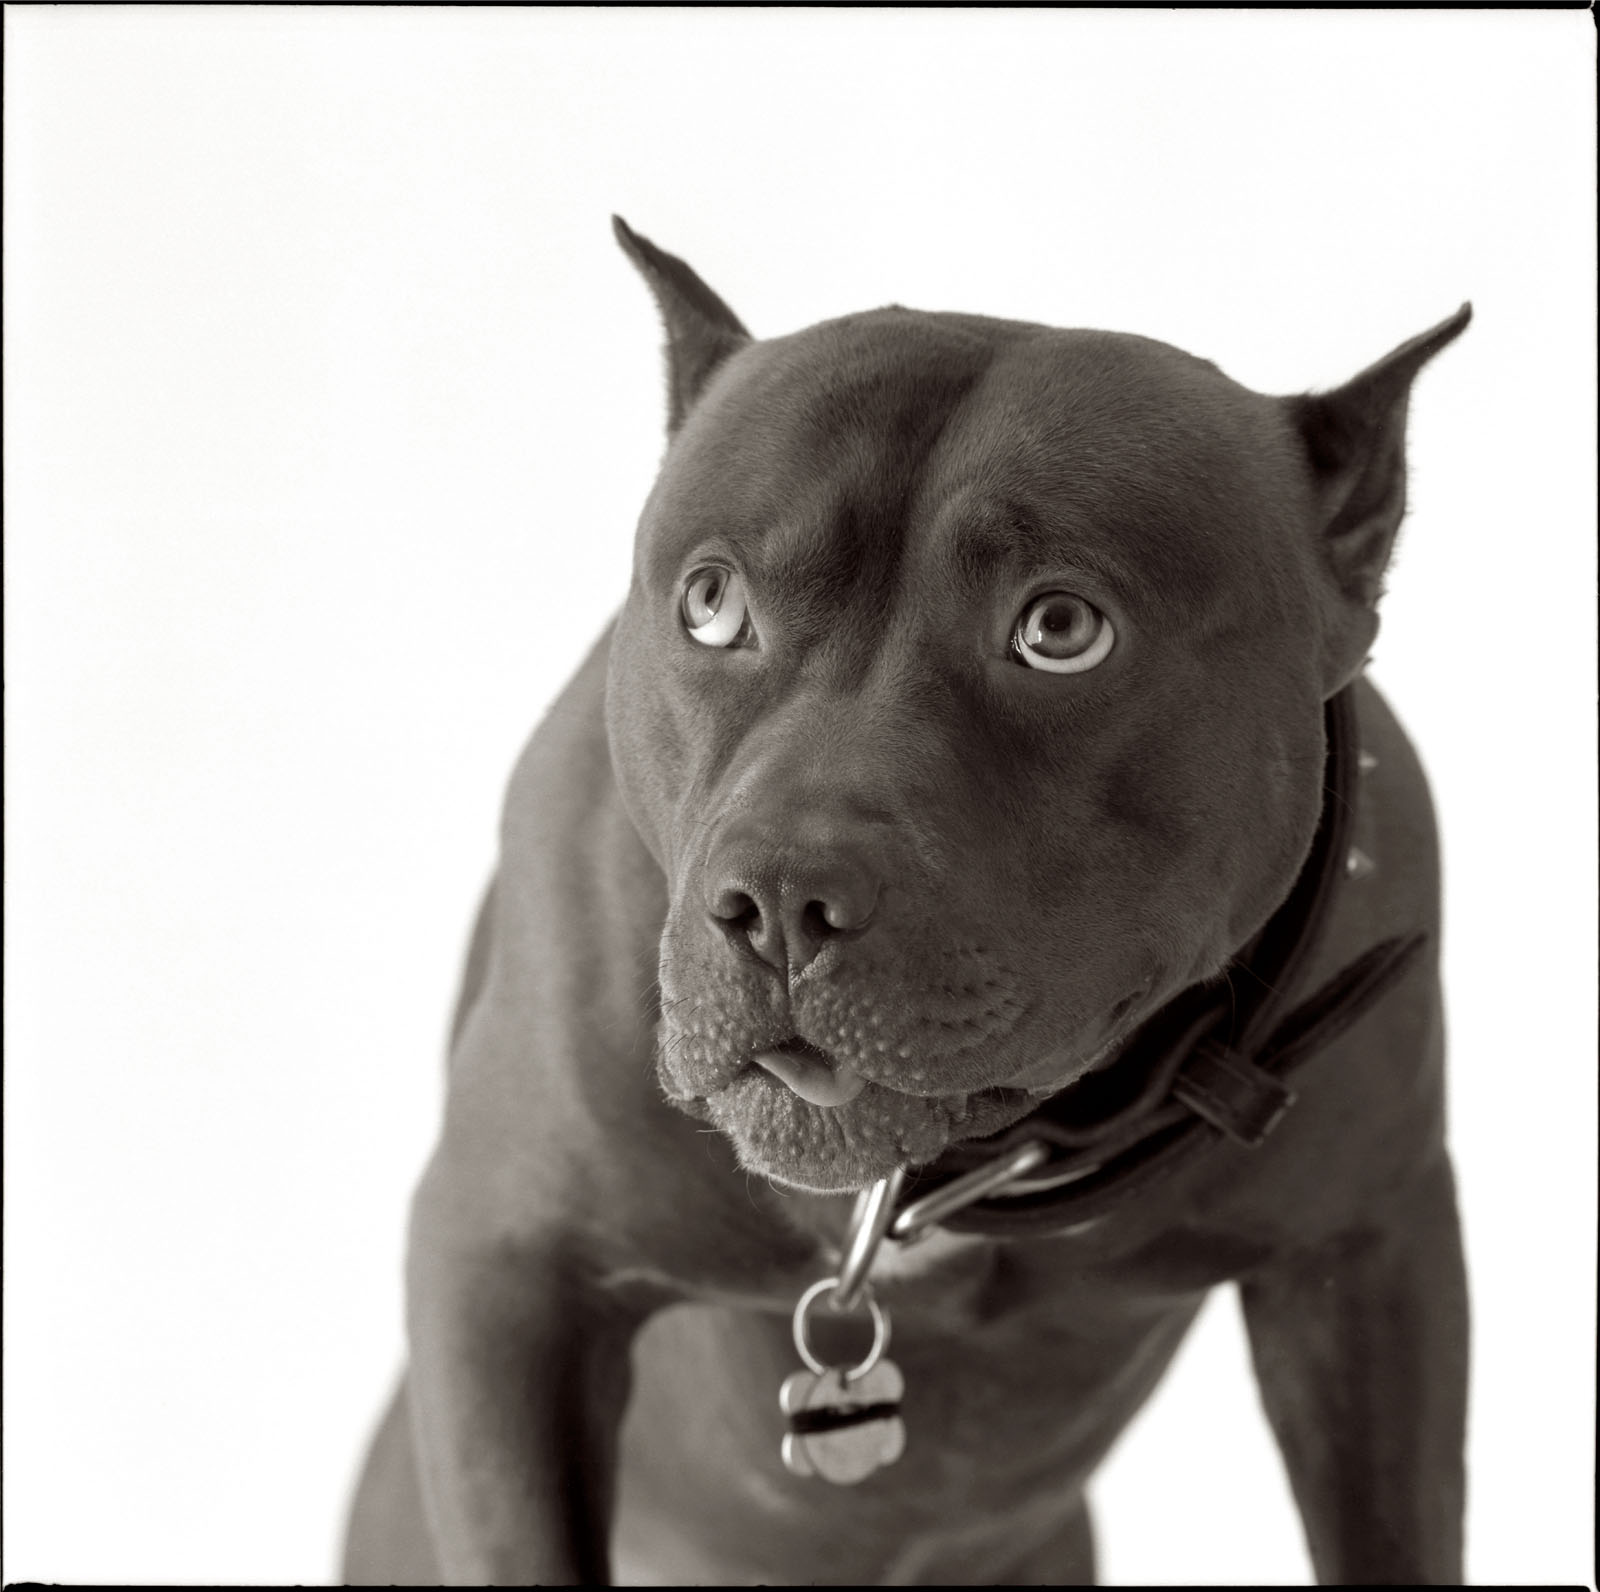
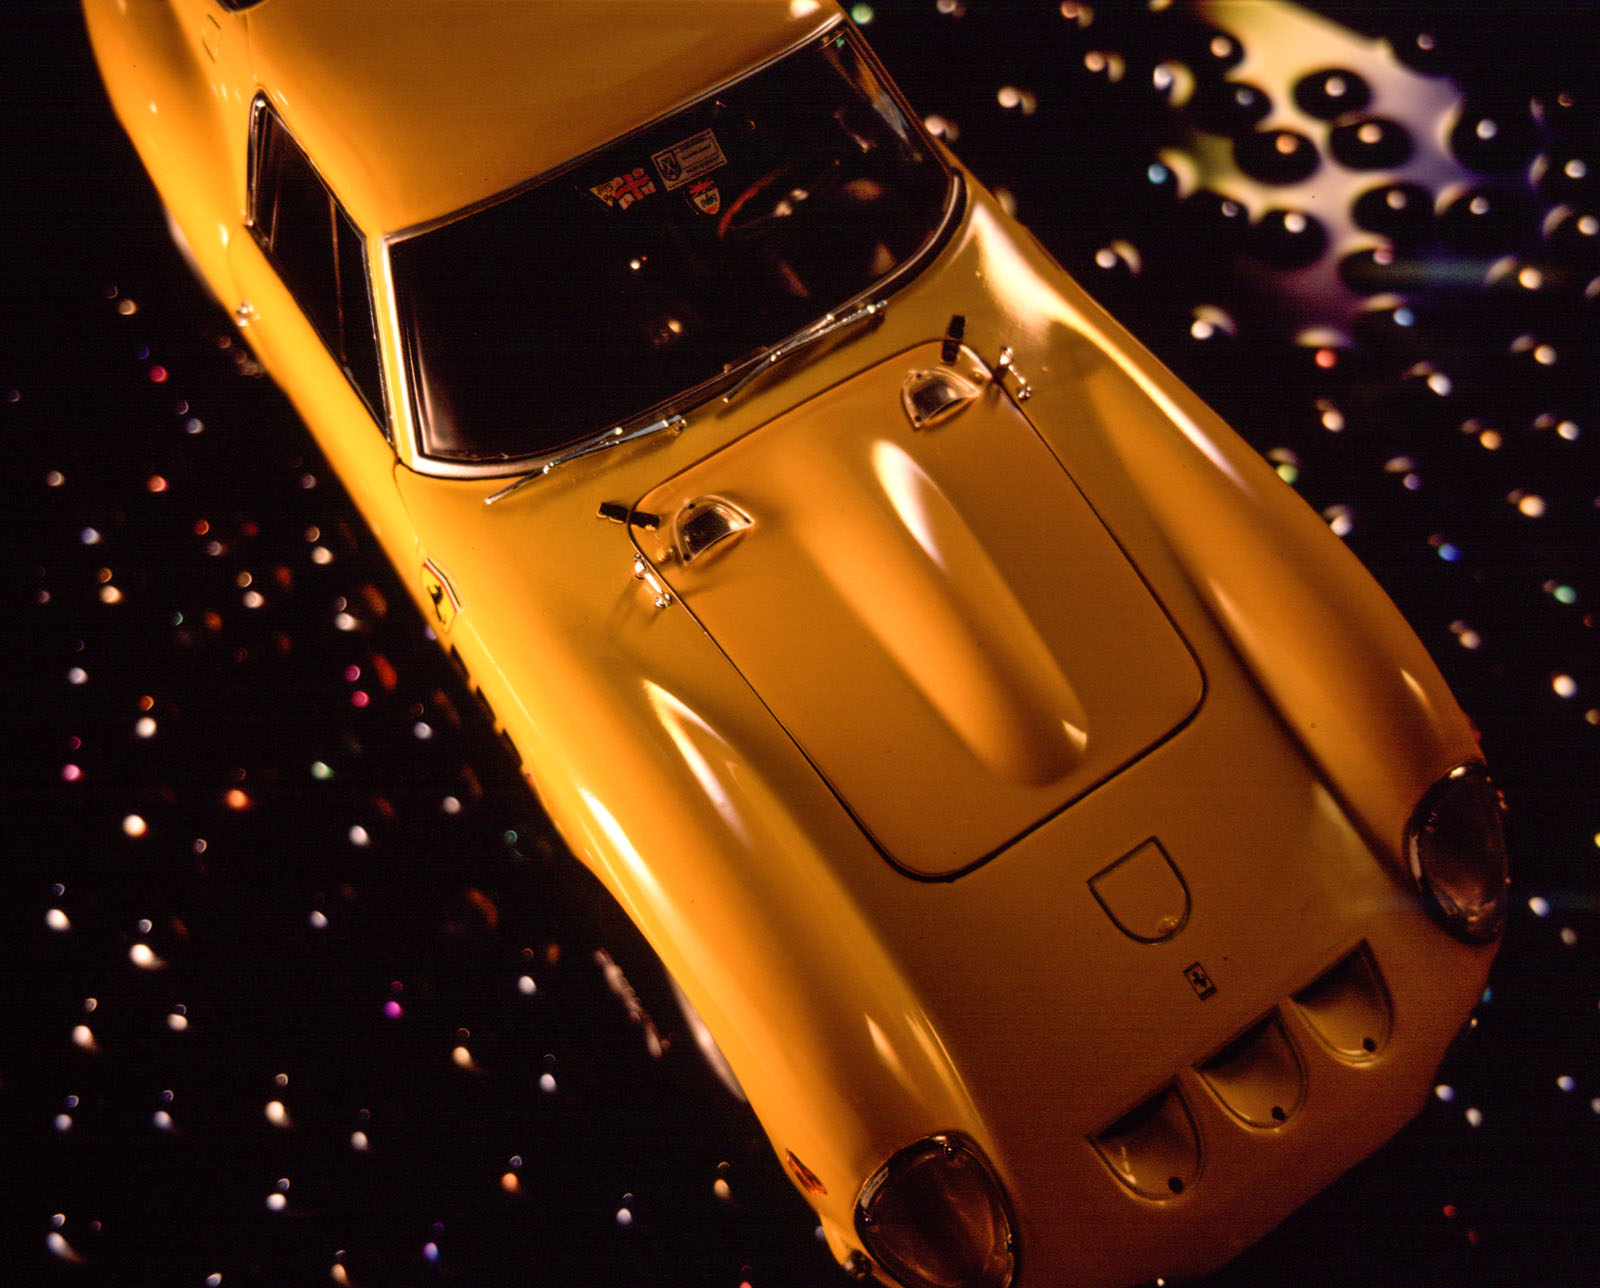
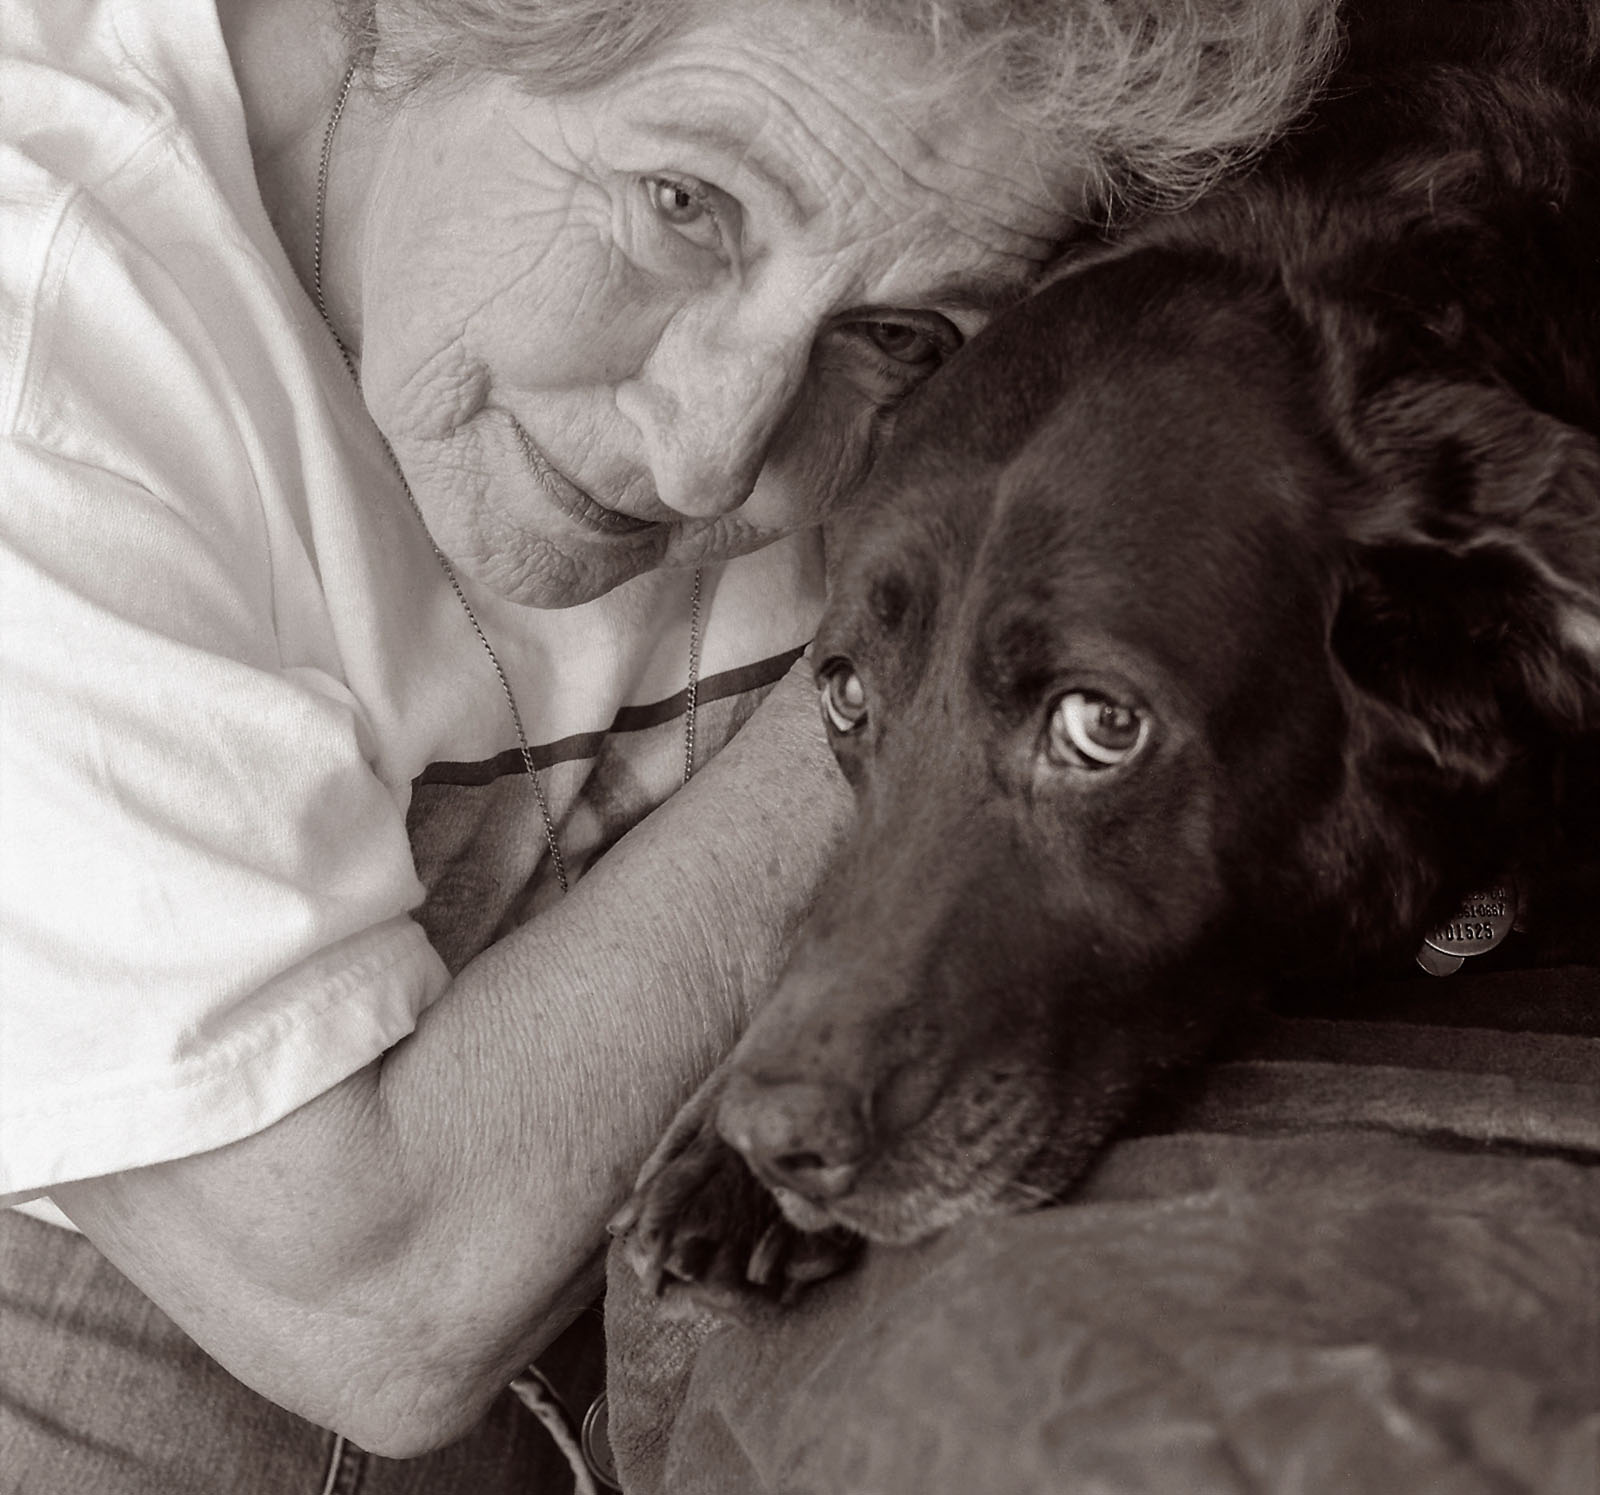
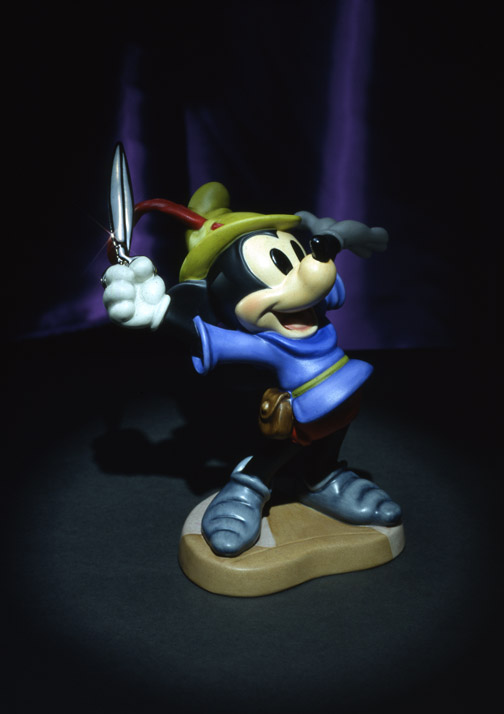
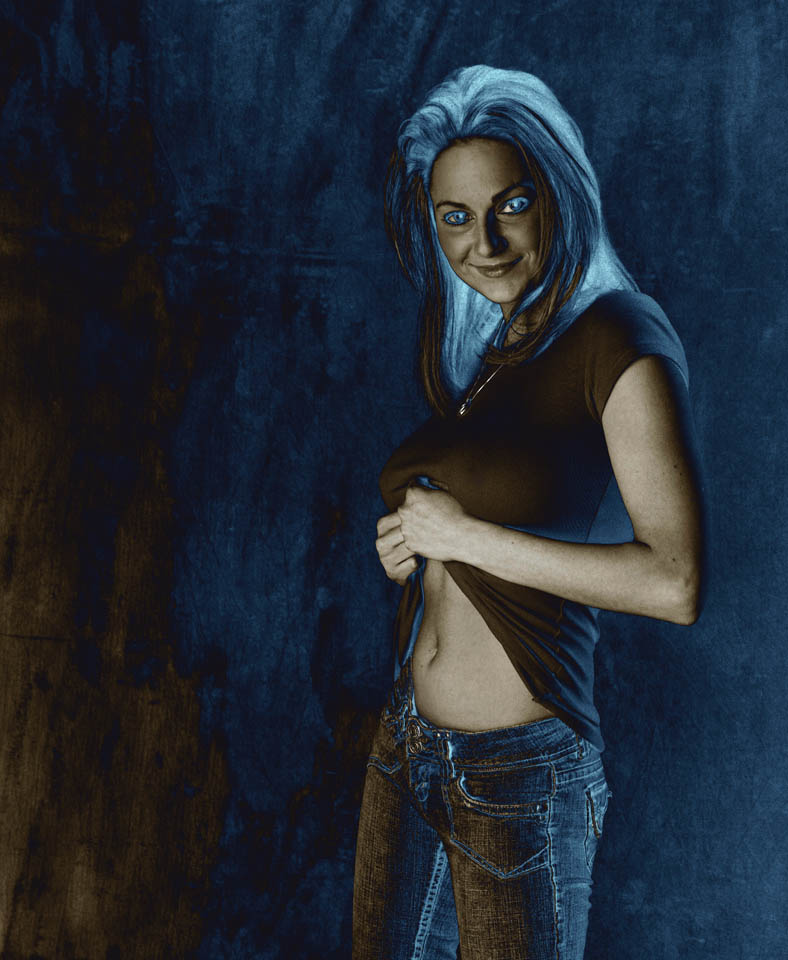
When I’m judging a contest I look at how much the interpretation or manipulation the photographer brought to the image. While there are may fabulous images that are technically just f8 and be there, I enjoy seeing images that the photographer worked for. I always want to see the photographer’s interpretation and expression in an image. Frankly I think it would be interesting to see a competition where everyone worked in the same location and had a choice of when to visit the location. Here’s the thing: many people take pictures, fewer people make pictures. I’ve included a couple of made pictures with this post.

disney 2 copy (1)

An image for a contest needs to be pretty strong. In most cases a judge won’t have time to become deeply involved with a very subtle image. You need to do a good job presenting your images matting and framing them. If you don’t present your images well it’s unlikely a judge will fully appreciate them. It’s my opinion that a neutral color mat: white gray or black is better for competition because you can’t control what will appear next to your shot. If I’m showing a more graphic image I might use a smaller mat to make the image space larger, but many images need extra space around them to isolate them from the surroundings. If two images are equally good, if such a thing is possible, that the image with better presentation will win. A good image, well presented, may often do better than a better image poorly presented. I usually use black metal frames for my images because are durable and separate my images from the surroundings.

jennifer solarization

One more thing, and this is a personal opinion. I don’t like canvas mounted photographs. I think that putting a photograph on canvas is a way of making a fake painting. My photographs are supposed to be photographs not paintings. If you would rather have paintings than photographs, or you think that paintings are better than photographs, perhaps you should learn to paint. If your clients will pay more for a photograph mounted on canvas then, by all means get canvas mounted photographs. Having said this, I think gallery wraps, where the image continues around the edges of the canvas frame can look good in some rooms, but I don’t think they are good for a competition. They are too easy to damage and they don’t separate from their surroundings.

pr12

If an image is good enough, and sufficiently better than the competition, than it can break any rule and still win. But good enough means pretty damn good. Things like the tonal separation in your print, sharpness and color are critical. It’s possible to have a good image on your computer and get a poor print. Before you enter a print in a competition make sure that print presents your image as well as possible.

knife   pepper

If you’re in Indiana you might be interested in my Portfolio Workshop. We discuss many of these issues and others. There’s more information about the workshop at this link. Also I’m putting some of my BetterPhoto lessons on my site. Please check them out at this link. If you’re interested in a One on One Workshop or private consultation please get in touch.

January 5, 2015

Free Photo Classes!

My books and my classes give me a reason to keep doing this blog. If you’re in Indiana I hope you’ll consider taking my Portfolio Workshop. You can see a little more information about this workshop if you check out this blog post. Thanks so much for your attention.

I taught Photographic Lighting and other subjects at BetterPhoto for about eight years, and it was a wonderful experience. I got to work with emerging photographer from all over the world as well as the other experienced pros who also offered courses at BetterPhoto. BetterPhoto is charting a new course that won’t involve any of the interactive classes that I, or the other instructors offered. I hope that Jim Moitke and the rest of the BetterPhoto crew do well with this venture.

I’ve been thinking about what to do with my classes. They’ve done well for me at BetterPhoto where I supported them with photo critiques, responses to questions and regular e-mails. Since the classes were priced around $200, I was compensated for this work. I’ve decided to make the lessons available on line for free, but if you want critiques and other support for the lessons I’ll charge a per lesson, rather than per class, fee of $25. This will give interested people a chance to use the course material and get help when they need it. I hope you’ll understand that I don’t have time to support these classes for free.

I’ll be putting up the lessons over the next few months. I hope to post a new one weekly. They’ll also be available at the workshop page of my site. So please check pack for more lessons. There is a PayPal link with each lesson so you can choose to get critiques of the assignments, or if you just want to support the lessons.

An Introduction to Photographic Lighting

Photographic Lighting, Lesson 1.pdf


Photographic Lighting, Lesson 2
Photographic Lighting, Lesson 3
Photographic Lighting, Lesson 4
An Introduction to Product PhotographyProduct Photography, Lesson 1

Product Photography, Lesson 2

October 20, 2014

Junk Man

My books and my classes give me a reason to keep doing this blog. If you’re in Indiana I hope you’ll consider taking my Portfolio Workshop. You can see a little more information about this workshop if you check out this blog post . I’ve listed my BetterPhoto classes at the end of this post. Thanks so much for your attention.


I’m a junk man. I think that it’s better to have more gear than newer gear. So I have a lot of Norman 200B strobes. Norman 200Bs haven’t been made in about 20 years, long time. Norman still makes a 200C, which costs about $1200, while a used, well used, 200B can be had for around $100 on eBay. So, if I can find them I can get a used unit for less than 10% of a new one. The used one weighs more, which is too bad, but it has some actual advantages. The 200B recycles quicker than almost any other strobe; the best 200Bs recycle to full power in a second. Norman 200Bs use 12-volt power, so you can run one off a cigarette lighter socket in your car, you can use a cheap lead acid 12V battery, you can even use a car battery. I don’t know of any other strobe that has so many inexpensive power options. A Norman 200B is pretty powerful, with a guide number around 114 with a standard reflector. The thing is that a Norman reflector spreads light a lot wider field than a Canon or Nikon strobe. The reflector isn’t built in so there are a lot more ways to modify the light, you can even use the bare tube (bare bulb) alone. I’ve also checked and with a big soft box, say 3X3 foot the 200B is about the same brightness as the much more expensive Canon or Nikon units. Now a 200b, even a 200C is a manual strobe: you can control the output, but the strobe won’t automatically change the output. If you’re designing the light for your shot this won’t be a problem, but if you want to have the flash make your choices a Norman 200B, any manual strobe, is not the way to go.


A Norman 200B Head (called an LH2) bare bulb and with some accessories

A Norman 200B Head (called an LH2) bare bulb and with some accessories

If I’m shooting interiors, for an architect or a designer I’ll take 7 of the 200B strobes with me. There are so many places that you might need to put light when shooting interiors, so sometimes even 7 strobes isn’t enough. It’s better to have a lot of strobes, even if they’re junk, than not enough lights. With architectural lighting power isn’t as important as having light where you need it. If I was shooting people or product I might not take as many lights, but I would still grab the 200Bs first.

Norman 200B power pack

Norman 200B power pack


If I’m shooting an event, and frankly I’d rather not, I grab a different strobe: the Sunpak 120J. Another piece of old junk. A 120J has a little more than half as much power as a Norman 200B, but it has automatic exposure! This is an earlier version of strobe automation, not the current ttl system. Still it’s accurate most of the time. Here’s a couple of things I like about the 120J: it uses the same strobe tubes as a 200b and the same reflectors. It can hold its own batteries or use a high voltage battery pack. Also it mounts on a hot shoe or a 1/4X20 thread. Oh yeah, they’re cheap, well reasonably priced. Quantum made some similar units that are worth checking out. The current Quantum strobes are probably worth having if you shoot a lot of events.

A 200B rig for flash fill

A 200B rig for flash fill


There are a couple more classic (old) strobes I should mention, first the Vivitar 283. They made millions of these and you can consistently find them for less than $30. I owned a couple of these modified with an extra capacitor to have a stop more power and there were a lot more modifications and accessories. The high voltage battery packs were really quite helpful because they reduced the recycle time a lot. Another strobe from the same time period is the Sunpak 411. I still use these because the head was so well designed it moved up and down as well as side to side. Unfortunately you don’t often see a 411 in good shape.

Norman kit for location

Norman kit for location


Of course there are a lot of other good used strobes available, and I should mention Lumedyne in particular. These are manual strobes, similar to the 200B, but can produce much more light. With the right accessories you can get up to 2400watt-seconds from these battery powered units. Lumedyne strobes are available new and used, and a little pricier than the Norman 200B. Still if you need battery powered strobes with as much light as a studio strobe this might be the way to go.

Vivitar 283-with manual power control and 2nd capacitor modification

Vivitar 283-with manual power control and 2nd capacitor modification


If you need a lot of light on location there are a couple of ways to go. First there are battery packs that you can plug a mono-light or a studio strobe into. Many companies offer these now, and they can be quite helpful. I prefer to use a gas generator. While it is much heavier you can shoot all night and day with just a few gallons of gas! Of course you may need an assistant to lug the thing around. Gas generators start at less than $150.00, batteries for mono-lights are generally more expensive.

Gas generator for location work

Gas generator for location work

d/I could discuss the new stuff on the market, but not in this entry. There’s a lot more information about strobes in my book: Understanding and Controlling Strobe Lighting: A Guide for Digital Photographers
If you’re interested in how to light interiors and other architectural shooting you might want this book: Photographing Architecture
Or you can check out my classes at BetterPhoto:
An Introduction to Photographic Lighting
Portrait Lighting on Location and in the Studio
Getting Started in Commercial Photography


September 23, 2014

One On One Photography Workshops!

A lot of class promotions start with the term: learn at your own pace. I’m offering you an opportunity to learn at your own pace, one on one, with the instructor. You choose the material we’ll go over. I provide the studio, the equipment, heck I might even buy lunch! Here’s the deal: A day in the studio with me. One on one. Pick a day. Pick the material. You set the pace. While we could discuss anything I think we should stick to photography, since that’s the subject I usually teach. This is a fabulous deal, and it will only last a short time. Just $425 for the studio, the equipment and me! Keep in mind the studio generally rents for $200 a day, so the studio, the equipment and me is a fabulous deal.

Some people have had schedule problems people with past courses, but now You Pick the Date! I hope we’ll have at least six hours together, but the class will fit your schedule. We could even do a second day for just a little more money. Let me know what you want to learn and when you want to come by. Also if you’d like to bring another person we can arrange that for a little more. Of course there’s no extra charge if you want to bring a model.

For my portrait class at BetterPhoto.com

For my portrait class at BetterPhoto.com

Now I know that you wouldn’t want to spend a day in the studio with just anyone. So I have to tell you about my accomplishments. Anyway I do this it’s going to sound like I’m blowing my own horn, but here goes: I was 15 when I had my first photography job, as an assistant to a commercial photographer in Los Angeles. His name is Steve Berman and he also taught at one of the best photography schools in LA: Art Center. I learned a lot! In the more than 40 years since then I’ve worked as a photographer and taught photography. In Los Angeles I’ve shot for Disney, Munchkin and General motors as repeatedly. Since I’ve moved to Indianapolis I’ve shot for the Hilton, BMW Construction, Mid West Studio and more. I’m currently teaching three classes at BetterPhoto.com: An Introduction to Photographic Lighting, Portrait Lighting on Location and in the Studio, and Getting Started in Commercial Photography. BetterPhoto has sent me students from all over the world. I’ve done two books for Amherst Media: Understanding and Controlling Strobe Lighting: A Guide for Digital Photographers and Photographing Architecture. Both are available from Amazon and also local camera stores. I’ve done a couple of dozen articles for photography magazines including Shutterbug, Photo Techniques, Studio Photography and View Camera. You can learn a lot more about me by visiting my website: www.siskinphoto.com. You’ll find most of my articles on the magazine page at my site. Of course I’ll answer any questions about my experience, just call 317.473.0406 or e-mail to john@siskinphoto.com

I also want to introduce you to my studio, because it is a terrific place to experiment and learn. I have more than twenty strobes, including a strobe powered projector! There are another half dozen quartz lights, various types. In addition there are umbrellas, light panels and soft boxes, even a ring light and a beauty dish. So you’ll have the opportunity for hands on learning with any equipment you might want. The shooting space is 24X45 feet with a 12 foot ceiling. Of course we could also arrange to do a location shoot, even an architectural shoot.

Shot of the Irving Theater for a workshop in Indianapolis.

Shot of the Irving Theater for a workshop in Indianapolis.

This is a custom learning opportunity. You can choose the material we cover. Here are some ideas, these can be a class or a starting point: How Light Works, Portraiture Lighting, Product Lighting, Shooting Jewelry, Commercial Photography, One Light Shooting, Location Shooting and whatever else I can help you with. For many subjects we can begin with a structured program or we can experiment and discover together.

Shot with a group of Ivy Tech students in my studio.

Shot with a group of Ivy Tech students in my studio.

The price for your day in the studio is just $425.


Remember you can choose a date that fits your schedule.
Shot with a class from The Learning Tree University in Los Angeles

Shot with a class from The Learning Tree University in Los Angeles

The pictures are from workshops and classes I’ve presented over the last few years.

If you’re in Indiana I hope you’ll also consider taking my Portfolio Workshop. You can see a little more information about the Portfolio Workshop if you check out this blog post .
 

Please visit my site to see my other workshops and to check out the Free On Line Classes!

July 6, 2014

Changing Your Way of Seeing

My books and my classes give me a reason to keep doing this blog. If you’re in Indiana I hope you’ll consider taking my Portfolio Workshop. You can see a little more information about this workshop if you check out this blog post . I’ve listed my BetterPhoto classes at the end of this post. Thanks so much for your attention.

Frame 16

I see as a photographer, constantly breaking the world into still images. I think that most people who spend a big chunk of life doing photography see a little differently from people who aren’t involved in static art forms. I’ll look at something and think: “I’d shoot that, maybe a little warmer and with more contrast” or maybe: “That was a really great instant” and: “Look at that design.” I think this is part of being a good photographer. I once heard a guy say that he always adjusted a TV to look like Kodachrome, since that was the way he saw the world. Of course this illustrates one of the problems with this way of seeing: you start to see everything the same way. I’ve been known to walk by an interesting subject while thinking that’s not the kind of shot I do. I often make my shots warmer, even my black and white shots, but I can’t remember the last time I made a shot cooler.

Frame 22

So I’m always looking for ways to break out of my way of seeing. I know that many people want to have a style, but not me. I’m a photographer, not a painter, so I can be prolific and do work that’s new. I want to push myself to see in different ways. One of the ways I do this is to work with different tools: cameras, lenses and software. I just got a Horizon Perfekt, which is really helping me to see differently. This camera shoots a 120º image, horizontally anyway. It’s really different from other wide-angle images because the lens actually moves during the shot.Frame 12


I shot with a Koni-Omega camera last week. It’s a medium format film camera. This is a manual camera with range finder. Shooting it reminded me of the acronym FAST: Focus, Aperture, Shutter and Think. I think that my digital camera has allowed me to get a little sloppy with technique. Of course shooting with a new camera is not the only way to open yourself to new ways of seeing, but it can be fun as well as enlightening.

Frame 15

I got an 11X14 camera recently, but I haven’t shot with it yet. I still have to build a lens board and order some film, but it should be a quite an experience. Whenever you work with a very large camera the difficulties increase and so does the expense. But if 11X14 is anything like 8X10 getting a good result will be really fun. Sometimes just getting a good exposure can make you feel great. There’s another practice tool I want to work with. I have an old Spiratone 400 mm f6.3 lens. I’ve really only used it a couple of times because I’m more interested in wide-angle lenses. But in an effort to expand my vision I’m going to put in on the digital camera and start shooting. Who knows how that will affect my seeing? By the way I’ve included a couple of panoramas from the Horizon camera and one more from the Koni-Omega. Also I recently updated my website so you can get an idea of how I’m seeing now. Please check it out at www.siskinphoto.com

Of course there are other ways of expanding your seeing, like taking a BetterPhoto course. Here are the three I teach, perhaps you’d like to take another one or share them with a friend.
An Introduction to Photographic Lighting
Portrait Lighting on Location and in the Studio
Getting Started in Commercial Photography
One other note about BetterPhoto: I’ve been in the habit of sending out a private note to all my former students at BetterPhoto (Almost a thousand people!) each month. There’s some sort of hang up in the e-mail system for thst so, for a while anyway, I won’t be sending that note. I hope no one is too disappointed.
Thanks,  John


June 16, 2014

Portfolio Workshop January 28th, 2019!

The last Portfolio Workshop went really well. Why not join us  for the next one? We’ve been doing this for a couple of years now, and we’re getting quite good at it! We’ll meet on January 28th at 6:30pm at my studio in Downtown Indianapolis. Read on for more details.
Making photographs might be a solitary experience, but as soon as you’ve made a photograph you’ll want to share it. As you gain experience as a photographer you’ll want to share your photographs more broadly, beyond friends and acquaintance. Of course you’ll be concerned about how other people perceive your work, or at least I hope you will. If you want to present your images to galleries or contests or businesses it’s important to learn how other people see your work. Frankly it’s quite difficult to learn this on your own. I’ve learned this for myself. When I look at my shots I remember the circumstances of the shoot, and this always colors my perception of the shot.

Mosaic

The above shot is a good example I made this shot for a hotel in Beverly Hills. The owners of the hotel and the designer weren’t ready for the shoot and there were other problems. So, while the shot is good, I didn’t put it on my website for quite a while because I remembered the problems when I looked at the shot. So choosing photographs to show is very difficult. When I do a shoot I have certain reasons for the shots, the reasons may be commercial, personal or something else. Because the first time I edit the shots the choices are based on the reasons I did the shoot. I sometimes miss a shot that has other possibilities. This is why I go back to older shots and review them again. That even happened with this shot:

What?


The purpose of the Portfolio Workshop is to help you develop skills for editing and presenting your shots. There are different ways to present your portfolio, and presentation is important. I’ve seen a lot of people who only have digital versions of their portfolios. While a digital portfolio is good, I think you might also want a print portfolio; for one thing it helps you sell prints. More important you want to show various ways of presenting images to your client: digital, website print and more. These tools may be important to a commercial client. For instance I had a high end landscaping client that showed very large prints to potential buyers. He told me that he was going to be landscaping a couple of acres of land and you just couldn’t present that with a 4X6 inch print. Of course he knew he needed really good photographs if he was going to show prints that big. I have a 16X20 inch portfolio that I present to architecture clients; it’s been quite successful. I have a couple of portfolios on my tablet and even a few pdf portfolios my clients can see on line: www.siskinphoto.com/aportrait.pdf and www.siskinphoto.com/aarch.pdf. In the workshop we’ll be talking about the most effective ways of sharing our work. We’ll also talk about how to get people to look at our work. The shot below is in my16X20 portfolio.

Mark David

There’s a lot more to this workshop than listening to me pontificate about someone else’s photographs. This is a small group and everyone is encouraged to participate. The idea is to see how several different people react to your images. One object of this workshop is to develop a supportive environment where you can get detailed feedback about your images. Another object is to develop everybody’s skill communicating about images. This is always challenging to photographers because few photographers have a background in design. When you can better describe why an image works you’ll also create better skills designing and building images. Of course we’ll also share technical information about making images, but, in this sort of workshop, technology is secondary to developing our design skills.

I’m asking participants to bring two images to each meeting. This way everyone will get a chance to have an image reviewed and to comment on other people’s images. I’m sure there are people who would like to have just their portfolio reviewed rather than be part of this workshop. I certainly do portfolio reviews, but they cost more than $20. A portfolio review is static, this workshop will help you develop your skills as a photographer over time and build great portfolios. The Portfolio Workshop is a live experience. It meets once a month in my Indianapolis Studio.

You can start attending this workshop with just a few images. We meet once a month so you’ll have the opportunity to create more images for your portfolio and bring them to the workshop. You can use the workshop experience to help you decide what kind of a portfolio to develop, or you can develop several portfolios at one time. I’m always working on several sorts of images at the same time. I encourage everyone to participate, by bringing images and by giving feedback to the other participants. Sign up at the Workshop Page on my site. Please join in!

You can get my books through amazon or other booksellers.

Please visit my site to see my other workshops and to check out the Free On Line Classes!

April 30, 2014

Notes From the Lighting Workshop

Filed under: Indianapolis,Lighting Technique,Photographic Education,Portraits — John Siskin @ 12:22 pm

Please check out my on-line classes at BetterPhoto: An Introduction to Photographic Lighting, Portrait Lighting on Location and in the Studio and Getting Started in Commercial Photography, take a look at my site for workshops in Indianapolis and check out my books:

The Lighting Workshop happened last weekend and it went very well. We spent all day discussing and working with strobes. Since the class size was small I was able to be very responsive to the specific interests of each participant. We set up the strobes to see how the tools work in specific situations as well as discussing the basics of how light works. If you understand the basics of a light: size, color, position and power, you can understand what a light will do. We did a lot of shots so that we could see the effect. Of course the shots were for demonstration so we concentrated on the lighting. In this shot I’m the model, which is not my best talent. I used a light panel with a white cotton broad cloth cover. These are great light modifiers. I wanted to use a hard light in the shot so I set up a strobe with a snoot to the right of the camera. I like snoots more than grid spots because the light spreads more than with grids as you pull the snoots back from the subject. This shot shows the set-up.

The light panel gives a smooth gradation across most of the face. The snoot defines the other side of the face. One of the first things I wanted to demonstrate was how to use a colored gel to change the color of the light. I usually use warm gels, but I wanted to make a change here so I added a CTB gel, which is a blue. The CTB gel is from Rosco and is designed to make a tungsten light act like daylight. The shot below shows how the shot looked at first: not great. The light on my face is a little dark while there is probably too much light from the snoot. It burns out the left side of my face.

In the next shot I made some adjustments. The light on my face is a little brighter, which helps. Also I’ve positioned the light panel just a little more in front of my face; this make the light cover more of my face. The snoot is positioned to keep the light on just the side of my face. This is accomplished by moving the snoot a little more toward the center of the shot. The light from the snoot is still too bright. You’ll notice that since the light panel is still situated pretty far to the side of my face as  there is little or know reflection in my glasses. The further the light panels comes toward the camera position the more reflection there will be in my glasses.

In the last shot I added a 1-stop neutral density filter to the blue gel. This reduced the light on the left side of my face nicely. The light panel is a little closer to the camera position so there is a little more reflection in my glasses. When you use a large light modifier, which makes soft light, the reflection (specular highlight) is larger and less bright, relative to the rest of the light. So the reflection is as strong as a reflection from a small hard light. This works well in this shot. The same thing applies to the catch lights in the eyes, which have a nice size and brightness in this shot.

You can see the two gels on the version of the shot below. They’re held onto the snoot by a very small spring clamp.

I hope you’ll consider taking one of my workshops. The next one is the continuing Portfolio Workshop on June 2. You can find more information on the workshop page of my site. You can also find the books on my site, and I hope you’ll check them out. I’ll be speaking about micro (not macro but micro) photography on June 5 at the Photo Venture Camera Club here in Indianapolis. Finally please don’t forget my classes at BetterPhoto, you can take them anywhere!
An Introduction to Photographic Lighting
Portrait Lighting on Location and in the Studio

Getting Started in Commercial Photography

Here are a couple more shots from the workshop. Thanks Bill!


January 10, 2014

Critiques

Filed under: Looking at Photographs,Photographic Education — John Siskin @ 3:55 pm

To start I just want to quickly remind you about the classes: An Introduction to Photographic Lighting, Portrait Lighting on Location and in the Studio and Getting Started in Commercial Photography and the books:

I went to the blog archive to find an entry about doing critiques, and I realized I hadn’t posted anything about this topic. Considering how may critiques I’ve written for my BetterPhoto classes, it surprised me that I haven’t done a blog entry about this topic. I’m continuing to build a portfolio class here in Indianapolis, and so this is an important topic. The pictures this week are from a shoot I did for the Indianapolis Hilton. I love shooting hotels!

A critique is different from a review. A review is done for an audience that hasn’t experienced the subject of the review. So it can be useful to give a negative review, perhaps even something scathing, because it will keep the reader from experiencing something bad. A critique is designed to give the creator of the work, a photographer in this case, information about how you respond to the image and helpful information about the image. So a review might say these are wonderful luminous images, a critique would say more. Perhaps: “I respond to the feeling of light in this image. I think you choose your subject matter well. I like the choice of paper, and the muted color palette of the image. You might have cropped tighter.” Well you get the idea.

I think the first thing you say about an image should be positive, but, frankly, that isn’t always the first part of a critique I write. One of the advantages of writing critiques is that you can organize your thoughts while you construct the critique. When you are doing a spoken critique, or participating in a class critique, you want to organize your thoughts before you begin. Certainly you don’t want to discourage anybody when you mean to help her/him. I try to start by talking about my emotional response to the image, if I have one. I want to say that I have a good feeling about the image, or a strong feeling, and to say why. So I might say that a shot of a frozen lake gives me a strong feeling of cold and distance, which might not sound good on its own, but matches the goal the photographer had for the image. One thing to keep in mind is that the emotion impact of a photograph is a big part of what a photographer wants to create in an image. Also you can create a bleak image, or a positive image, from pleasant elements by manipulating light and exposure. One of the important things is to discuss the impact of an image: are the feelings from an image mild or wild?

The next thing to discuss is what you might be able to do to strengthen the image. I like to start by discussing things that can be done with the existing image, that is things you can change in post-processing. The first, and most important, thing is cropping. I have seen so many images that are weakened simply because the photographer hasn’t cropped the image. I try to shoot with a little extra room around my image, so I expect to crop every shot that I work with. I am surprised that so many people show images that they haven’t cropped. When I do a critique on-line I’ll also be talking about the color, contrast and sharpening as well as anything else you can do in post. If I am doing an in-person critique I will talk about presentation as well. If you show me a 4X6” print of a shot I won’t thing you are as committed to your work as when you show me an 11X14 with a mat. If you aren’t committed to your work why would you expect people to take it seriously? Some images have to be big in order to work well. I have friend in Los Angeles who makes very complex images that are really quite wonderful. His prints are 20X30”, and work quite well because you can examine all the details in the big print. However if you look at these images on his website the images suffer a lot because of the small size. In addition to size I will discuss the matting and framing, as well as other presentation details.

The last section of my critiques is devoted to items that can only apply to making new shots. So I might say if you work with a back lit subject outdoors you might want to use flash fill. I may even suggest that flash fill is usually a good idea outdoors. I also find myself discussing the way you load the frame. Perhaps I’ll say something about keeping empty space on the right side of the frame or keeping the subject’s hands in a shot. This is a good time to add information about any technique.

If you’d like me to critique your shot then you might want to come to my portfolio class on Monday January 13. Or if you can’t get to Indianapolis you can take one of my BetterPhoto classes:
An Introduction to Photographic Lighting
Portrait Lighting on Location and in the Studio
Getting Started in Commercial Photography.


December 9, 2013

More Than Pressing the Button


To start I just want to quickly remind you about the classes: An Introduction to Photographic Lighting, Portrait Lighting on Location and in the Studio and Getting Started in Commercial Photography and the books:


People make pictures as a form of communication. People have been making pictures for tens of thousands of years, maybe for as long as there have been people. The oldest pictures that are still visible are made with pigments and painted in caves. These may not be the first pictures, but they seem to have lasted the longest. I suppose that pictures like the ones in caves might have been common, but time has washed them away. The reason I start with this idea is that the ability of a picture to convey information about the nature of things, or about feelings, is basic to humanity.  Of course this isn’t the only way we communicate, you’re reading this after all, but it is possibly the most basic way we communicate. Perhaps, because it is so basic people don’t receive much instruction in images. I’ve taken more English classes than I can remember, as well as other language classes. I’ve even taken classes in computer languages, learning to communicate with an inanimate object. Now, of course, I’ve also taken photography and art classes, I make photographs for a living after all, but every class I took about making images was an elective, not one was required. As a photo teacher I’m constantly amazed at how little insight my students have about how to communicate with images. Perhaps we should have more basic instruction in communicating with images.

As an example consider what is called the “rule of thirds.” The basic idea is that a line in your frame, particularly the horizon line, should run across the frame at one third of the way from the top or bottom of the frame. There are a few more considerations with this rule, like the idea that the places where the lines a third into the frame intersect are the most effective places to place the subject. If a photographer has any information about composition, this will often be the first thing he/she knows. Some of my students have followed this rule slavishly, even when it made an obviously bad image. Other basic ideas, like leading lines or placing the subject in a place where the eye will find it quickly are rarely known. Too bad, really. So many photographers have the idea that composition is an innate skill, something you do with your gut, rather than your brain. People often refer to this skill as the eye: “he has a really good eye.” We spend so much of our time discussing equipment and technique, but ignore the most critical skill, building better images. I think there is more to it than choosing what to make a picture of; how we present a subject is at least as important as the subject.

Another consideration is how a photograph itself is presented. If somebody shows me photos of a model mixed in with photos of their last vacation and a couple of pictures she/he took at an antique show, it’s going to make all the images more confusing and less effective. Choosing images that support each other builds a portfolio that is stronger than the individual images. Presenting the images in a consistent manner can also help strengthen the individual images. Most people I know are presenting their images in an electronic format, either on line or in a tablet. I do present this way this too, but I think it is a weaker way to show images. In general this presentation means that the images are small, and there is a sameness to reviewing images on a screen that you don’t have in a print portfolio. If you go to a museum or gallery you’ll notice that the size and frame of an image are part of the artwork. A Sunday Afternoon on the Island of La Grande Jatte and Guernica look depressingly similar on my computer screen, but Seurat’s painting is 10 feet long and Guernica is something like 25 feet long. So what you see on your computer screen is not what these paintings look like, unless you have a 25-foot screen. Maybe you think that these images don’t look very similar; perhaps you should go see them in person.

I’ve been tying to start a group here in Indianapolis that would work on building portfolios and better images. Frankly it’s not going very well. I’m hoping to find a group of around ten people who will commit to building a group of images that work together, or on portfolio groups. I’ll be working on a couple of things myself. I hope the participants will have new images most months. I expect them to discuss their reactions to the other participants’ images. Getting feedback from several people is probably the best way to learn how others react to your images. Also, it’s easier to listen to a critique from someone who is also building a portfolio and presenting images. If there are enough people then we could have separate groups for commercial work and fine art. So this is a group effort, not presentation where you sit back and watch.

I’ve attached images from one of my tablet portfolios. I’m going to present these images at facebook as well. Tablets are clearly a wonderful tool for an informal portfolio presentation. You can have an extensive portfolio with you wherever you go. You can choose different groups of images to show different audiences. Also you have some control over the way your images appear, at least because you can choose which tablet to buy. However if the tablet is the only way you present yourself you’ll limit your print sales, if nothing else.

If you’re interested in the portfolio class please contact me at john@siskinphoto.com or 317.473.0406. Also check out the workshop (http://www.siskinphoto.com/Workshop.html) page of my blog for more information. I’m not doing a portfolio project on line, at this time, but I am still teaching at BetterPhoto.com. I have three classes there, all of which involve critiques of images as well as technical information. I hope you will check them out:
An Introduction to Photographic Lighting

Portrait Lighting on Location and in the Studio
Getting Started in Commercial Photography.


Please keep in mind that the classes and the books help to keep this blog going, so do your holiday shopping here! Happy New Year!


October 1, 2013

Bike Shot in the Studio

I’ve been working on the studio, no surprise there. I’m finally happy with the current situation, while there’s more to do, it doesn’t have to be done now. I’ve moved in the lights: 20 or so strobes, another half-dozen quartz lights and an armful of projectors. I think I have 10 tripods, not sure how that happened. Booms and light stands, umbrellas, soft boxes and light panels, and all the things that come from a life spent in photography. Of course the important thing now is to get the studio busy. That means shooting, and I just got a couple of new customers! I also want to rent out the studio and offer classes here. What I want to do in this blog is to show you the studio at work, shooting and teaching. Ginny Taylor-Rosner brought a few of her advanced student from Ivy Tech in for a motorcycle shoot. This entry has a lot of large shots; I hope you will follow it to the end. Here’s the studio plan:

It’s easy to get large subjects into this studio, as you can see. I used a gray muslin on the back wall and black plastic muslin on the floor, so the set was really inexpensive.

The first thing I did was pull down white seamless along the side walls. I installed seamless holders on the side walls so that I could use them for very large reflectors with white paper, and so I could pull down black paper to reduce bounce light. It worked really well in this shot. In the shot marked Side Lights I only have the lights that are on the side seamless on, not the light on the front seamless. The light on camera left was placed at the front of the seamless to rake across the paper. This creates a very big light source. On camera right I place a light set at 750 watt-second at the back of the seamless. It spread across the side seamless and onto the diagonal seamless.

I put another roll of seamless on a pair of seamless stands on a diagonal in front of the bike. Once again I used a strobe raking across the seamless to give me a big light source. This light was set at only 400 watt-seconds. You can see what this light added in the image marked Front Light. This image has the all three of the large light sources. It’s important to have barn doors on the lights when you are bouncing light off seamless paper. The barn doors keep the light from spilling directly onto the bike and the background. I had to use cine-foil, black aluminum foil, in addition to the barn doors, for the front light because of spill light.

Only the light on the diagonal seamless.

I made some small changes in the position of the lights that rake across the paper. It’s much easier to move the lights than it is to move the bike or the paper. We also moved in a gobo (large black light panel) at the back of the bike to make the light on the saddlebag more even. Then I put a bare bulb light set at 200 watt-seconds, covered with a pale lavender gel, behind the bike. This added the highlight below the bike and put a little color into the background. If I’d used a darker background we could have added more drama with this light. This shot is marked Last Light.

Added a small strobe behind the bike. Bare bulb with a gel.

In this shot, Final Set-Up, you can see the position of most lights in the set. I added the light panel in front of the bile late in the shoot. It helps to open up the tire and to even some of the reflection on the front of the bike.

I was a little concerned about the density of the engine and the high light from the light behind the bike, so I made a couple of bracketed exposures. I used these captures to give me a little more control over these areas by using them as layers in Photoshop. I did a few other quick touch-up to make my Final Image.

Thanks for visiting the studio here in the blog. If you’re in Indianapolis give me a call and come by 317.473.0406. If you need to rent a studio I’m ready. Special price for October: $275 for the day! I hope to have classes available in the next few weeks. If you need a private session let me know as well. The Portfolio Class is meeting on TUESDAY OCTOBER 15. This class will help you present your work. There’s more information, and a sign-up link here. I hope to see you soon!


Here are a couple more images from the shoot!

Shot by Terry Pitman

Don’t forget about the classes at BetterPhoto and my books!
: An Introduction to Photographic Lighting
Portrait Lighting on Location and in the Studio
Getting Started in Commercial Photography


« Newer PostsOlder Posts »

Powered by WordPress