

My books and my classes give me a reason to keep doing this blog. If you’re in Indiana I hope you’ll consider taking my Portfolio Workshop. You can see a more about this workshop and other classes if you visit the workshop page on my site. Thanks so much for your attention.
I’ve done blog posts about micro-photography in the past. You might want to check the posts at this link: https://siskinphoto.com/blog/?cat=12. I generally like the term micro photography, rather than macro photography, for a couple of reasons: first Nikon calls their close-up lenses Micro-Nikkor. If it works for Nikon it works for me. In addition much of the time I’m shooting at a reproduction ratio grater than 1:1. This means that the image of the object is grater than life size on the camera sensor. Another way to think of this is that the full frame 35mm sensor is 1X1.5 inches. So if a U.S. quarter just fills the short dimension of the frame you’re shooting 1:1, since a quarter is 1 inch tall. I could add metric equivalents, but I hope you get the idea. For a smaller sensor you need to more than fill the frame to get to 1:1. The size of the object and the size of the image, on the camera sensor, are the key to the reproduction ratio, at the camera anyway. If you then multiply the reproduction ratio by the size of the print or the monitor image you get the actual magnification of the image. If I did a shot at 1:1, and then made an 8X10 print, the print would magnify the subject 8 times. If I did a shot that was 10 times the size of the object, on the sensor, the reproduction ratio would be 10:1. If I made an 8X10 print the print would then magnify the image 80 times.
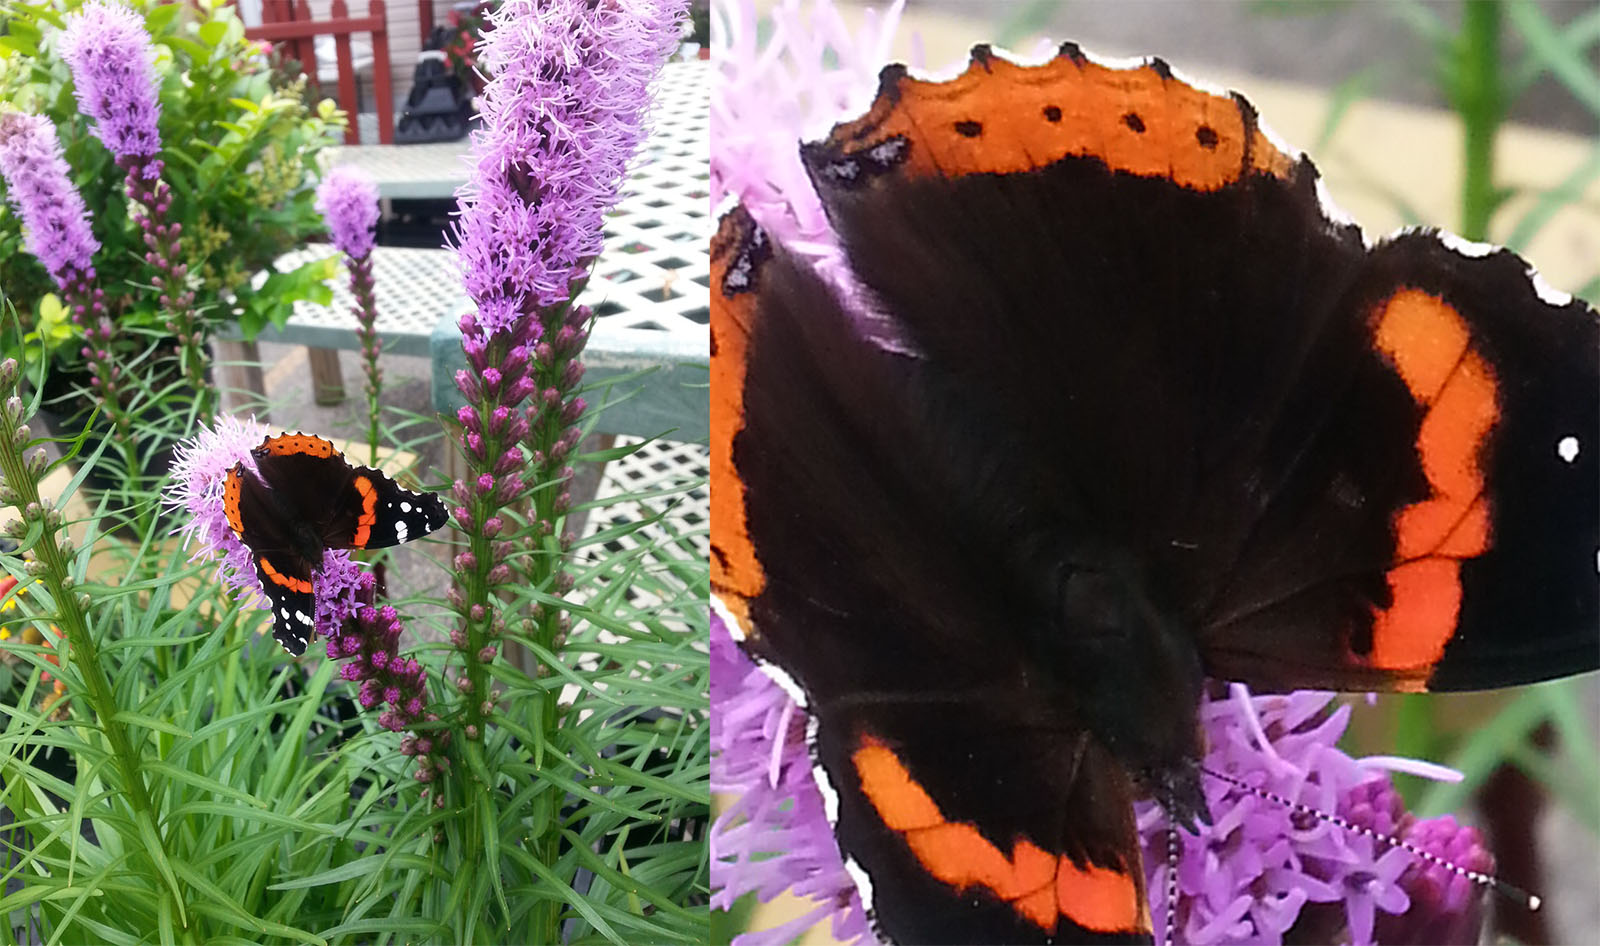
made with the cell phone
The thing to keep in mind is that you can magnify the image many times on the monitor, or the print, but usually the resolution will suffer. I’ve included a butterfly picture from my phone. The whole image looks good, especially from a phone. I cropped a closer version of the image, and frankly that doesn’t look so good. There is a very significant improvement in image quality when you magnify the subject in the camera rather than trying to magnify the image in post-production. The camera optics you use to magnify the subject also have a huge effect on the quality of your final shot. The blog posts I mentioned earlier have a lot of information about how various combinations of lenses and other hardware perform for this kind of photography.
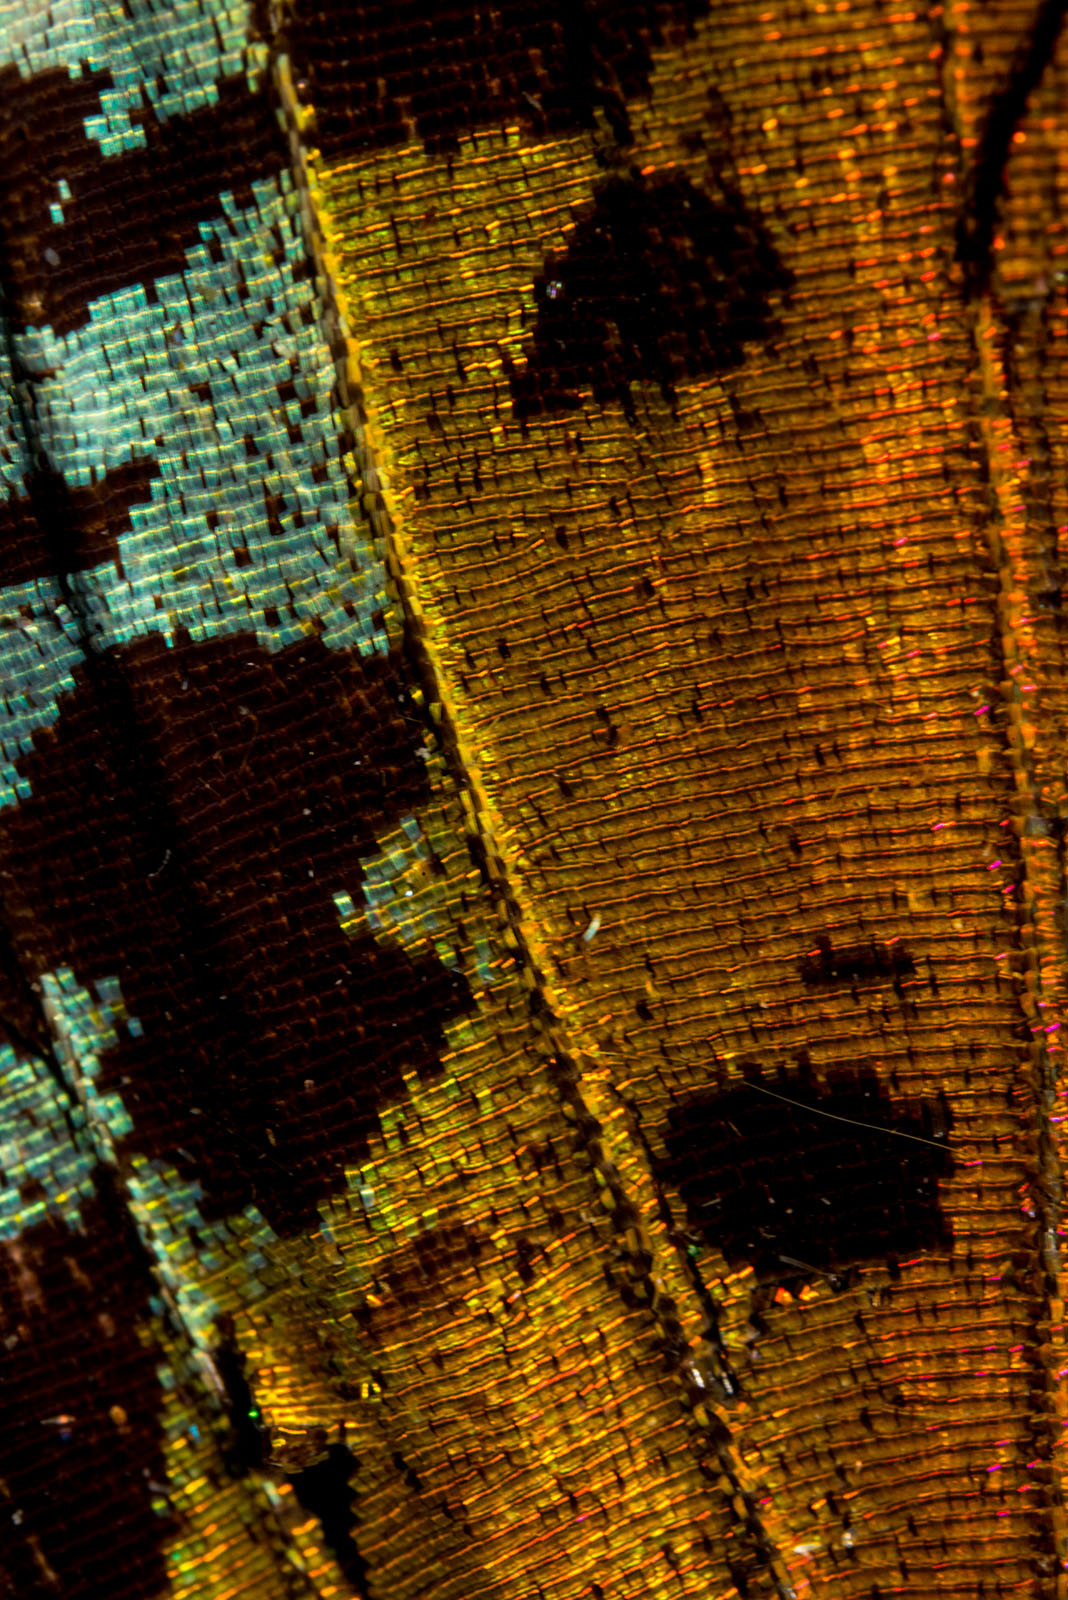
Butterfly wing
I’ve recently acquired a new bellows and I wanted to write about it here. The bellows allows you to magnify the image, on the sensor, by moving the lens further from the sensor. I know this seems backwards, but the further the lens is from the camera sensor the grater the magnification is on the sensor. Of course the problem is that camera lenses, even Nikon Micro lenses, limit the distance you can move the lens from the sensor. So there are bellows, and extension tubes, so that you can mount the lens further from the sensor. For many years I’ve used a very simple bellows to do micro work, the Nikon Model 3, and its worked pretty well. However I have long wanted to get the Nikon PB-4 Bellows. This isn’t the newest bellows Nikon makes, but I think it’s the best they ever made. First the bellows have a swing movement, so you can change the geometry between lens and camera. This means that the middle of the lens doesn’t have to be parallel to the film. One thing you can do with this adjustment is to change your depth of field so that it follow the subject, or you can use it to change the shape of the subject. There’s a lot of information about swing and tilt movements in other places, so I won’t go into it here. The bellows also has a shift movement, which makes it easier to place the subject in the frame. The thing that really improves my micro shots better is that the camera and the lens can be moved together with a focus adjustment on the bellows unit. This is relatively simple, and a lot of bellows have it, but not my Nikon Model 3. Since I use an old copy stand for my micro set up this offers me better fine focus. The Nikon PB-4 bellows are the only model Nikon made with the swing and shift movements. Of course there are other ways to do this: www.siskinphoto.com/magazine/zpdf/DigitalViewCamera.pdf. This digital view camera works, but it’s more awkward to use than the Nikon PB-4.

Opal
There are a lot of lenses you can use with the bellows. One good source of optics is enlarging lenses, another is microscope lenses. I’ve discussed lens choices and adapters in the earlier blog posts: https://siskinphoto.com/blog/?cat=12. One of the things I want to do is mount a 135mm enlarging lens on the bellows. This should allow me to focus at infinity, so I can easily use this lens to do table top and other set-up that aren’t actually micro. Of course the advantage will be the swing and shift movements.
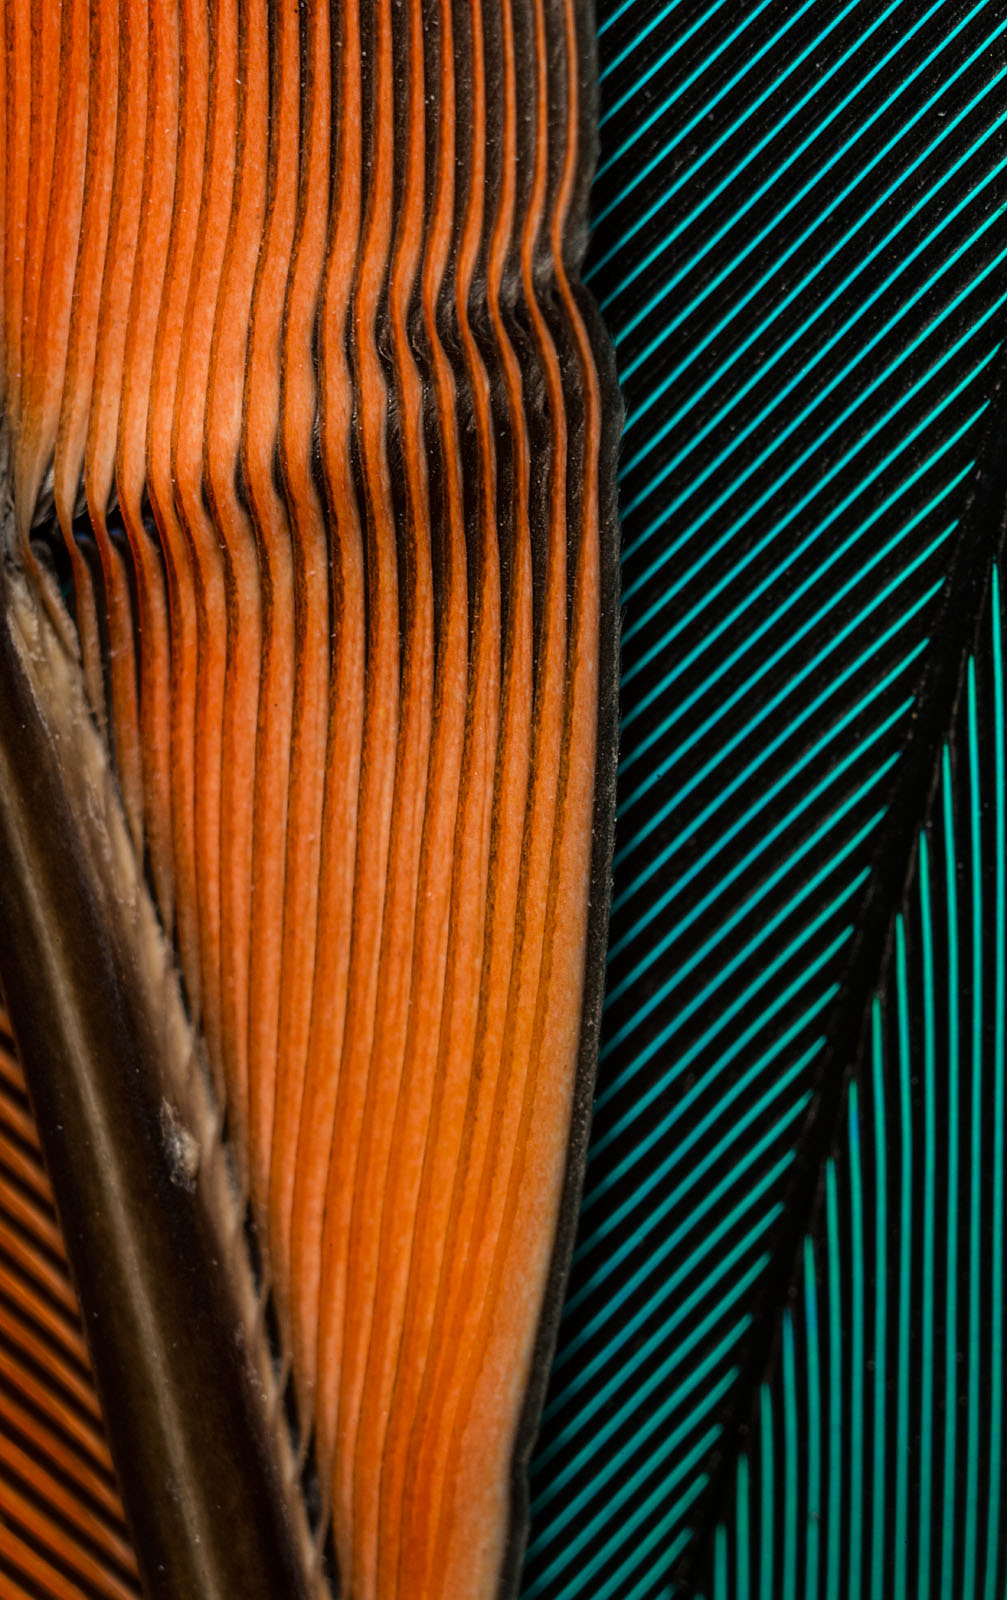
Parrot feathers
I’ll be posting more shots soon, here and at my facebook page: www.facebook.com/JohnSiskinPhotographer. These are just my first experiments with the new bellows. I’ll also be doing a post about the Nikkor 60mm G ED f2.8 micro lens that I recently added to my tool kit. Please keep an eye out. You may also want to check out my magazine articles: http://www.siskinphoto.com/magazinearticles.php as well as the workshop page: http://www.siskinphoto.com/workshop.php. I’m continuing to add the classes I used to teach at BetterPhoto to the workshop page. Of course I hope you’ll consider purchasing my books at Amazon.

Tiny Skull
There are over 2900 subscribers to this blog! 3000 soon! Thanks for your interest. I hope some of you will remember to like my page at facebook: www.facebook.com/JohnSiskinPhotographer.


